
In today's steel string acoustic guitars, the truss rod is as common as the soundhole. But is a truss rod really necessary? What would happen if it was removed entirely and/or was replaced with something else, such as a carbon fiber stiffener? Let's explore the topic in detail...
A truss rod is a rod, bar or beam installed into a channel beneath the fretboard during the construction of the guitar in order to compensate for the pull of the strings on the neck. In today's vernacular, fixed truss rods are more commonly referred to as stiffeners, where adjustable truss rods may be of uni-directional or bi-directional design.
Truss Rods
A six-string set of D’Addario EXP11 Light Gauge steel strings applies 159 lb (72 kg) of tension on a 25.5″ scale length guitar. A light gauge 12-string set from the same supplier (EXP36) is rated at nearly 242 lb (110 kg) of tension!
Most guitar necks are made of wood and, without supplemental support, prove to be no match against the pull of the strings. Guitars constructed without a truss rod and strung with steel rapidly develop a forward bow in the neck. Over time, the strings may continue to elevate farther away from the fretboard, resulting in an unplayable instrument (you can strum the strings, but you can no longer comfortably press them down against the fretboard to change their pitch).
Comparatively, nylon string guitars exert much less tension on the neck, typically ranging from 75 to 100 lb (34 - 45 kg). Historically, truss rods were rarely found in such instruments as the wooden necks were (are) inherently stiff enough to resist the pull of the strings. However, as countering string pull is not necessarily the only function of truss rods, they are also being included with modern nylon stringed guitars.
Early renditions of truss rods were simply fixed stiffeners. Extra-stiff wooden bars or metal square tubes, T-bars, I-beams, U-channels, etc, went a long way toward prolonging the inevitable forward bow but, as they possessed no inherent adjustability, they eventually fell out of favor as innovations were introduced. Wooden trusses are still, well... wood. To be rigid enough to be effective they are, by necessity, heavy hardwood. And they are subject to the same environmental factors the rest of the neck is subject to. By contrast, to be light enough to be usable, fixed steel trusses are still subject to bending and, once bent, may form a rather permanent forward bow.
I believe the fault of the early fixed stiffeners was one of material availability, more so than adjustability. If you read on, you will understand why I say that...
Non-adjustable Truss Rod
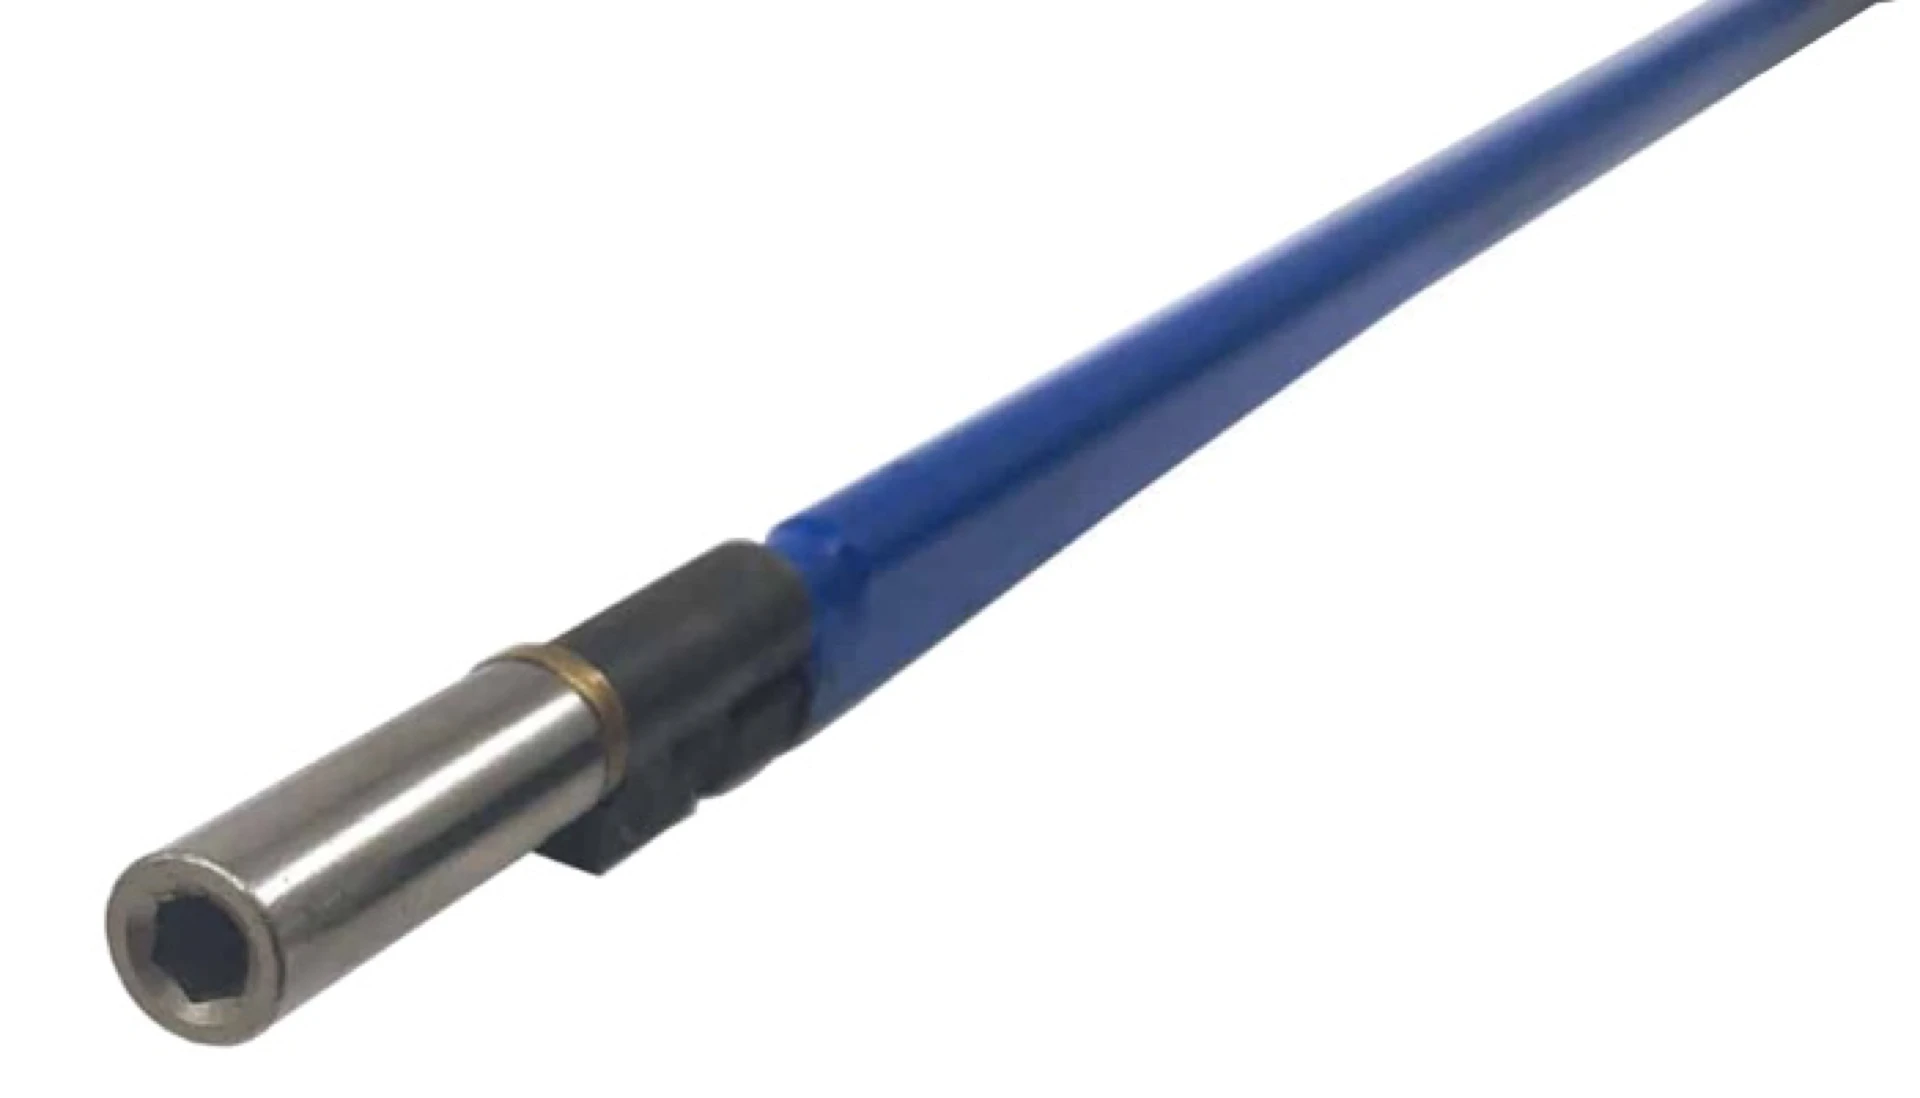
The simplest form of an adjustable truss rod may be the Compression Rod. A steel rod is permanently secured at one end of the neck, compressed into a slight concave bow in a channel cut into a dead flat neck, and held in place via a shaped filler strip. The opposite, threaded end of the rod is exposed for adjustment purposes.
Modern versions of the Compression Rod may thread into a barrel bolt on the end that is to be retained, where older versions featured a peened rod against which a thick, rolled washer is affixed, even welded in many cases.

Modern Compression Rod
Twin Compression Rods ('70s era Guild 12 String)
On acoustic guitars, that fixed end is commonly anchored at the heel of the neck and the threaded end passes through a recess routed into the headstock. Most electric guitars reverse the orientation, exposing the threads at the body end of the neck. Tightening the nut on the threaded end of the rod (against the wood through which the rod passes) attempts to shorten, and subsequently straighten, the embedded bowed rod, effectually compressing the back of the neck and lengthening the fretboard to counteract the string pull. Tightening such a rod with no strings attached will result in a slight back bow of the neck, and loosening it should return the neck to dead flat again. Since the strings are attempting to pull the neck into a forward bow, the result is a balance between two opposing forces.
The Compression Rod has proven to be quite effective over the years, but is not without faults. The embedded rod is held in a pre-determined curve based on an educated guess regarding the future movement of the neck. Over time, the compensation effected by the tightening of the compression rod may no longer be sufficient, as the rod can only move from its original, slightly bowed position toward straight (at best). Many a compression rod has had additional threading applied in order to effect greater pressure. Over-tightening often results in a snapped rod, a very undesirable condition. Due to the one-way adjustability of the design, it is often difficult (if not impossible, without special jigs) to return the neck to the straight, dead-flat condition needed for fretboard/fret work, setups, etc.
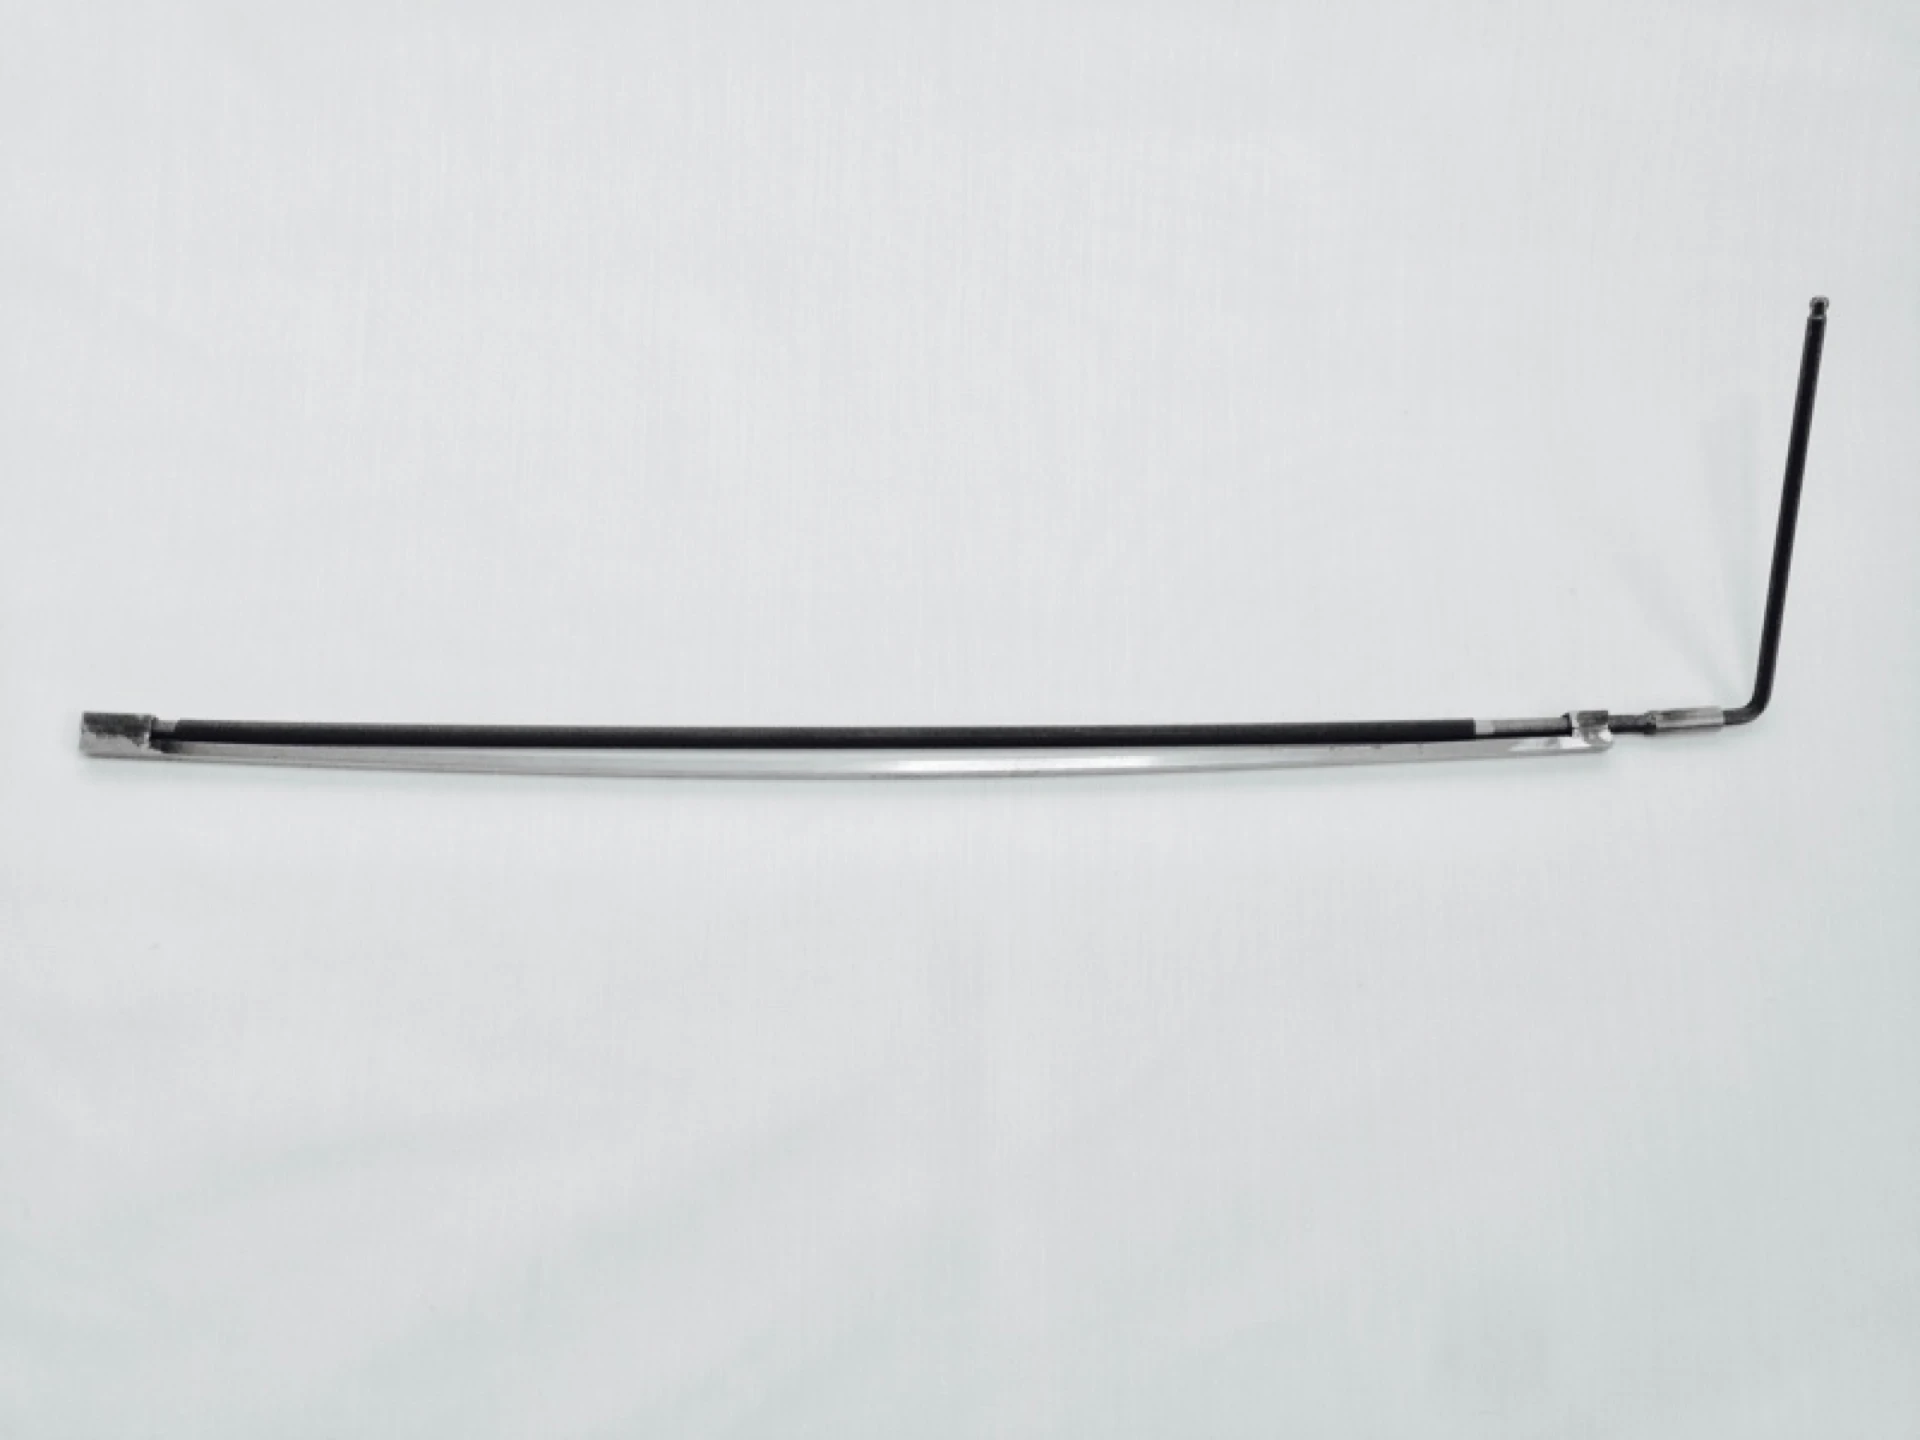
Like the Compression Rod, the Single-Action (or single acting) Truss Rod employs a uni-directional adjustment to counter the forward bow of the neck resulting from the pull of the strings. Unlike the Compression Rod, it is a self-contained machine, requiring only a rectangular slot in which to reside beneath the fretboard. It is not fixed to either end of the neck, nor does it need to be compressed into a curve.
Single-Action Truss Rod
A Single-Action Truss Rod is comprised of two parallel rods, one slightly longer than the other, that are joined at one end (two rods may be welded together, or one long rod may be heated, folded in two, and hammered tightly together). At the other end, one rod is fixed into a block through which the second, longer rod passes. The two rods are bound together with tape or a sleeve made of heat-shrink material. The end of the longer rod is threaded and, as a nut is tightened against the stop block (into which the shorter rod is terminated), a bow is developed; concave for the longer rod and convex for the shorter.
Installed into a slot in the neck in such a way that the longer rod (the rod having the adjusting nut) is farthest from the fretboard, tightening the nut of this style of truss rod will introduce a back bow in the neck. If you were to reverse the installation, and rotate the rod 180° along its length in the neck slot where the longer rod (the rod having the adjusting nut) is up against the fretboard, tightening the nut would result in a forward bow in the neck.
If care is taken when designing and assembling this style of truss rod, and if the guitar neck is removable (such as is the case with a bolt-on neck), the truss rod may be reversed at will in order to adjust for various conditions.
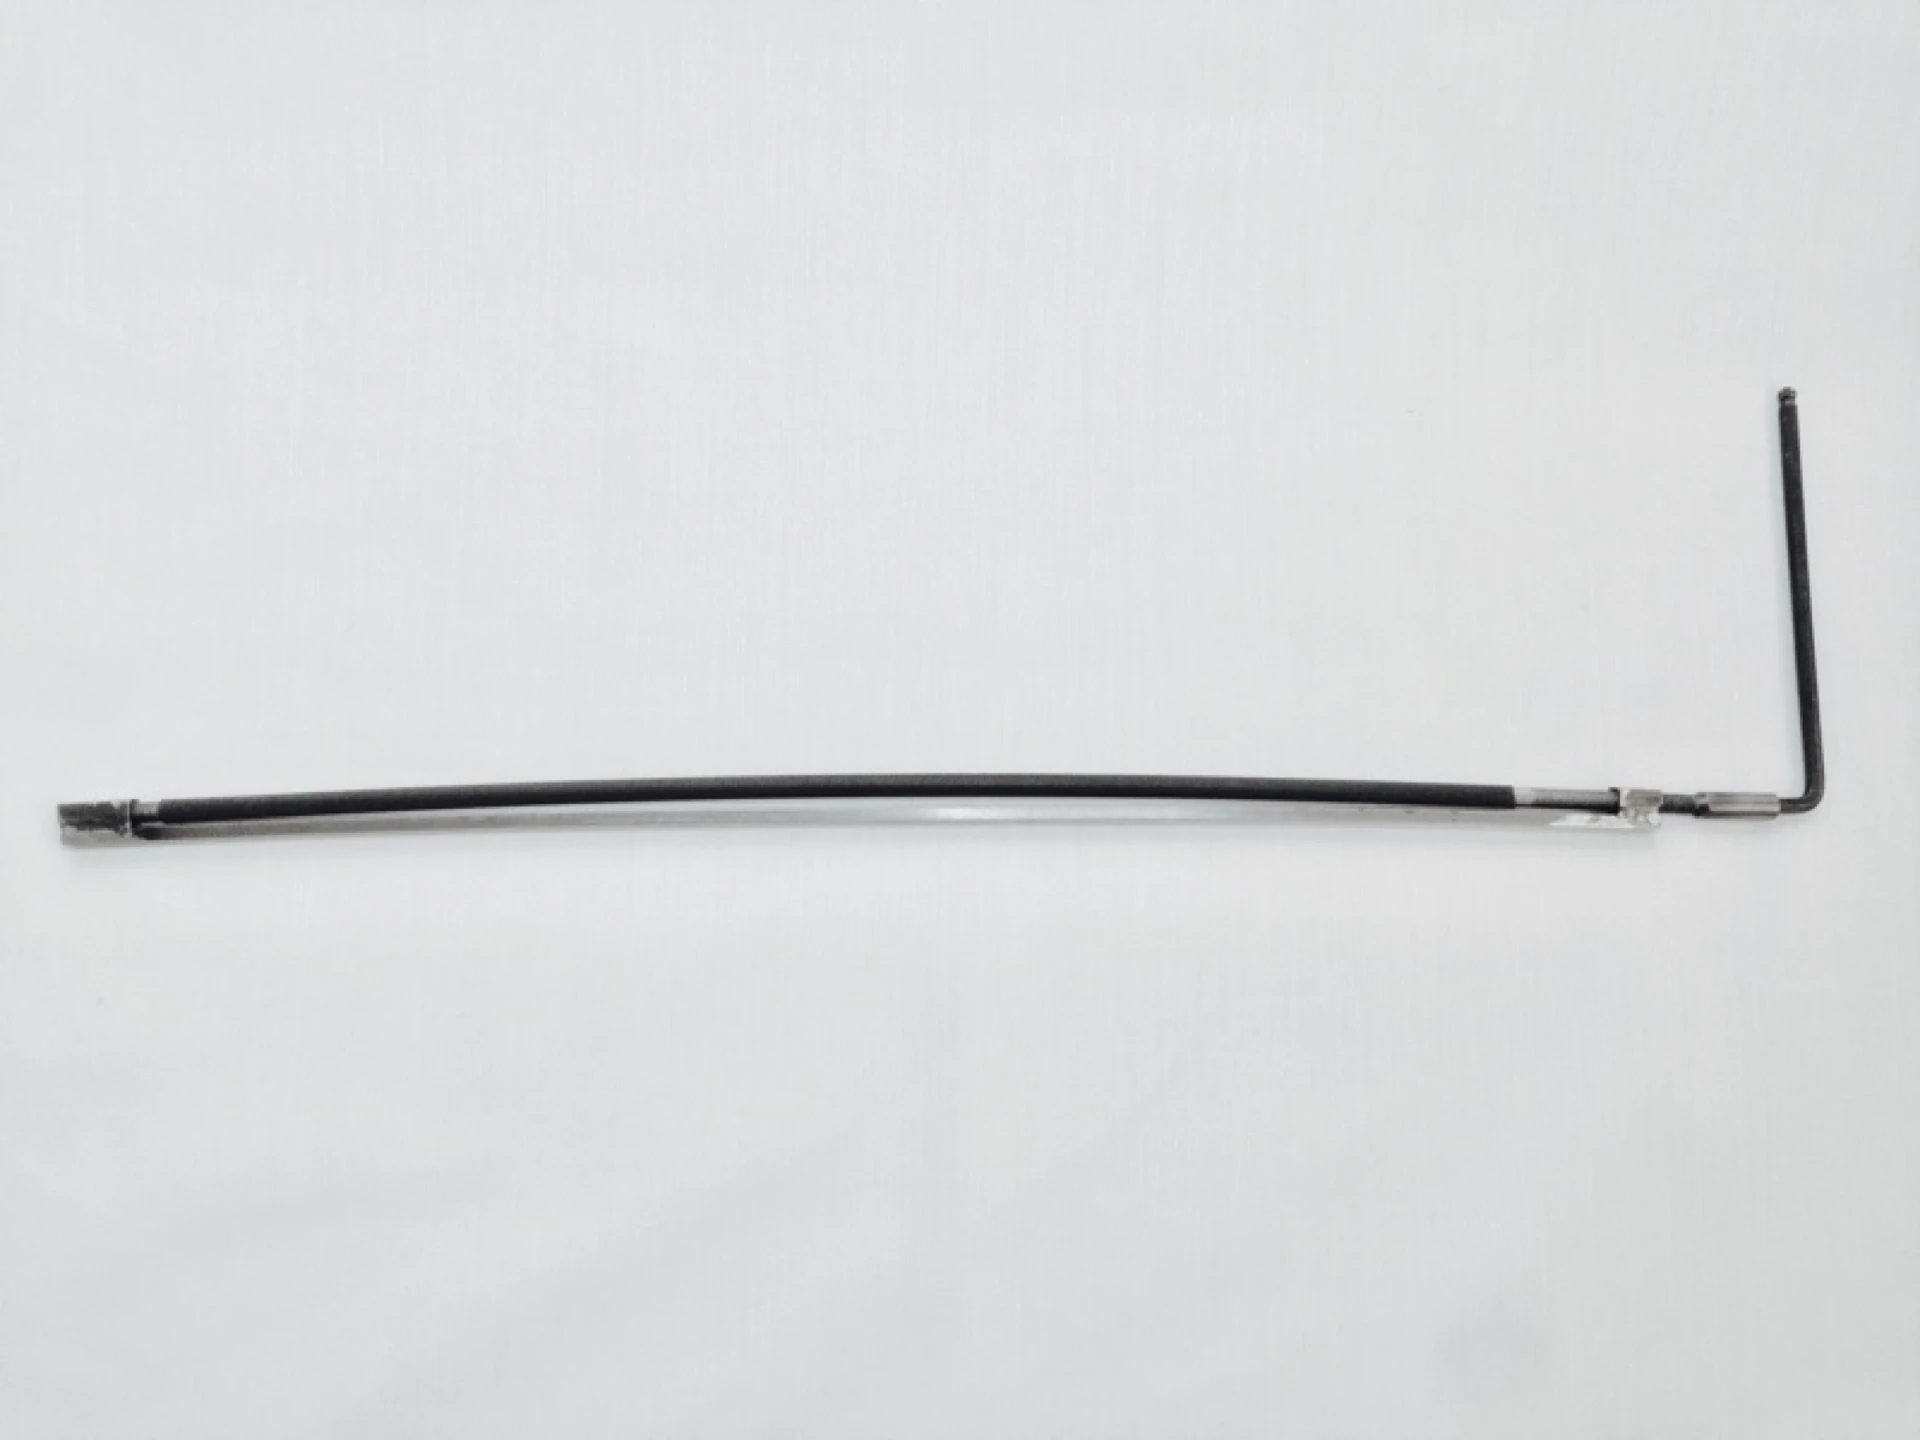
Can one truss rod introduce both a forward and back bow in a guitar neck without having to be un-installed, rolled over 180° and re-installed? Enter the clever, if not ingenious, Dual-Action Truss Rod (double-action, double acting, twin-action, etc). Its self-contained, two-way adjustability overcomes the uni-directional limitations of both the Single-Action Truss Rod and the Compression Rod and provides a greater degree of neck bow control. Turn clockwise to induce a forward bow, and counter-clockwise to bow the neck backwards. This reversing of direction is accomplished by threading the rod through the stop block, as opposed to simply passing it through a hole in the stop block, as is the case with the Single-Action Truss Rod.

Dual-Action Truss Rod
Along with ease of installation, requiring only a simple, straight channel, it is understandable how this design skyrocketed it to truss rod super-stardom. But does the Dual-Action Truss Rod have a downside? More neck material may need to be removed to accommodate it and, unlike the Compression Rod, the channel it occupies must be left open perpetually requiring greater care when attaching the fretboard. It is typically heavier than its single-action cousin, has been known to introduce the dreaded intermittent rattle (Ugh!). As with any steel Truss Rod of adjustable design, the Dual-Action Truss Rod is subject to failure (welds, stripped threads, snapped rods, etc).
Despite its shortcomings, the the Dual-Action Truss Rod is ubiquitous today.
Clockwise to induce forward bow
Counter-clockwise to induce back bow
The use of carbon fiber for stringed instrument neck reinforcement is now several decades old, and it is easy to understand why. The fact that carbon fiber often weighs less than the wood it replaces and is certainly many times stiffer and stronger can be reason enough to incorporate it. Fibers comprised of long chains of carbon atoms are embedded in a matrix of epoxy resin resulting in material having properties similar to steel with the weight of a plastic.
Carbon Fiber Neck Reinforcement
Steel and plastic are said to be homogeneous and isotropic, meaning their properties (mechanical, electrical, thermal, etc) are equal at all points, in all directions, throughout the material. Carbon fiber, on the other hand, generally exhibits strength along the axis of the fibers only, similar to wood. Carbon fiber can be specifically constructed to approach isotropic (called quasi-isotropic) properties by layering the laminates in off-axis direction (think: plywood).
With or without the adjustability of a truss rod, a guitar neck needs to be as stiff and lightweight as possible. Many builders have chosen to supplement an adjustable truss rod with parallel bars of carbon fiber running the length of the neck.
Assuming a builder has addressed countering the pull of the strings, perhaps the most common reason for incorporating an adjustable truss rod into the neck of a guitar is to provide adjustment for Relief.
Relief refers to an ever-so-slight but deliberate forward bow in the neck intended to accommodate the path of the oscillating strings, preventing or mitigating the incidence of contact with the metal frets. 99% of the time, such forward bow is provided by the natural pull of the strings, and does not need to be induced. If anything, there is too much forward bow, and a truss rod is used to counter the pull, reducing the bow.
Relief may be helpful in reducing string buzz, especially for extremely low action setups and/or reduced tension (lower-than-concert pitch) tuning(s) and/or heavy gauge strings. Aggressive strummers may also benefit from having some relief, although such players will likely benefit more from simply having a higher action. Having the ability to adjust "relief" may be beneficial for those players who insist on dramatically altering string tensions on the same instrument, as these changes definitely affect neck bow.
In an effort to satisfy as many customers as possible, many builders seek to construct a guitar that will handle any possible playing or setup scenario. Such an instrument will provide for adjustable relief by incorporating an adjustable truss rod (with or without carbon fiber stiffeners). And most consider that to be a good thing.
For such builders (and subsequently most all of the guitar-buying public), an adjustable truss rod is seen as a required component in any acoustic guitar. For larger companies, this approach is a necessity. The primary goal of any corporation is to maximize shareholder value, therefore, sales are targeted to the largest consumer base. And that base wants what it wants, and what it has been told it wants is an adjustable truss rod. But building anything with a "one-size-fits-all" mindset comes with its own price, doesn't it?
Assuming all other setup conditions have been met (fret plane is perfectly flat, nut slot heights are perfect, saddle height is perfect, etc), additional forward bow may be deliberately introduced using an adjustable truss rod after the strings are tuned to the desired pitch (assuming the tension of the strings on the neck did not already introduce sufficient forward bow and, subsequently, sufficient relief - which is the case most of the time).
Most often, the action may have heightened slightly as a result of existing or added forward neck bow and would, subsequently, need to be adjusted one last time. In an ideal scenario, this *should* be handled by the neck geometry, for that is its primary role (thus the benefit of having an adjustable neck, such as a bolt-on neck). If the neck is glued in place, and there is no intention of resetting proper neck geometry to set up the desired action, then the action *should* be adjusted at the saddle. Alas, many (most?) will simply use that same truss rod to counter the forward bow, introducing a back bow to bring the string height back down.
Seems rather silly, doesn't it? Instead of bending the neck back and forth in various attempts to “dial it in,” why not simply design and build the flattest, stiffest neck possible from the outset?
“Most (if not all) luthiers and guitar technicians acknowledge that neck relief, while related, is to be treated independently of string height (action). Otherwise, you end up chasing your tail trying to get the setup perfect. Assuming we are starting with a neck having an adjustable truss rod, and that neck is set to be dead flat (planing and radiusing are perfect, frets are perfectly consistent in height, string height at the nut is perfect, etc.), when we correctly set up the guitar for playability we first establish the desired relief independent of string action, then address the string height at the saddle. Sadly, many tweak and fiddle with the truss rod to address action, which only succeeds in complicating what would otherwise be a very straightforward setup process.” —
A growing contingent of builders and players have become convinced that these steel fixtures (Square tubes, T-bars, I-beams, U-channels, Compression Rods, Single-Action Truss Rods, Dual-Action Truss Rods, etc) have no place inside their instrument necks and are actually detrimental to both the playability and the sound of their guitars. They contend that the weight of the added steel does not make for an optimally balanced neck, and the metal fixture may have/has a negative impact on the overall tone.
“By design, a dual-action truss rod is contacting the neck and fretboard at 3 points, not along it's entire length. Overall acoustic guitar tone is created by the standing waves traveling back from the edges of the soundboard, having been generated from the kinetic energy of the strings which were plucked or strummed. The shortest distance between two points is a straight line, and that is any given string's resting path between the nut and the saddle. When a string is deflected from that path, it is *not* stretching; it is rocking the bridge forward. Though subtle, the rapid back and forth movement of the bridge is flexing the soundboard, generating waves that ripple out toward the sides of the guitar, as with a stone dropped into a pond. Those waves hit the shore, or the binding in our case, and come bouncing back across the top giving us the audible frequencies we associate with the sound of our acoustic guitar. The goal of acoustic guitar construction is to capture as much energy at the saddle (and bridge) as possible, with the least amount of damping. On guitars that have a dual-action truss rod, an entire section of the structural frame supporting the length of the strings (the neck, directly beneath the fretboard), which could have been tasked with transmission of energy, has been removed to accommodate a damping-inducing mechanical tool.” —
More than likely, regardless of the issue of relief, the truss rod and/or stiffener(s) cannot simply be removed, as the need to counter the pull of the strings remains and most wooden necks ever built have failed to successfully compete with string tension without supplementary assistance. What is a luthier to do?
If one believes neck relief to be essential for optimal playability, it can be readily introduced into the neck design. Long before the advent of carbon fiber, guitars were constructed using fixed necks, having pre-set neck relief, so this is not a new thing. Today, when I am asking if an acoustic guitar needs to have an adjustable truss rod, I am really asking if it is absolutely necessary to be able to adjust neck relief.
Can you honestly tell me that, at this stage of life, you do *not* know what gauge strings you prefer to play with on any given acoustic guitar?
Can you actually demonstrate that, if you are truly among the unique few who are constantly swapping out string gauges and/or dramatically altering tunings ON THE SAME GUITAR, that you make truss rod adjustments each and every time?
If you can honestly answer “Yes” to either question, let me be the first to congratulate you, and add that I do not see any benefit in your pursuit of a truss rod alternative.
I am adding this section to the topic because it comes up all the time in acoustic guitar neck, fretboard, truss rod, relief, and action discussions. By "hump" I am referring to what appears to be a raised area of the fretboard where the neck joins the body. I say "appears" because 99% of the time there is no hump! What is being called a hump is a deliberate design factor of an acoustic guitar neck and fretboard. Not realizing this, many mistakenly think something is wrong with their guitar. Permit me to explain:
A (typical) acoustic guitar neck and fretboard assembly is NOT identical to a (typical) electric guitar neck and fretboard assembly. On an electric guitar (if the fretboard is even a separate component) you can expect to see the material of the neck running in a perfectly flat plane beneath the frets from the nut to the end of the neck. By contrast, on most acoustic guitars (elevated fretboard designs excluded), the neck is only supporting the fretboard up the point where the neck joins the body (typically the 12th or 14th fret). Past that point, the fretboard extends beyond the neck, unsupported, kind of like a diving board over a swimming pool.

Acoustic and Electric Guitar Necks
The extension of the fretboard that projects out beyond the neck lays on top of the hollow body of the guitar. It is a mistake to expect the surface of an acoustic guitar fretboard to be a perfectly flat plane from nut to the end of the board. Why is that? A deliberate design decision called "fall-away" is introduced to the fretboard extension, where it is sloped (slightly) to drop away from the path of the strings from the 15th fret to the end of the board. What is the purpose of fall-away? To mitigate string buzz, just like introducing relief to the fretboard between the nut and the heel. Is this fall-away absolutely necessary? It depends on how low your action is, and how aggressively you pluck the strings.
Now let's add forward bow to the neck, or rather, the strings will do that for us, as they pull the headstock up away from what would be its resting position without any strings attached. Because of how the neck and fretboard assembly are designed, the forward bow of the neck is limited to an area of the neck that is shorter than its entire length.

Forward Bow Path
I have already stated that it is a mistake to assume that the plane of the neck/fretboard should be perfectly flat along its entire length. It is also a mistake to assume that the endpoints of the curve of the forward bow exist at the nut and the end of the fretboard. They do not! They only exist from the nut to the heel of the neck (which does not extend past the body joint).

NOT the Forward Bow Path
Now, with this in mind, let's revisit the issue. What most players call a “hump,” in an attempt to describe the area of the fretboard where the neck joins the body, is due to two things:
The area between the 14th and 15th fret looks raised into a "hump." But it isn't a hump at all.
All that said, there are some things that can exaggerate the appearance of a hump. Adding (or being unable to counter) a ridiculous amount of forward bow will introduce an obnoxious "wave" into the fretboard. Additionally, when an acoustic guitar neck is reset, the angle of incidence is most always increased (the plane of the neck tips back away from where it was prior to the reset). The fretboard extension must be shimmed to compliment the change in geometry, and the fall-away must be corrected (increased) so that the board does not protrude up into the oscillating string path. Simply bending the extension back down to be glued to the soundboard will really exaggerate the fall-away. This common repair misstep will surely exaggerate the hump illusion.
If you will keep any relief and fall-away between 0.01″ to 0.02″ (0.1 to 0.5 mm), there will be no apparent “hump” effect. The more gap you introduce, the more hump may appear.
Along with my own subjective experience, I had obtained sufficient anecdotal evidence regarding neck stiffness and carbon fiber usage to purge a neck of a truss rod altogether. I selected the Dragonplate D-Tube Neck Beam, a carbon fiber structural component specifically designed for the task. This 16″ hollow beam weighs a mere 1.8 oz (0.05 kg). The well-known Martin-style adjustable truss rod weighs more than three times as much at a whopping 6.06 oz (0.17 kg). Comparatively, weight-wise, the D-Tube is practically non-existent! There are multiple versions of this product available, but I chose to use a straight tube 3/4″ wide x 1/2″ high x 16″ long, as the groove I would have to cut into the neck, being of equal depth throughout, would be straightforward to rout.
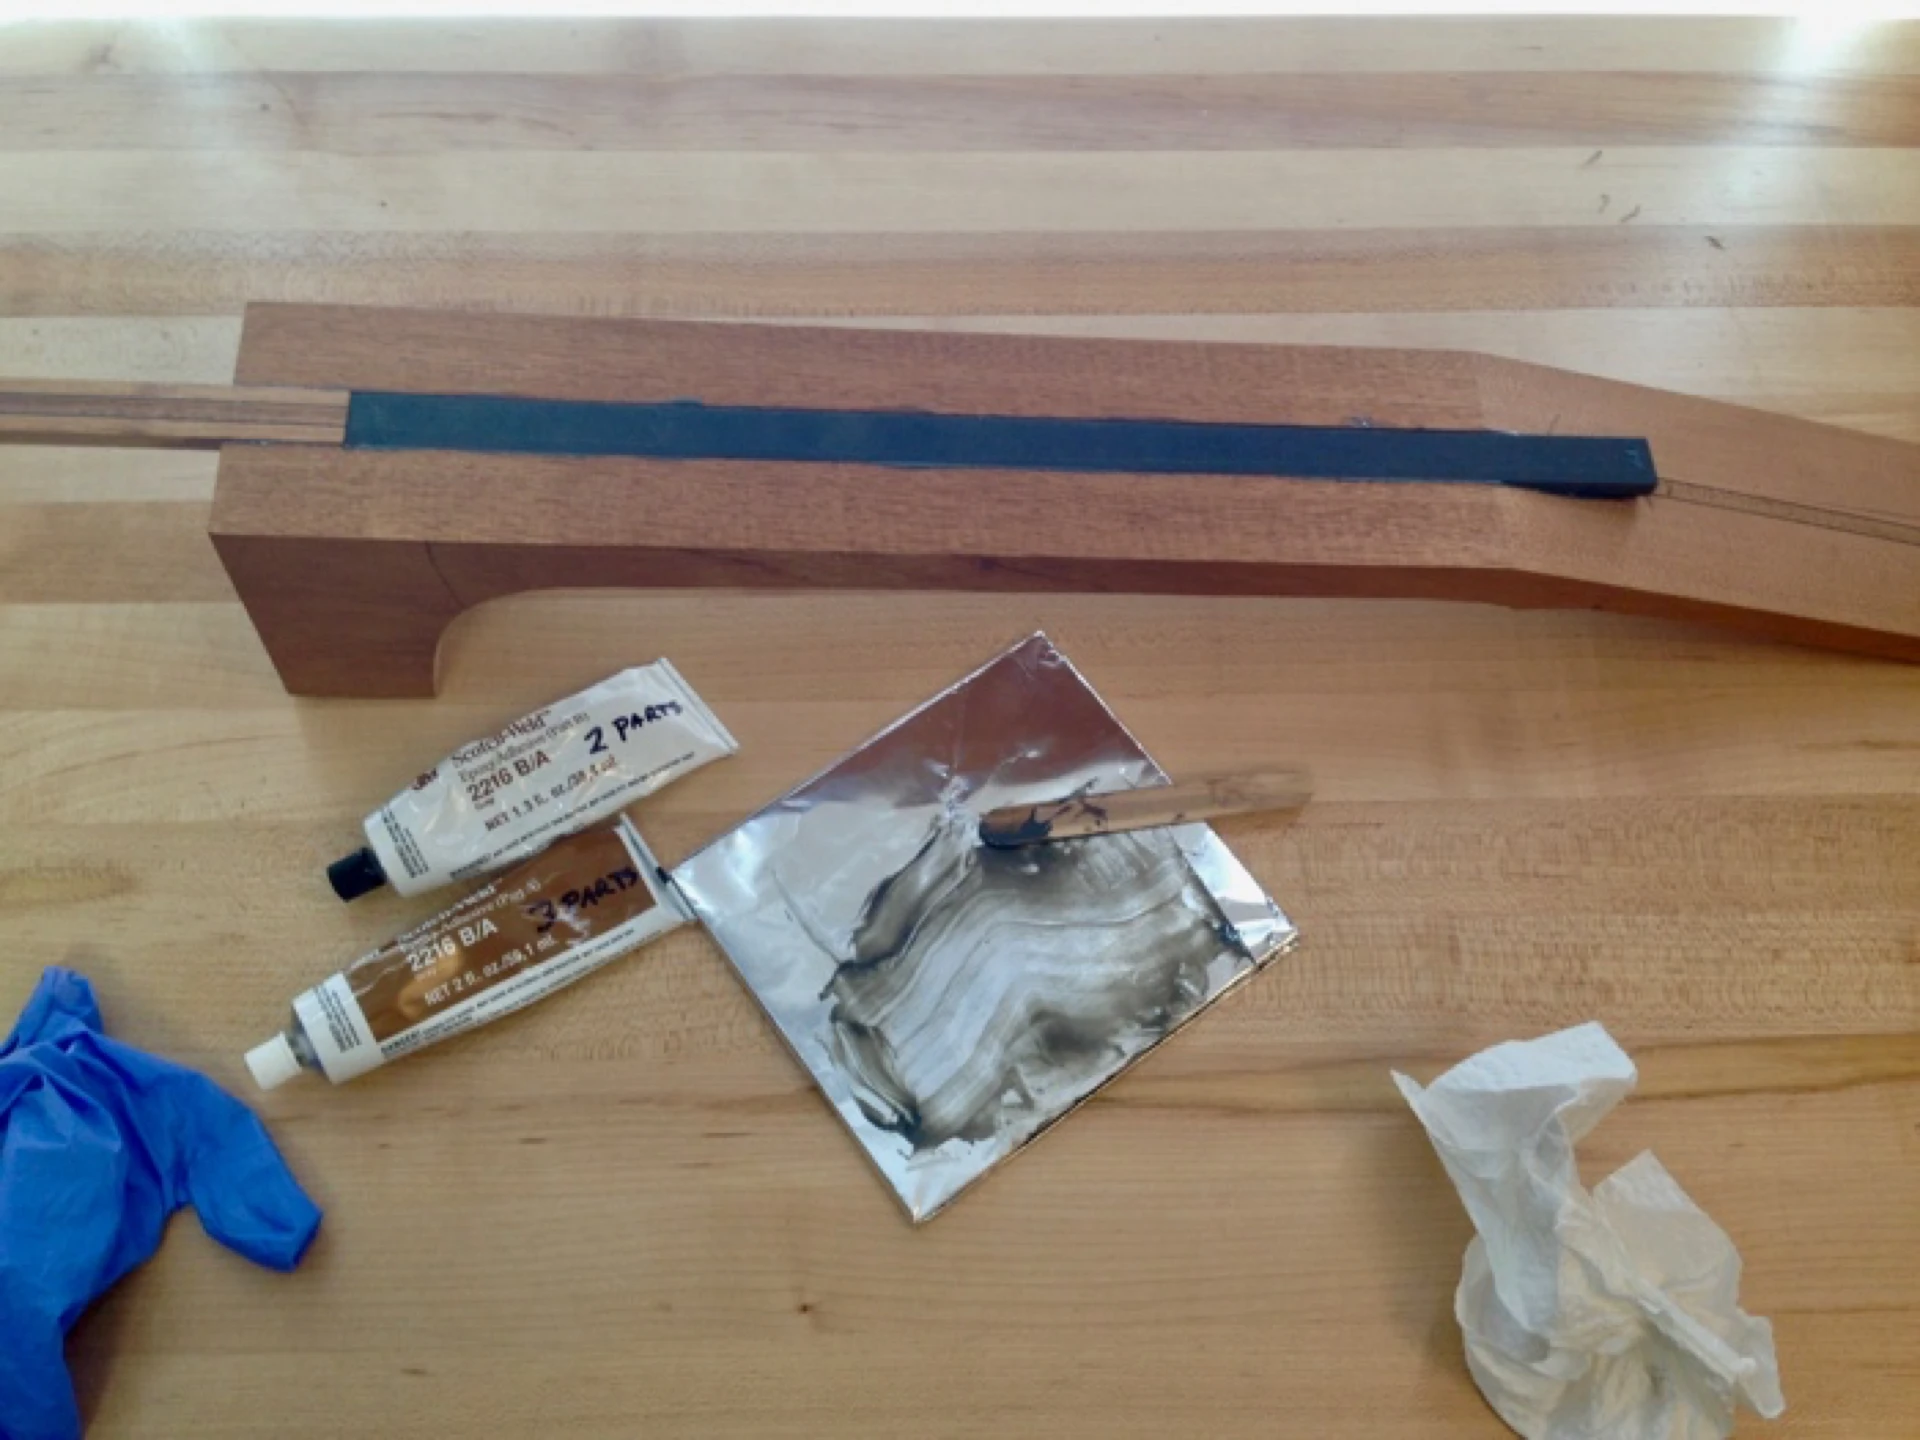
The groove may be cut via CNC, milling machine, a router table, jigs and fixtures with a handheld router, or with hand tools (I use a router table). In addition to the D-Tube, a few supplies are necessary:
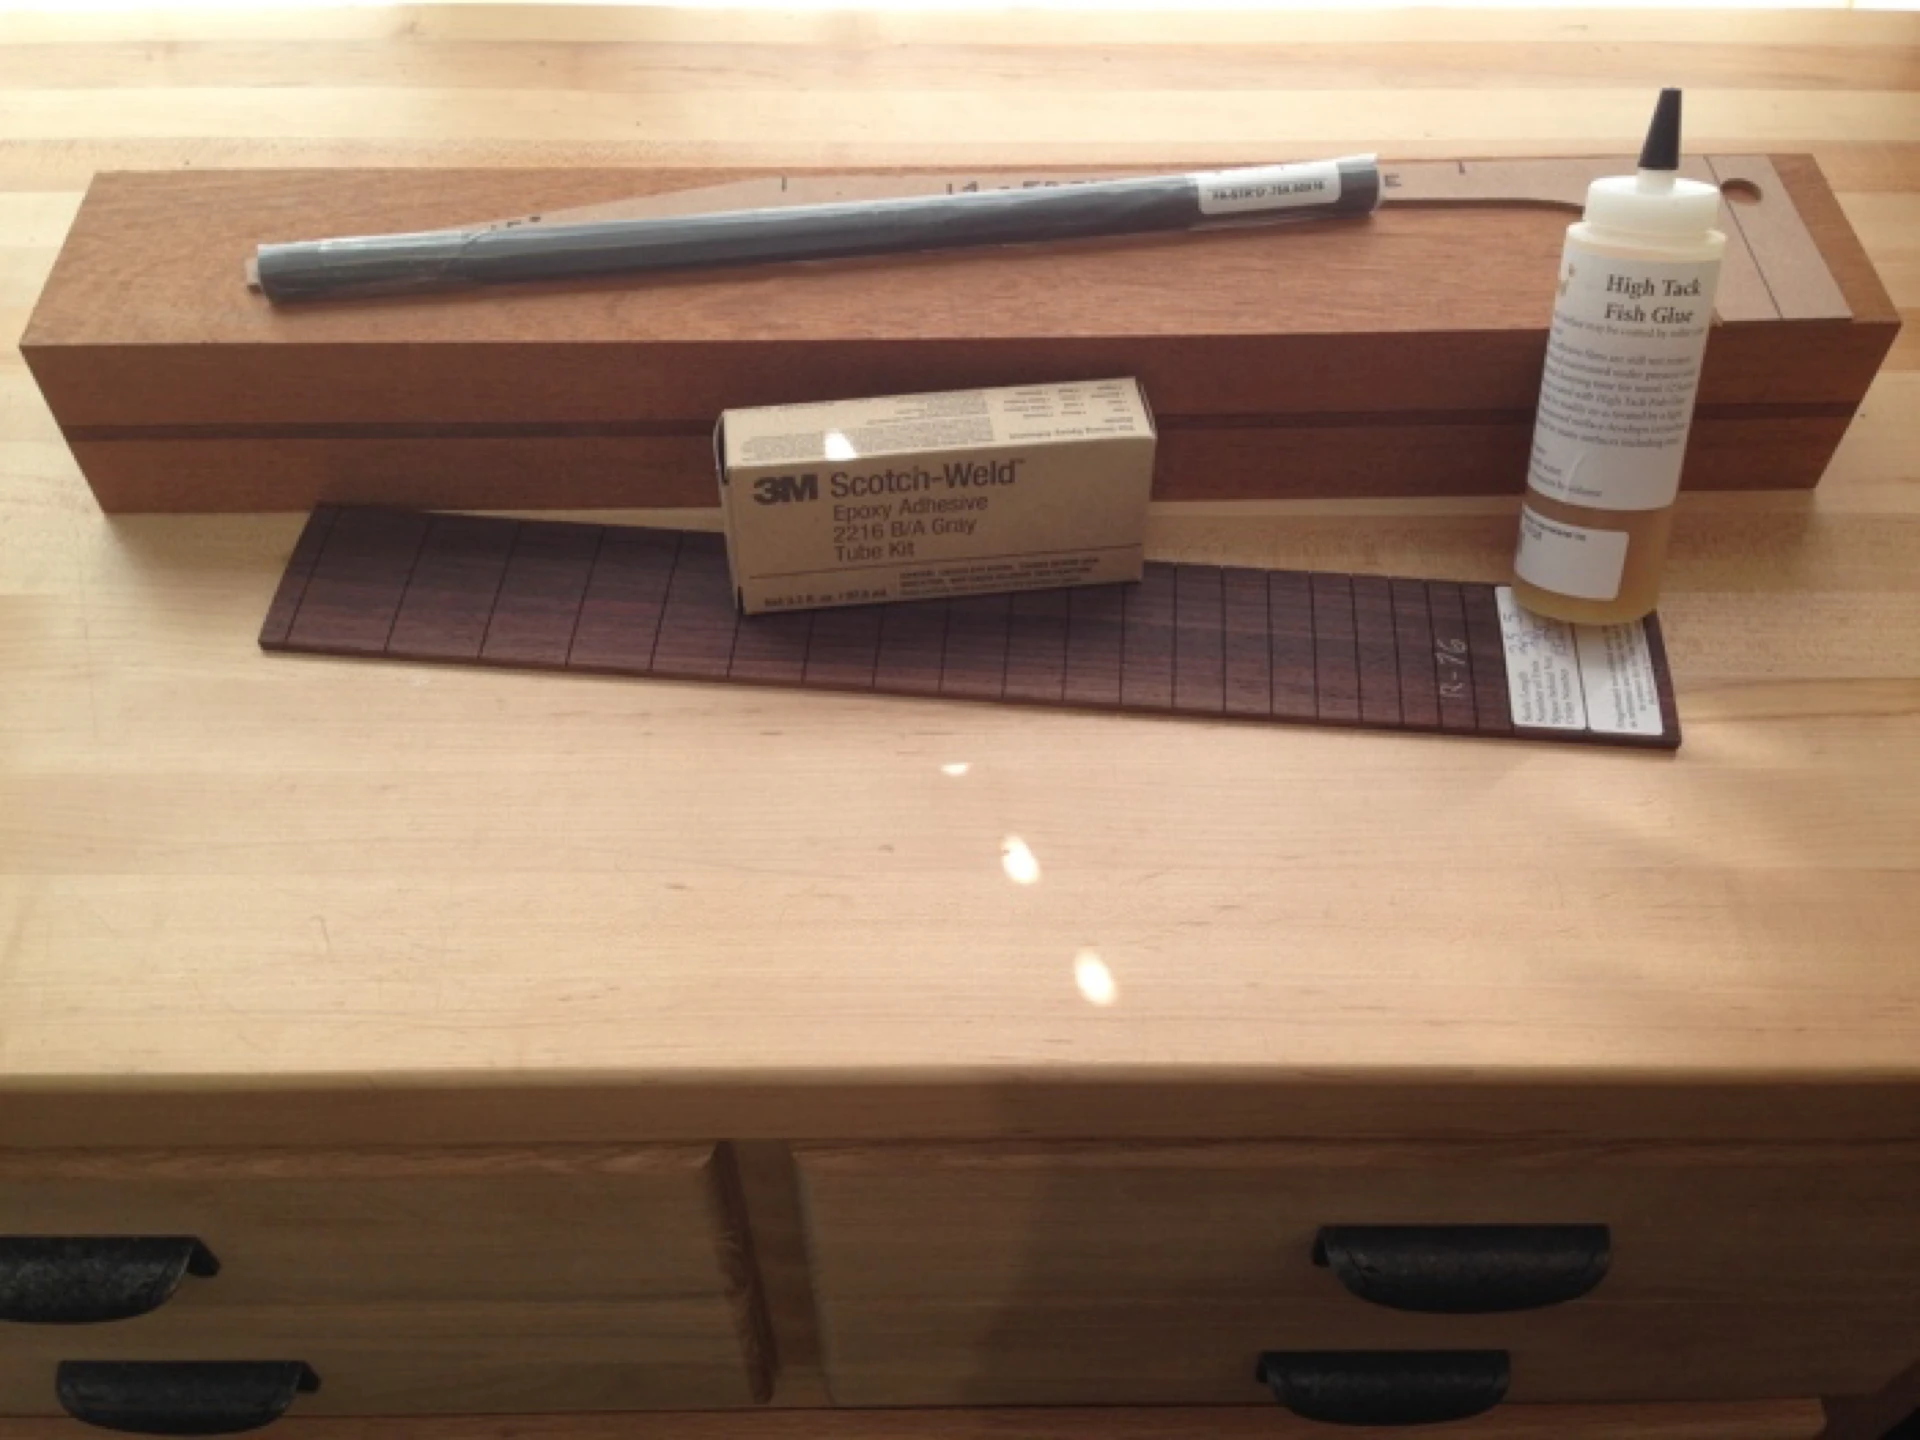
Neck Supplies
Neck design is of little consequence when considering the installation of a D-Tube. Whether a neck is laminated or solid wood, whether the headstock is one piece with the neck or attached via a scarf joint, whether the neck to body attachment is a glued dovetail, a bolt-on mortise-and-tenon, a butt-joint loose tenon, or even an integrated Spanish heel; all are able to receive this truss rod replacement.
For my application, the sides of the neck blank must be true and parallel before proceeding.
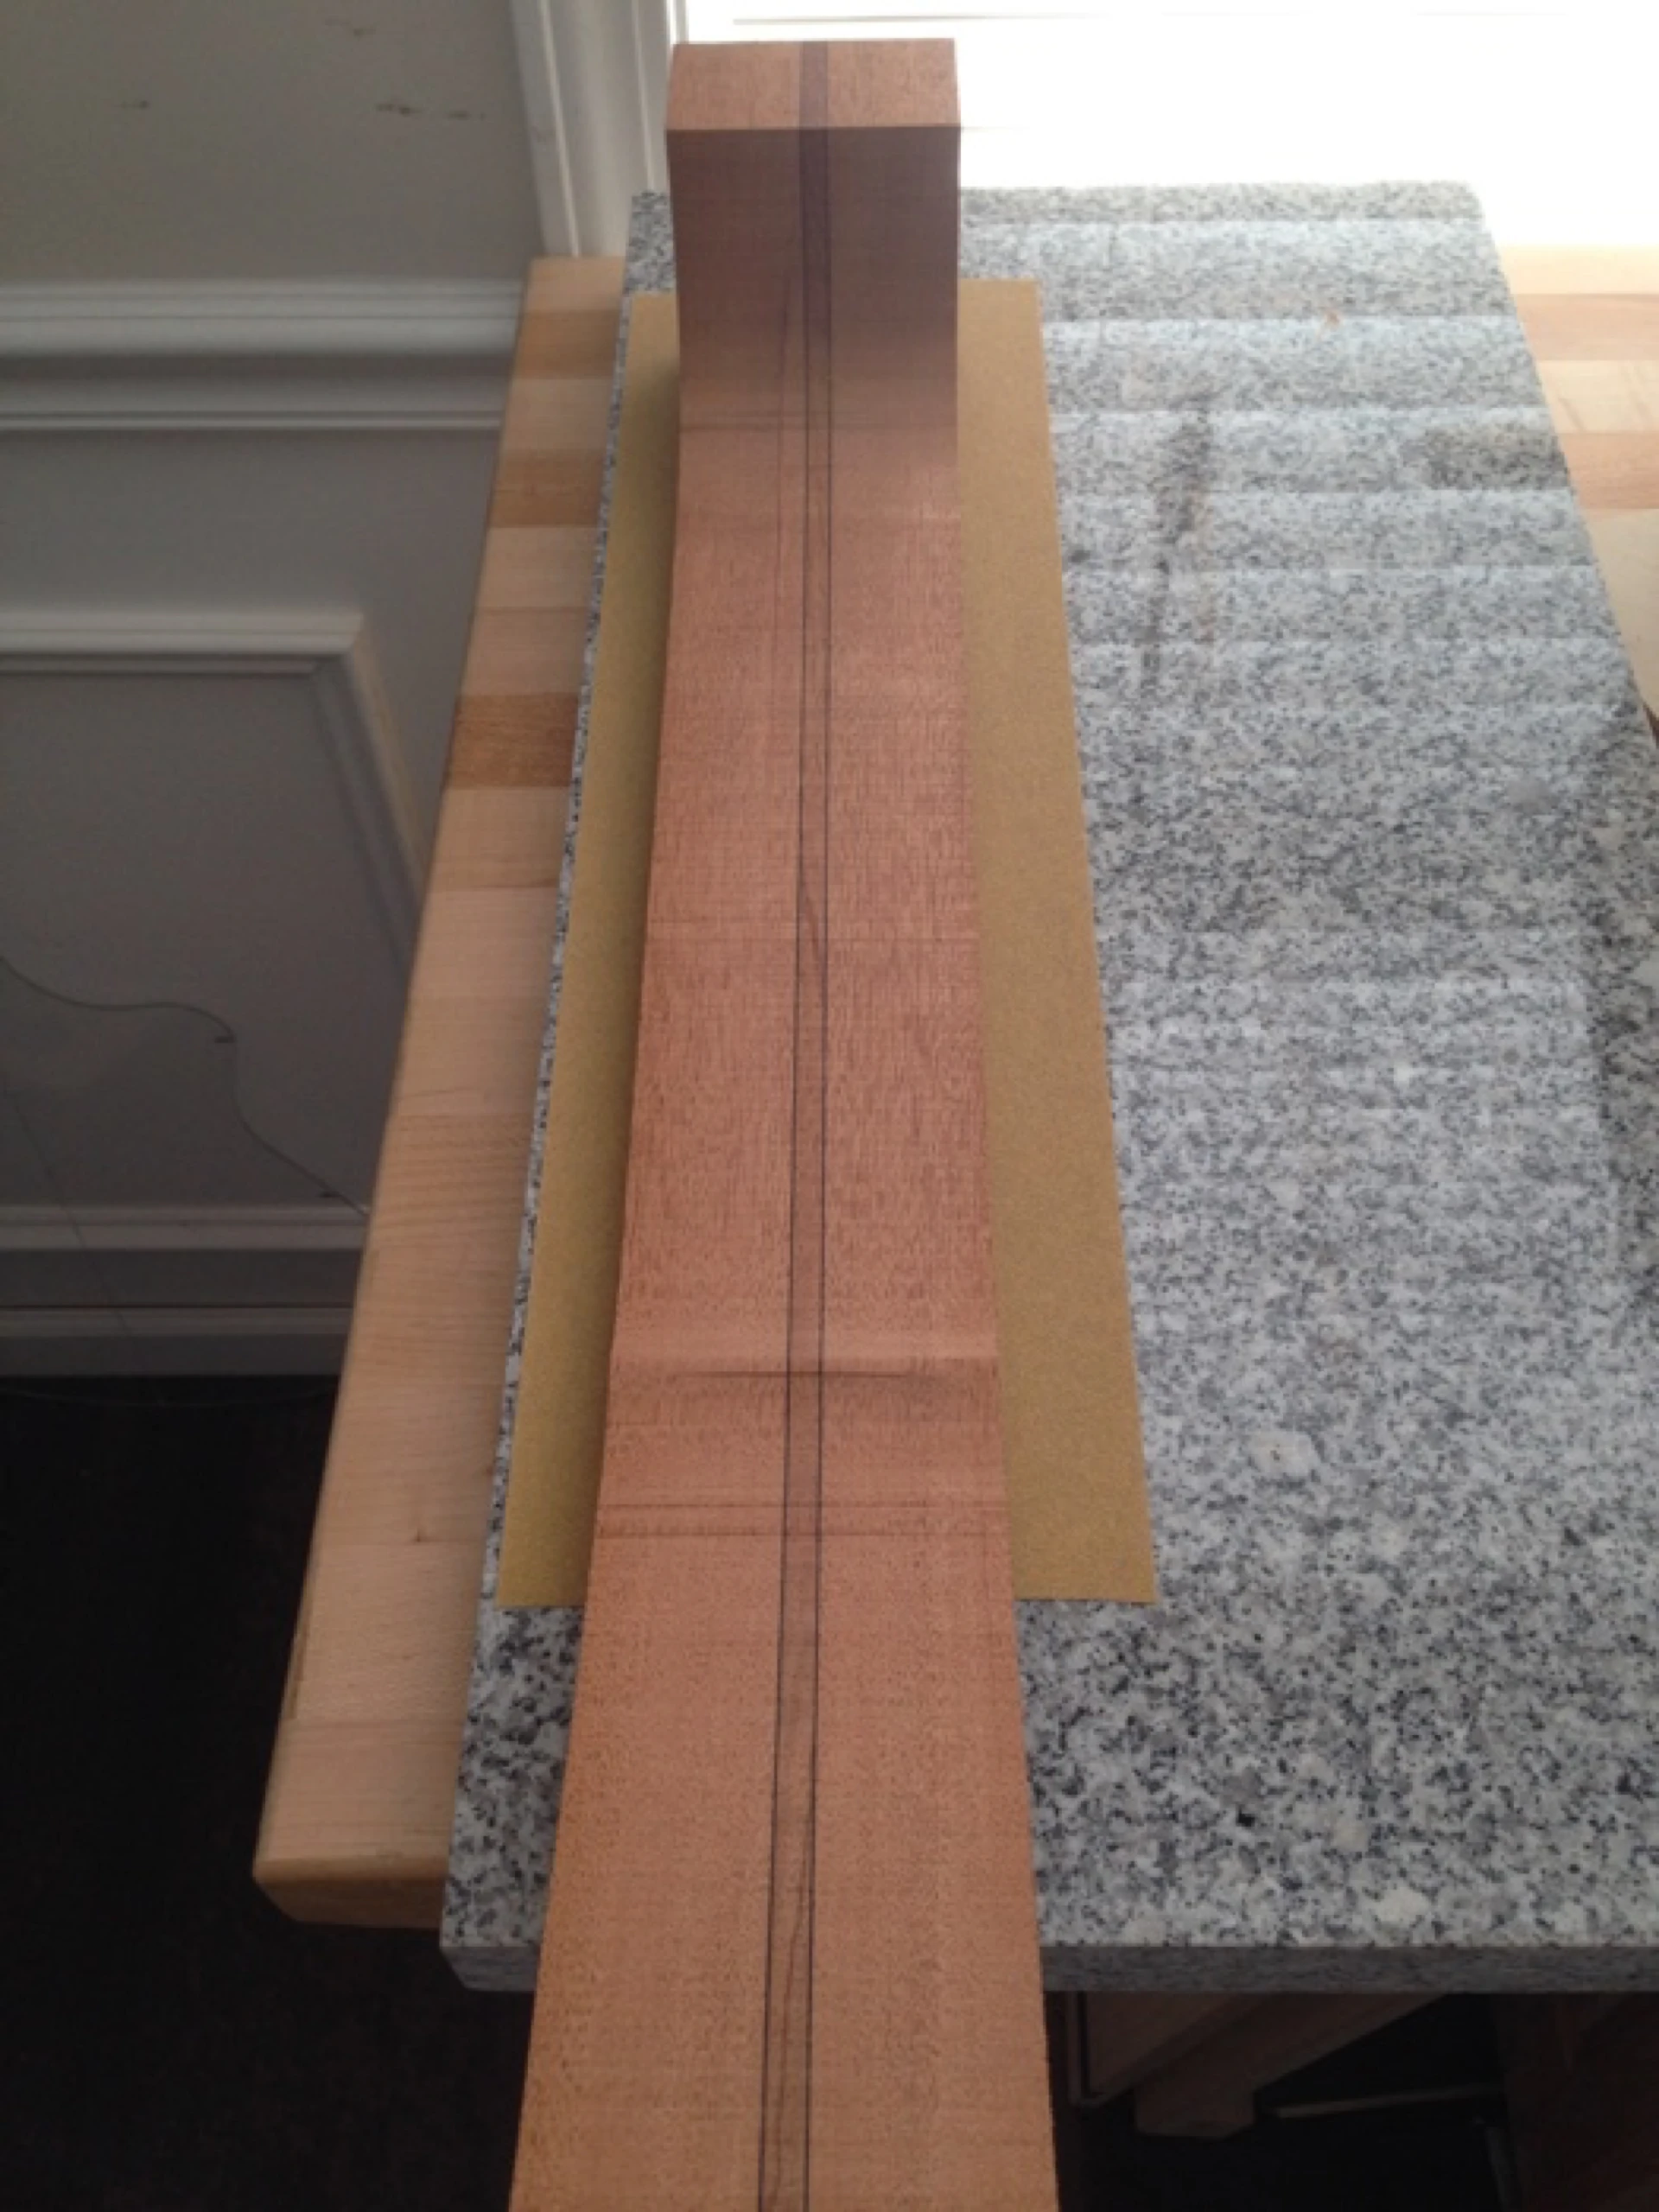
The laminated mahogany block I selected was sized to accommodate two (2) of these necks by reversing the template and flipping it vertically. The necks were separated at the bandsaw.
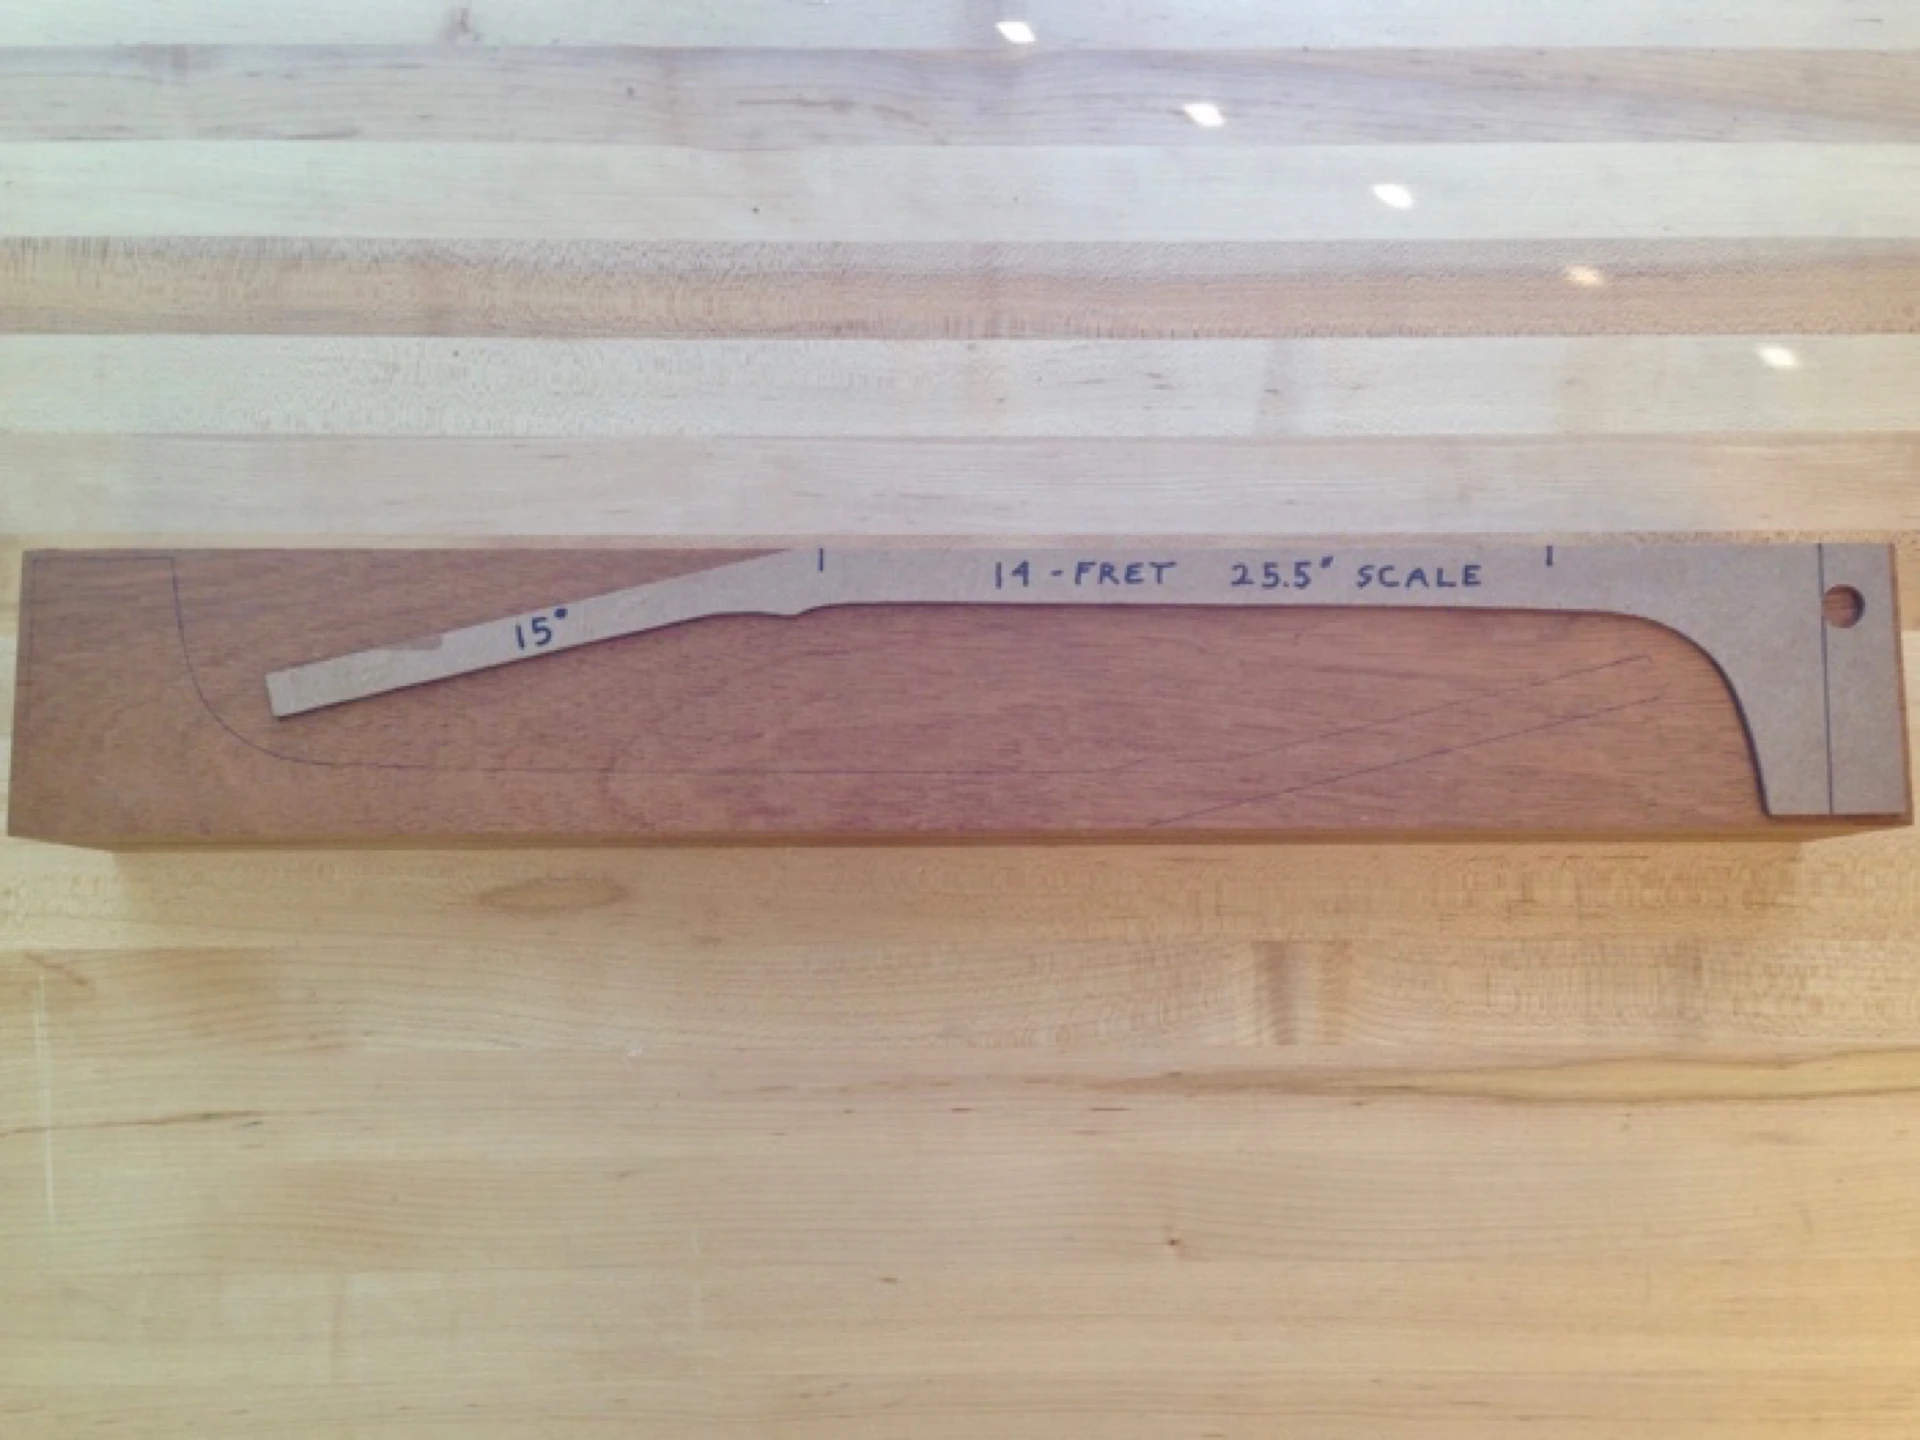
Neck Blank with Template
My roughed-out necks must to be trued-up prior to cutting any grooves, so they go to the bench to be hand-planed. At this stage I am ever mindful of the angle of my headstock (15° in this case) as well as the point of intersection of the headstock at the fretboard. It takes only a single pass with a hand plane to alter the dimensions and, the closer I get to completion, such a pass can result in an unrecoverable mistake.
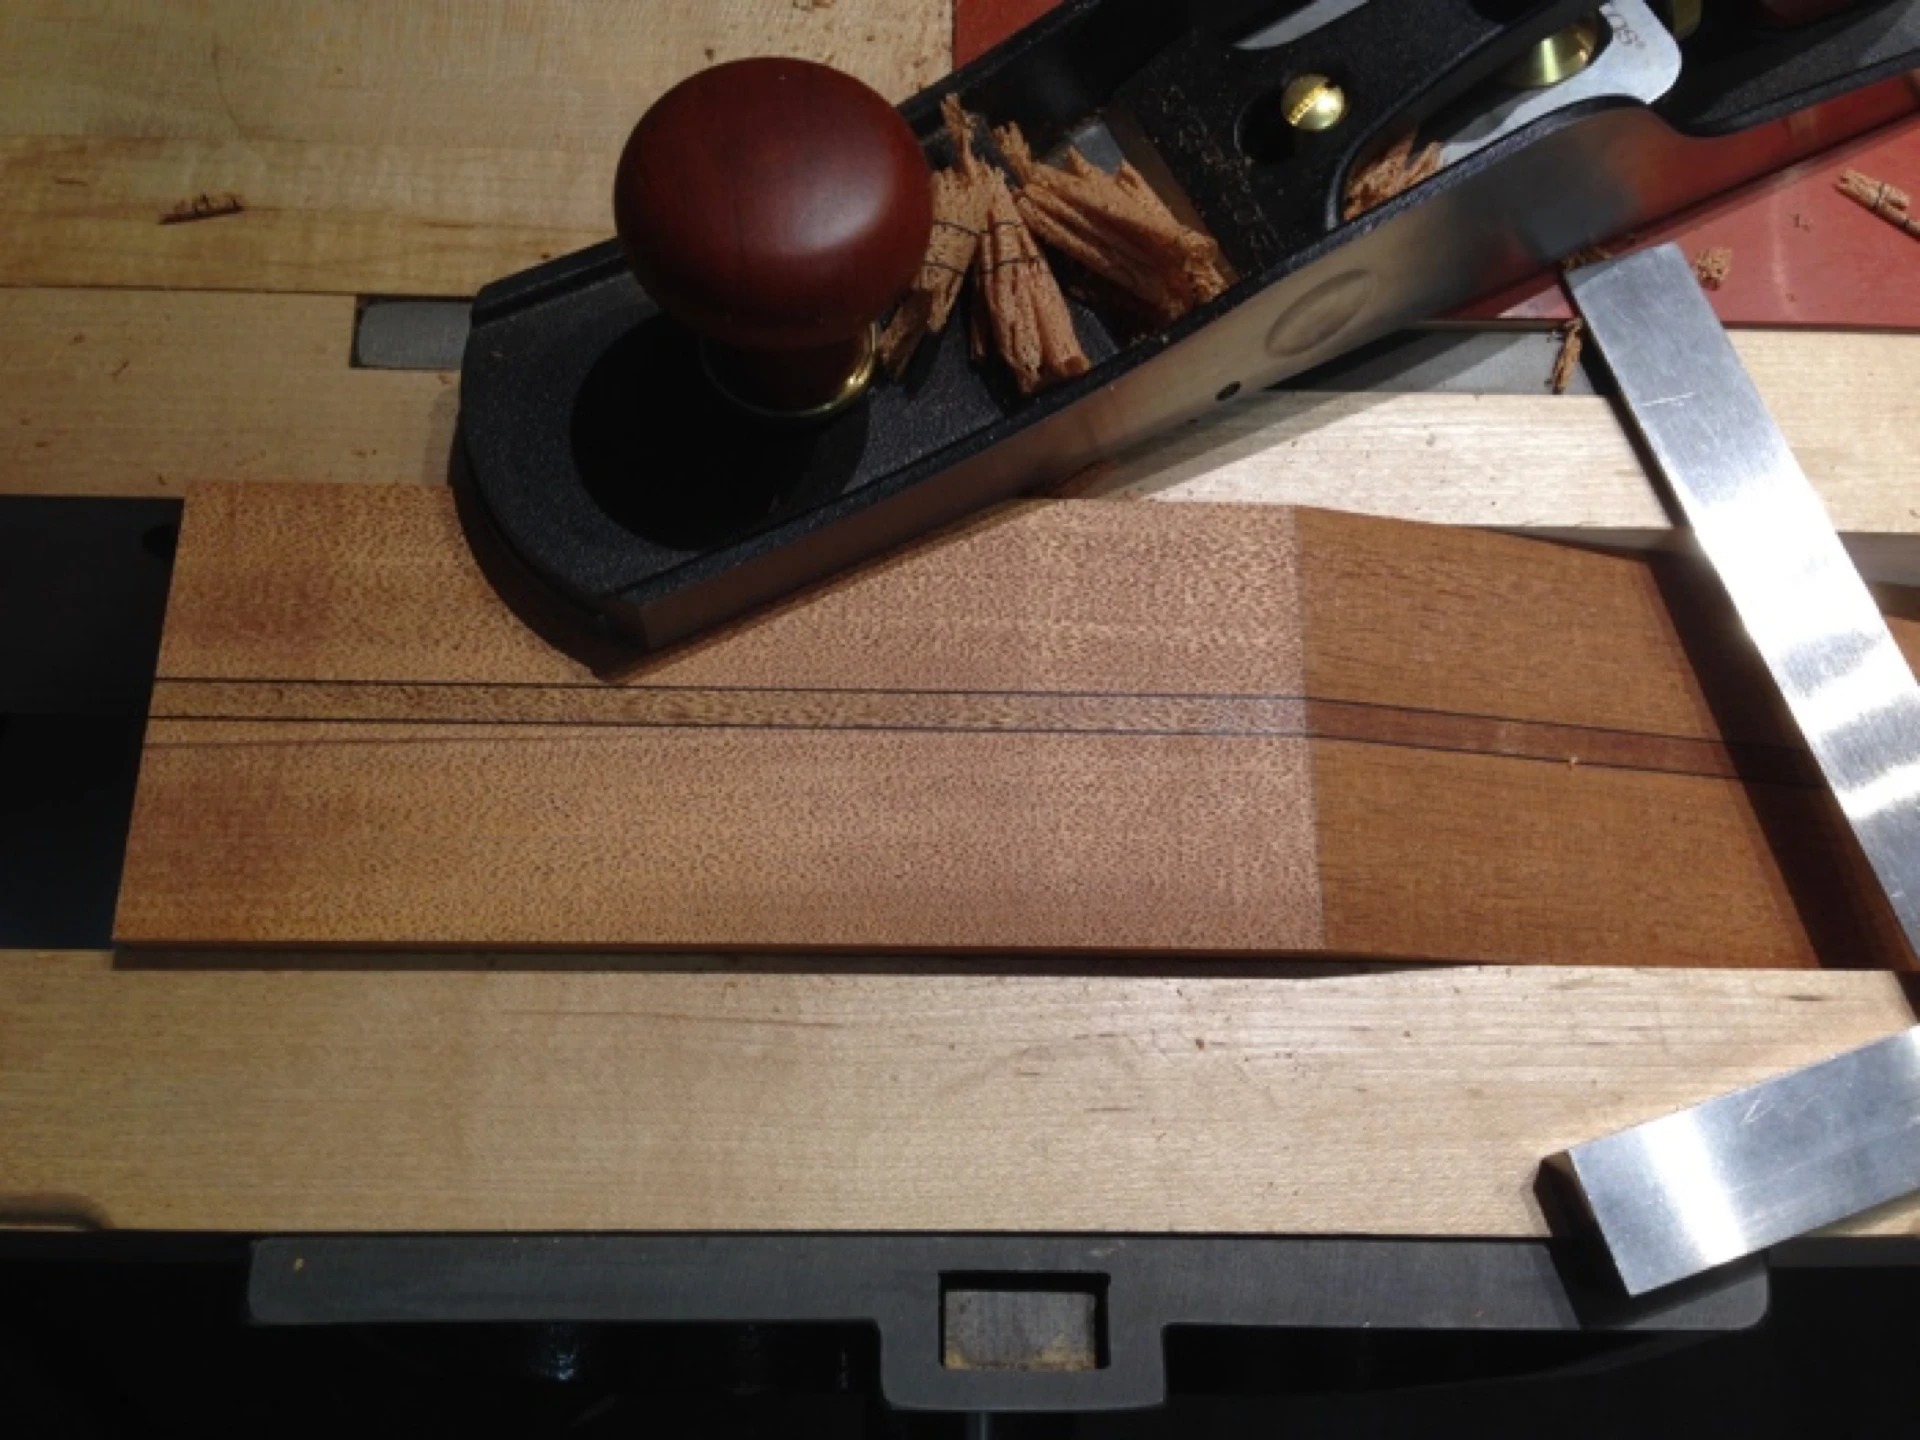
True up the Neck
Up to this point, these steps would be required for any conventional acoustic guitar neck built this way, with or without a truss rod.
The only difference between constructing a neck with a D-Tube and constructing a neck with a truss rod and Carbon Fiber stiffener combination is in the number and size(s) of the groove(s). The D-Tube requires that I rout a single channel down the center of the neck and epoxy in the Neck Beam, as opposed to routing three slots, the center one for the loose-fitting truss rod and the remaining two for carbon fiber stiffeners (which would also need to be epoxied into the neck).
Tool recommendation: I use a 3/4″ wide Whiteside 1411 3/8″ radius round nose (Core Box) router bit that perfectly matches the half-round profile of the “D” shaped carbon fiber beam.
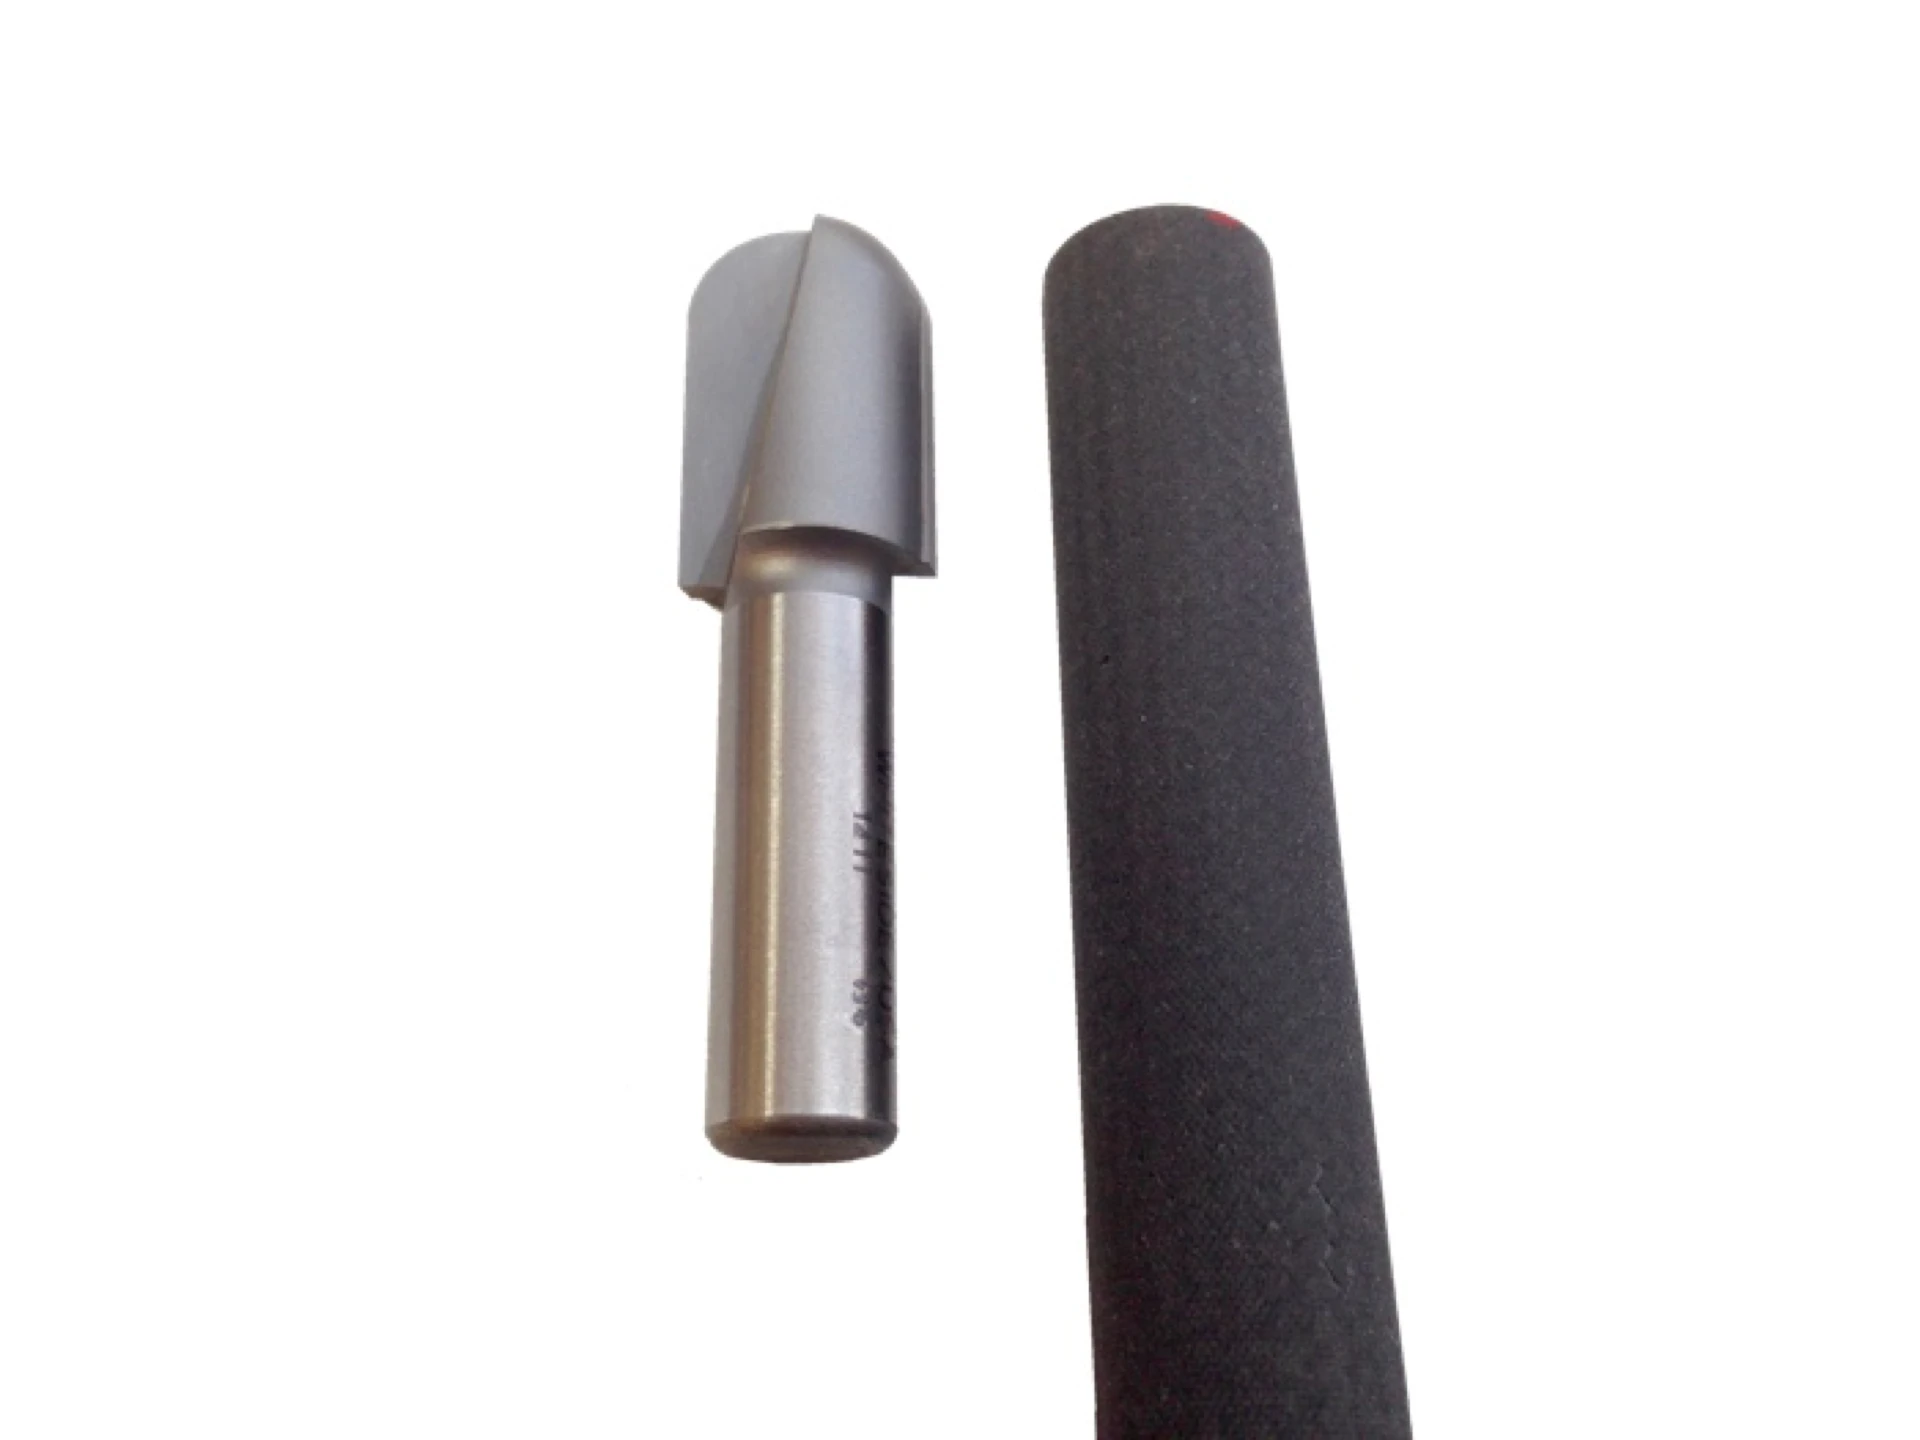
Core Box Router Bit
A trip to the router table provides me with a couple of advantages over using my handheld router with a centering base. Dust collection is a given at my router table and can be harder to control with a handheld tool. Additionally, the fence allows me to cut grooves quickly, safely and accurately. With a handheld router, I need to be much more vigilant regarding the proximity of the router base to the neck. More importantly, my neck blank does not extend far enough beyond my groove's start and stop points to safely register my router if using a centering base (dedicated router base having two (2) perpendicular pins spaced equidistant from the center). If I didn't have a router table I would employ a jig or fixture to both cradle the neck and to guide the router along. Otherwise, I would have to alter my construction techniques, attempting to rout the groove prior to dimensioning the neck. Such an approach could be fraught with peril. :-)
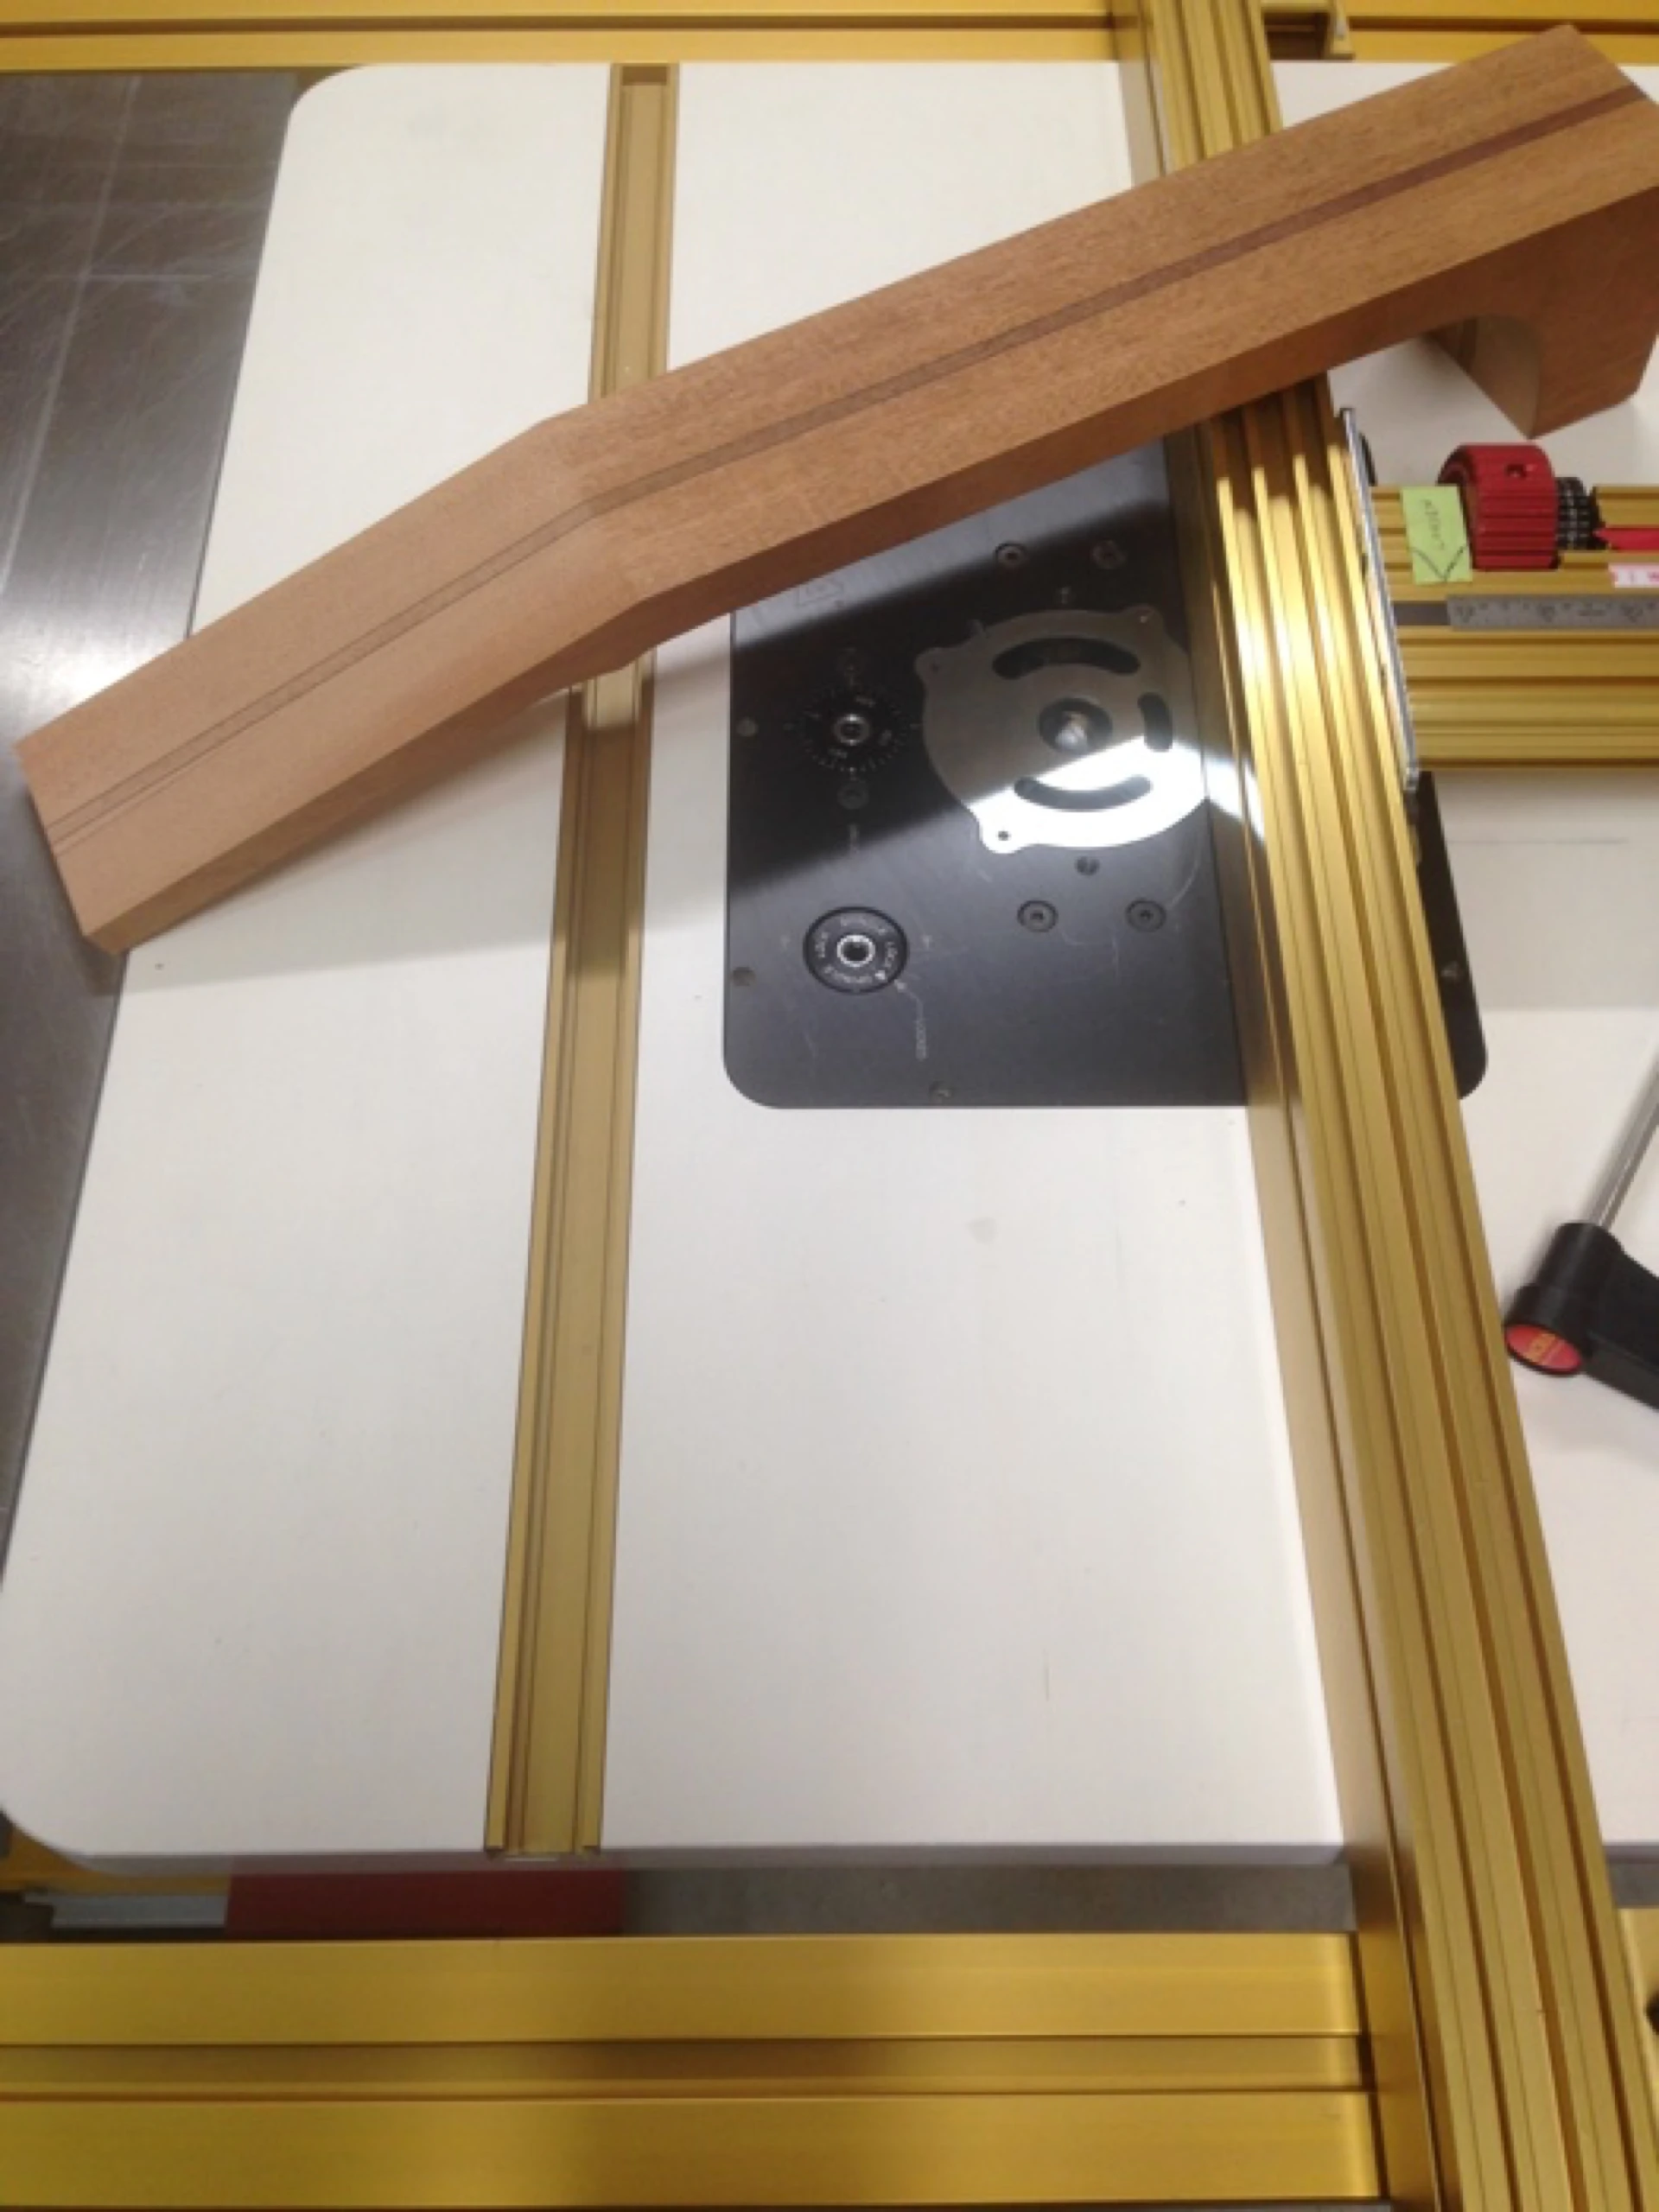
At the Router Table
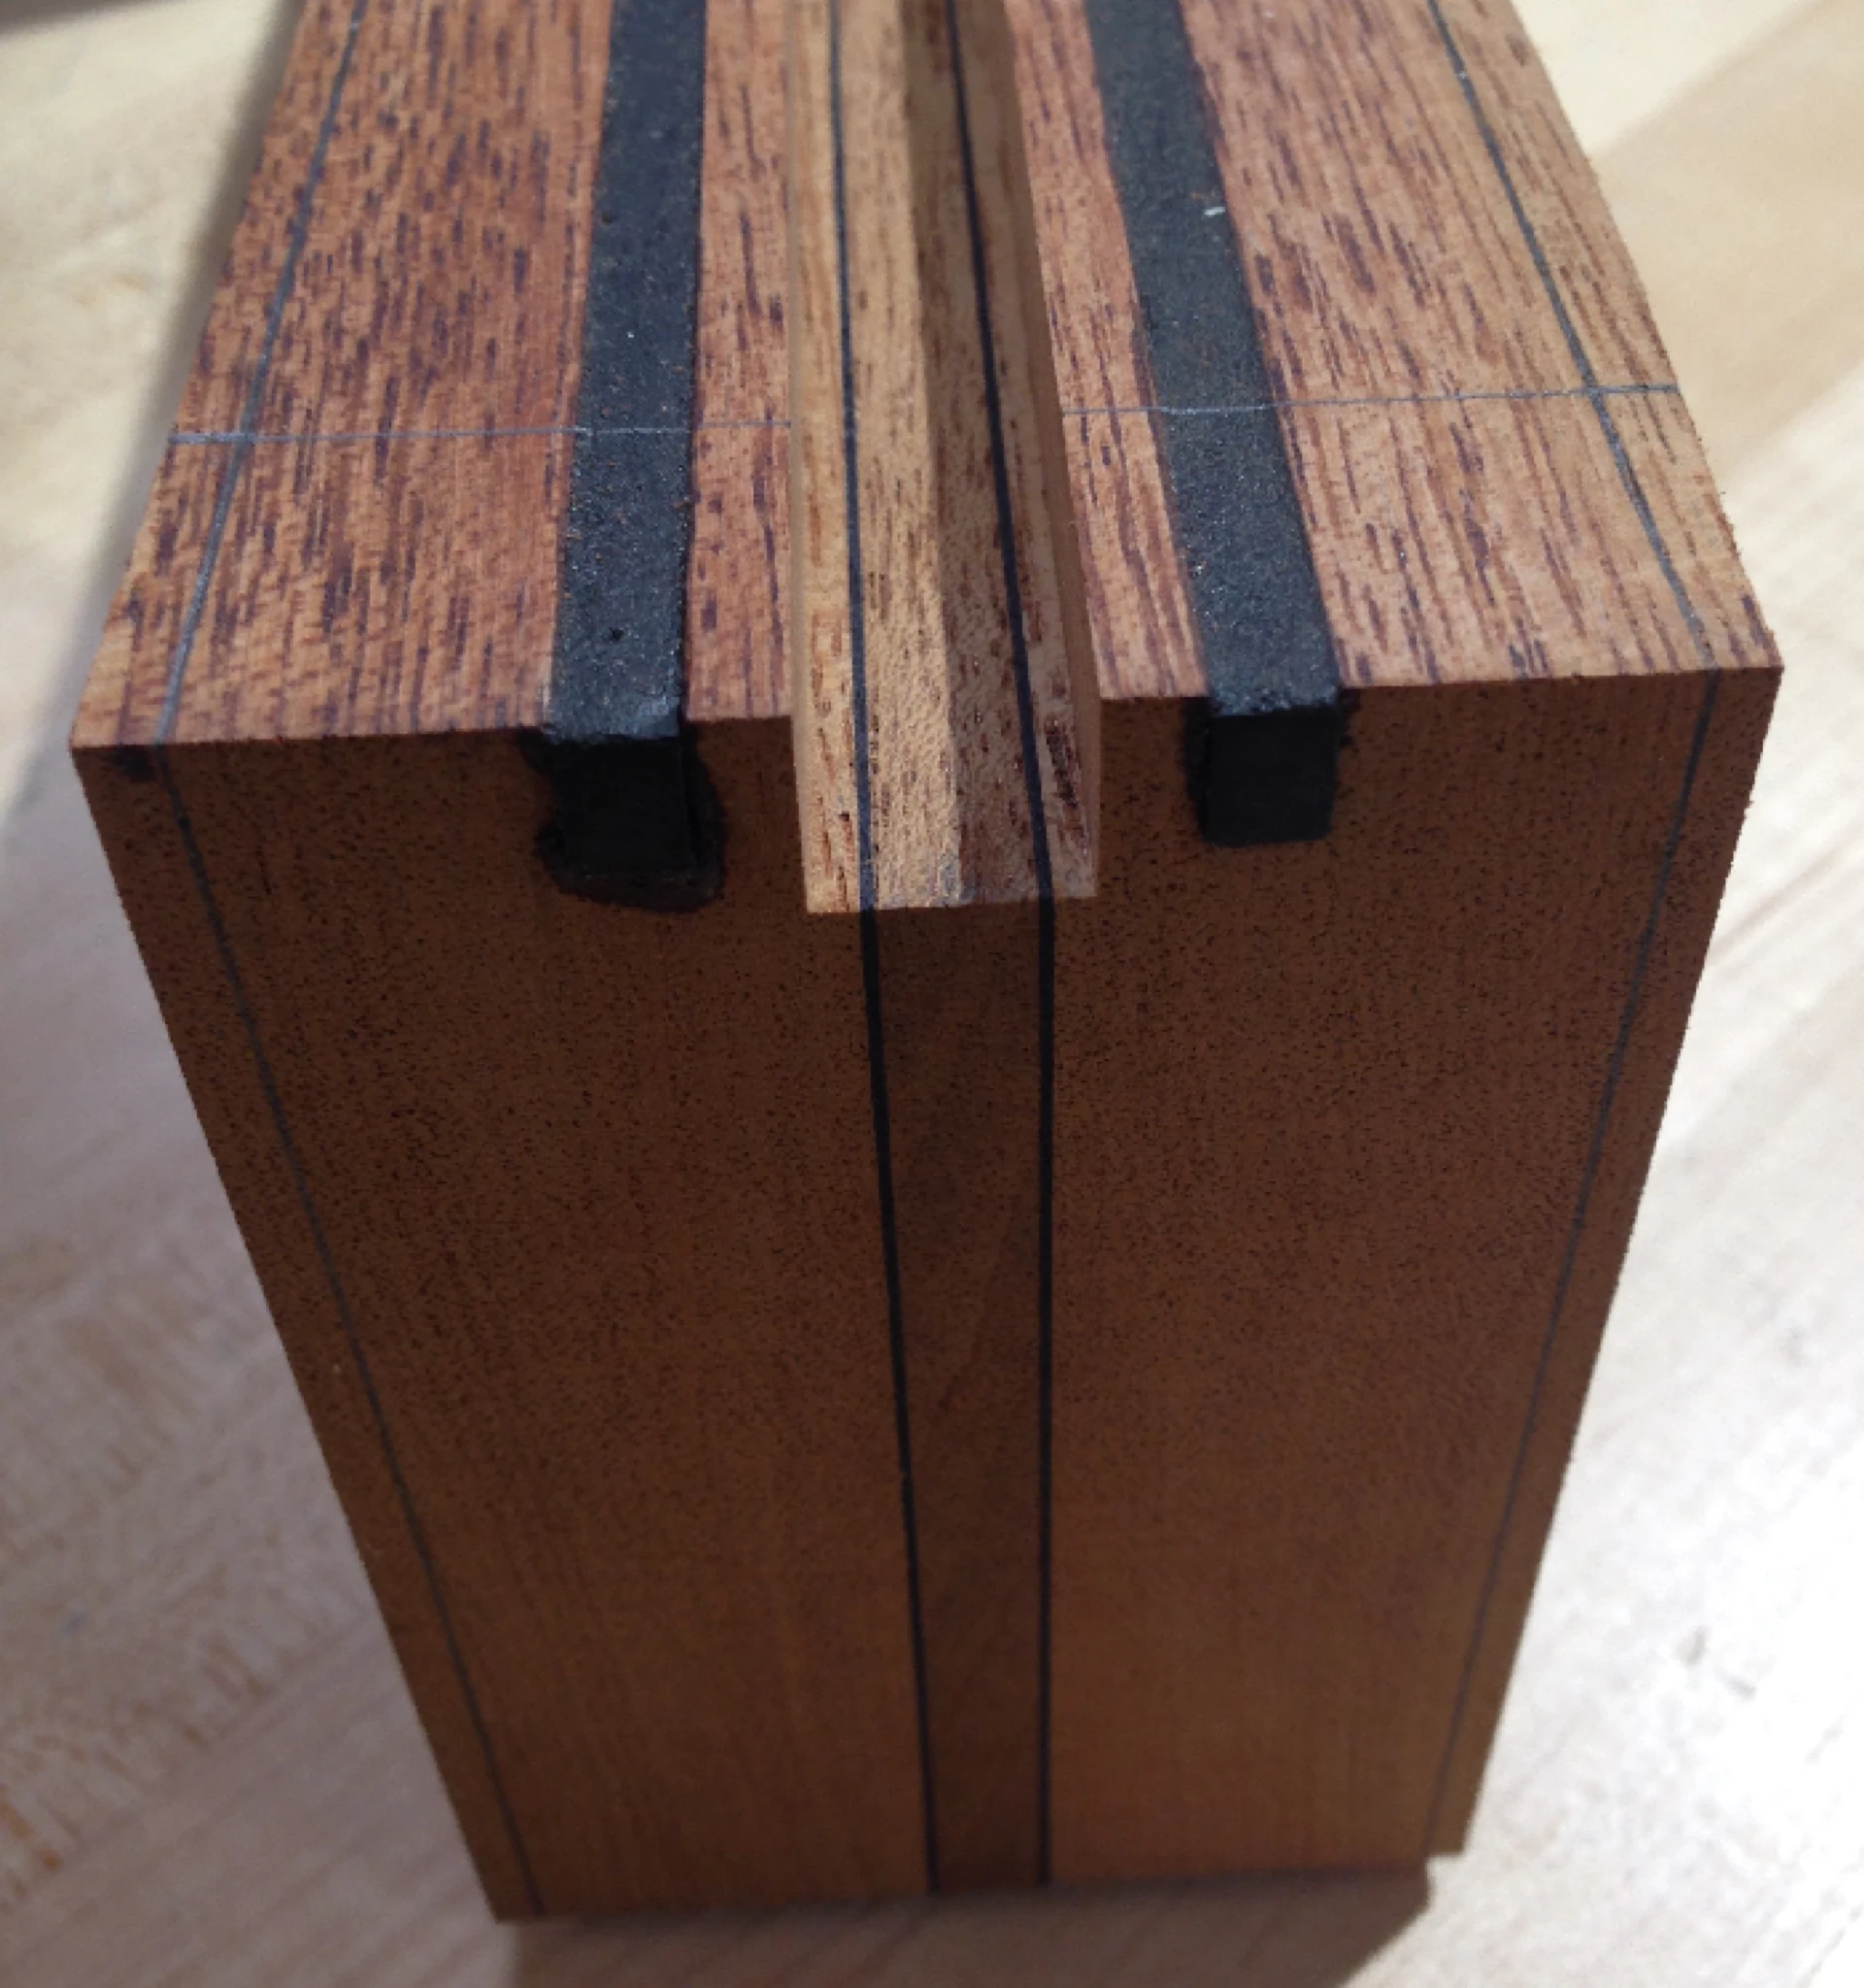
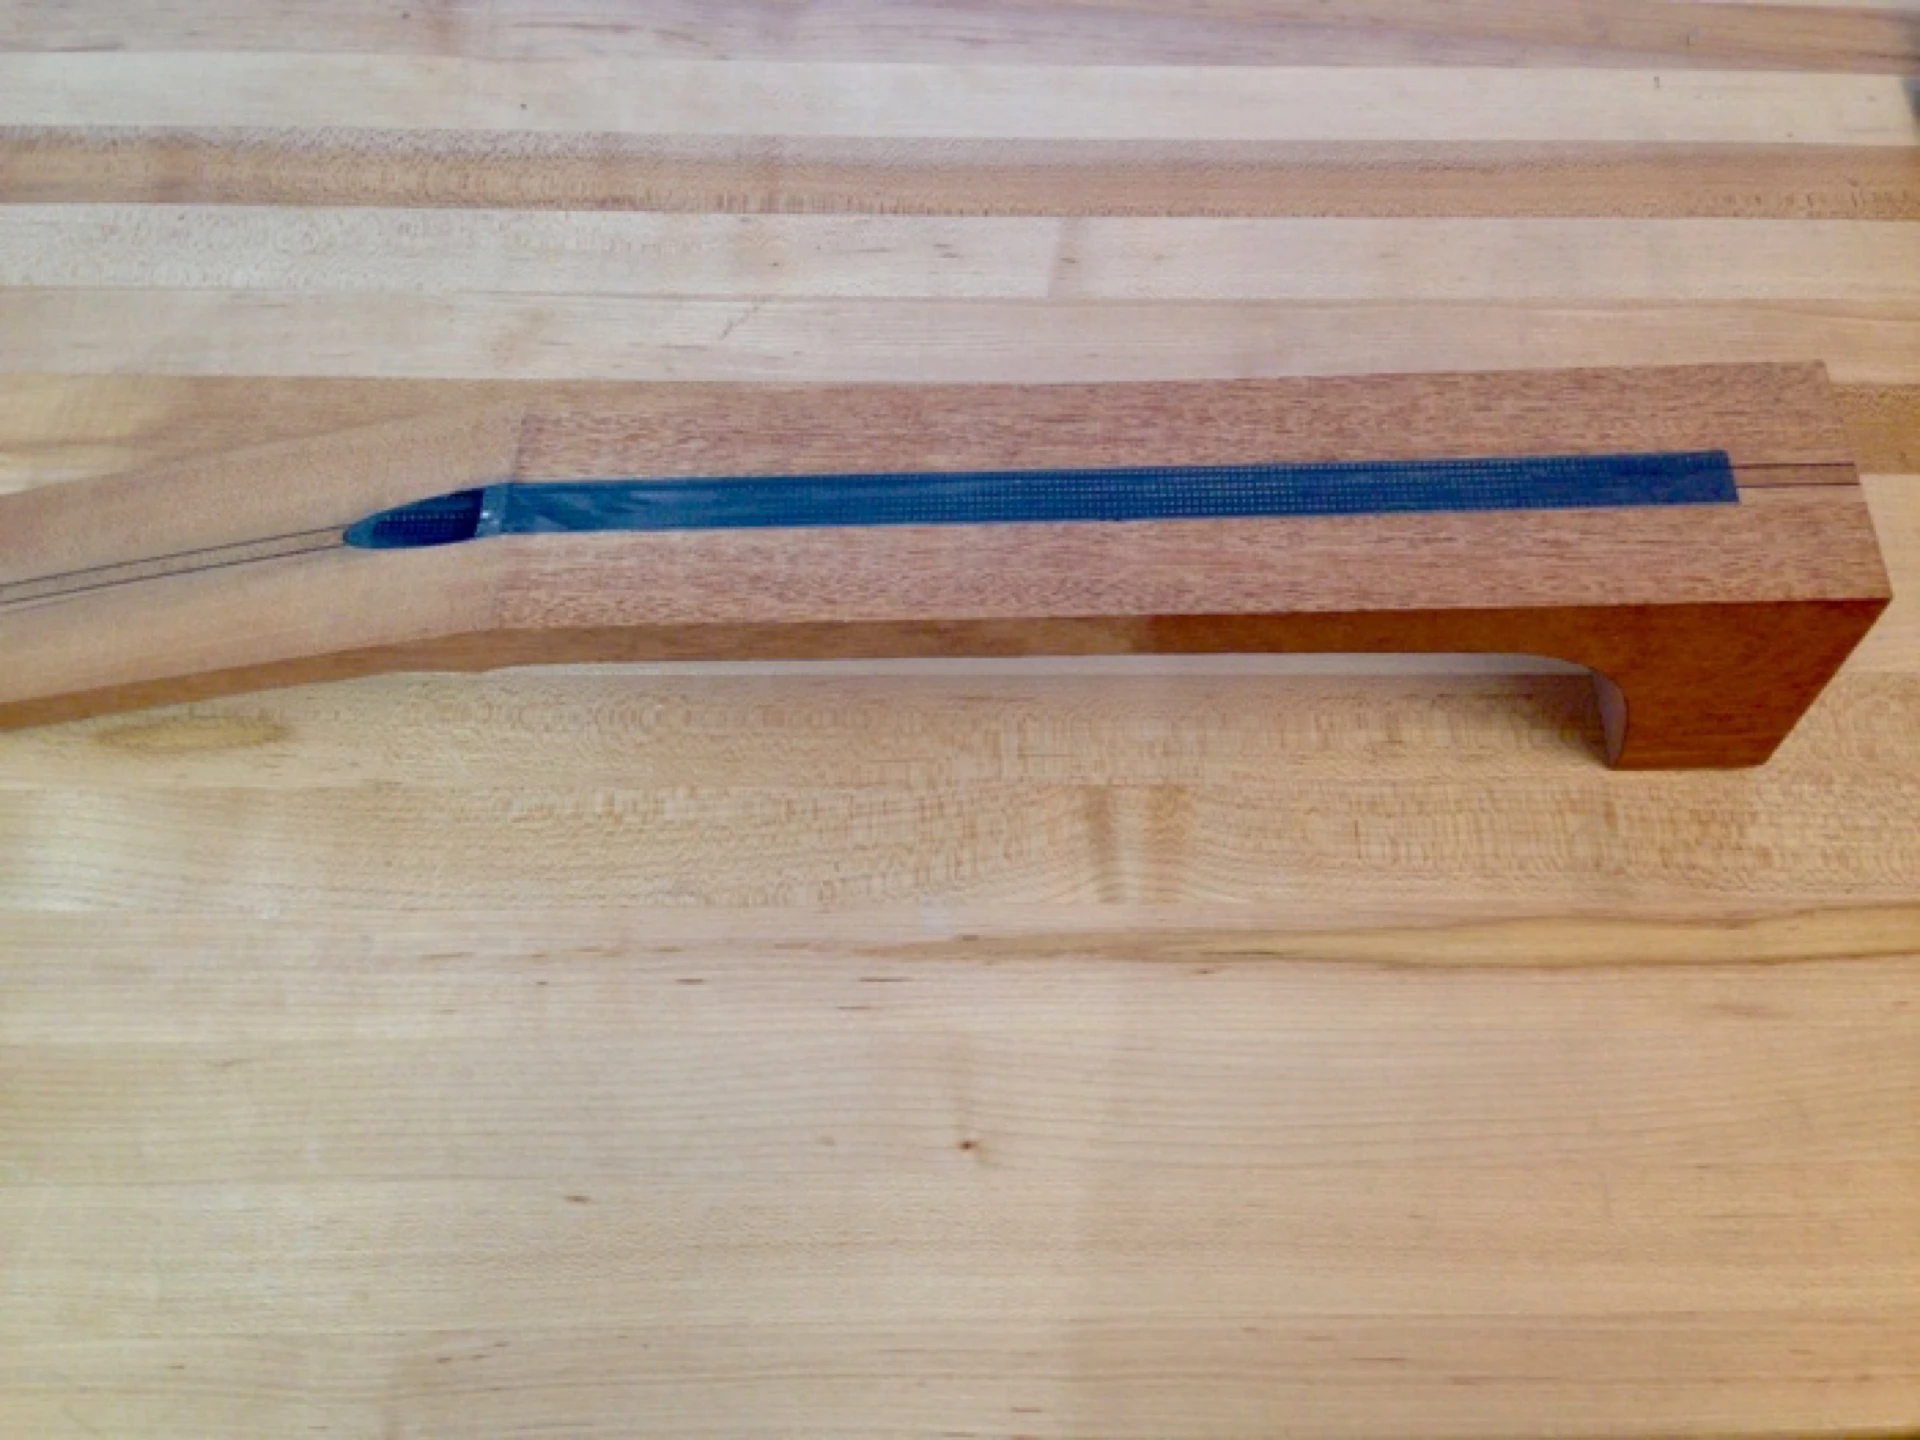
For my application it is necessary to rout a 3/4″ wide by 1/2″ deep groove or channel down the center of the face of the neck (the side to which the fretboard will be attached). I choose to keep the D-Tube flush with the face of the neck blank, where it will be in direct contact with the back of the fretboard, as opposed to recessing it and filling the recess with a thin strip of wood. At 1/2″ deep, this material will sit very close to the back of my finished neck at the headstock end, so I want all the clearance that can be afforded me. I opt to rout a through groove from the headstock to the heel block, as opposed to a stop dado. I accomplish this in three (3) ever-deepening passes over the router bit.
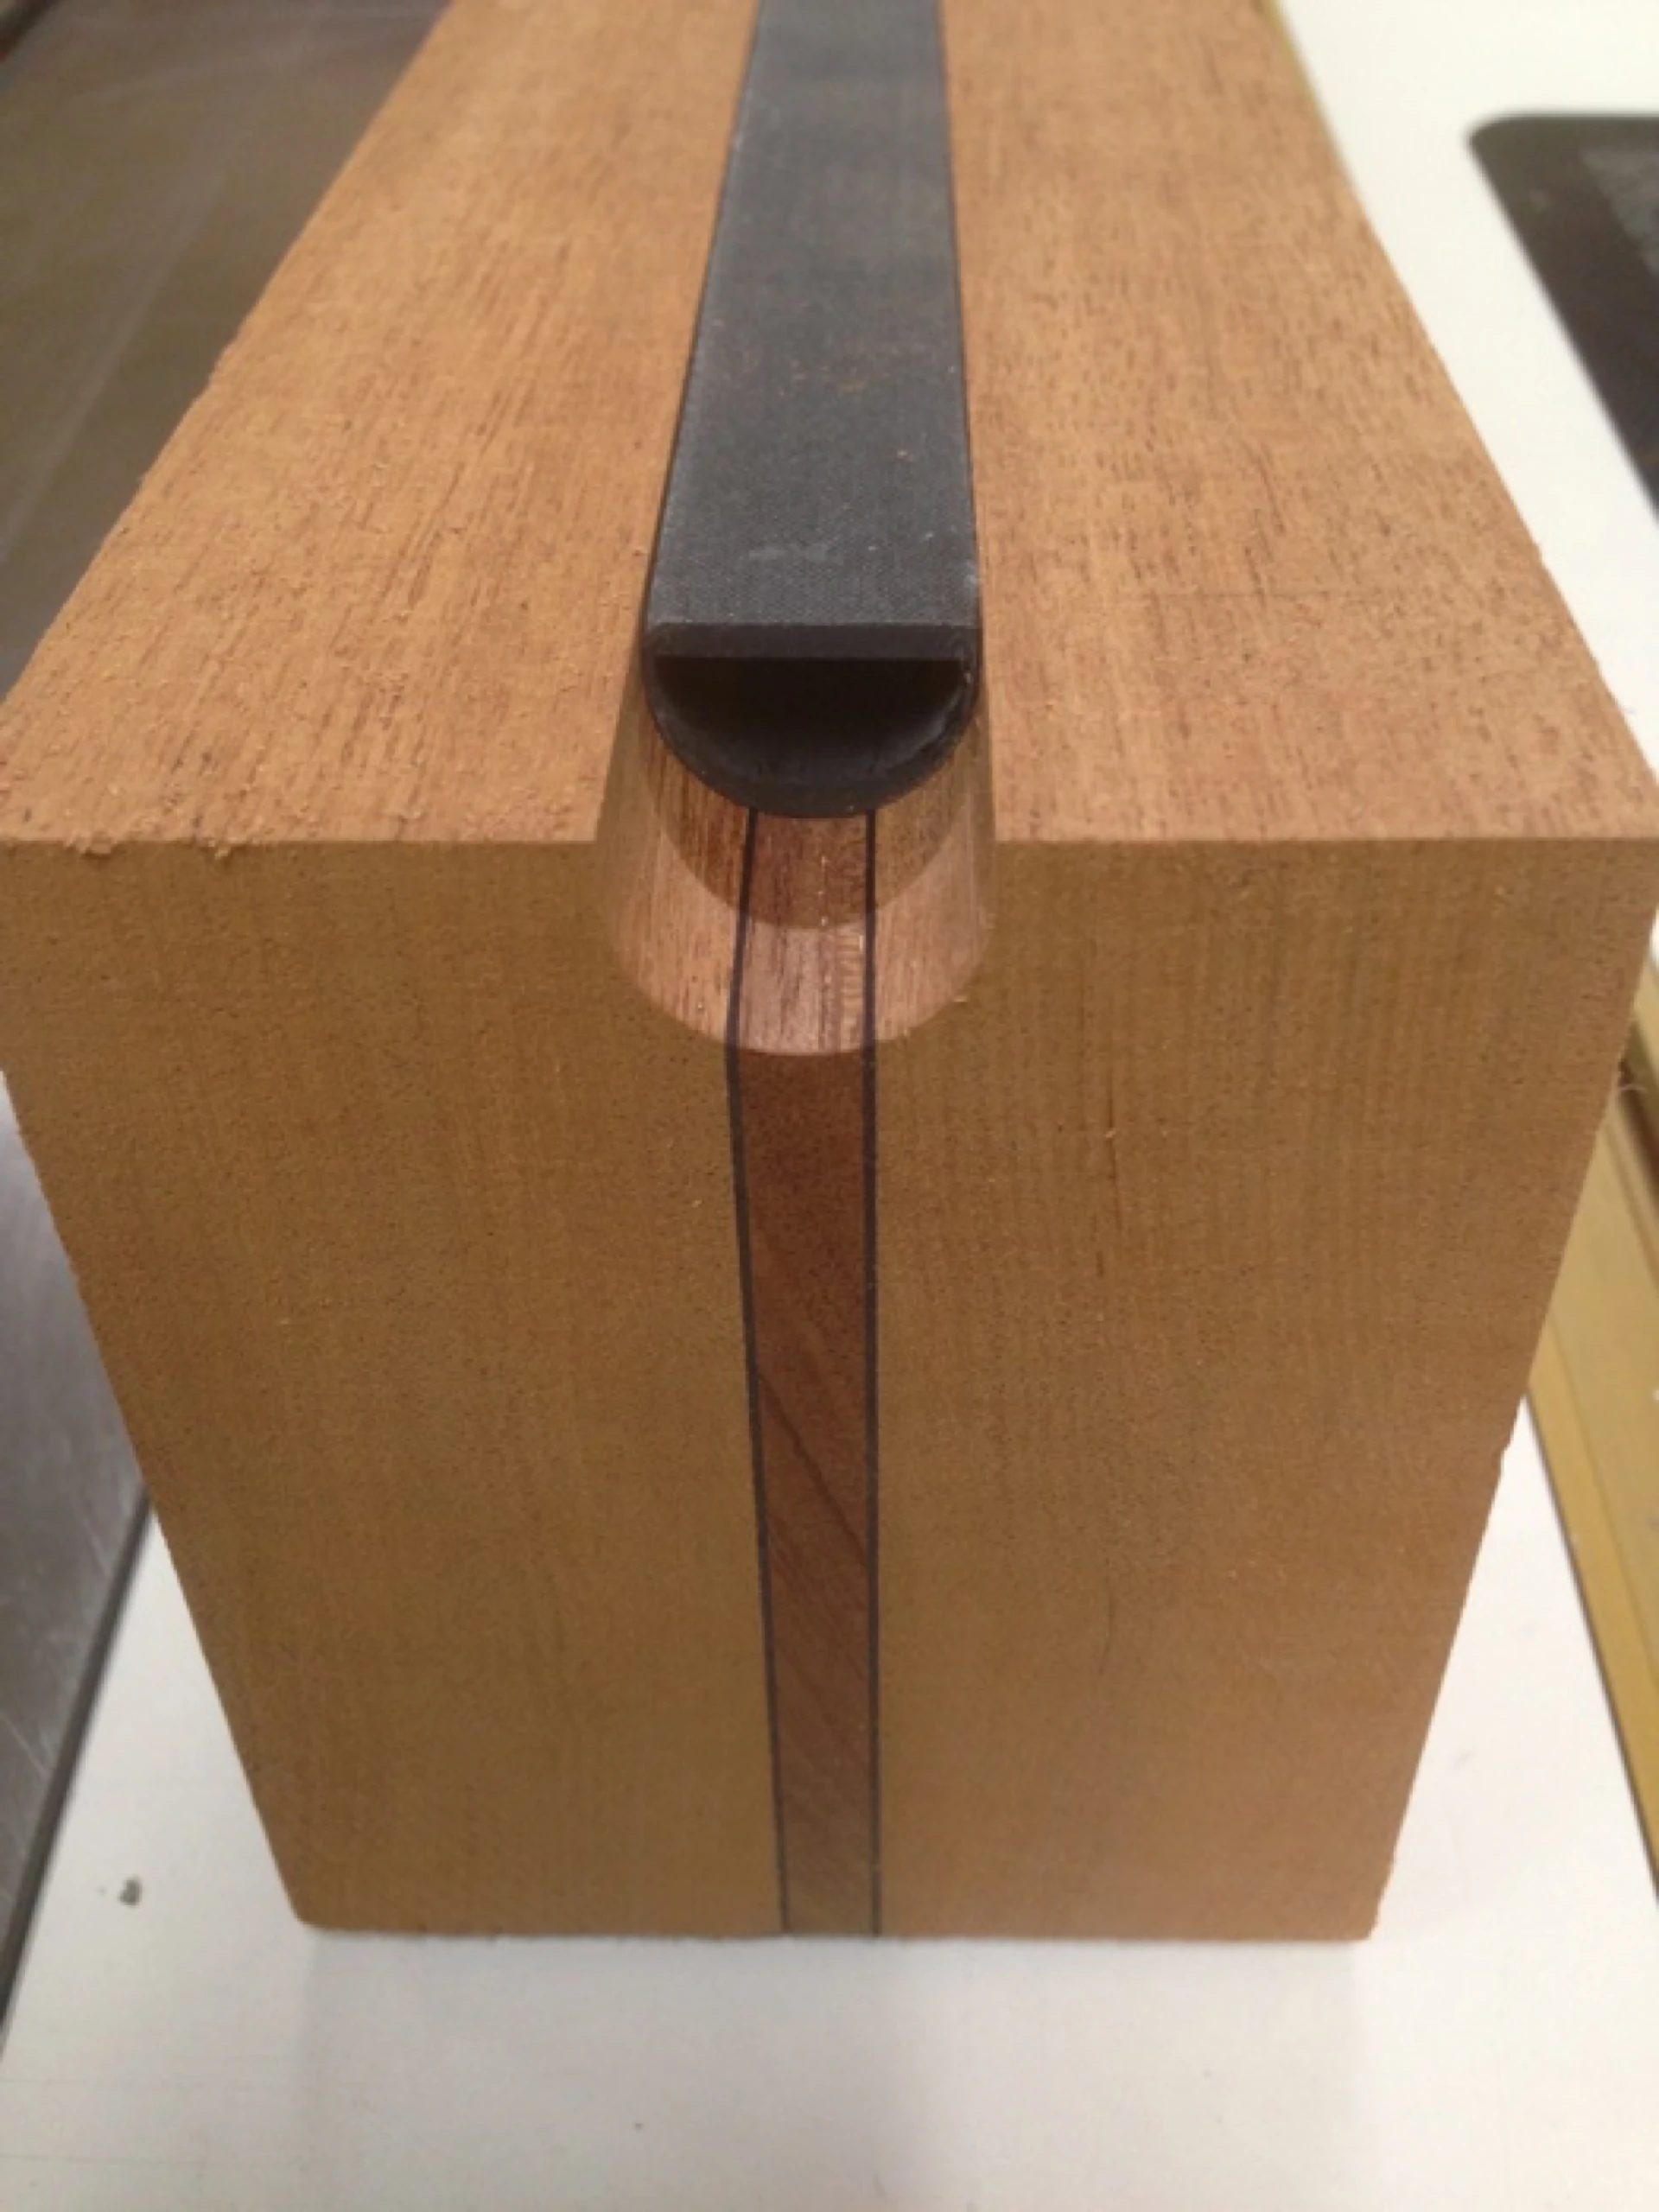
Routing the Through Groove
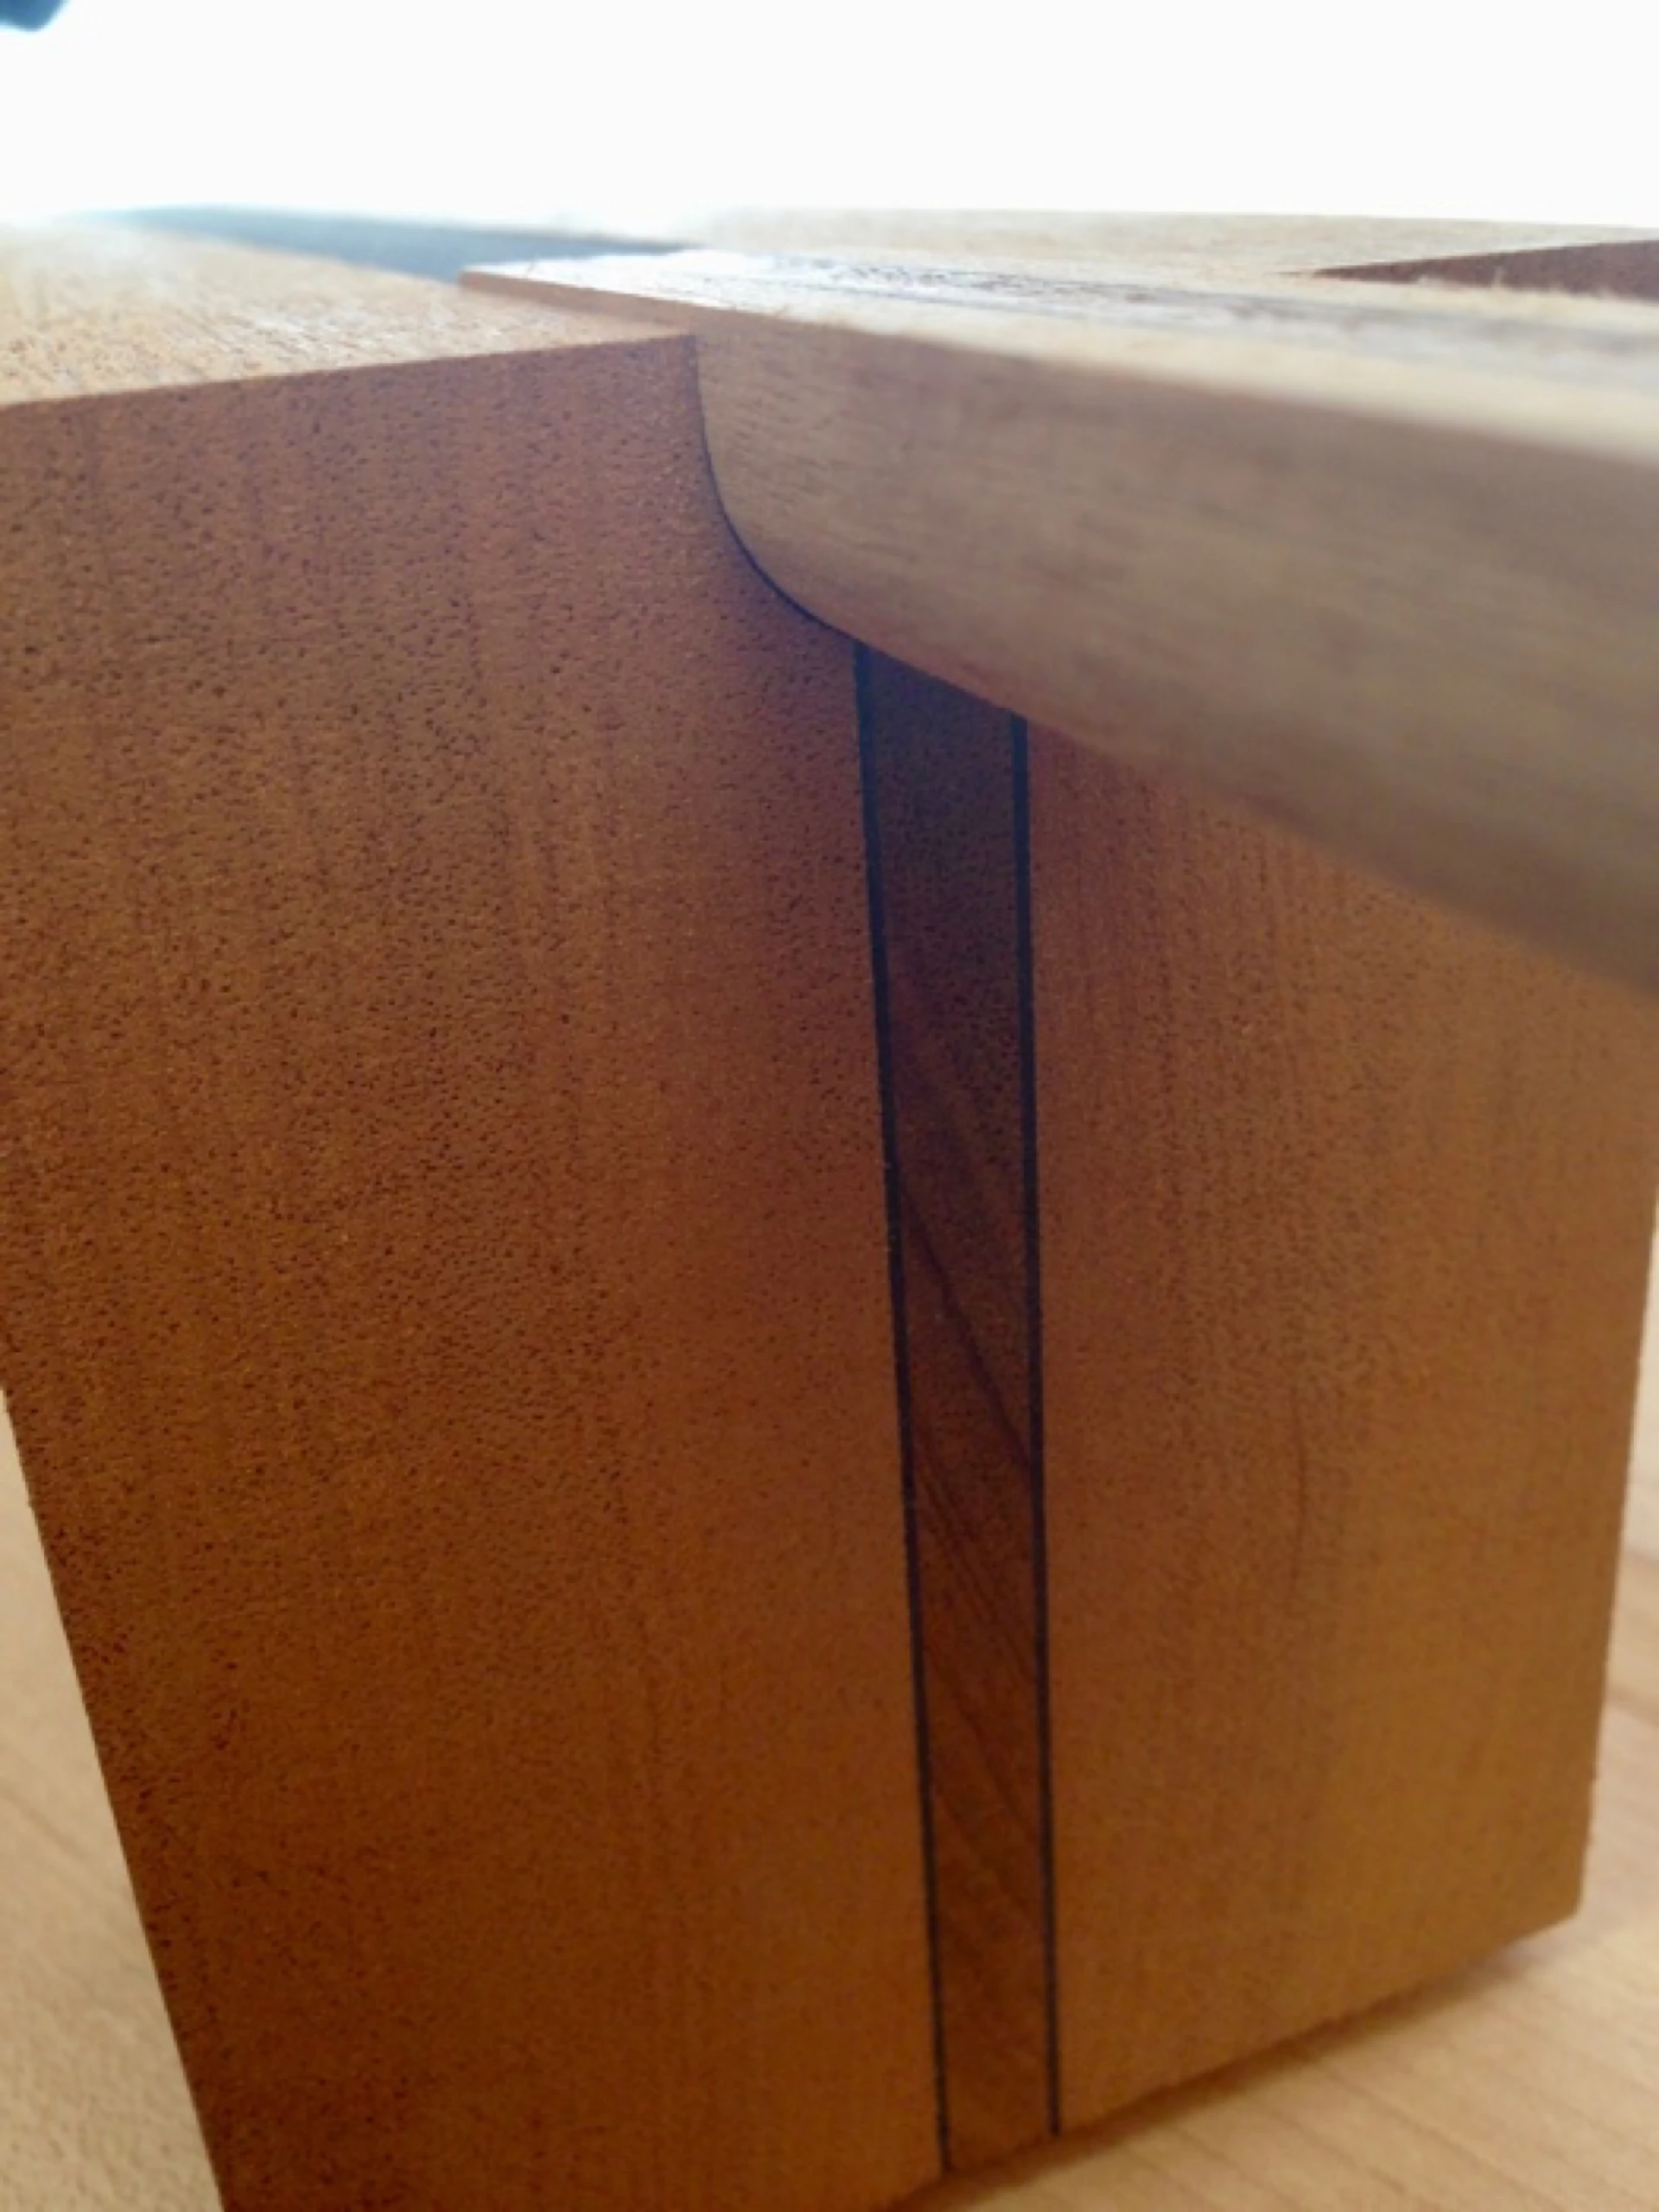
The groove is cut ever-so-slightly deeper than the height of the D-Tube to accommodate a thin layer of adhesive. Once the epoxy has cured and the surface is trued-up again, the D-Tube will (should) be perfectly flush. I want 100% contact of neck material to carbon fiber at all points. I fashion a plug that will fill the void (the portion of the groove not filled by the carbon fiber), butting up squarely against the end of the D-Tube, a process which takes just a few extra minutes at the bandsaw and the disc sander. I have also successfully used 3/4″ hardwood dowel stock for this purpose. Alternatively, I could have attempted to shape the end of the D-Tube to conform to the compound radius left by the stop dado, or simply have plugged the end of the D-Tube and filled the small void with epoxy.
 >
>
Groove / Channel Plug for 16″ D-Tube
As an alternative to stopping the 16″ D-Tube short of the dovetail tenon end of the neck, I can use a longer 20″ D-Tube that runs the full length of the neck with material to spare. This can project out onto a dovetail or tenon, or across a raised fretboard's extension. I don't currently do this, as I prefer to leave that area as solid wood. That solid wood then forms the upper portion of the tenon of my neck joint. Replacing that solid wood with a hollow D-Tube has not provided me with an obvious benefit.
Note that on the opposite end of the neck I have run the carbon fiber up into the headstock, rather than terminate the groove short of the point where the fretboard ends at the nut, as I would with a truss rod slot. It has been a long time since I fashioned a neck without using some form of carbon fiber stiffener, and I have always extended those stiffeners into the headstock area. Having witnessed a few cracked headstocks from other builders, I believe this crucial juncture of the neck benefits from the extra attention. As others have rightly pointed out, be aware of the dimensions of the D-Tube, the slot in which it resides, and the target thickness of your finished neck.
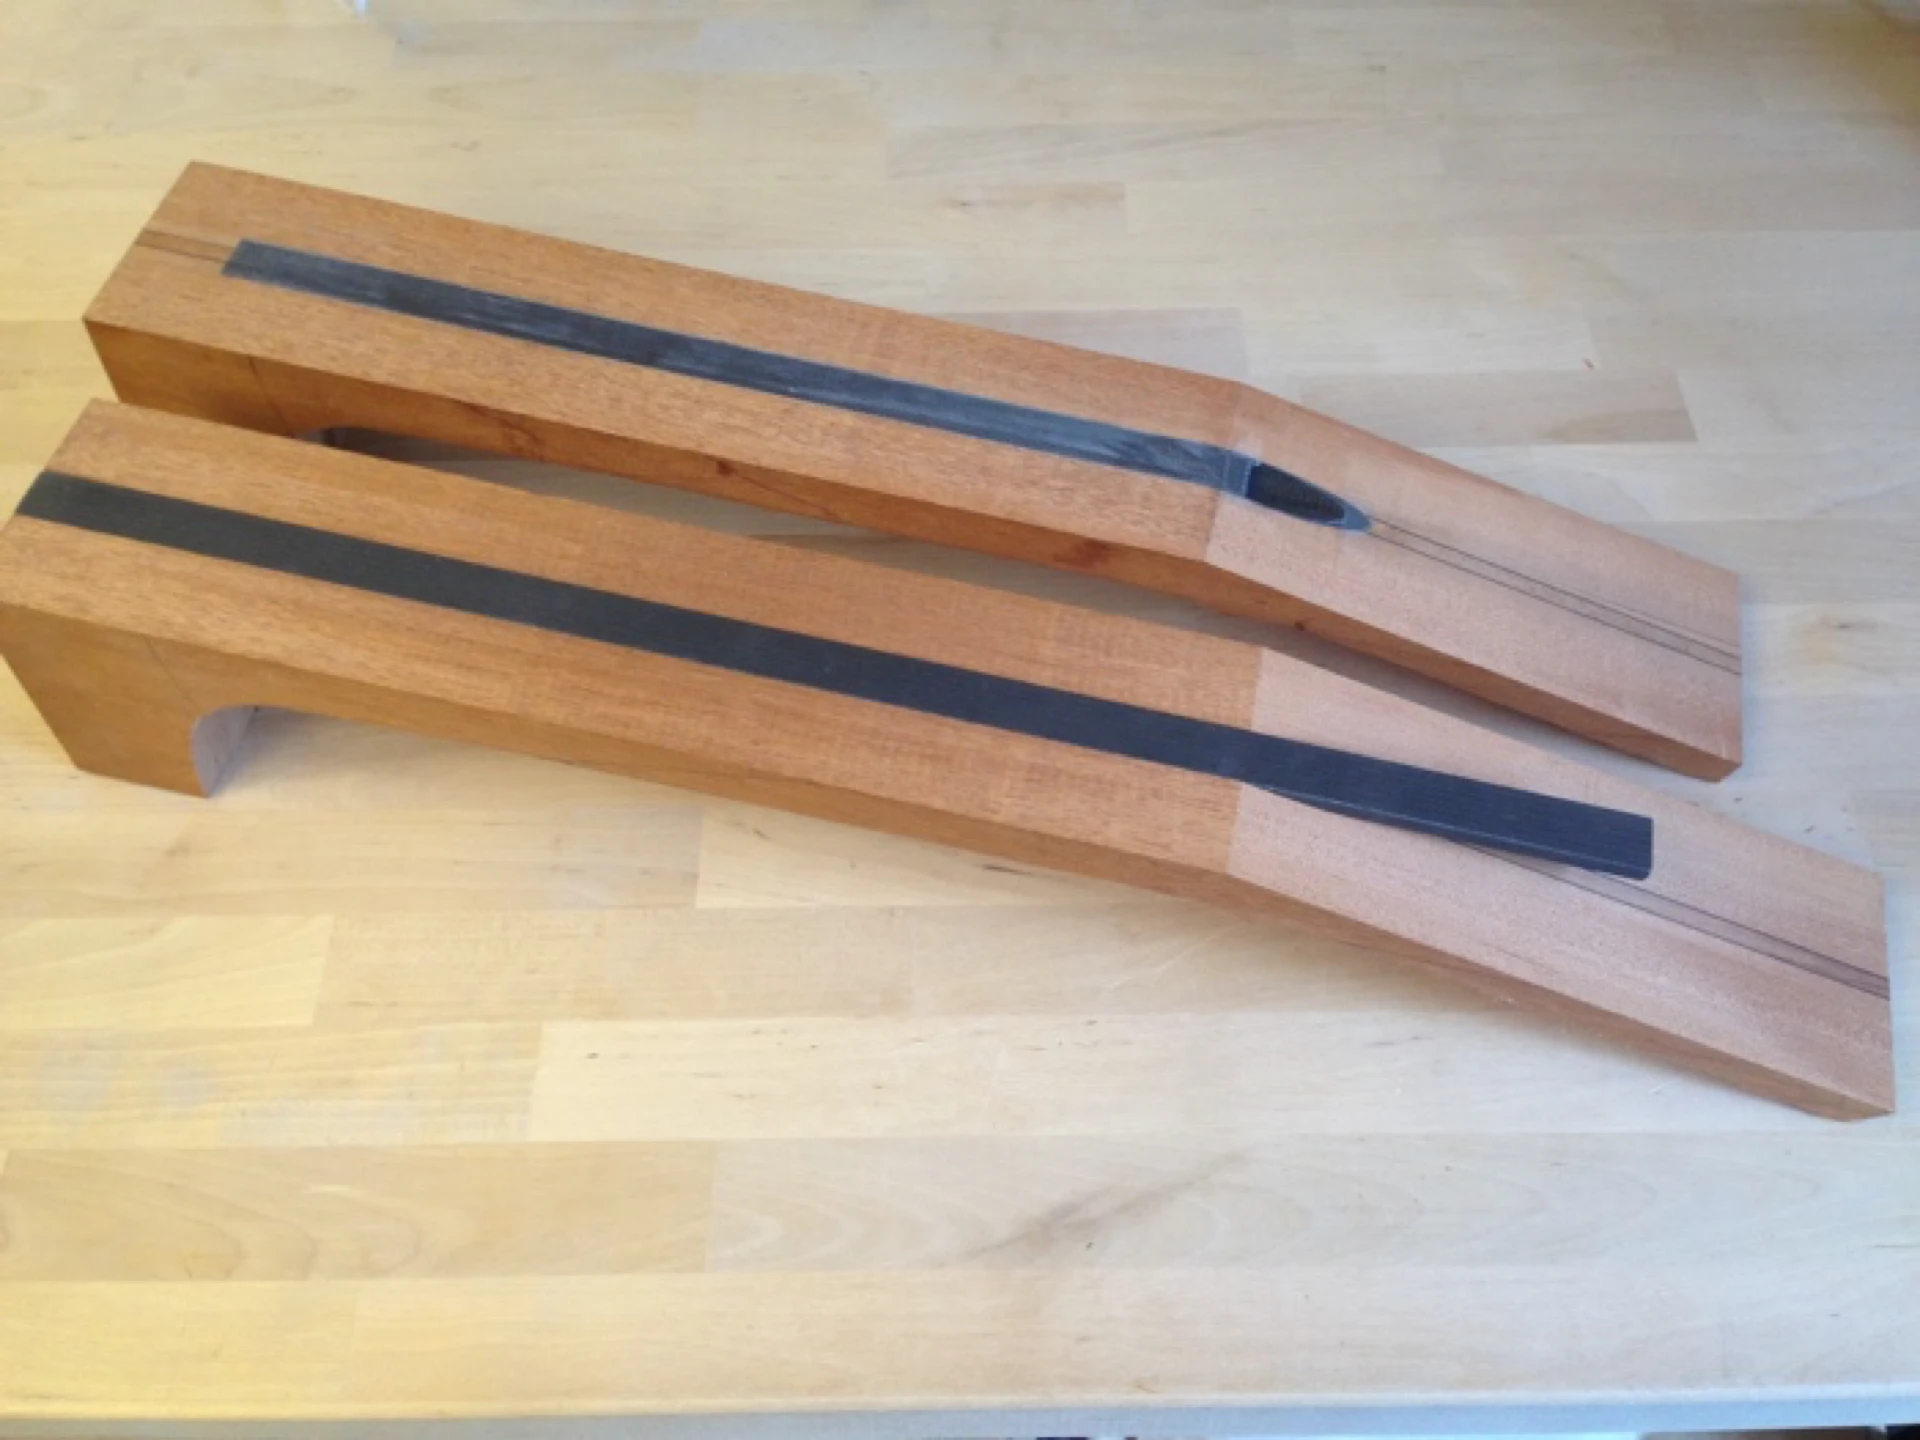
16″ D-Tube and 20″ D-Tube
The groove gets coated with a thin layer of epoxy. The D-Tube is hollow and I don't want glue inside of it. Because I do not flood the groove with adhesive there is no need to plug the ends of the D-Tube. Here I am using 3M Scotch-Weld 2216 2-part epoxy. It has proven to be very effective. I have also had success with Superbond Epoxy 1:1 from Fiberglass Coatings.
To simplify cleanup, I would suggest applying low tack tape to the surface of the neck blank prior to adding the epoxy. Two narrow strips, one down each side of the groove, or a single, wide strip whose center is removed with a razor knife will also mitigate the need to aggressively remove any squeeze-out and subsequent hardened epoxy. Why bother with tape, you may ask? I have no desire to re-establish my neck geometry, which can (would likely) be altered when attempting to sand off epoxy squeeze out. Your mileage may vary.
Both the carbon fiber D-Tube and my custom wooden plug are pressed into place. I lay a piece of parchment paper over the neck and lightly apply a few small clamps, merely to prevent any shifting during cure. If you are unfamiliar with epoxy, unlike PVA or AR glues, it does not benefit from high-pressure clamping; in fact, heavy clamping is advised against. The neck is left to dry overnight.
A debate persists regarding whether or not to add a filler strip of wood above the carbon fiber. Those adding the filler argue that a (micro-thin) wood strip, applied over the carbon fiber and secured with epoxy, will somehow provide a superior glueing surface for the fretboard. Technically, the argument rests on the adhesion capacity of the glues and materials in use, in conjunction with concerns over delamination. I have successfully bonded many fretboards to neck blanks containing carbon fiber stiffeners using protein-based glues (Fish or Hide Glue) with no adverse results. My preference is to use epoxy to attach fretboards and, while fretboard removal may be a bit more difficult, there is absolutely no concern regarding obtaining a sufficient bond with the carbon fiber. If you are using an AR glue, such as Titebond or the equivalent, you may want to consider routing your groove a bit deeper in order to add a wood filler strip. Be aware that increasing the depth of the groove, already 1/2″ deep, in order to allow for a thin veneer on top of the carbon fiber could potentially compromise the overall thickness of the neck (The manufacturer does offer both a smaller, straight tube as well as a tapered tube that may be used if neck thickness really becomes an issue).
D-Tube Glue Up
After releasing the clamps and lifting off the parchment paper, I removed any accumulated, cured epoxy using a scraper. My go-to scraper these days was designed by luthier Al Carruth, and is available through StewMac. When setting the depth of cut for the groove, I had taken the time to ensure the D-Tube would sit just shy of the surface of the neck blank. I was rewarded as the scraper just kissed the surface of the carbon fiber as all the squeeze out was removed.
What do you do if the tube is slightly proud of the surface of the neck? You will need to make it flush without altering your neck geometry and without weakening the D-Tube. And then try really hard *not* to do this on the next neck!
Cut-off wheels, such as the type used with rotary tools, are my preference for cutting carbon fiber. With a Dremel, I remove most of the section of D-Tube that extends out over the headstock. The balance gets sanded back nearly flush with the headstock at the disc sander. For final dressing of the face surfaces of the neck and headstock, I rely on strips of adhesive-backed sandpaper affixed to a dead-flat marble slab. A few careful strokes across that slab are all that are needed to complete this stage of the neck construction. I could also saw the waste off and true it up with a sanding block. At this stage, it is critical to maintain the dimensions of the neck, so sand with caution.
Tip: Protect your airways and eyes when machining carbon fiber! That includes any and all routing, sawing and sanding.
Sanding on a Marble Slab
While carbon fiber machines nicely, it can dull my tools rather rapidly. Having an effective (read: fast, accurate) means of keeping my hand tools honed makes the process much more enjoyable. Don't attempt to cut this stuff with your favorite fret saw or your best Japanese saw; you will be very sad if you do, as the teeth will be dulled after one or two strokes!
The neck blank is surprisingly light and stiff at this point compared to necks containing a truss rod. I have now replaced the truss rod (or combination truss rod / carbon fiber stiffeners) with the Dragonplate D-Tube Neck Beam.
Truss Rod Replacement
But
The question remains: What, if any, effect will the strings have on moving this neck away from dead flat? I completed the neck in the same way it would have had I installed any other form of Truss Rod.
This neck is impressively lightweight! Equally impressive is it's rigidity when it is installed on the guitar; it does not move under string tension! For my purposes, that is a good thing, as it assures me that I retain complete control of any relief I may choose to build into my necks - or not. Even though the neck has been developed separately from the body, the overall feel of the instrument is more unified.
My own guitars are already light, as I incorporate carbon fiber in other components. The only metal on my instruments, apart from the strings, is found in the tuning machines. Responsiveness and sustain are much more noticeable than with the average acoustic guitar. Though I have not yet measured it, I believe the addition of the carbon fiber D-Tube may have actually increased that sustain!
UPDATE: In my guitars having no center soundhole (where I incorporate my Shoulder Port design), the soundboards are noticeably more responsive using necks having D-Tubes. When the soundboard is vibrated at the resonant frequency of the box, I can measure greater responsiveness in the soundboard as I move toward the neck block, much more so than on my guitars having center soundholes. An additional design feature of these guitars is that I tie my carbon fiber and wood laminate bracing into the neck block, and I suspect this more integrated approach improves the overall rigidity of the string path, from nut to saddle.
At the outset of this article, I asked two questions about truss rods that I believe I can now answer:
Thank you, Dragonplate!