
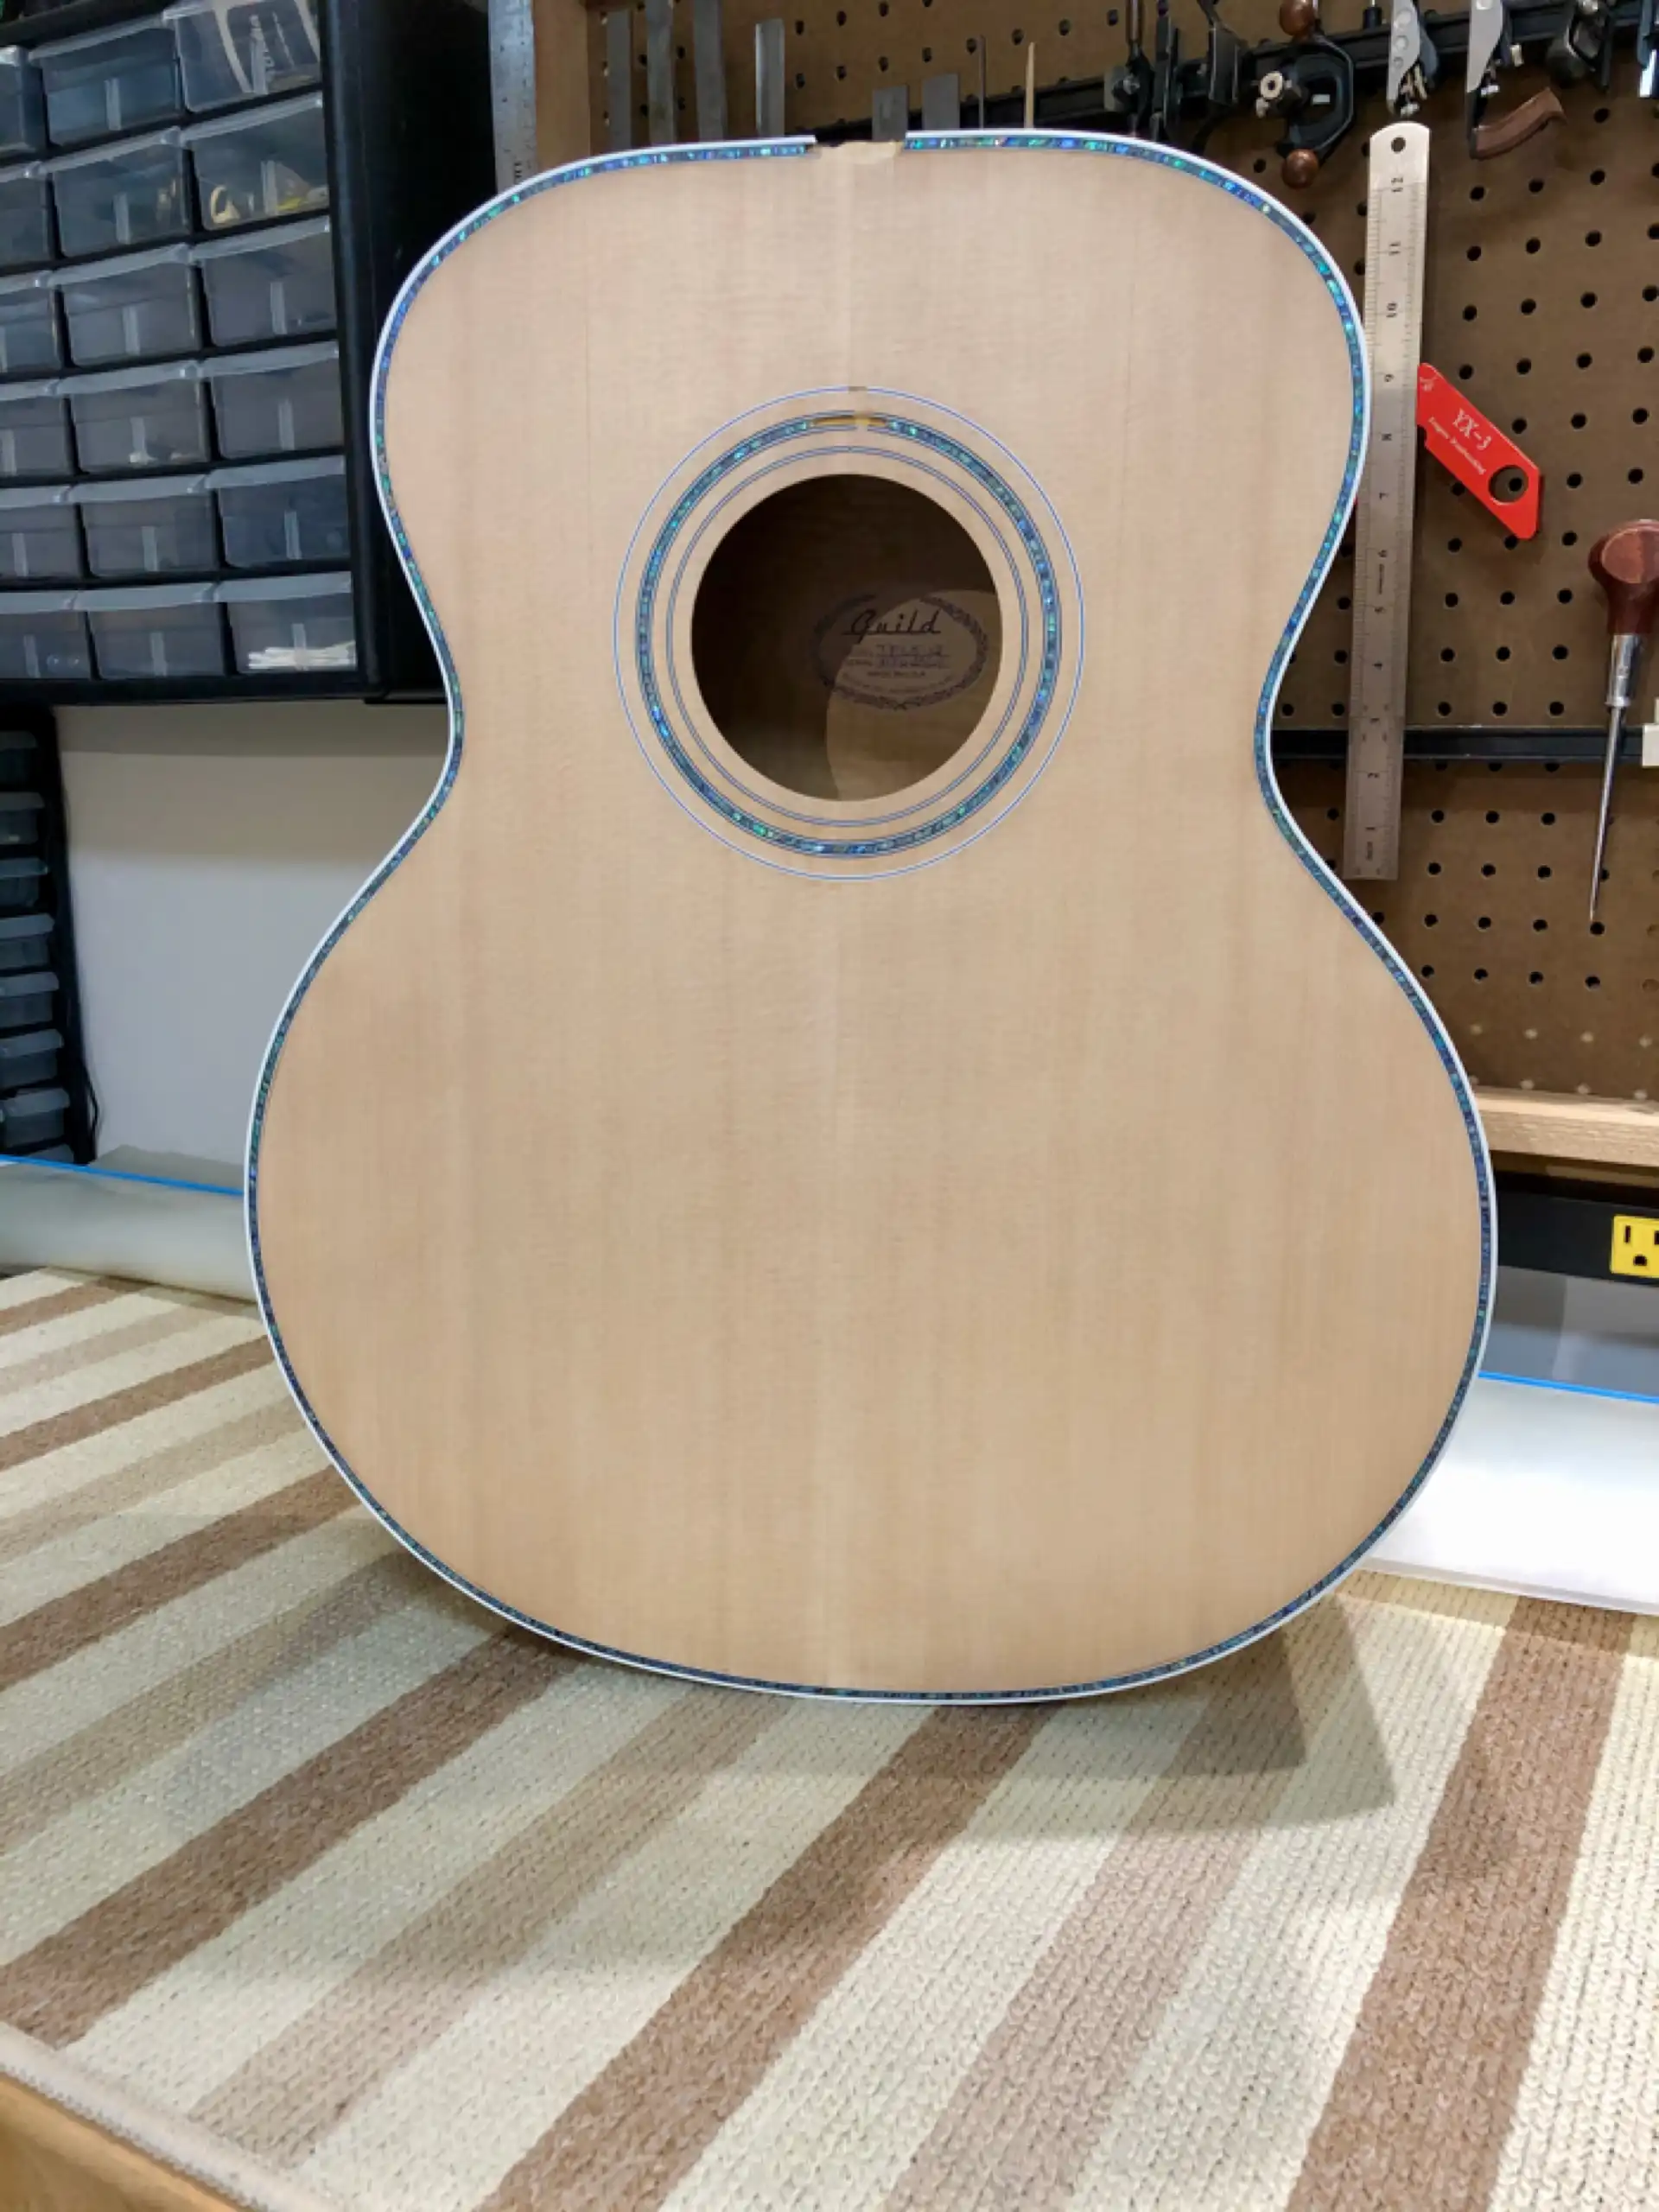
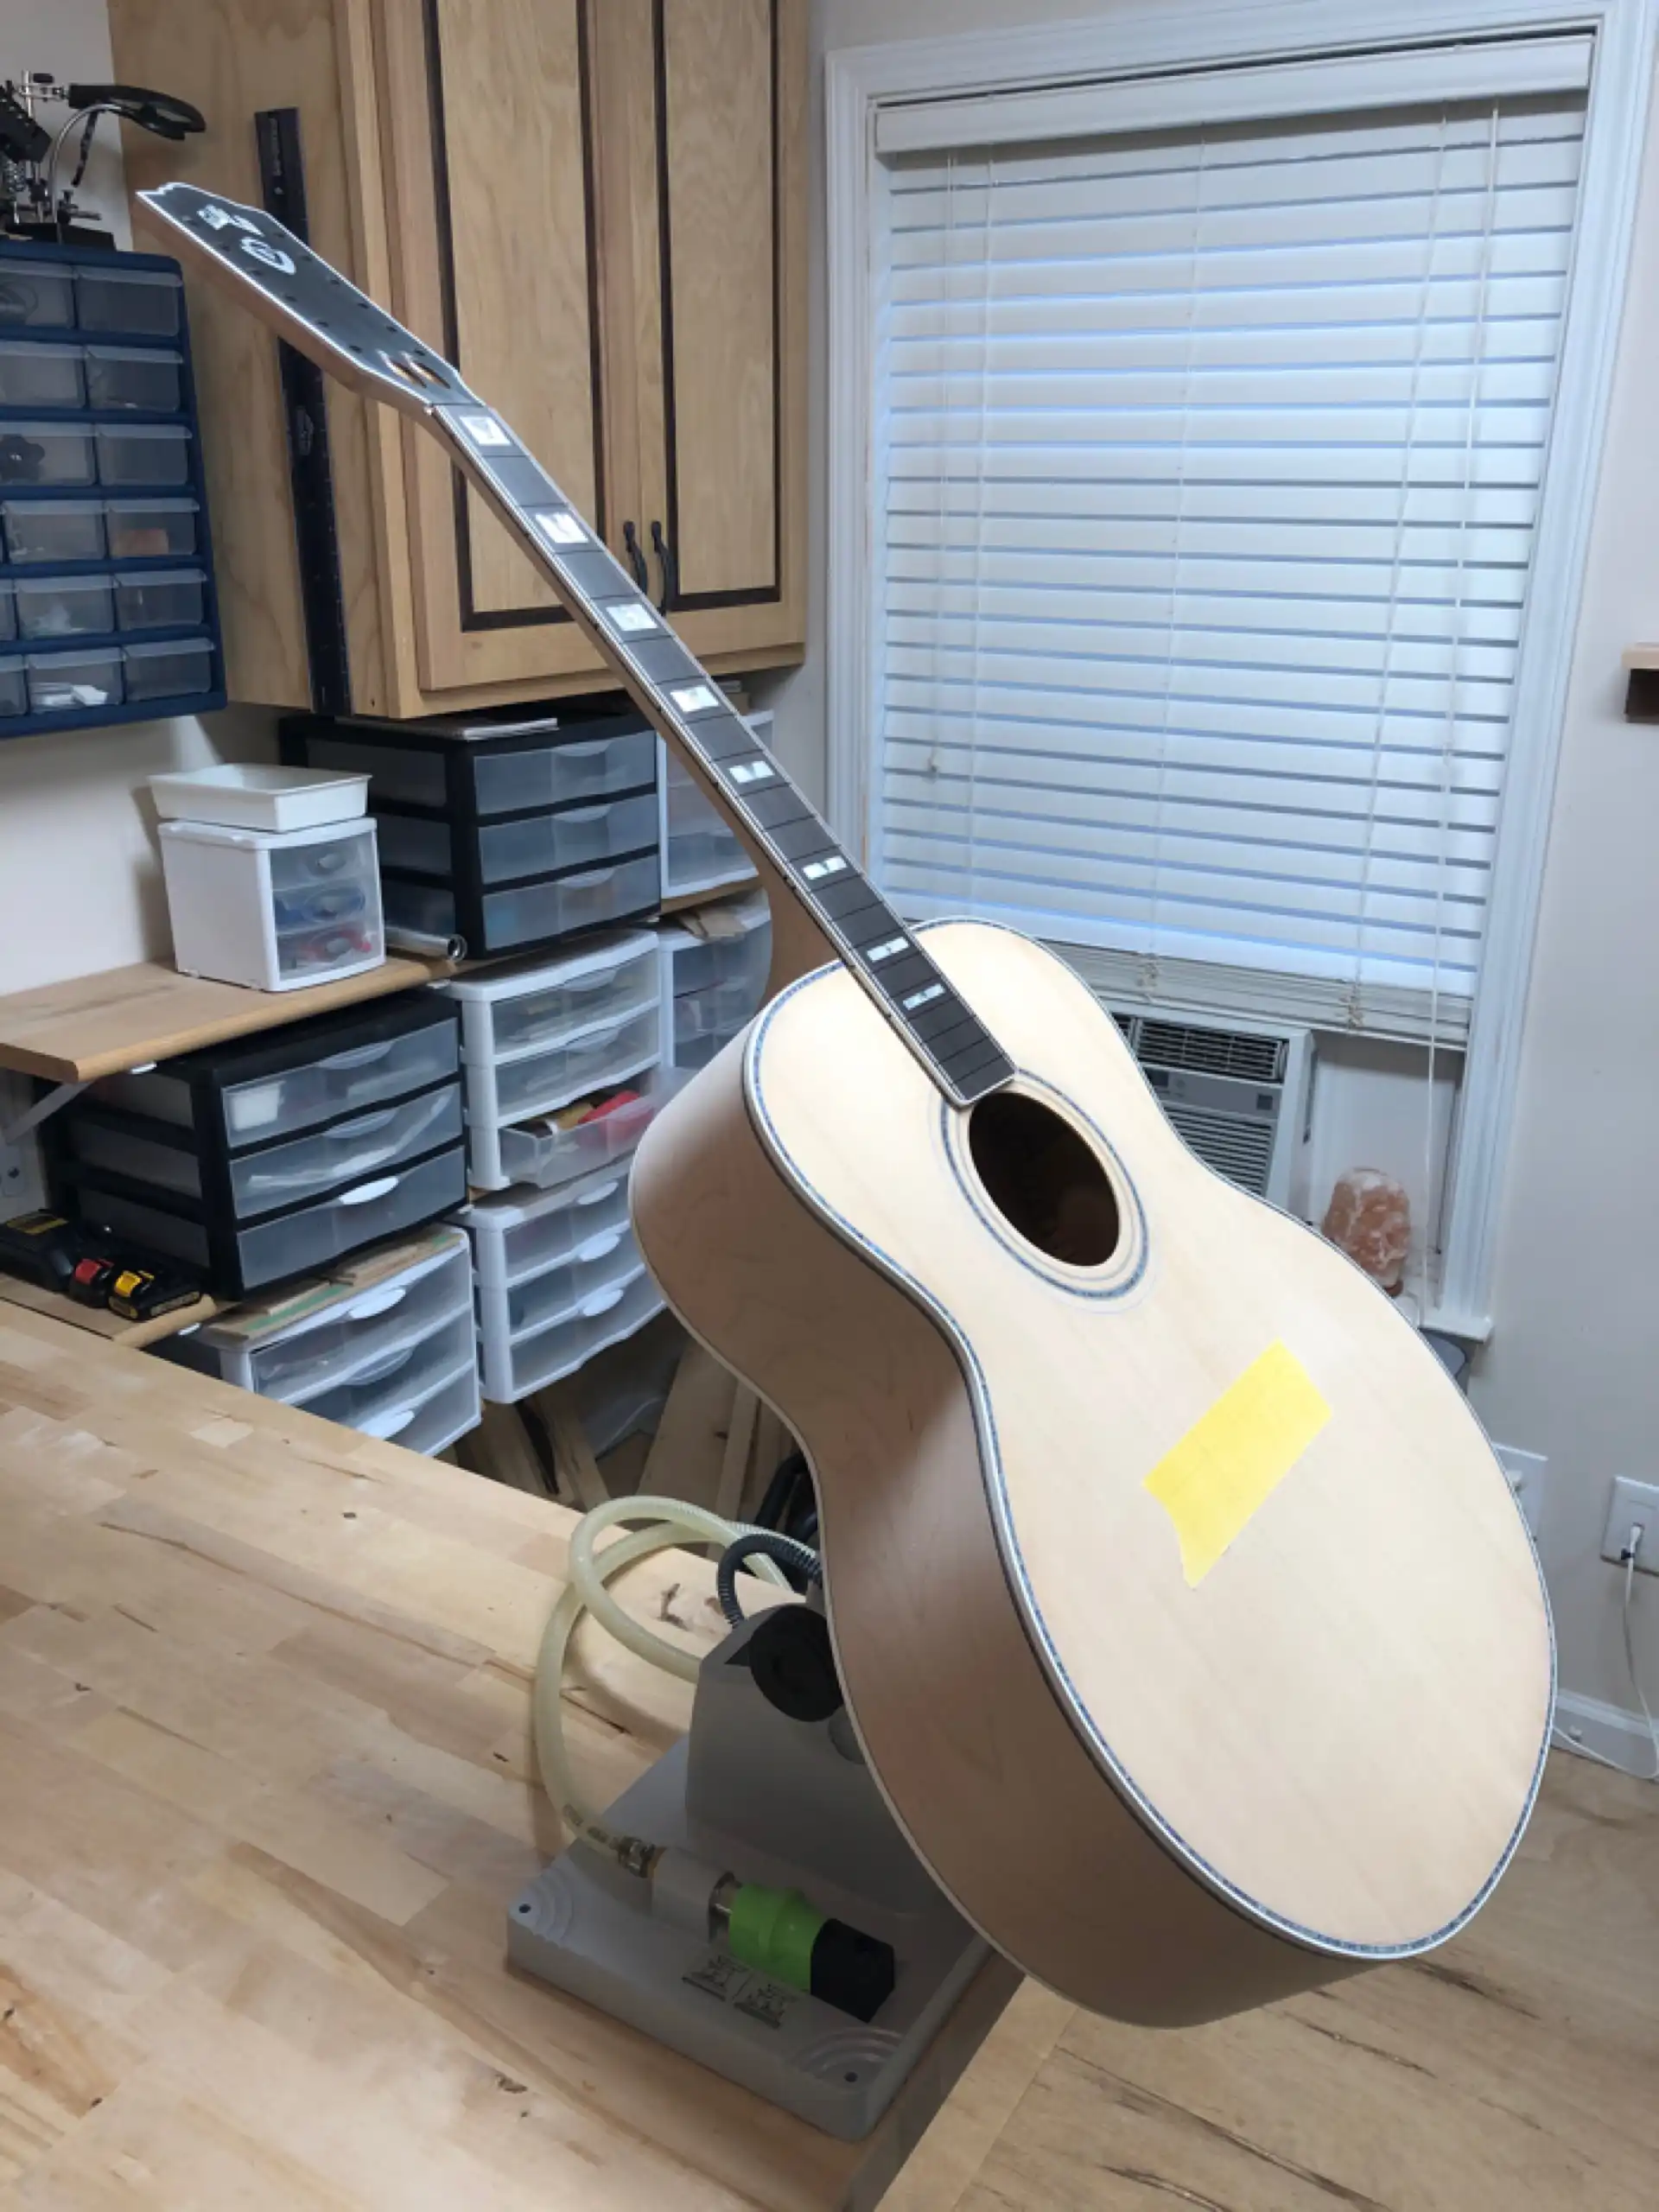
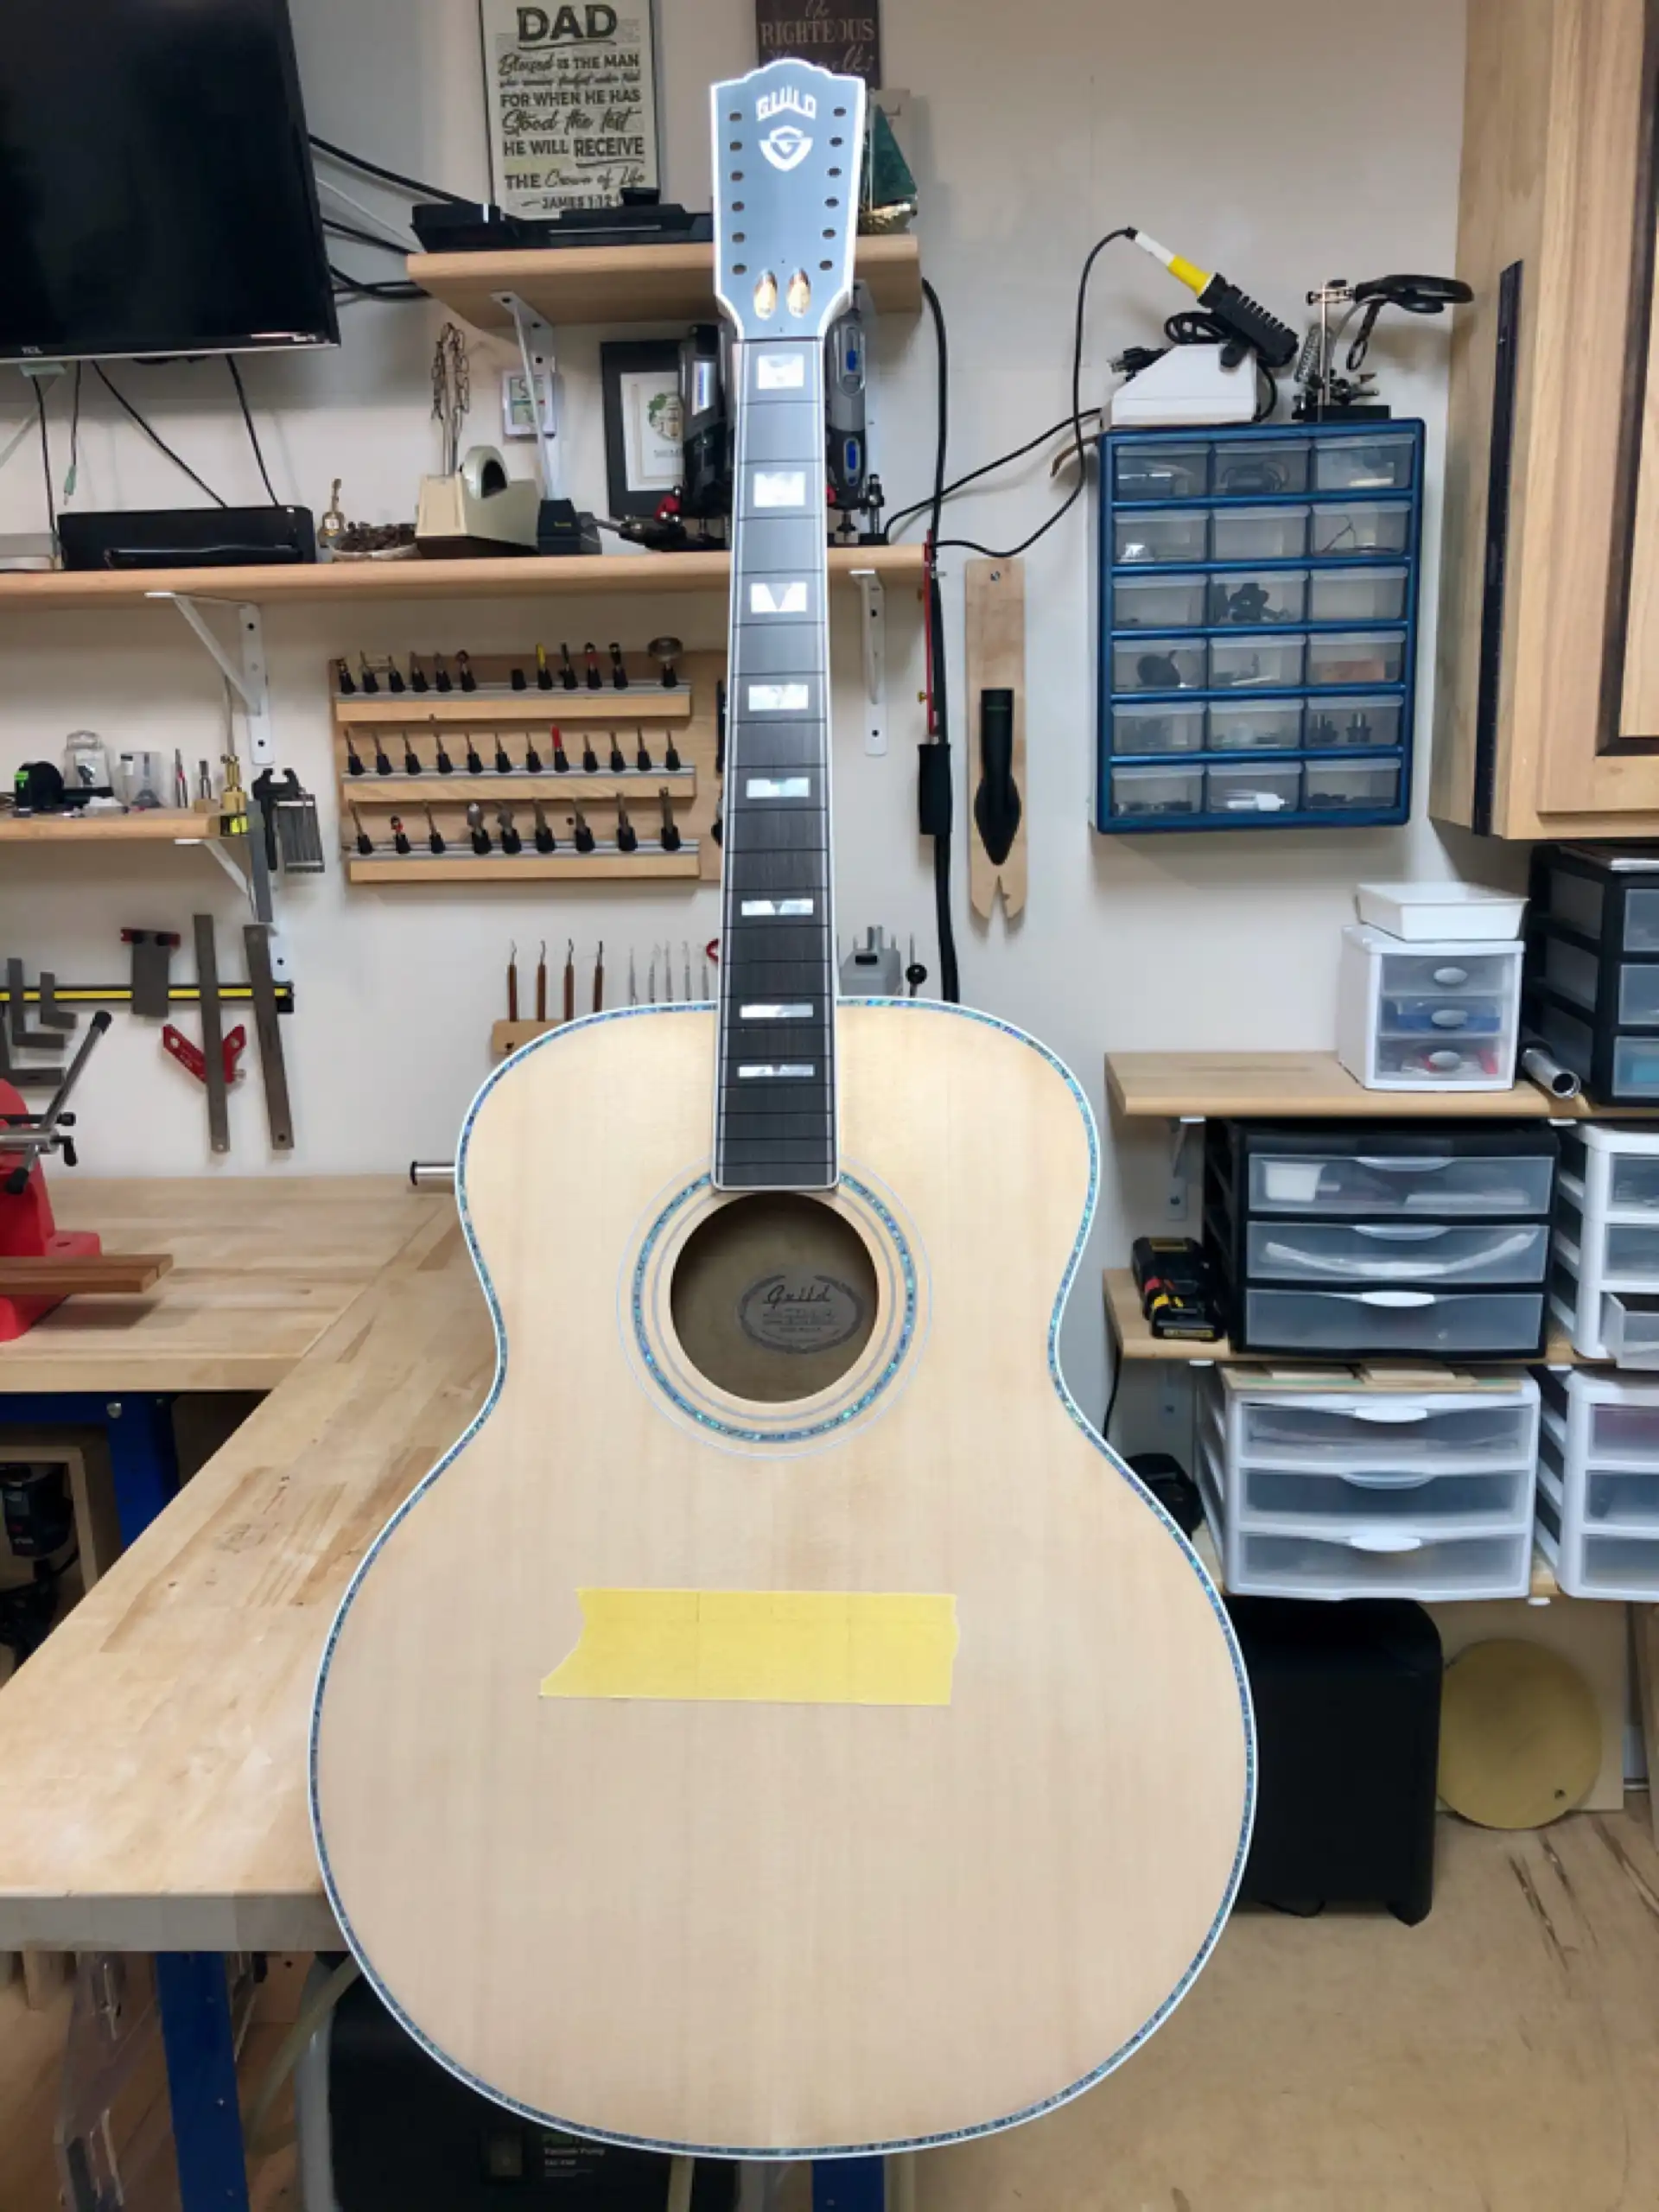
Before
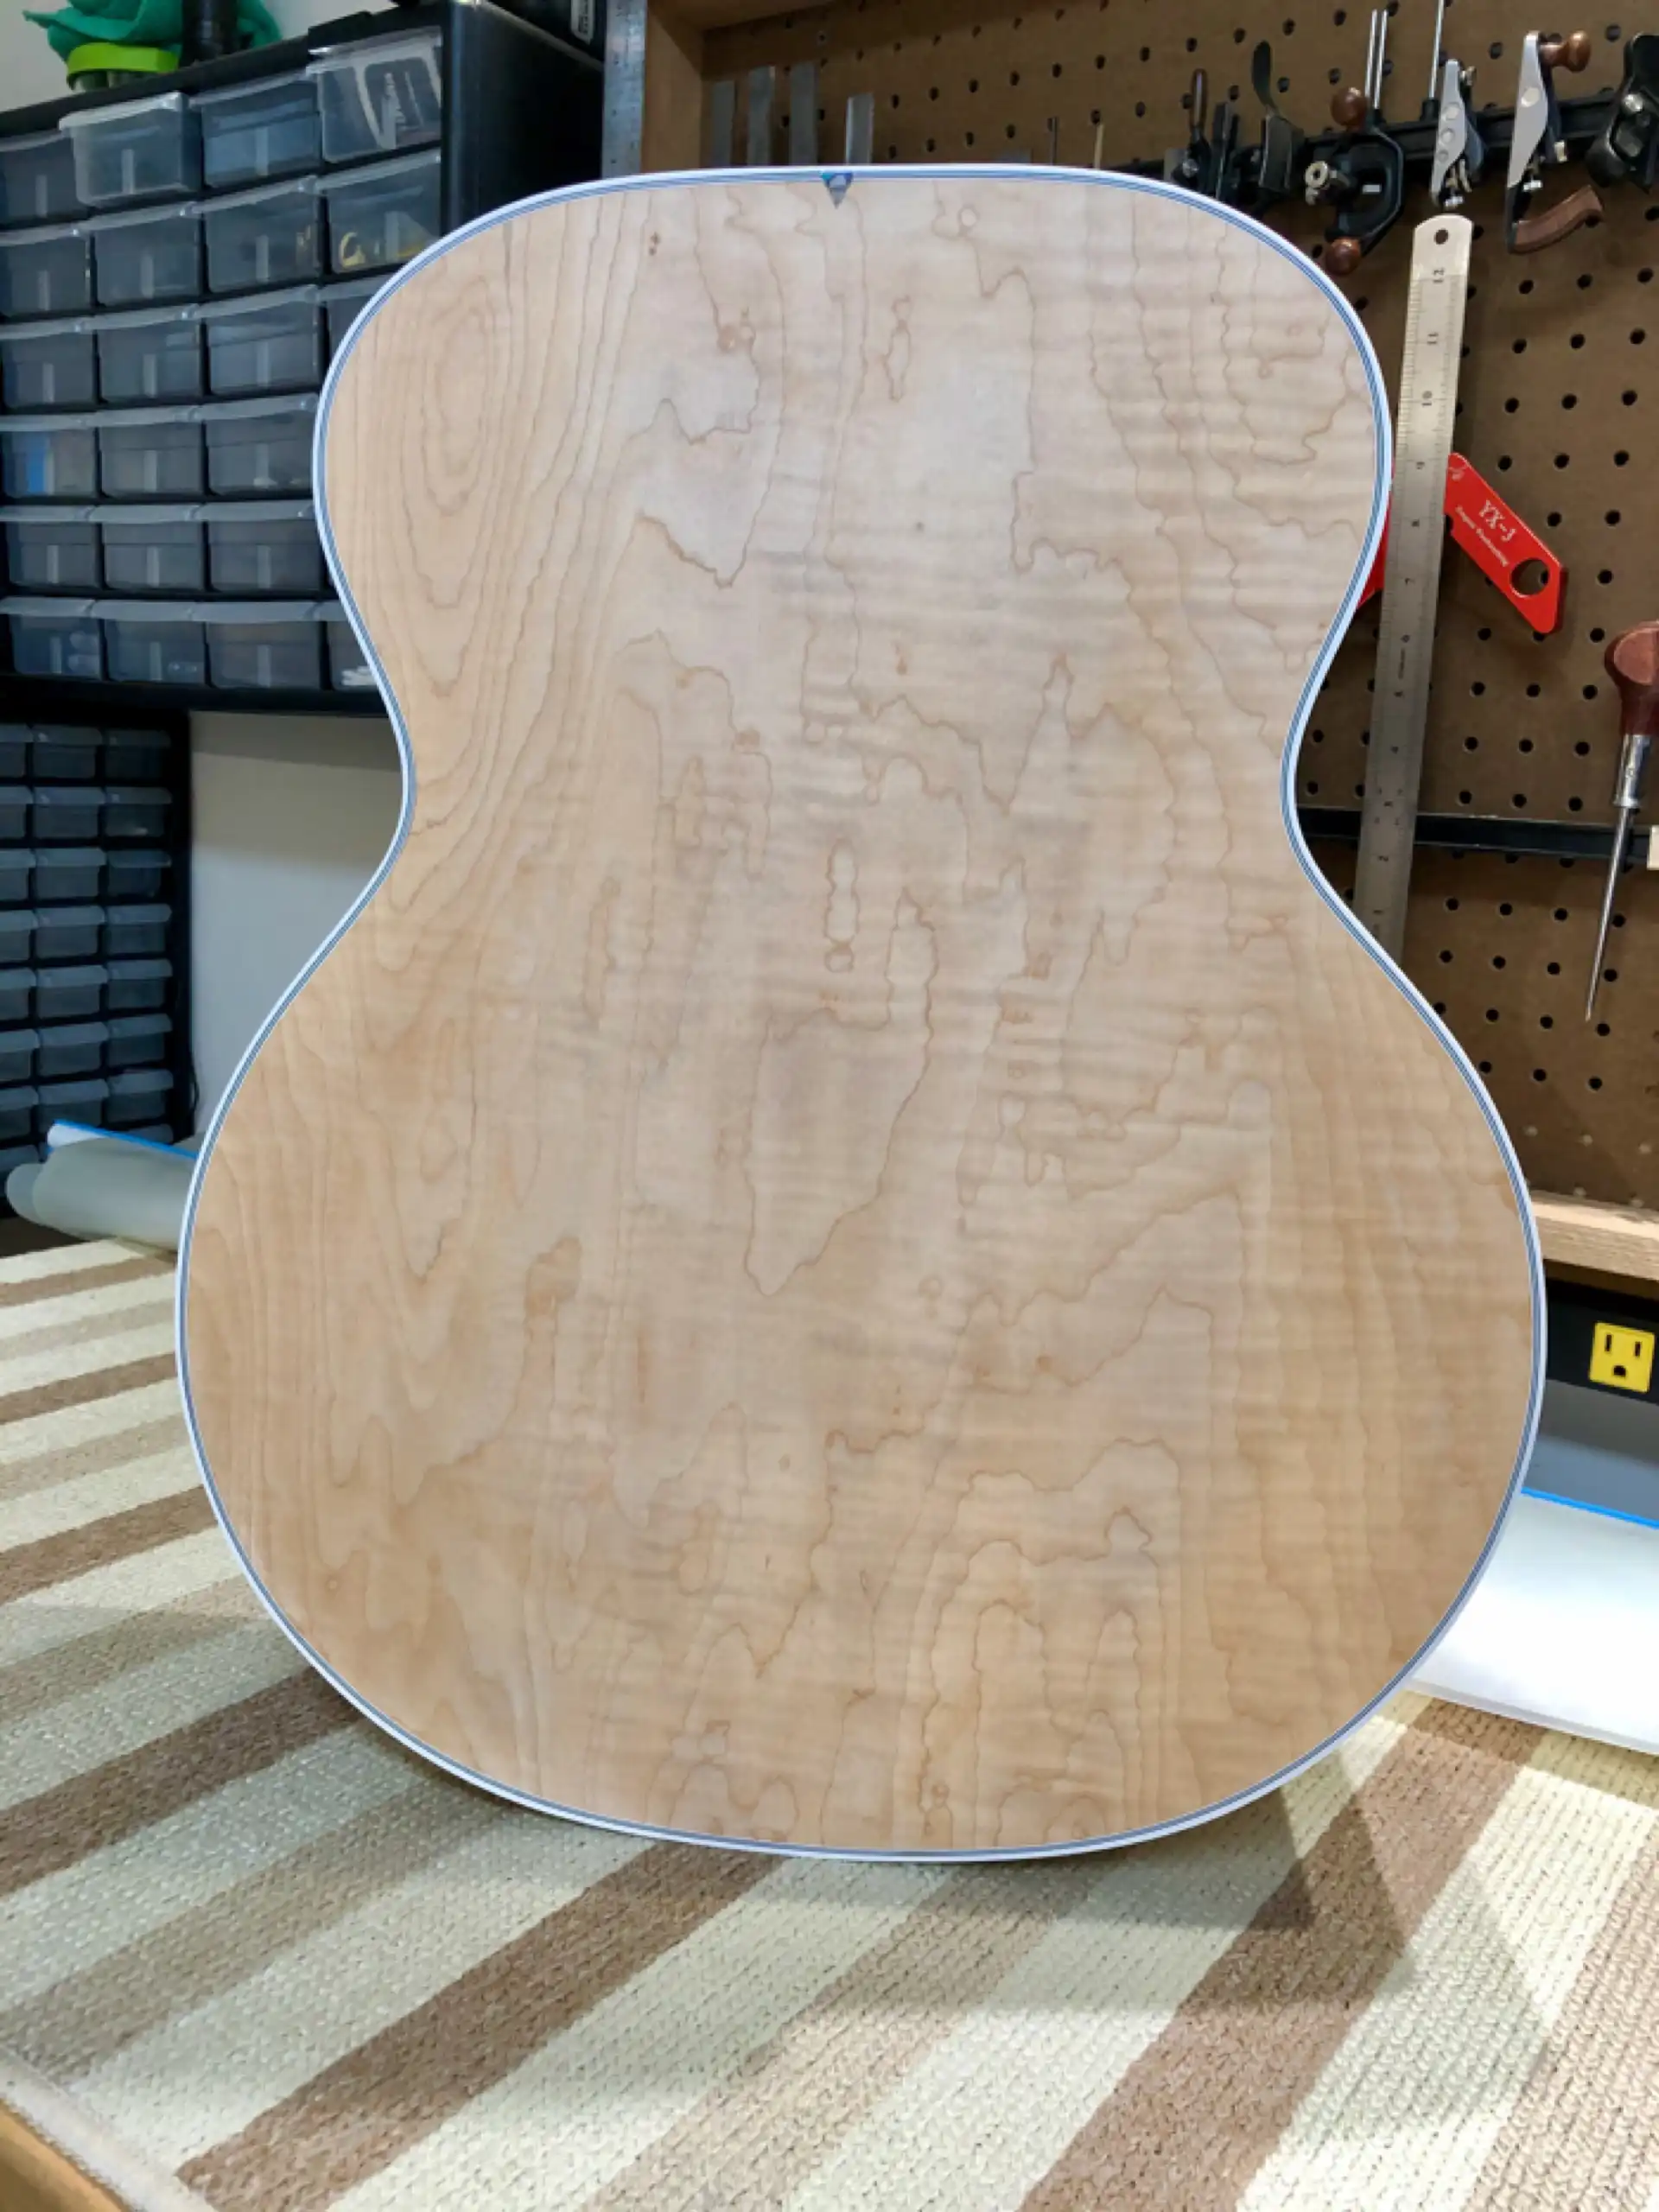
After
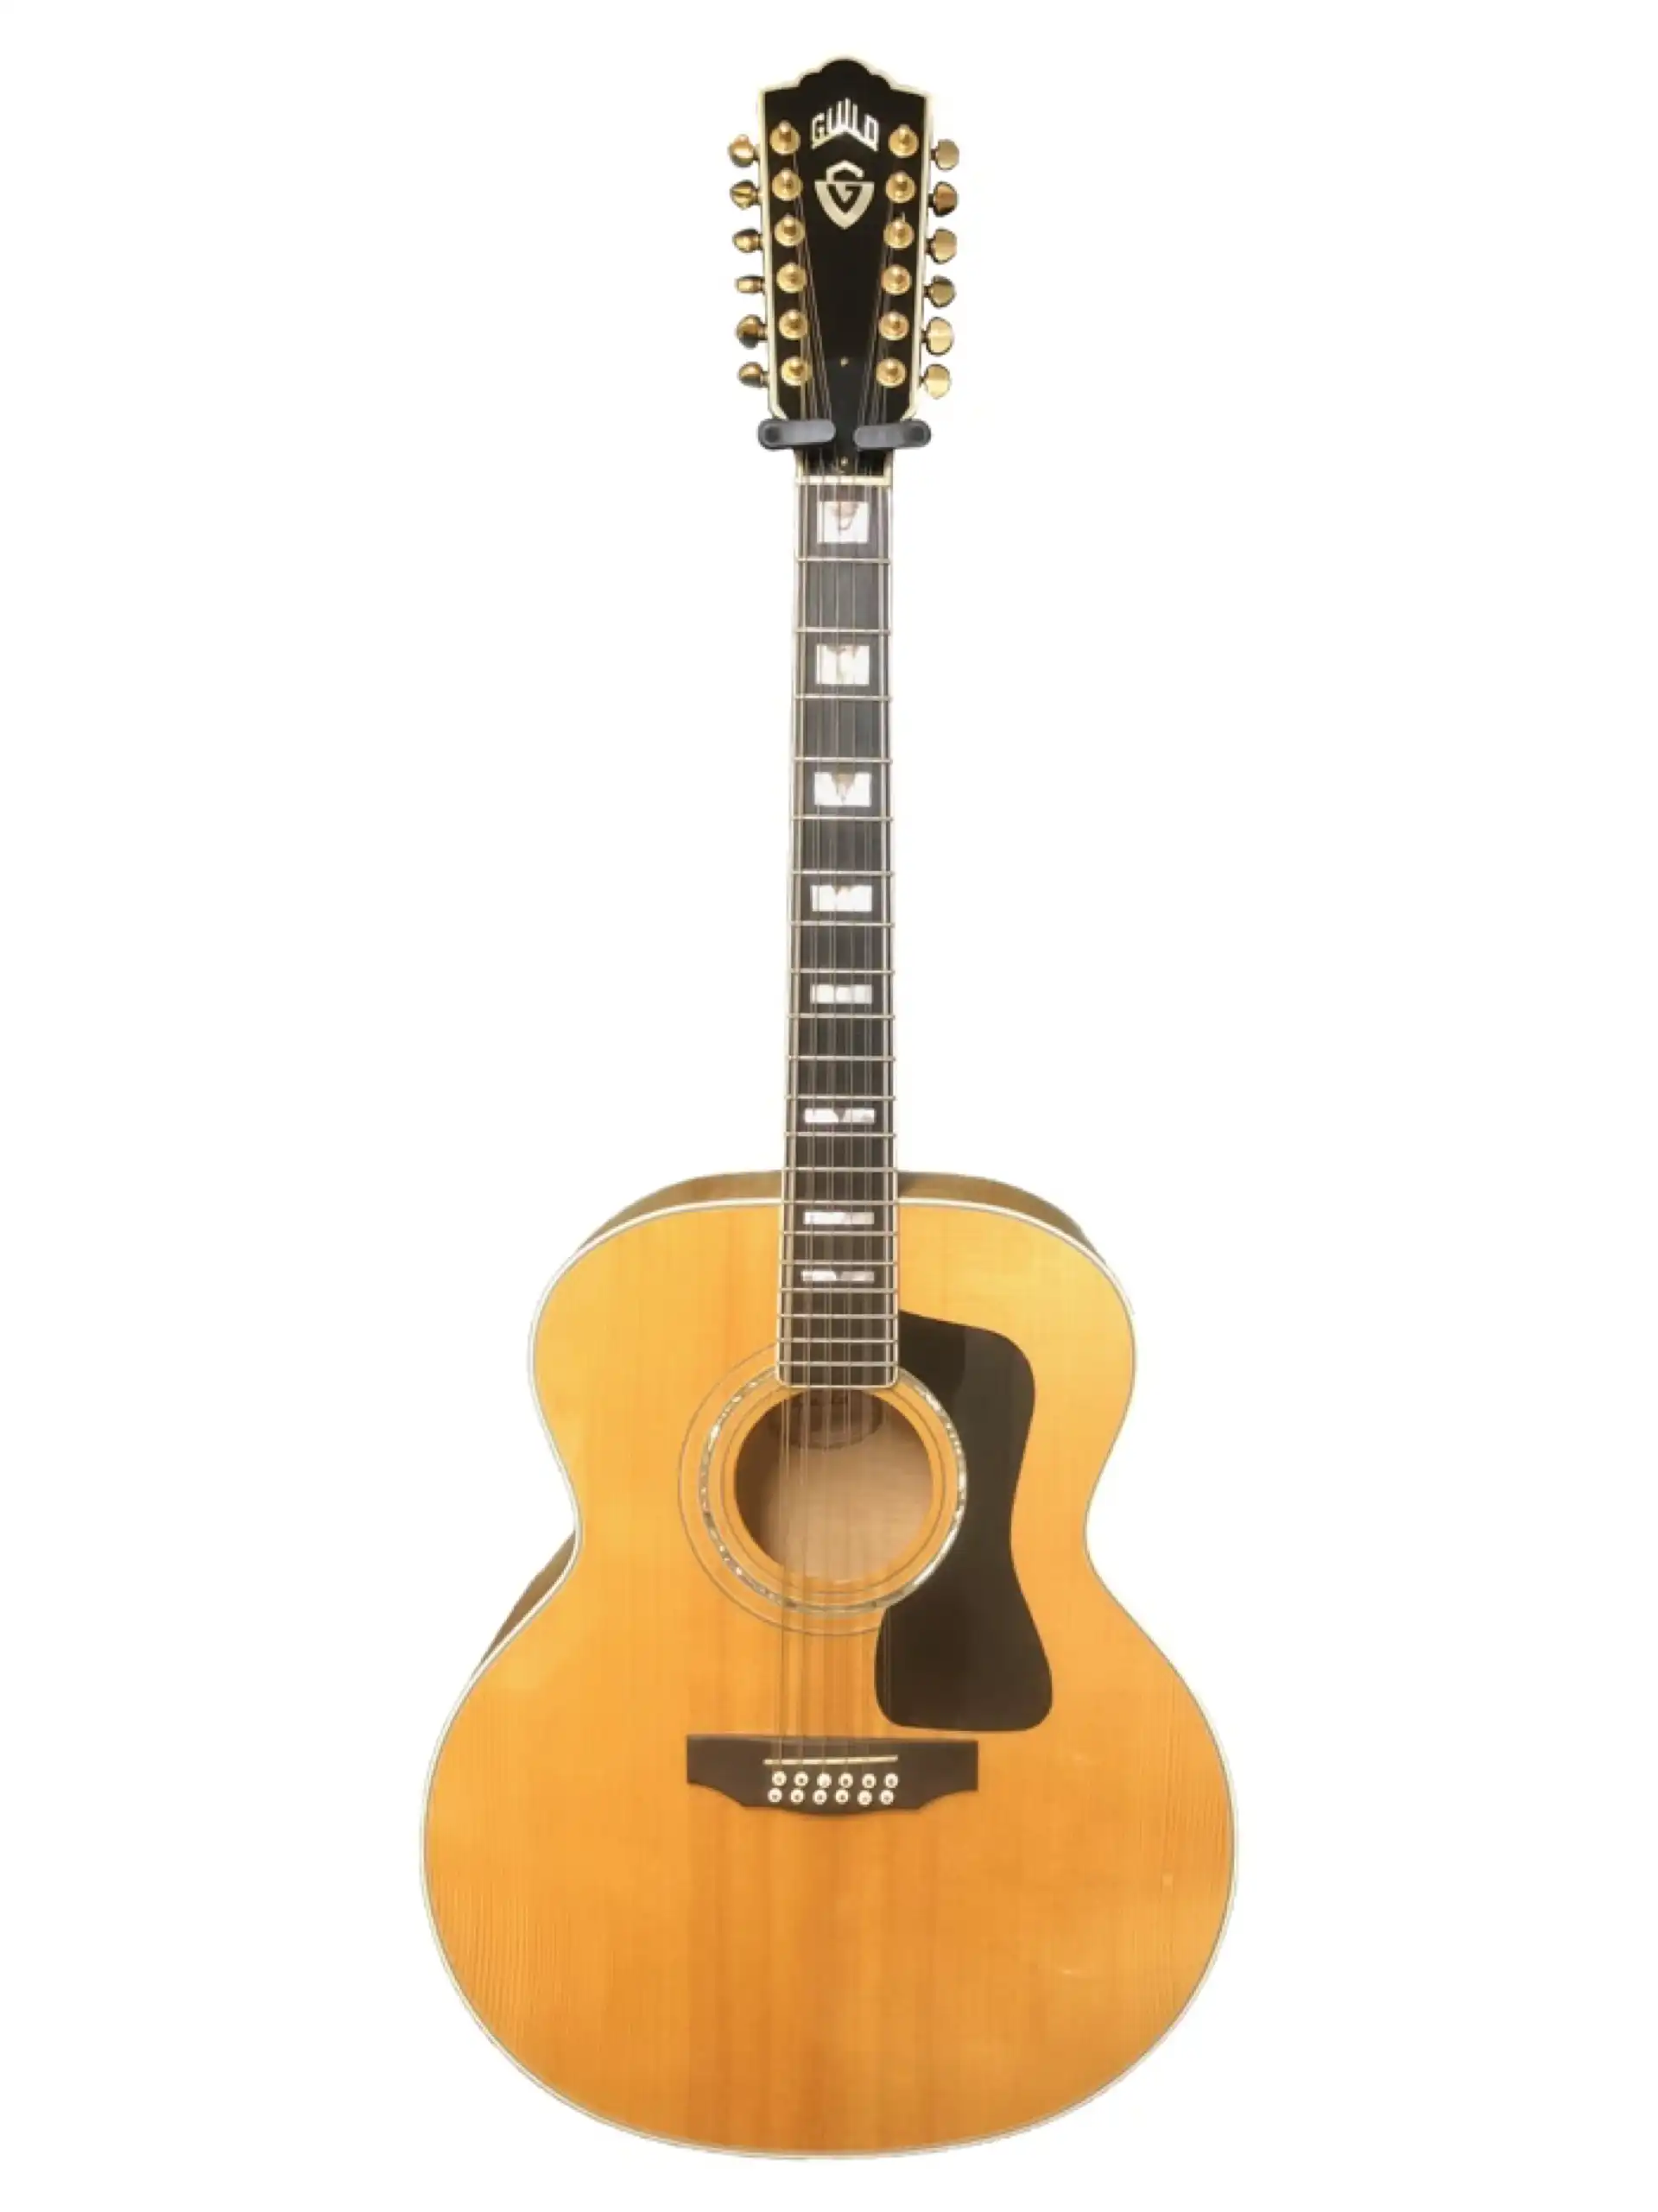
Guild's top-of-the-line Maple 12 string in 1999 was marketed as the JF65-12 (prior to this name change it was known as the F-412). This particular guitar had suffered a soundboard split along the fingerboard extension and into the soundhole, an all-too-common occurrence in these instruments. It is impressive that these cracks occur despite the generous amount of braces and patches glued to the underside of the top. In addition to needing a neck reset, the guitar was generally lackluster, both visually and aurally. The woods for the construction were less than top grade.
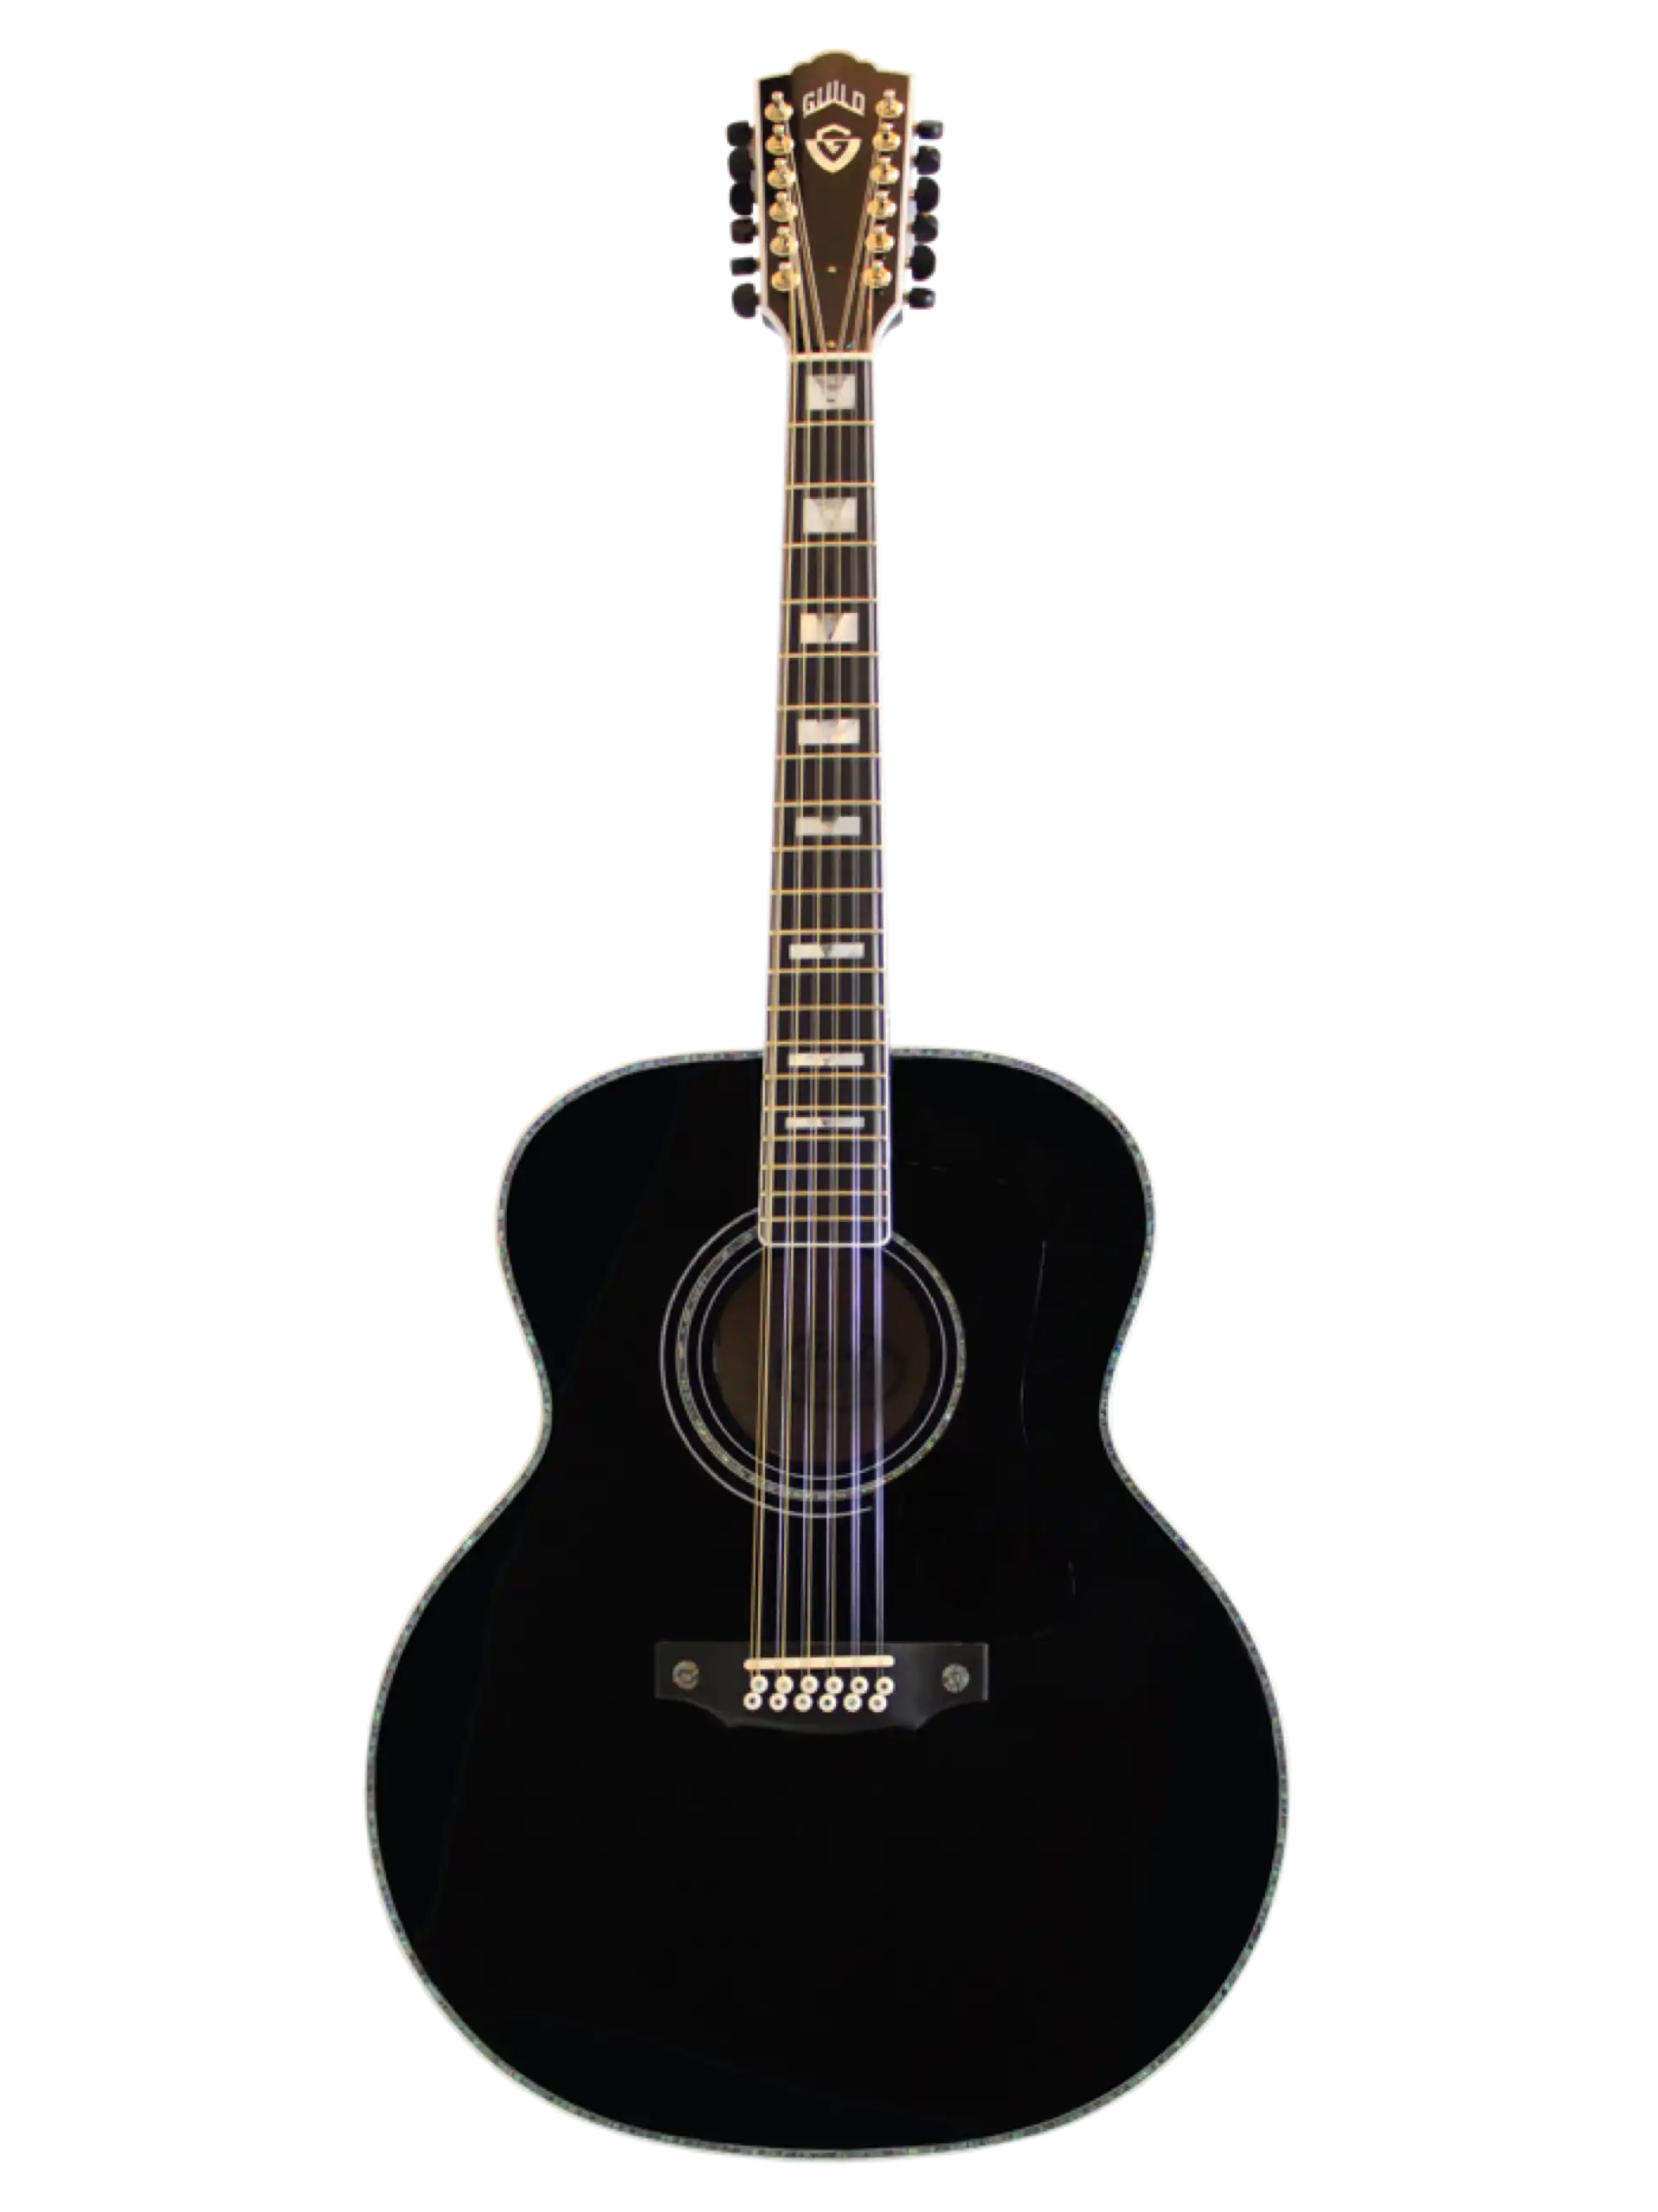
The owner had sensed the soft cry of potential from his favored Guild, and set out to pursue his upgrade options. Rather than trade out guitars, and inherit an all new set of issues, he wisely chose the overhaul path. Such an approach allows one to keep what ones likes about an instrument, and change out what can be improved. We conversed at length, discussing his goals and desires and determined to replace and improve the soundboard, add tasteful inlay, and refinish the entire guitar in black lacquer. The guitar was packaged up carefully and shipped to me via FedEx Ground, arriving without damage.
After receiving the guitar, I gave it a thorough inspection. In addition to the crack in the soundboard, I would rate the wood a 2A Sitka top, at best. It had an interesting chatoyance in the lower bout, along with an ever-widening grain width as you moved toward the sides. The arched Maple of the back had potential to be really pretty if I could accentuate those Tiger Stripes, where the sides were going to be more of a challenge, as they did not present as much striping. The back of the Maple neck also had potential to be very pretty. Structurally, the neck appeared to have a decent twist in it (something that I was able to readily confirm once I removed it). The entire body had a slight twist in it on the treble side upper bout, preventing it from resting firmly on its sides. The owner had identified a discomfort felt when playing the guitar. This can often be addressed by adjusting the spacing of the strings, the width of the neck, and the contour of the neck - all elements I will tackle as I encounter them. Otherwise, the guitar was in relatively fine shape, exhibiting very few visual indications of dings, scratches, or the like. The binding was loose around the fretboard, but I would either be re-glueing it or replacing it, so I did not consider it to be a problem. Overall, this was a well cared-for instrument.
I recorded a brief sample of the sound of this 1999 Guild JF65-12 for comparison, later. This was recorded using the old strings, just prior to deconstructing the guitar. I will record the same piece once the guitar has been completed.
I have disassembled my share of factory made, brand name guitars, the majority (not all) of which were built between 1960 and the year 2000. The majority (not all) of those instruments have been Guild or Martin guitars. From my experience I would offer a sweeping generalization, that being Martin guitars are built lighter than Guilds (slightly thinner soundboards, backs and sides, smaller braces, etc). As a result, they are often more “responsive” (simply meaning that you get the sound they are capable of producing with less energy required to produce it). That does NOT mean a more responsive guitar sounds better. It also does not mean a more responsive guitar sounds louder. But I can benefit this 12 string makeover from what I have learned over the years from Martin construction technique. Apart from the obvious benefit of building slightly heavier, more robust guitars, Guild guitars produce a sound all their own, something I want to maintain (or stay as close as possible to) when I rebuild this guitar.
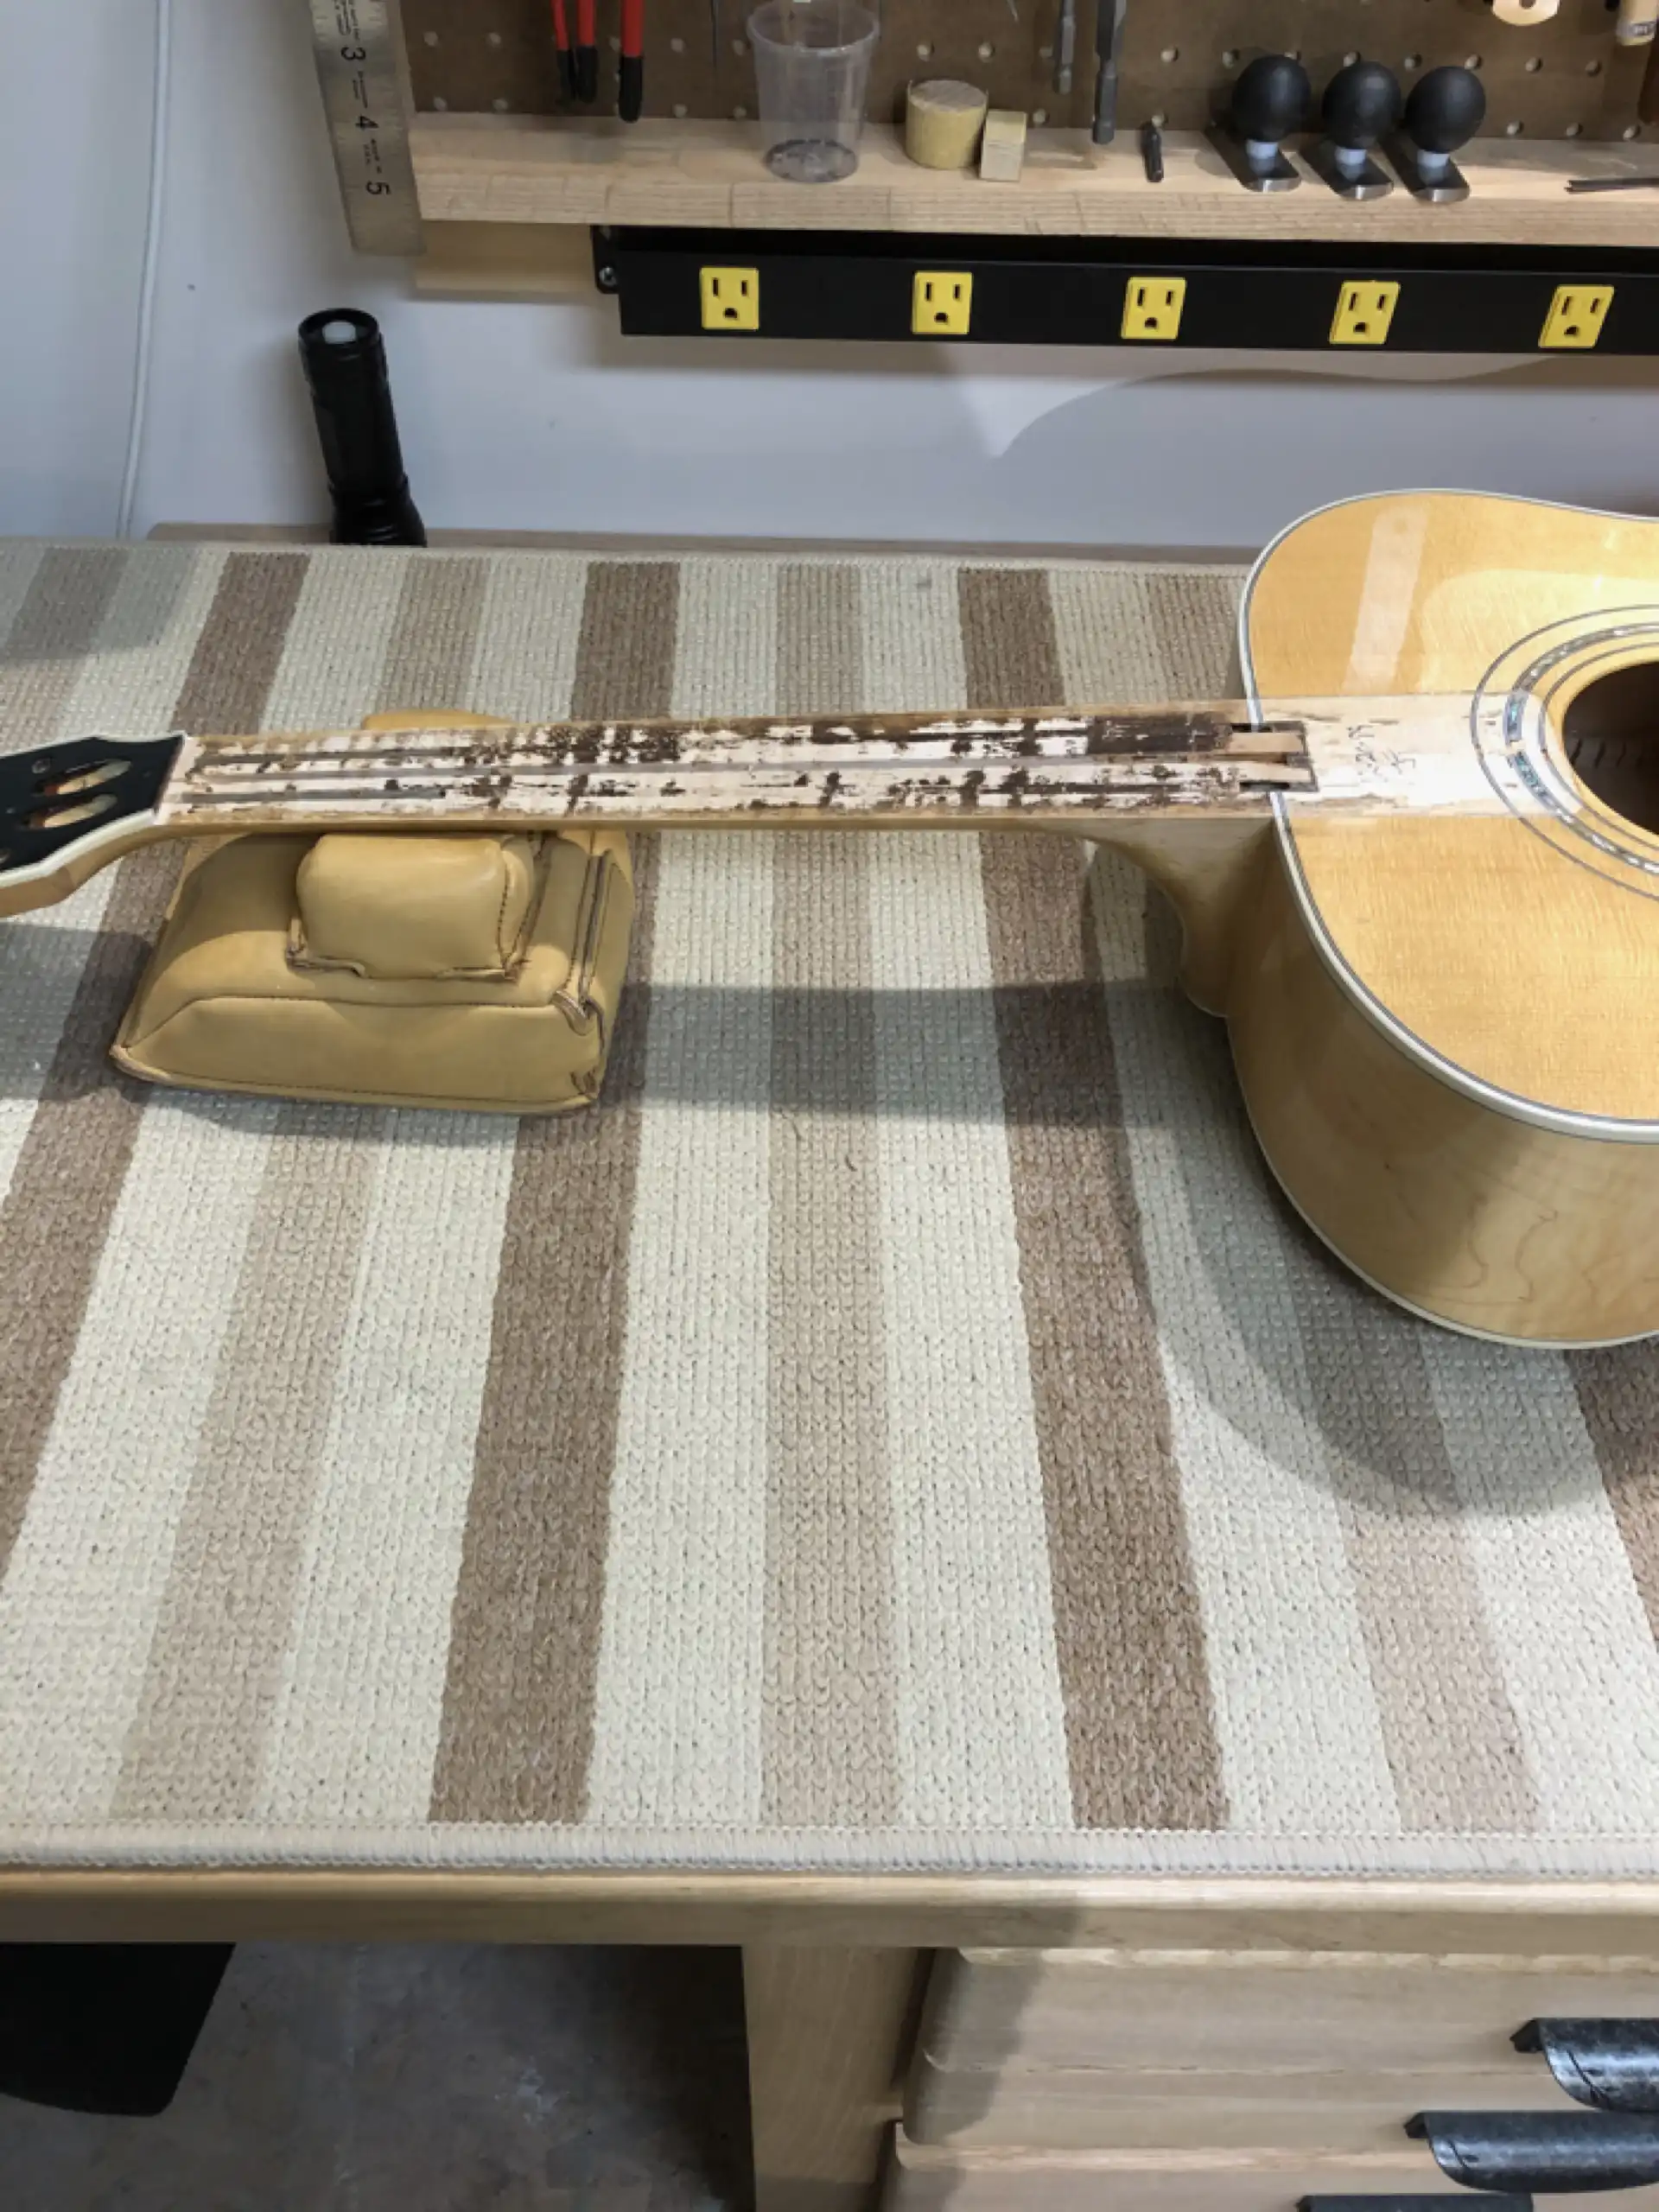
My intention was to preserve the original back and sides, fretboard, and neck, and replace everything else. To do so I needed to “unbuild” the guitar, taking it down to its base components. I decided to document the process and that meant spending a bit more time taking things apart, so I got started by removing all the hardware, the nut and saddle, the bridge, the frets... I even removed the pickguard...
Ready for Surgery
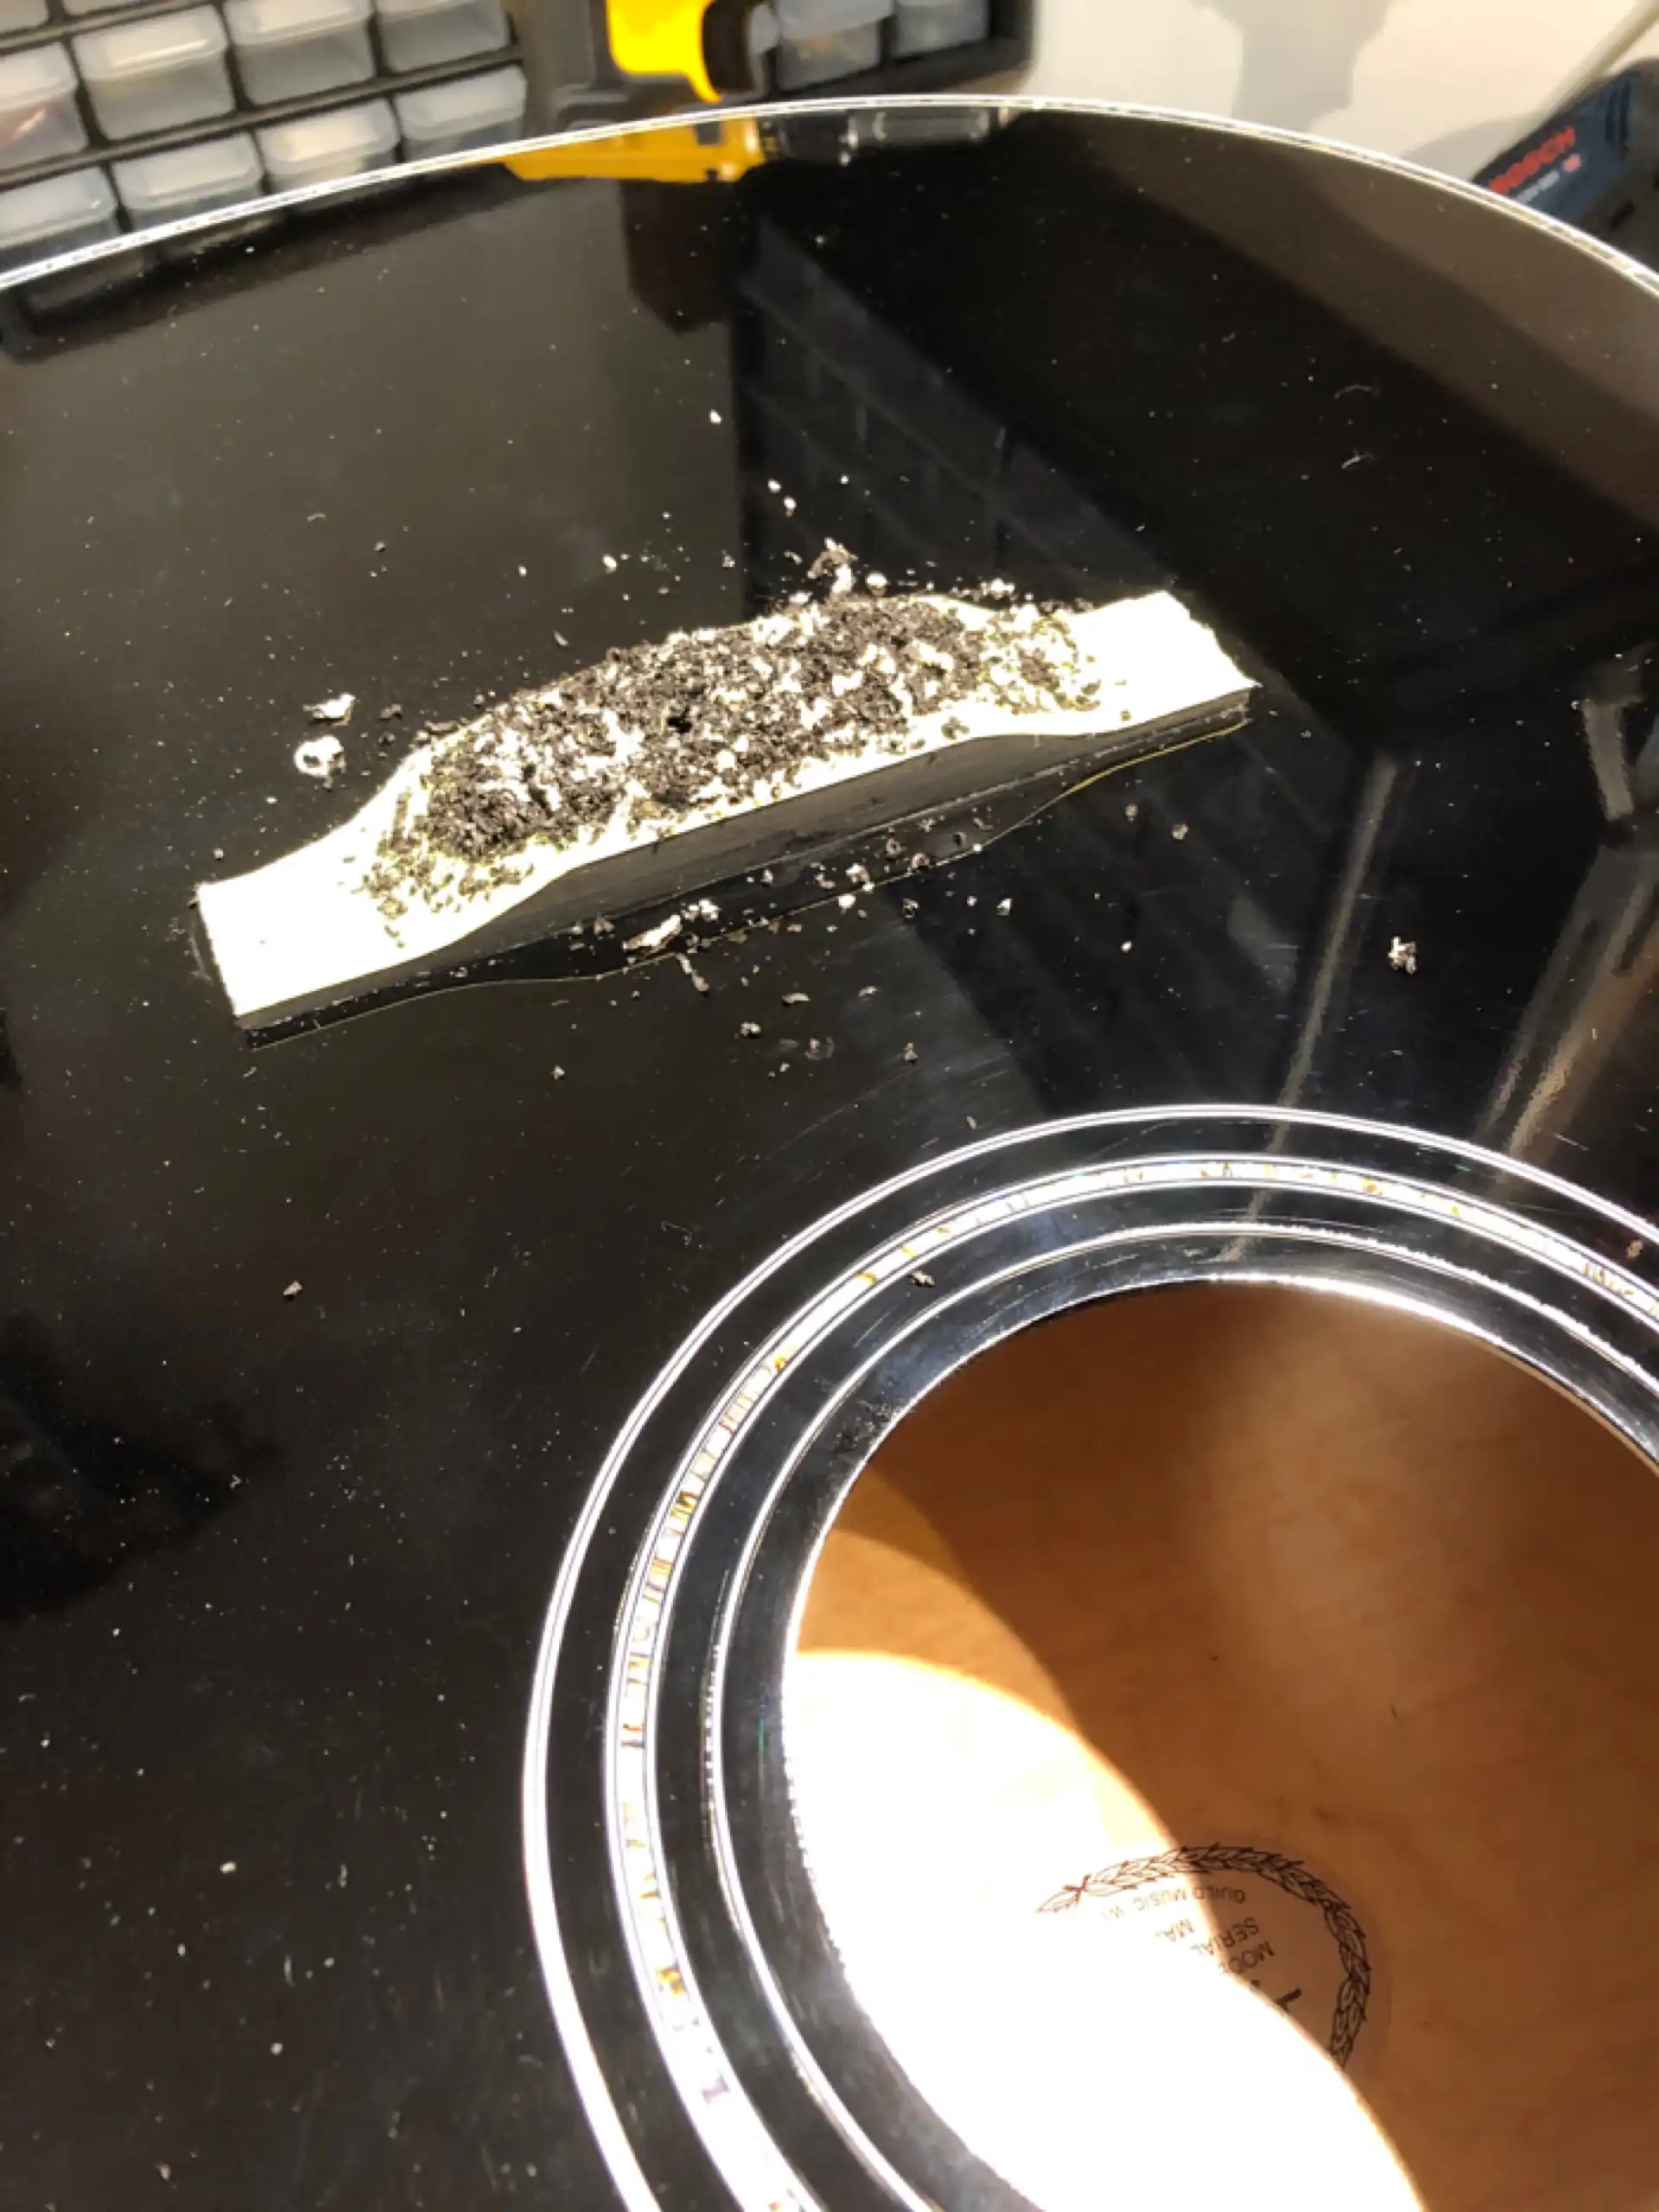
When removing the nut, it is customary to first carefully scribe around the ends with a scalpel in the event any finish was sprayed over the nut. Using a small tool and a hammer, a sharp RAP to one end or the other should be enough to break the nut free (assuming the last person to touch applied a dot of glue to the fretboard edge of the nut). In this case, the nut let go without drama.
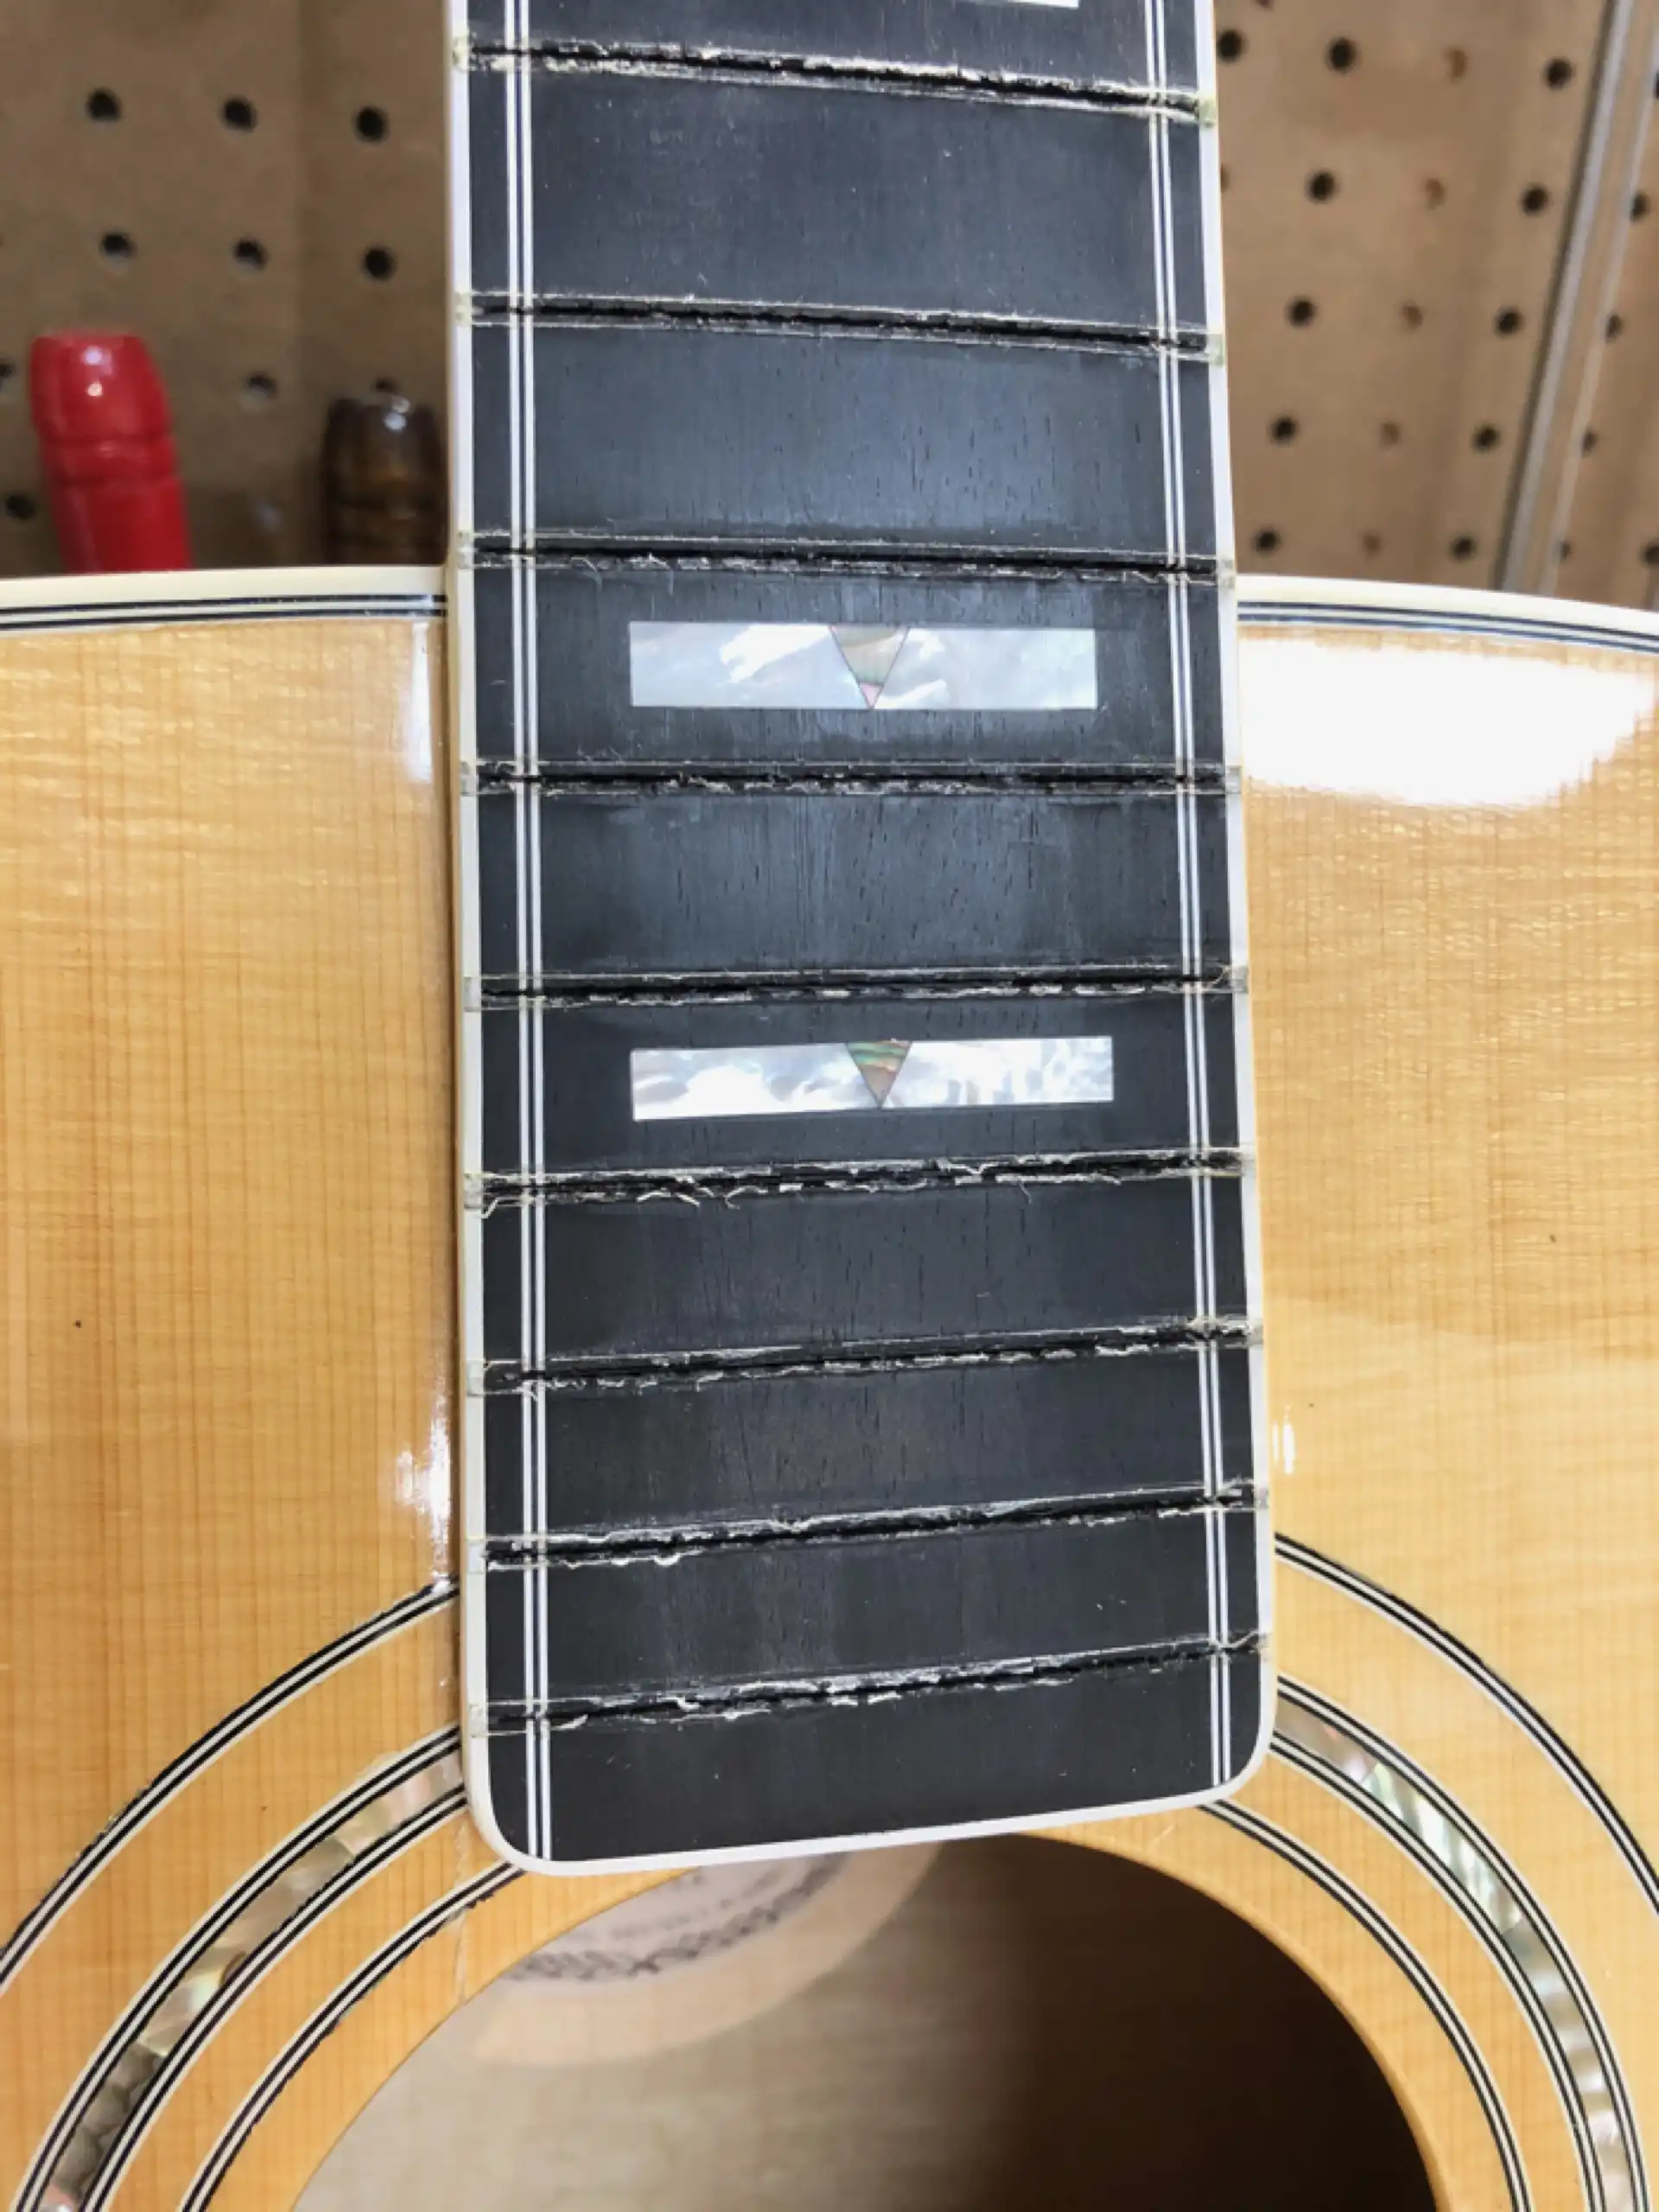
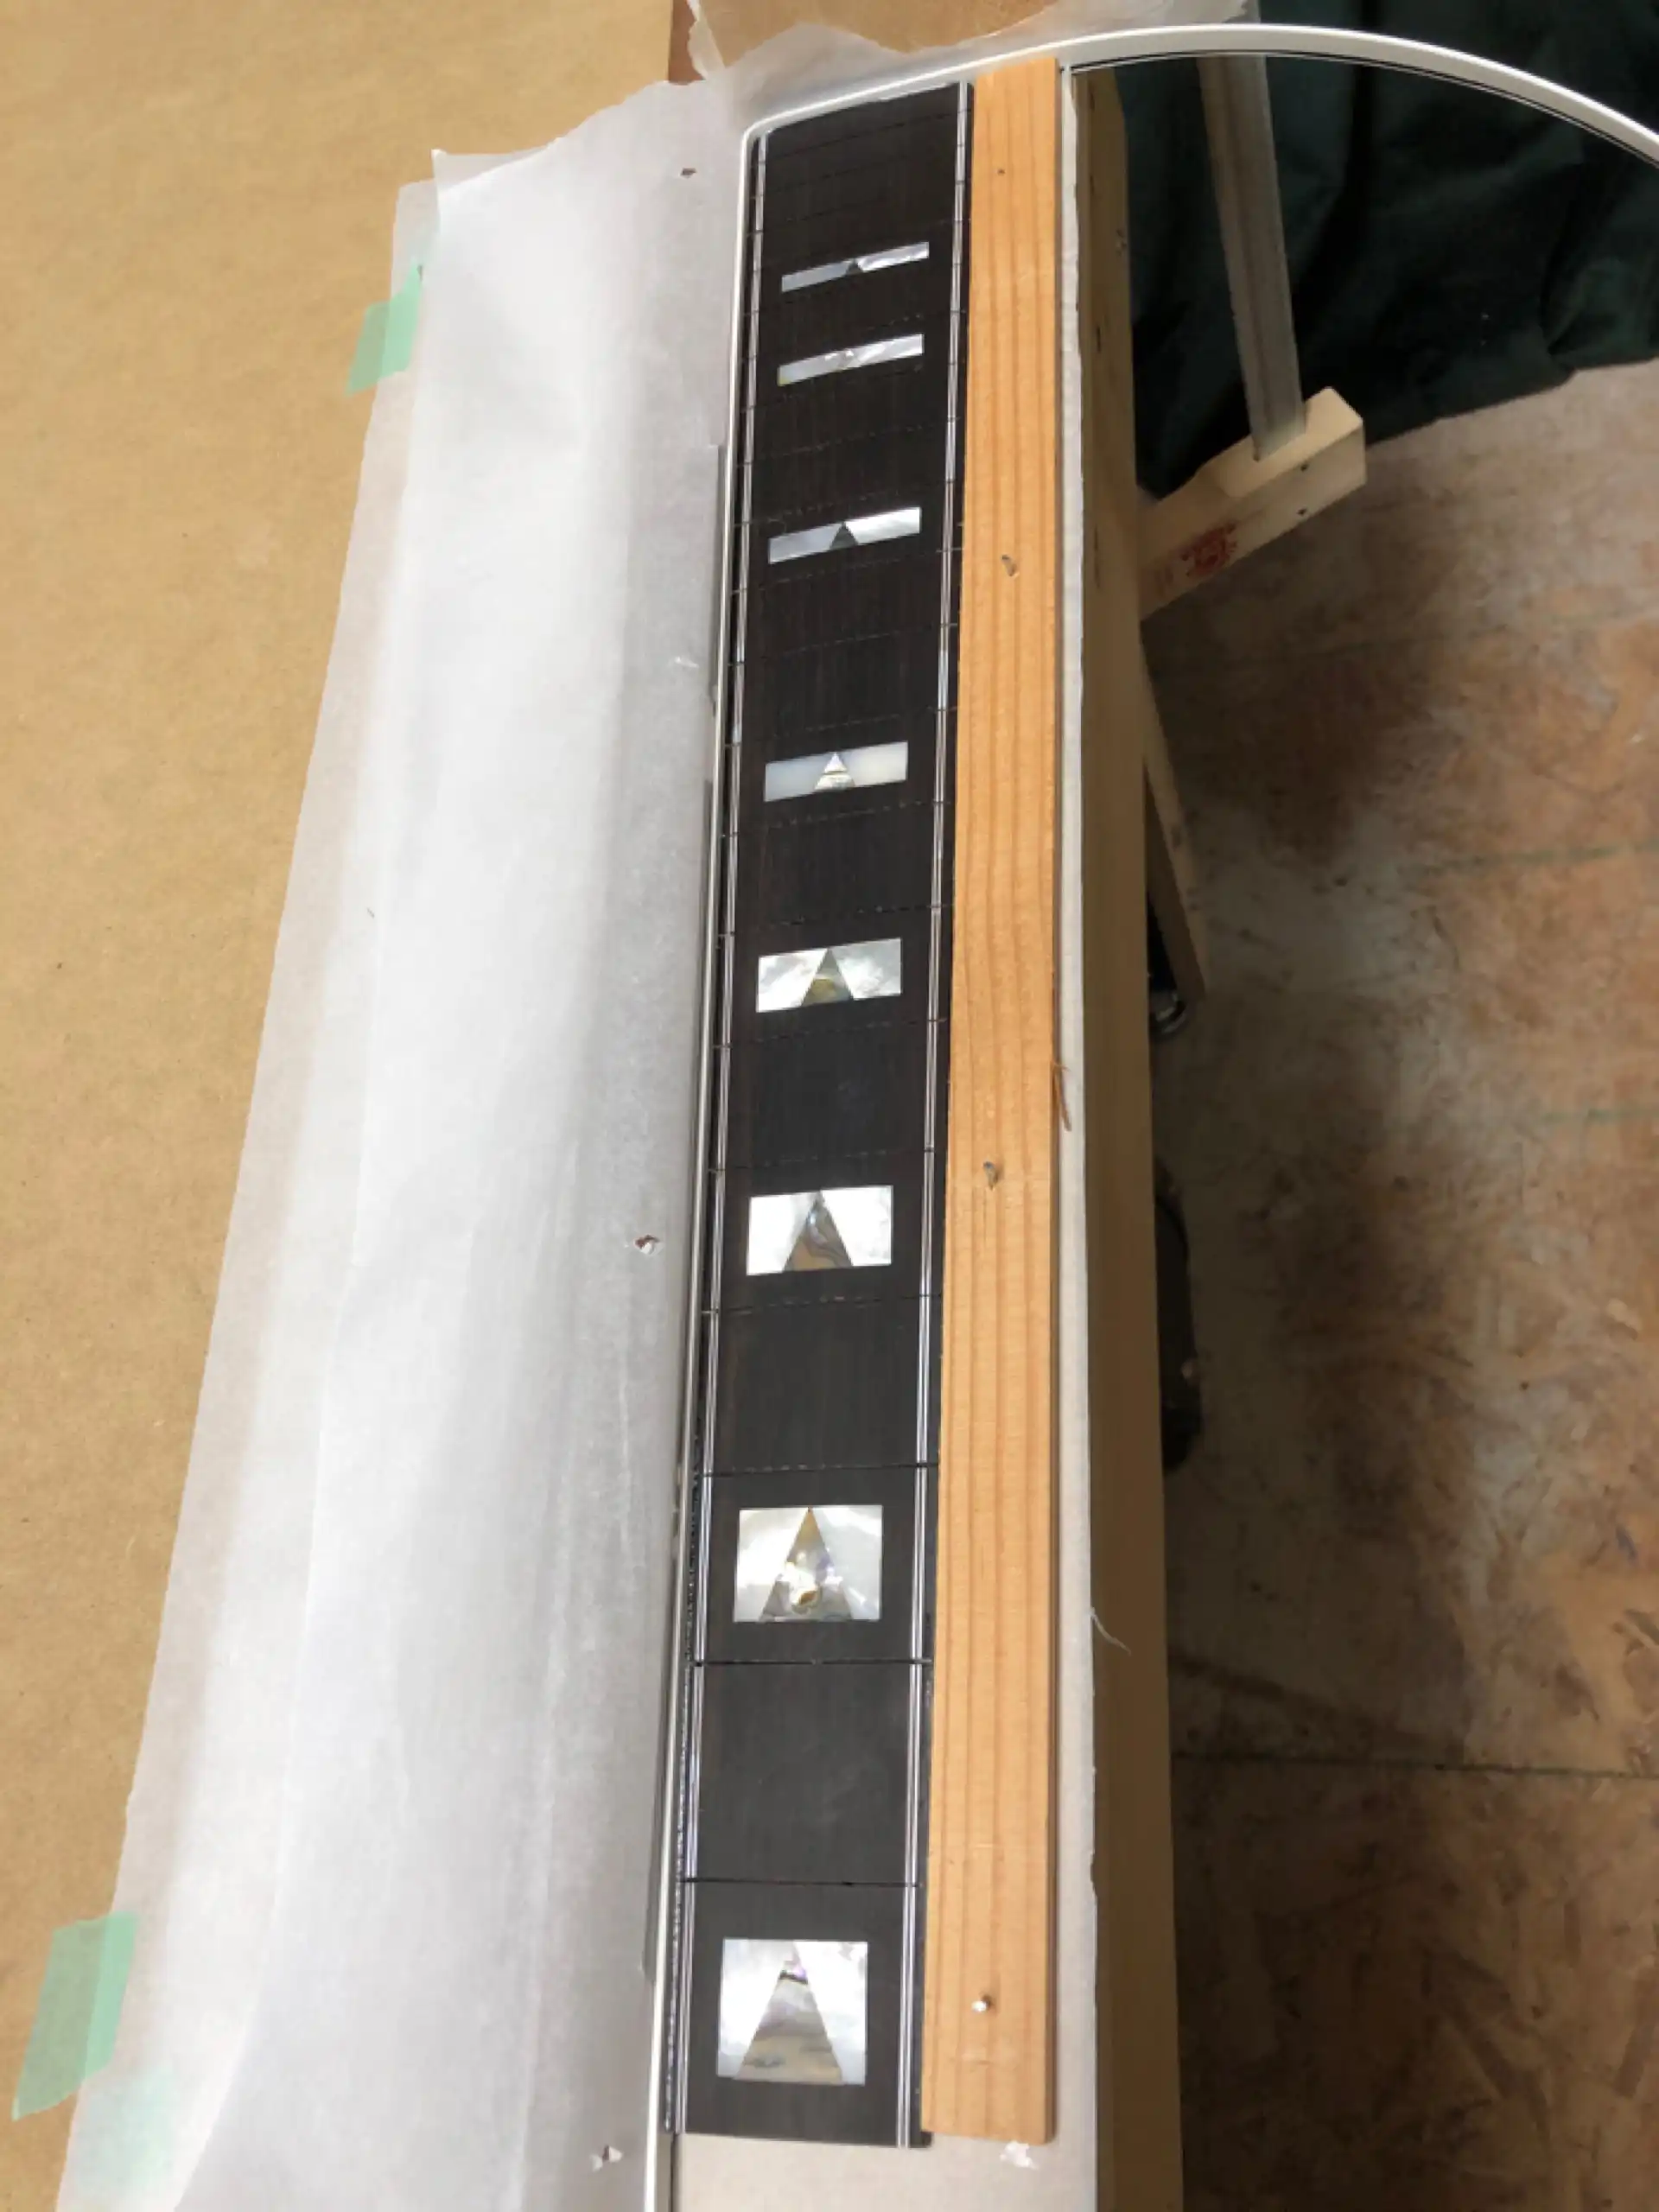
This was a well-fitted bone nut, properly seated and properly glued. It came out cleanly. I will create a new nut, in order to both control tone and setup. Notice the wider string spacing between the first course of strings (1st and 2nd string) when compared to the narrower spacing of the second course of strings (3rd and 4th strings). The new nut will avoid wide string spacing.
Nut Removal
If you look closely at the plastic fretboard binding near the 1st string (on your left, in the photo) you can see the shrinkage that has occurred as the solvents evaporated over the years, where the binding stops well short of the end of the fretboard.
Nut Removed
All the hardware was removed. This included the tuning machine heads and the truss rod cover. These parts went into a bag for safe keeping, along with the nut, saddle and end pin. With the bag labeled and neatly tucked away in the accessory compartment of the guitar case, the hardware parts await re-installation.
Partly due to the fact that I knew I would be replacing the soundboard and partly inspired by my desire to try out a new heat gun, I tackled the removal of the pickguard. This guitar was built late enough to be fitted with an adhesive backed pickguard, rather than the lacquered-on celluloid of old. The plastic pickguard lifted right off the adhesive using hot air in conjunction with a spatula/palette knife. The adhesive, however, took another 20 minutes to remove using Naptha and some serious elbow grease.
This guitar had been finished using a clear nitrocellulose lacquer (NCL). Over the years the clear finish had yellowed, as can be seen when contrasted with the finish beneath the pickguard. What is often thought to be patina (a natural discoloration of the wood as it ages) may only be a visual illusion. That was the case with this Guild. It is only the lacquer that has yellowed, not the wood.
Pickguard Removed
Guild pickguards, while maintaining the same basic shape, came in a variety of sizes, having slightly different contours over the years. Nevertheless they were all readily identifiable, and this one is quintessential Guild!
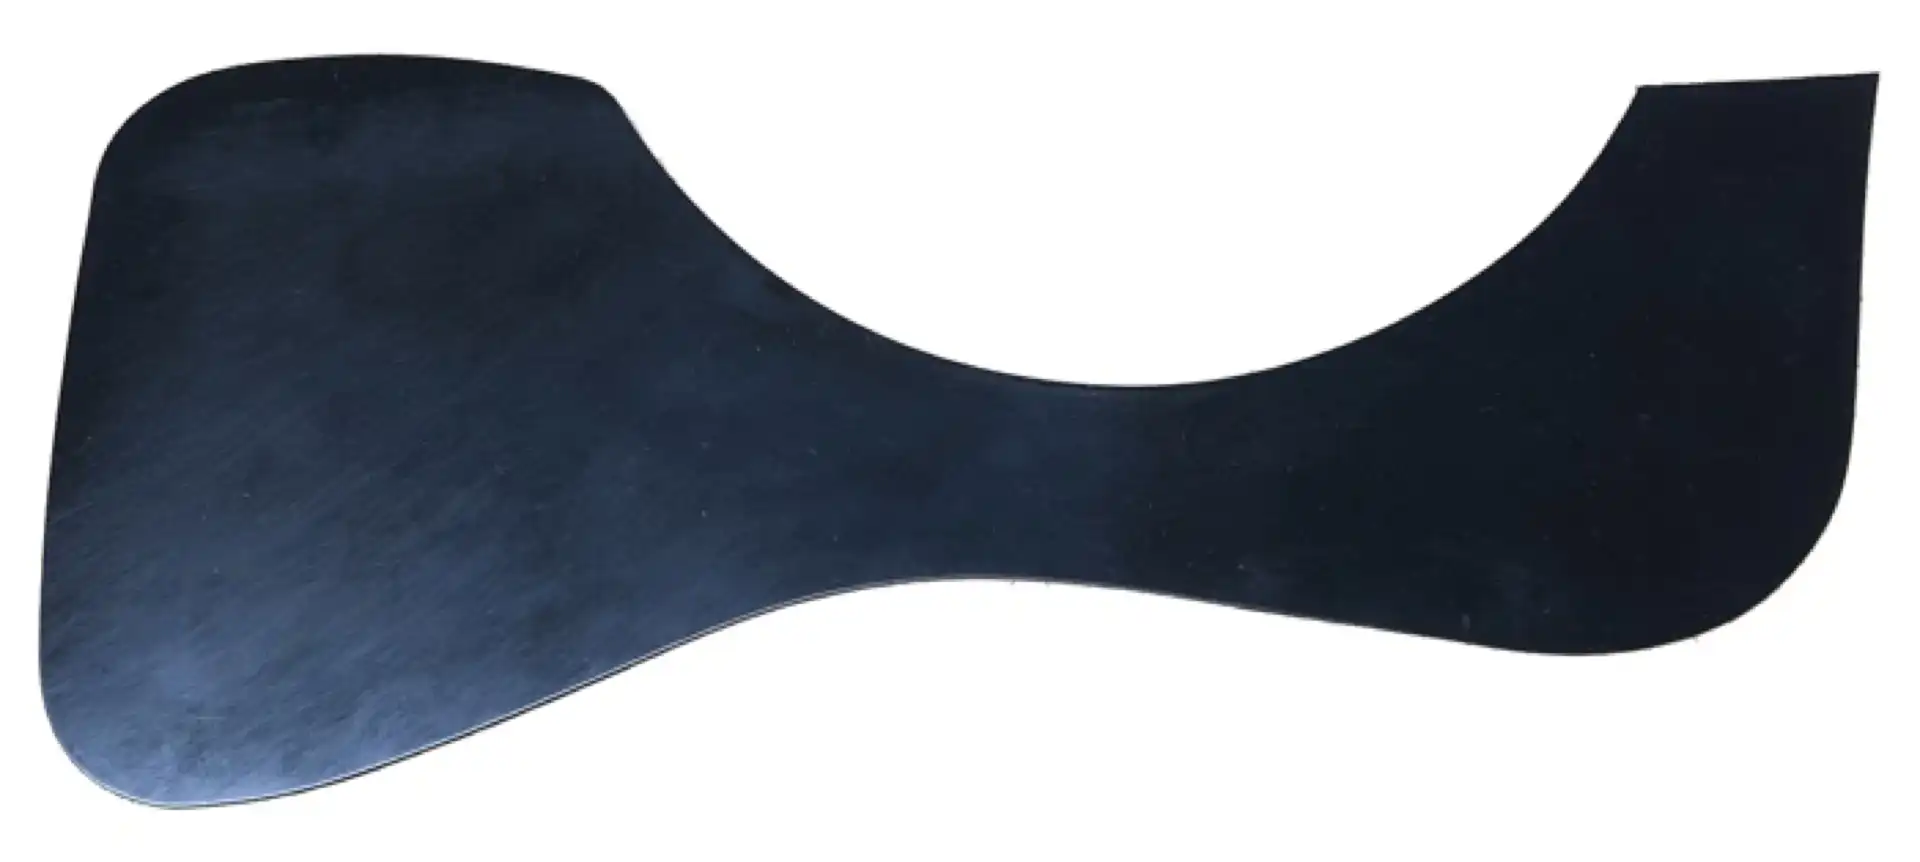
1999 Guild JF65-12 Pickguard
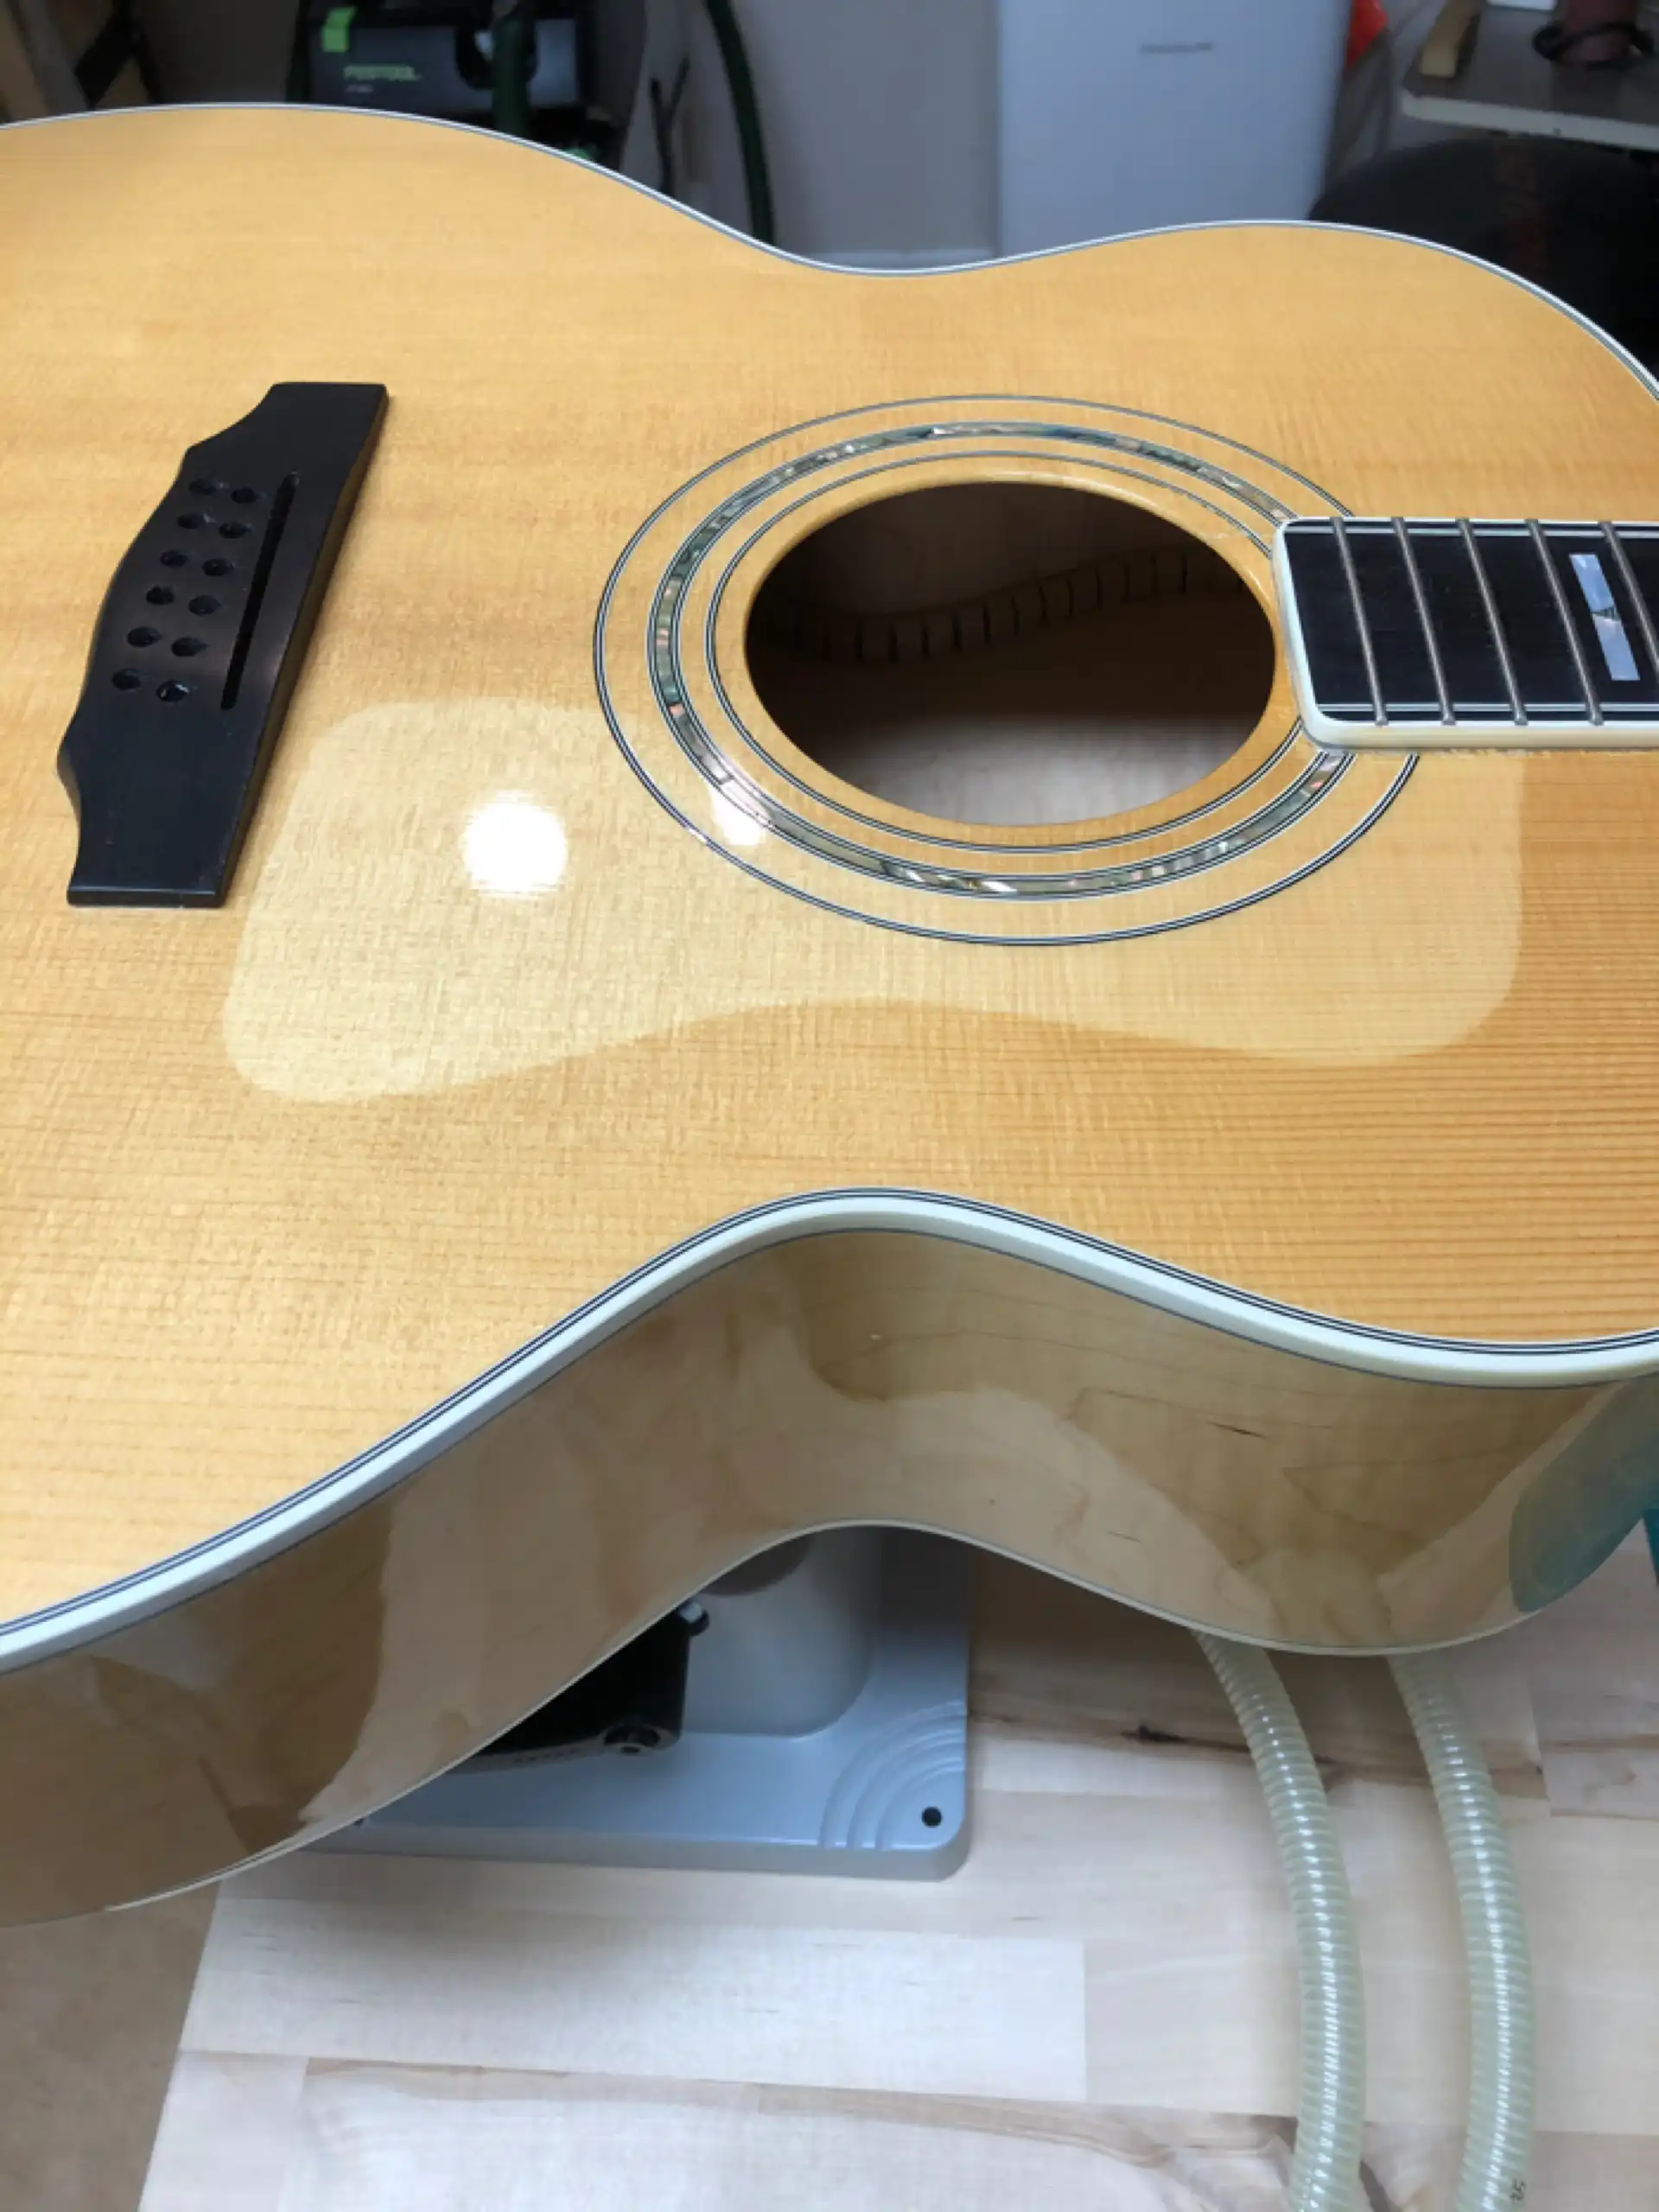
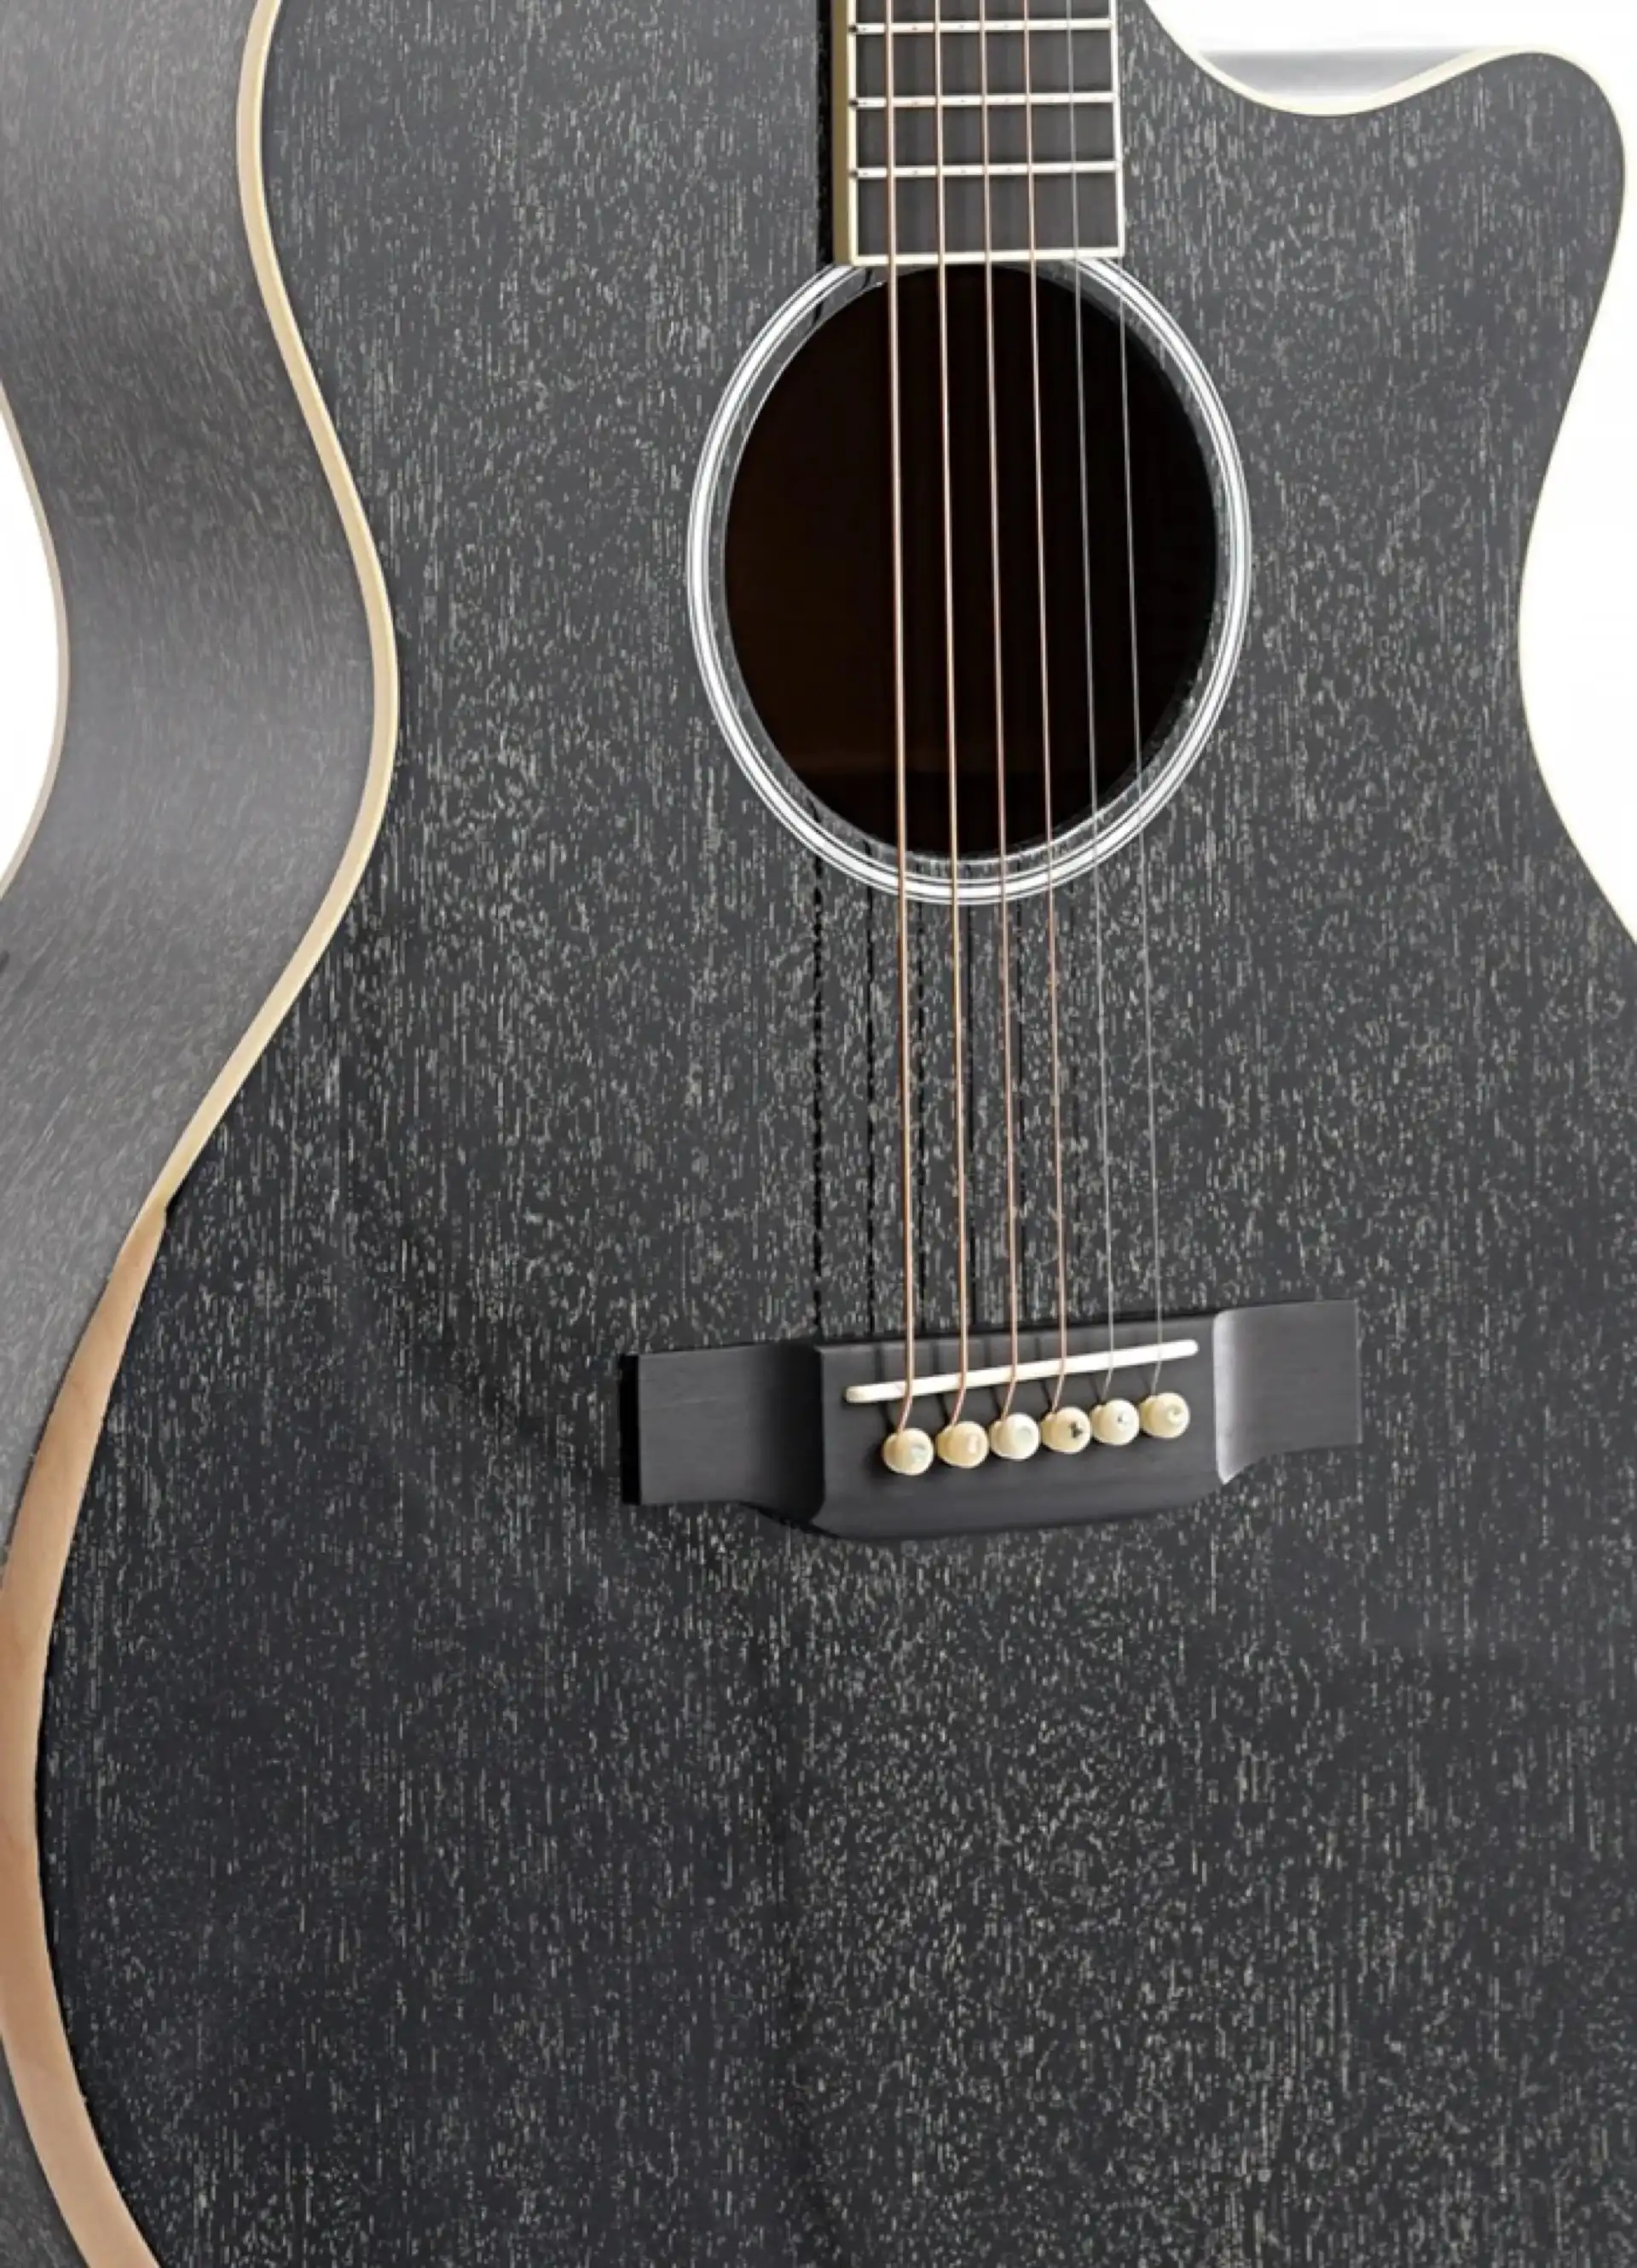
It was time to take off the bridge. This bridge had been re-glued at least once in its life so I knew a potential for surprise awaited me. But alas, there was no drama. The bridge came right off with a little heat and coaxing. Notice the wide glue setback used (the space all around the perimeter of the bridge imprint on the soundboard, the part that glue was never applied to). This wide border makes it easier for the person applying the bridge onto a finished guitar, but can also contribute to the bridge releasing under tension. In other words, this is a major contributor to the need to re-glue bridges that are pulling up.

Bridge Removed
Guild bridges can also vary a bit in appearance, size and shape from guitar to guitar, but maintain the overall look of the brand. This bridge is much thinner than I like to use, and I will most likely need to make a replacement. We'll see, once we get to that stage of the rebuild...

1999 Guild JF65-12 Bridge
Now that the fun stuff was behind me, I tackled the frets. Years ago I would touch each fretwire with a soldering iron prior to applying my nippers to the fret in order to soften any glue used and minimize chipping of the wood. These days it is all accomplished with hot air. This technique is especially beneficial when working so close to plastic binding, which a soldering iron can easily burn and/or melt. These frets came out with zero chip-out! That is a relief, as heavily chipped, pre-slotted fretboards are very time consuming to repair.
Frets Removed
Next I set out to remove the neck. In my experience, Guild dovetail mortises generally measure 1-5/16 inches at the top, outermost edge and widen to approximately 1-7/16 inches at the top back, which can be anywhere from 1/2 inch to 5/8 inch deep. Two holes are drilled in the fret slot nearest the body joint, following the dovetail angle.
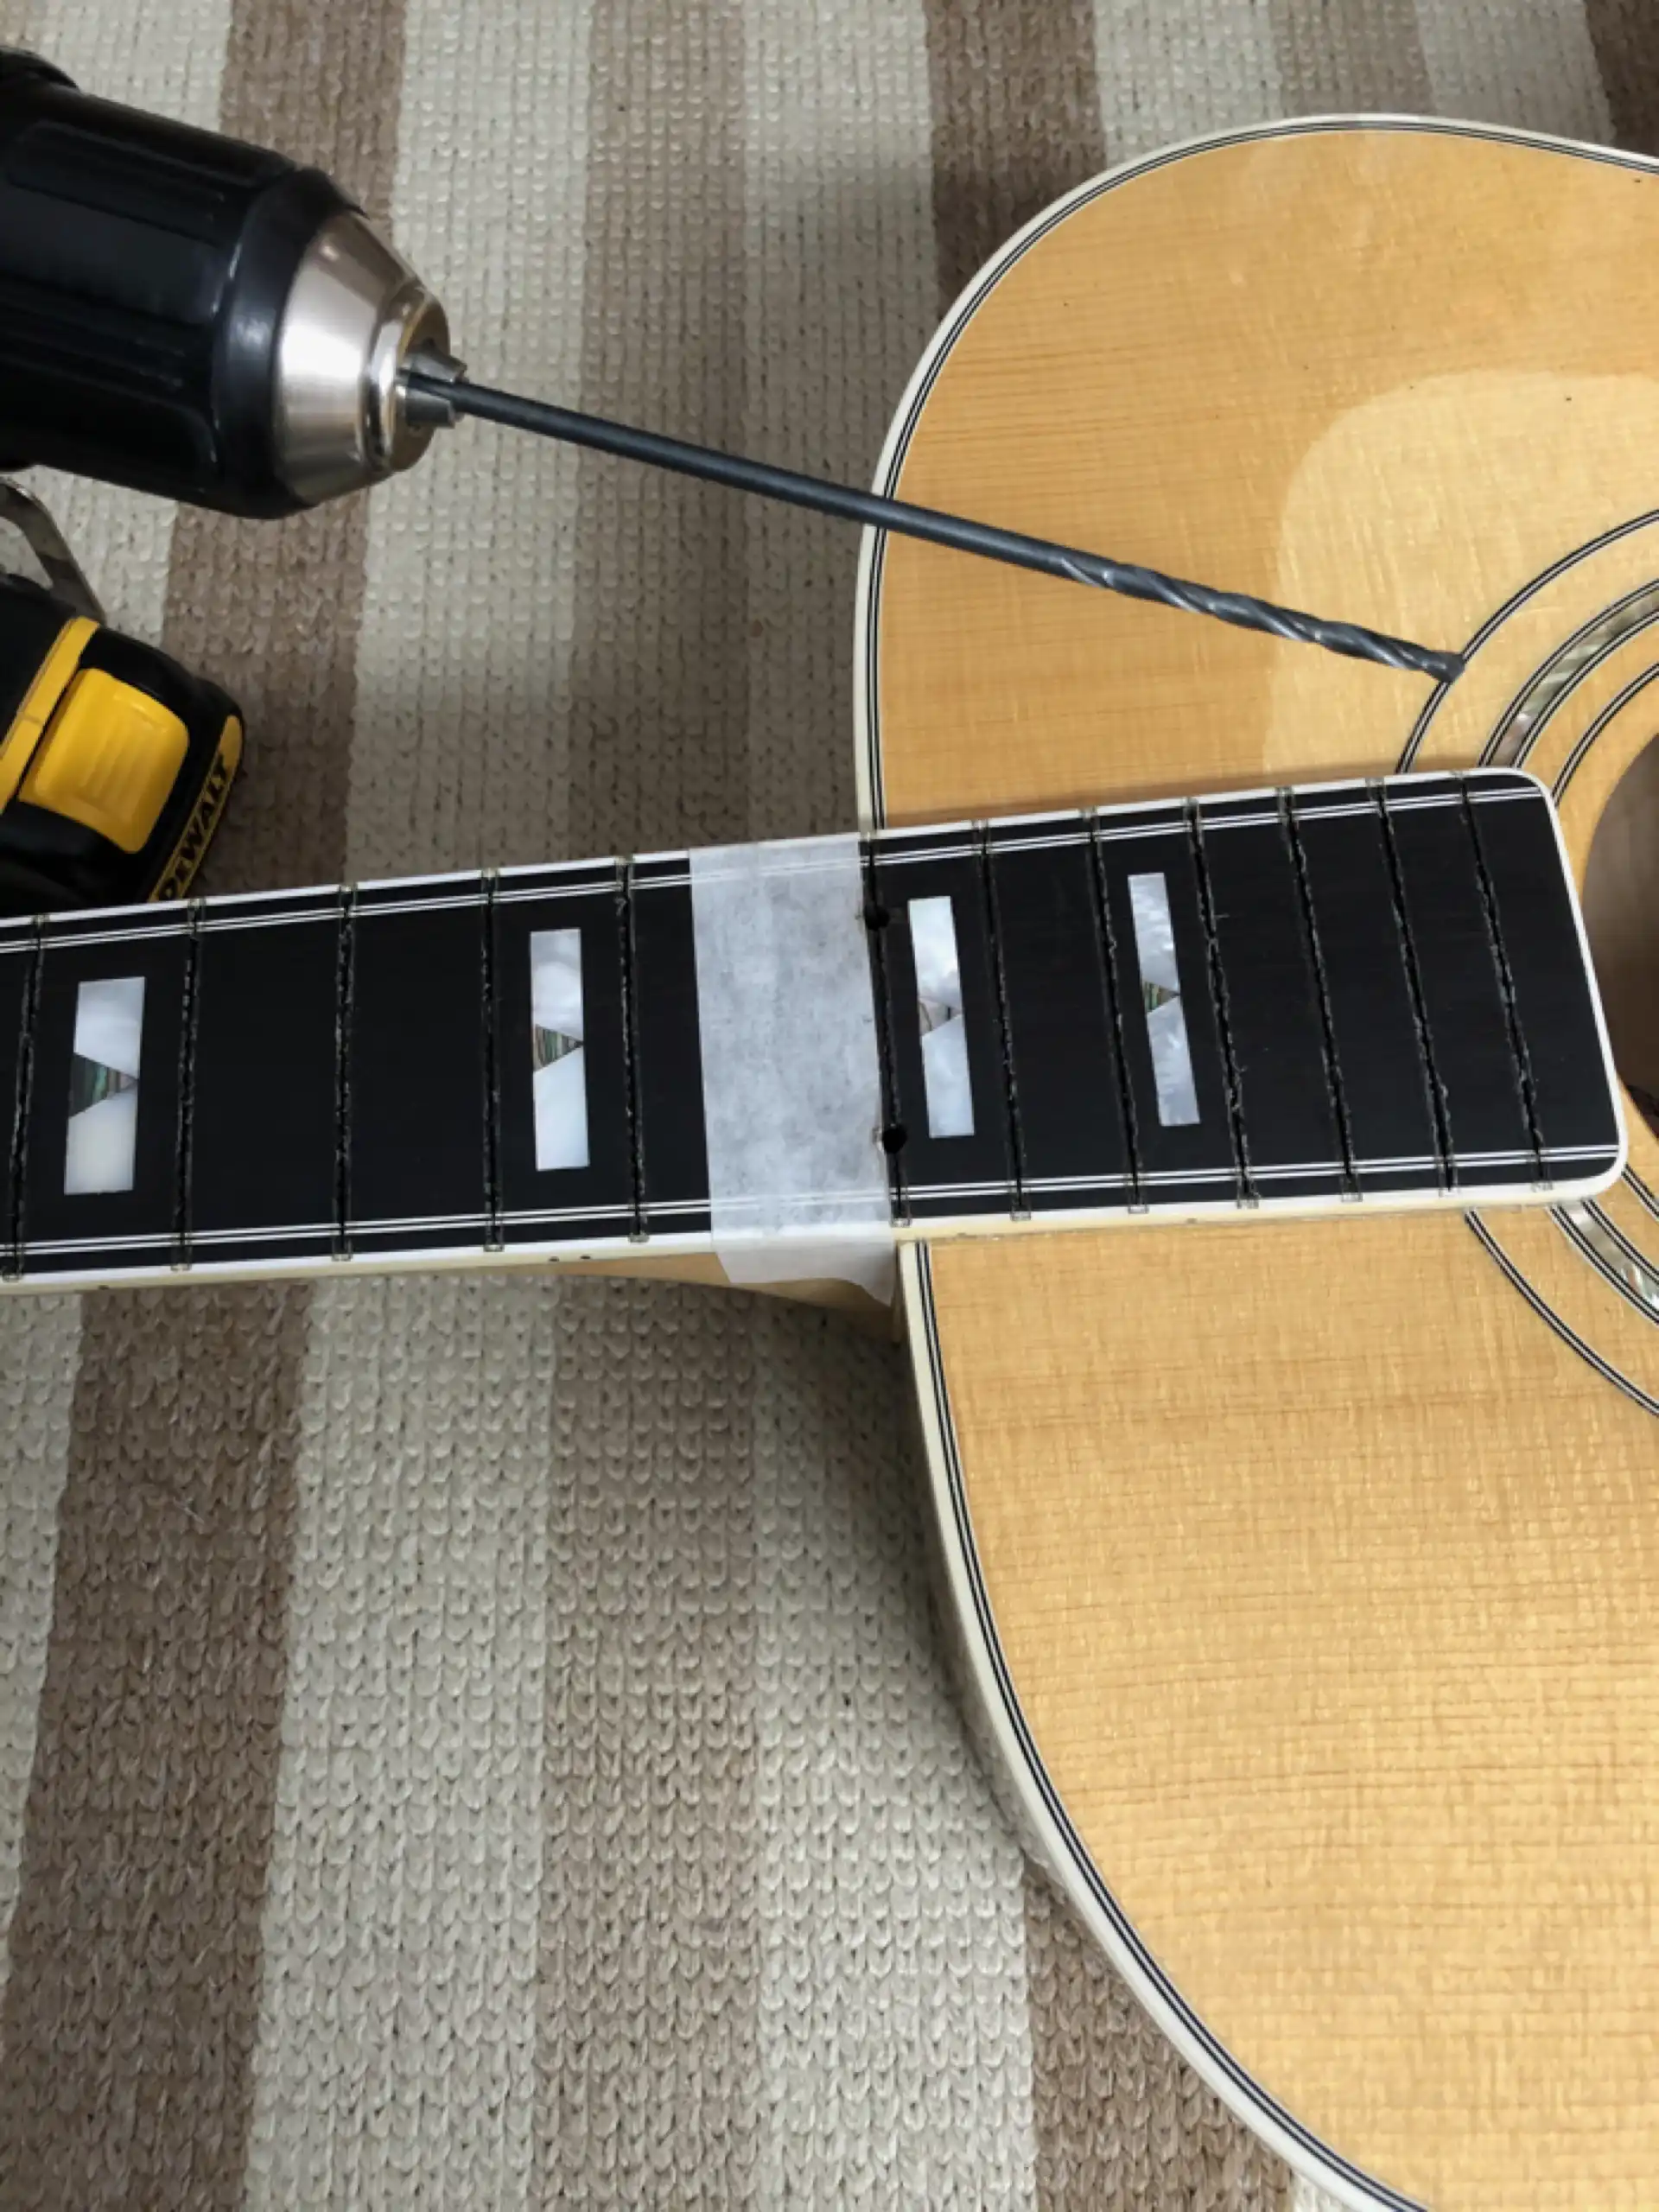
Drill Fretboard for Neck Removal
At this point I hit my first obstacle: the neck did not want to release. Having sailed these waters before, and suspecting a heavy application of glue, rather than risk any damage I opted to simply remove the fretboard to see what I was up against.
NOTE: Were I not rebuilding this instrument this would have been a different story. For those who do not have the option to go where I went, I do sympathize. These are the cases where extra effort must be applied, and extra care must be taken to avoid mishaps. Plenty of Guild necks have been removed in order to reset the neck geometry, as the neck block shifts in toward the soundhole. Many necks come off just fine, while others prove more difficult. This was going to be one of the more difficult ones to remove.
Prior to taking off the fretboard, I needed to address the fretboard binding. With the frets removed the fretboard binding was practically falling off, almost as though it had never been glued on. The plastic binding had shrunk away from the nut (lengthwise) on both sides and that began its multi-year demise as it broke free from its glue bond.
Fretboard Binding Falling Off
When I set out to “unbuild” this Guild, I had secretly hoped to not have to go quite this far.
Fretboard Binding Completely Removed
Now, with the binding out of the way, I softened the glue beneath the fretboard and lifted it off.
Fretboard Removed
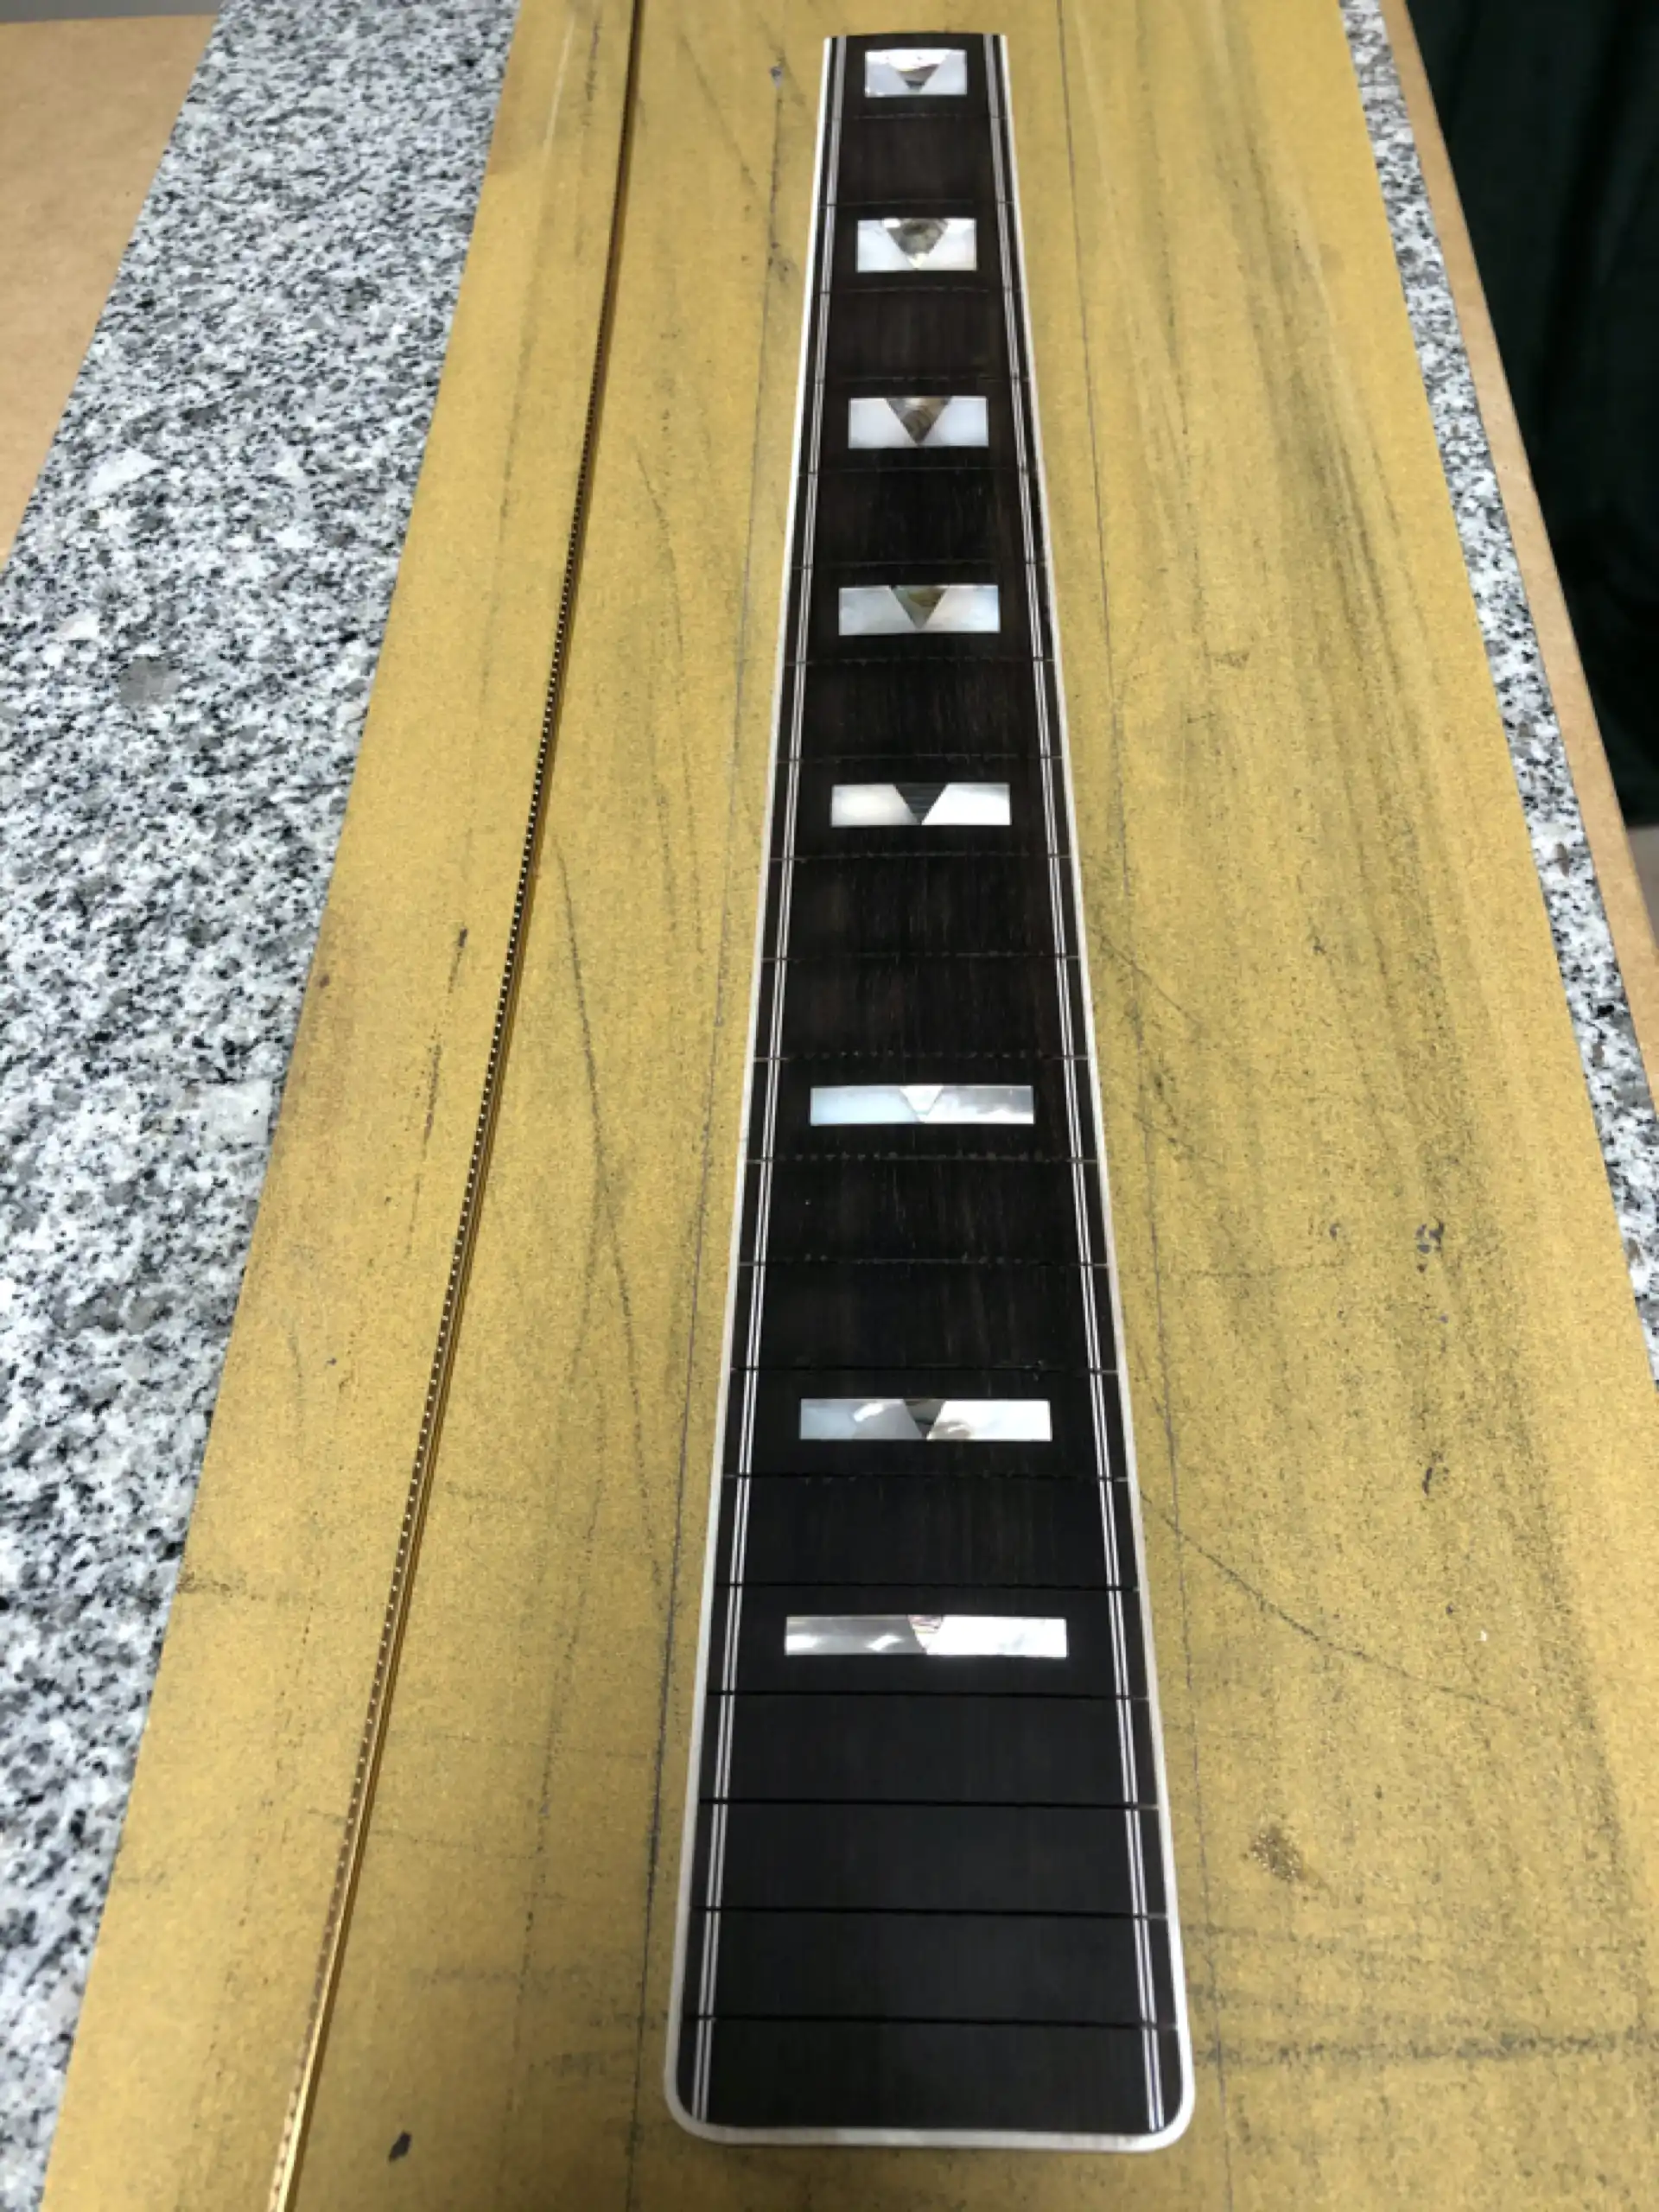
The fretboard was then clamped dead flat, to rest overnight. I had no intention of recreating all that Abalone and Mother of Pearl inlay, so this fretboard was treated with care.
1999 Guild JF65-12 Fretboard
The ideal dovetail joint has minimal space between the face of the mortise (on the neck block) and the face of the tenon (on the neck), and fits tightly along the sides. A quality dovetail joint requires very little glue to hold it in place. Less space between mortise and tenon translates to less cavernous gap that (should not, but) can be flooded with glue.
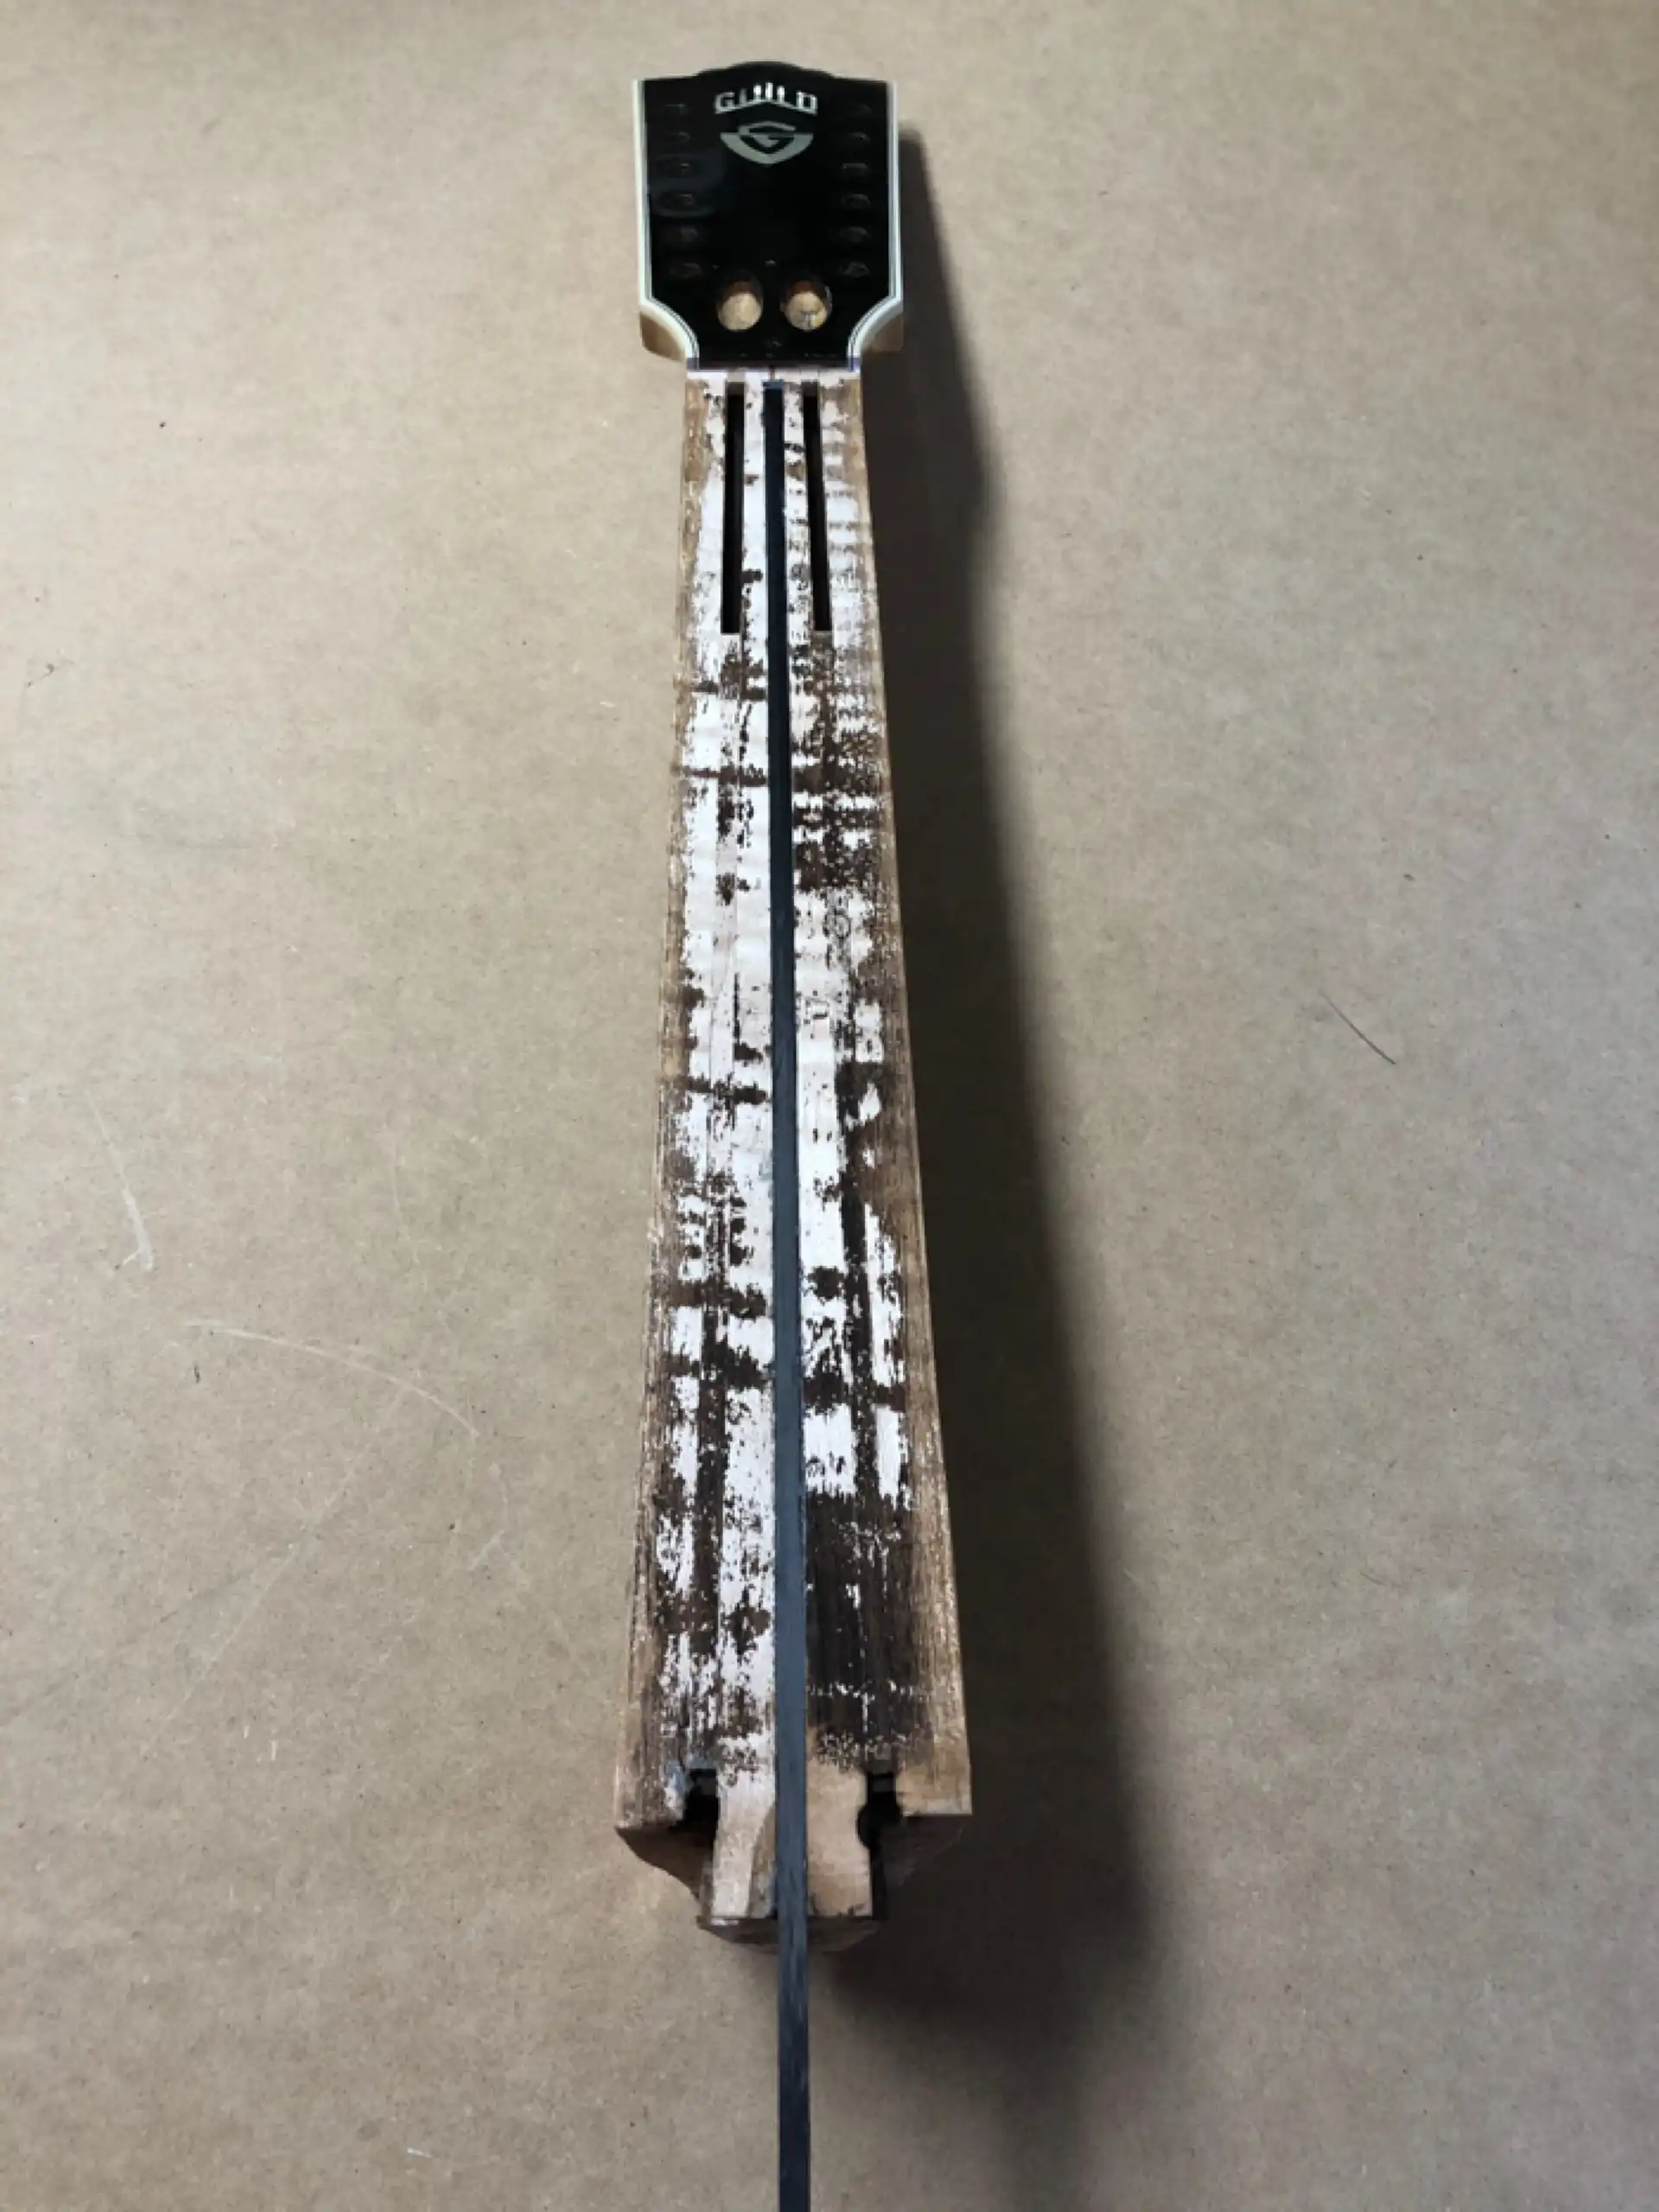
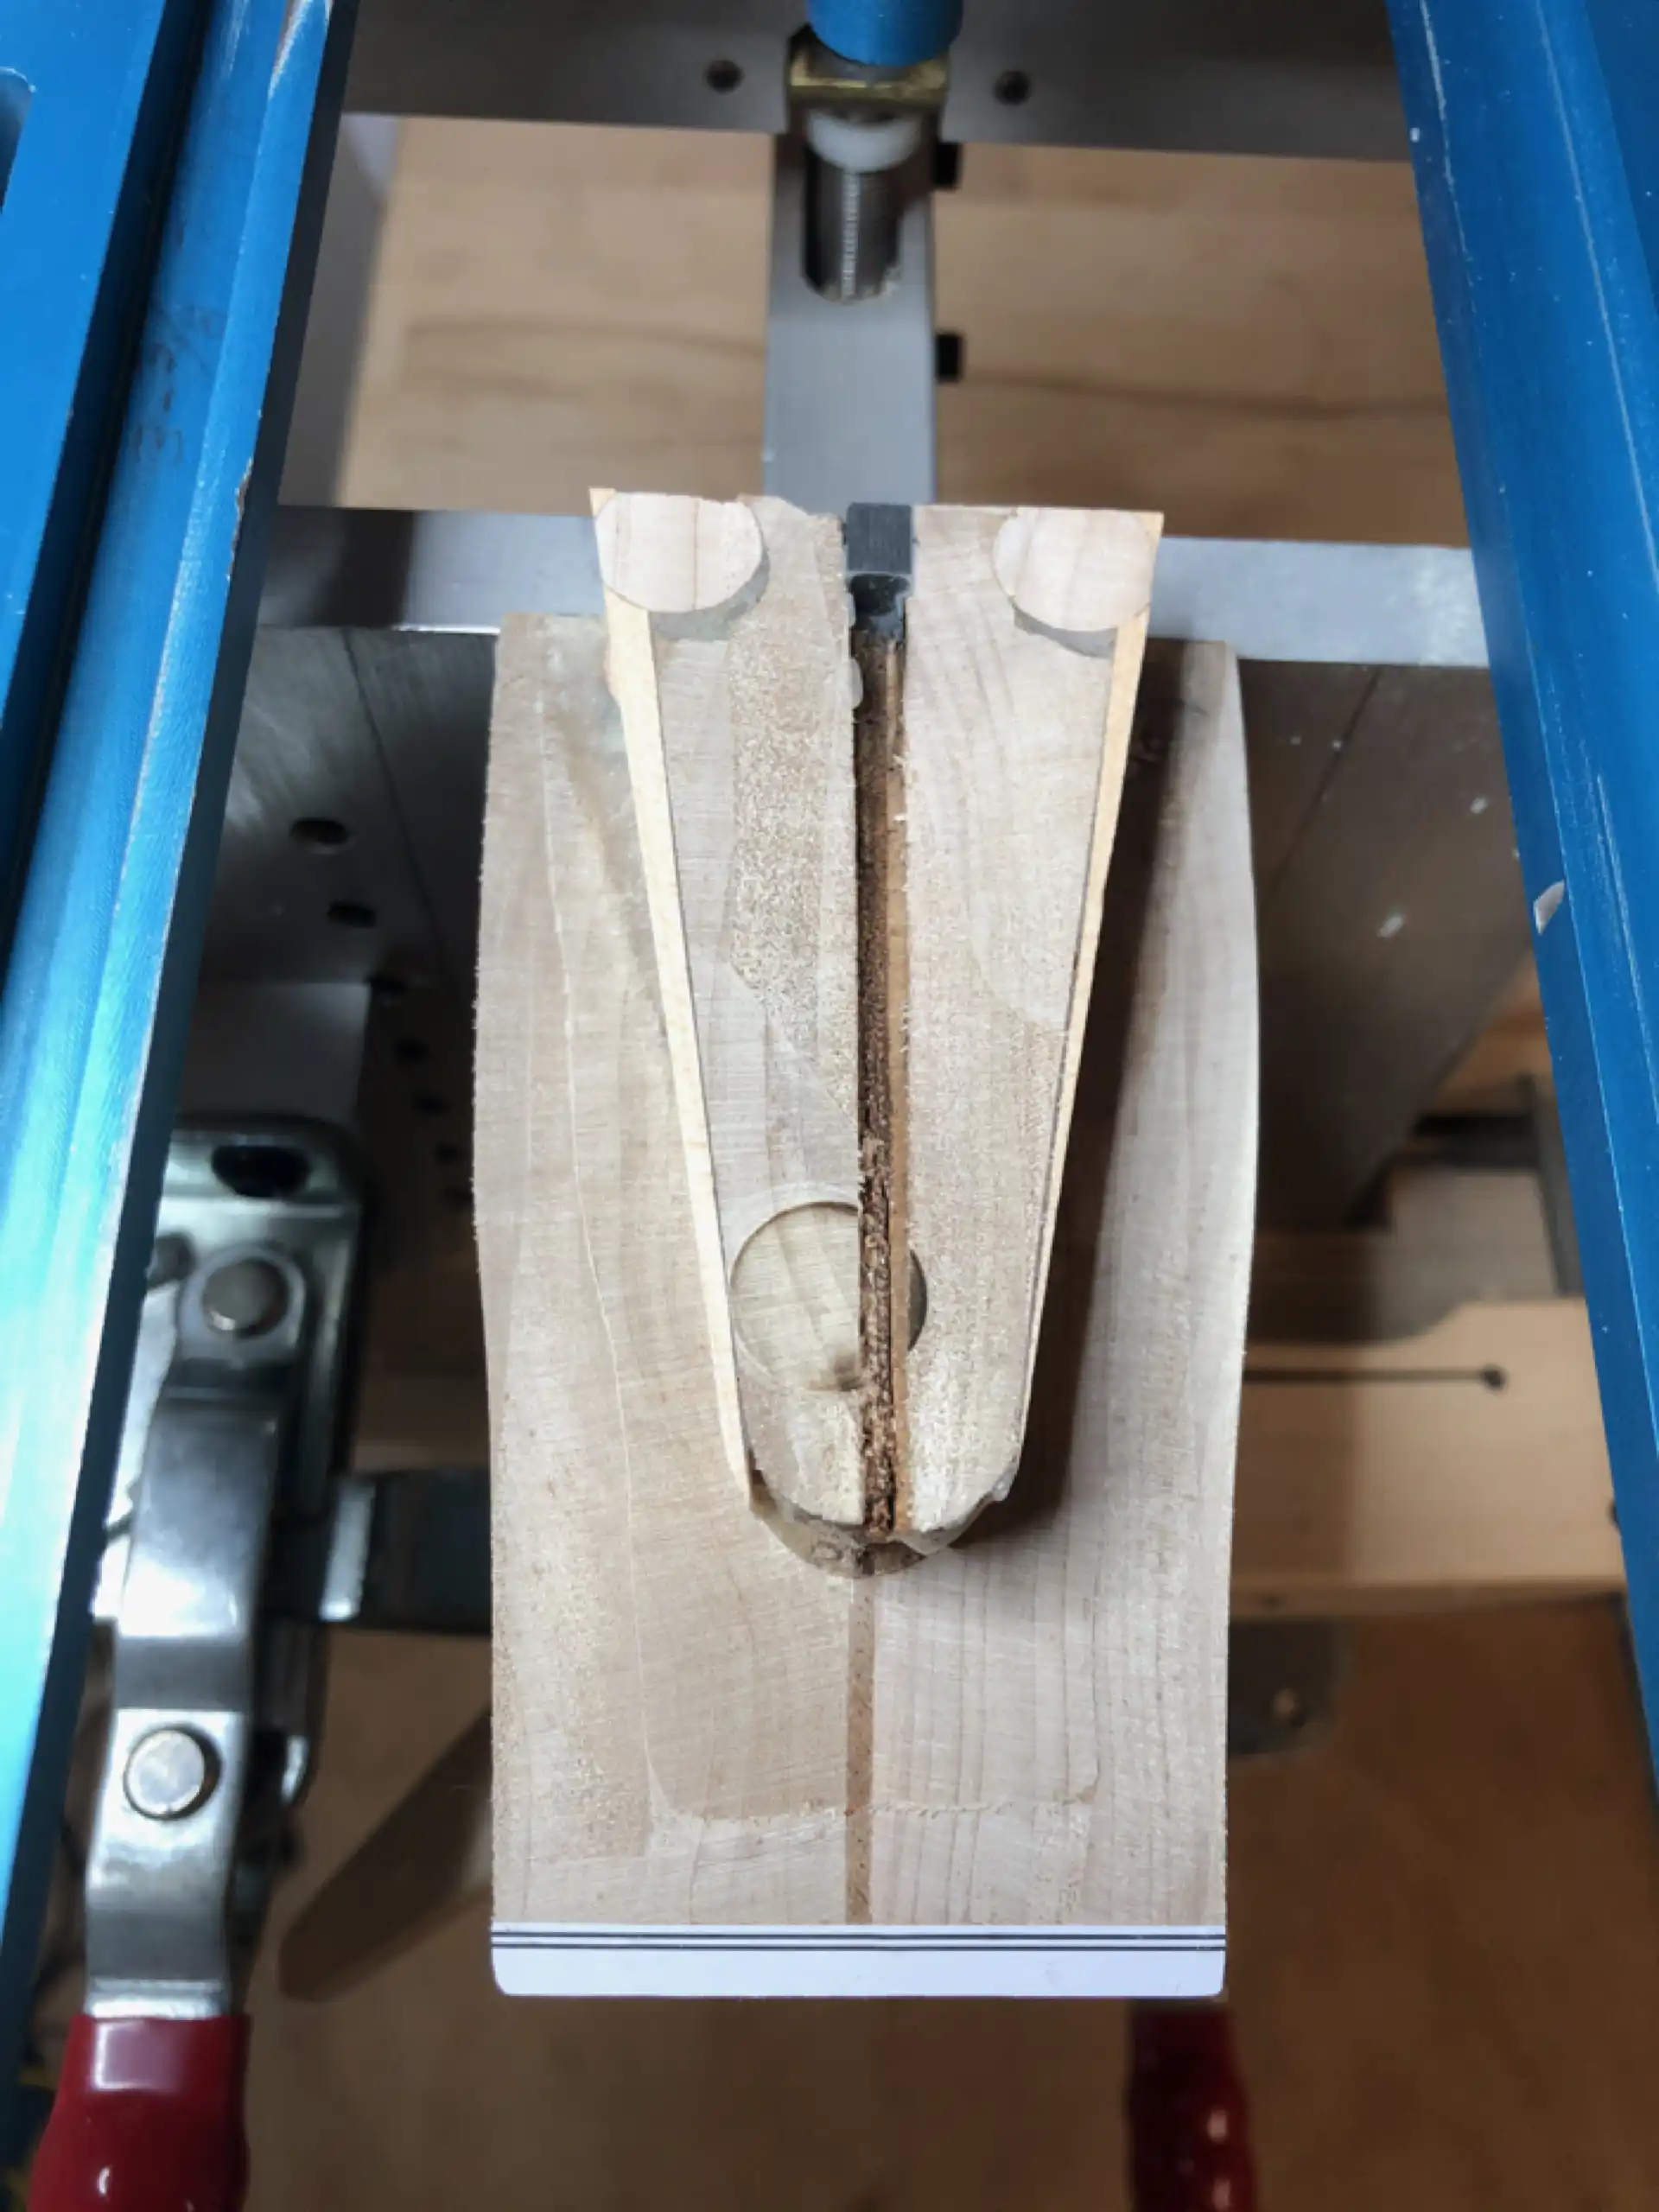
Complicating matters, this is an older Guild 12 string that features two (2) compression rods in place of today's more common lone dual-action truss rod. These rods were installed into twin slots running the length of the neck and secured at one end by drilling two (2) 1/2″ holes into the end of the tenon to receive the flat, fixed end of each rod. This results in removing a rather large amount of tenon wood, making way for an even larger potential glue reservoir.
Neck Tenon
As I mentioned earlier, this was one of those occasional Guild guitars that you hear about, the one with more glue in the dovetail joint than would likely be necessary to completely build an additional guitar!
Glue in the Neck Joint
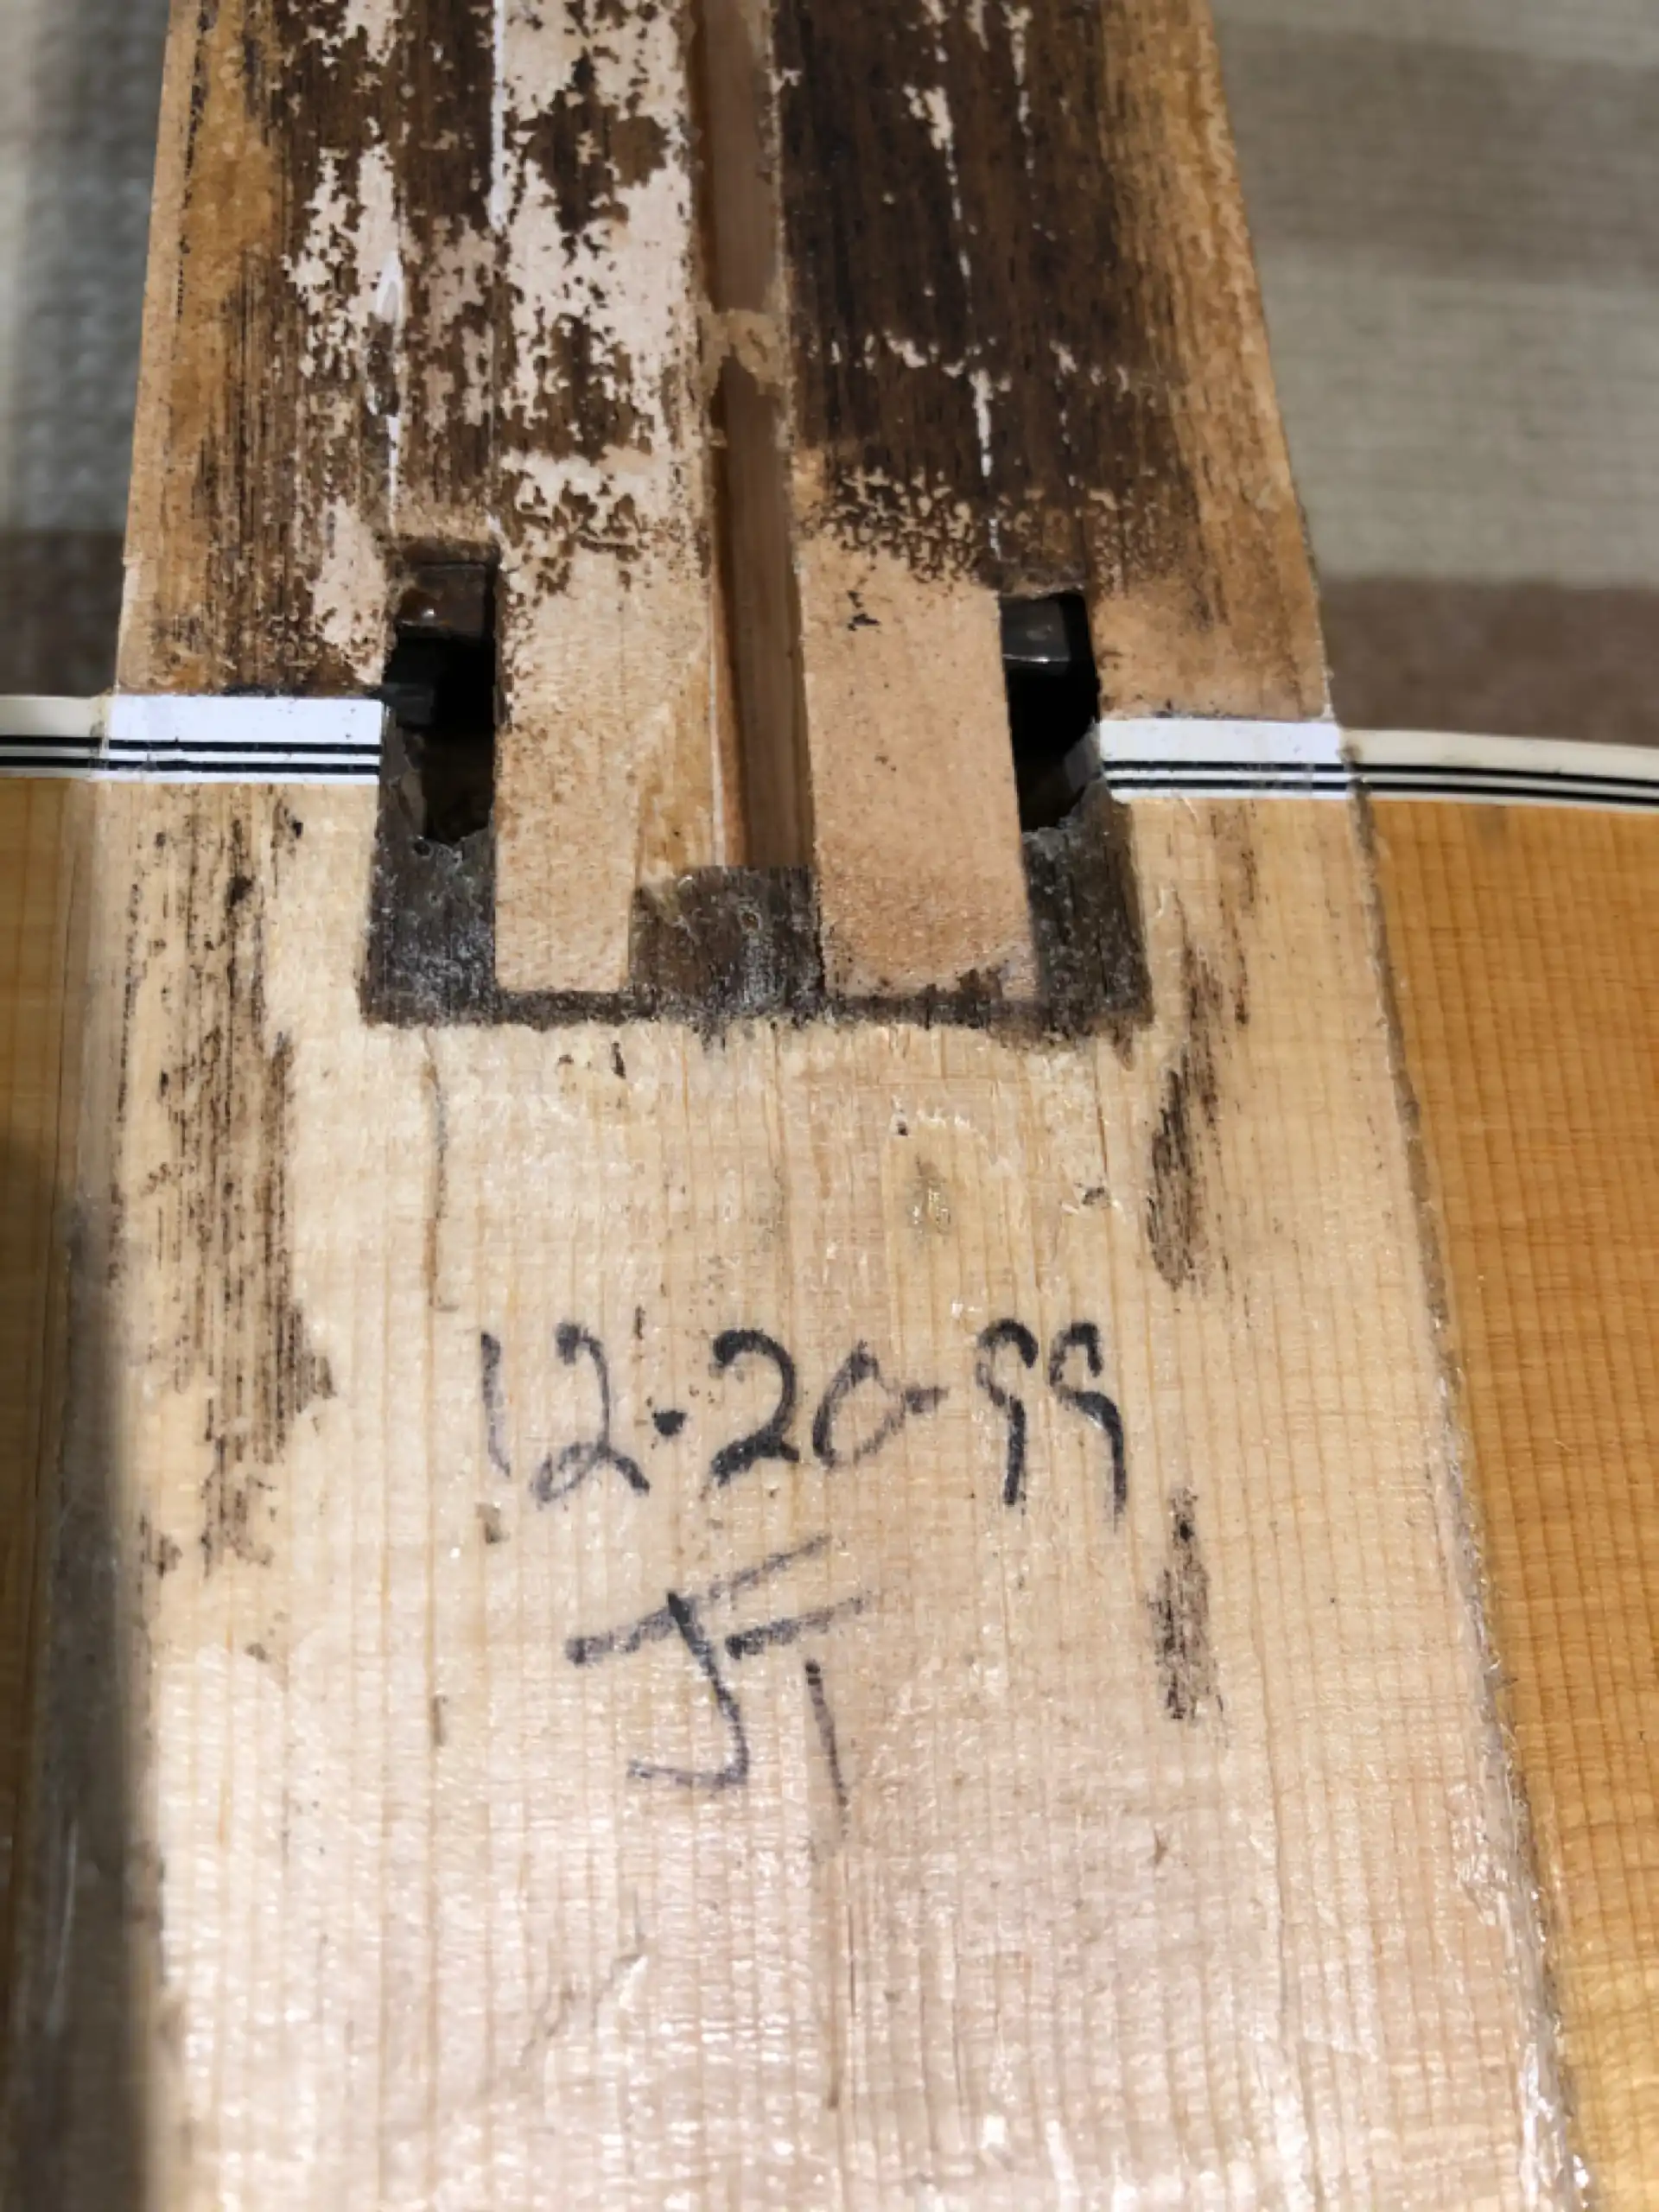
Fun Fact: That guitar neck was signed back in ‘99 by “JT”, Jeffrey Tougas, who was a neck fitter at Guild's Westerly location from 1986 to 2001.
When you get the measurements right, and the angles right, the holes drilled through the fretboard go right down into the dovetail/mortise joint. Perfect aim! WooHoo!
Holes in the Neck Joint
Because I was able to remove the fretboard, I drilled a hole in the cavity between the tenon on the neck and the mortise of the neck block. I already had two angled holes drilled, one along each side of the dovetail. Now, with three holes in total, this neck stood no chance of continued resistance. I injected a couple of drops of water down into each hole then inserted my Stew-Mac HeatStick. Alternating between the three holes, I was able to take the neck off and avoid any water or steam damage, as well as any unsightly dripping or pouring glue all over the inside of the guitar.

Neck Removed
With the fretboard removed from the neck, and the neck removed from the instrument, I first cleaned the glue out of the mortise in the body and off of the tenon of the neck. This neck is very sloppy in the joint, and clearly required a copious amount of glue to hold it in place. This factor alone easily accounts for the challenge I encountered when trying to remove the neck. The extra glue I cleaned out of the two (2) 1/2″ holes in the tenon compounded the difficulty. This dovetail joint will be fully addressed later, when it comes time to fit the neck back to the body. At this stage I loosened the twin compression rod nuts and clamped the neck flat on a bench.
Neck Clamped Flat
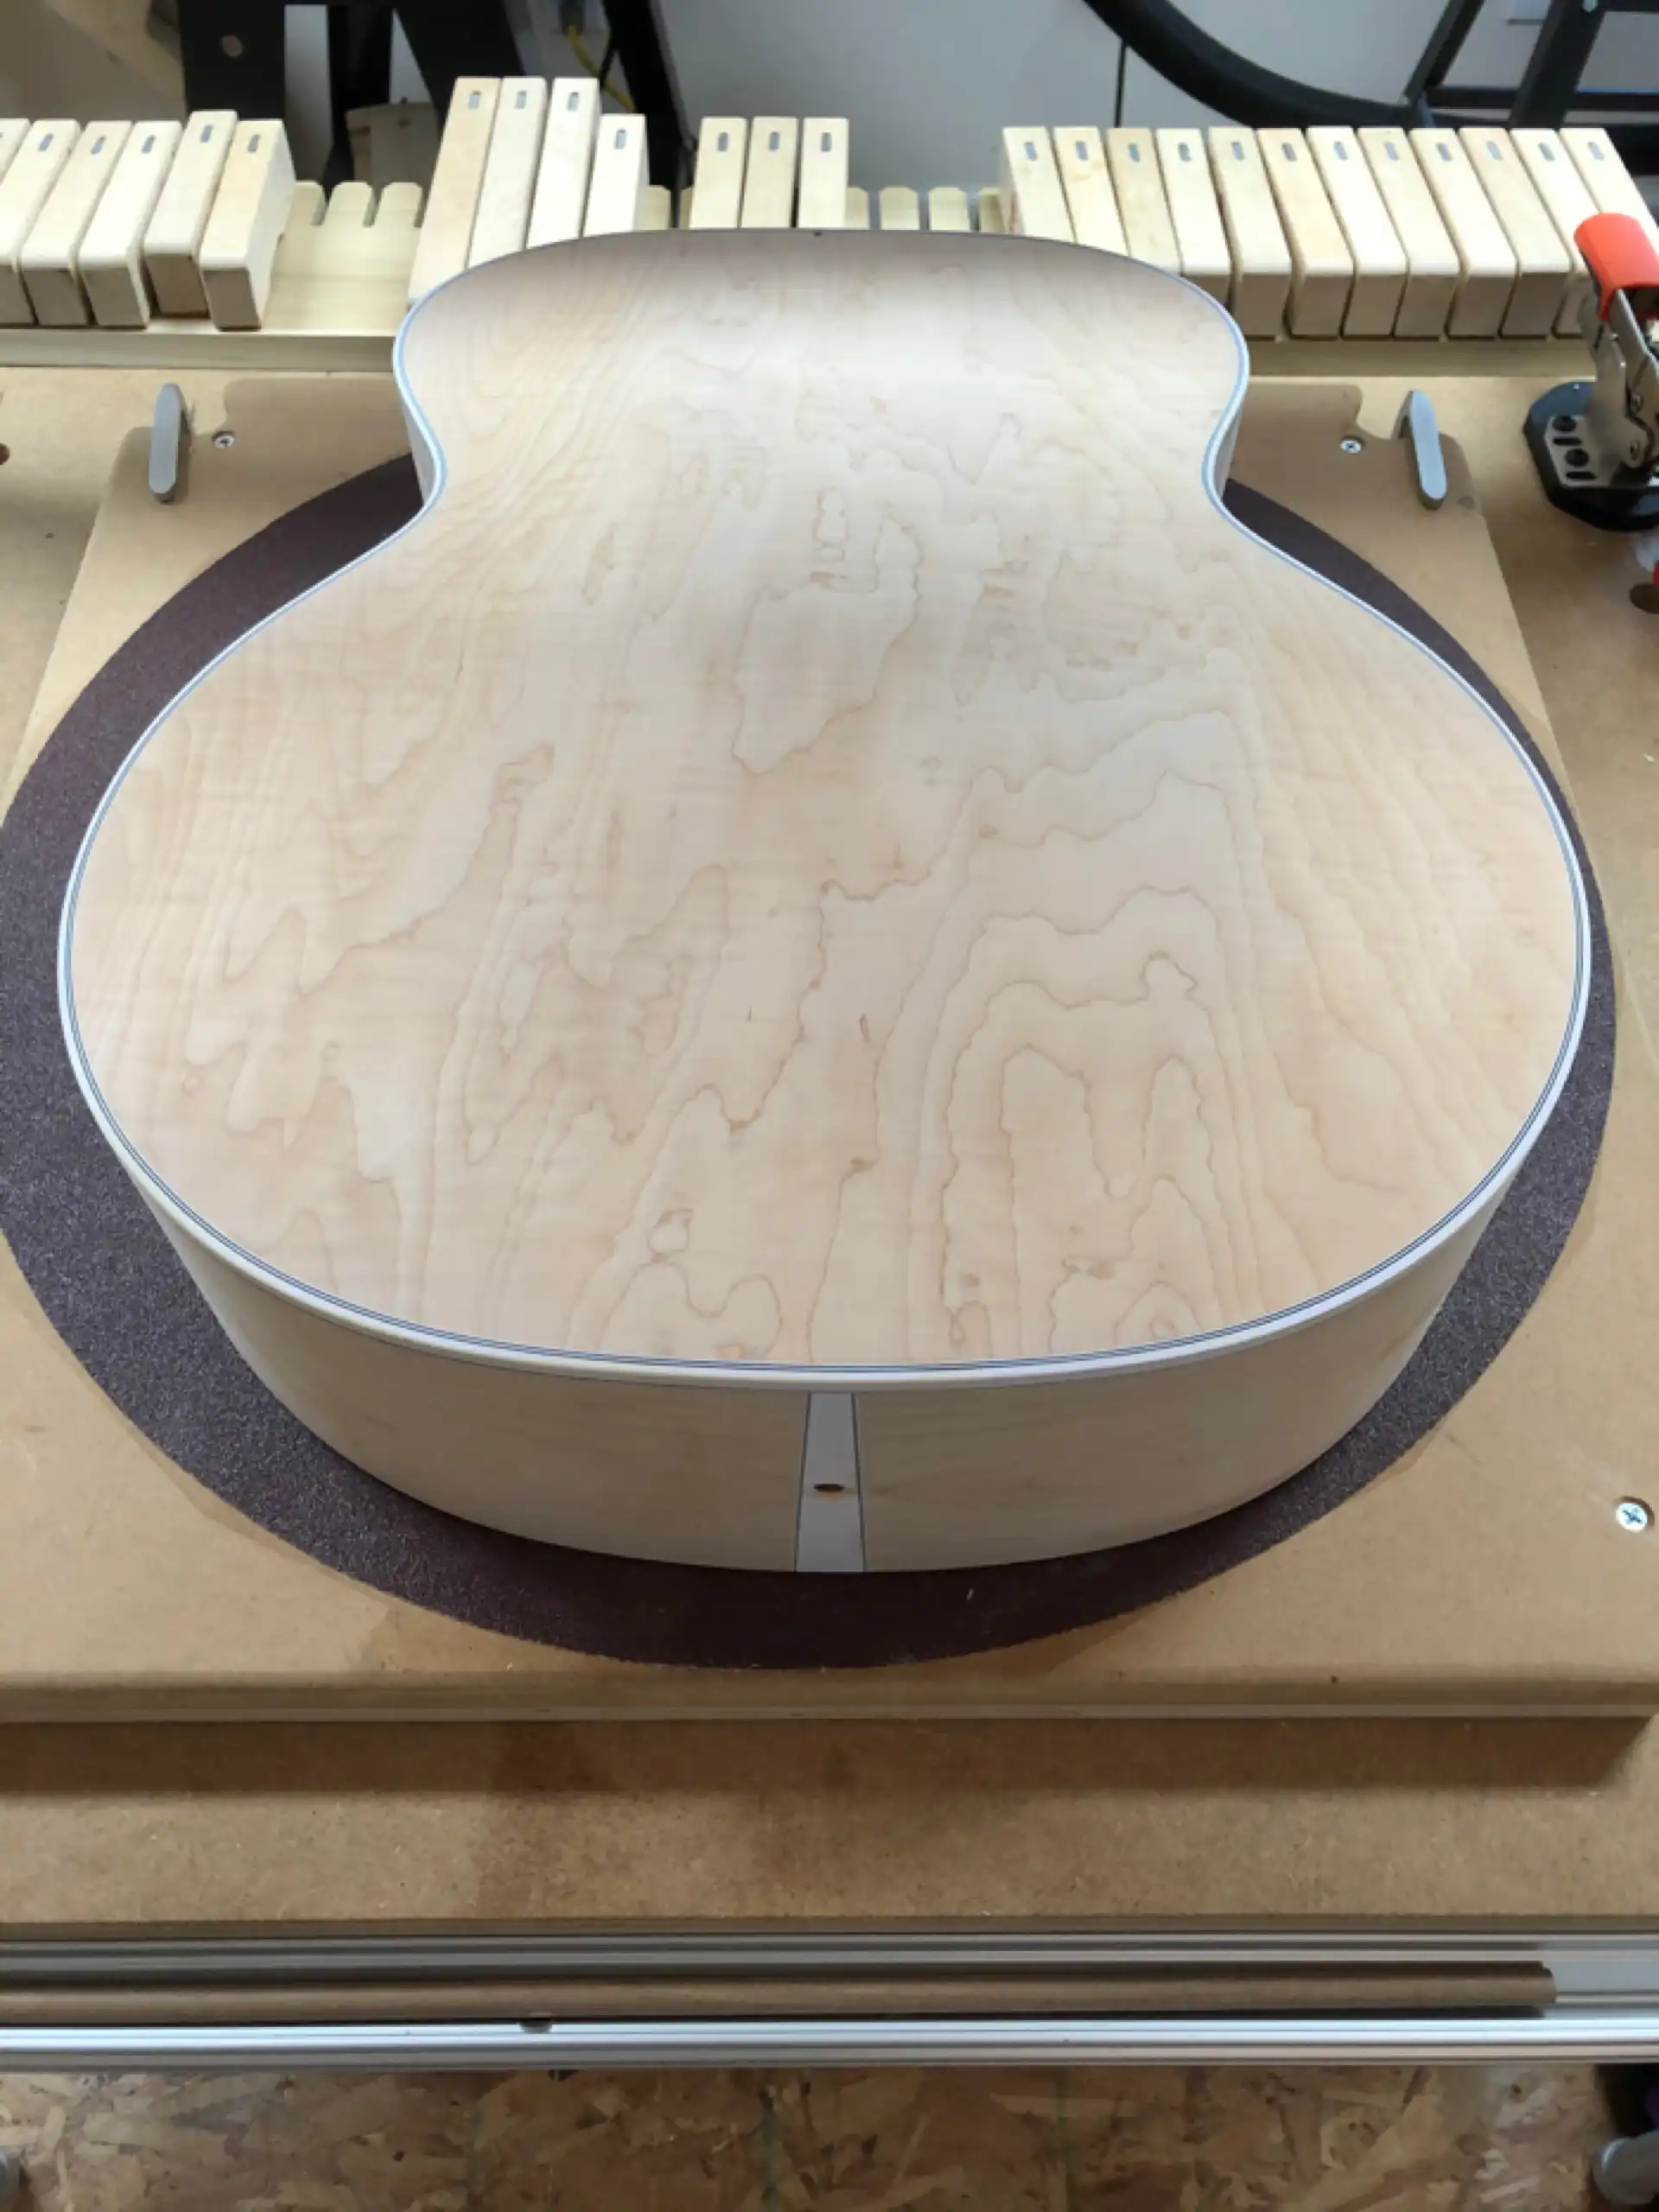
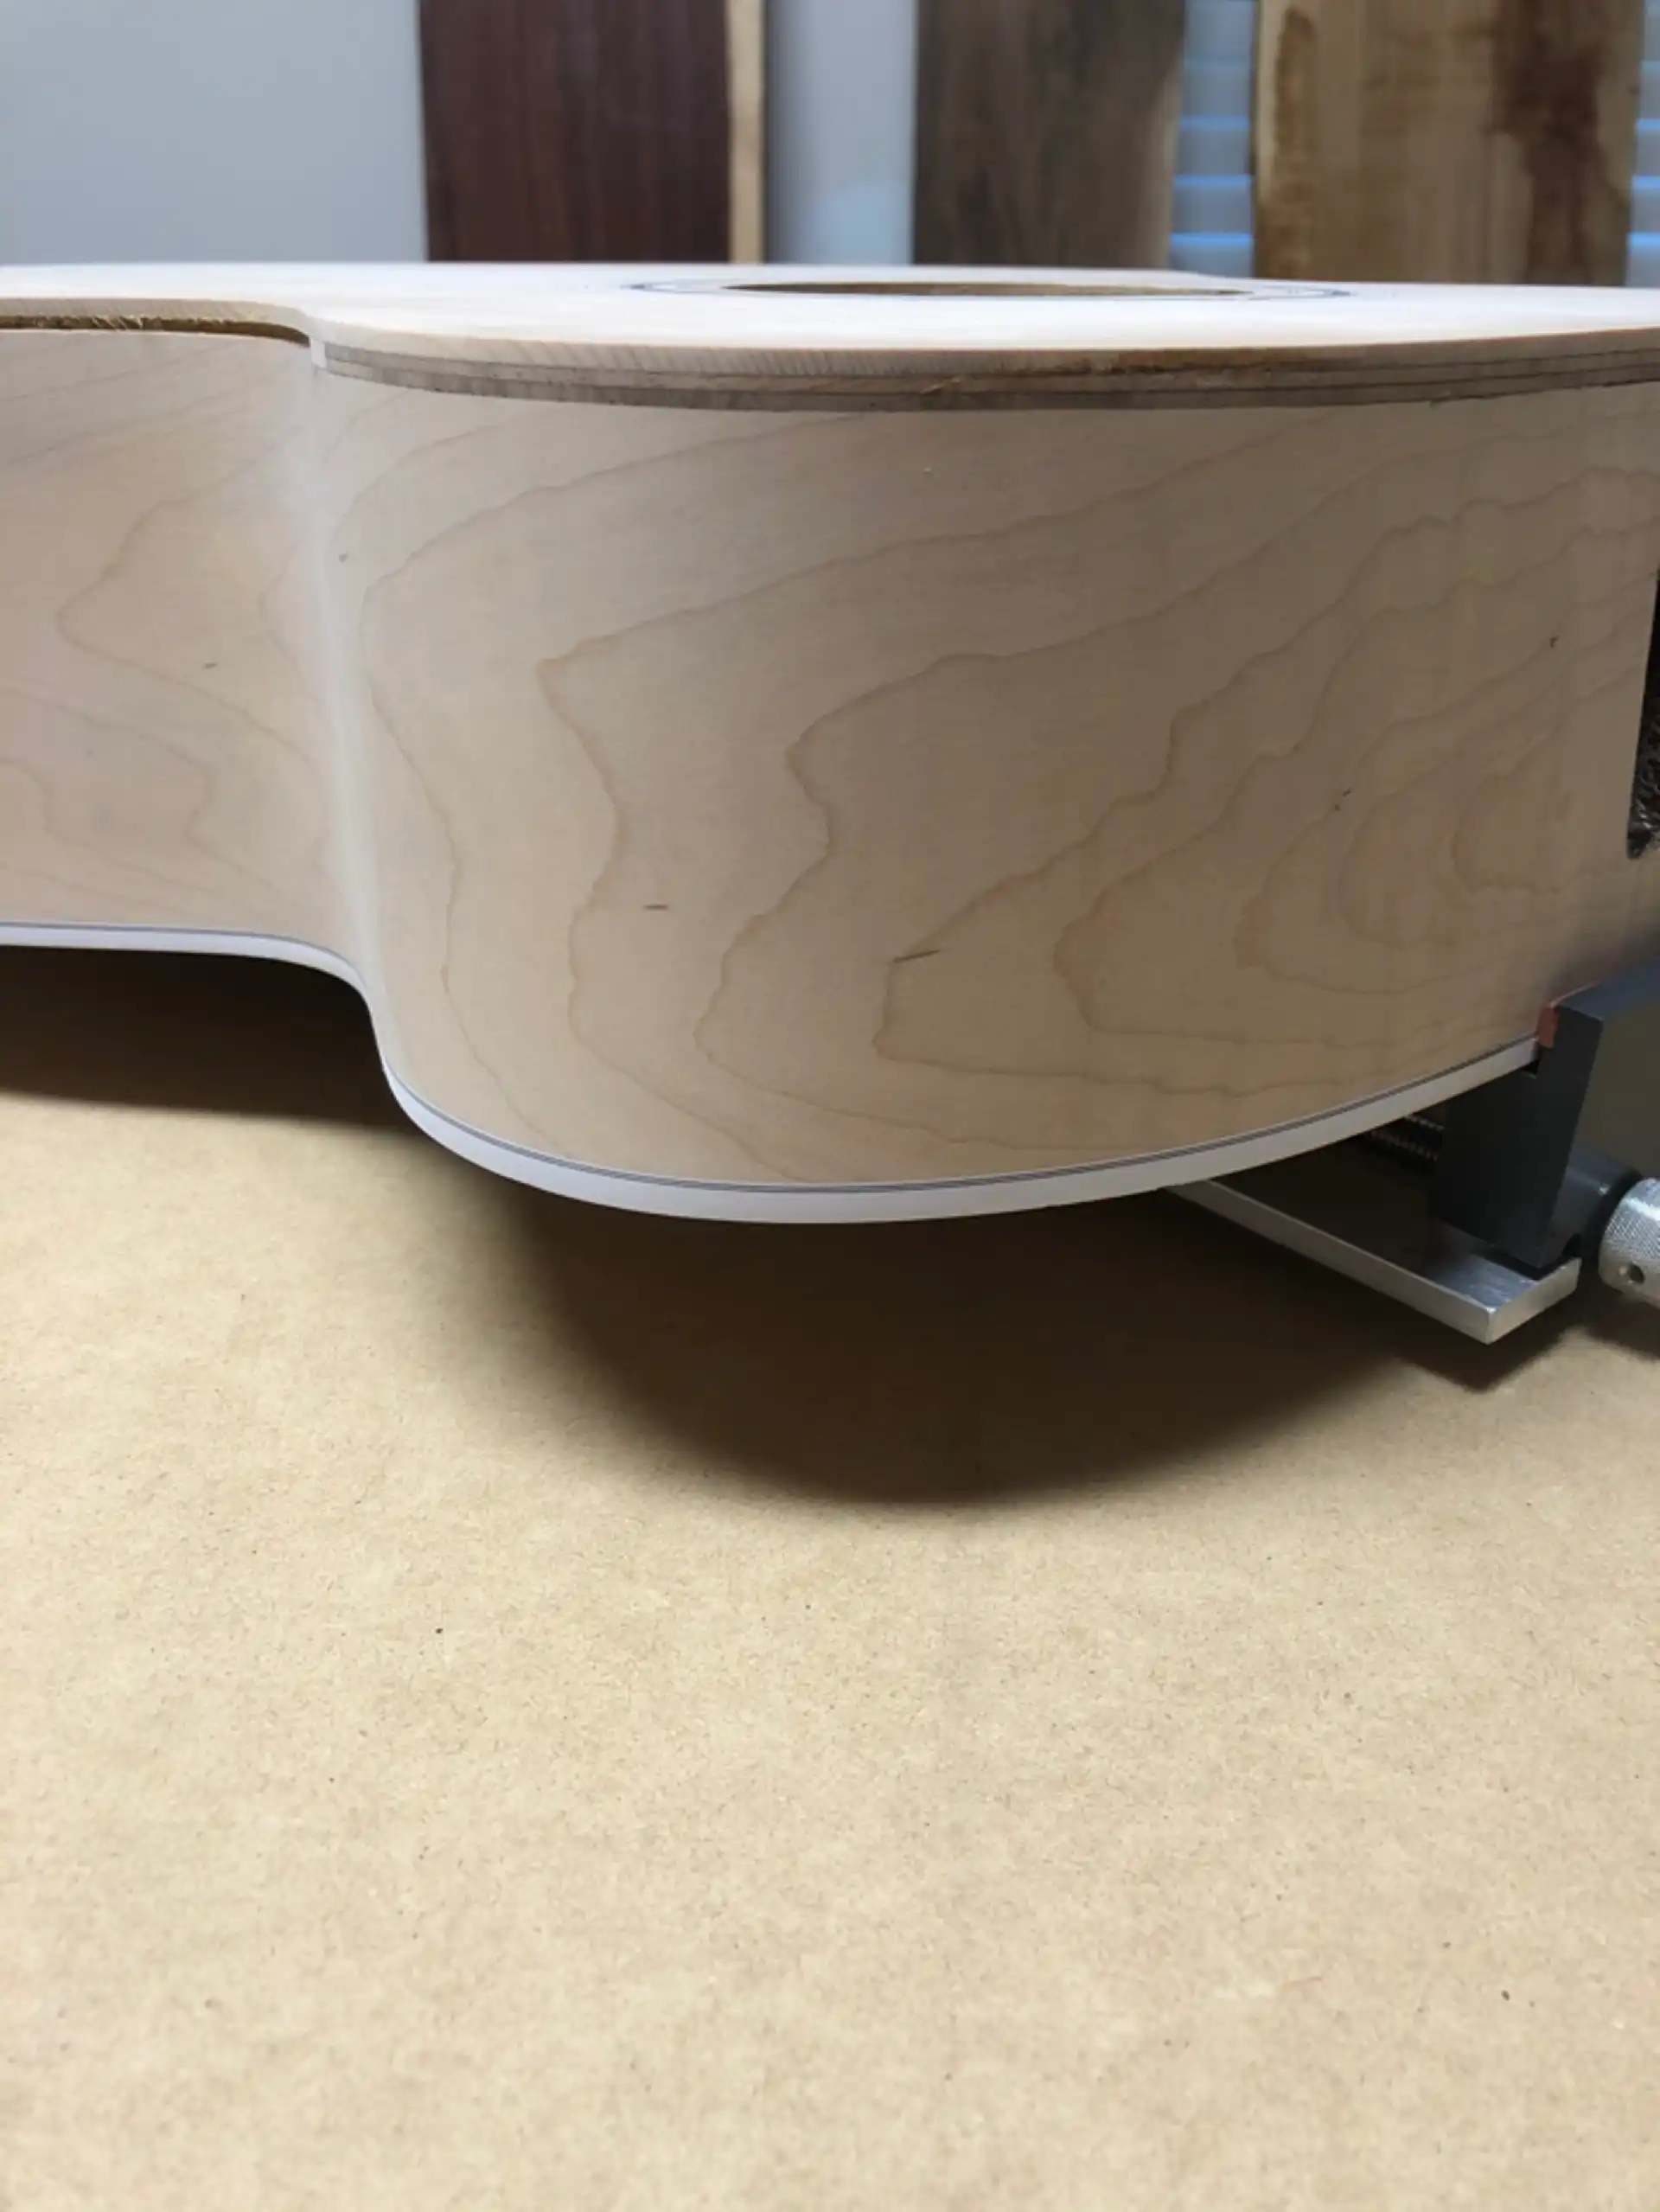
Next up was the removal of the soundboard. There are several ways to take a soundboard off a guitar. I had a router bit made years ago by the awesome folks at Whiteside, here in the Carolinas where I live. It is an extremely thin carbide wheel cutter with an offset bearing that lets me run a router around the edge of the soundboard and it cuts through the binding and kerfing. A small saw is then used to free the top from the heel/end and neck blocks, and/or where the braces are inset into the sides. In the interest of time I will often rout through a soundboard, tracing the perimeter and around the blocks, just to get the top off. But I wanted to save this top, especially the area above the neck block, as it provides a really good visual example of the notorious neck block shift / soundhboard shear. I used heat and my palette knife and the soundboard was successfully removed, intact.
This particular Guild was constructed with rift-sawn solid Maple sides and a laminated Maple arched back along with a three-piece Maple-Mahogany-Maple neck. This image as seen from the tail block reveals the wood used for the sides.
Solid Maple Sides
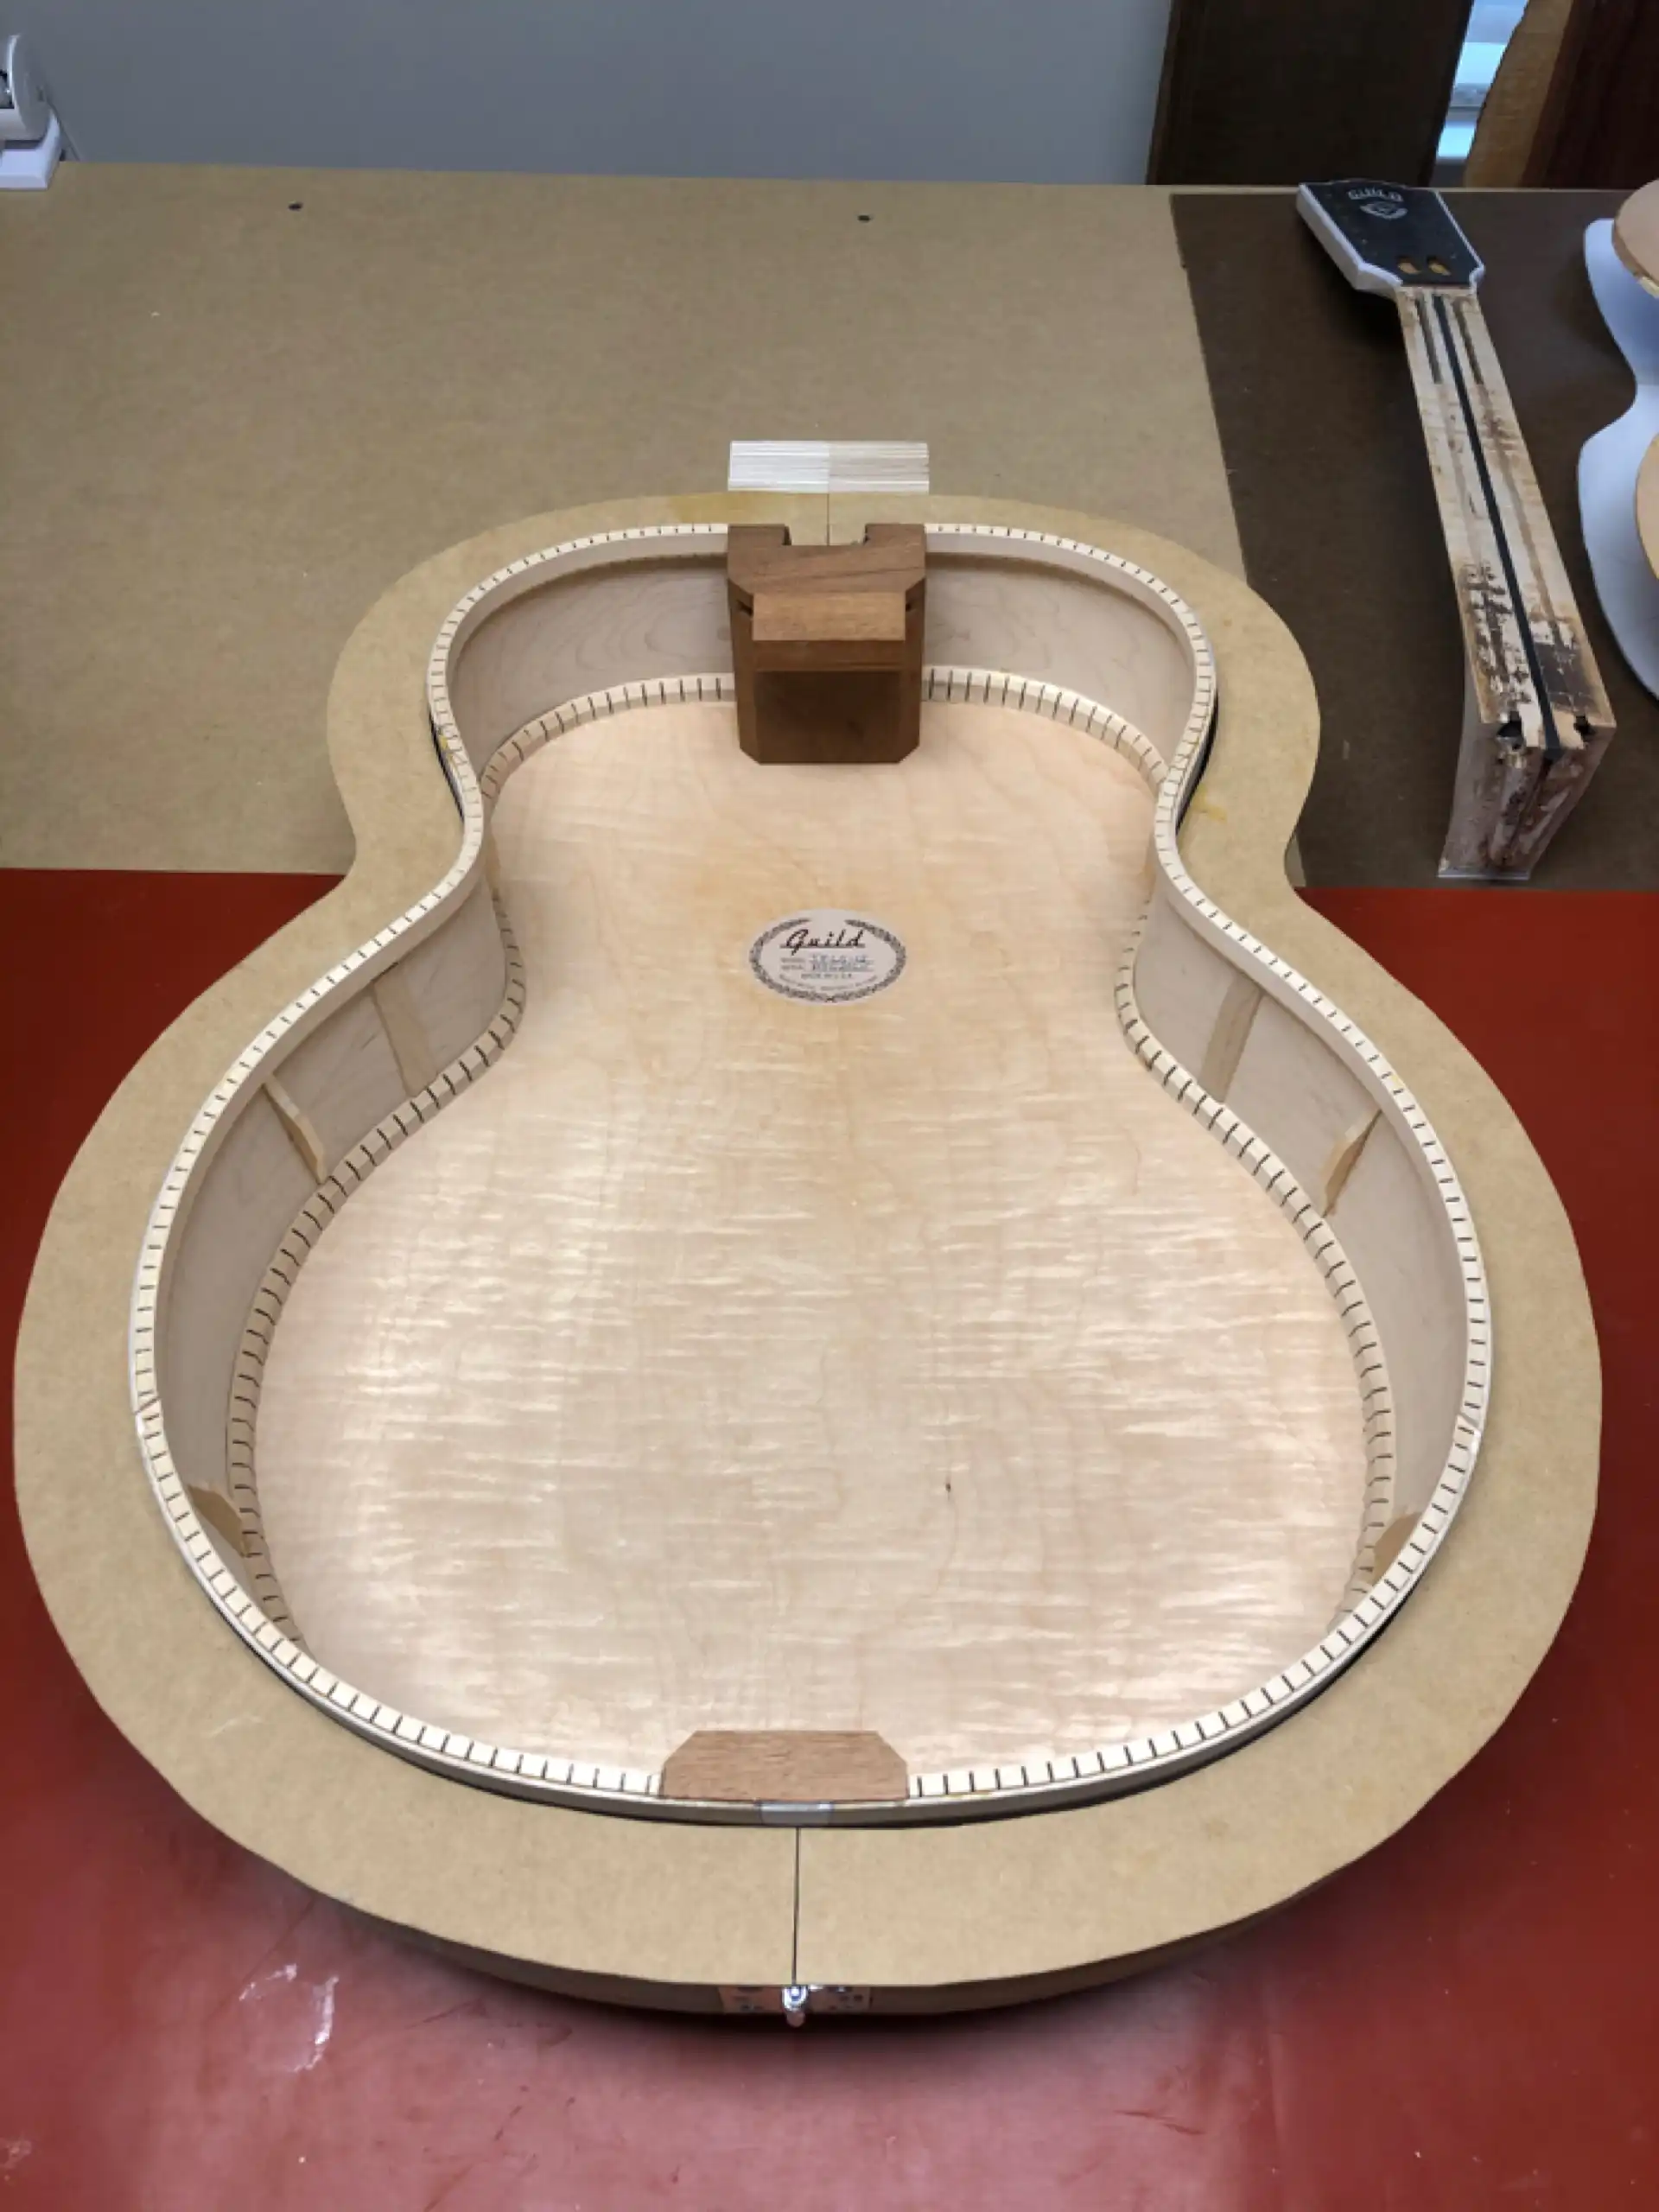
Here are the components of this deconstructed Guild.
1999 Guild JF65-12 Deconstructed
1999 Guild JF65-12 Deconstructed - Bracing
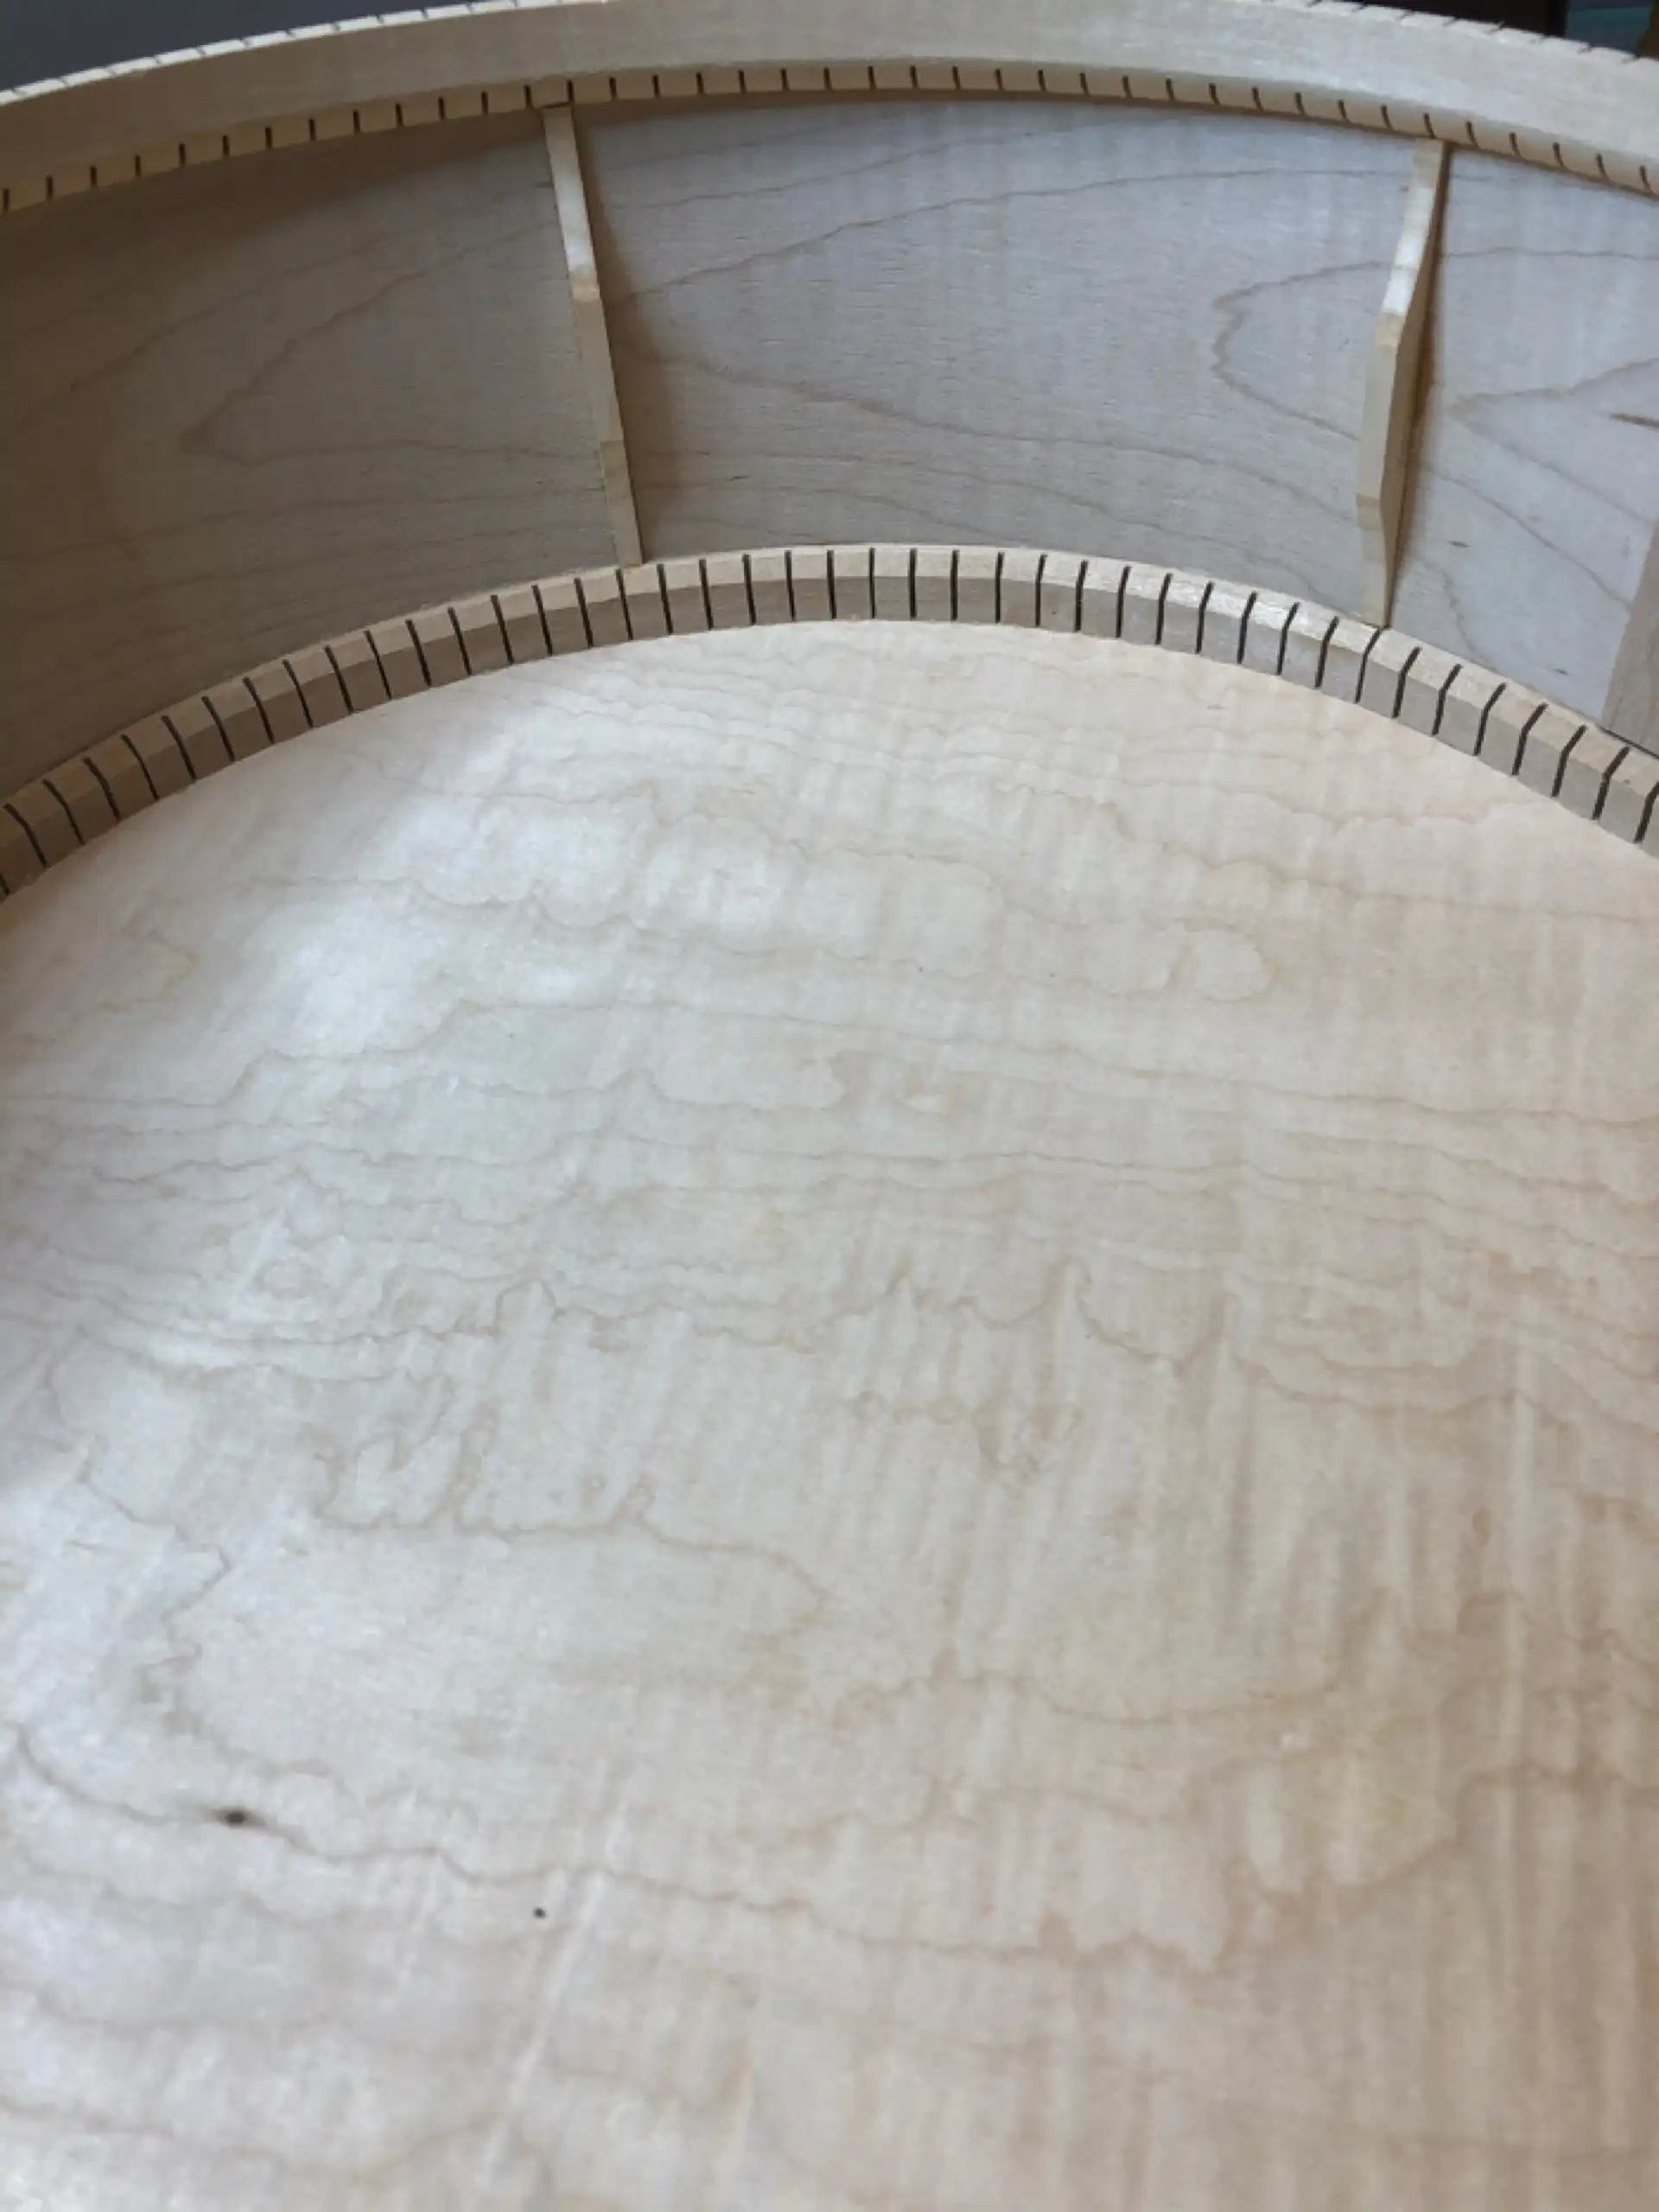
A little more deconstruction was necessary before I could start re-building this 12 string. Removing the top may/will also remove some of the kerfing, leaving it shorter than desired. Additionally, X-braces are typically let into the kerfing in order to rest the ends of the X on the sides. On the Guilds I have encountered, two (2) of the three (3) finger braces (per side) are also let into the kerfing, instead of terminating them just shy of reaching the sides. All this extra routing, if left unaddressed, would leave large gouges for the soundboard to span, resulting in very little positive contact with the sides. That perfect contact all around the edge of the soundboard is critical for generating the standing waves responsible for the sound we hear from the guitar.
Old Kerfing
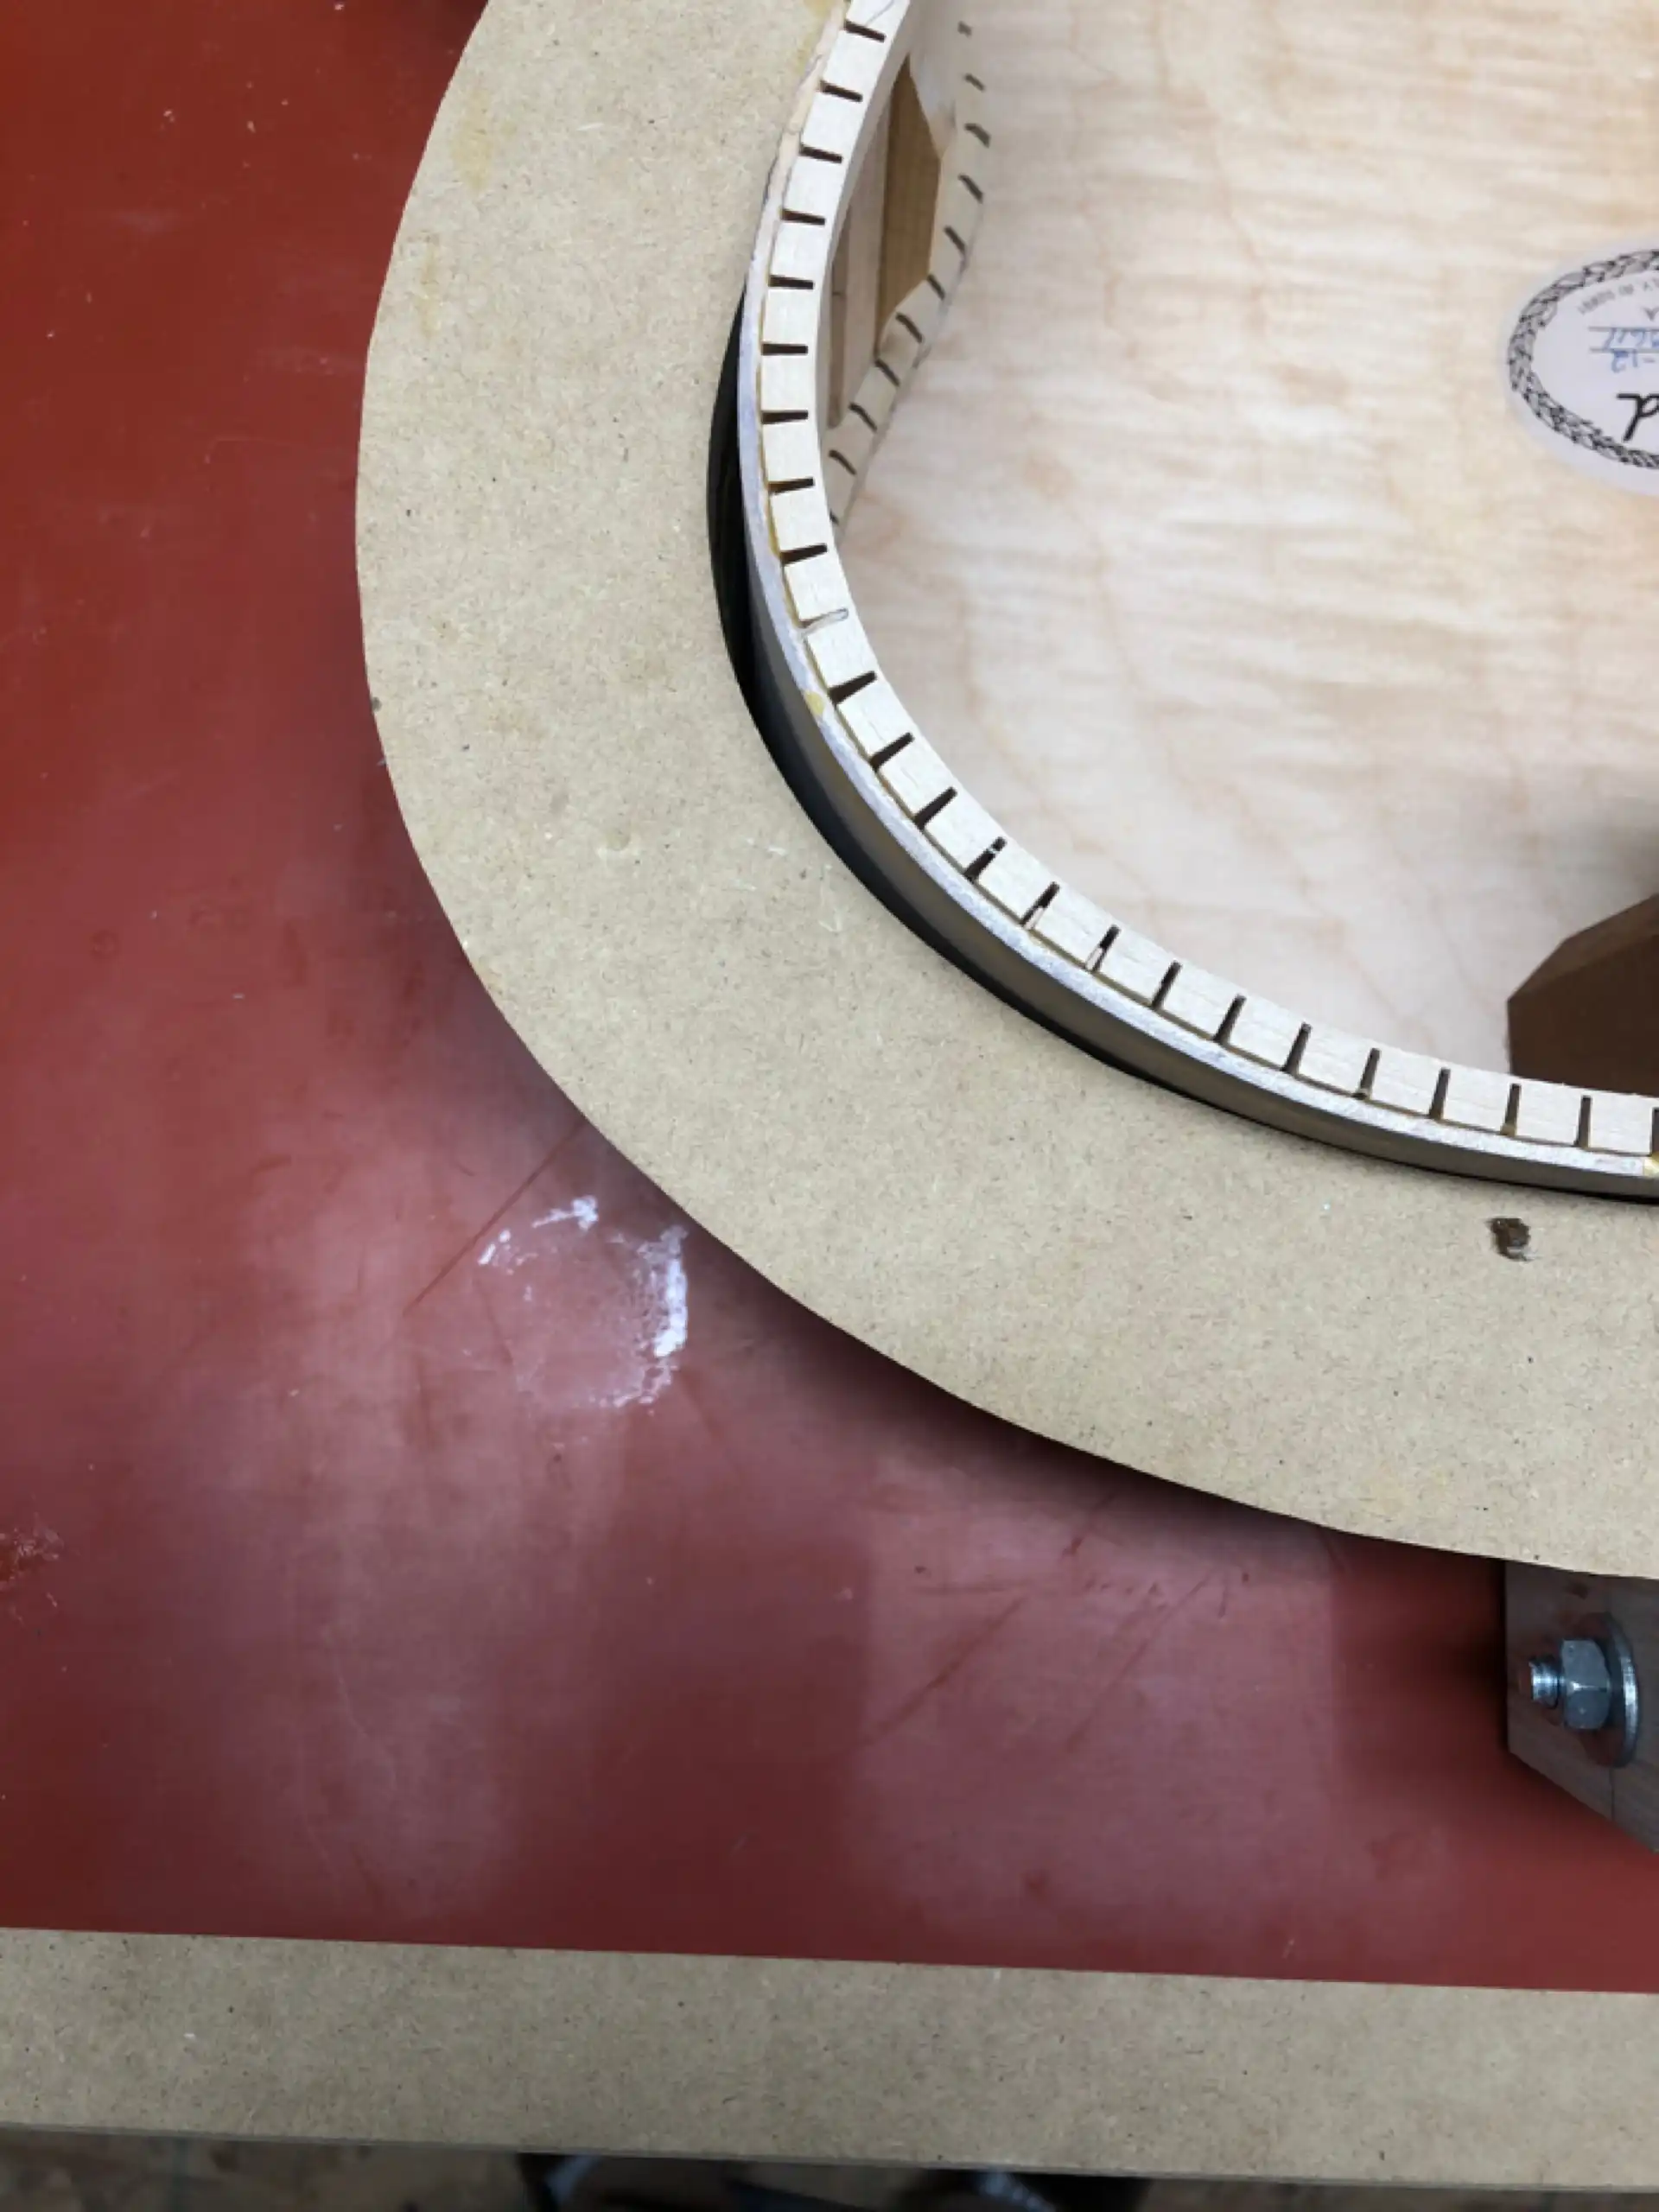
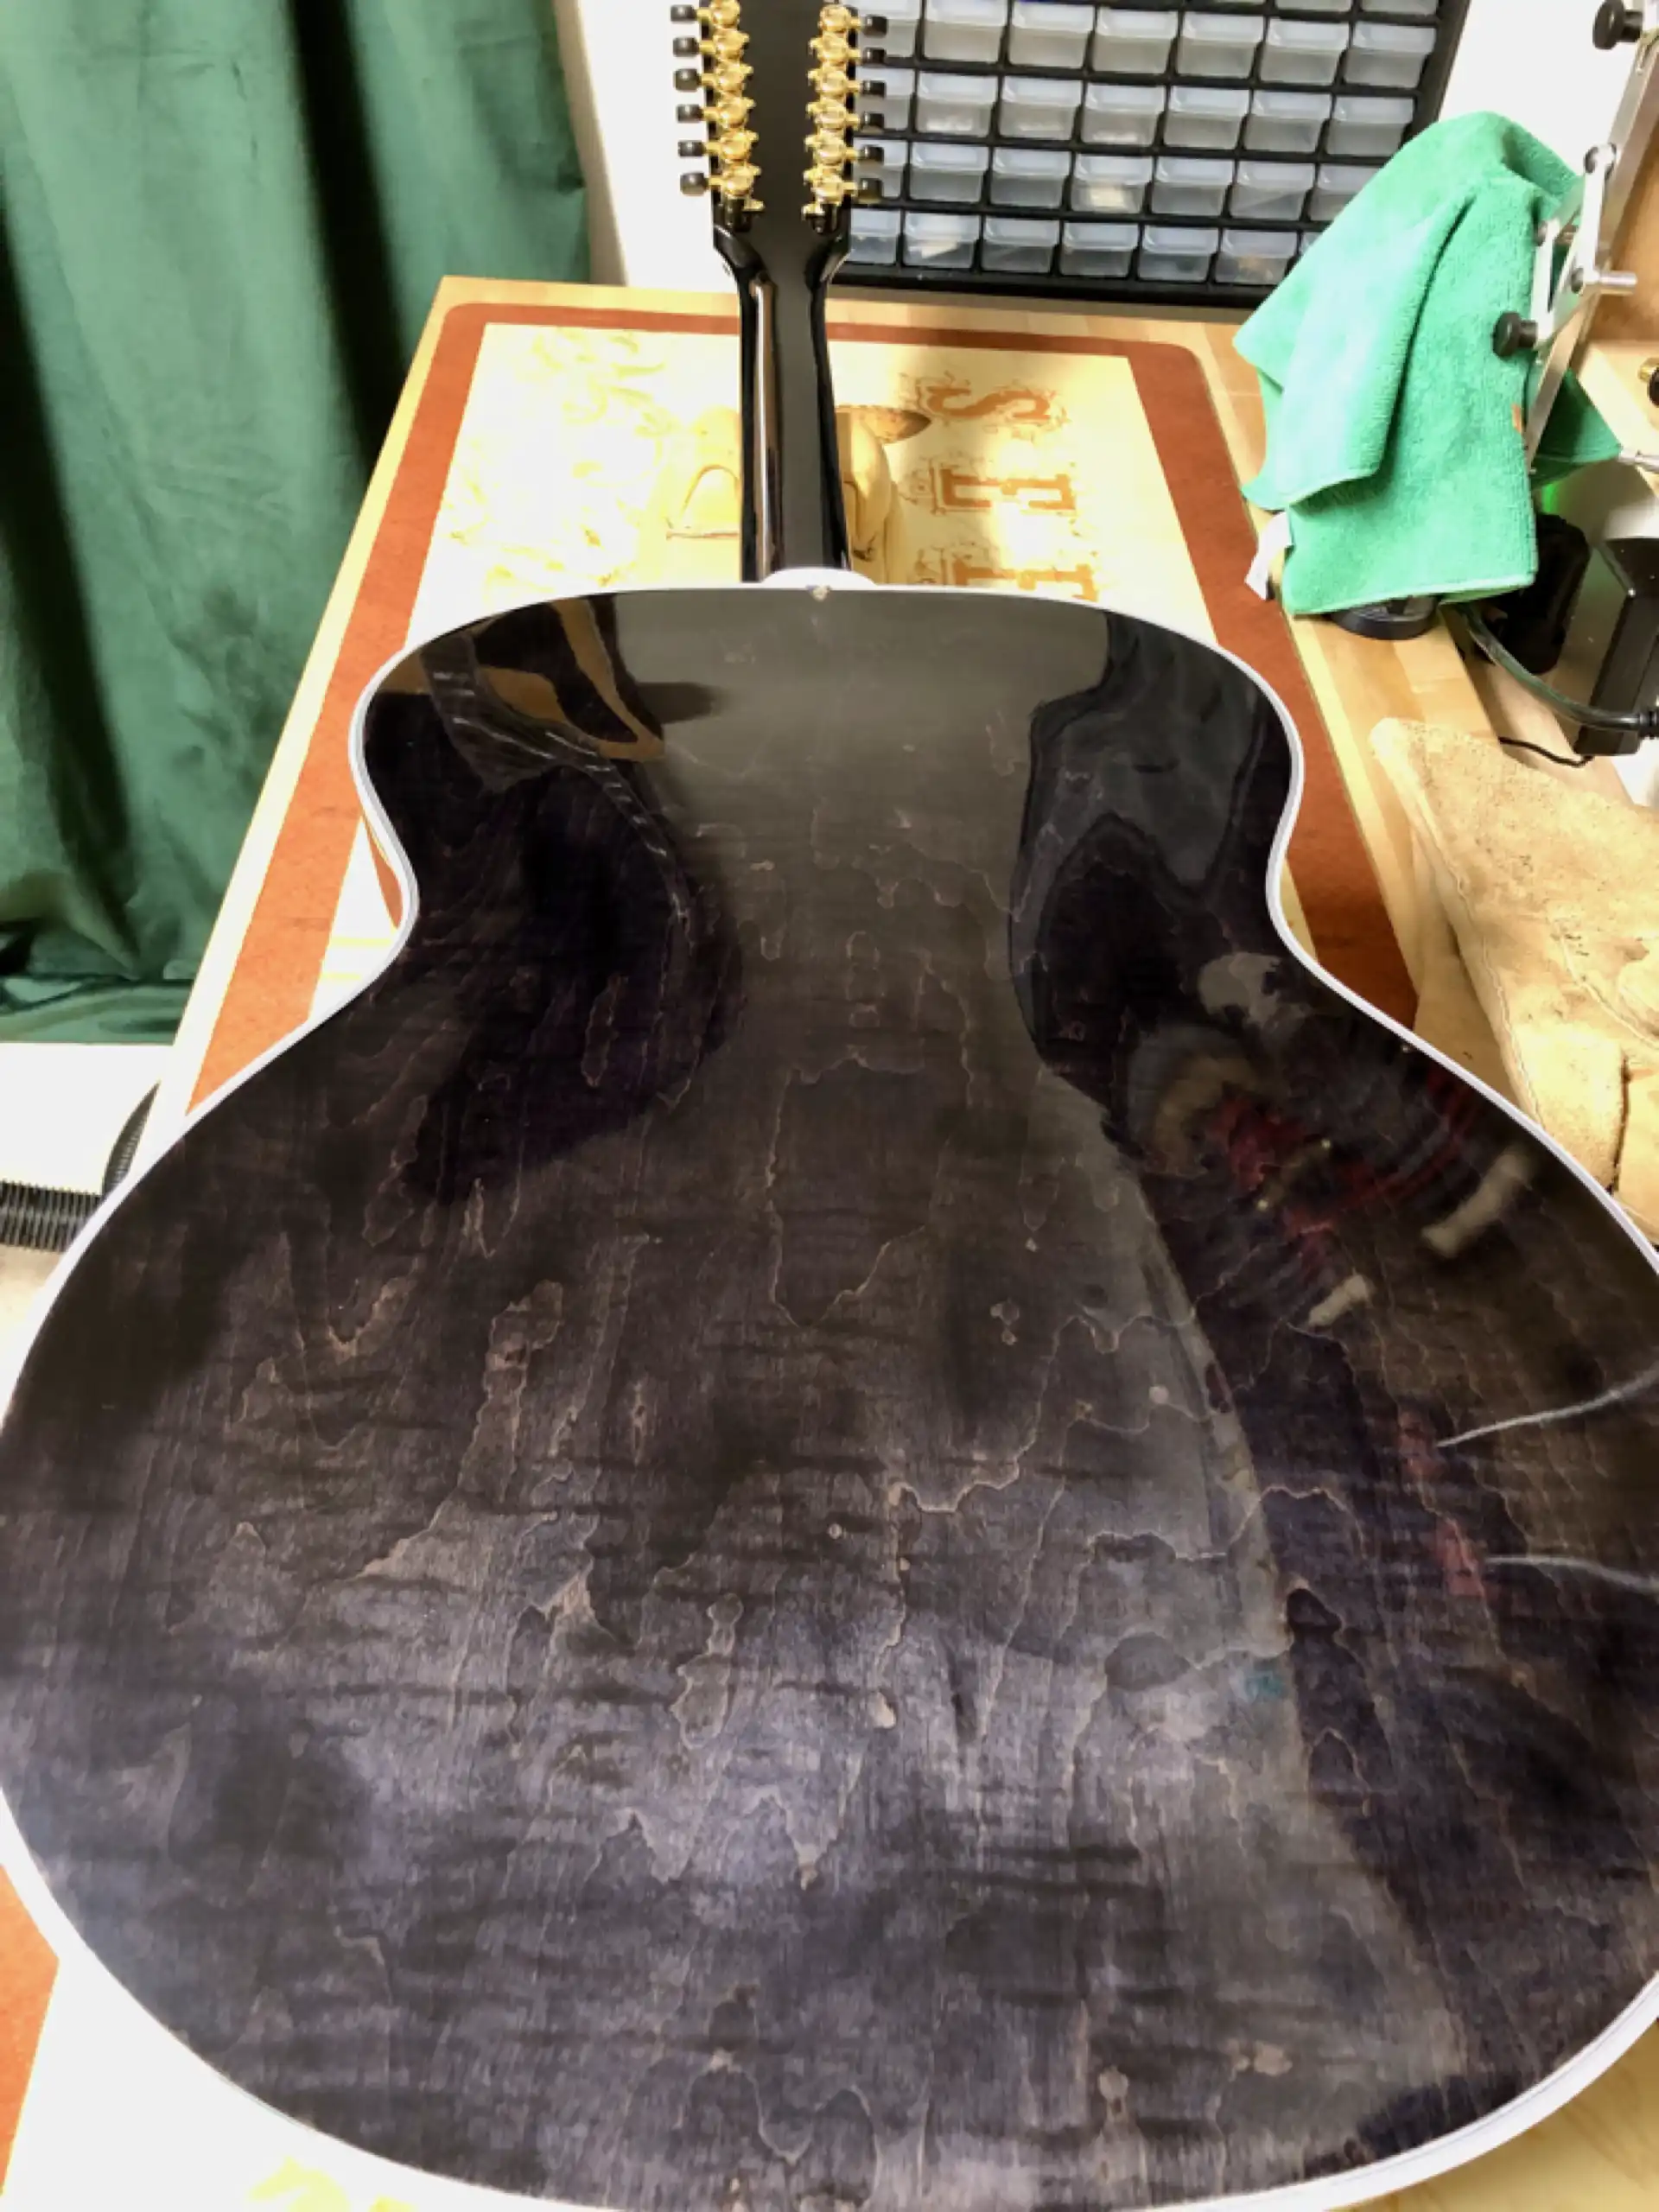
I removed the old kerfing around the soundboard edge of the sides. You can get a good look at the Maple used to construct the back.
Kerfing Removed
I opted to replace the old kerfing with a higher quality reverse kerfing. I first wet the wooden kerfing strip and then clamp it, backwards, to the outside rim of the body. In this way it takes the shape of body and I can apply it to the inside as a unified whole, without breaking it in multiple places and having to splice it.
Forming the Kerfing
The front and back plates of an acoustic guitar are not technically glued to the sides of the body, at least not directly, as there is insufficient surface area to hold the pieces meeting at 90° together under any kind of stress. Kerfing supplies the needed surface area for the soundboard and the back to attach to by forming an integral "ledge" onto the sides. Kerfing is first glued to the sides, and then the plates are glued to the kerfing.
It is called kerfing, or kerfed lining, due to the numerous slots, or saw kerfs, cut deep into a strip of wood in order to more easily accommodate bending around the curves of a guitar body. The early Spanish guitars used tiny, individual rectangular pieces of wood, called tentallones, that were applied one-by-one. The introduction of kerfing improved both the efficiency of application and added a degree of stiffness to the joint, thus improving overall tone. The early versions of kerfing were simply triangular strips of wood that had slots cut into them. Variations of this style are used to this day.
Reverse kerfing is a measurably stiffer component than its predecessor, and is even more efficient to apply. Essentially, it is much akin to the original form of kerfing turned inside out. It creates a more rigid shelf, or ledge, at the point where the soundboard makes first contact with it. Here it is, glued in place.
New Kerfing
At this stage of any build it is customary to radius this face of the body in preparation to receive the soundboard. To mitigate the risk of dramatically altering the depth of the sides I set the kerfing a little high, such that it projects beyond the top edge of the sides. This allows me to sand the kerfing to the correct radius without ever touching the sides (remember, the soundboard is being glued to the kerfing, not the sides). Binding will span any gap between the top edge of the sides and the soundboard, anyway. A short time at the radius dish and the desired profile was obtained.
Radiusing the Kerfing
With the new kerfing in place, it was time to add bracing to the sides. Side reinforcement was approached differently over the decades. In an effort to control side splits, some builders applied tape across the side wood. Here is a 1975 Guild F-212 with copious amounts of fabric tape in place.
1975 Guild F-212 Side Tape
To reduce the occurrences of splits in the thin sides of the steel string acoustic guitar, it became very common at some point to add reinforcing cloth tape to the sides. Over the years, in lieu of tape, many builders were installing actual braces across the grain of the sides. In the case of X-braced guitars, I have had good success in tying the placement of actual side braces to the ends of the X. Additional braces are added at points of stress. In addition to providing reinforcement along the sides to hopefully prevent any splitting due to mishap or even sudden grain expansion or contraction, such braces are theorized to assist in the transfer of energy from the front plate to the back plate.
Side Braces
With the new kerfing in place and radiused to receive the new soundboard, and the side braces added to stiffen the sides and mitigate stress fractures, the only thing left to address inside the box is to correct the sloppy, off-center placement of the label (at the specific request of the owner).
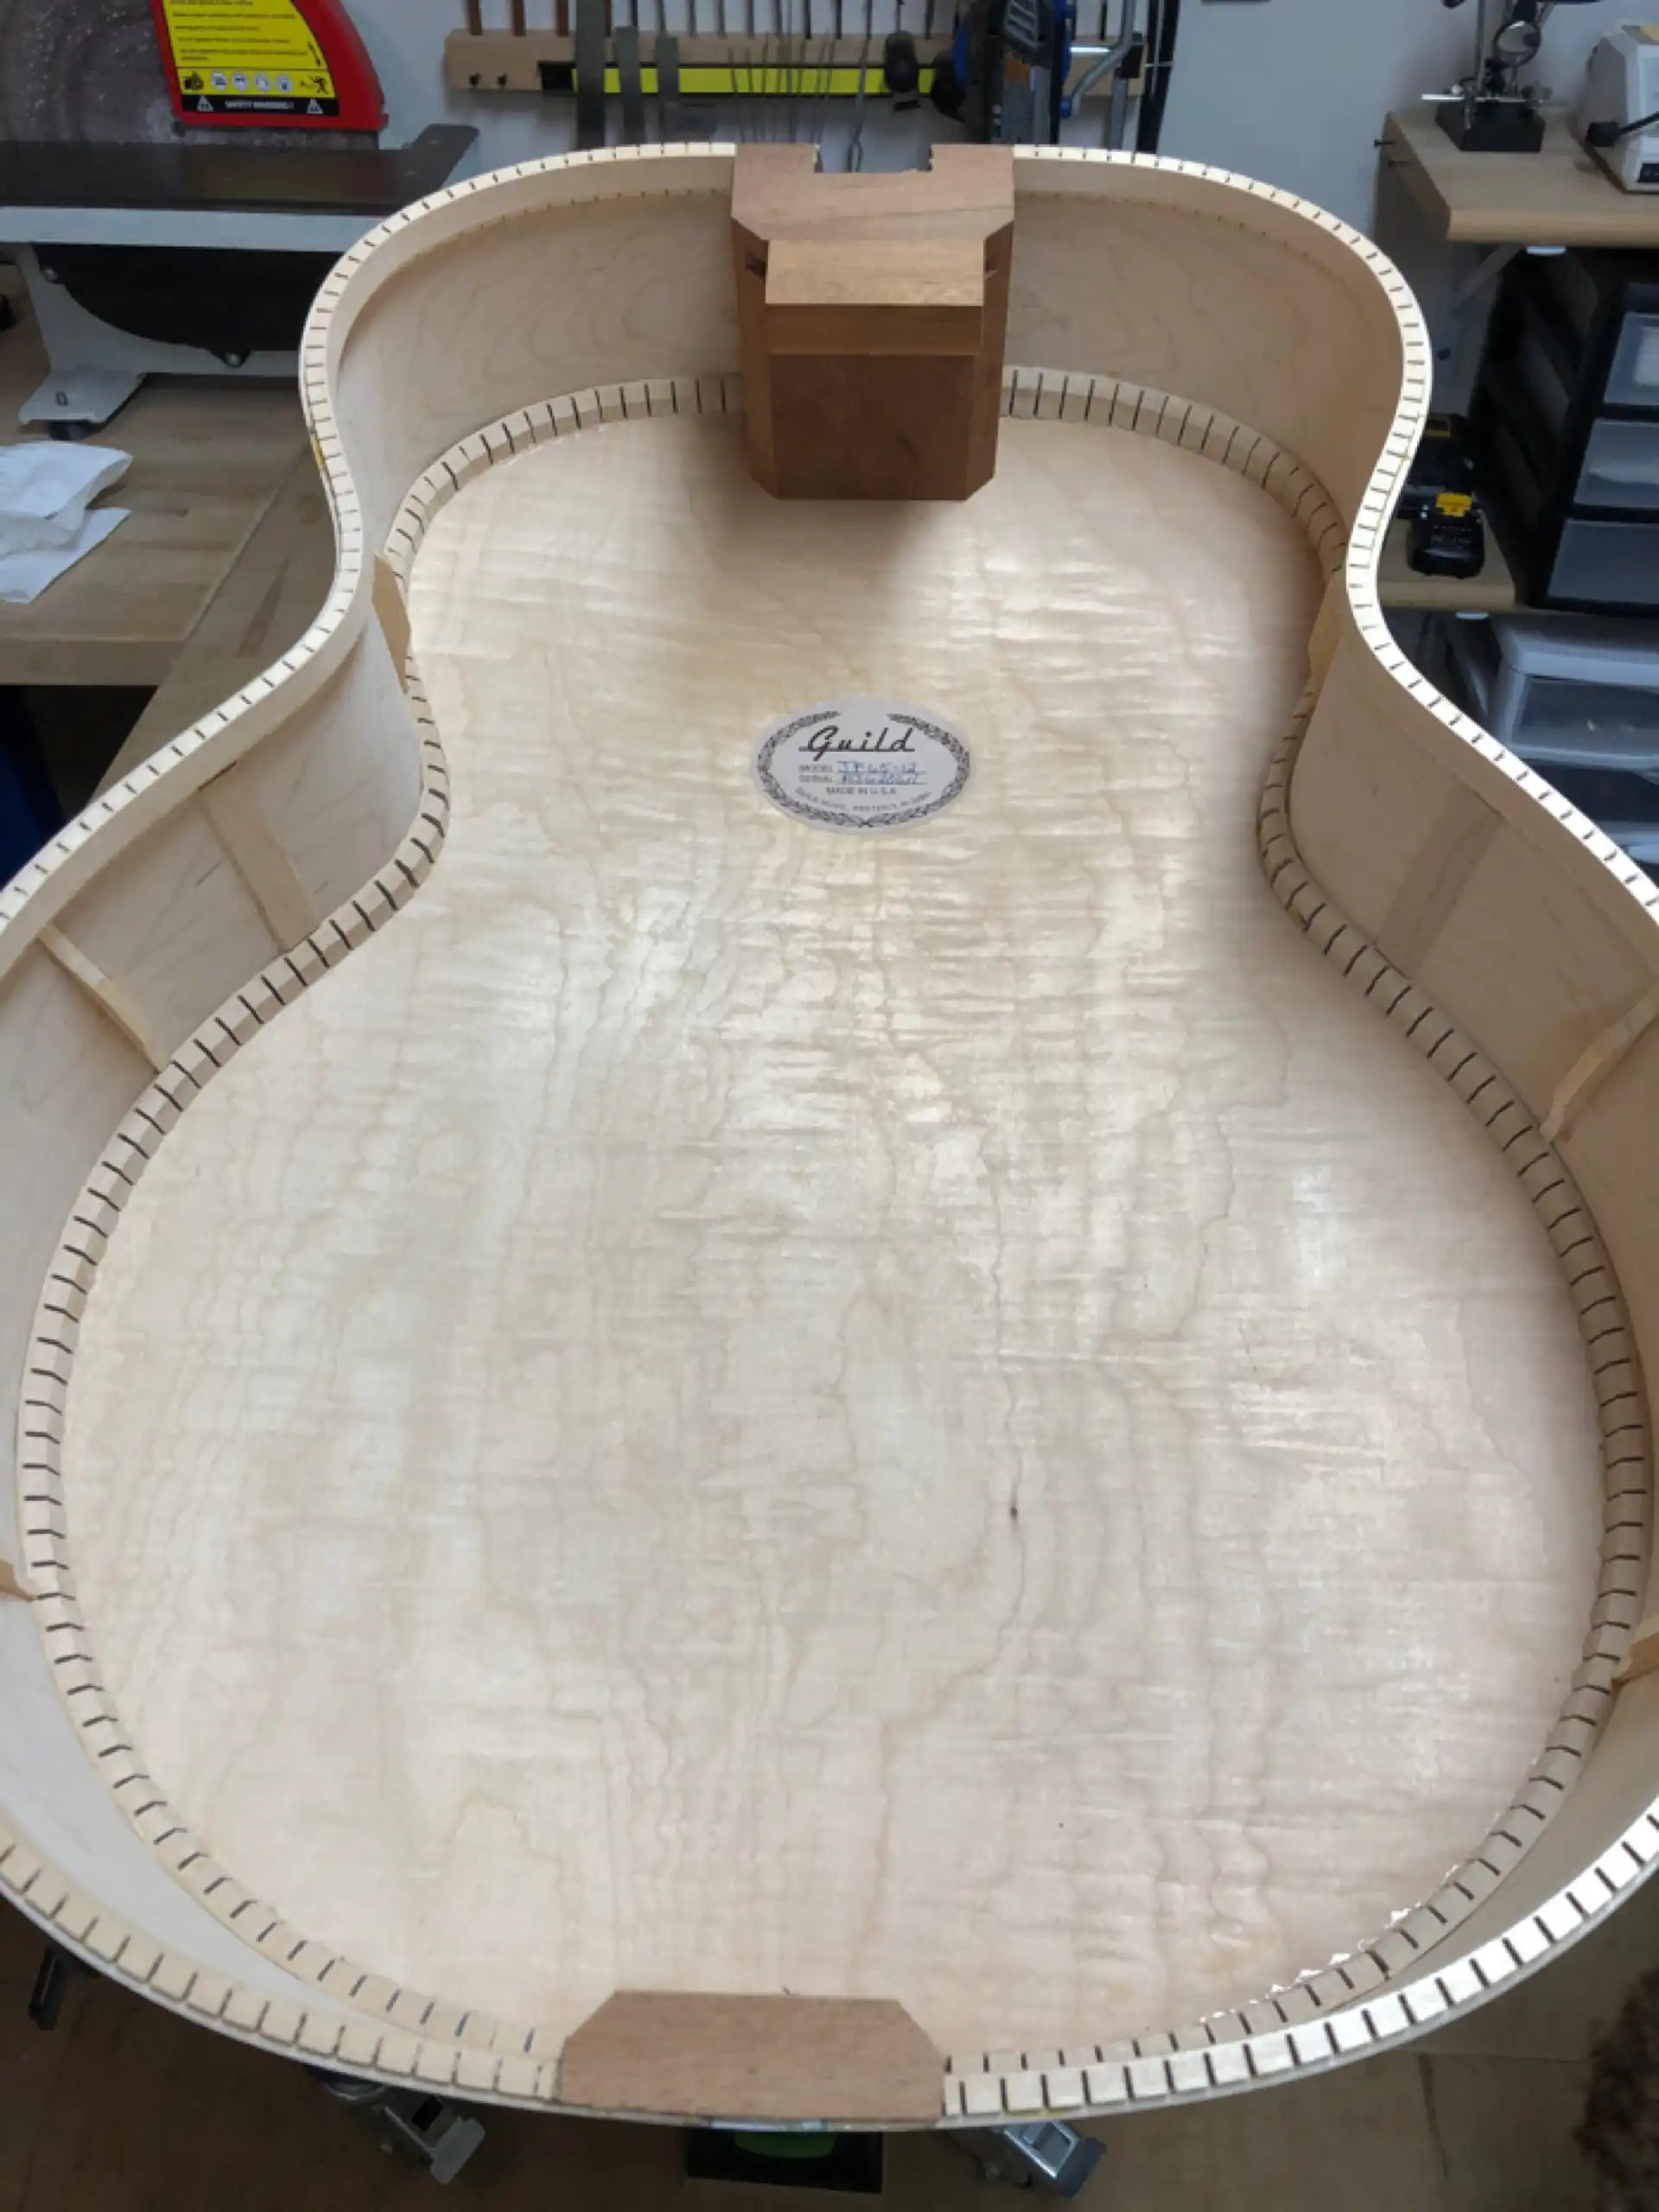
Inside the Box
The old lacquer needed to be removed in preparation for a brand new finish. There are four (4) techniques available to the finish remover: solvents, heat, sanding and scraping. Harsh chemical solvents can soften glue joints and will melt plastic binding. Heat is the enemy of glue joints and, unless you are deliberately attempting to further disassemble the guitar, should be avoided. The arched back of this 12 string is a laminate comprised of two layers of maple and glue that was pressed into shape with heat. It does not need to be reheated at this point in its life. Sanding is not a great idea for finish removal when our material is already at dimension (it is already as thin as it should be). The sides and back are also at dimension. Any sanding risks thinning them further, and that must be avoided. The best way for me to safely remove this old finish is to carefully scrape it off.
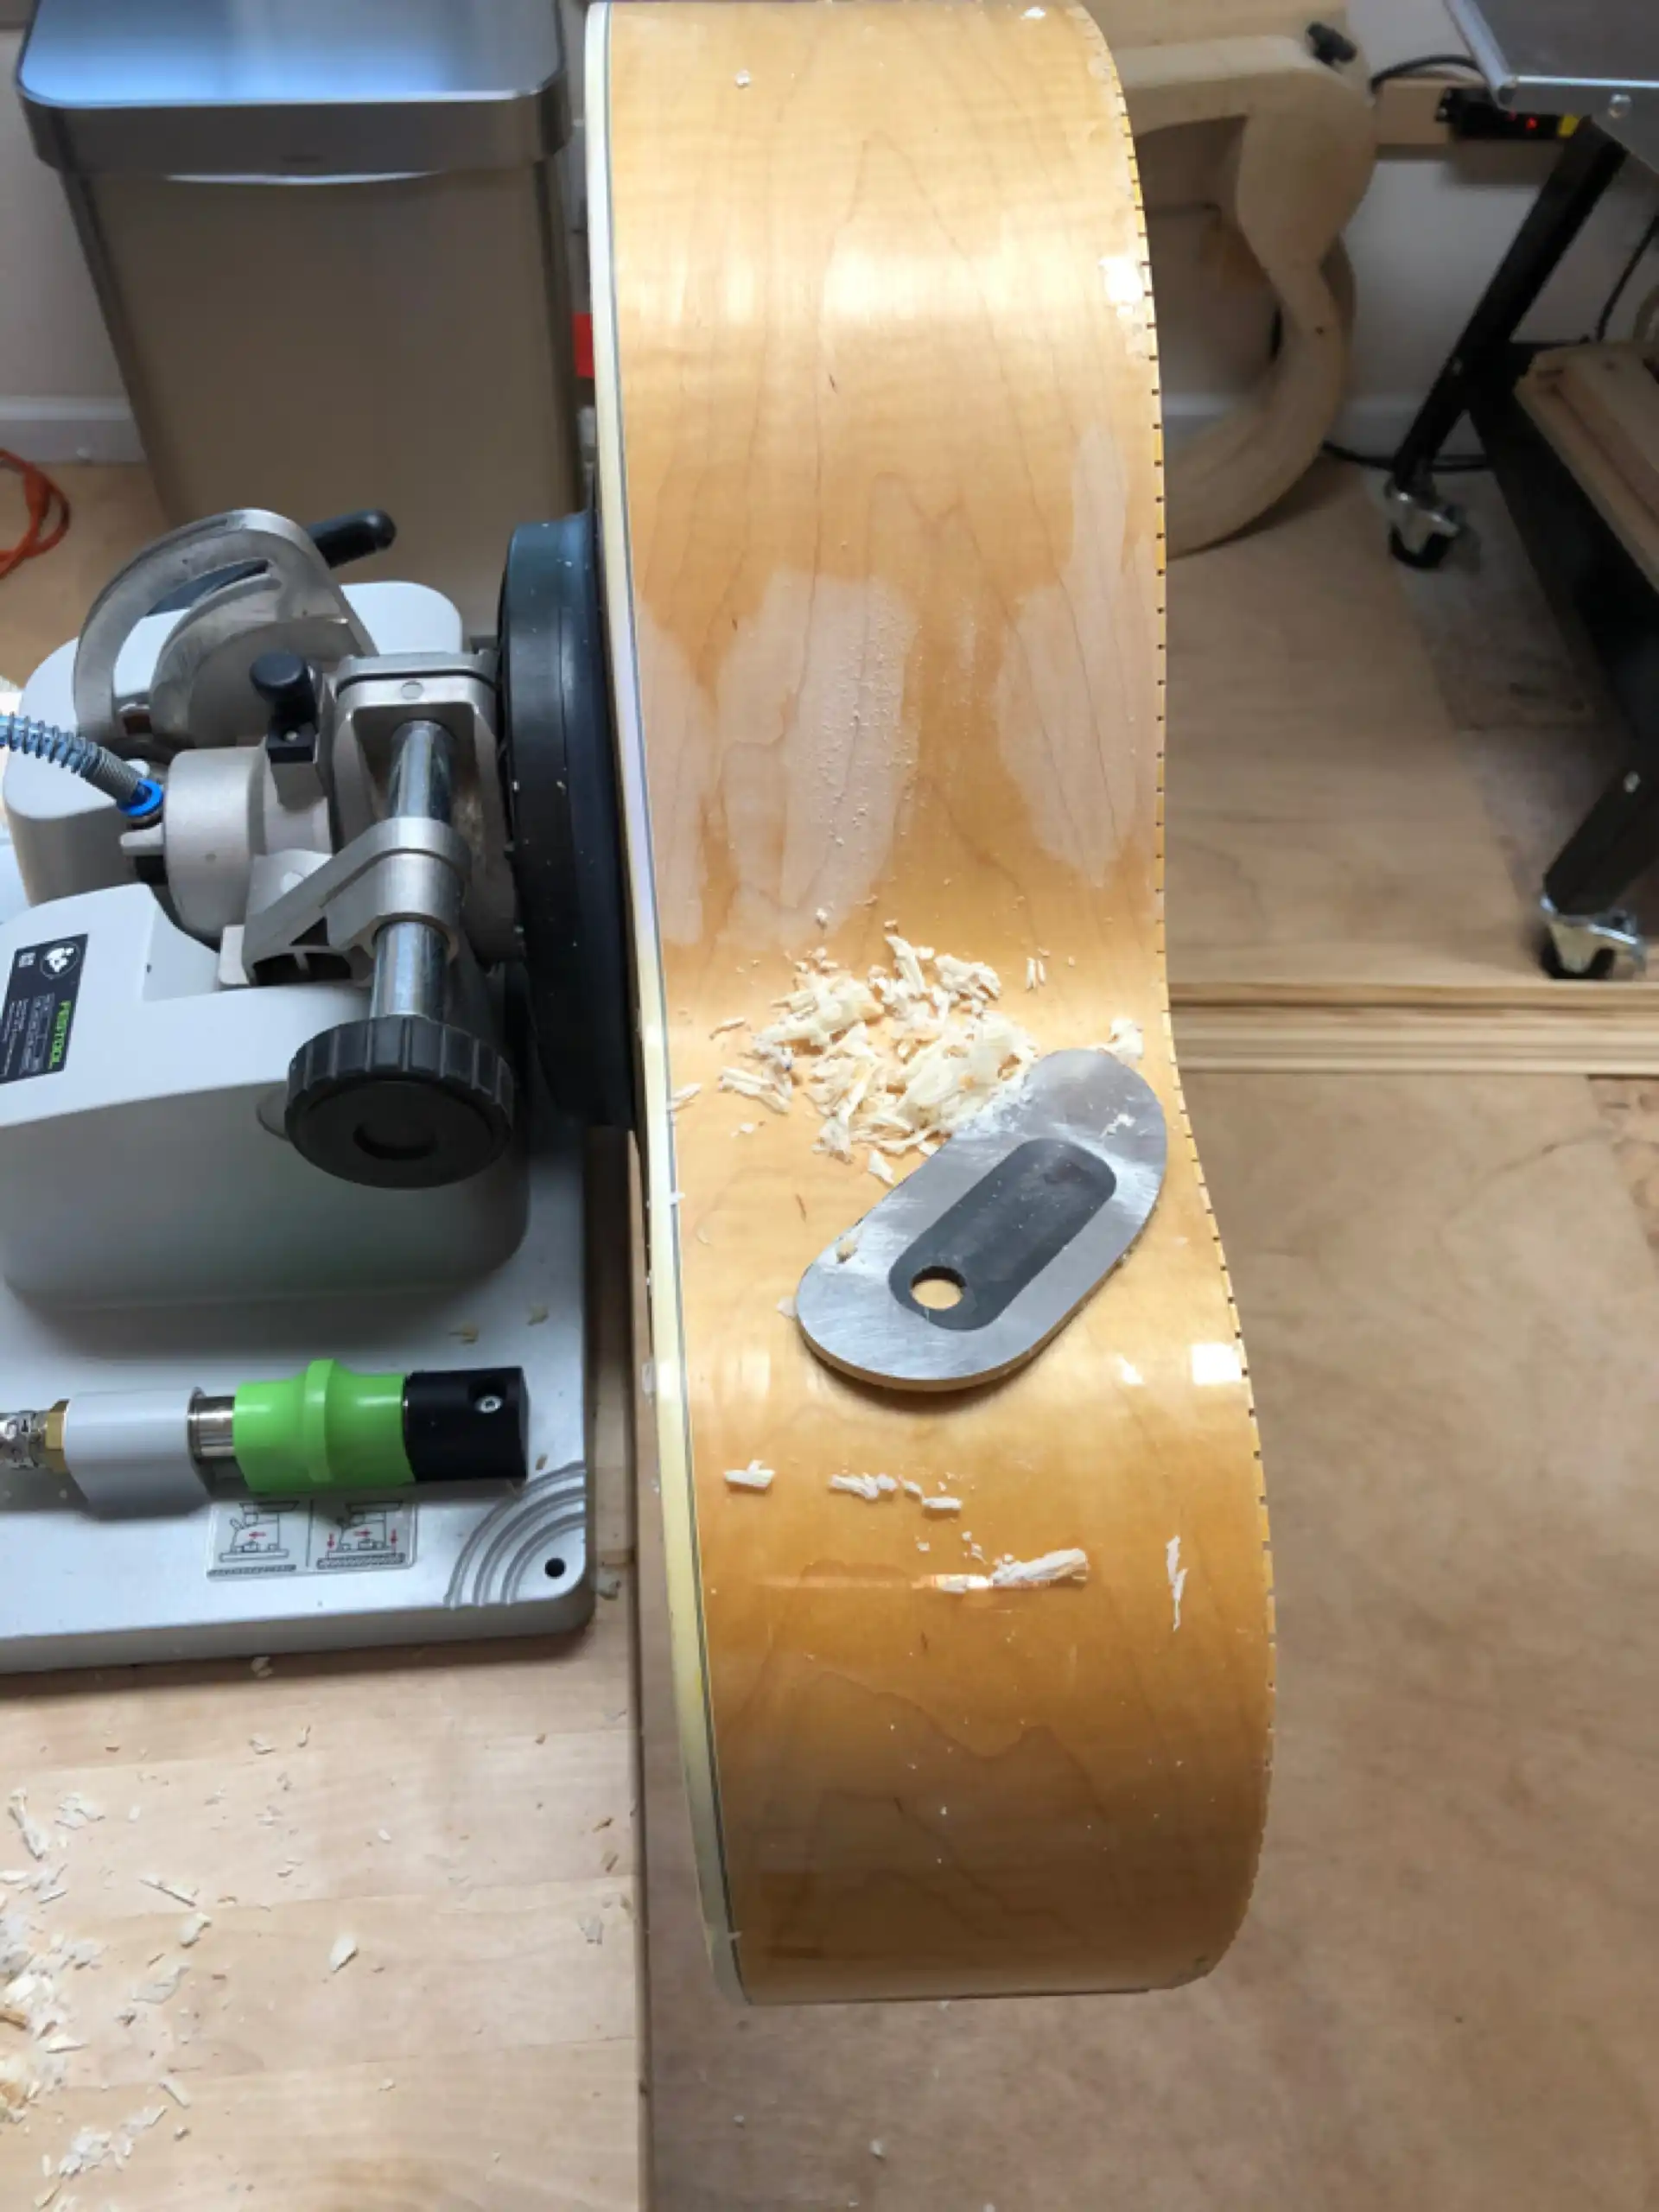
Scraping off the old finish
Scraping off a lacquer finish is a time-consuming process. It is important to keep the scraper razor sharp, so as to maximize each pass.
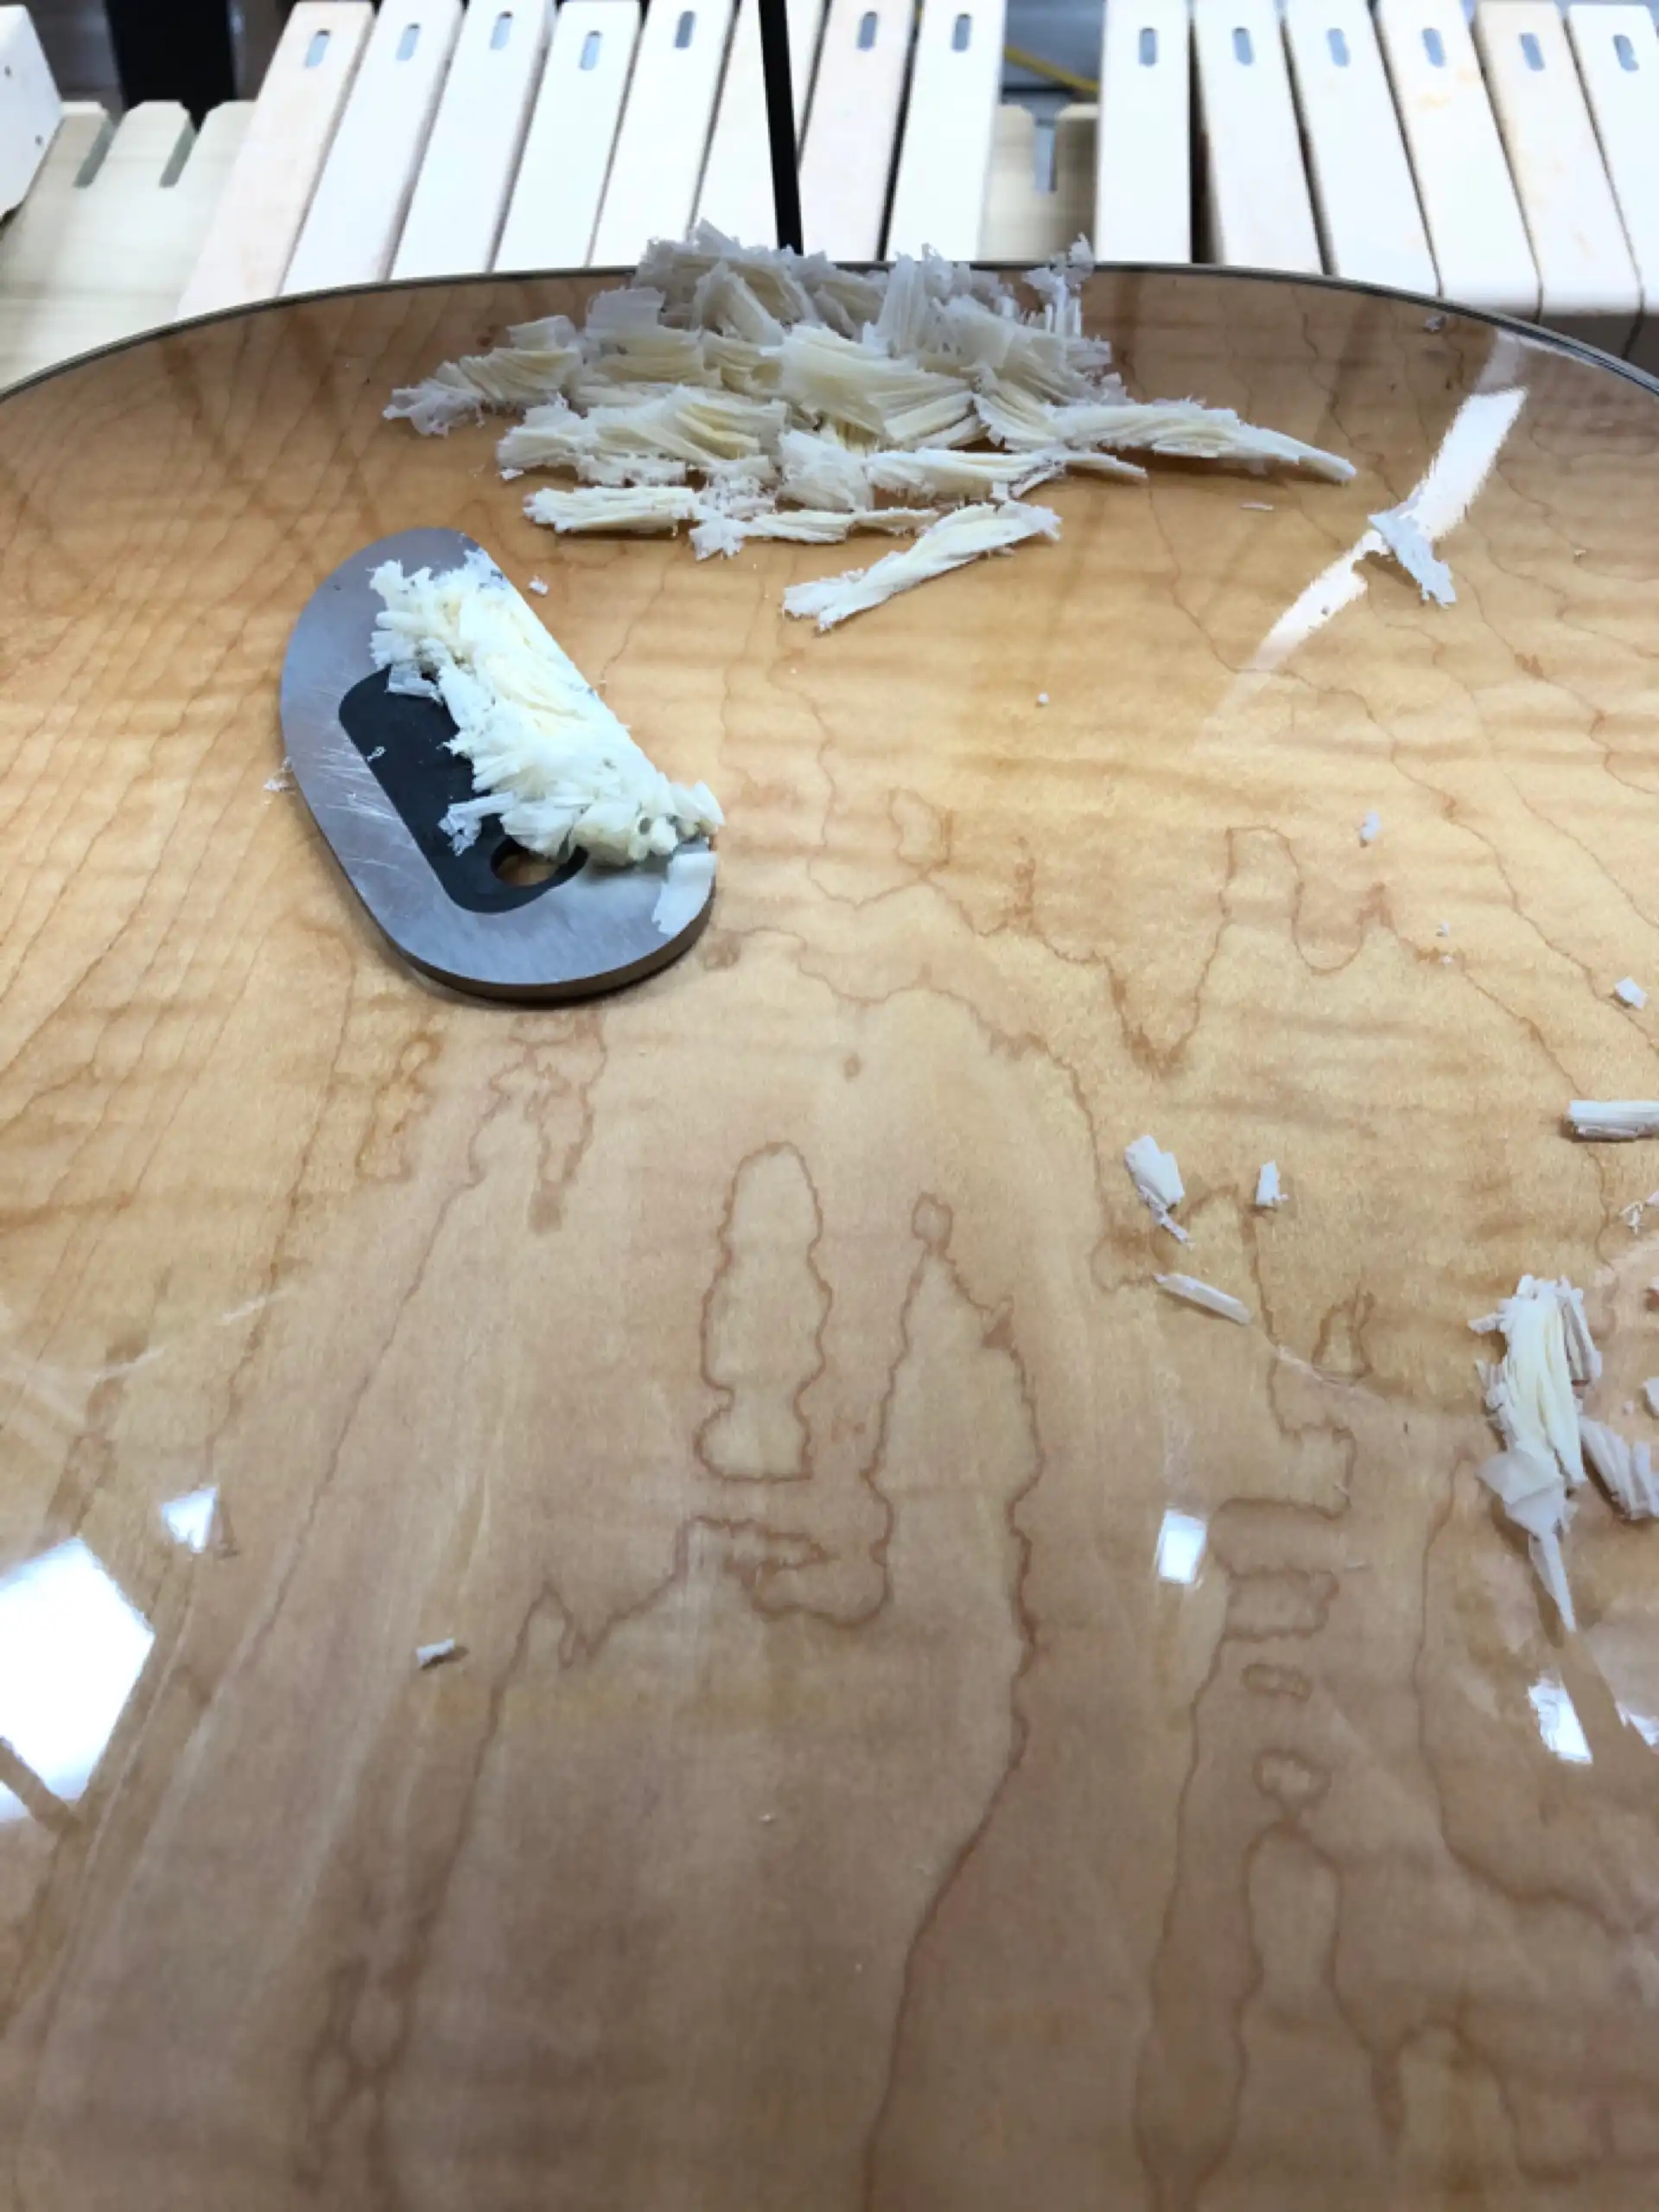
Scraping the back
Eventually a visual distinction makes evident what scraping work remains.
Scraping nearly complete
Thousands of passes later, the body is scraped clean.
Scraping complete
To improve the overall stiffness of the neck I added a carbon fiber rod. The Guild 12 strings of this era featured a twin compression rod system designed to counteract the forward bow of the strings. I epoxied the carbon fiber rod down the exact center of the neck, in between the two compression rods. The neck was clamped dead flat while the epoxy set. The result was a perfectly straight neck with no twist!
Carbon Fiber Rod
The soundboard is the primary driver of the sound we associate with the acoustic guitar. And the area of greatest interest on any given guitar soundboard, the so-called beachfront property or prime real estate (according the luthier Kent Everett), is located between the bridge and the tail block. All other things being equal, I want a board that is aurally lively in that area.
The fundamental difference between a 12 string guitar and a 6 string guitar is the obvious addition of 6 strings (two of which are typically paired in pitch, with the remaining four set at octave intervals. Other factors remain the same. When constructing the soundboard for a 12 string, the primary consideration the luthier has to be aware of is the (potential) load of up to 100 pounds of additional string tension! A 12 string soundboard should be stiffer than its 6 string sibling. Selecting a stiff wood to begin with, then leaving the plate a bit thicker than you would for an equivalent 6 string is the first critical step.
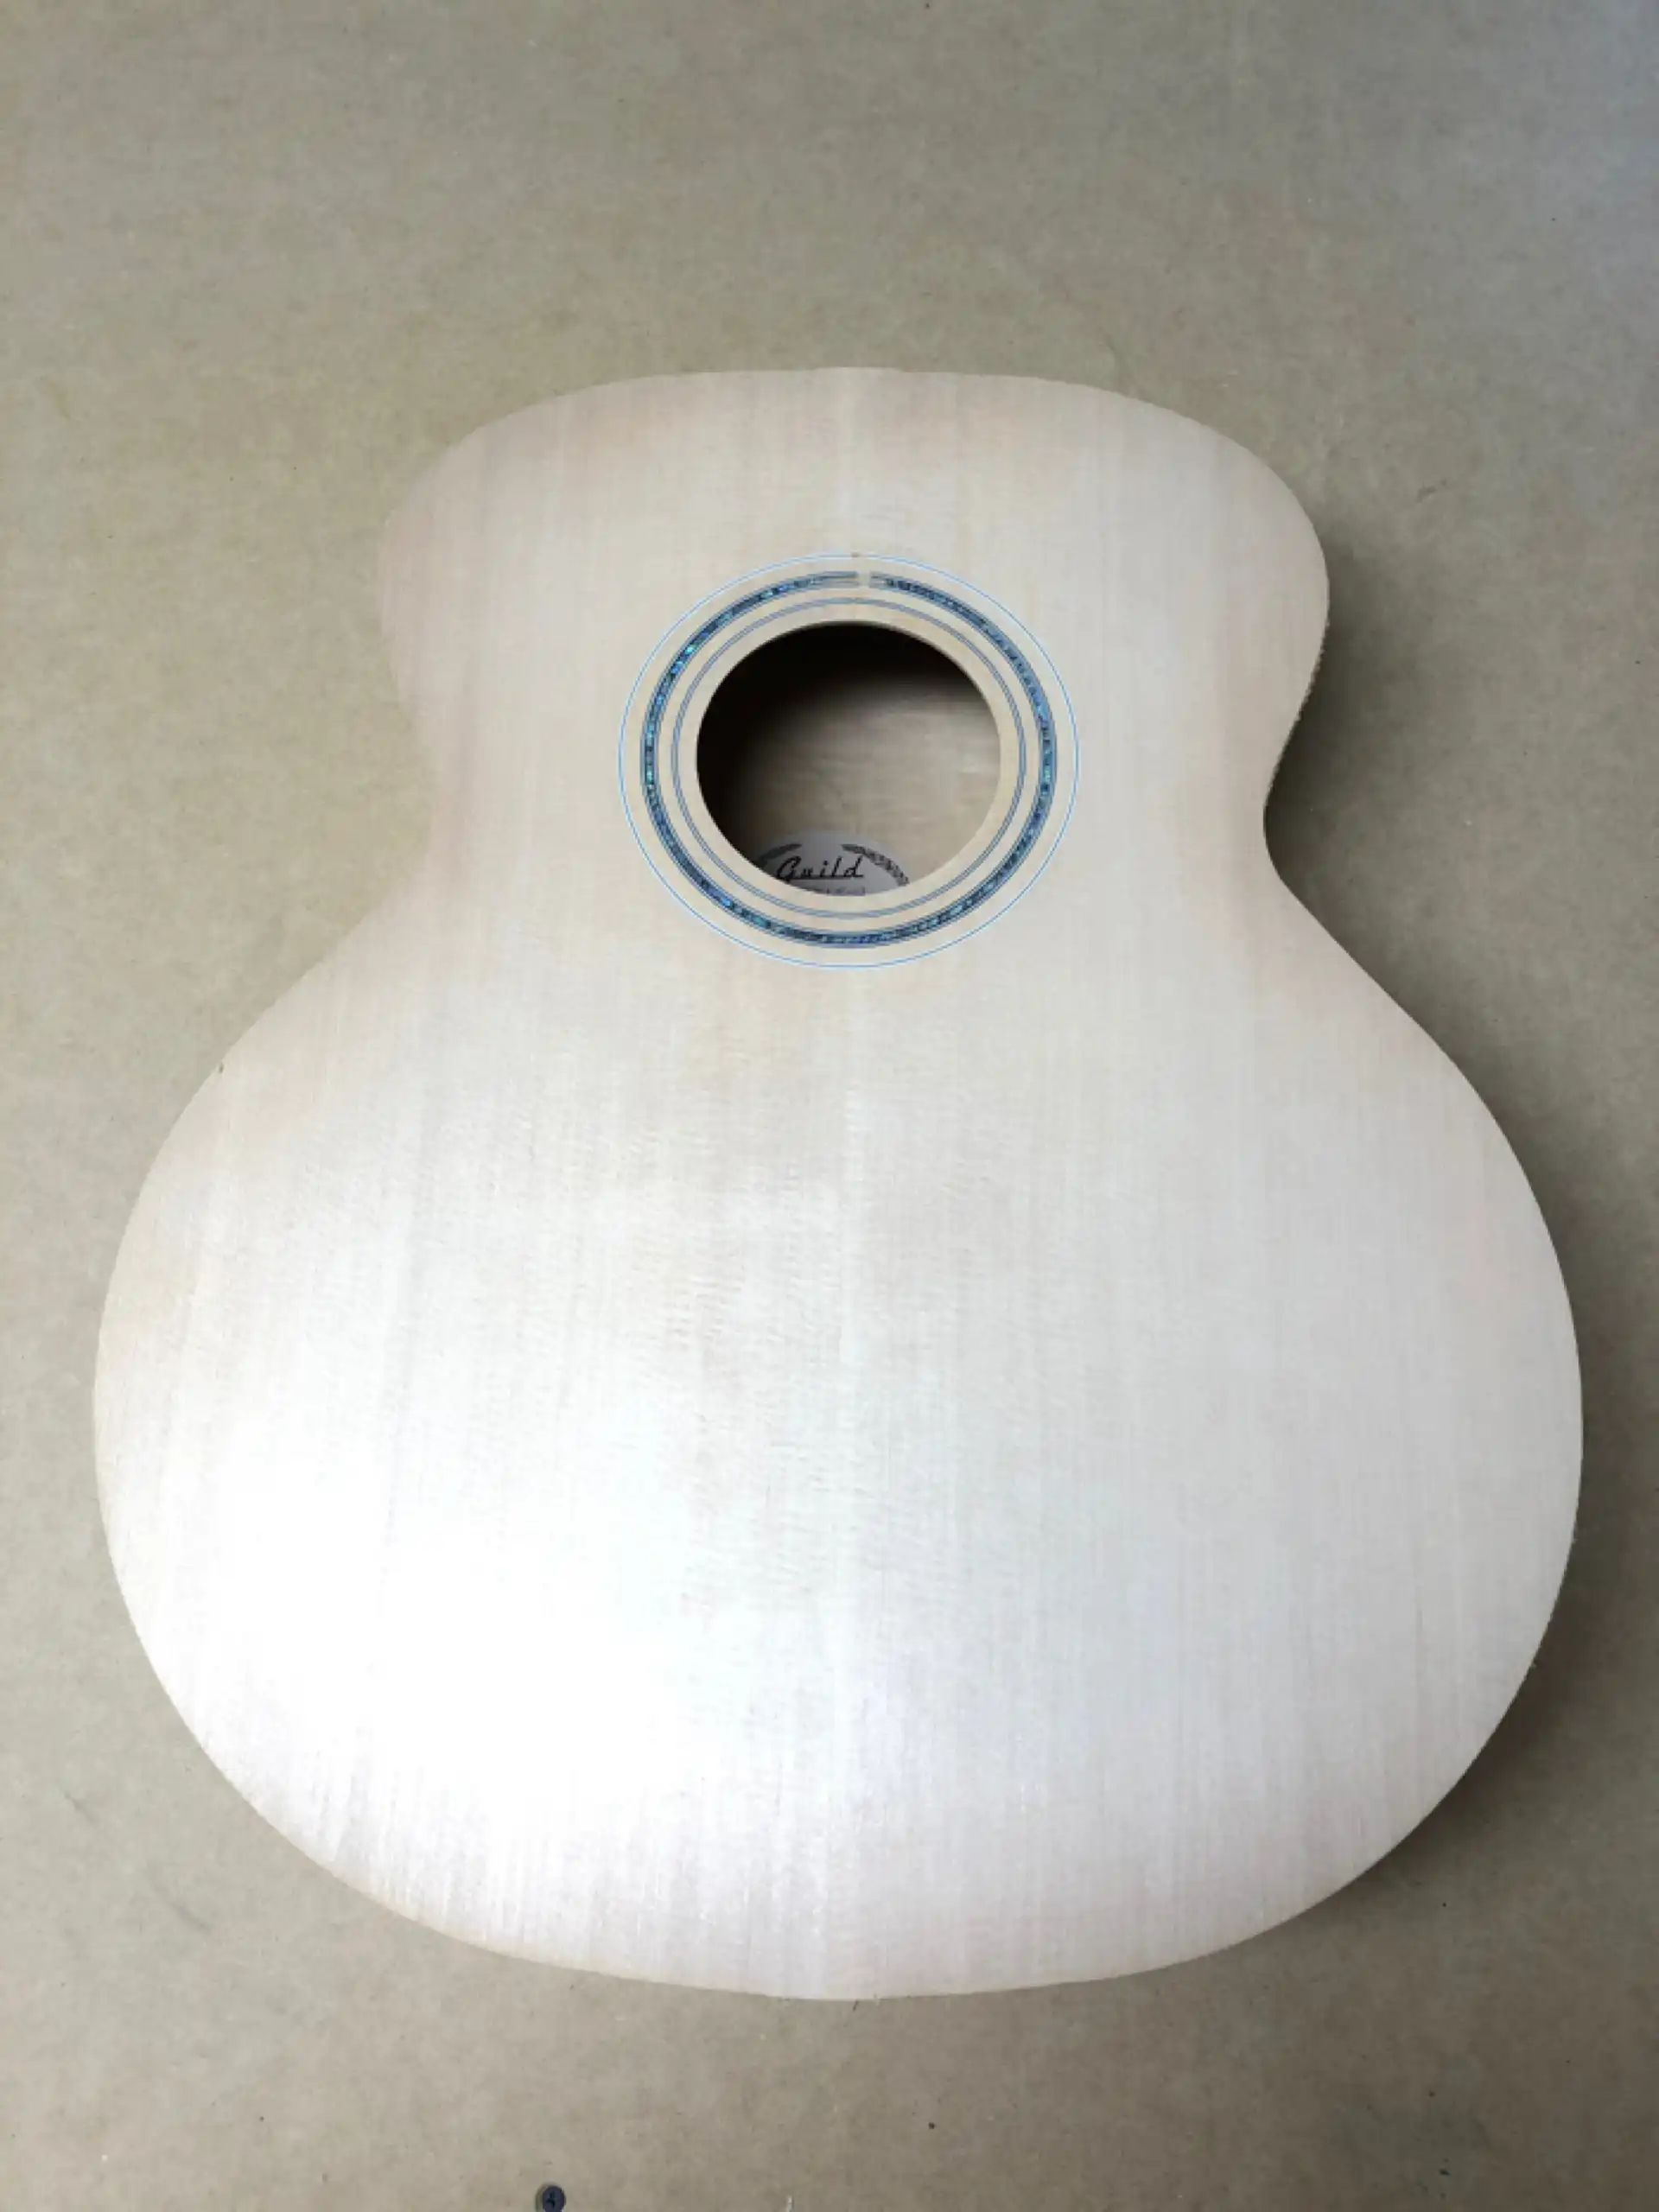
I selected a AAAA (4A) Sitka Spruce top that is approximately 20 years old for the job. I have added a rosette, combining two classic Guild white and black ABS trim rings with a Paua ring in between. The Paua will also outline the entire soundboard. Here is a preview, taken prior to applying the bracing...
Soundboard Preview
A light, loose soundboard that might perform spectacularly as a 6 string will be quickly overdriven when 12 strings are used. The bracing must be increased to accommodate the extra tension but, as with any acoustic guitar having any number of strings, for a premium sound it is important to neither over-brace or under-brace the soundboard.
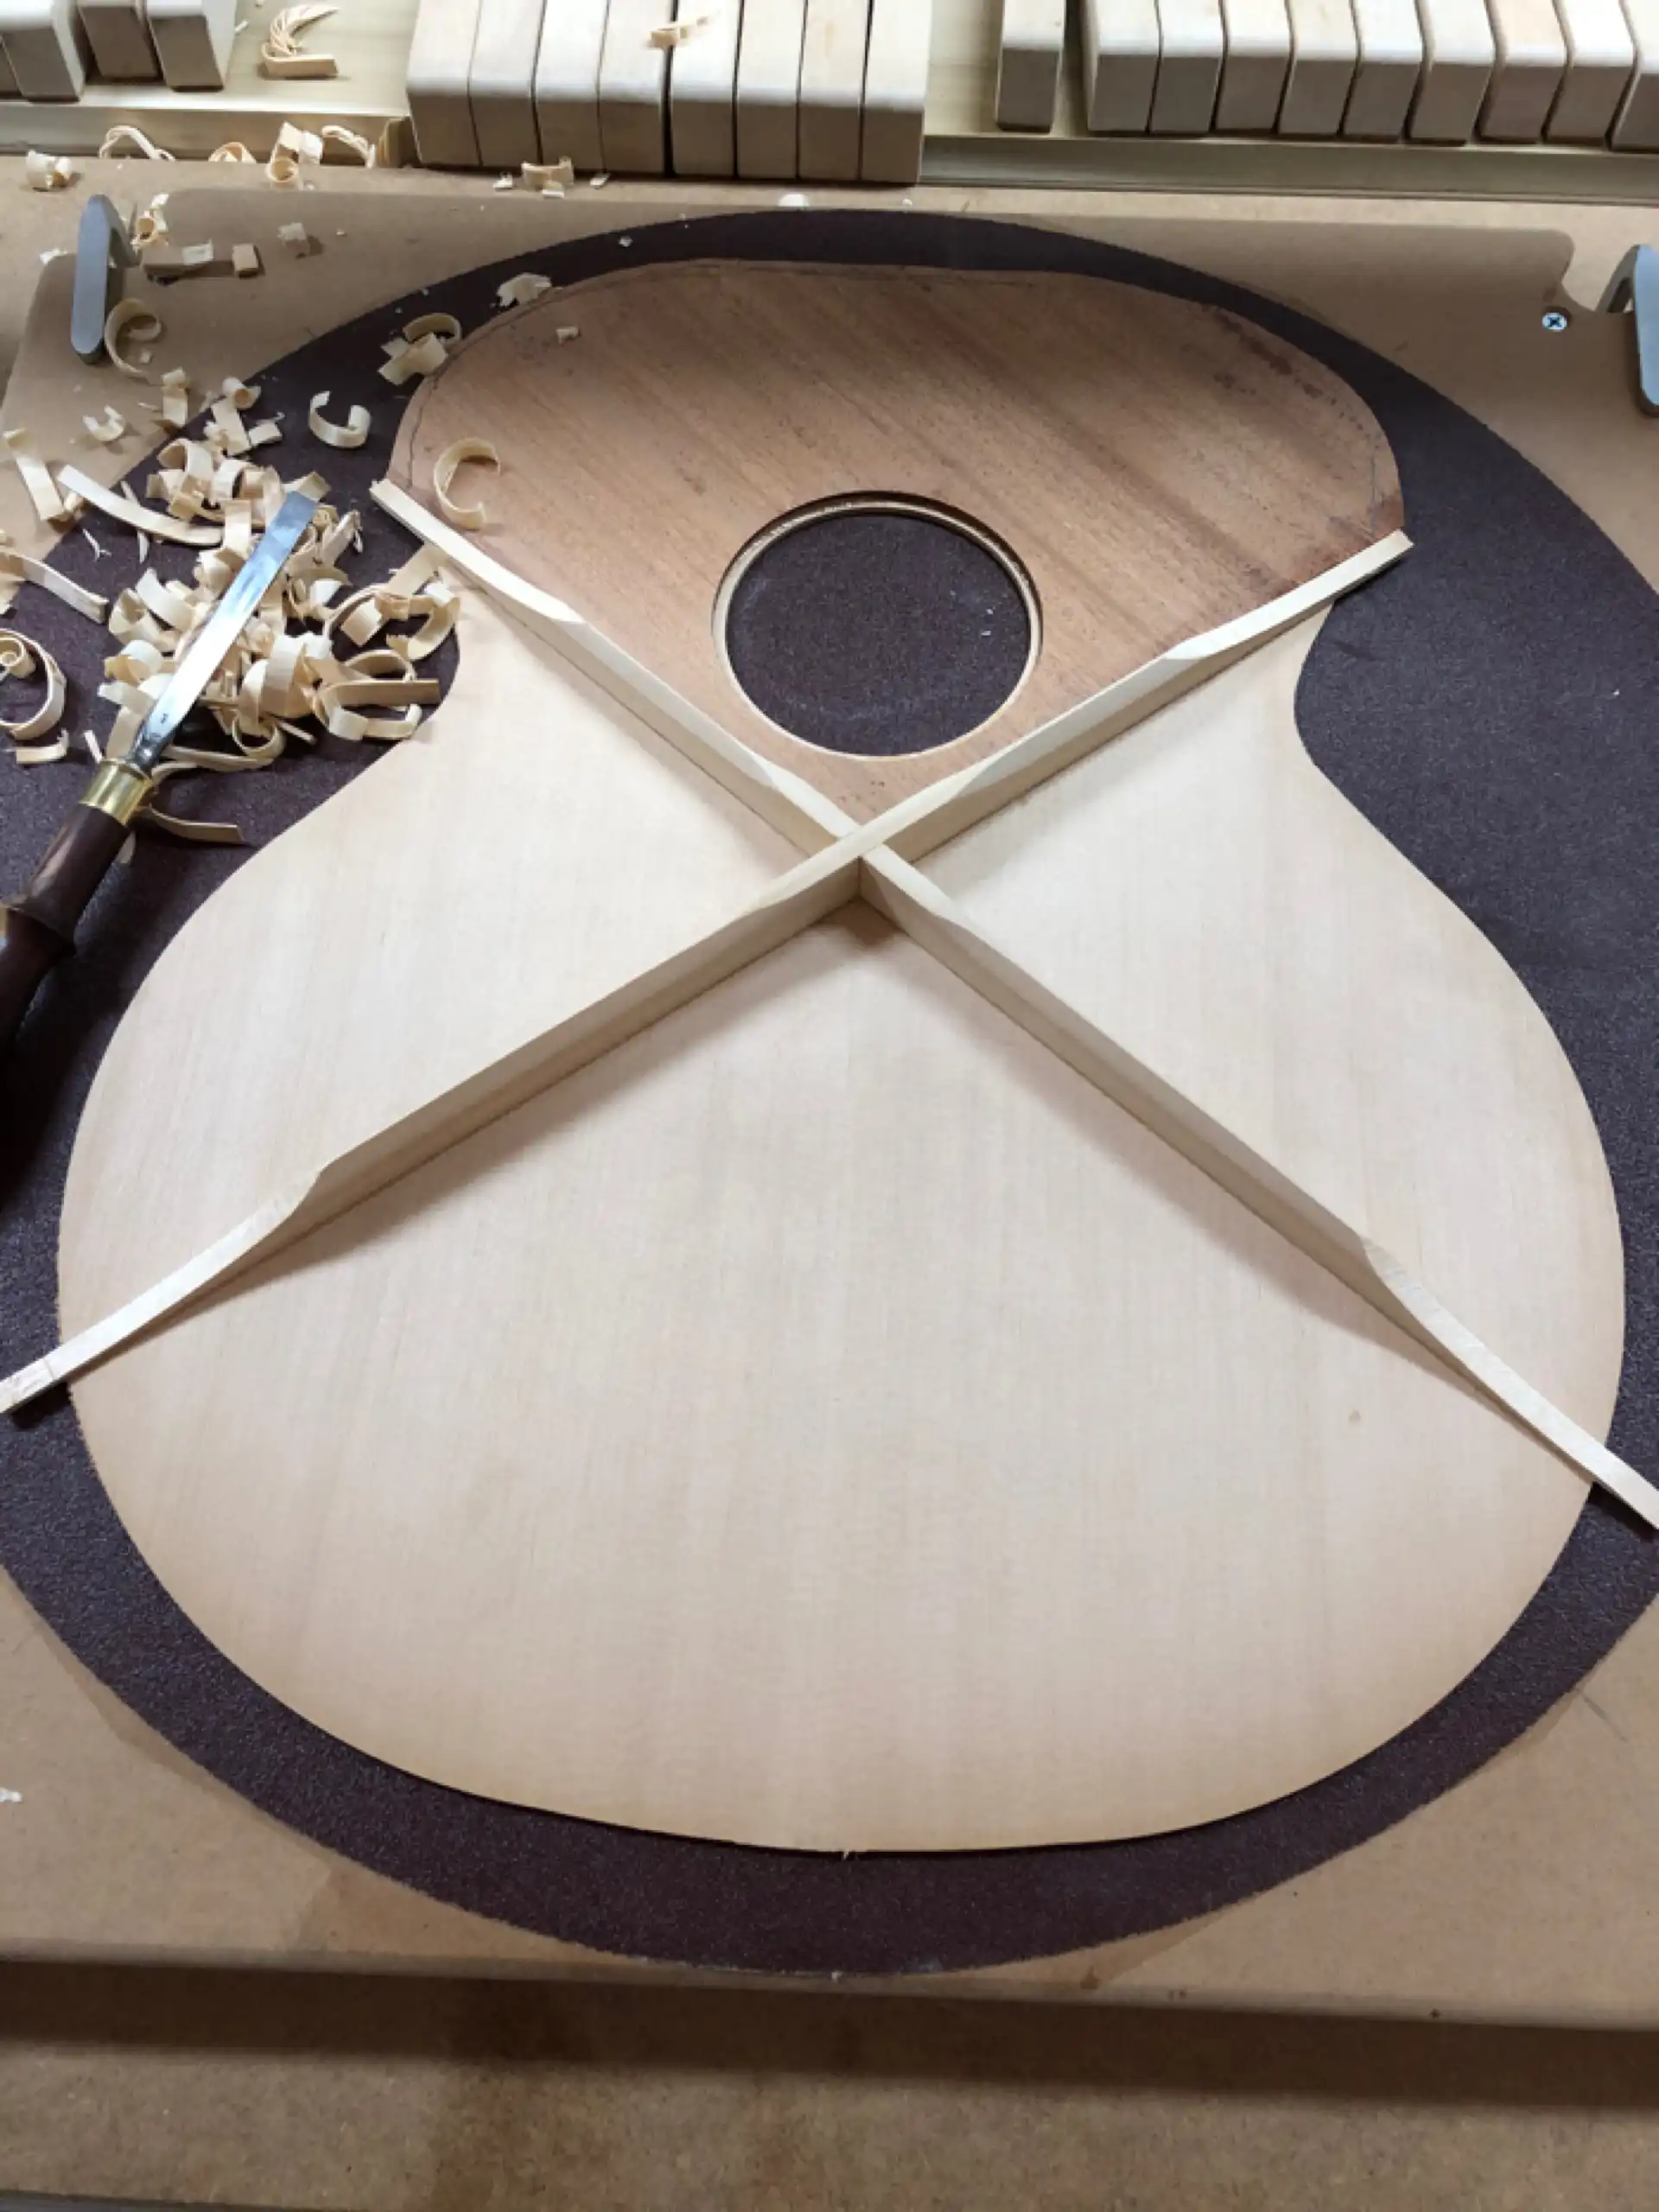
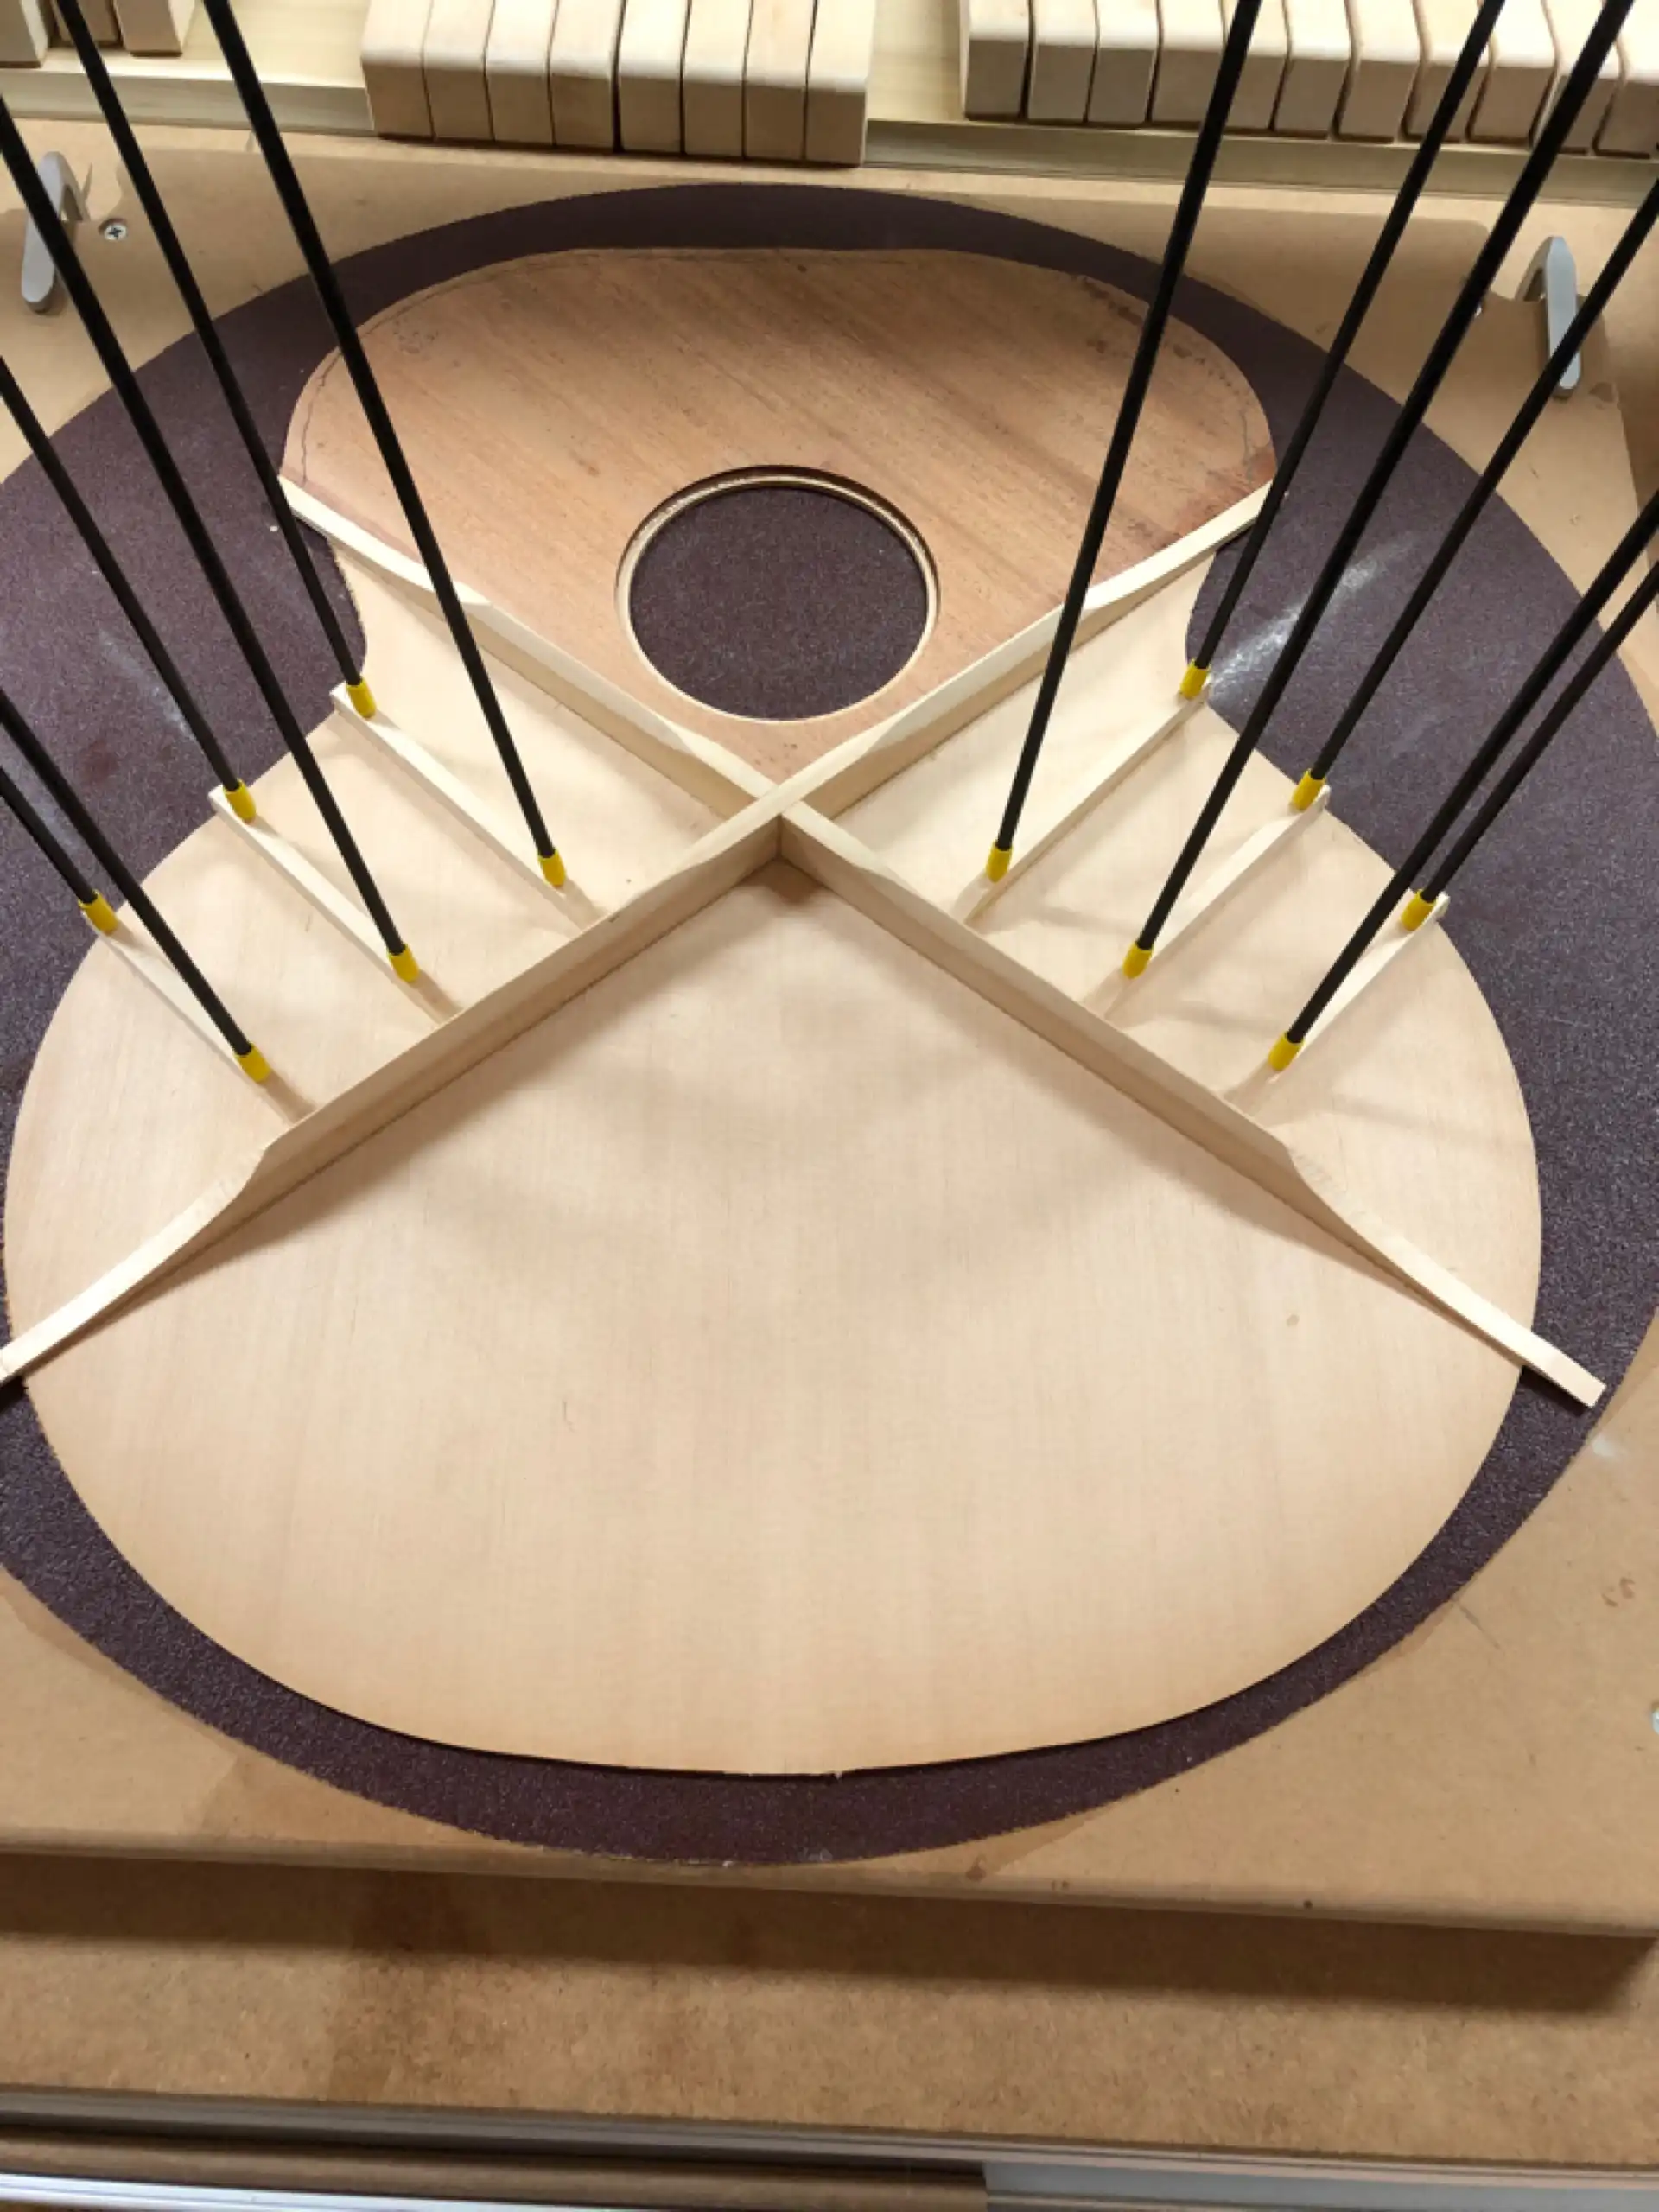
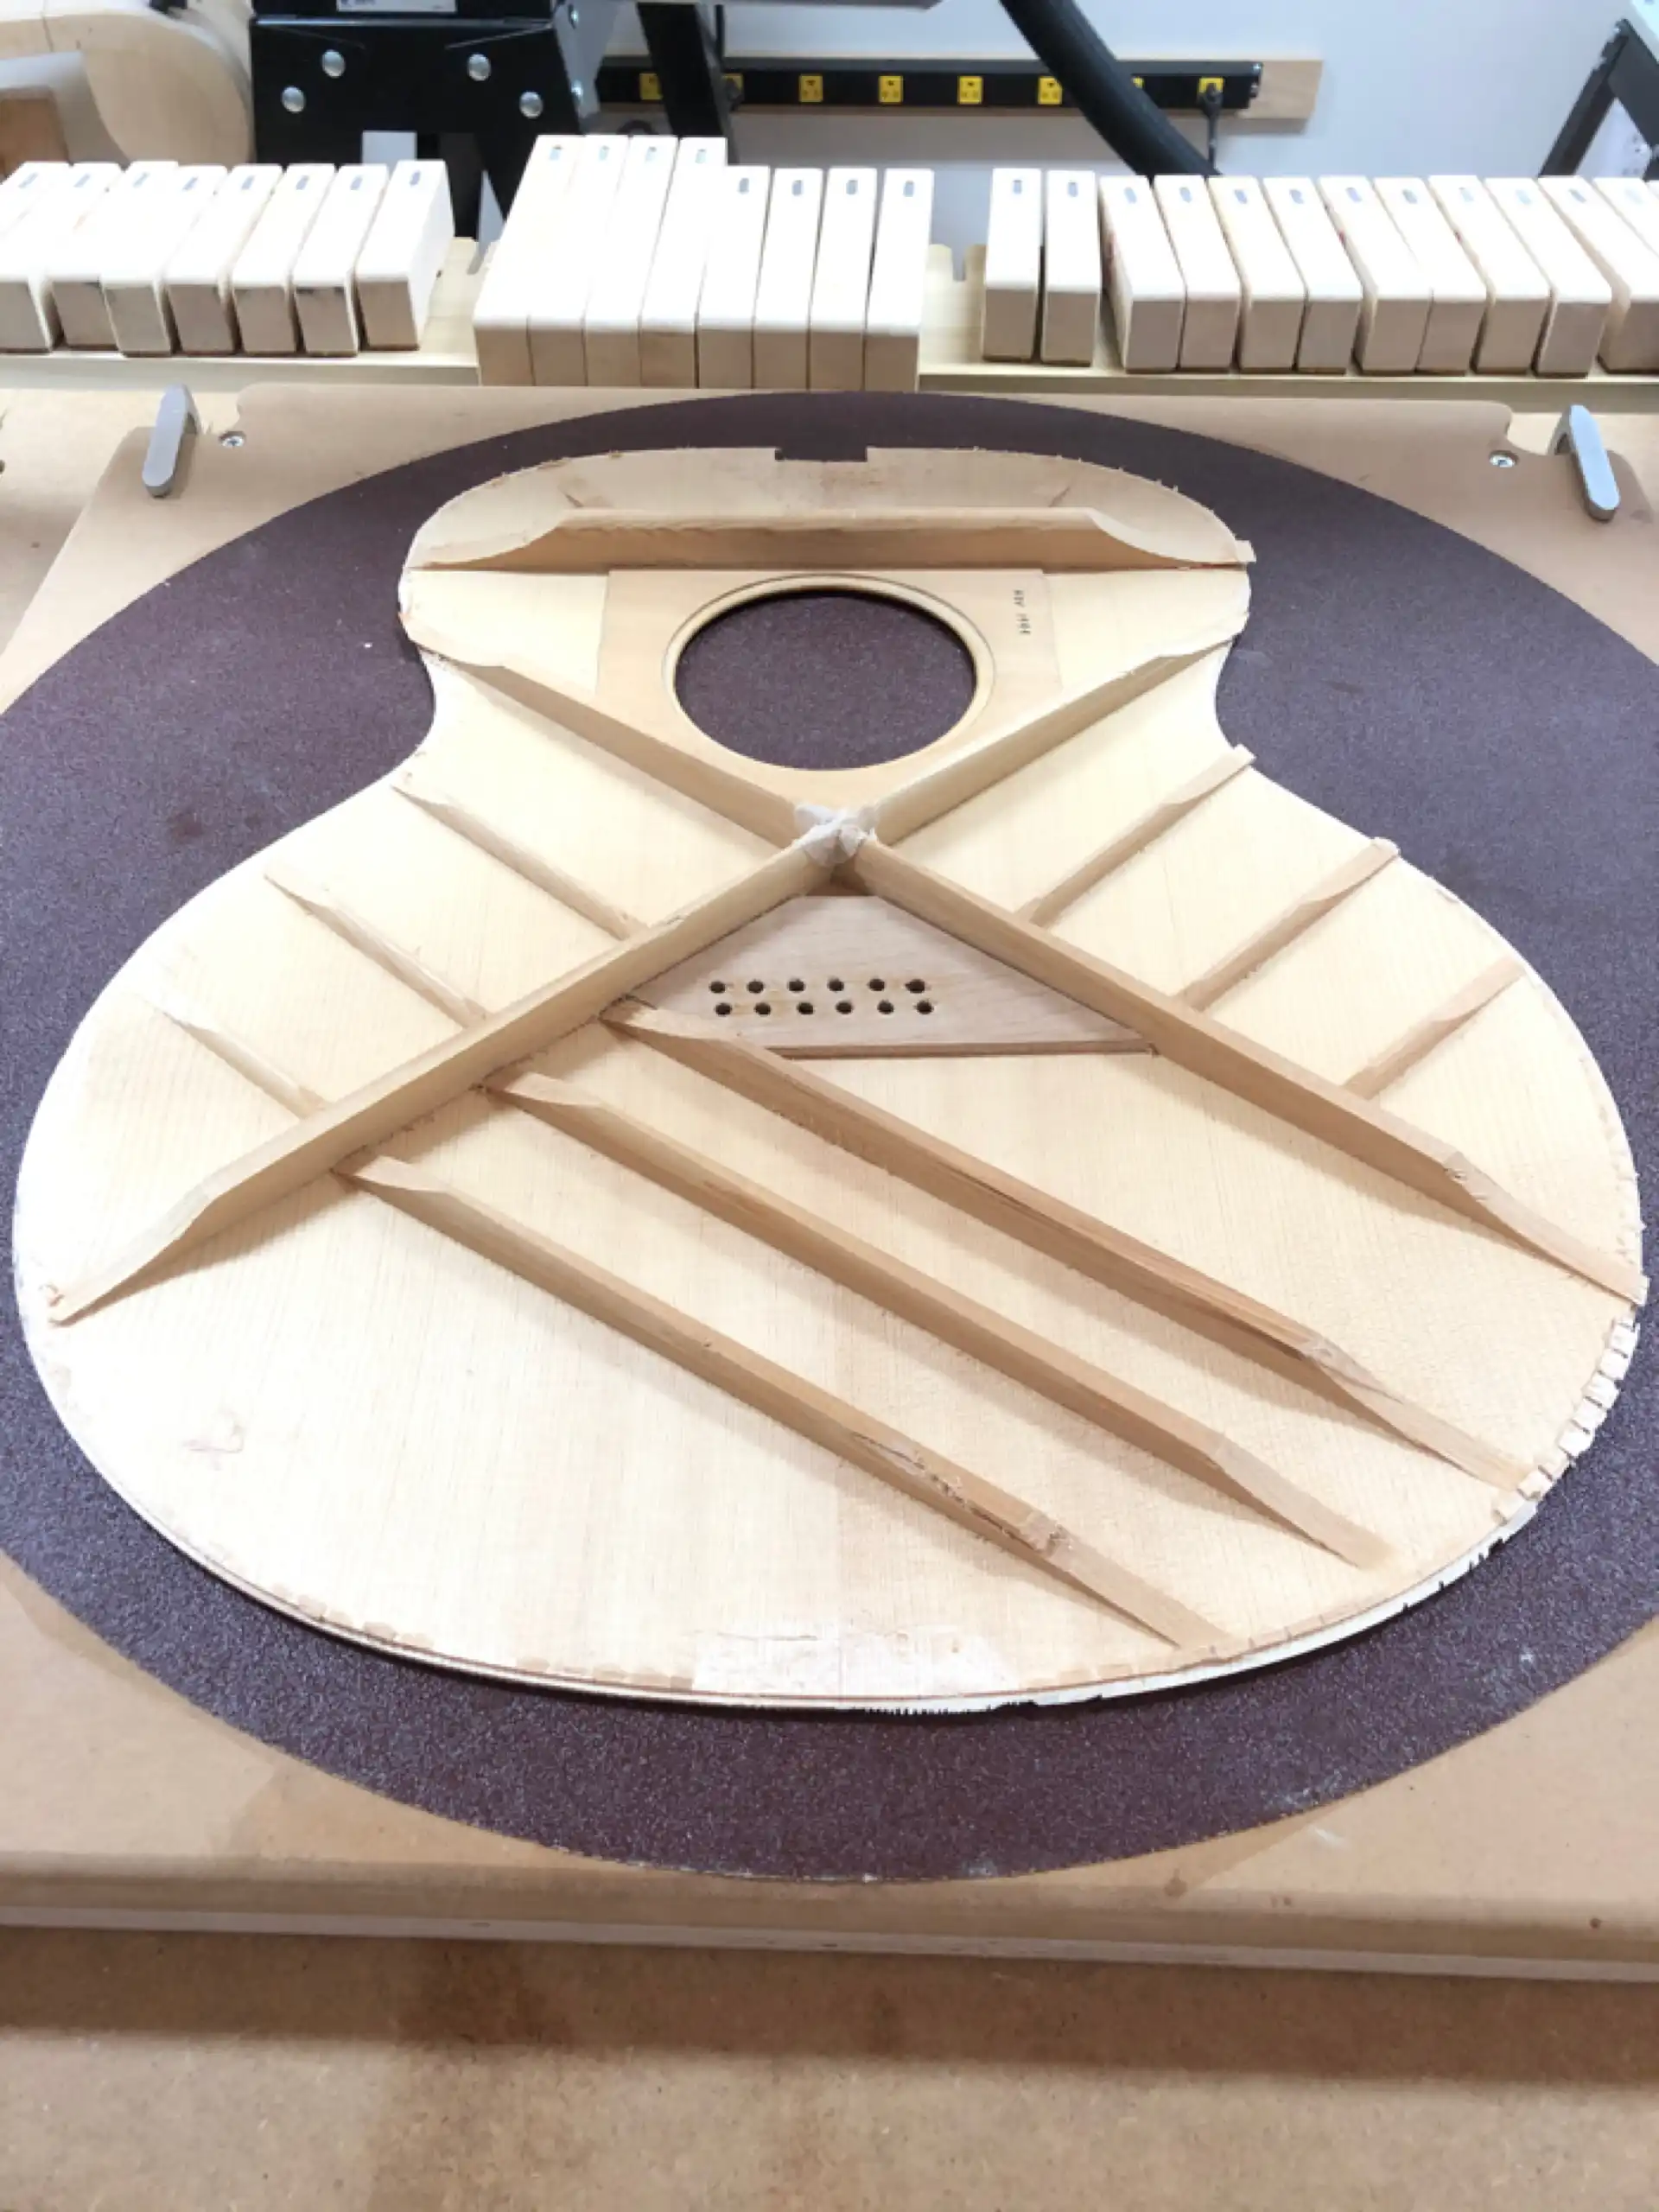
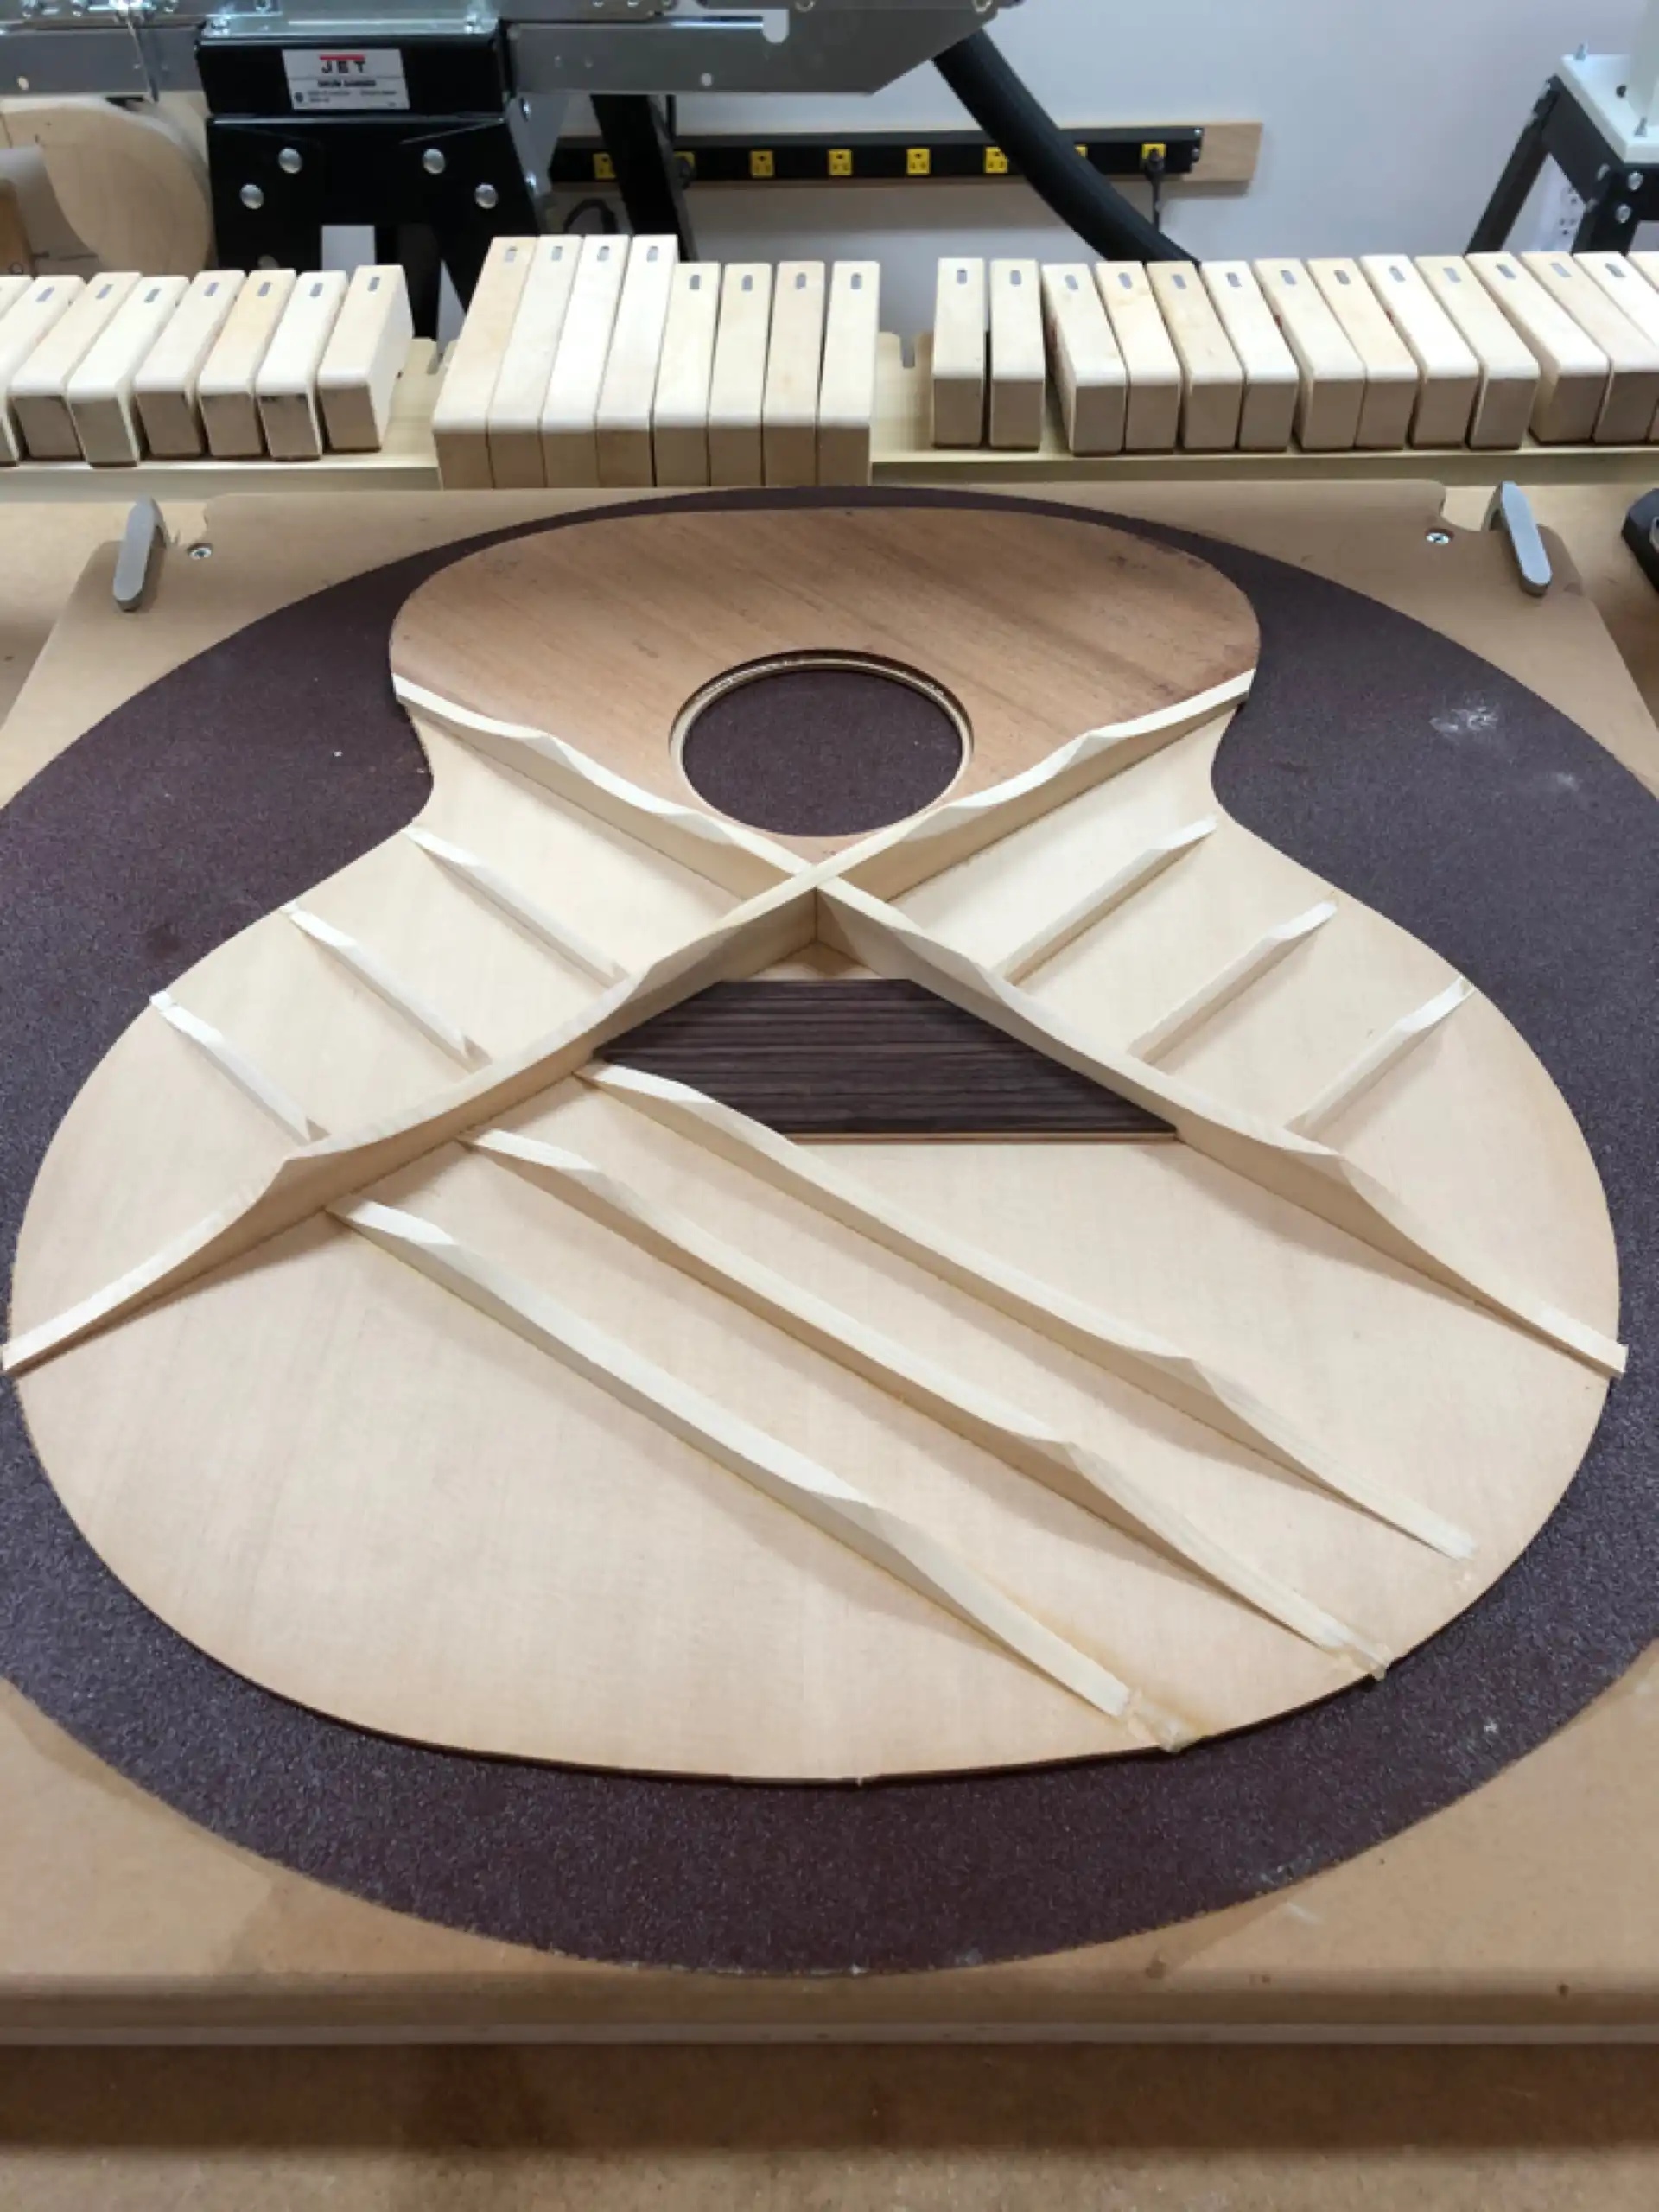
In addition to preventing the pull of the steel strings from collapsing the body of the instrument, soundboard bracing controls, or shapes, the sound. In addition to a traditional straight, X-brace that spans the upper and lower bouts of the front plate and intersects just behind the soundhole, Guild Jumbo 12 strings traditionally use six (6) finger braces (three (3) per side) and three (3) tone bars to round out the bracing. While four (4) finger braces (two (2) per side) and a total of two (2) Tonebars are sufficient, I want to stay in the audio spectrum of the quintessential Guild sound so I will add the extra braces.
Center soundhole soundboards typically share a common bracing pattern, that being the X brace developed and perfected by the Martin company. The cross of the X sits just below the soundhole, reinforcing / adding strength back to the giant 4 inch hole that was cut in the soundboard. The arms of the X reach up around the hole and rest on the rim formed where the sides meet the kerfing in the area called the upper bout. The lower legs of the X also rest on the rim of the sides and extend into the area referred to as the lower bout.
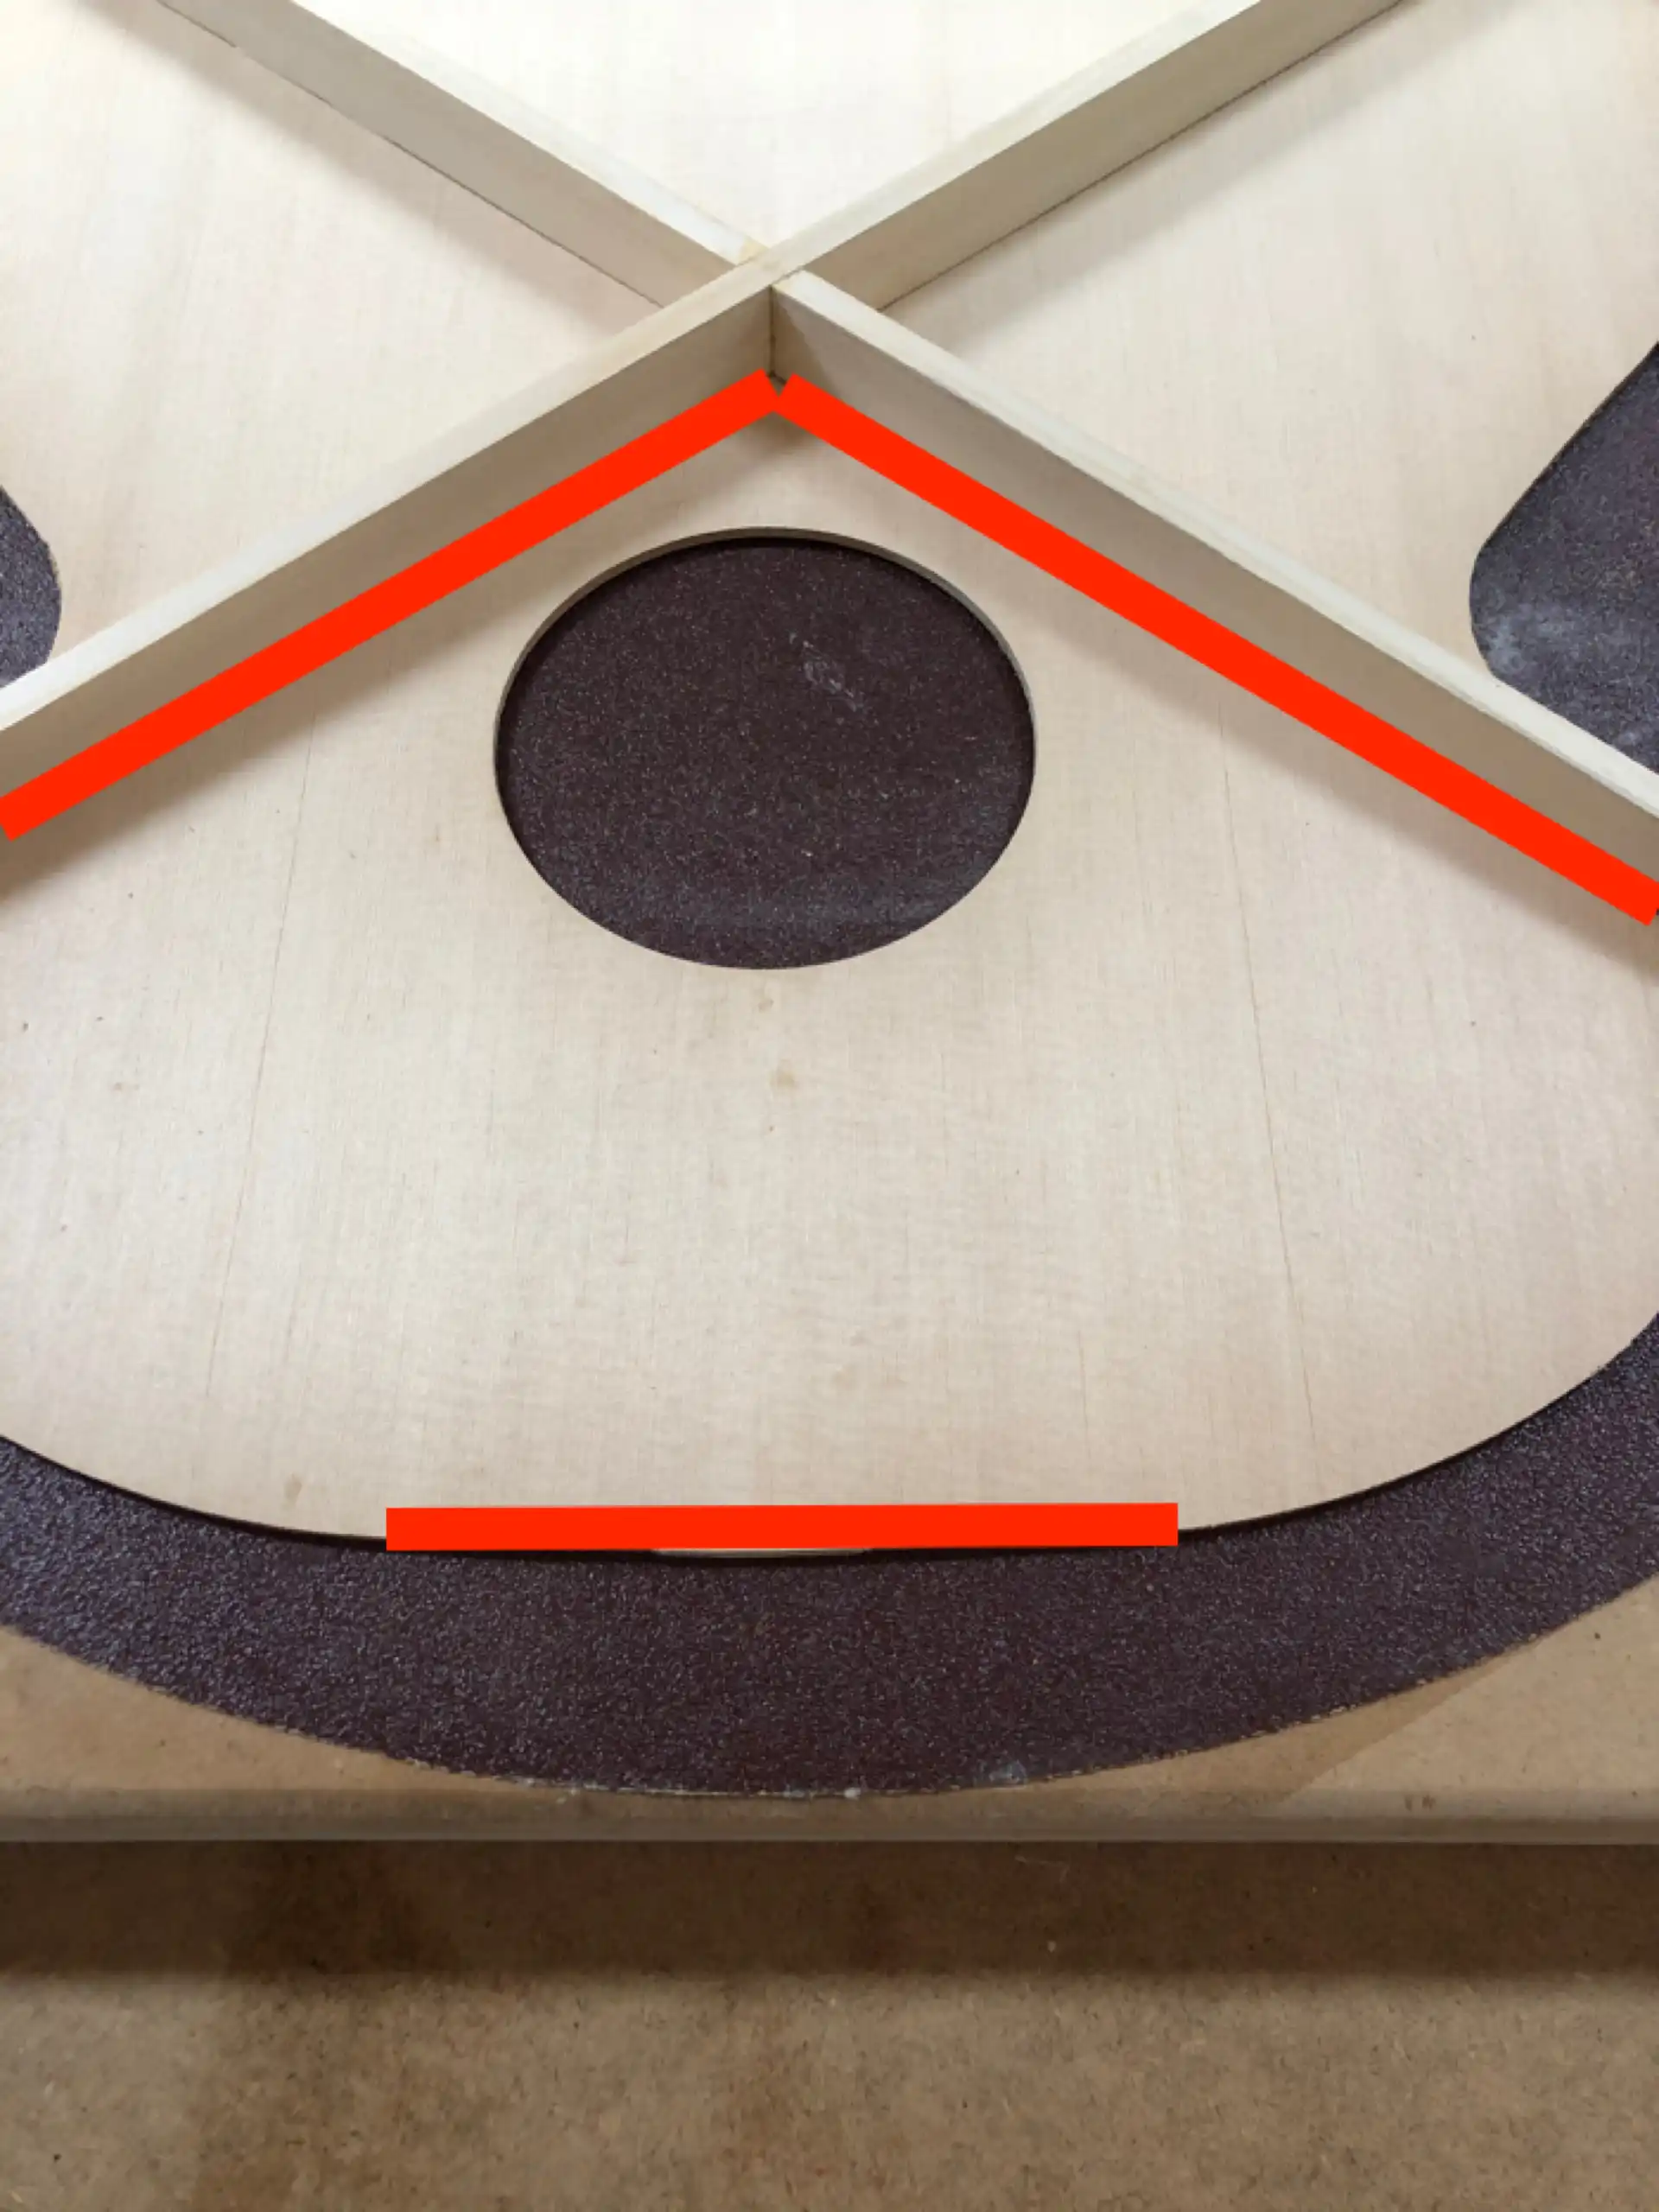
I have learned through experimentation that by slightly widening the X on the lower legs I can get an increased bass response from these Guilds. Never boomy, just better. In the photo, below, I have laid the original soundboard on top of the new soundboard for comparison, and drawn red lines on the photo to emphasize the slightly wider spread of the X-brace on the new soundboard.
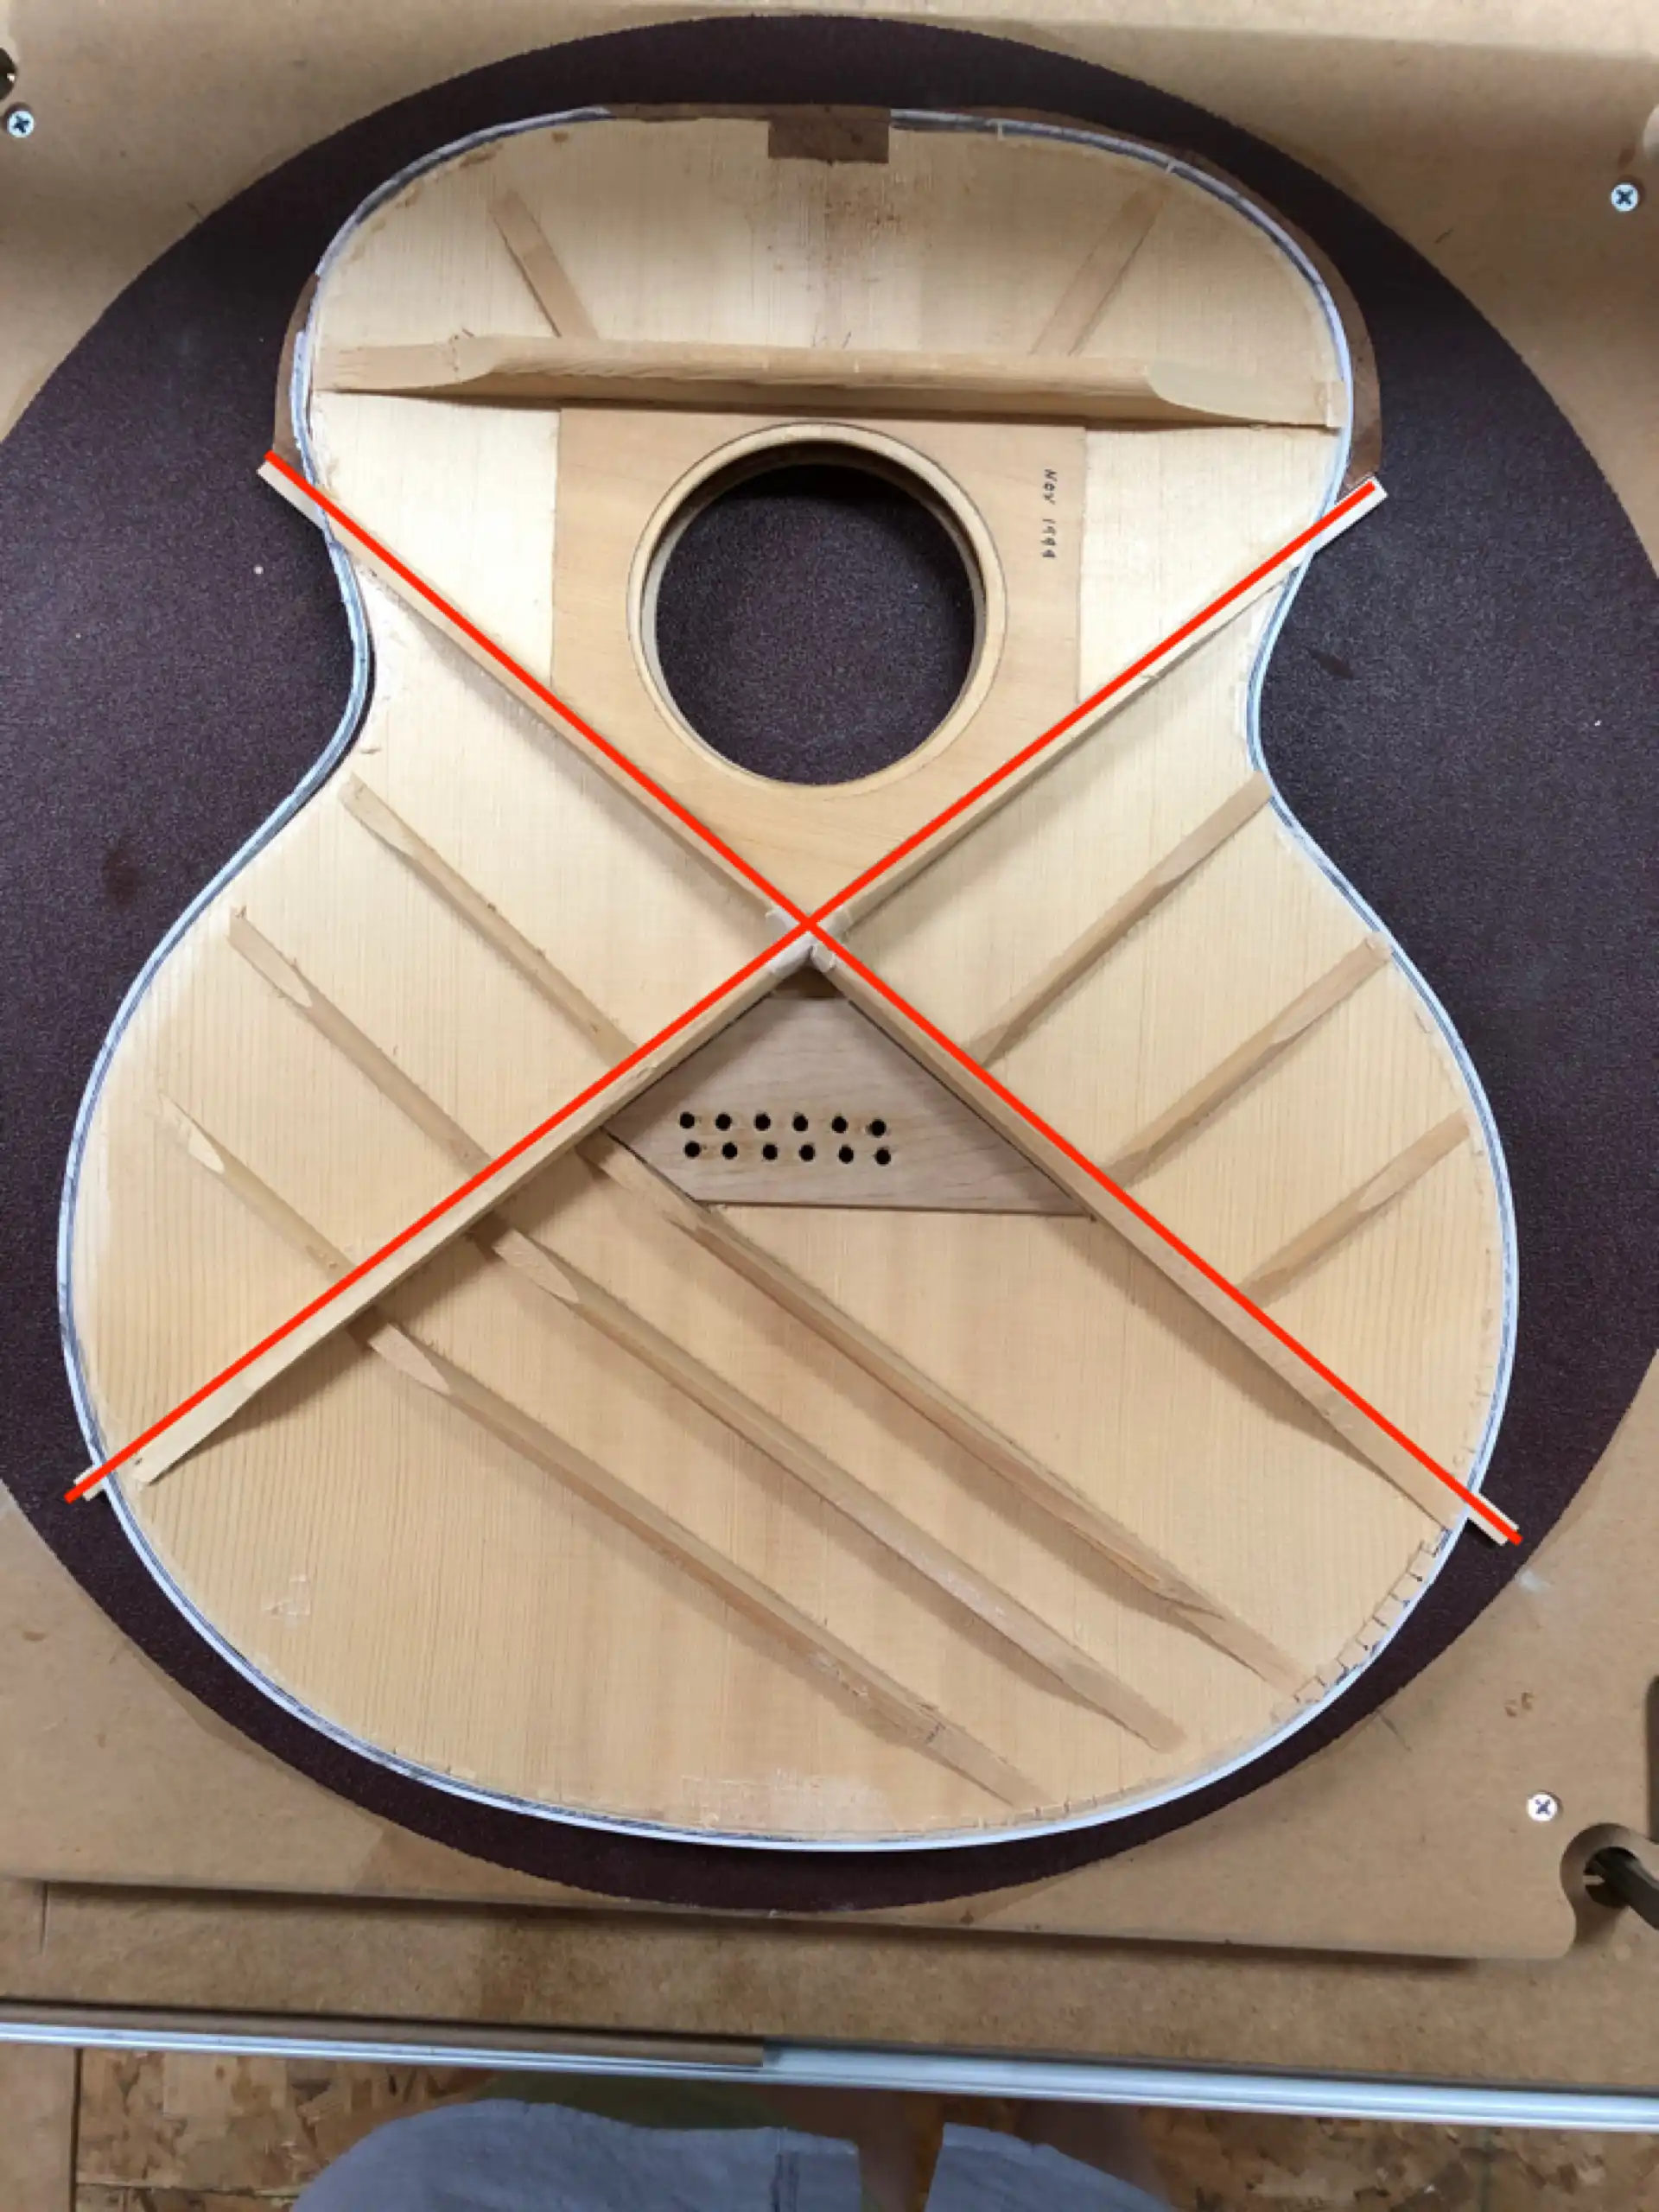
X Brace Widened
Bracing material, shape and dimensions vary among designers and builders, as the measurements determine the stiffness and/or strength of these crucial support beams, and everybody has their own idea regarding what combination of material, shape and dimensions make for the best solution. The primary role of the X Brace is to counteract the pull of the strings that, with no bracing in place, would simply collapse the soundboard into the box.
A slight radius is sanded into each brace that results in a slight domed effect across the face of the soundboard. The tighter the radius, the more pronounced the dome, or arched, effect, and the stronger the soundboard (think: suspension bridges). Strength comes at a price, however, and that price is reduced volume. Flatter equals louder. The generation of acoustic guitars that this 12 string came from back in the late 60s and early 70s were called “flattops” due to the flatter (less arched) soundboards. I am using a relatively flat 52 foot radius for this 12 string. I will leave the braces a little taller to support the flatter top.
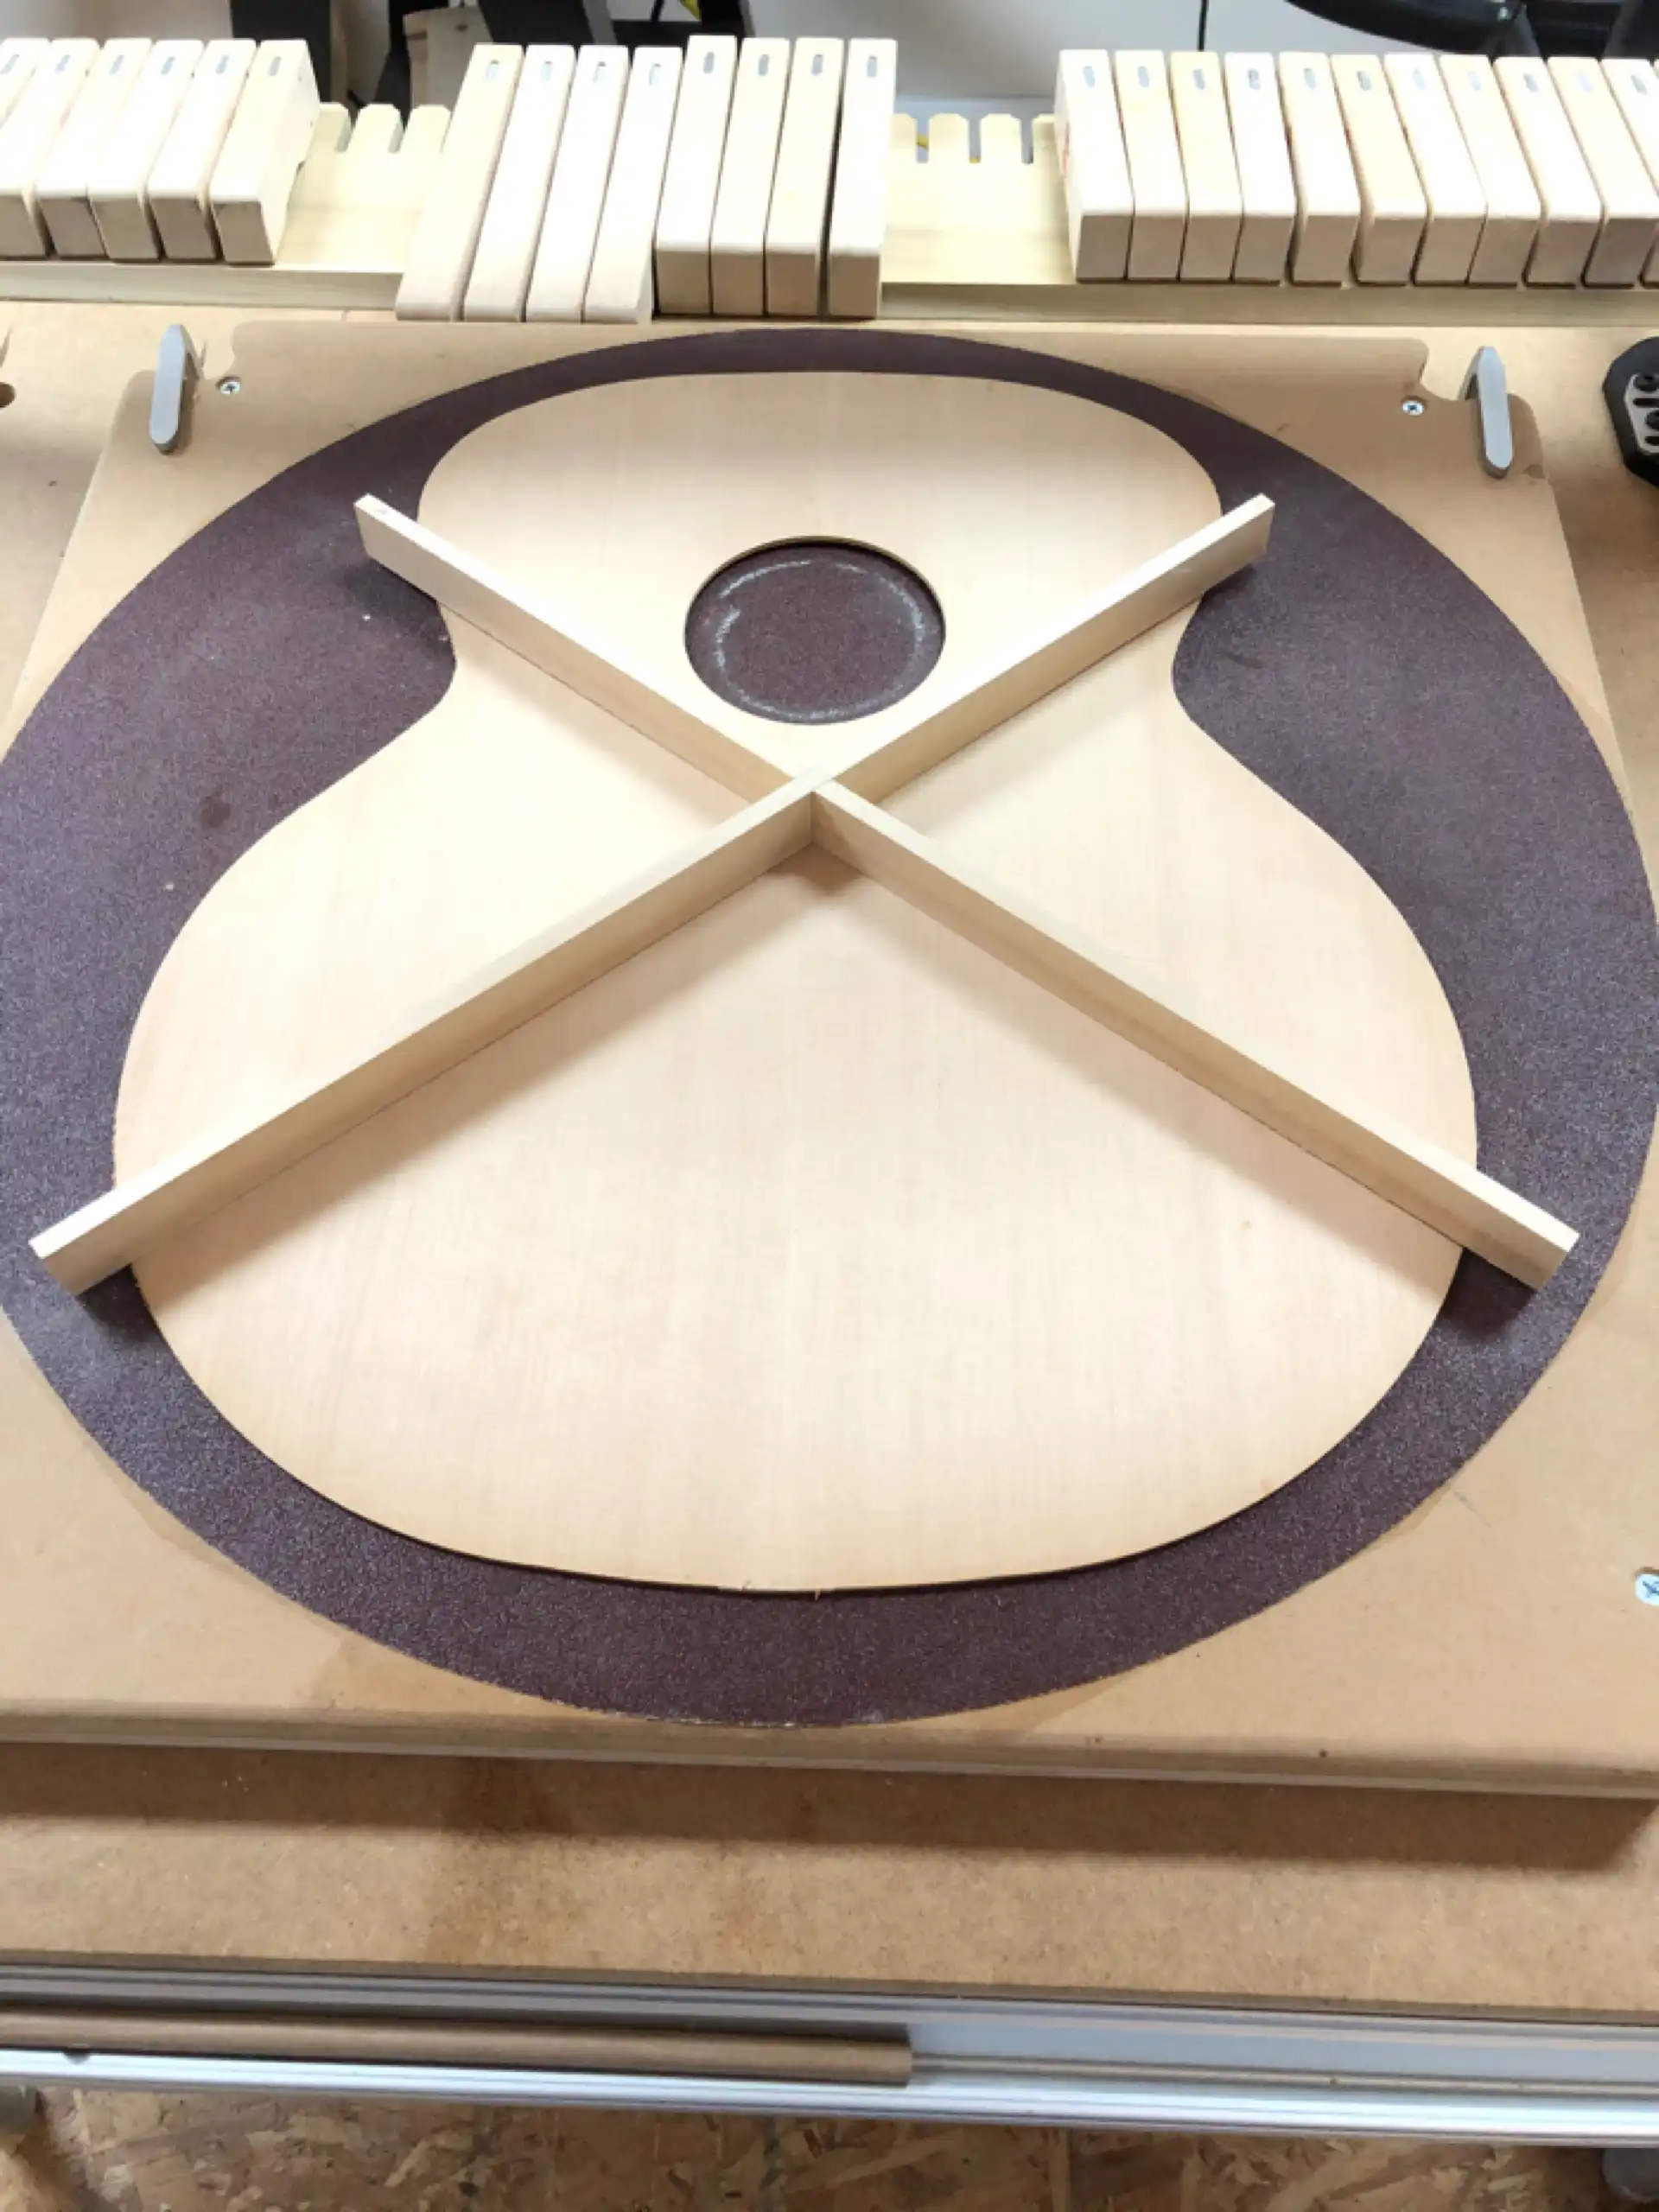
X Brace
The braces must be strong enough to counter the effort of the strings to collapse the top, but not add damping and unnecessary weight to the soundboard. Too much wood results in a condition frequently encountered on factory-built instruments, called “over-braced”. There is a balance to be achieved between strength and stiffness, where the top is properly supported and the entire top is stiff enough to promote the free travel of kinetic energy across the surface. If the soundboard is too stiff, the top will never get set into motion, and there is little sound generated.
Material selection determines the bracing dimensions. The soundboard braces I have fashioned for this Guild come from very stiff, straight grained Adirondack (Red) Spruce. The original braces measured 3/8 of an inch thick by 3/4 of an inch high. I am reducing the width of these braces to approximately 5/16 inch and increasing the height to approximately 7/8 of an inch. Producing braces that are thinner and taller will provide me with the support I need and yield that superior sustain I am after.
The bridge of an acoustic guitar is also a brace, albeit an external one. It is typically designed to be long enough to rest atop the lower bout legs of the X Brace. The bridge supports the saddle, which is the primary contact point for the energy transfer from the plucked strings to the soundboard. In addition to (traditionally) anchoring the strings, the bridge adds mass to the soundboard. Too little mass and the plate will never be set sufficiently in motion. Too much mass and the energy will be subjected to unnecessary damping. This extra brace must always be factored in when determining the overall front plate bracing: dimensions (length, height and thickness), shape (tapered, scalloped, etc), stiffness, and placement.
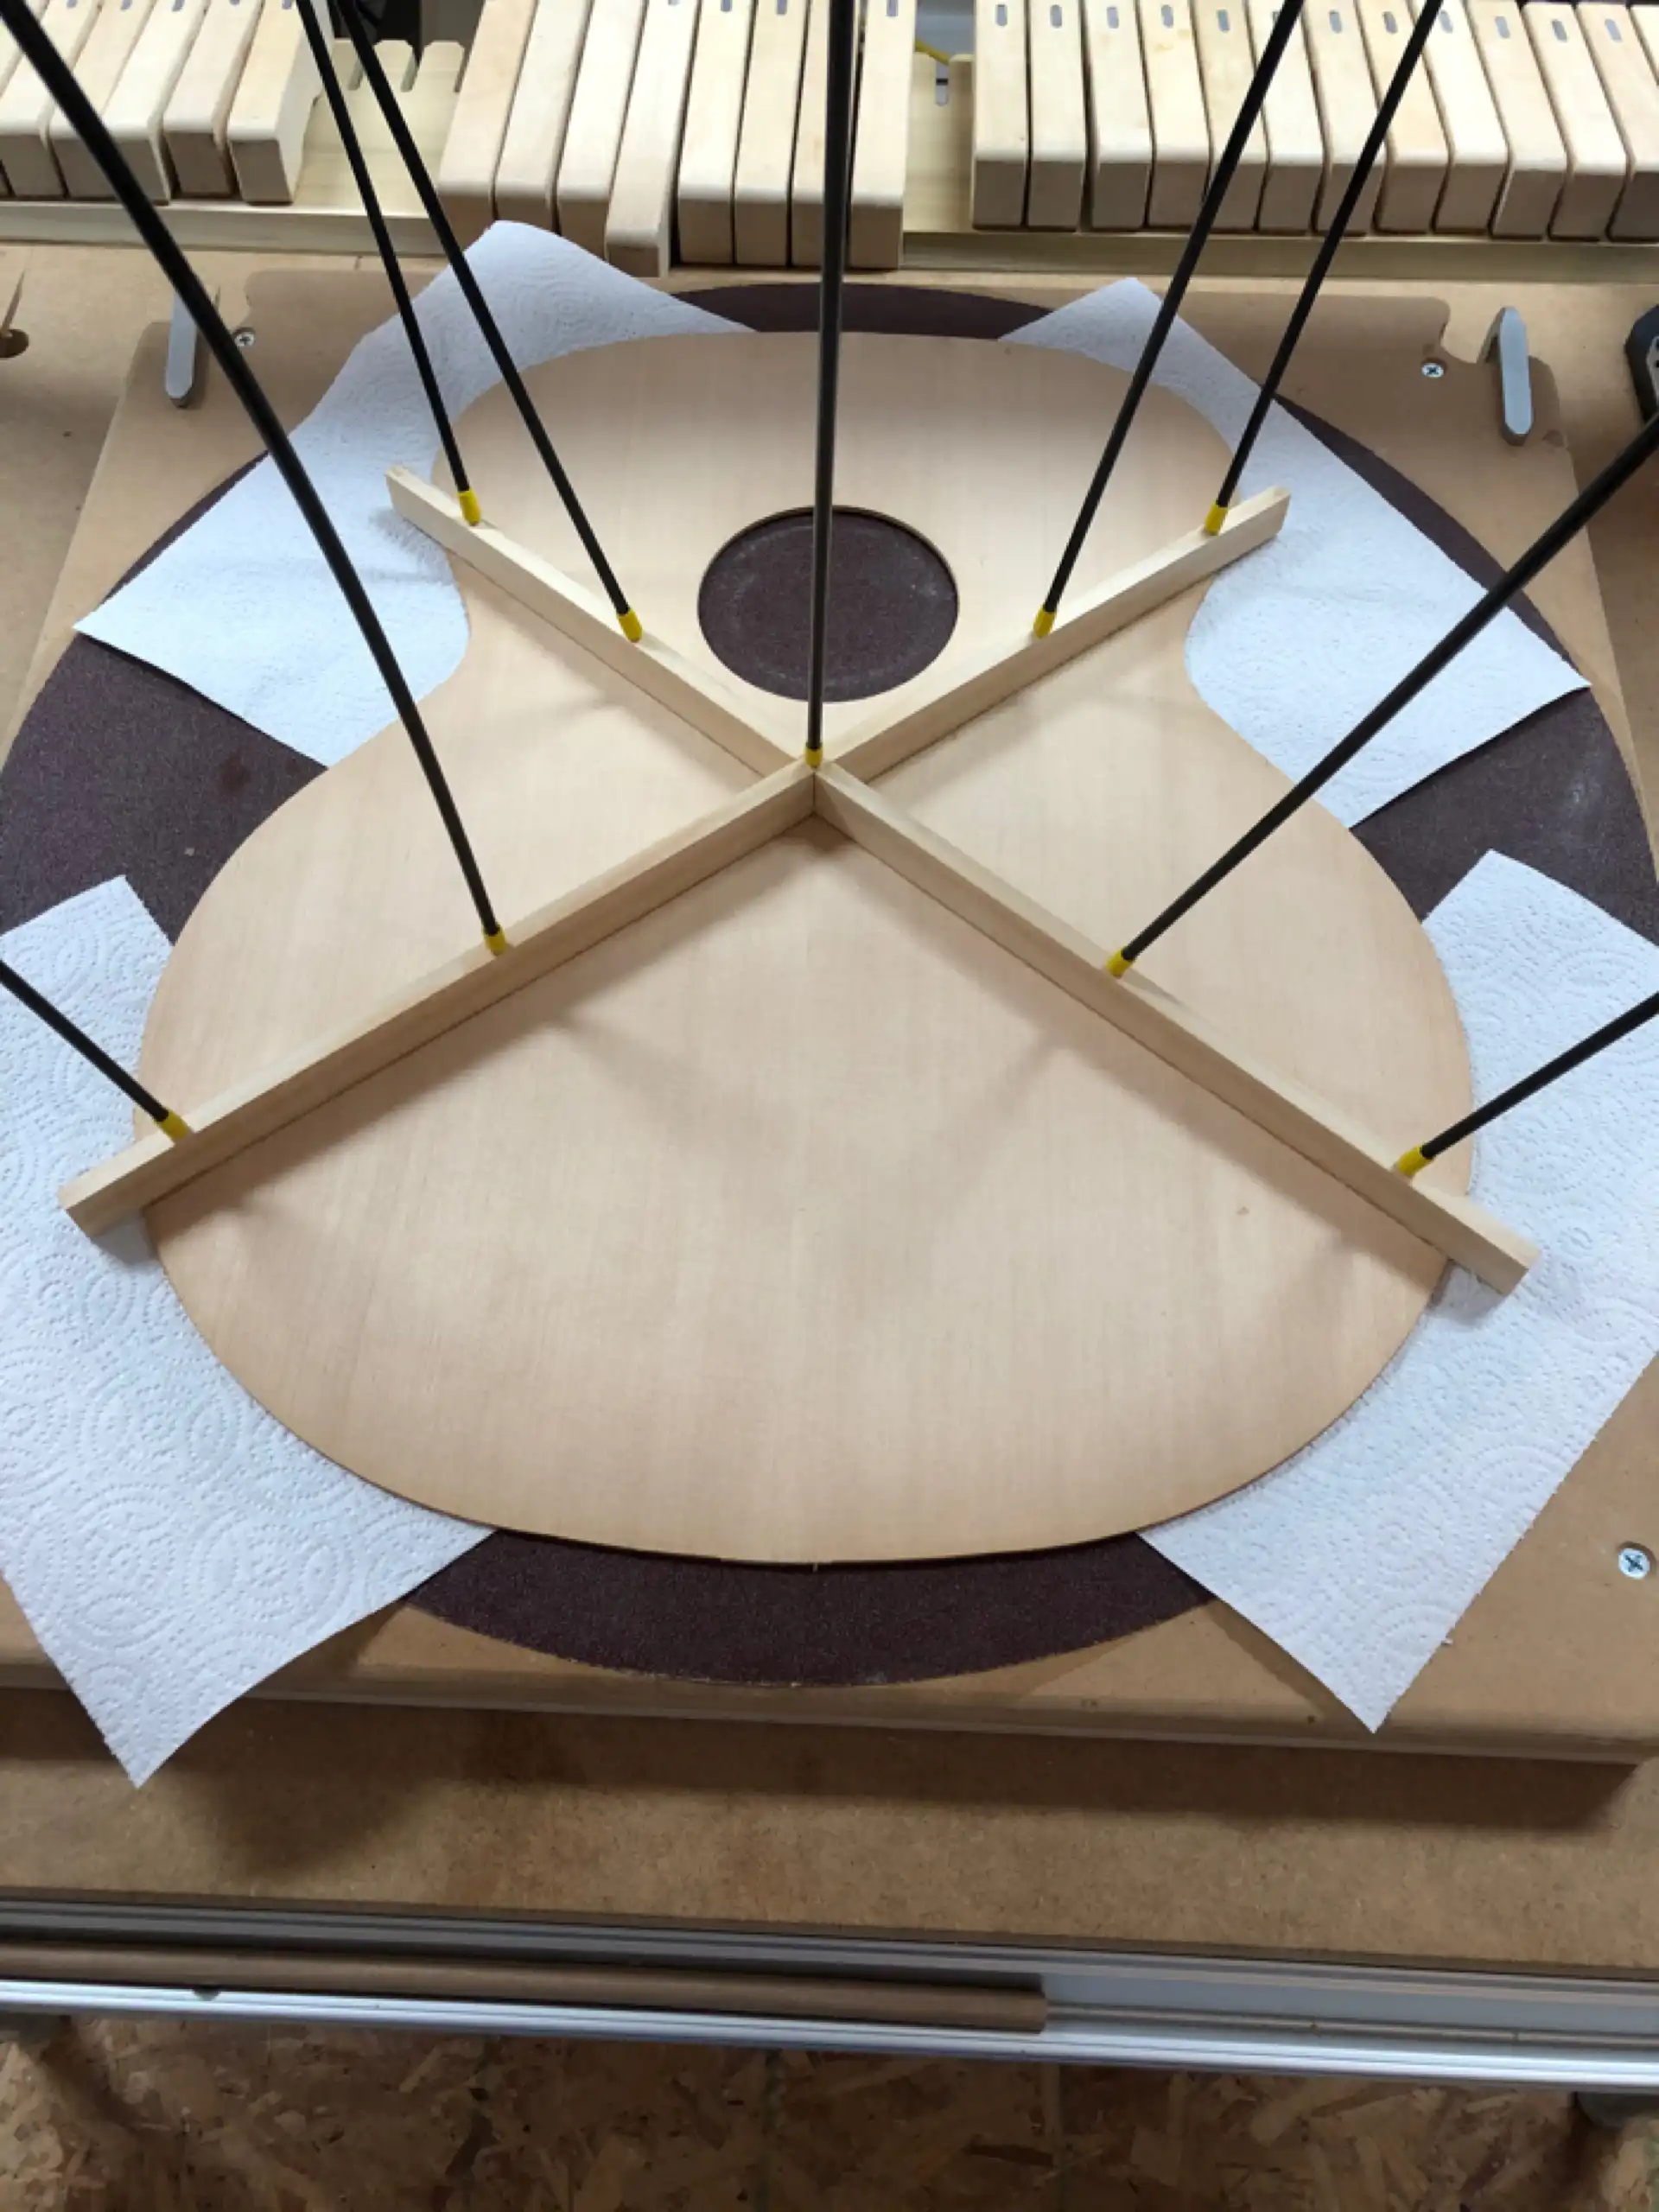
X Brace in the Go Bar Deck
The topic of neck resets should be (and may yet become) an article unto itself. But this is an appropriate time to address it as my center soundhole soundboard construction technique is born from my attempts to overcome the conditions that result in the need to reset the necks on these instruments. There are only a few components involved that can possibly contribute to the condition where the neck of an acoustic guitar must be removed, its angle of incidence (where it contacts the body) altered and be re-attached. A neck can bow forward beyond the point at which it is correctable short of surgery. The belly area below the bridge can pull upwards due to insufficient bracing and/or over-thinning the soundboard and/or brace failure where the only option is to reset the neck.
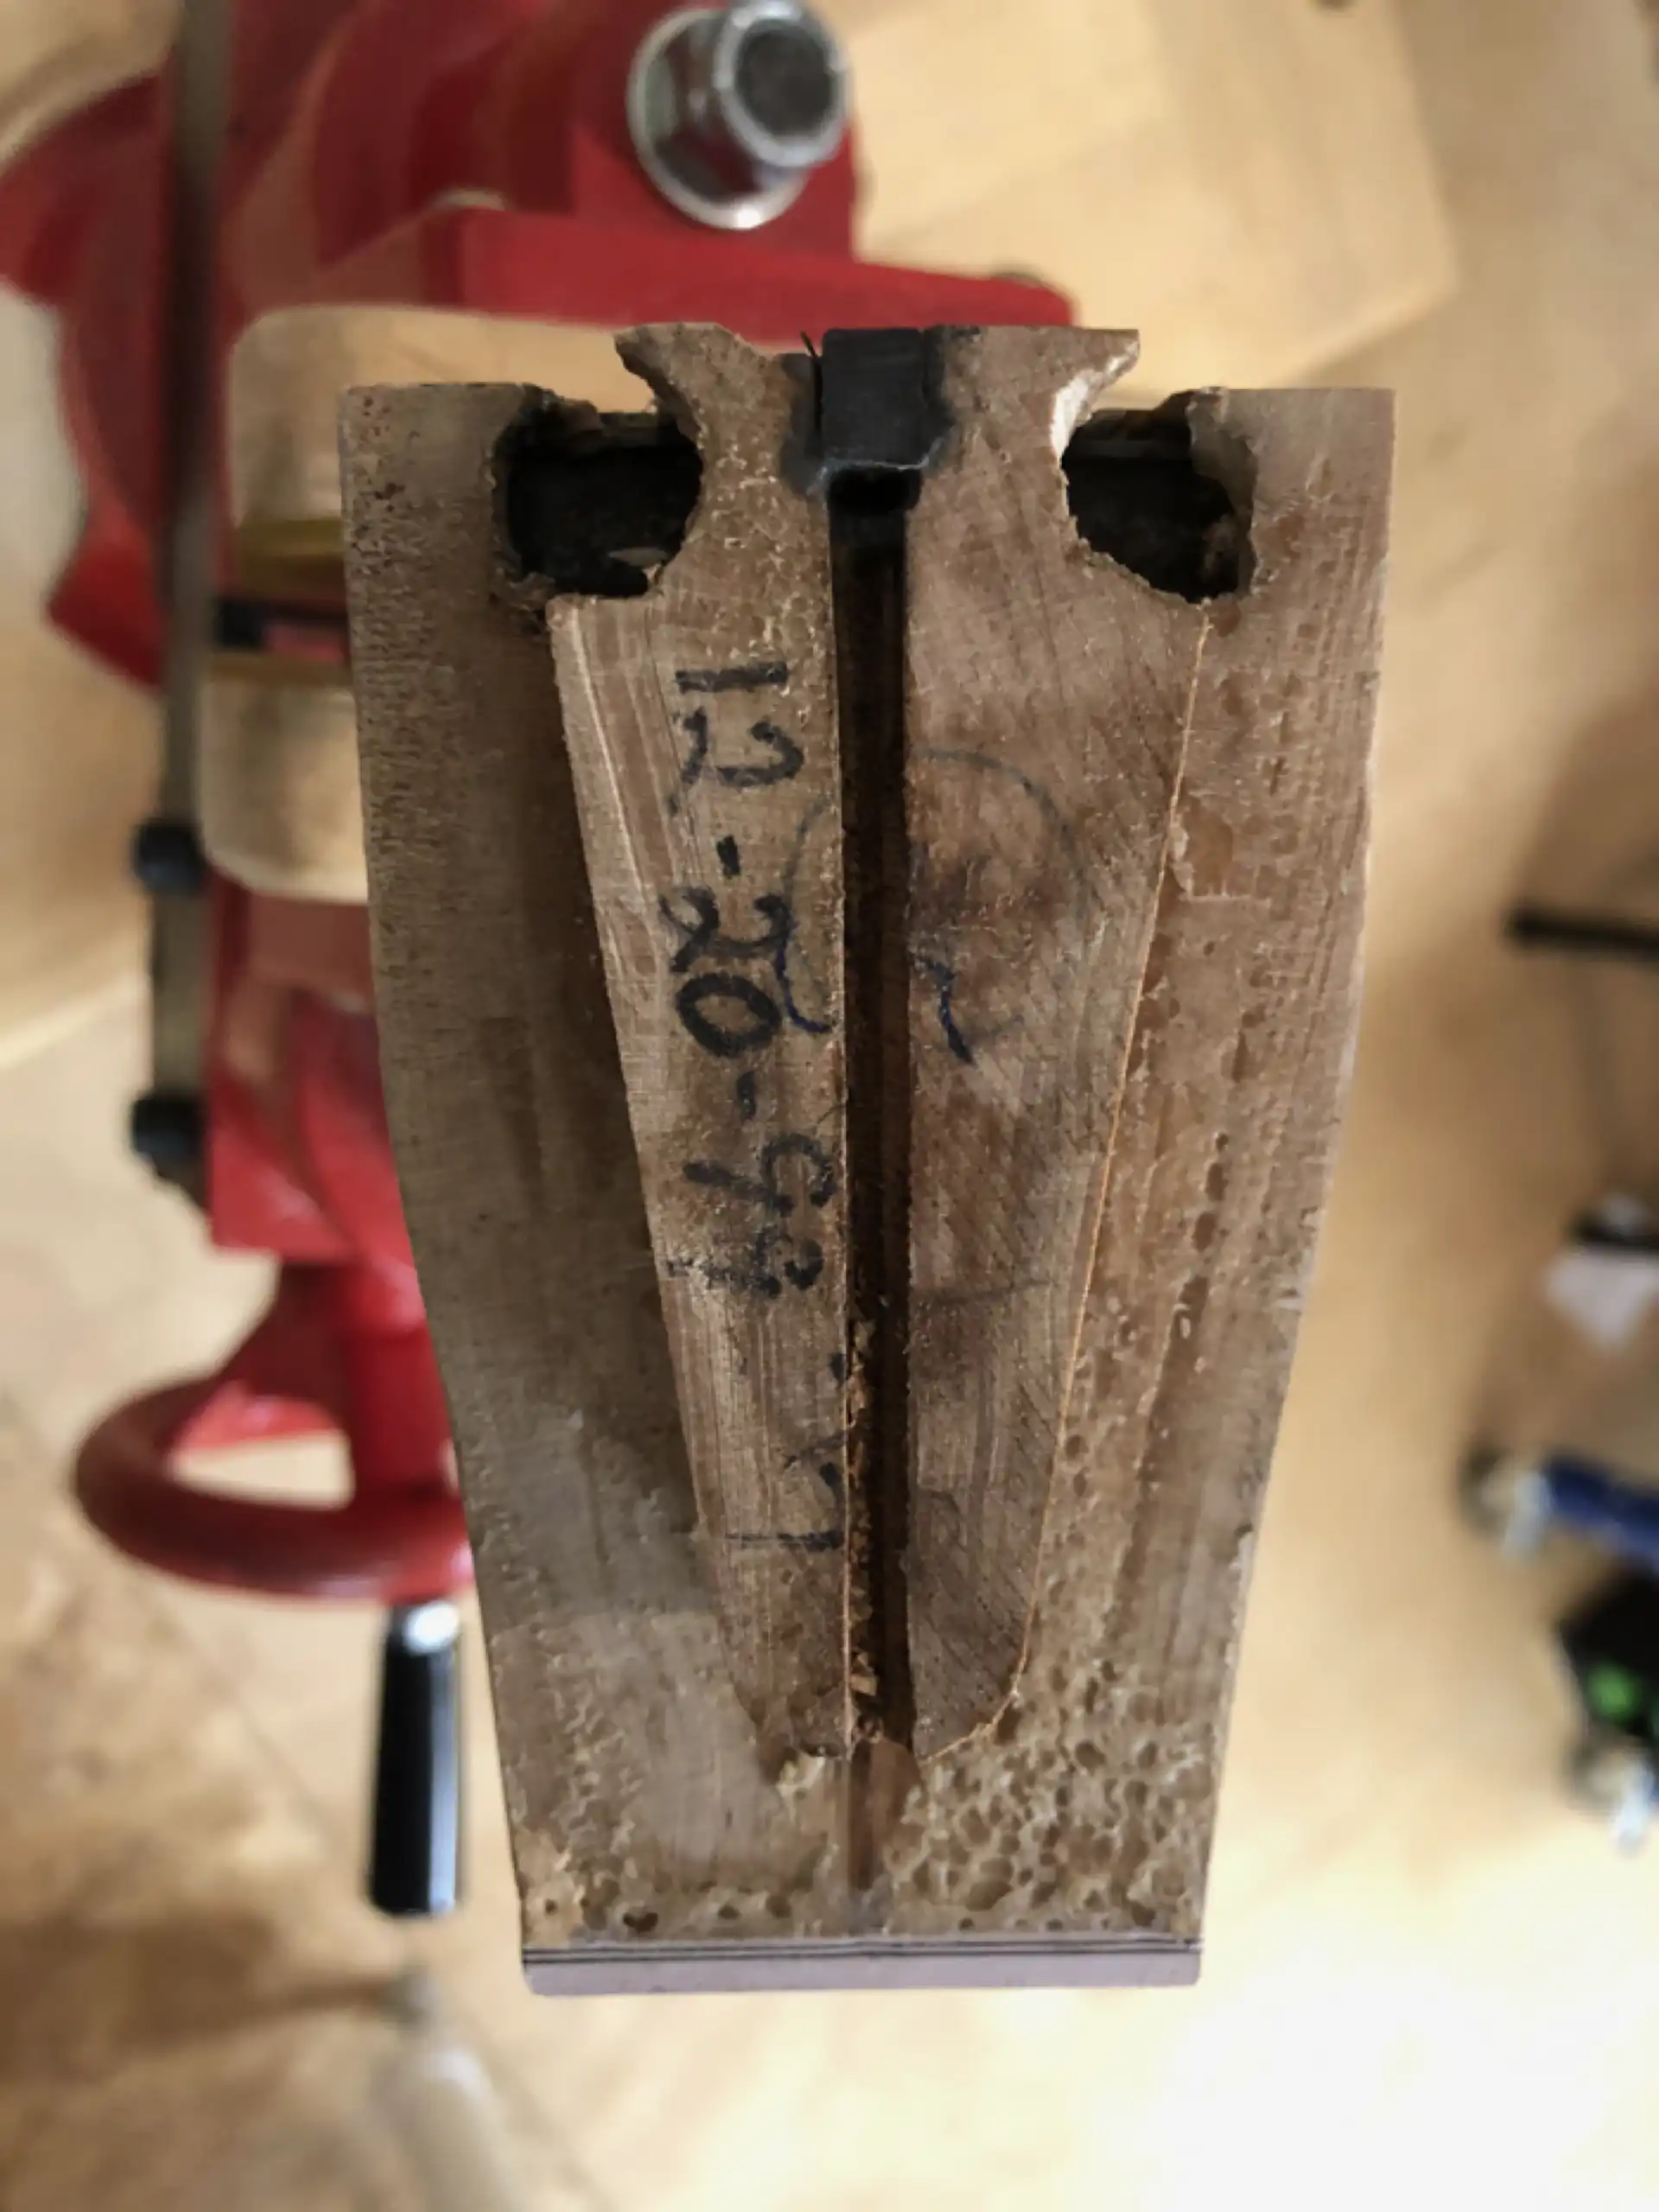
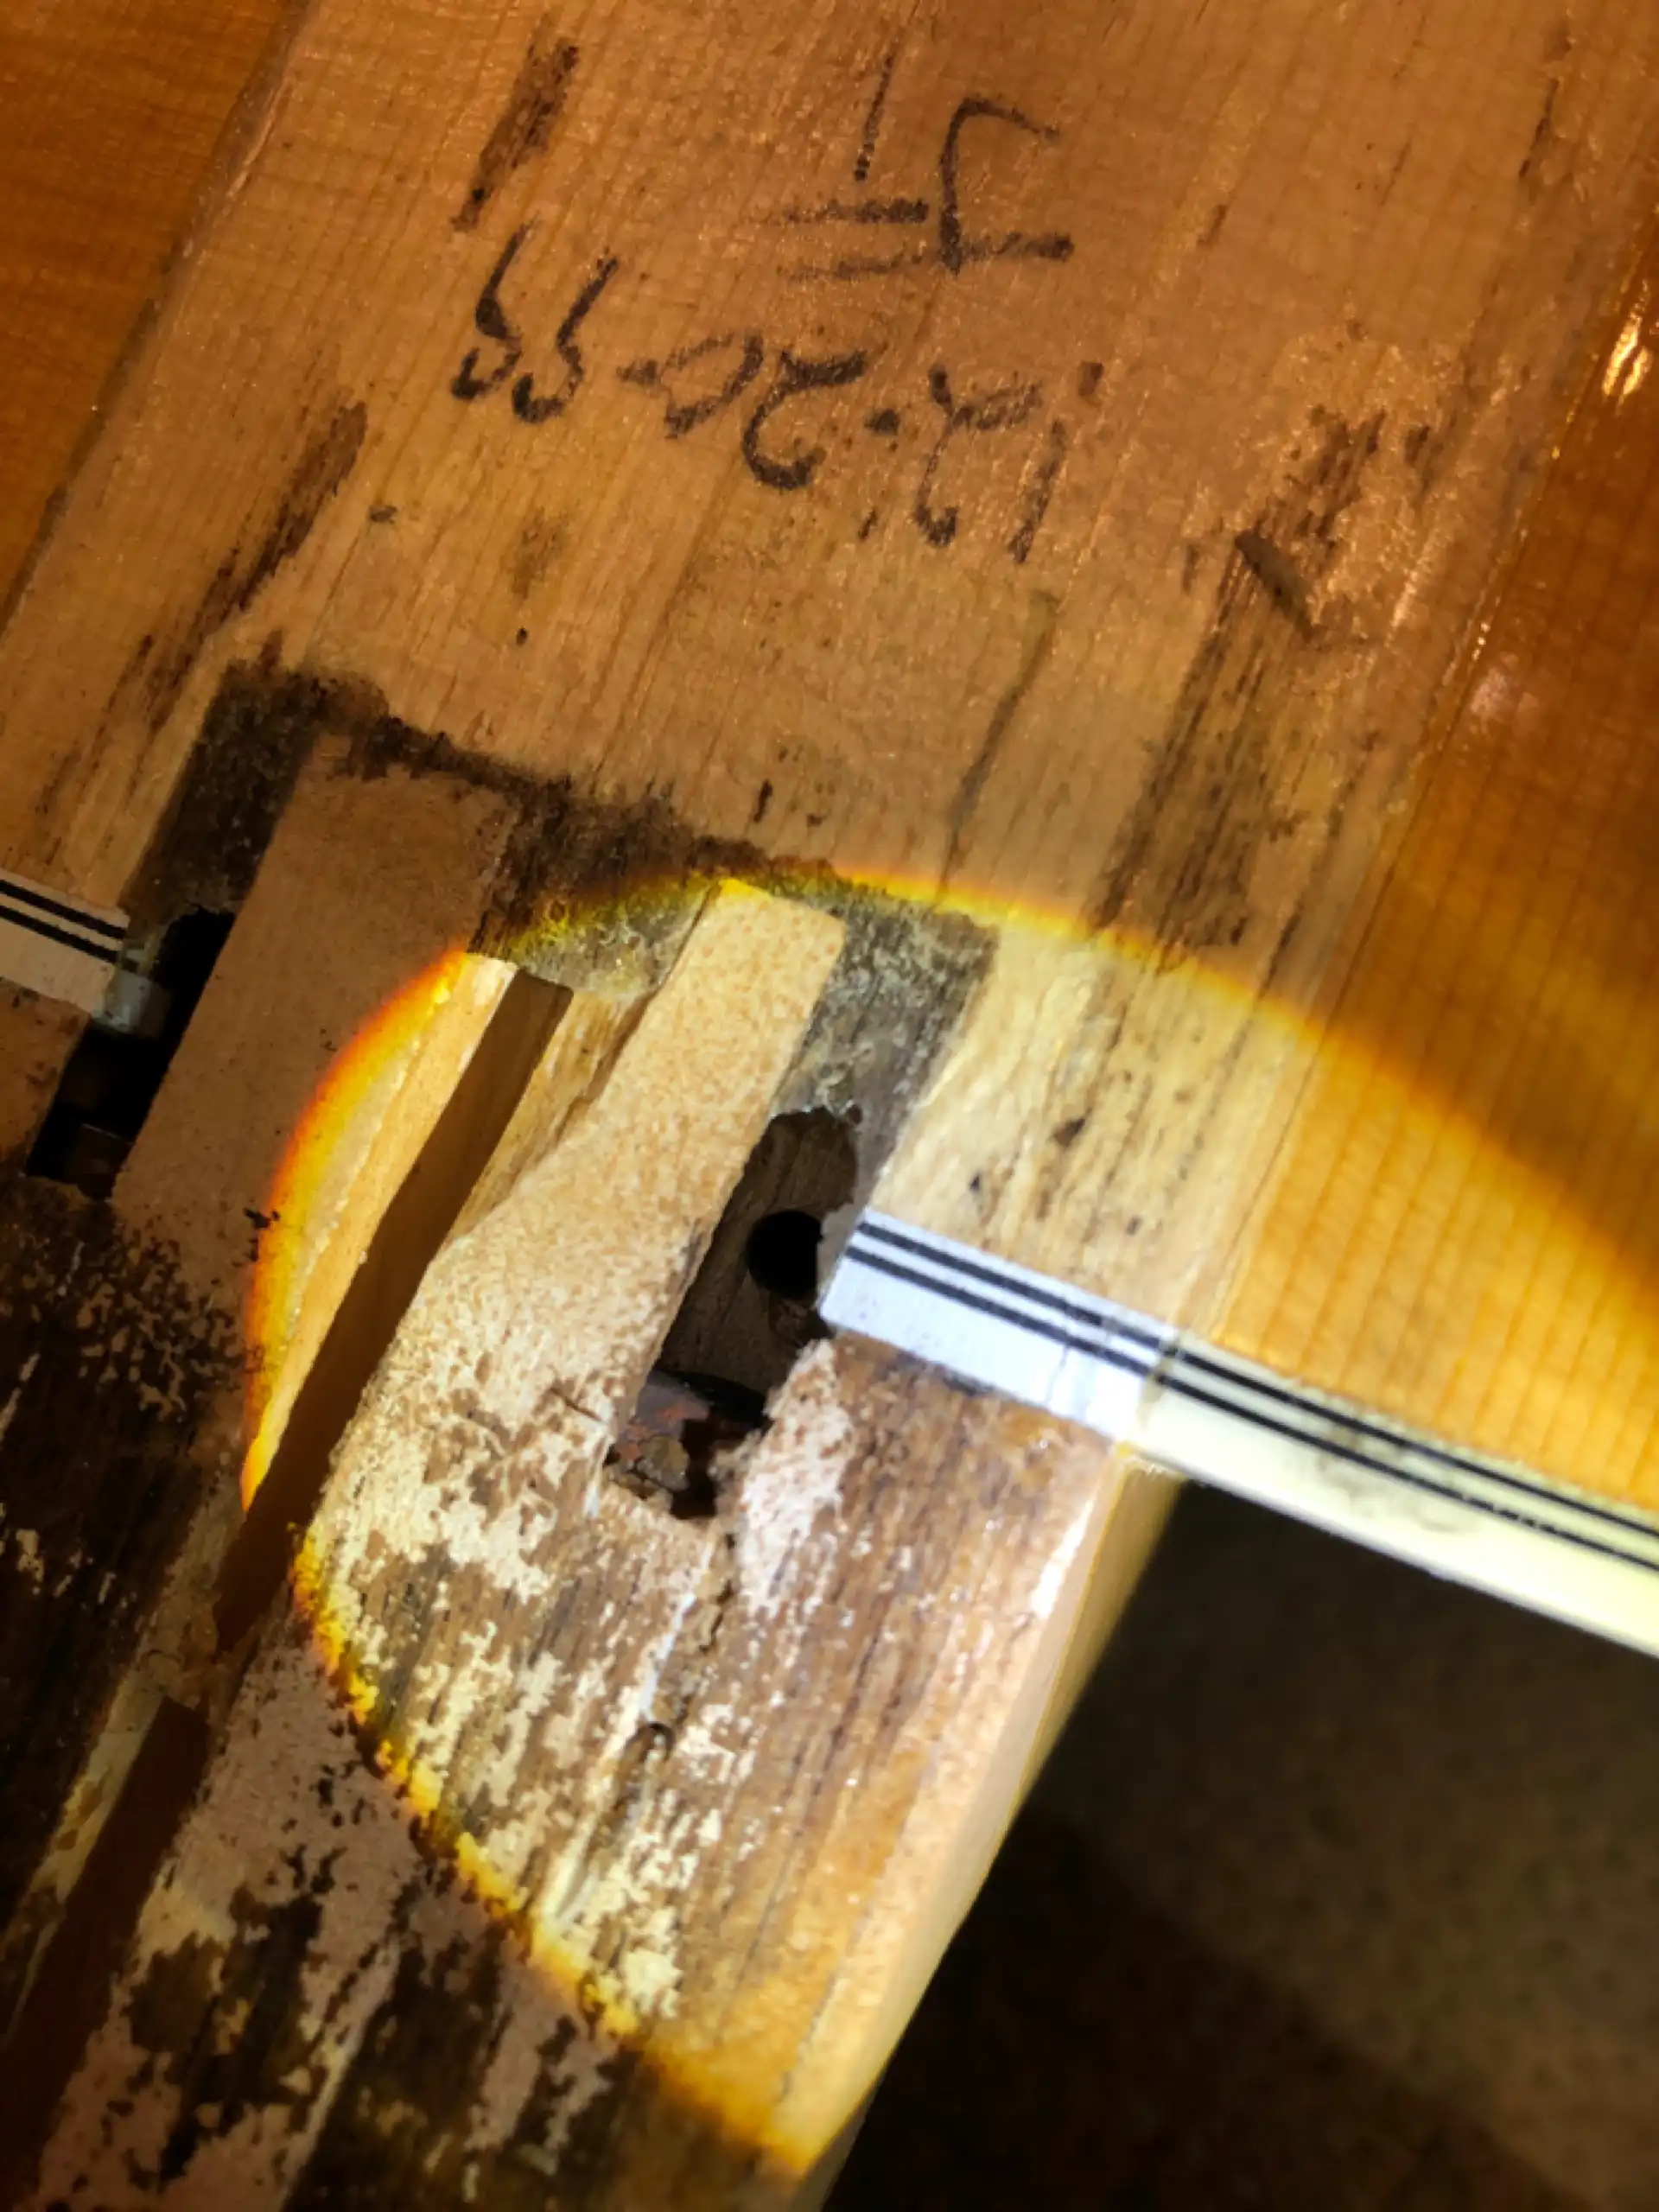
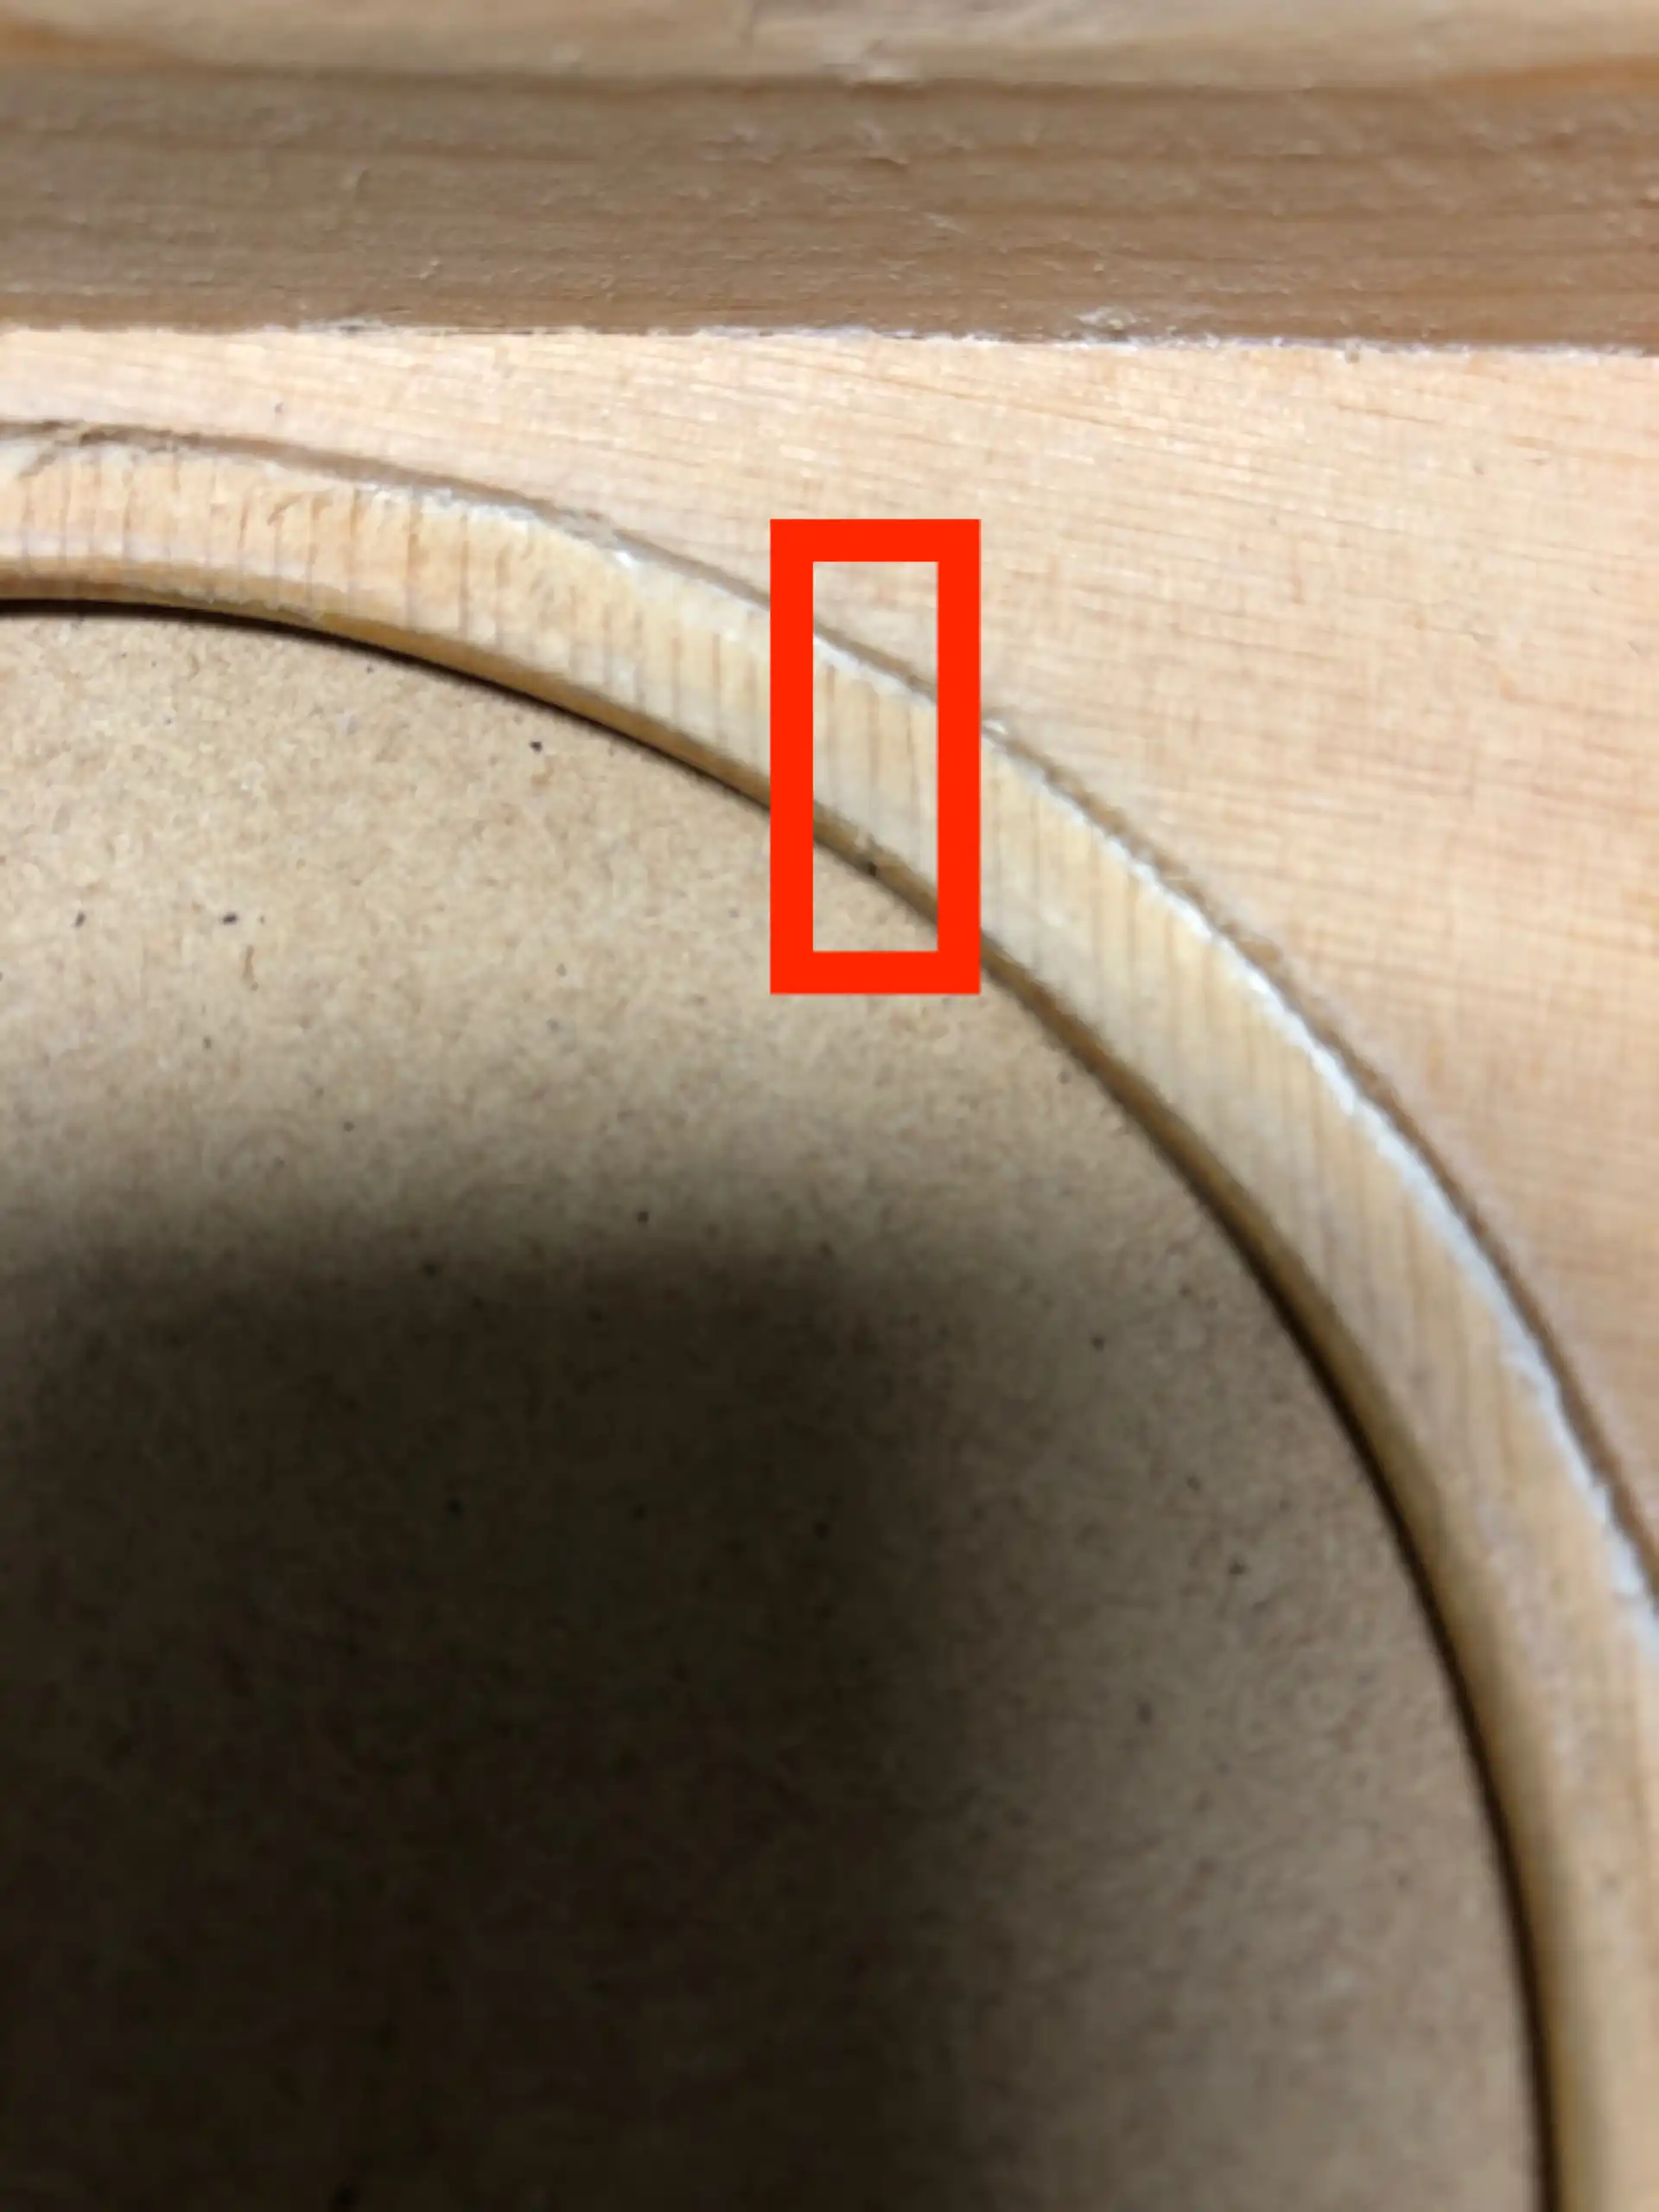
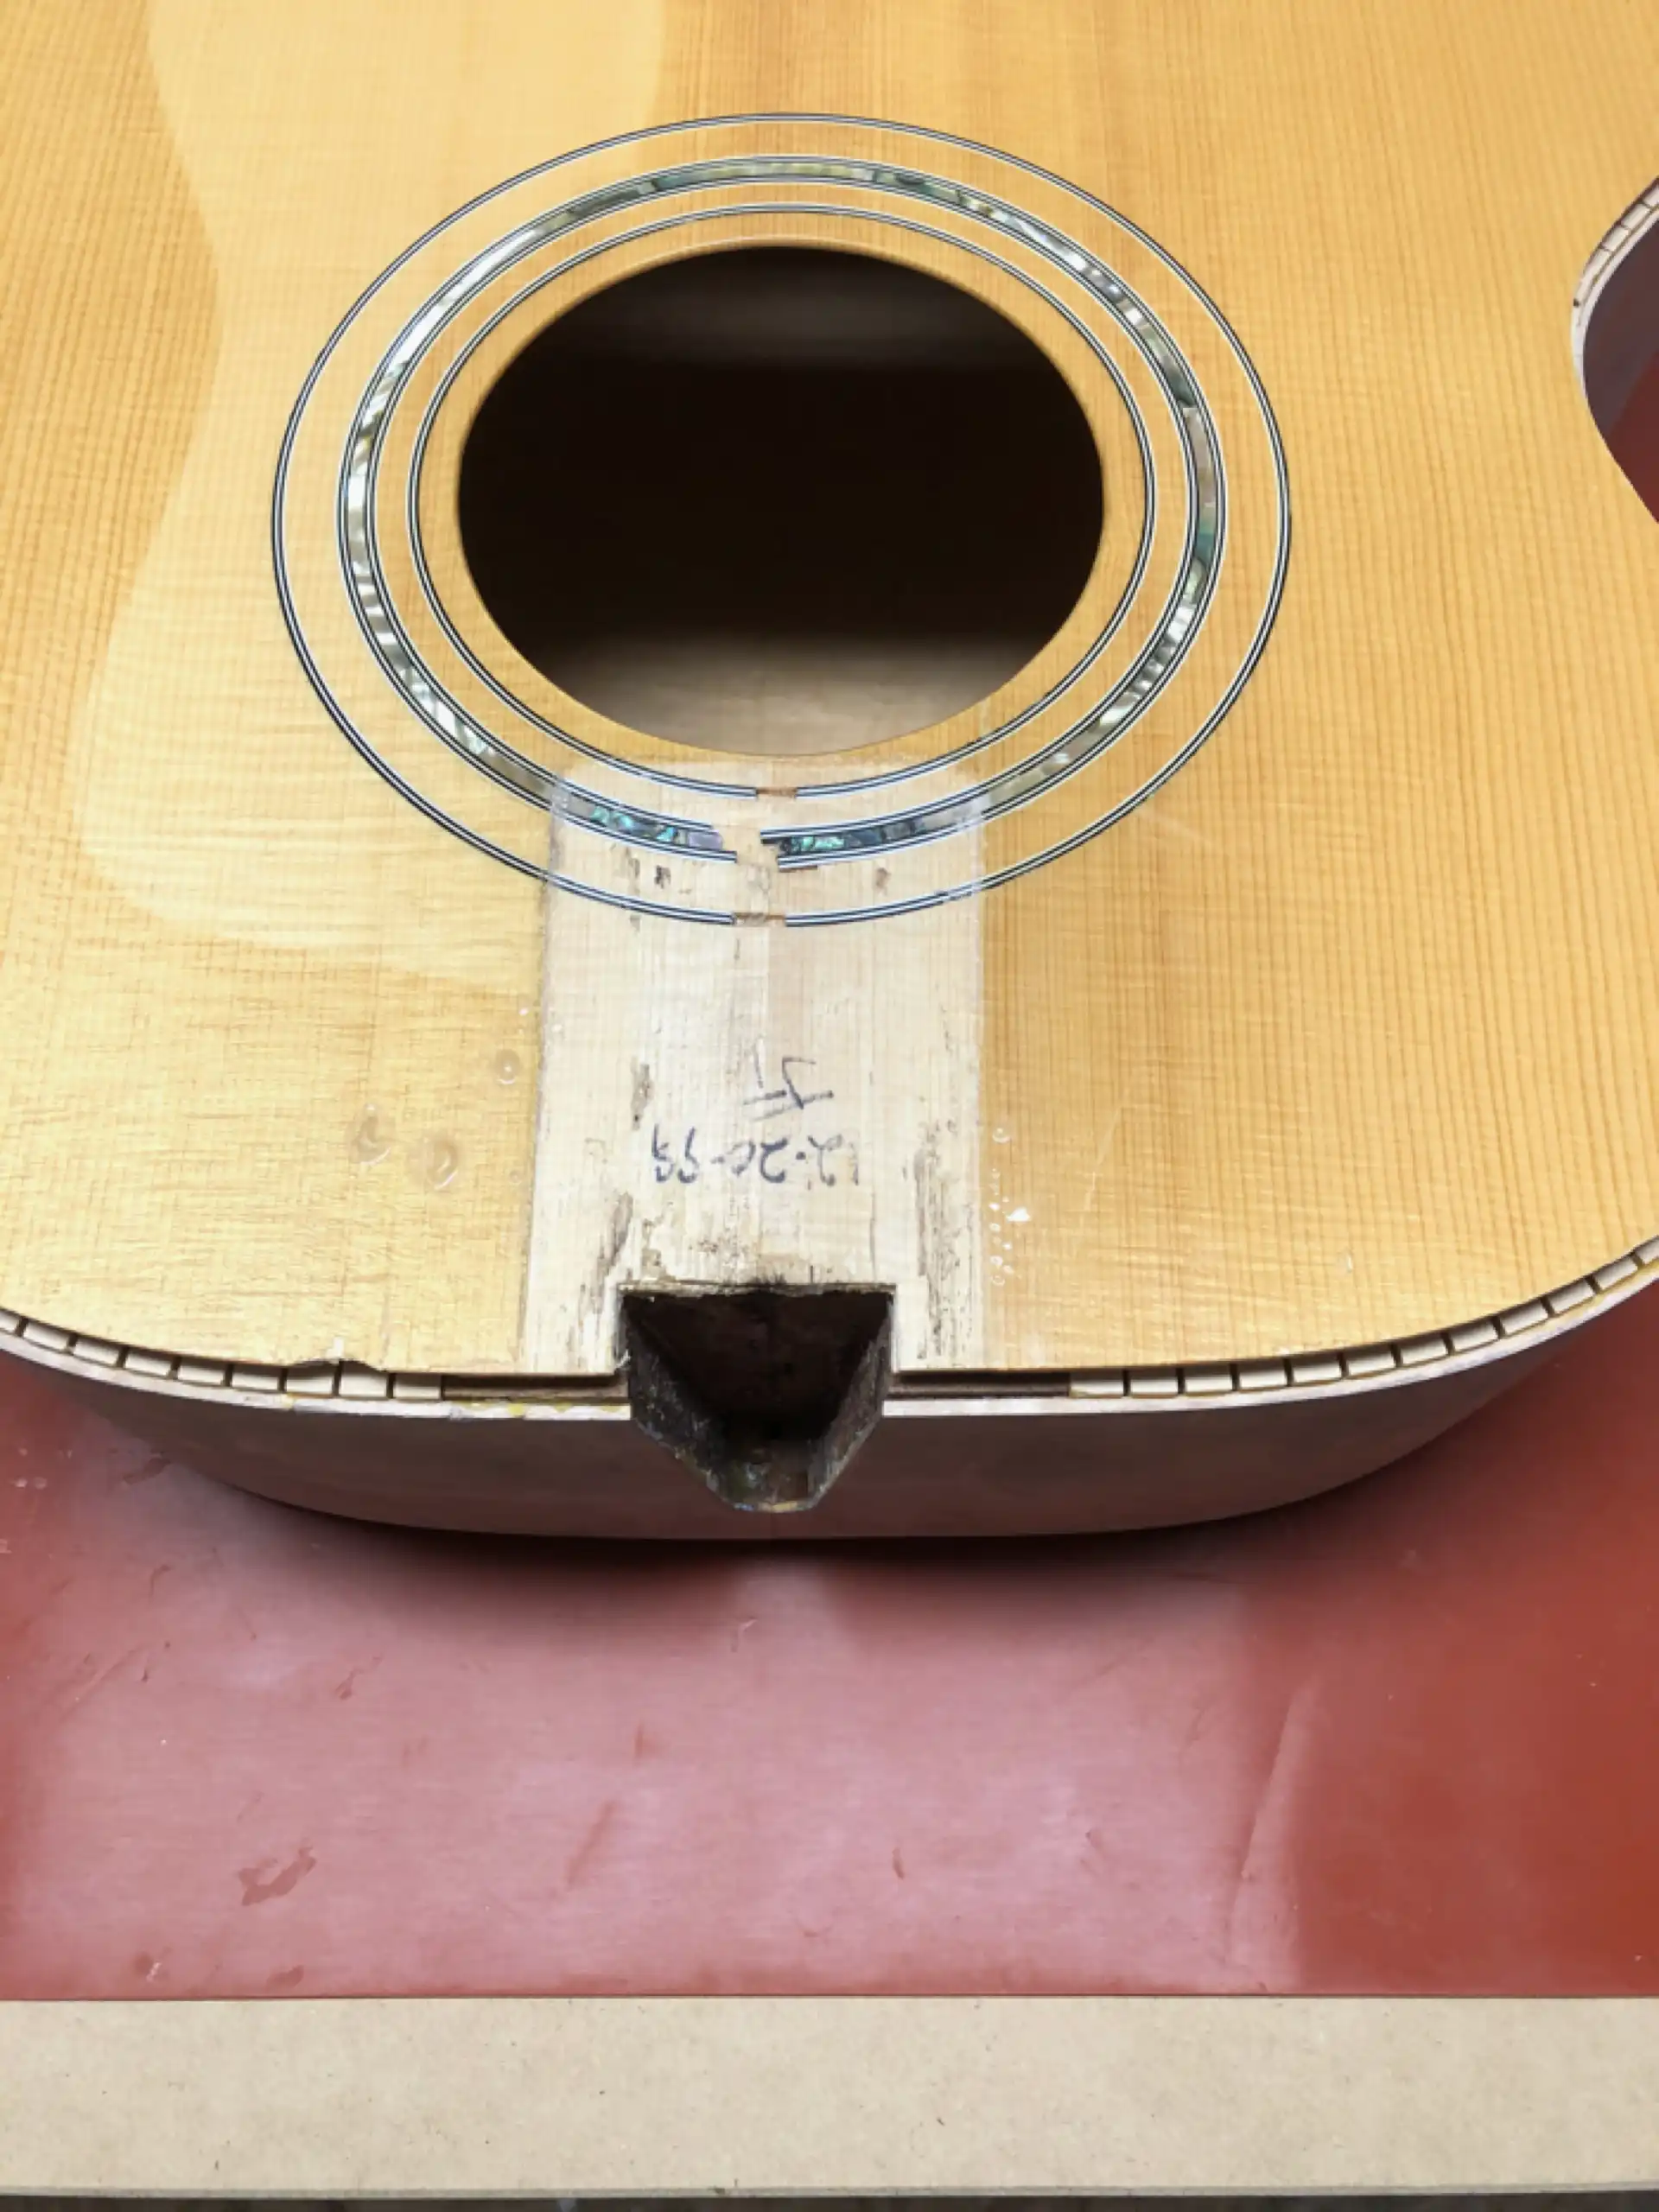
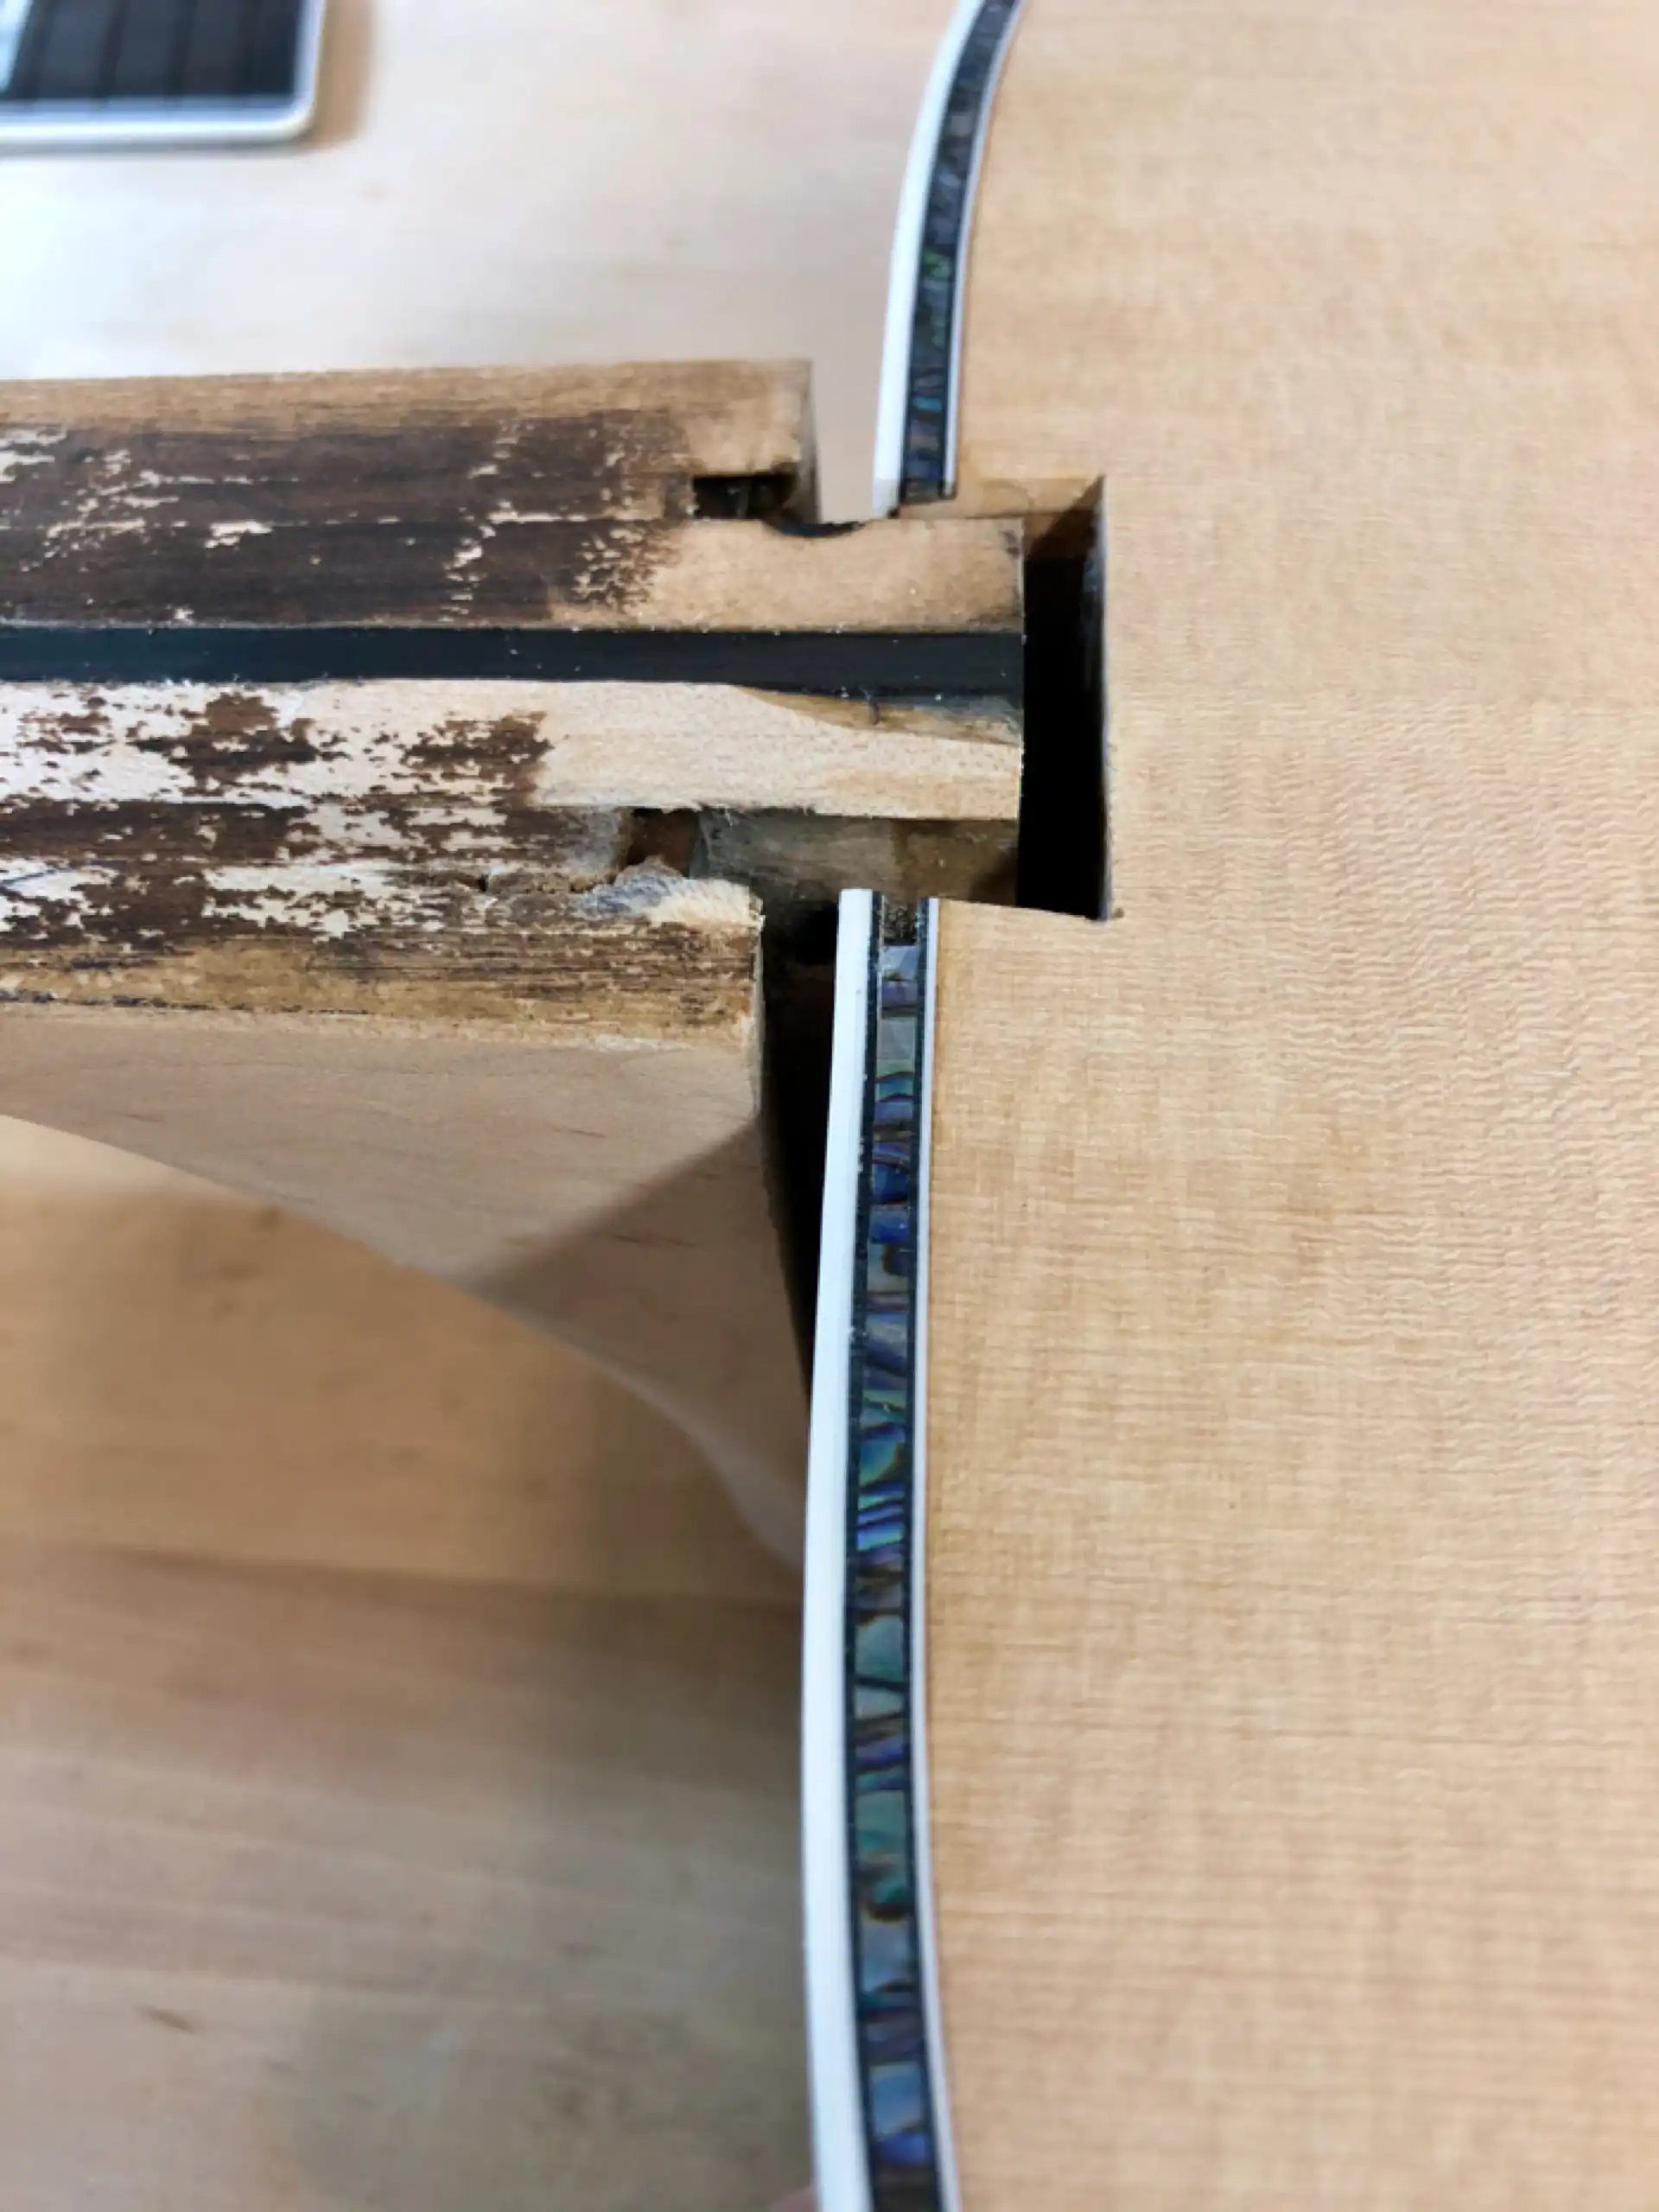
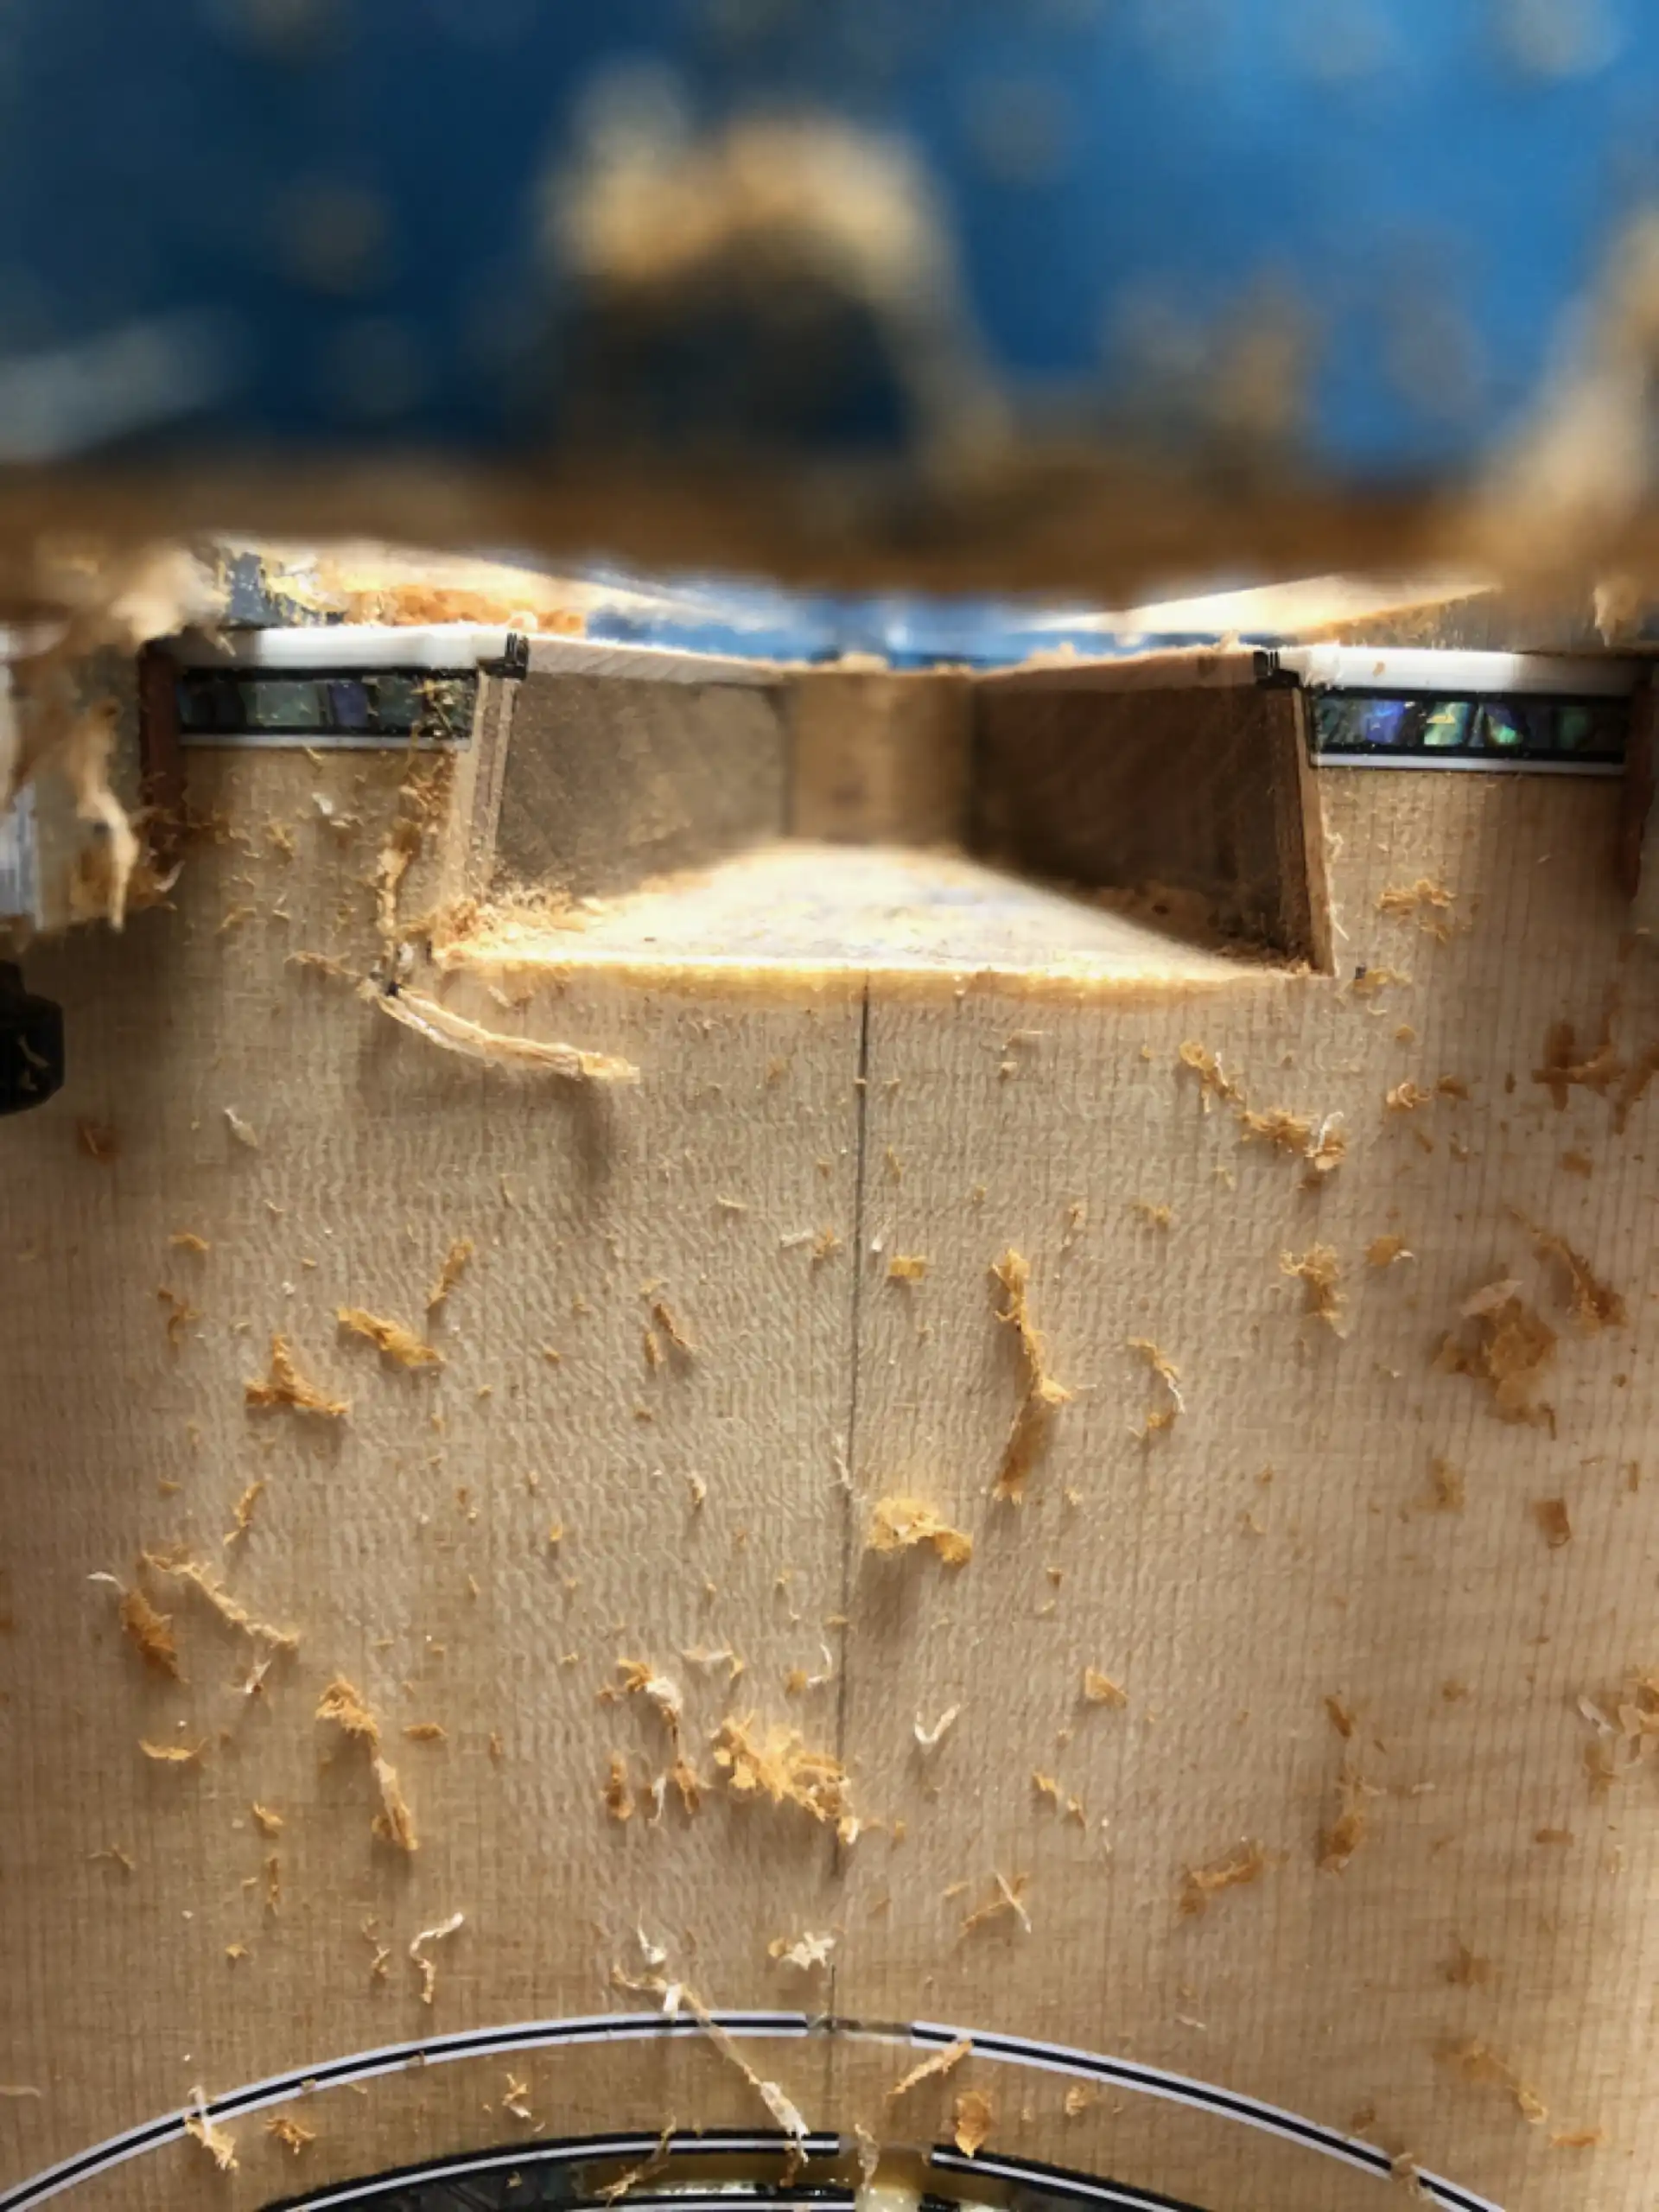
The number one contributor to the need for a neck reset is something called a neck block shift. A change in the relationship between the neck block, the sides, the back, the kerfing and the soundboard allows the entire neck system to plunge forward, in towards the soundhole. When strung and tuned to pitch, a 12 string guitar can experience upwards of 200 pounds of combined string tension. At times, whether due to a sudden shock or a weakening of adhesive, the structure resisting change is overcome and something gives way. In some cases (pun intended), there is an ever-so-slight slipping of parts, just enough to change the critical relationship between the components. Many times it is the wood of the soundboard that fails, where it actually shears off of itself, following the grain line right alongside the fingerboard/fretboard extension.
Soundboard Shear
Viewed from inside, the damage is almost imperceptible, but the split is clean through the wood along the grain line. This split is enough to allow the soundboard and neck system to shift forward toward the bridge, contributing to the raised action and need for a neck reset. This shearing of the soundboard can occur along one or both sides of the fretboard. As illustrated by the image below, this shearing can and does occur despite the presence of a transverse brace and/or soundhole patch(es). Resetting the neck of a guitar whose soundboard has split in such a way, and hoping that all will be well over time, may work out just fine. Then again, it may prove to be an unfortunate investment.
Soundboard Shear - Inside
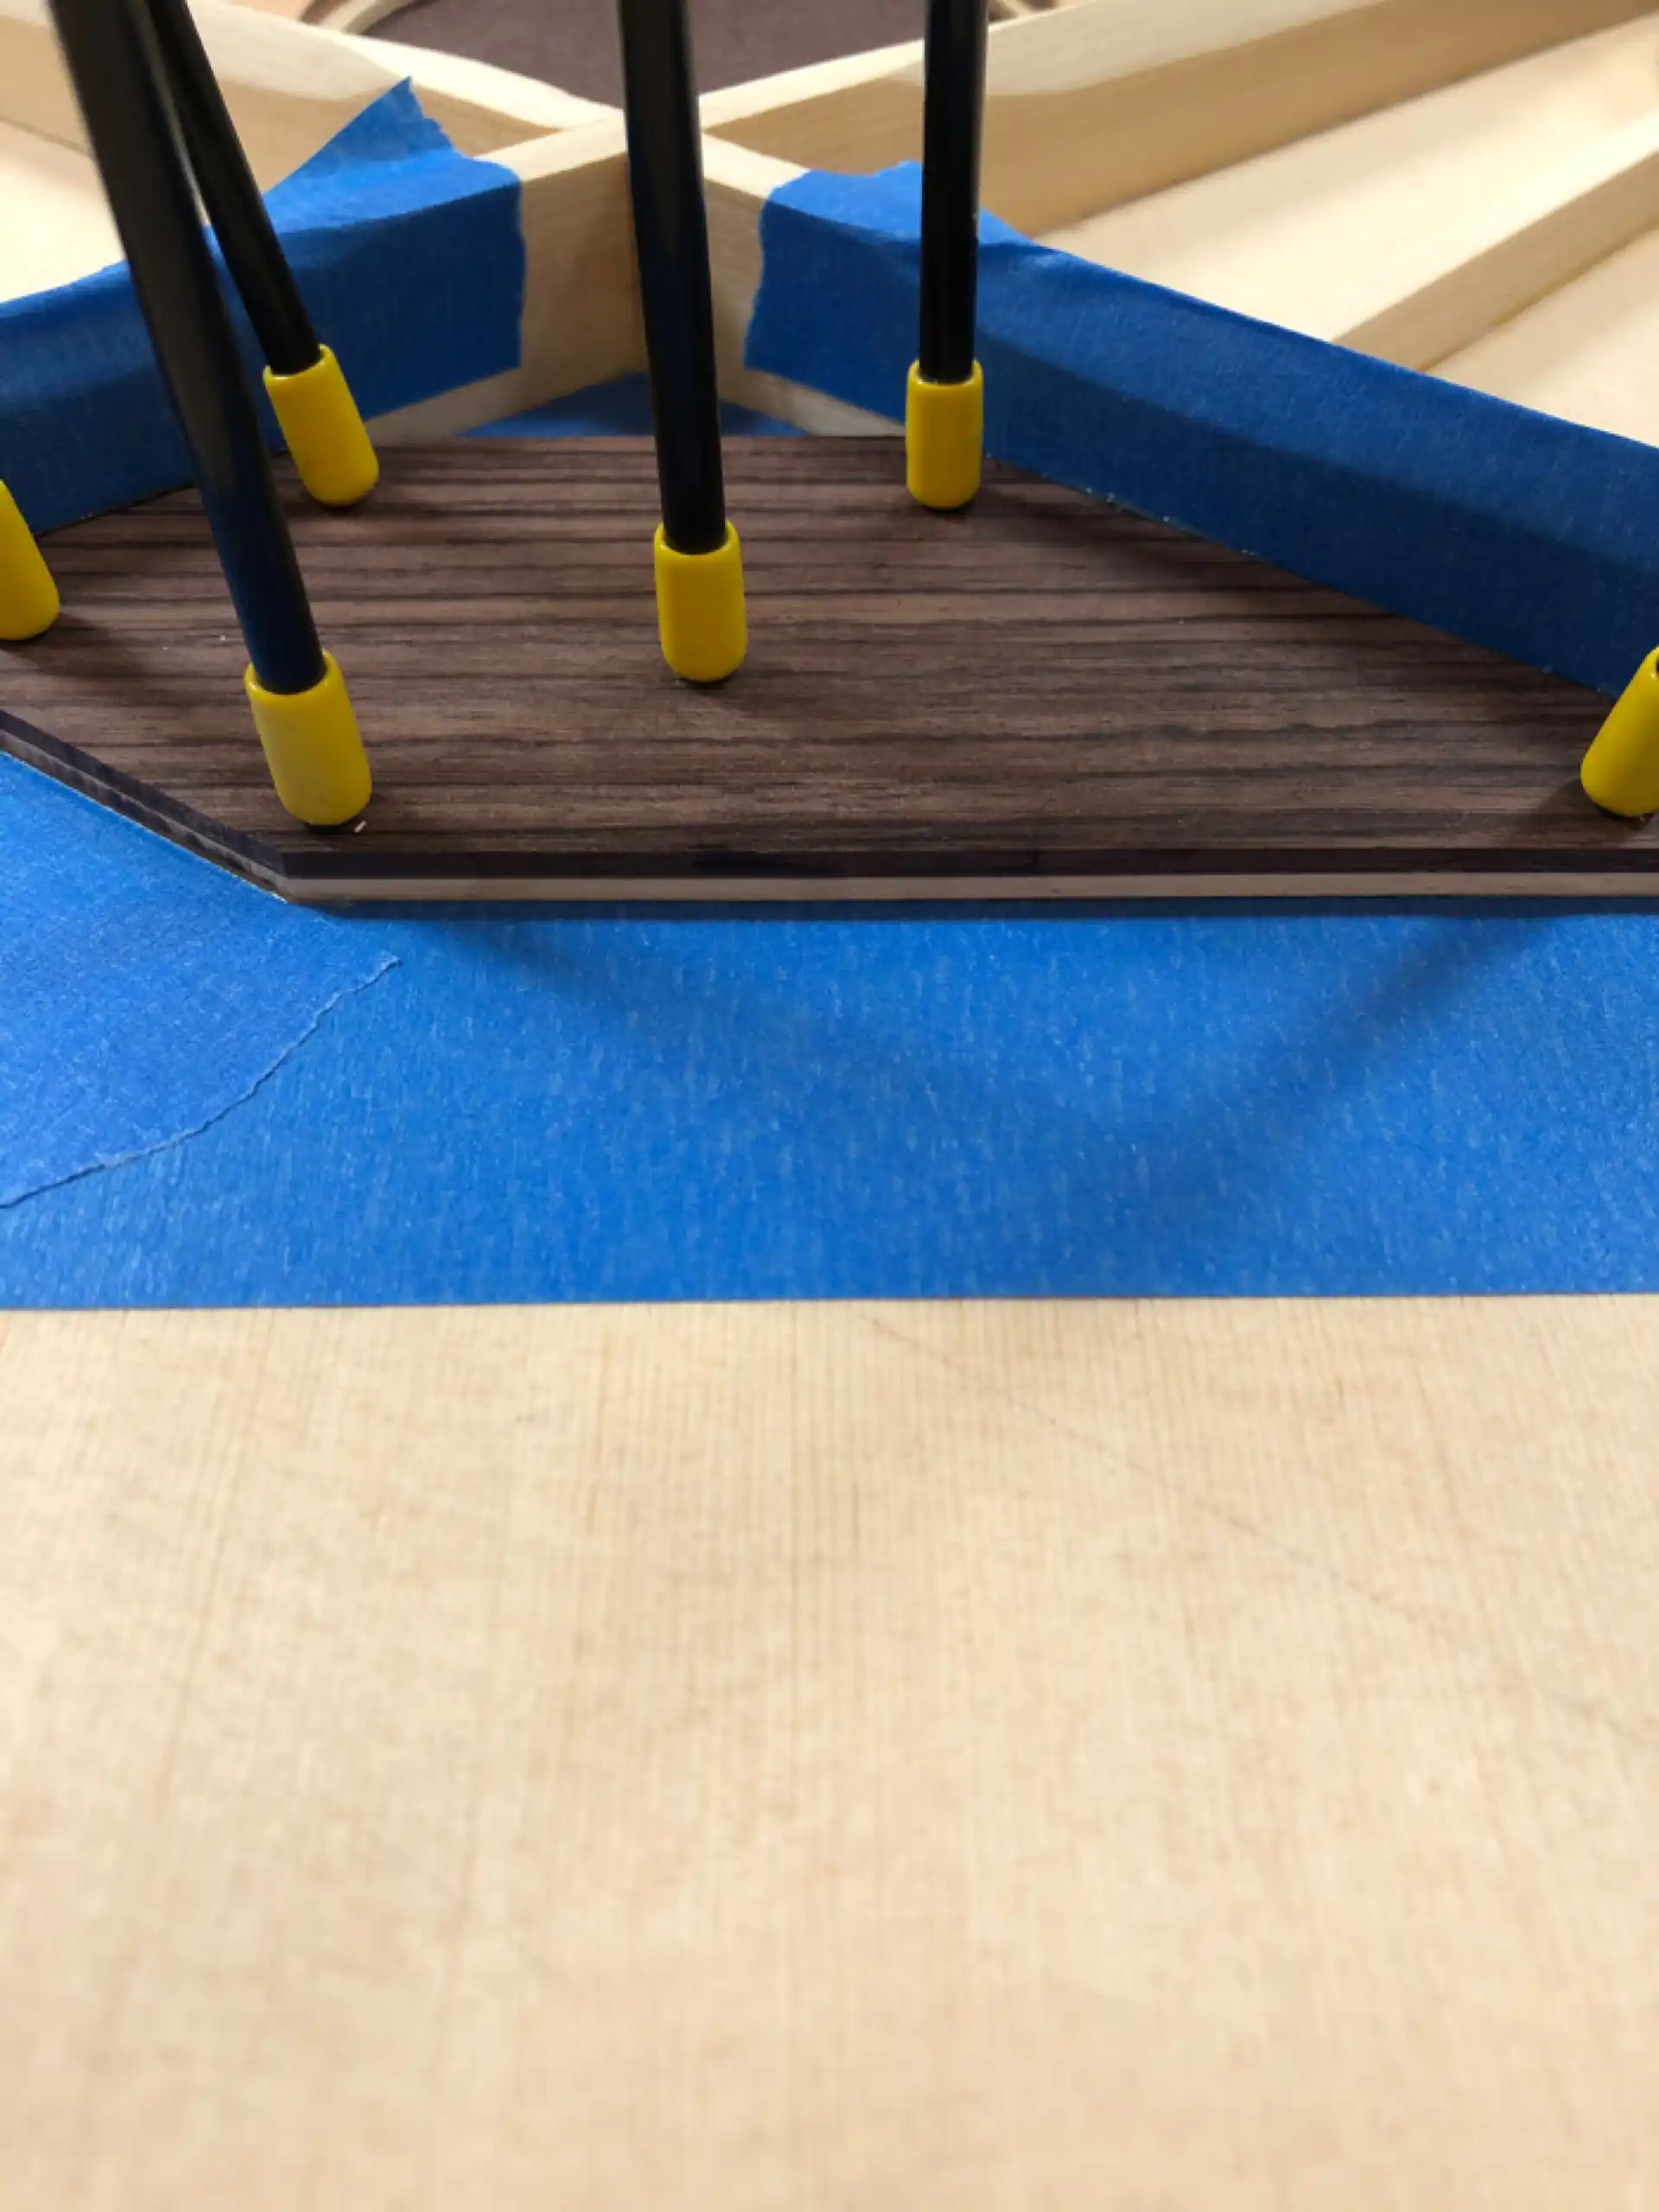
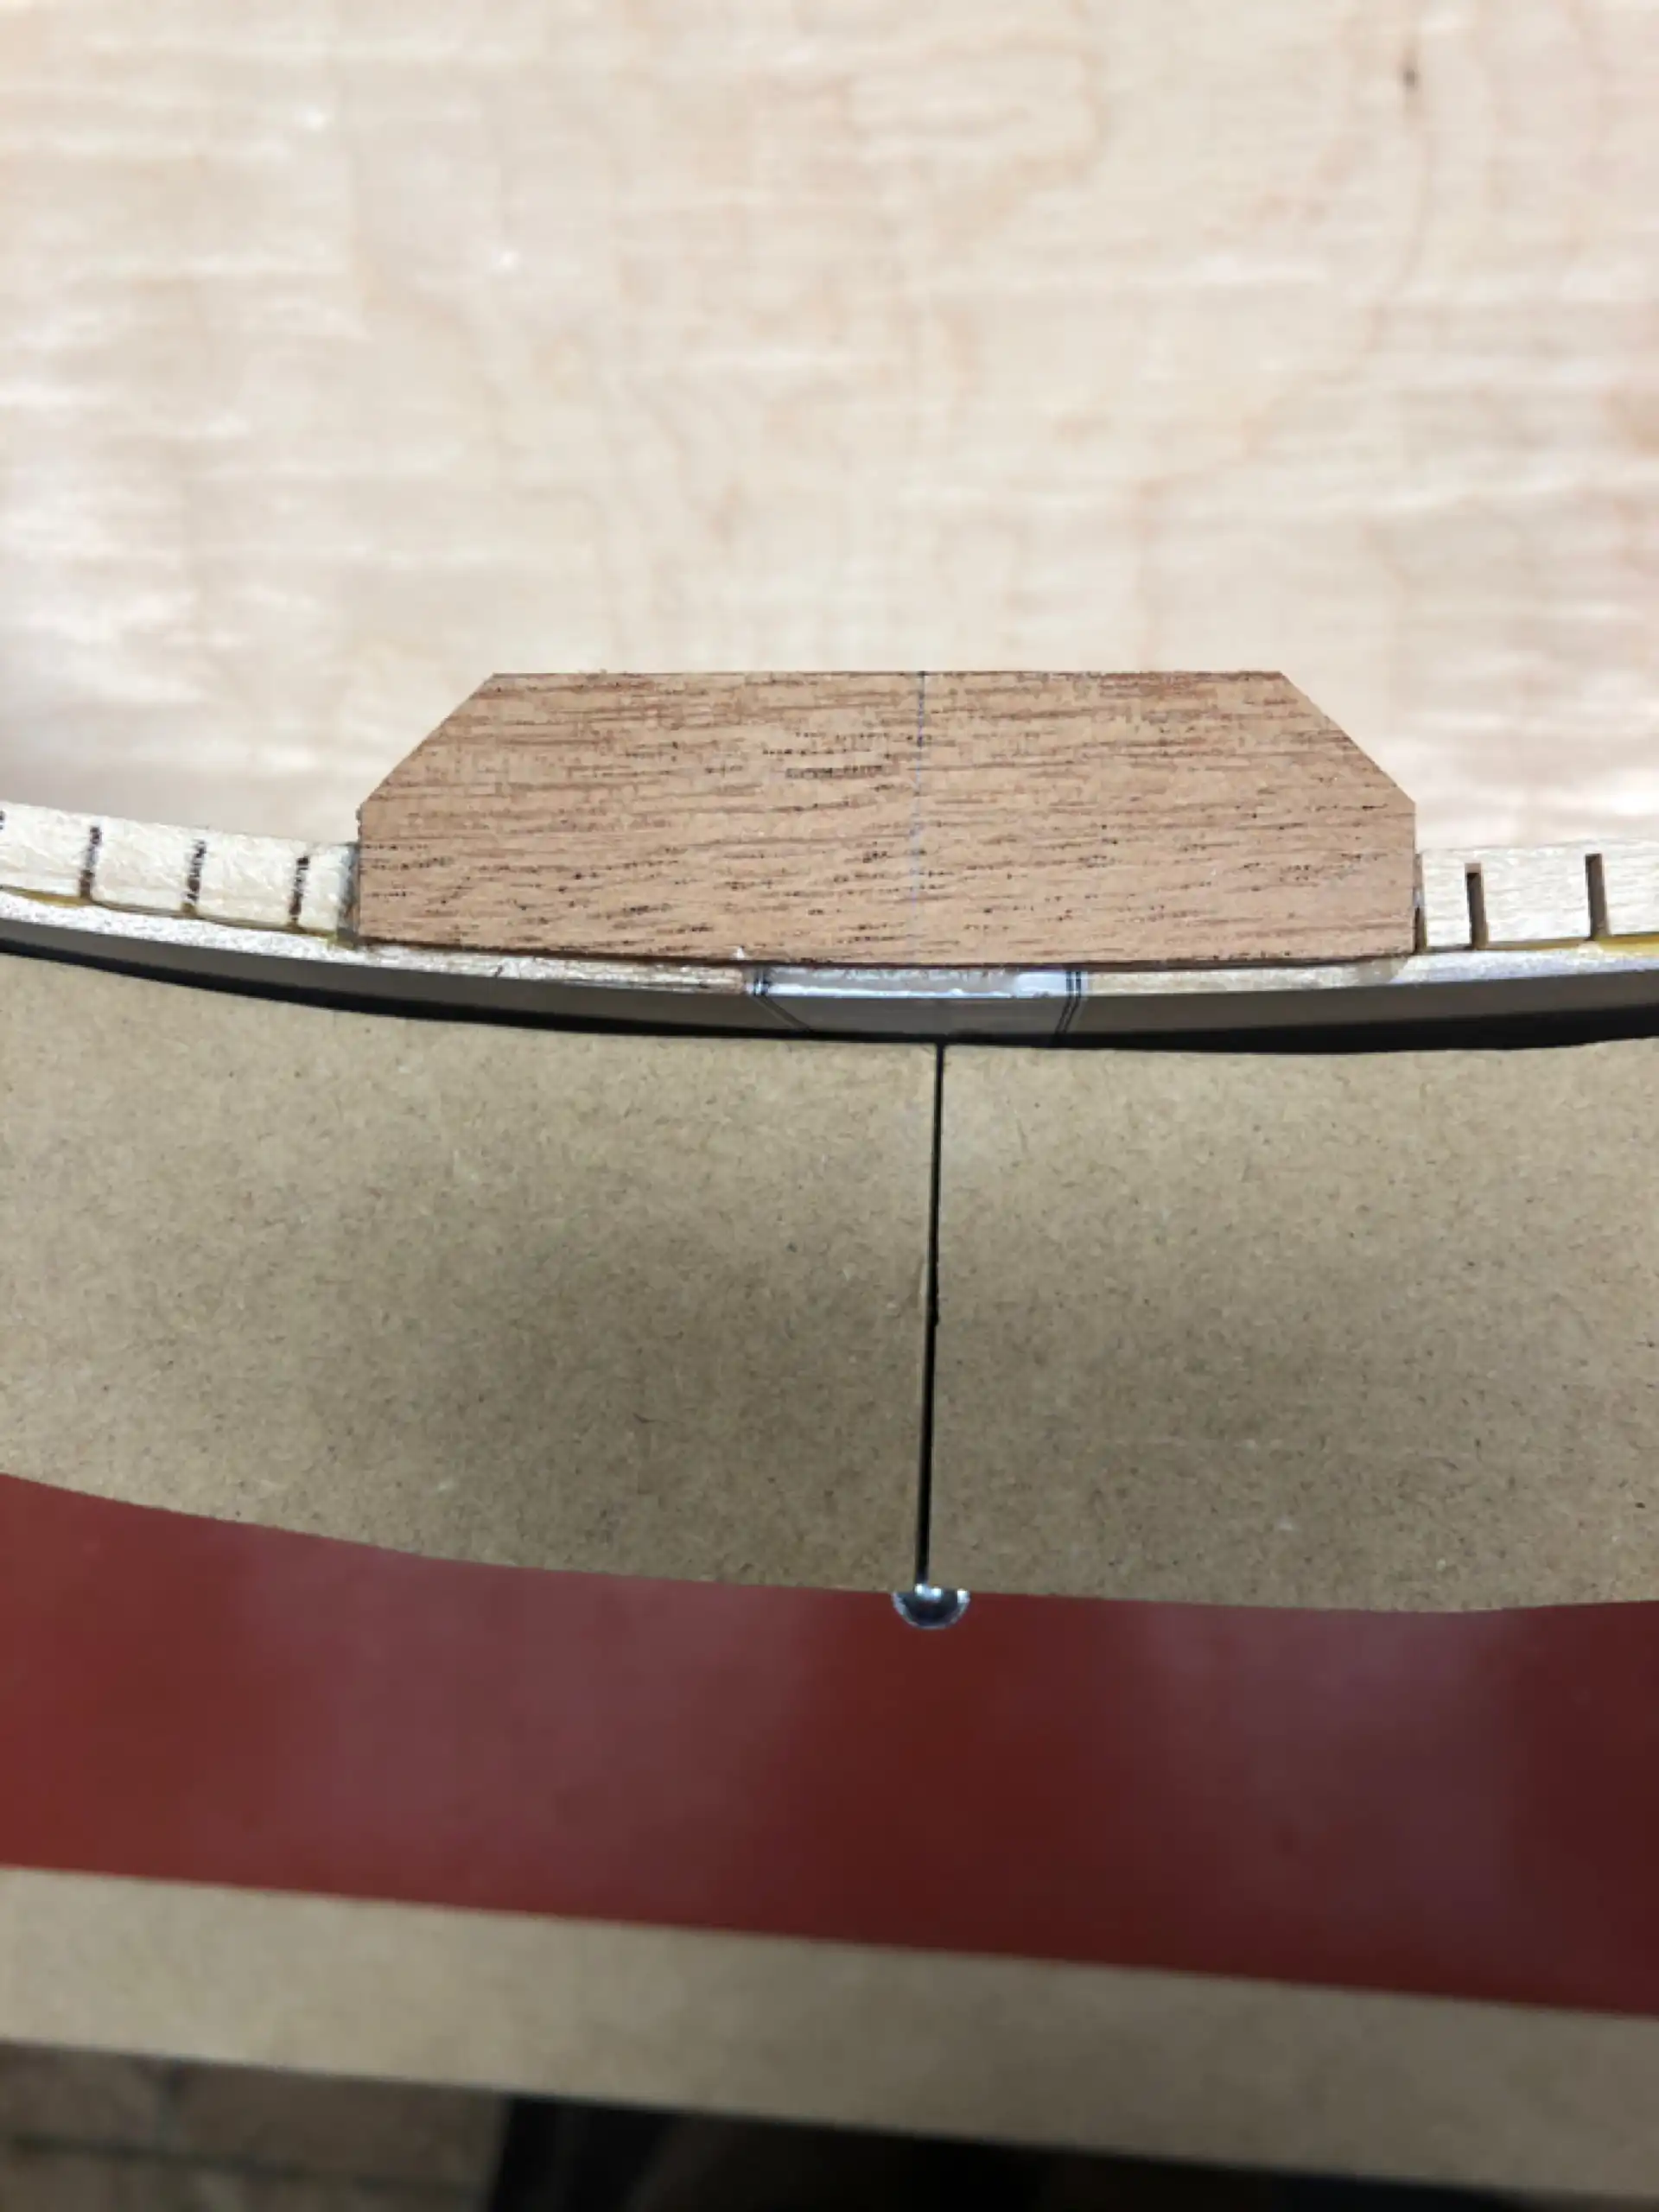
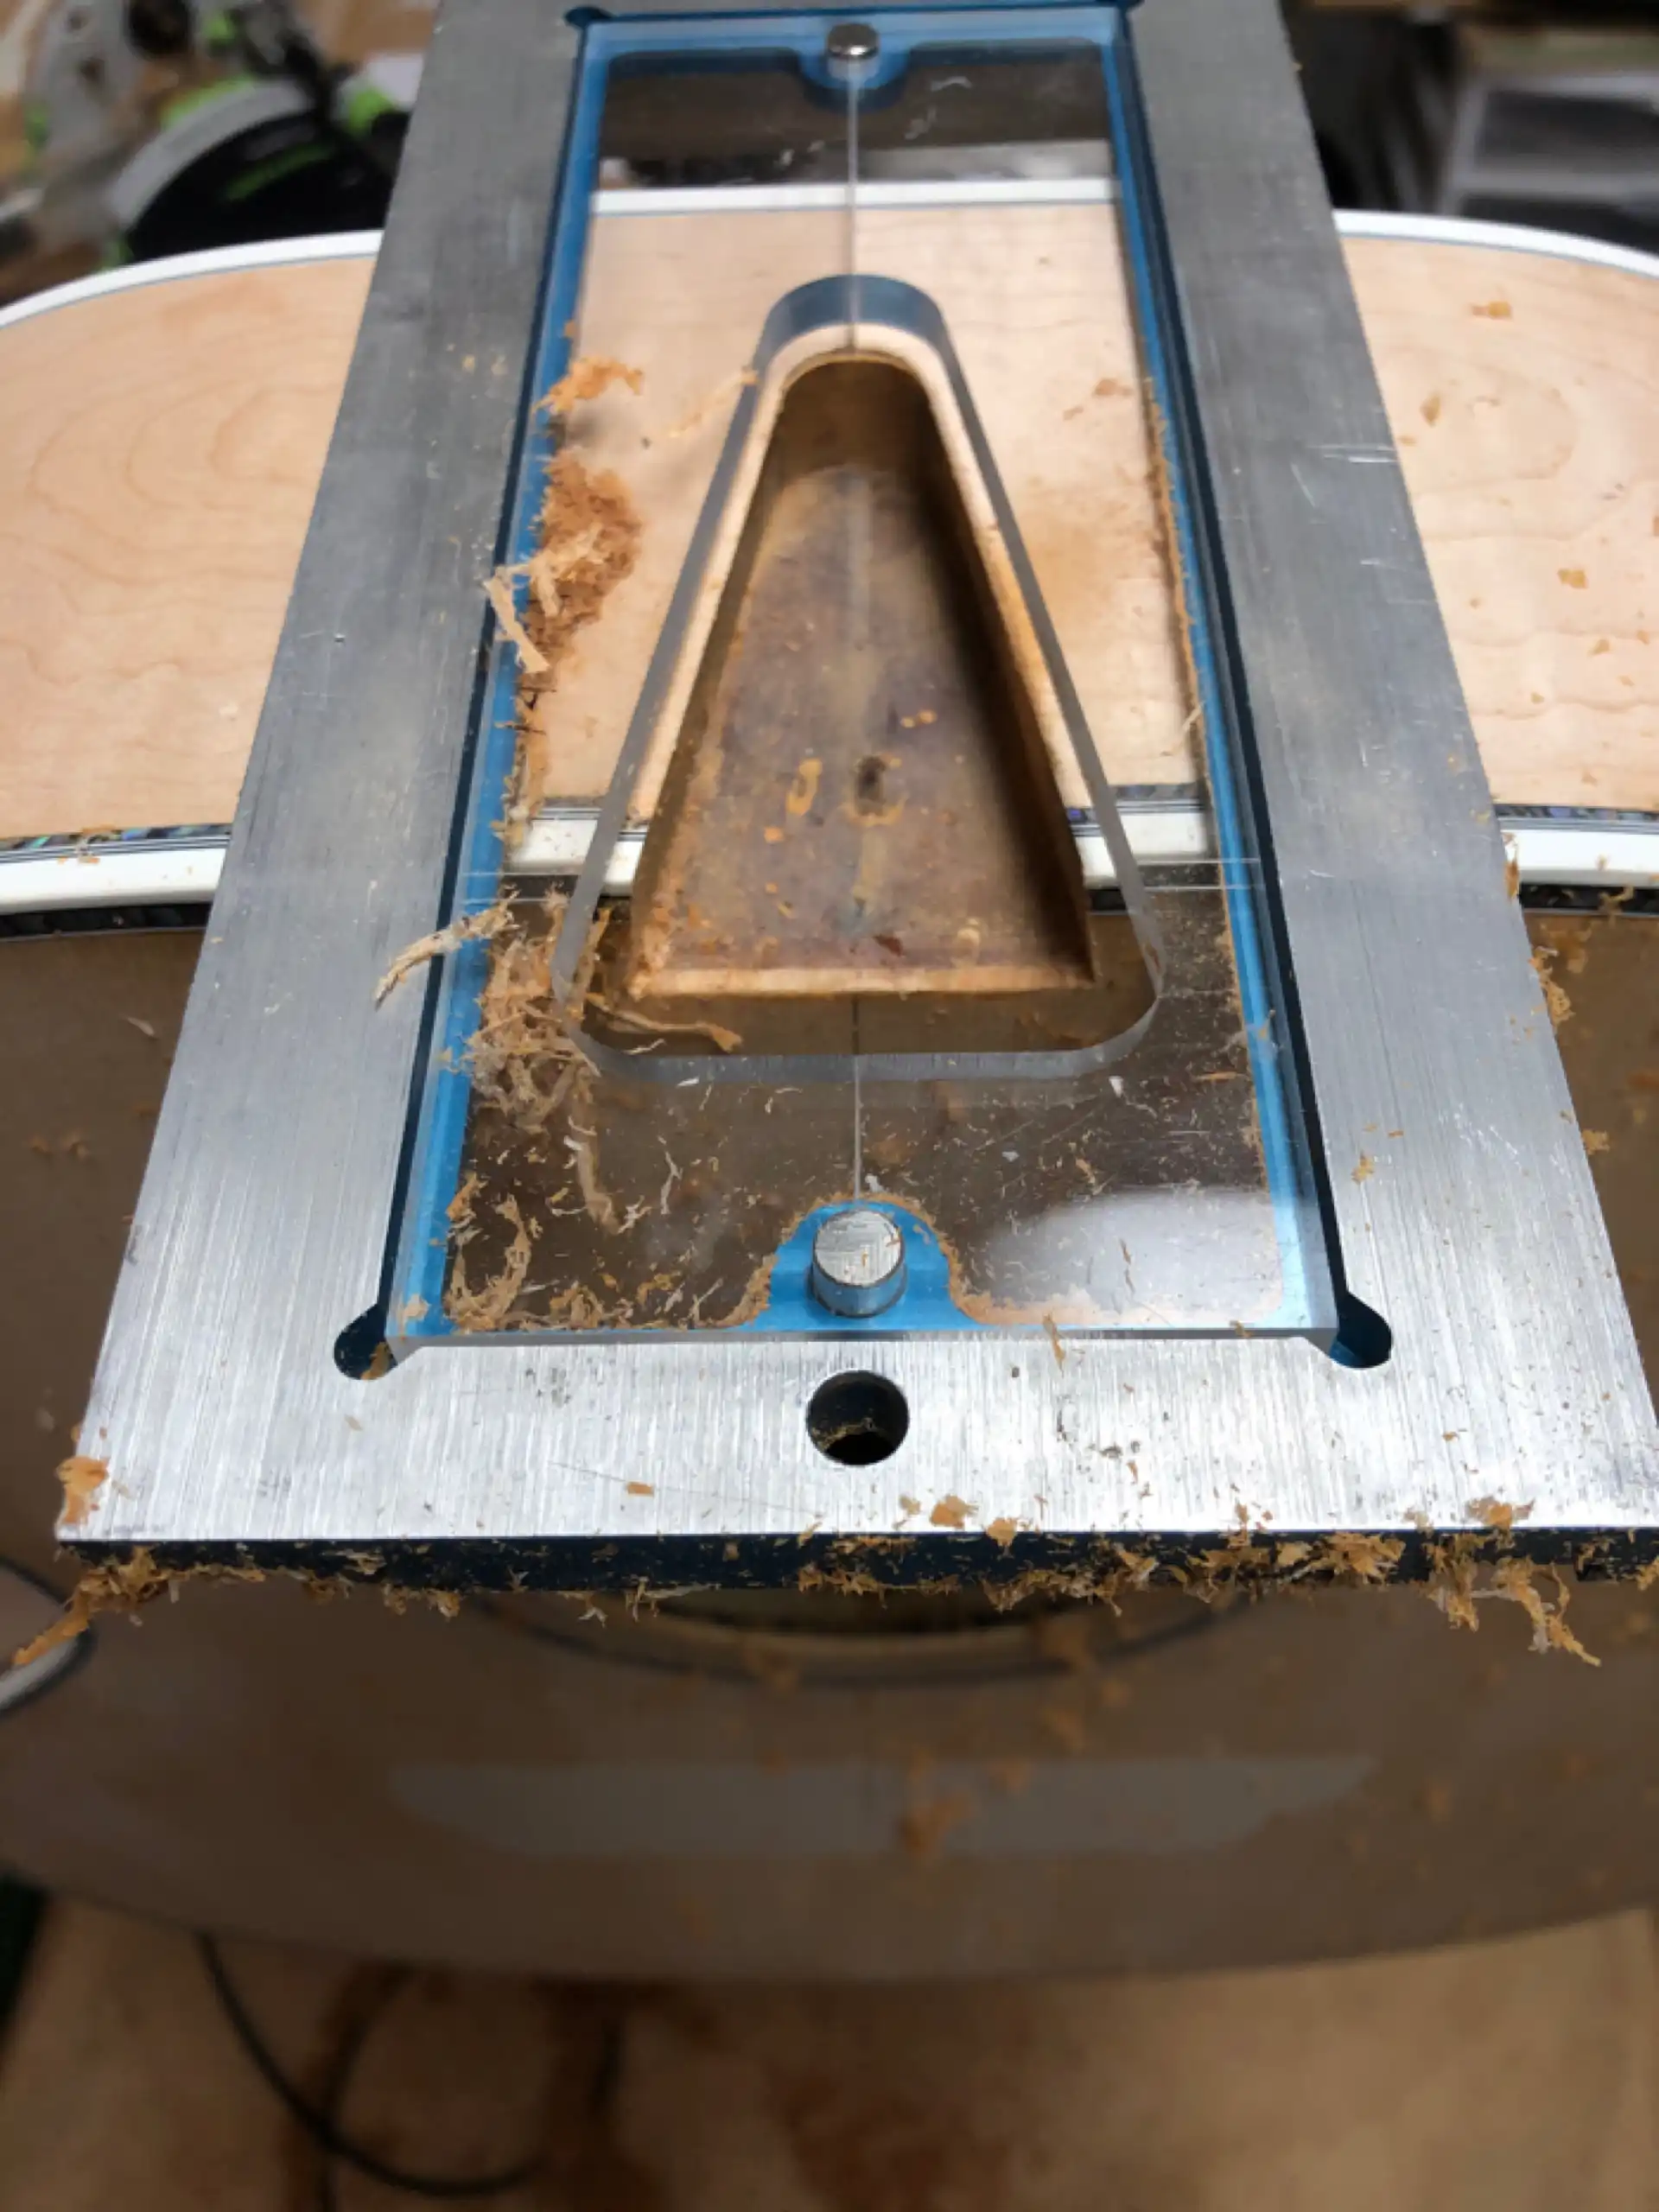
The upper bout of a center soundhole soundboard serves a negligible role in the generation of any significant sound. Rather than ignore or tip-toe around this fact I learned to embrace it. I was able to envision a solution to the neck block shift issue perfectly framed within the X Brace design.
Space Framed by the X Brace
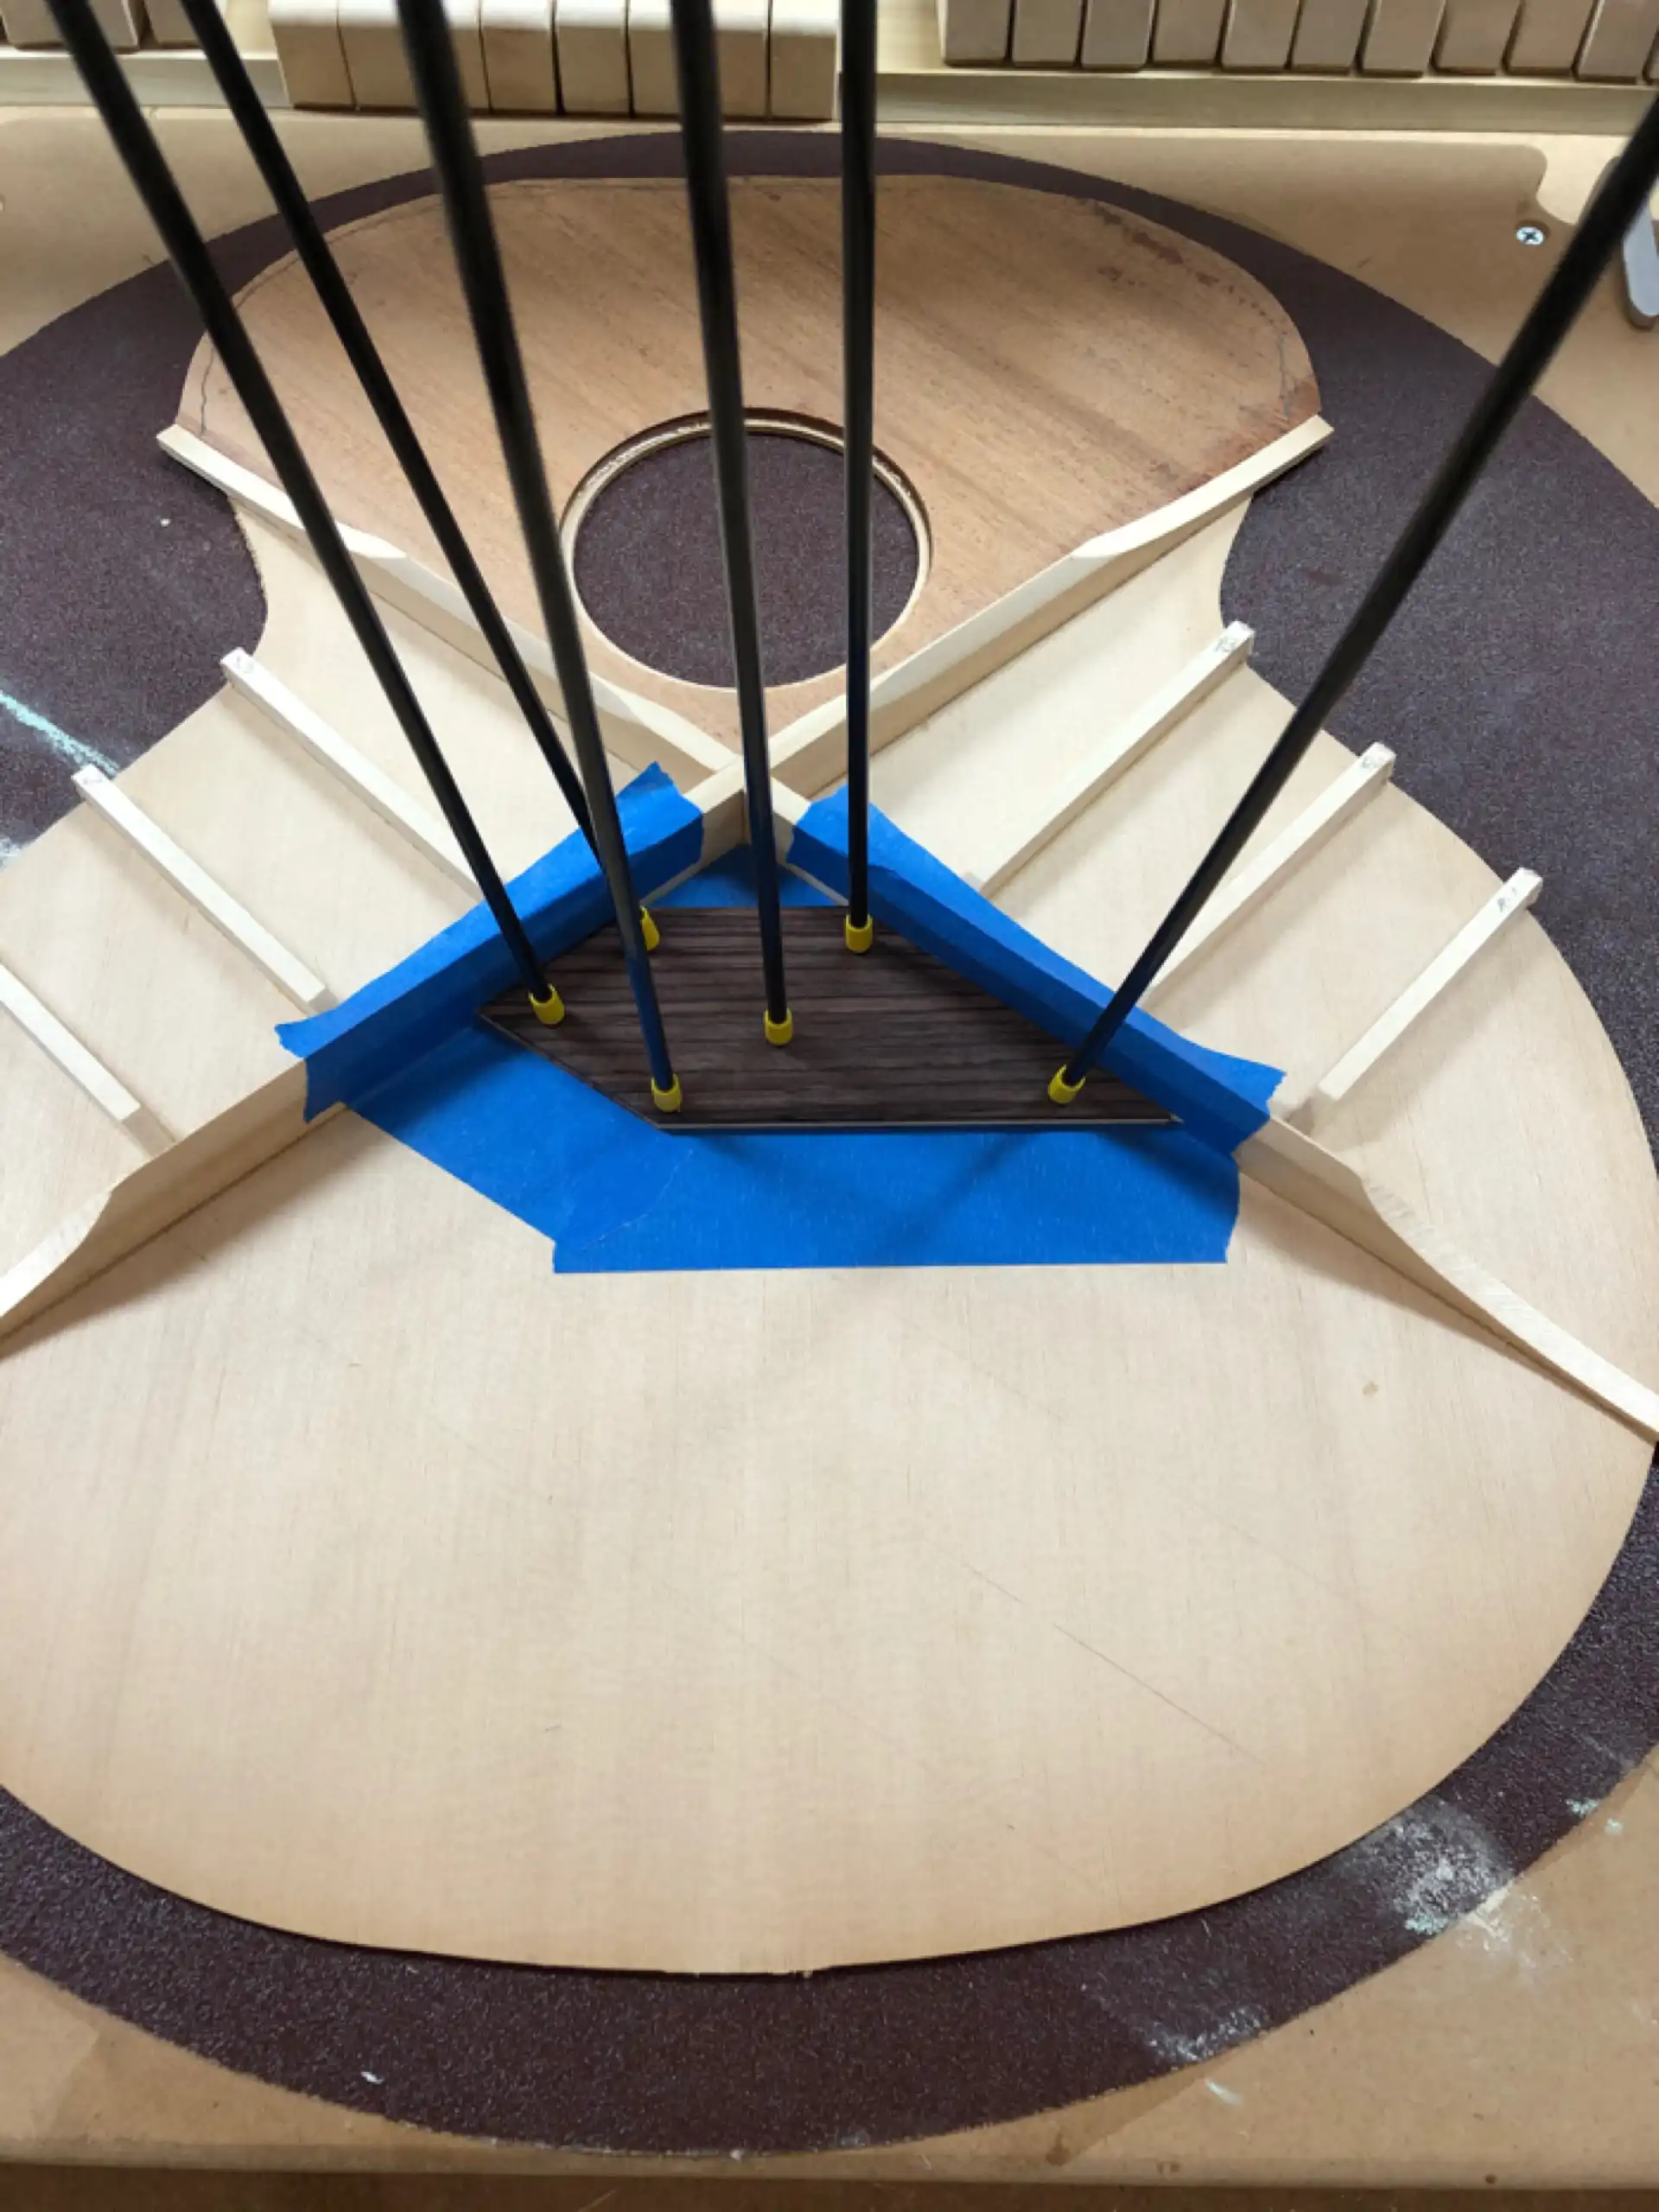
My solution involves laminating two (2) very thin pieces of Mahogany directly onto the soundboard in the upper bout spaced framed by the X Brace. I cut the soundhole out of each piece, slightly larger than the soundhole in the soundboard...
Soundhole Cutout
I am careful to orient the Mahogany pieces such that none of the grain direction of any of the three (3) plates (soundboard and two (2) Mahogany plates) are running parallel. I am also moving the edge of the hole in the reinforcement plate(s) back away from the edge of the soundhole. If I were intending to bind the soundhole, I would align these edges. But a bound soundhole would introduce yet one more non-standard Guild feature to stare at.

Bottom Plate
Top Plate
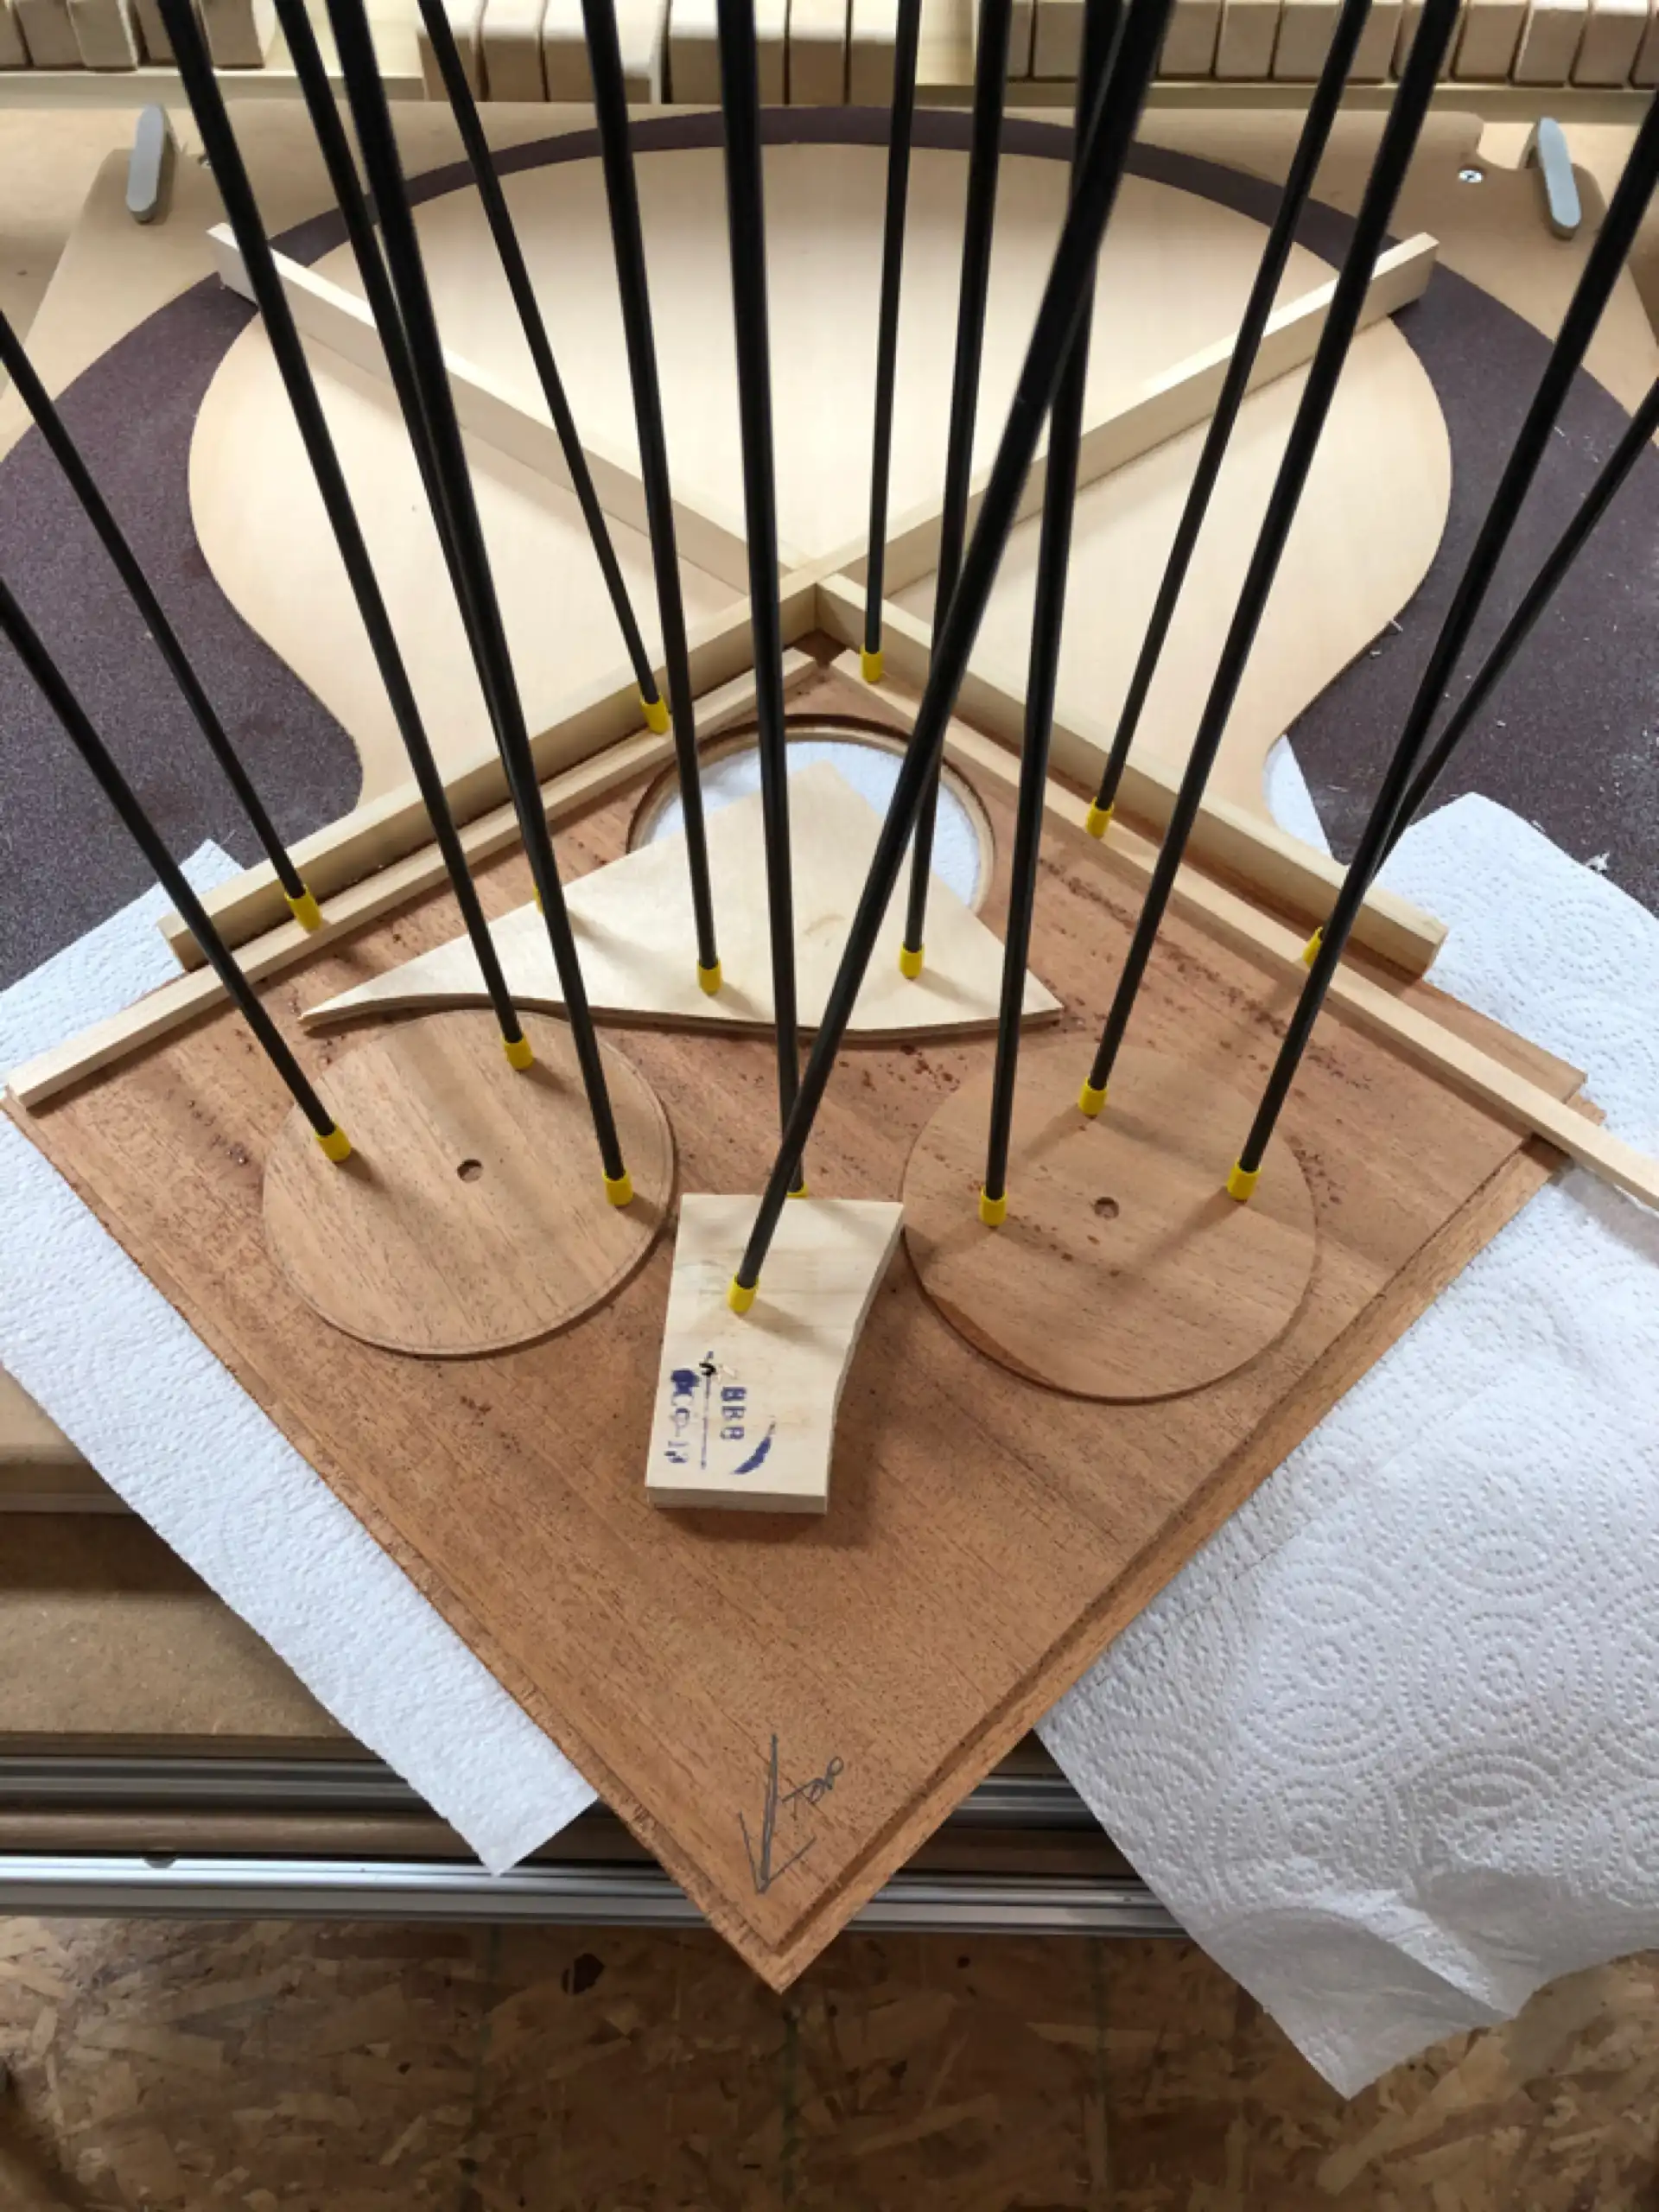
Plate Glue-Up
(Just in case anyone was wondering: the extra pieces of wood in the photo, above, are being used a cauls to distribute the clamping pressure from the fiberglass rods. They are not part of the finished solution.)
Once the soundboard is fitted into the body and epoxied in place, this approach forms an impressively strong, light-weight cohesive union of soundboard, X Brace, Neck Block, Sides and Back. The guitars I have constructed this way do not experience neck block shift, as there is nothing to shift, nor is there any place for anything to shift to. In my real-world testing of this solution, I have proven that the bridge will fail (using sufficient force, a bridge will actually tear off the soundboard) long before any change in the position of the neck block will occur. And, with epoxies selectively in use, the heat that would be disastrous on a hide glued guitar has no deleterious effect.
The X Brace gets shaped to reduce unnecessary weight while maintaining sufficient strength.
Shaping the X Brace
As mentioned earlier, all braces must fit the contour of the slightly domed soundboard. The so-called Finger Braces first get sanded in place on the radius dish prior to gluing (by “in place” I mean sanded on the radius dish in approximately the same location they will be glued to the soundboard in order to match the contour).

Brace Radiusing
Finger Braces
The bridgeplate resides directly beneath the bridge and sandwiches the soundboard between itself and the bridge. Its primary role is to mitigate the tearout that would occur as the ball ends of the strings that pass down through the bridge pin holes pull against (and through) a softwood such as Spruce. A good choice for a bridgeplate is a hard, oily wood such as Rosewood, which is very resistant to being all torn up over time ball the ball ends of the strings. In its lesser role, the bridgeplate acts as an additional brace. As such, it either contributes to or detracts from the sound. Debates rage as to which hardwood makes the best bridgeplate, with the consensus leaning toward Maple being the wood of choice for a bright, non-damping brace. For my bridgeplates, I split the difference between the benefits of the two (2) woods and laminate a plate of Rosewood with a plate of Maple. I get the best of both worlds while constructing an arguably stiffer brace.
Laminated Bridgeplate
Bridgeplate Closeup
The so-called Tonebars run diagonally across the lower bout and serve both to distribute the kinetic energy of the strings across the surface of the soundboard as well as to provide structural support in the belly area below the bridge. In Guild's case, they used three (3) Tonebars. While two (2) are sufficient (yes, even for a 12 string), the sound will change and no longer be identifiably Guild. That is not the goal.
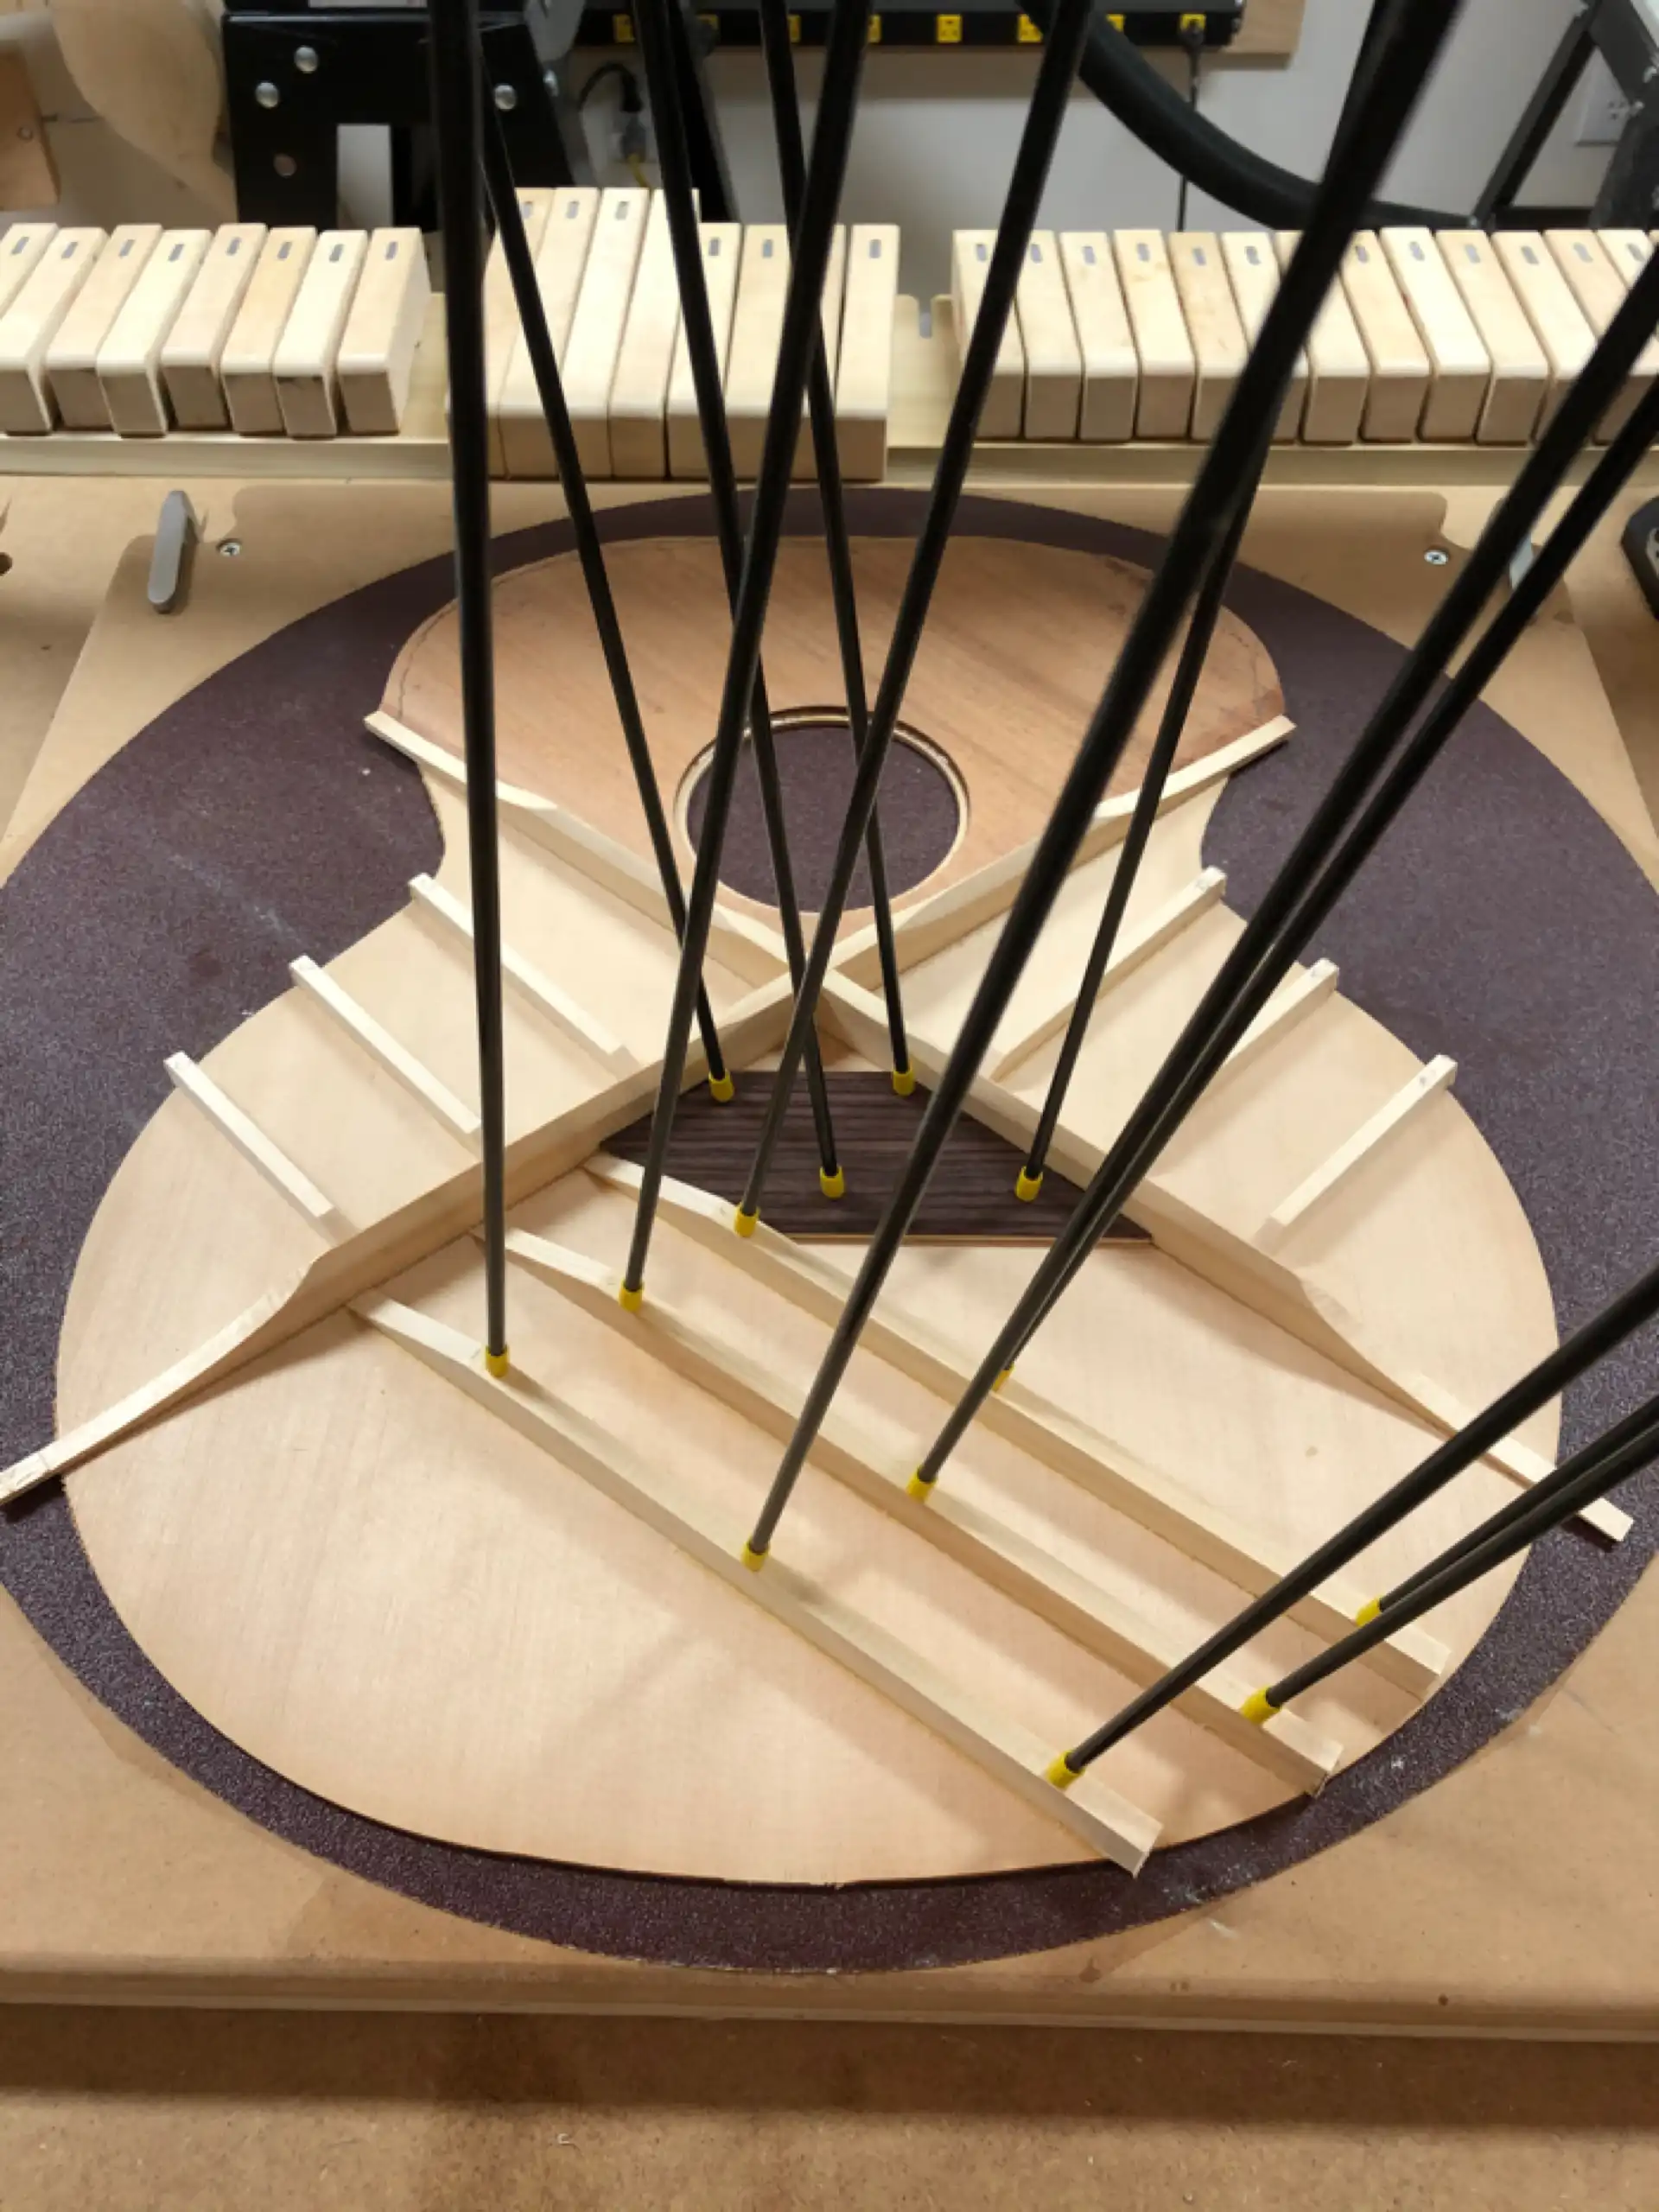
Tonebars
Employing an iterative process of lightly holding the soundboard and rapping it in the lower bout to listen to the response, removing material from the braces and repeating the process as necessary, I scalloped the Tonebars and the X Brace in order to produce as bright an overall sound as possible while still maintaining a woody warmth. This process, known as “voicing”, can be enhanced even farther by using instrumentation to target particular frequencies. Leaving the bracing all at the same height, while potentially enhancing the low end (which I have achieved by slightly widening the legs of the X Brace), typically results in a soundboard that can be a bit too tight, too “cigar box guitar” sounding to my ears. The extra wood also adds unnecessary weight. Scalloping a brace, when done correctly, removes weight without compromising strength.
The original soundboard weighed a svelte 13.7 oz. The new, un-sanded soundboard weighs in at 14.8 oz (remember that I added not one, but two plates of Mahogany to the upper bout, along with a heavier Rosewood layer to the laminated bridgeplate. The overall weight of this new board will be further reduced once it is attached to the body, as it has yet to be sanded to final dimensions, and twelve (12) holes will be drilled through the top and out of that heavy rosewood/maple bridgeplate. It is safe to say that, when completed, there will be very little weight difference between the two boards, with the added benefit of additional strength and stability in the upper bout of the new board.
Old Soundboard
Did I mention that the new soundboard will sound better, richer, having greater sustain? Better design, better materials, and better craftsmanship will produce the greater responsiveness I am after.
New and Improved Soundboard
Body Mold
During the assessment, I had discovered the body of this 12 string has a slight twist in it. This is a very common issue. My own Guild 12 strings each have such a “feature.” A twist can be readily identified on a completed acoustic guitar by attempting to rest the instrument on its sides. Ideally, when turned on either side, the body of an acoustic guitar will sit solidly on a flat plane, where both the lower bout (hips) and the upper bout (shoulders) rest squarely on that surface. Like many other guitars, this instrument had a different understanding of that notion.
When the lower bout on the treble (1st string) side was pressed firmly against the flat surface, the upper bout would only touch at the back of the side. The soundboard side was twisted up and away from the surface approximately 1/4" of an inch. This was a good indication that the instrument was possibly not well-secured in a body mold (a jig/fixture designed to hold the sides of the body in a specific shape) throughout its entire construction, and/or extra care and attention may not have been paid when gluing on the kerfing (which can alter the contours of a side).
Upper Bout Twist
Ideally, the body should be held in that same position that was achieved after attaching the sides to the tail block, neck block and kerfing while both the back and the soundboard are attached. Under no circumstances should the completed sides, tail block, neck block and kerfing be stressed, torqued and/or twisted after glue-up into a new shape while the back and/or soundboard are attached. It is ill-advised to ever attempt to force the sides into a new shape and believe that they can be held there by gluing the soundboard on, even if that means the end result is a slight twist in the side(s).
Correcting such a twist in this body would require a complete disassembly of the guitar: removing the back, removing the neck block, re-aligning the sides... essentially starting over. This issue in the upper bout, where the wall of the side leans in slightly toward the soundhole, has ZERO affect on the sound. Since the waist of the guitar (where it rests on the leg of the player) is properly perpendicular (not twisted) and play comfort is not compromised in any way, no alterations are going to be made. Now that I have made a great big deal out of what is essentially a non-issue, let me say, “We are in fine shape going forward.”
With the body secured in a body mold, the the first step in fitting the soundboard is to identify the centerline. On many pre-robotic, factory-built instruments this can be a daunting task. This guitar is a good example, where neither the neck block or the tail block were accurately centered on the sides. However, a visual centerline has been determined by the plastic V-trim at the tail block and by the meeting of the back binding at the neck block. Short of a complete disassembly, this is what I must use for the positioning of the soundboard - not the centerlines of the neck and tail blocks.
Playing detective and piecing this all together, I surmise that the old soundboard had been glued onto a rather imperfect side assembly which had been forced back into a body bold under tension to try to straighten it out. Eventually, the weakest link failed and the soundboard sheared in toward the soundhole. Regardless, the problem now goes away, forever!
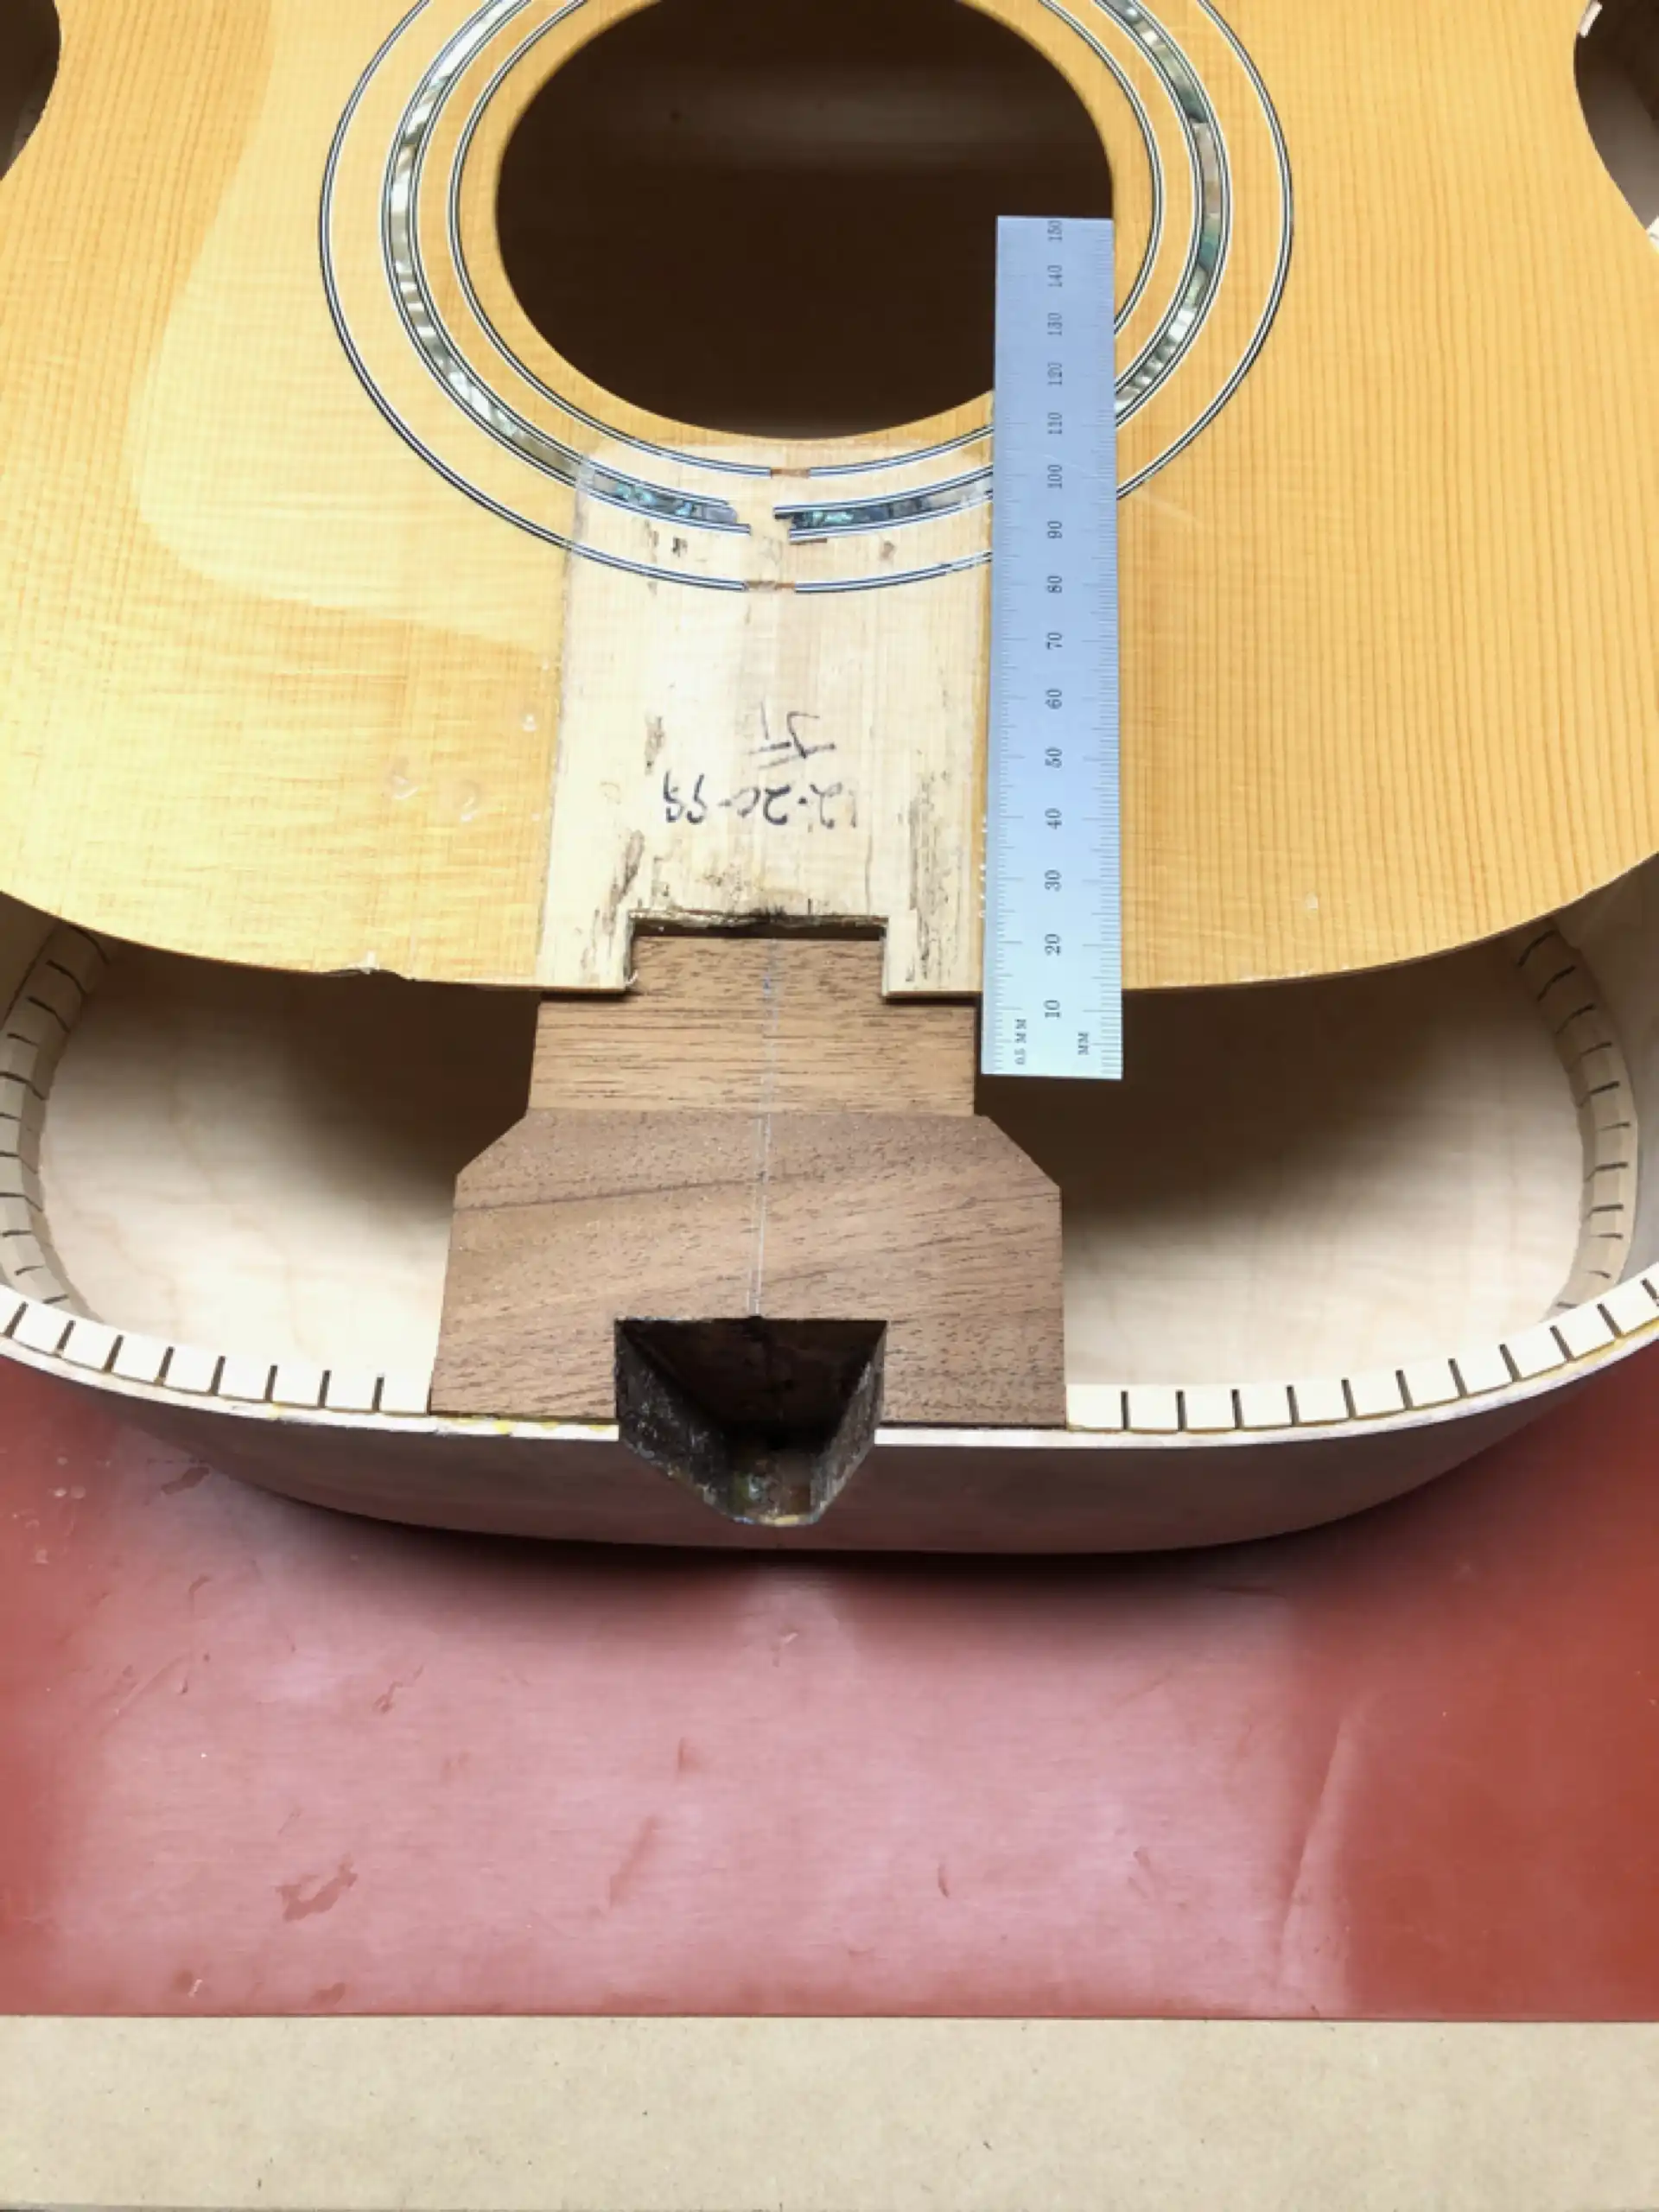
Soundboard Shear
When the guitar was first built, as a result of the neck block not being centered, the dovetail mortise was cut off center of that block in order to align the neck with the body.
Neck Block Centerline
Regardless of how off-center the tail block (glued inside) may be when compared with the visual centerline determined by the original plastic V-trim, that visual centerline is what the soundboard centerline will now be aligned with.
Tail Block Centerline
To fit a traditional X Braced soundboard, the ends the X Brace along with the ends of the Transverse Brace are let into the kerfing and sides, providing a ledge for them to rest upon (as mentioned earlier, Guilds will also let in two (2) of the three (3) Finger Braces on each side).
For this soundboard, I will let in the ends of the lower legs of the X Brace along with the entire upper bout, from X brace to X brace. This massive “notch” in the upper bout locks the soundboard against the sides and prevents any shift.
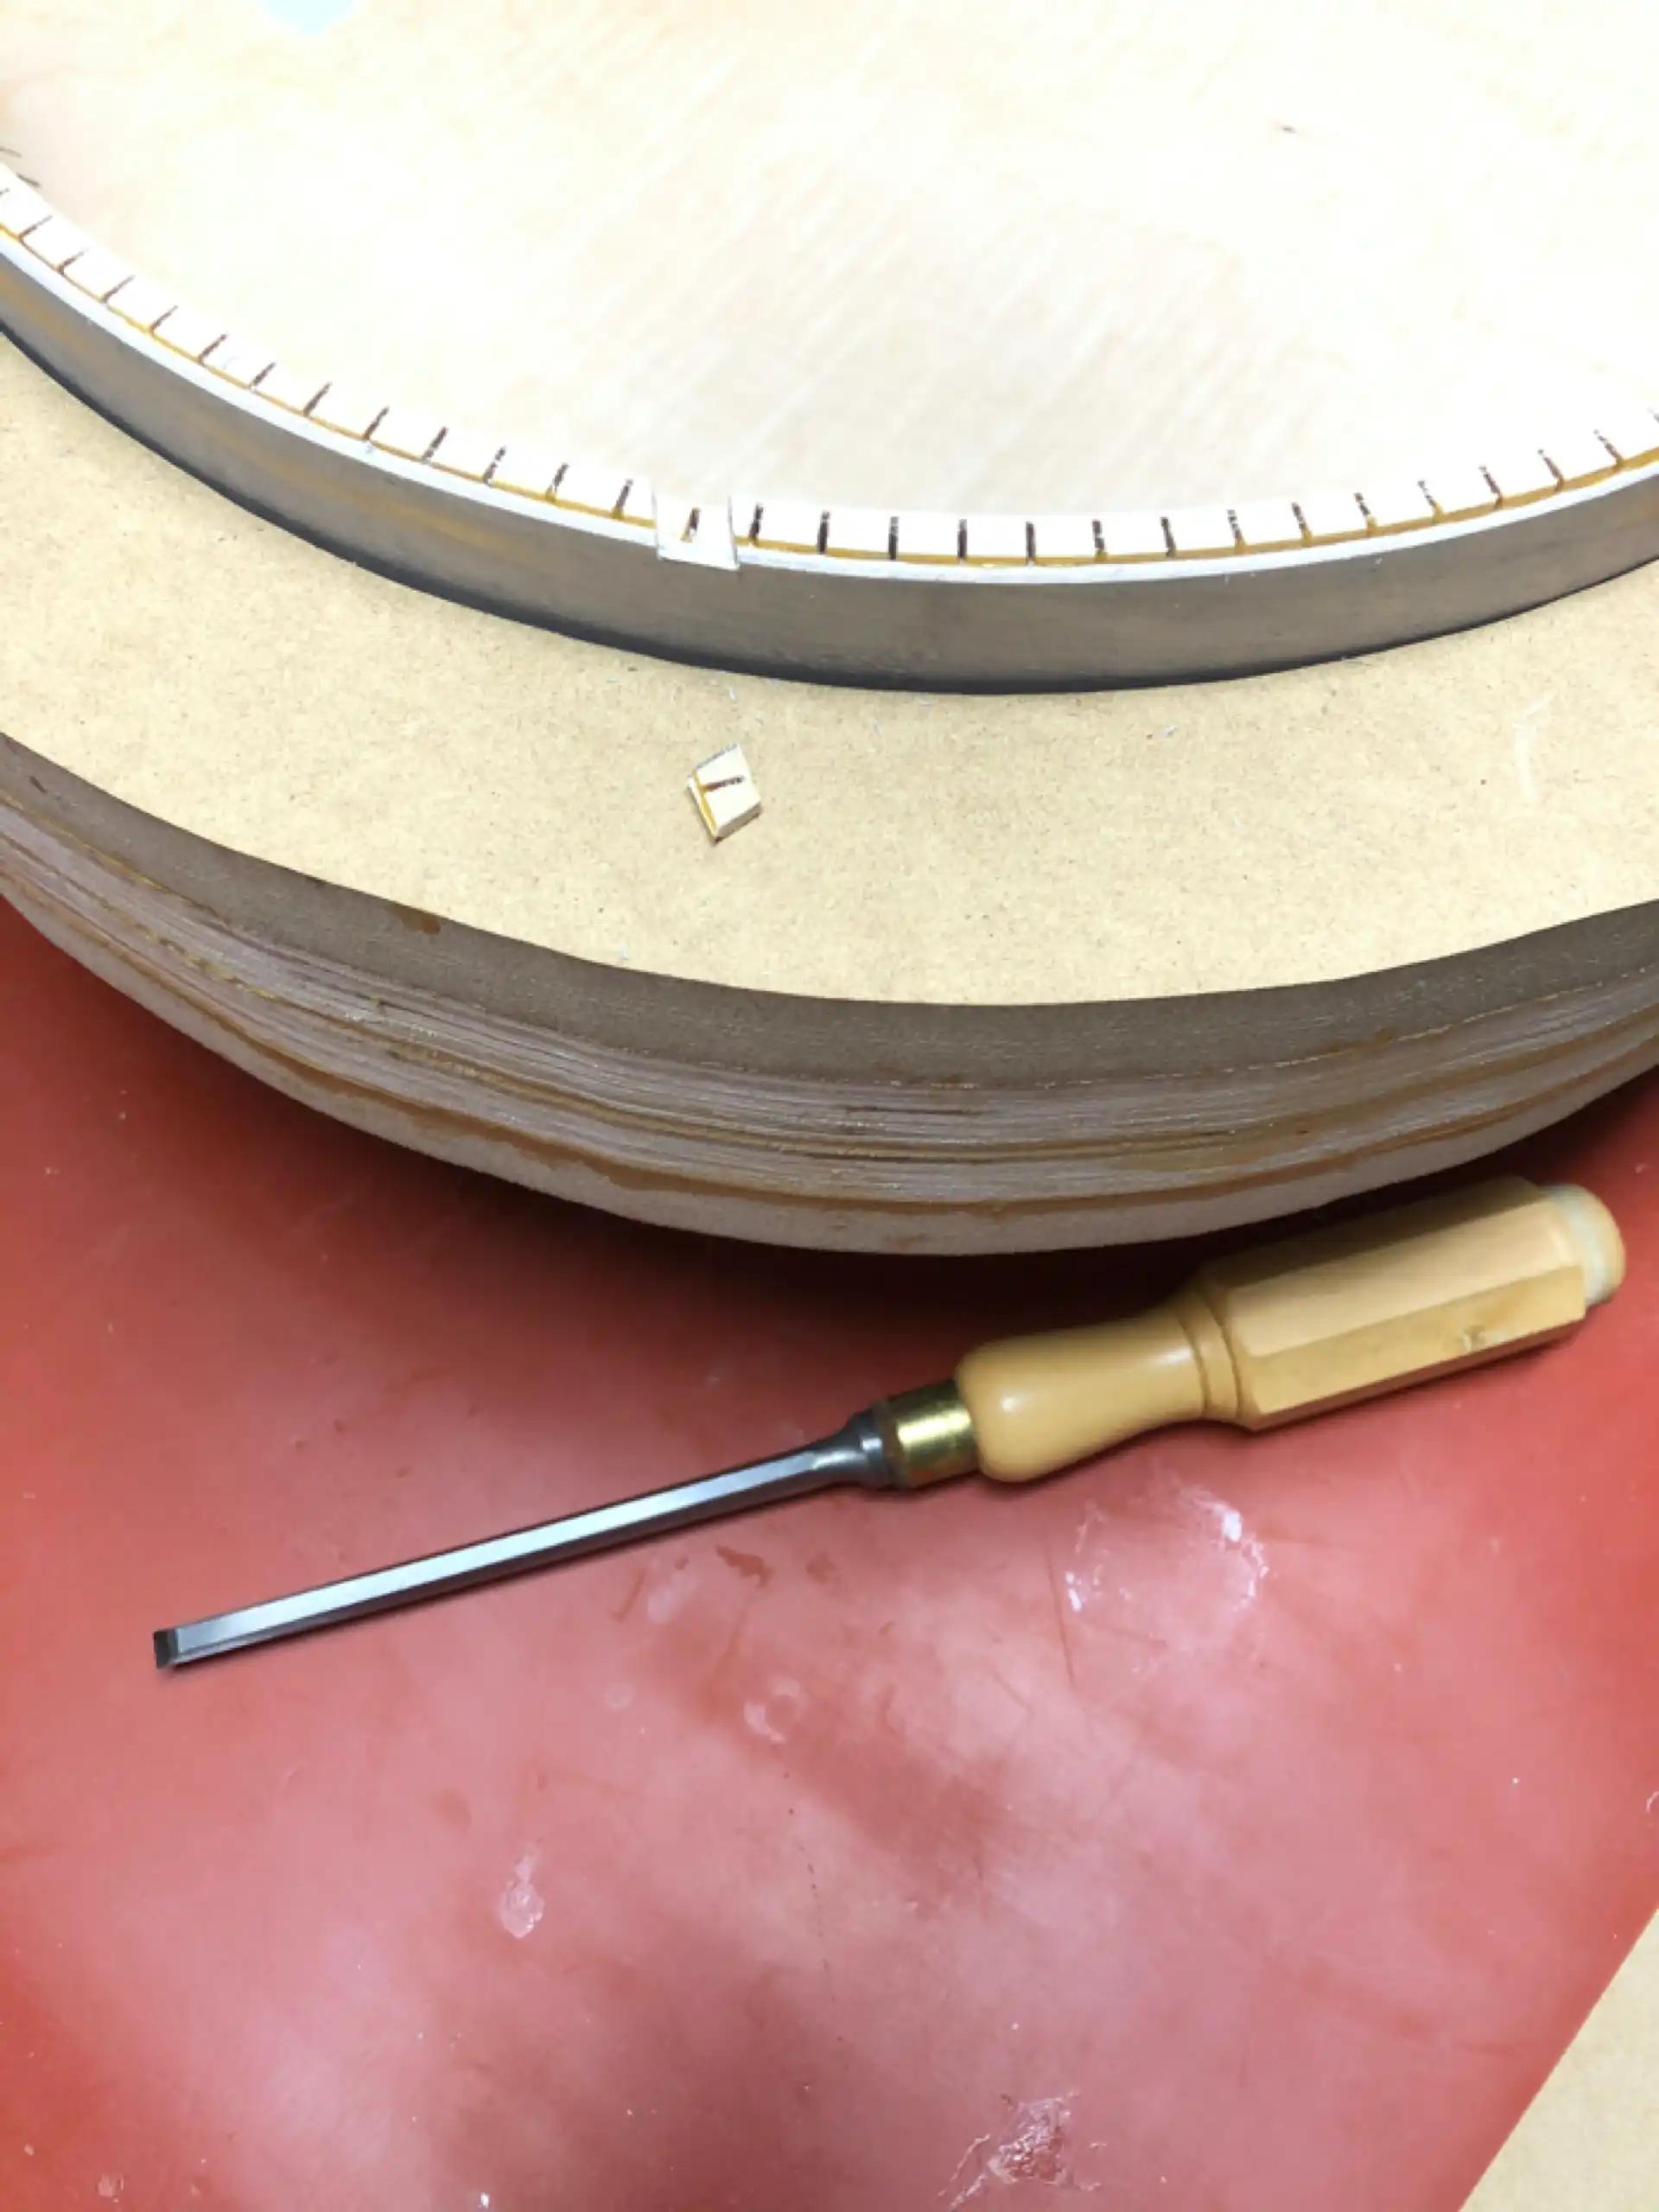
Kerfing Notched for X Brace
A sharp chisel, a small handplane, and 1 hour are all that are required to ensure a perfect fit. I reduced the height of the neck block, kerfing and sides in the upper bout area by the height of the two (2) Mahogany plates. Of course it would have been easier to have cut those plates to fit inside the kerfing, but then we are largely back to where we started, where the only thing holding everything together is the thin Spruce soundboard glued to the kerfing. My approach literally locks the soundboard into the sides, forming a cohesive unit to act against the pull of the strings.
The body is now ready to receive the new soundboard.
Ready for the Soundboard
Glue is applied to the kerfing, Tail and Neck block surfaces and the soundboard is clamped into place.
Soundboard Glue-Up
Here is a close-up of the glue-up, highlighting the depth of the soundboard throughout the upper bout. When the binding is applied, only the Maple side will be visible; the Mahogany and Spruce layers will be underneath the binding.
Soundboard Close-Up
Binding serves more than one role on an acoustic guitar. Most notably, it provides for an aesthetic trim. Body binding visually eases the transition between the sides and the front and back plates, while fretboard and headstock binding can dress up an otherwise austere or unadorned instrument. Binding also serves to provide an insulatory layer of protection against bumps and blows that may occur along the edges of the instrument. Perhaps a lesser-known function of binding, soundboard binding in particular, is that of providing a rim or wall against which the initial soundwaves generated by the strings and traveling across the soundboard are able to literally bounce against and be dispersed back across the soundboard, creating the standing waves responsible for what we perceive to be the sound of an acoustic guitar. For those who may doubt this function, a simple experiment can end the argument: simply rout off the soundboard binding, leaving everything else intact, and listen to what happens to the sound!
Body binding (with or without side purfling) requires a ledge to be cut into the sides of the body where the sides meet the front and/or the back plate. When purfling is added, an additional groove is routed into the soundboard or the back, extending the binding channel. Typically, binding is much taller than purfling, and any purfling extending out into the soundboard must not exceed the thickness of the soundboard. Here is an image that someone else created that shows the separate pieces that may comprise body binding.
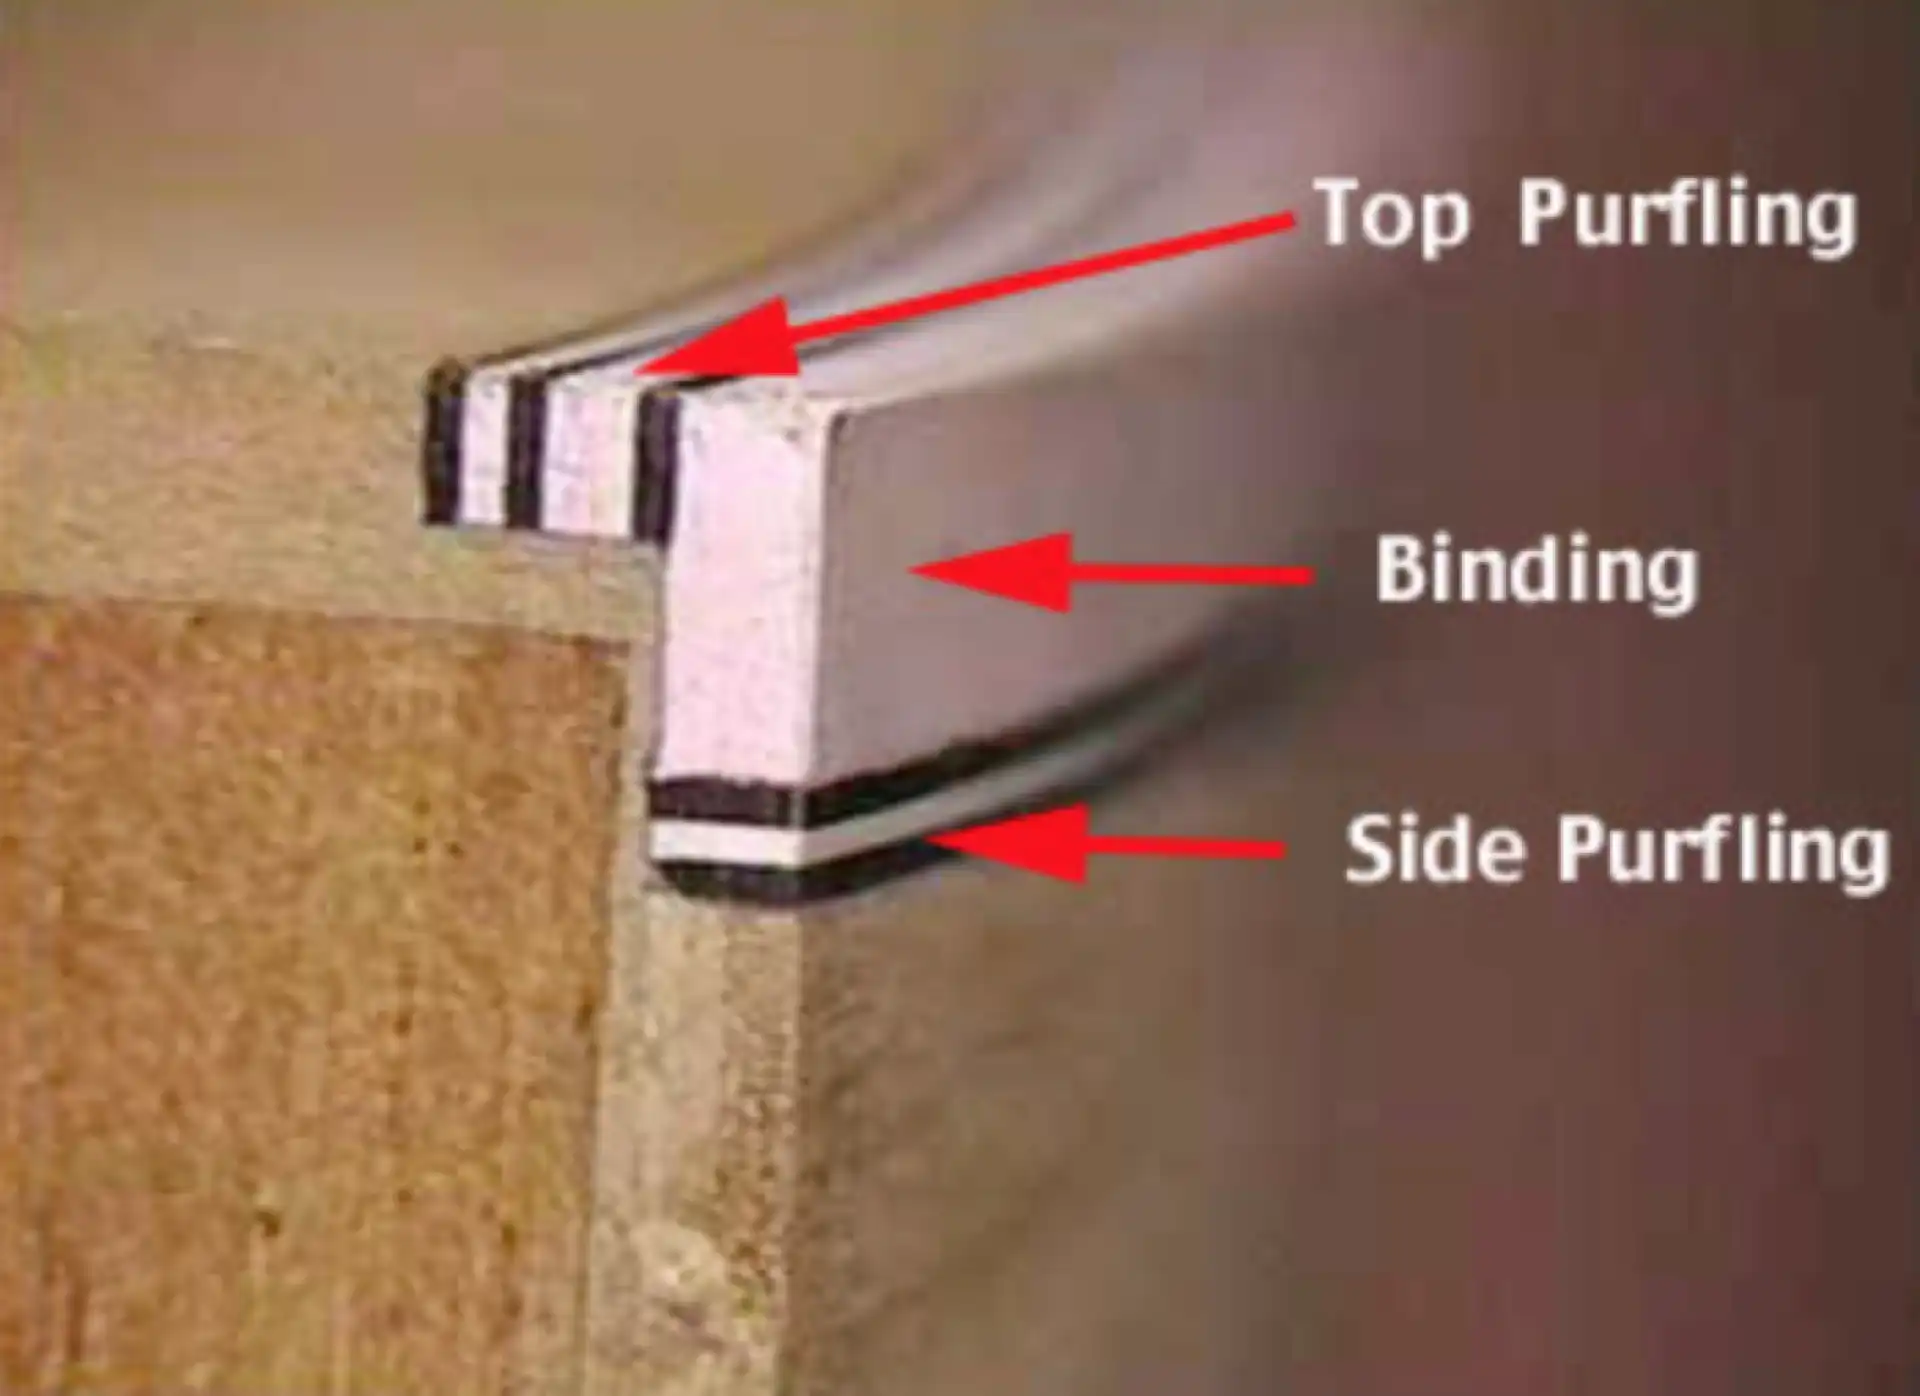
Binding Diagram
Whether a manual graver and sharp chisel or an electric router is used to cut the channel/groove that will accept the binding, it is customary to follow the sides as a reference in order to control how far into the soundboard and/or back the binding/purfling channel extends. Trimming the soundboard flush with the sides is necessary to ensure (in my case) the binding router has a perfectly smooth reference to follow.
Soundboard Trimmed Flush with the Sides
In order to determine how deep and wide to cut the binding channels, it is absolutely necessary to have the binding/purfling in hand. The trim is first measured and the channels/grooves are cut a bit shallower, allowing the trim to project slightly proud of the surface(s). It can then be scraped and/or sanded flush.
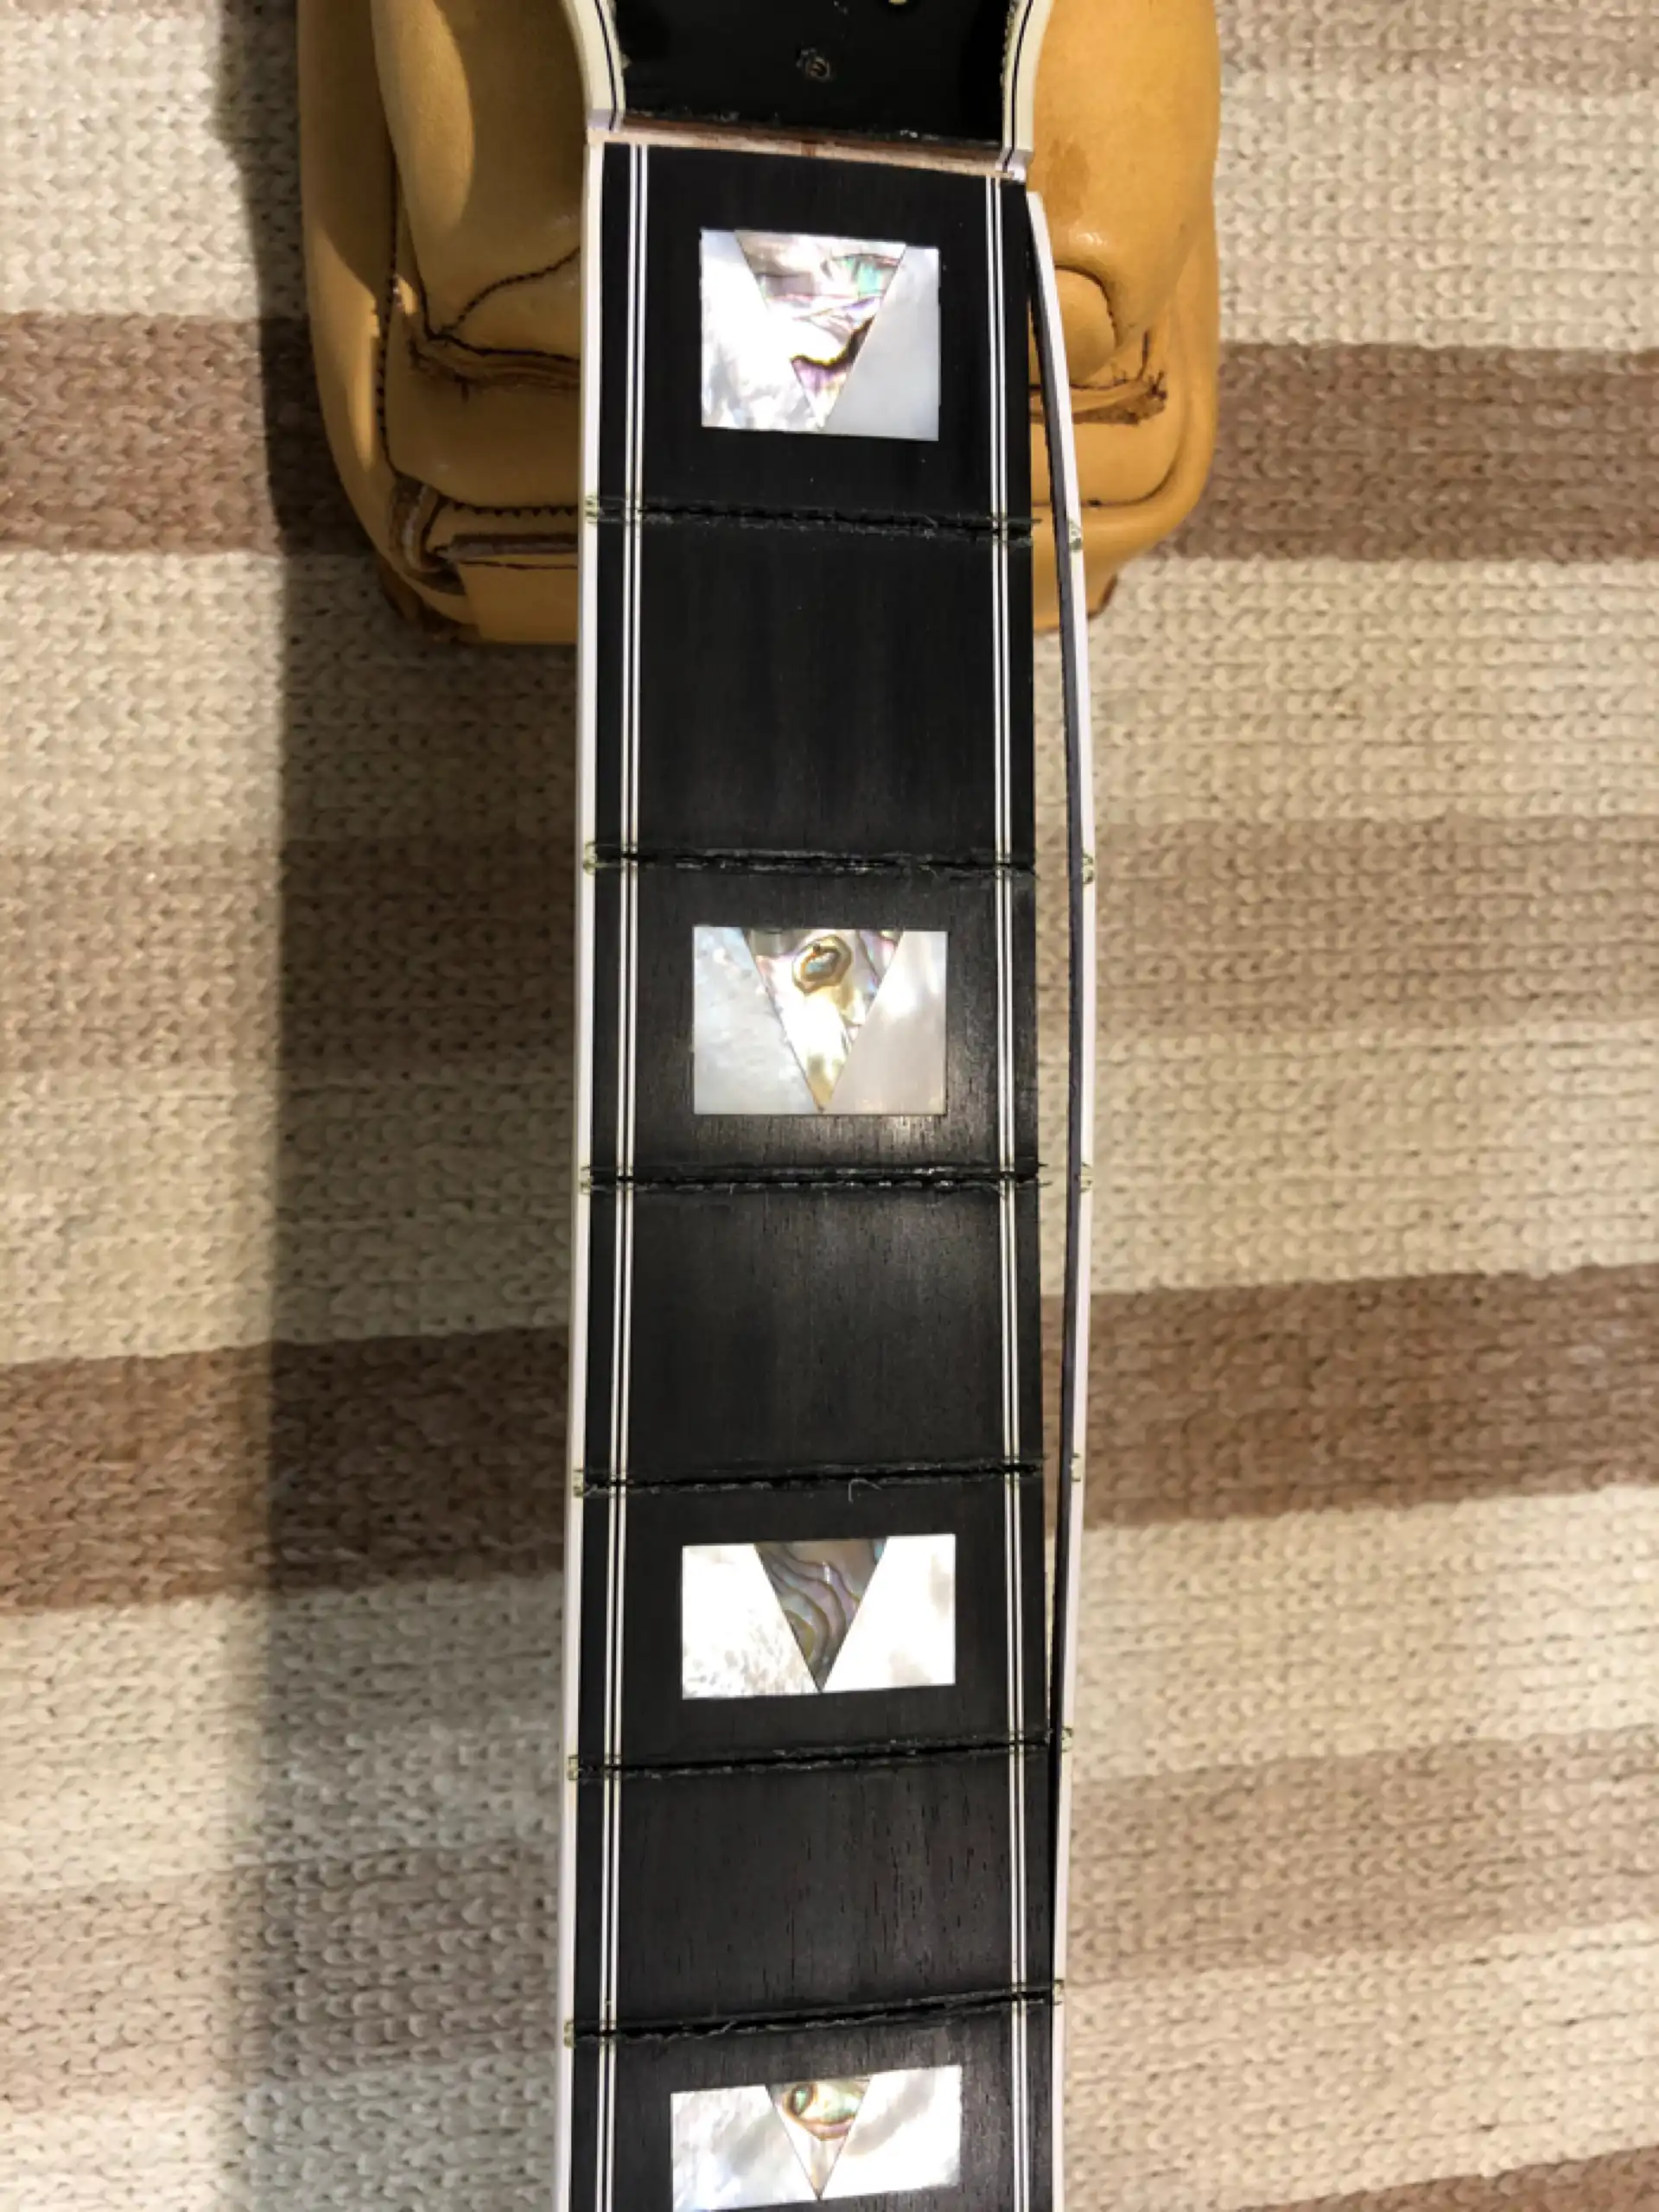
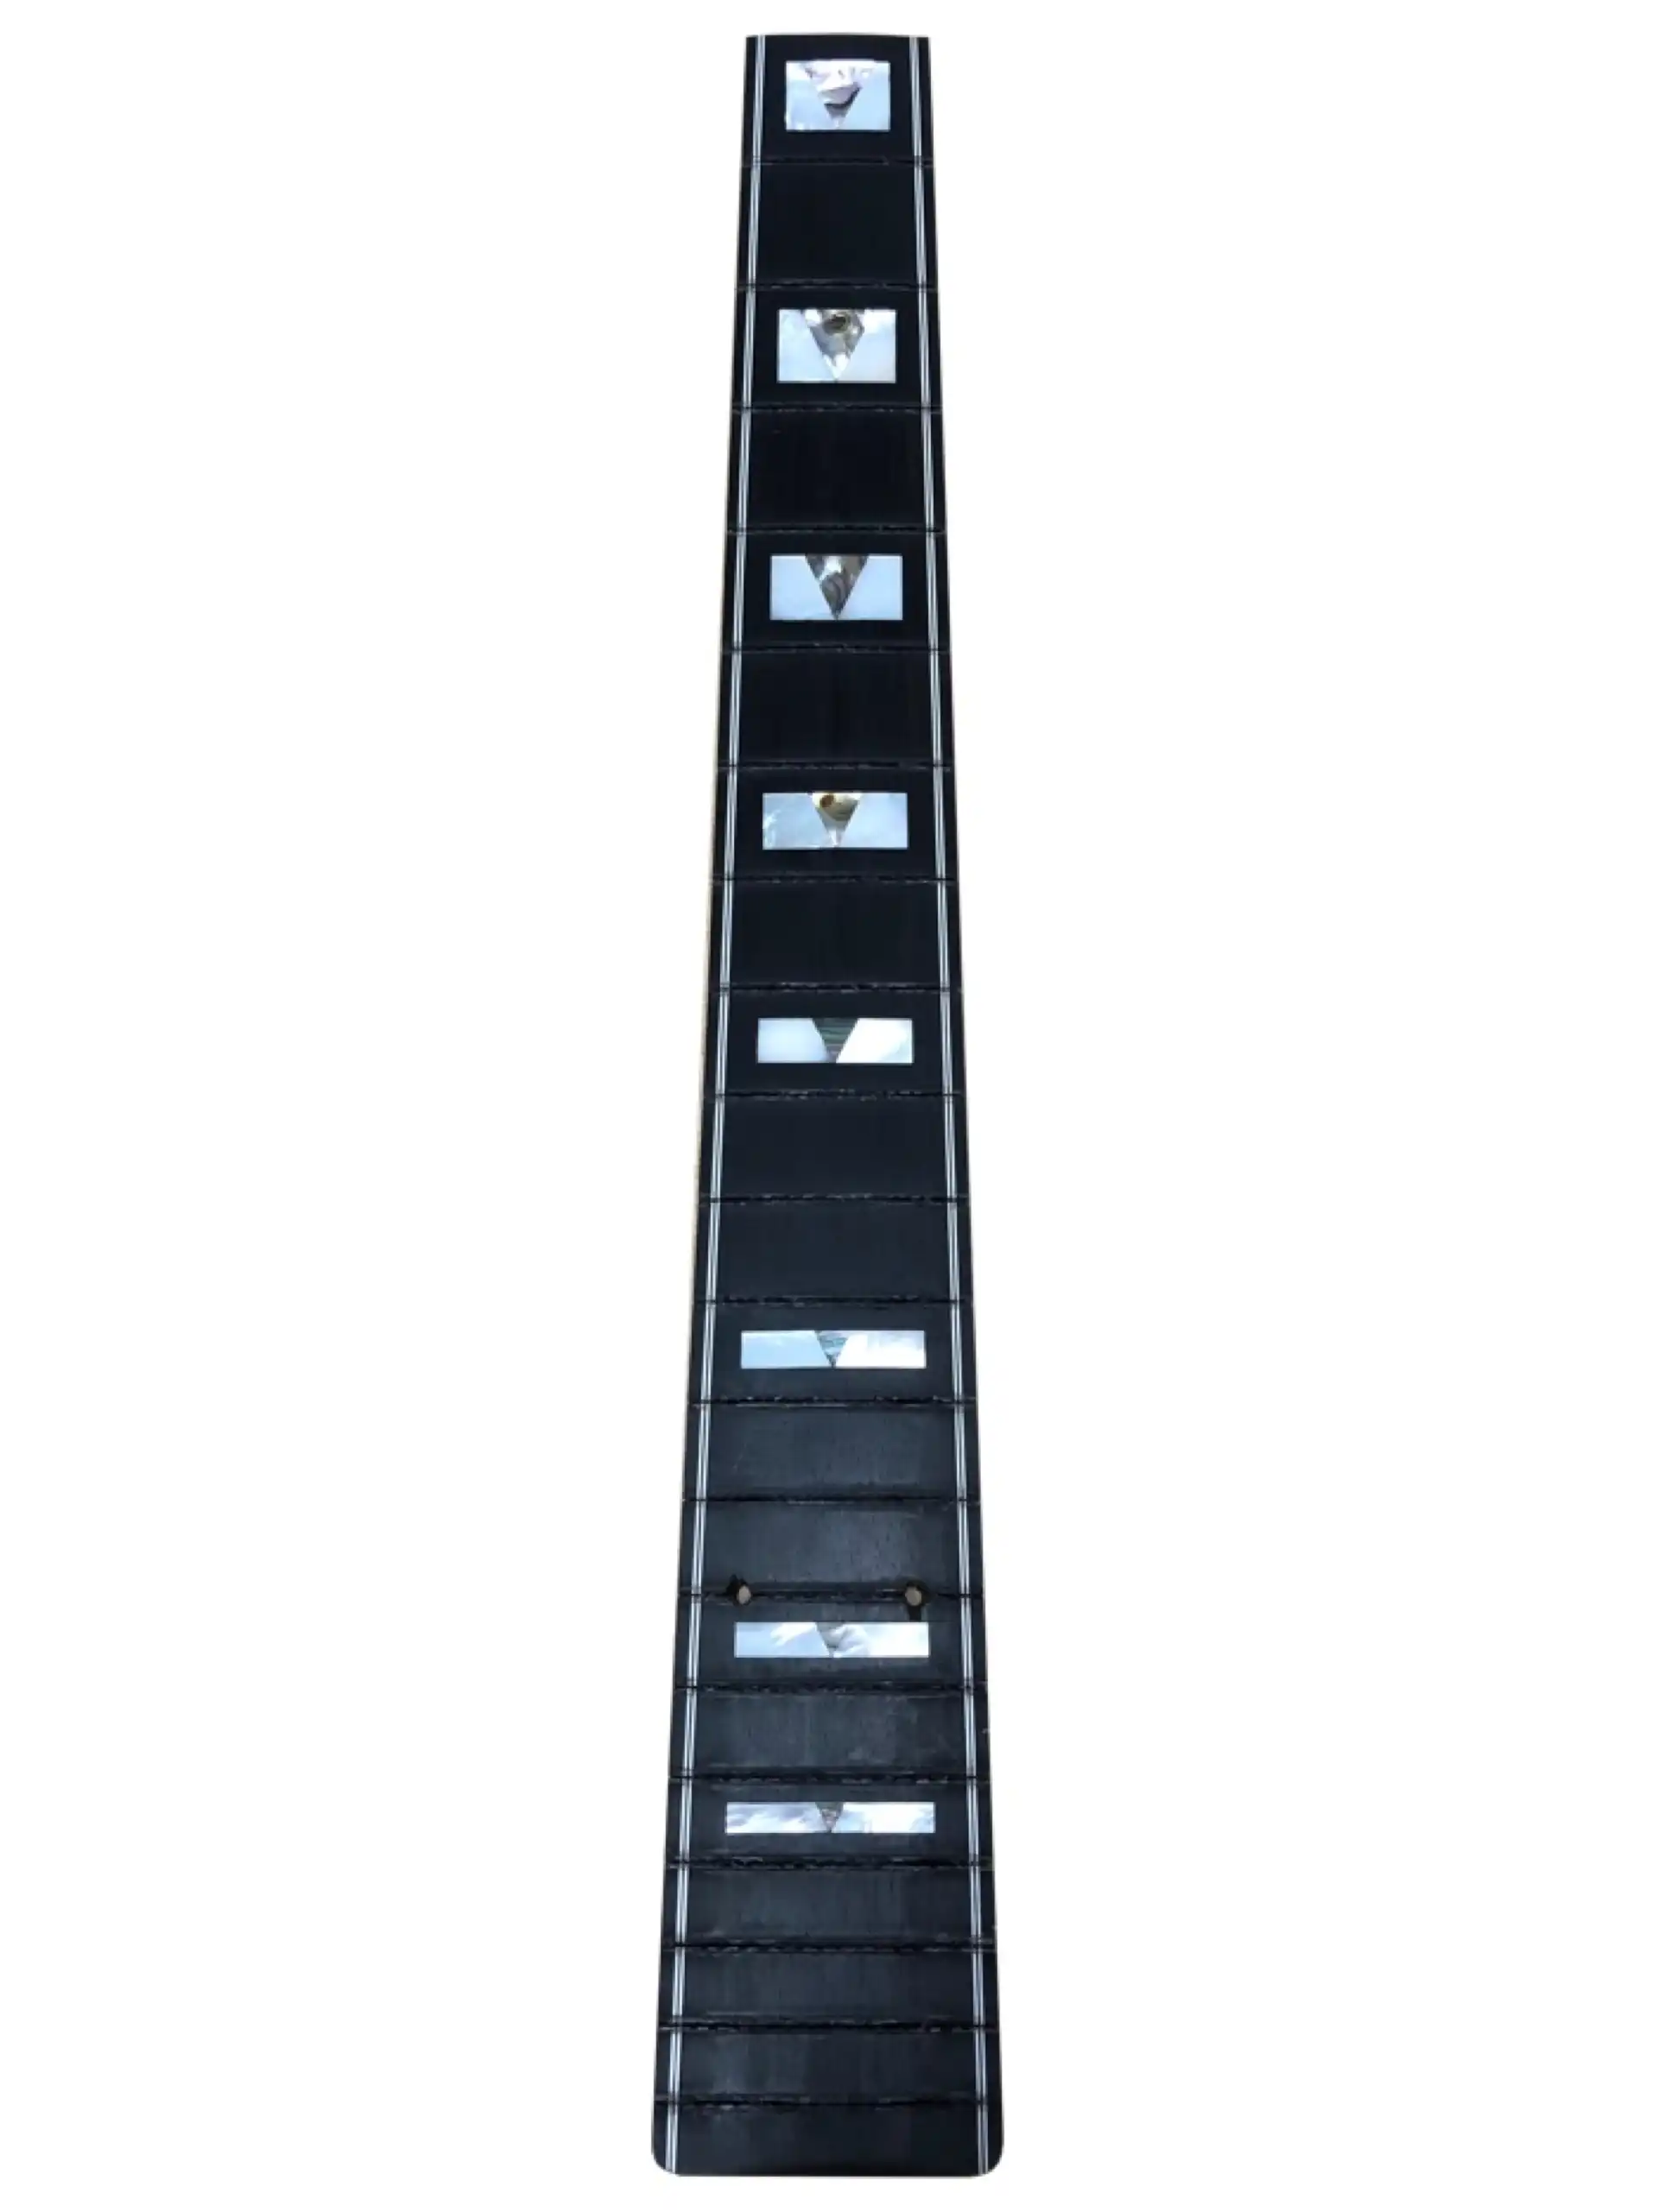
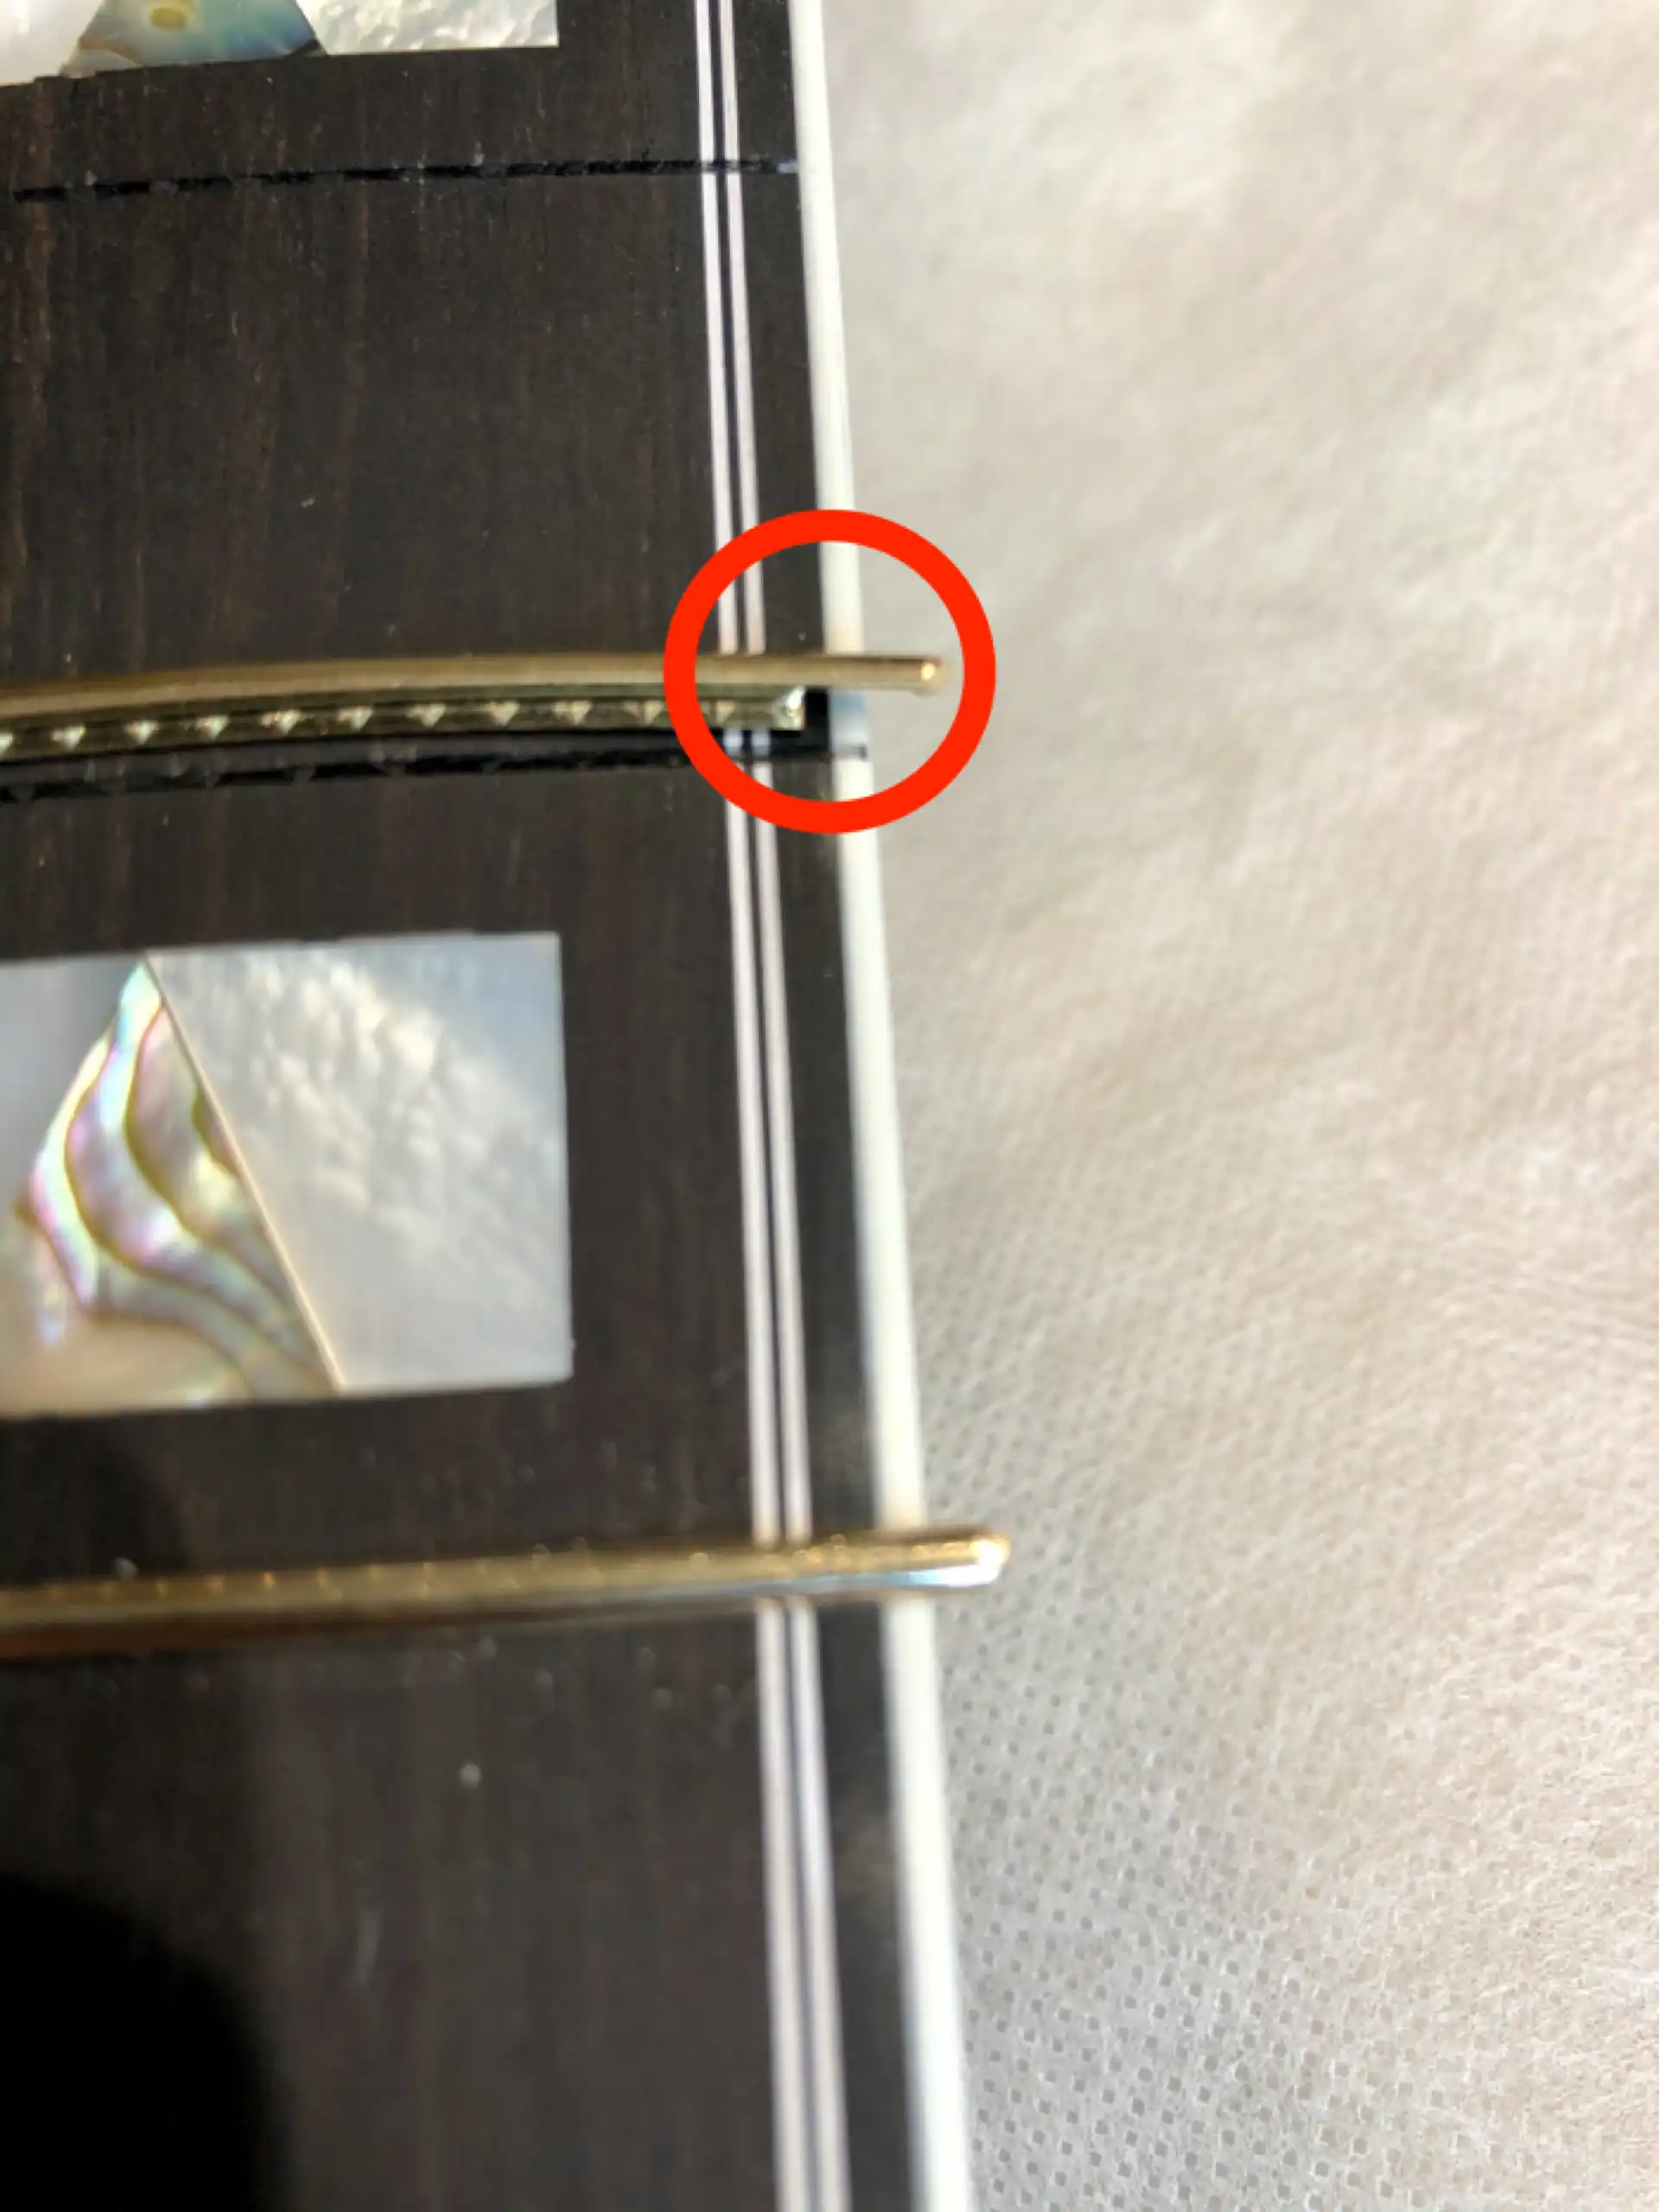
Guild uses plastic binding on their instruments, as do many manufacturers. Though it requires a specialty adhesive to get to stick and stay in place over time, it is highly flexible and (with a little heat applied) can navigate the tightest of bends and curves. A single piece of white ABS binding, while functional, can appear rather plain; a bit too plain. Guild embellished their binding by bonding several pieces of very thin layers of plastic purfling together, creating the well-known “railroad tracks” trim that adorns the higher-end models.
The binding needed for this guitar does not technically exist outside of Guild; as in, it is not available for off-the-shelf purchase (at least, not for this luthier). Whenever contacted, based on whoever has owned the brand at the time, Guild has consistently refused to sell their pre-made binding to me. So it must be made by hand. I cannot accurately cut the binding channels into the guitar until I have made all the trim.
Re-creating this trim is no small affair... There are five (5) pieces of binding and purfling that must be joined into a single piece just to comprise the side binding. Additional pieces are joined in various orders to form any one of the popular purfling trim patterns found along the edge of the soundboard and back of various guitars across the decades.
Binding Pieces
The multiple pieces may be affixed to one another using either a specialty glue or Acetone. As both approaches tend to melt (dissolve) the plastic, it is critical to use only enough bonding medium to accomplish the extremely tedious, time-consuming task. When using Acetone and joining larger pieces together (eg, 0.090 x 0250 inch), a swab or small brush may be used to paint a very fine layer of solvent on the inside of one of the pieces to be joined. Using a fixture to reference one edge as the pieces are then held together is necessary to ensure straight lines. Those who have bound an electric guitar this way may wonder what all the fuss is about.
I use a small UHMW fixture supplied by StewMac to hold a section of ABS binding pieces together while I apply a tiny amount of Acetone using a syringe and blunt-end needle. The Acetone wicks between the layers of plastic and melds them together. Without such a fixture (jig) this task is nigh unto impossible to accomplish.
Binding Laminator
Too much Acetone melts the plastic and destroys all that hard work! The fixture cleverly employs a spring-loaded section of UHMW plate to pinch the binding pieces up against the main UHMW block. This polyethylene thermoplastic material is not impacted by Acetone (or any glue I know of). With this approach I am able to work 1.5 inch of binding at a time. Depending on how much melting is going on, it can take upwards of 20 minutes for the Acetone to completely flash off and the ABS to be fully hardened again. Attempting to move the newly bonded binding too soon can result in damage, as well. It takes me several days to create sufficient binding to re-bind a Guild guitar. But the results are a significant improvement over a lone strip of plastic having a solitary color.
I assume that Guild binding was machine manufactured, as creating this level of detail by hand takes nearly as much time as building the guitar. But it had to be done!
Binding Fixture
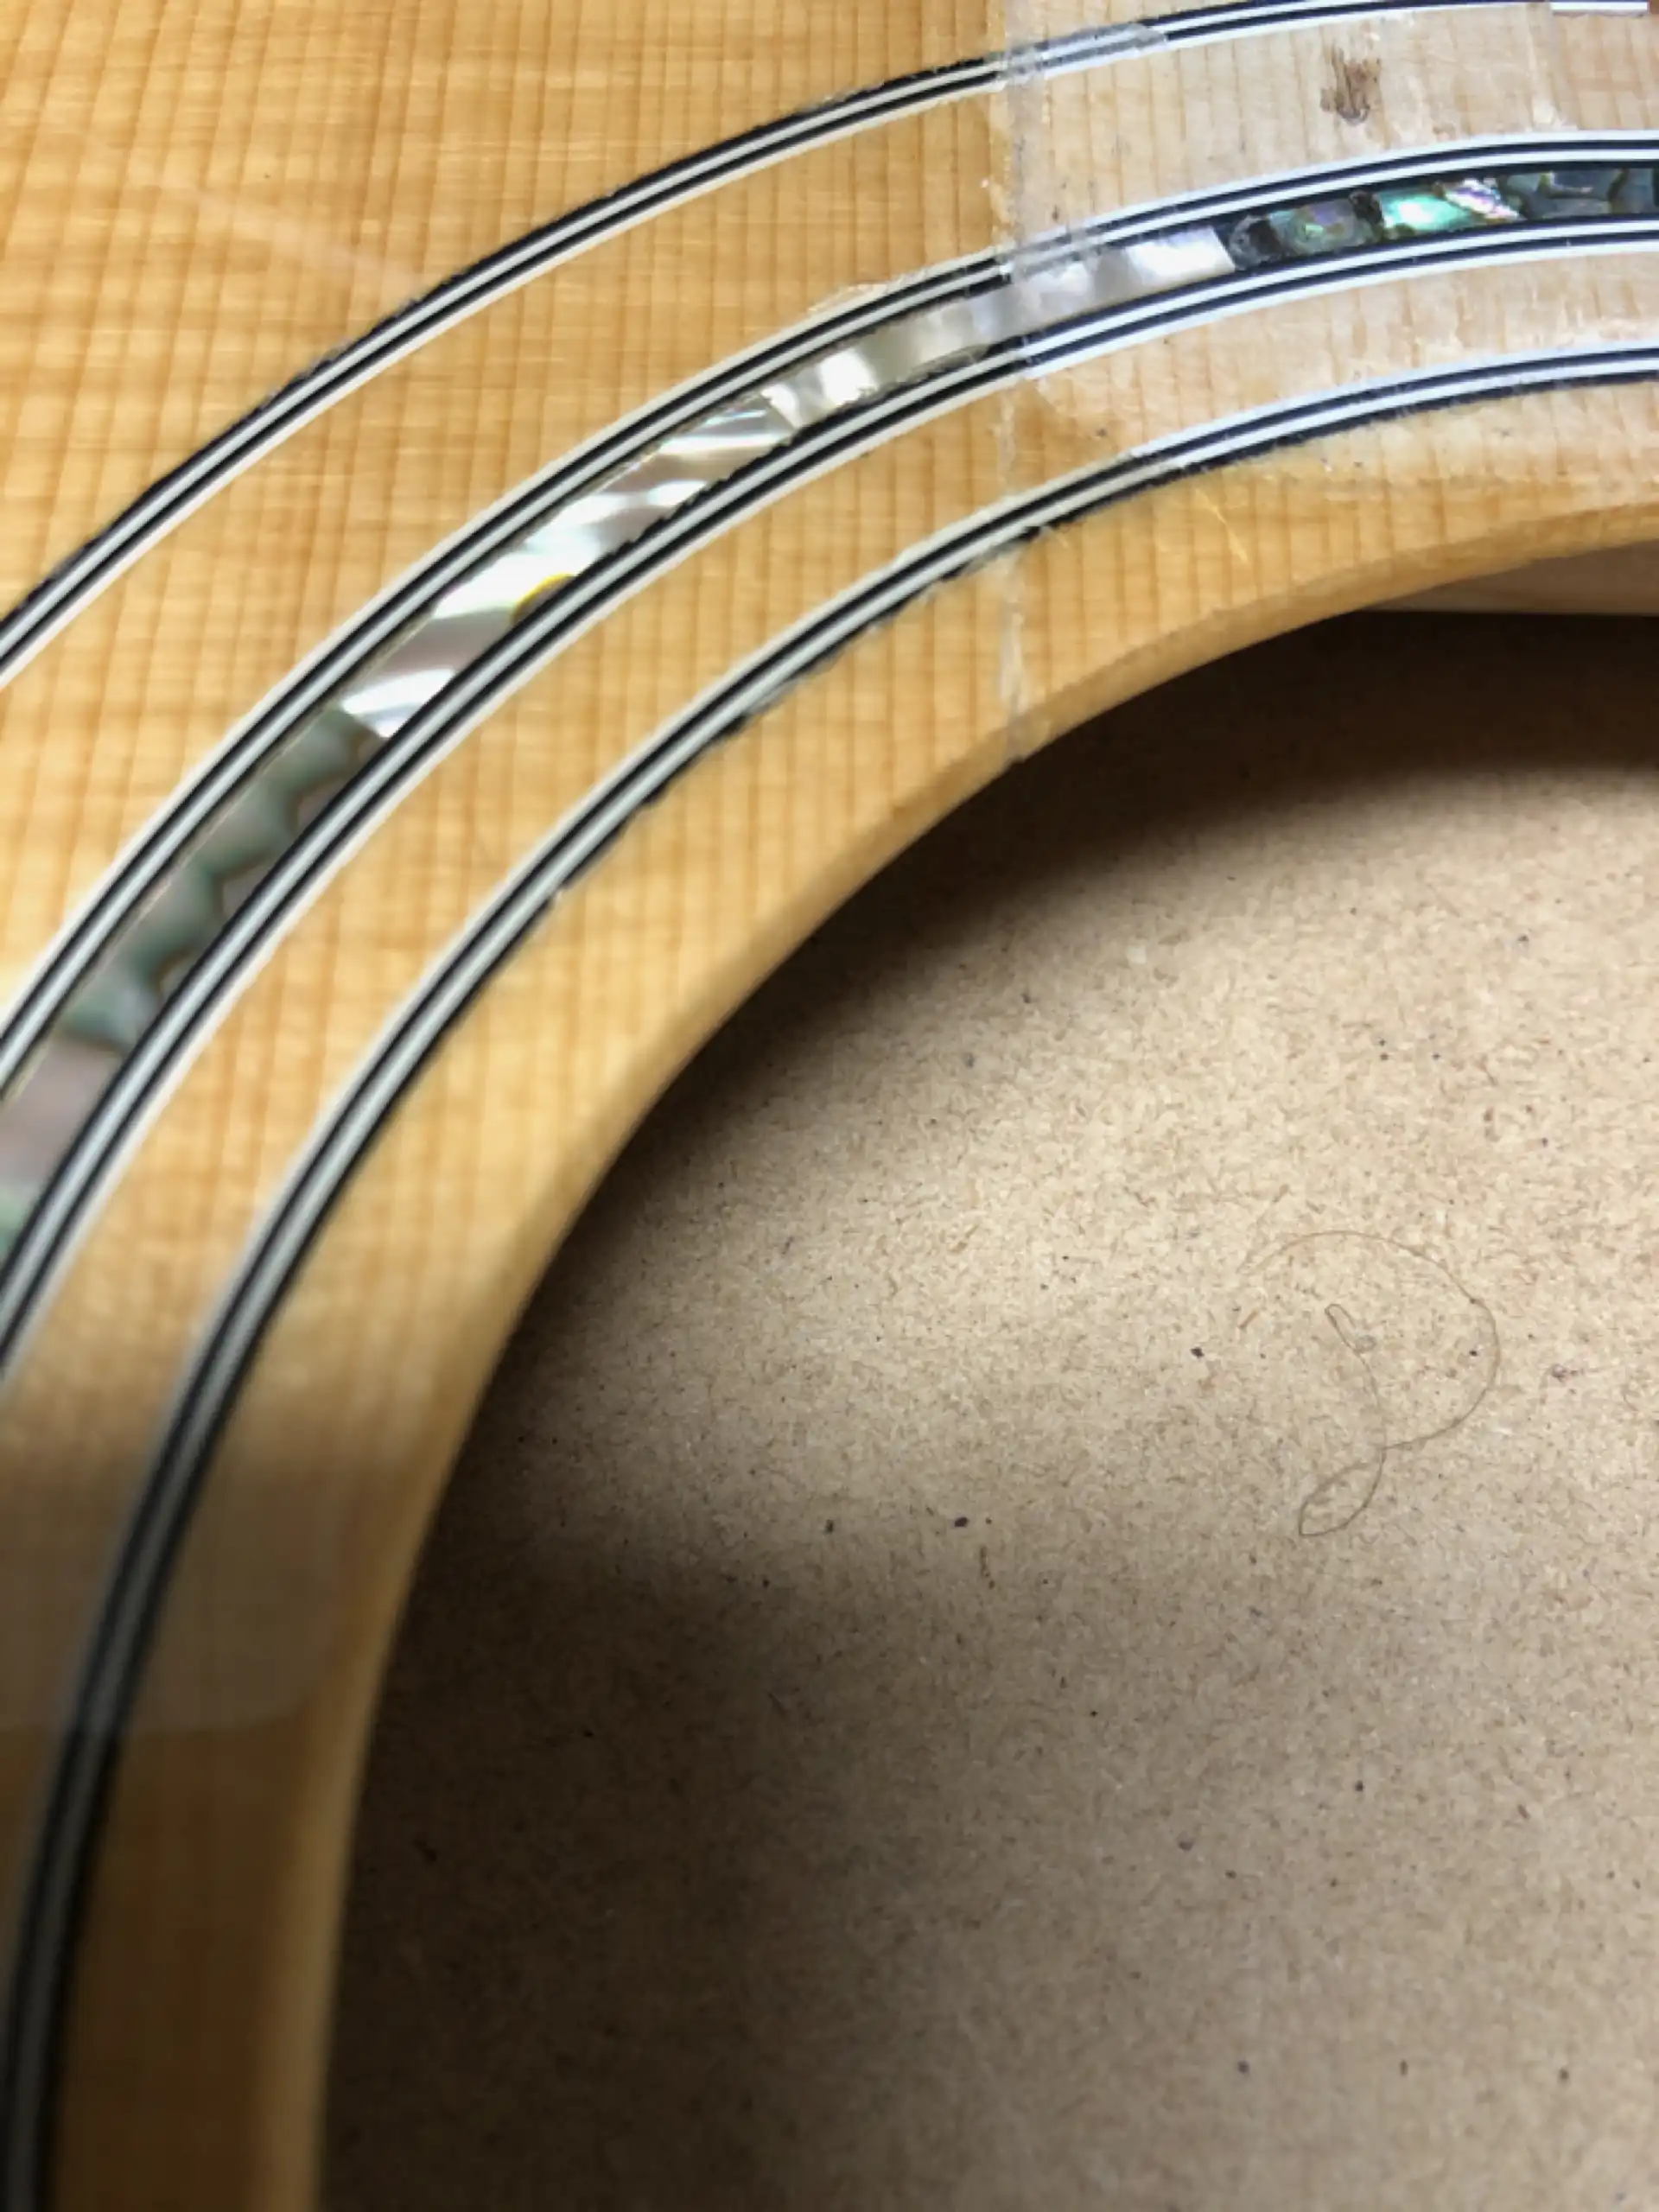
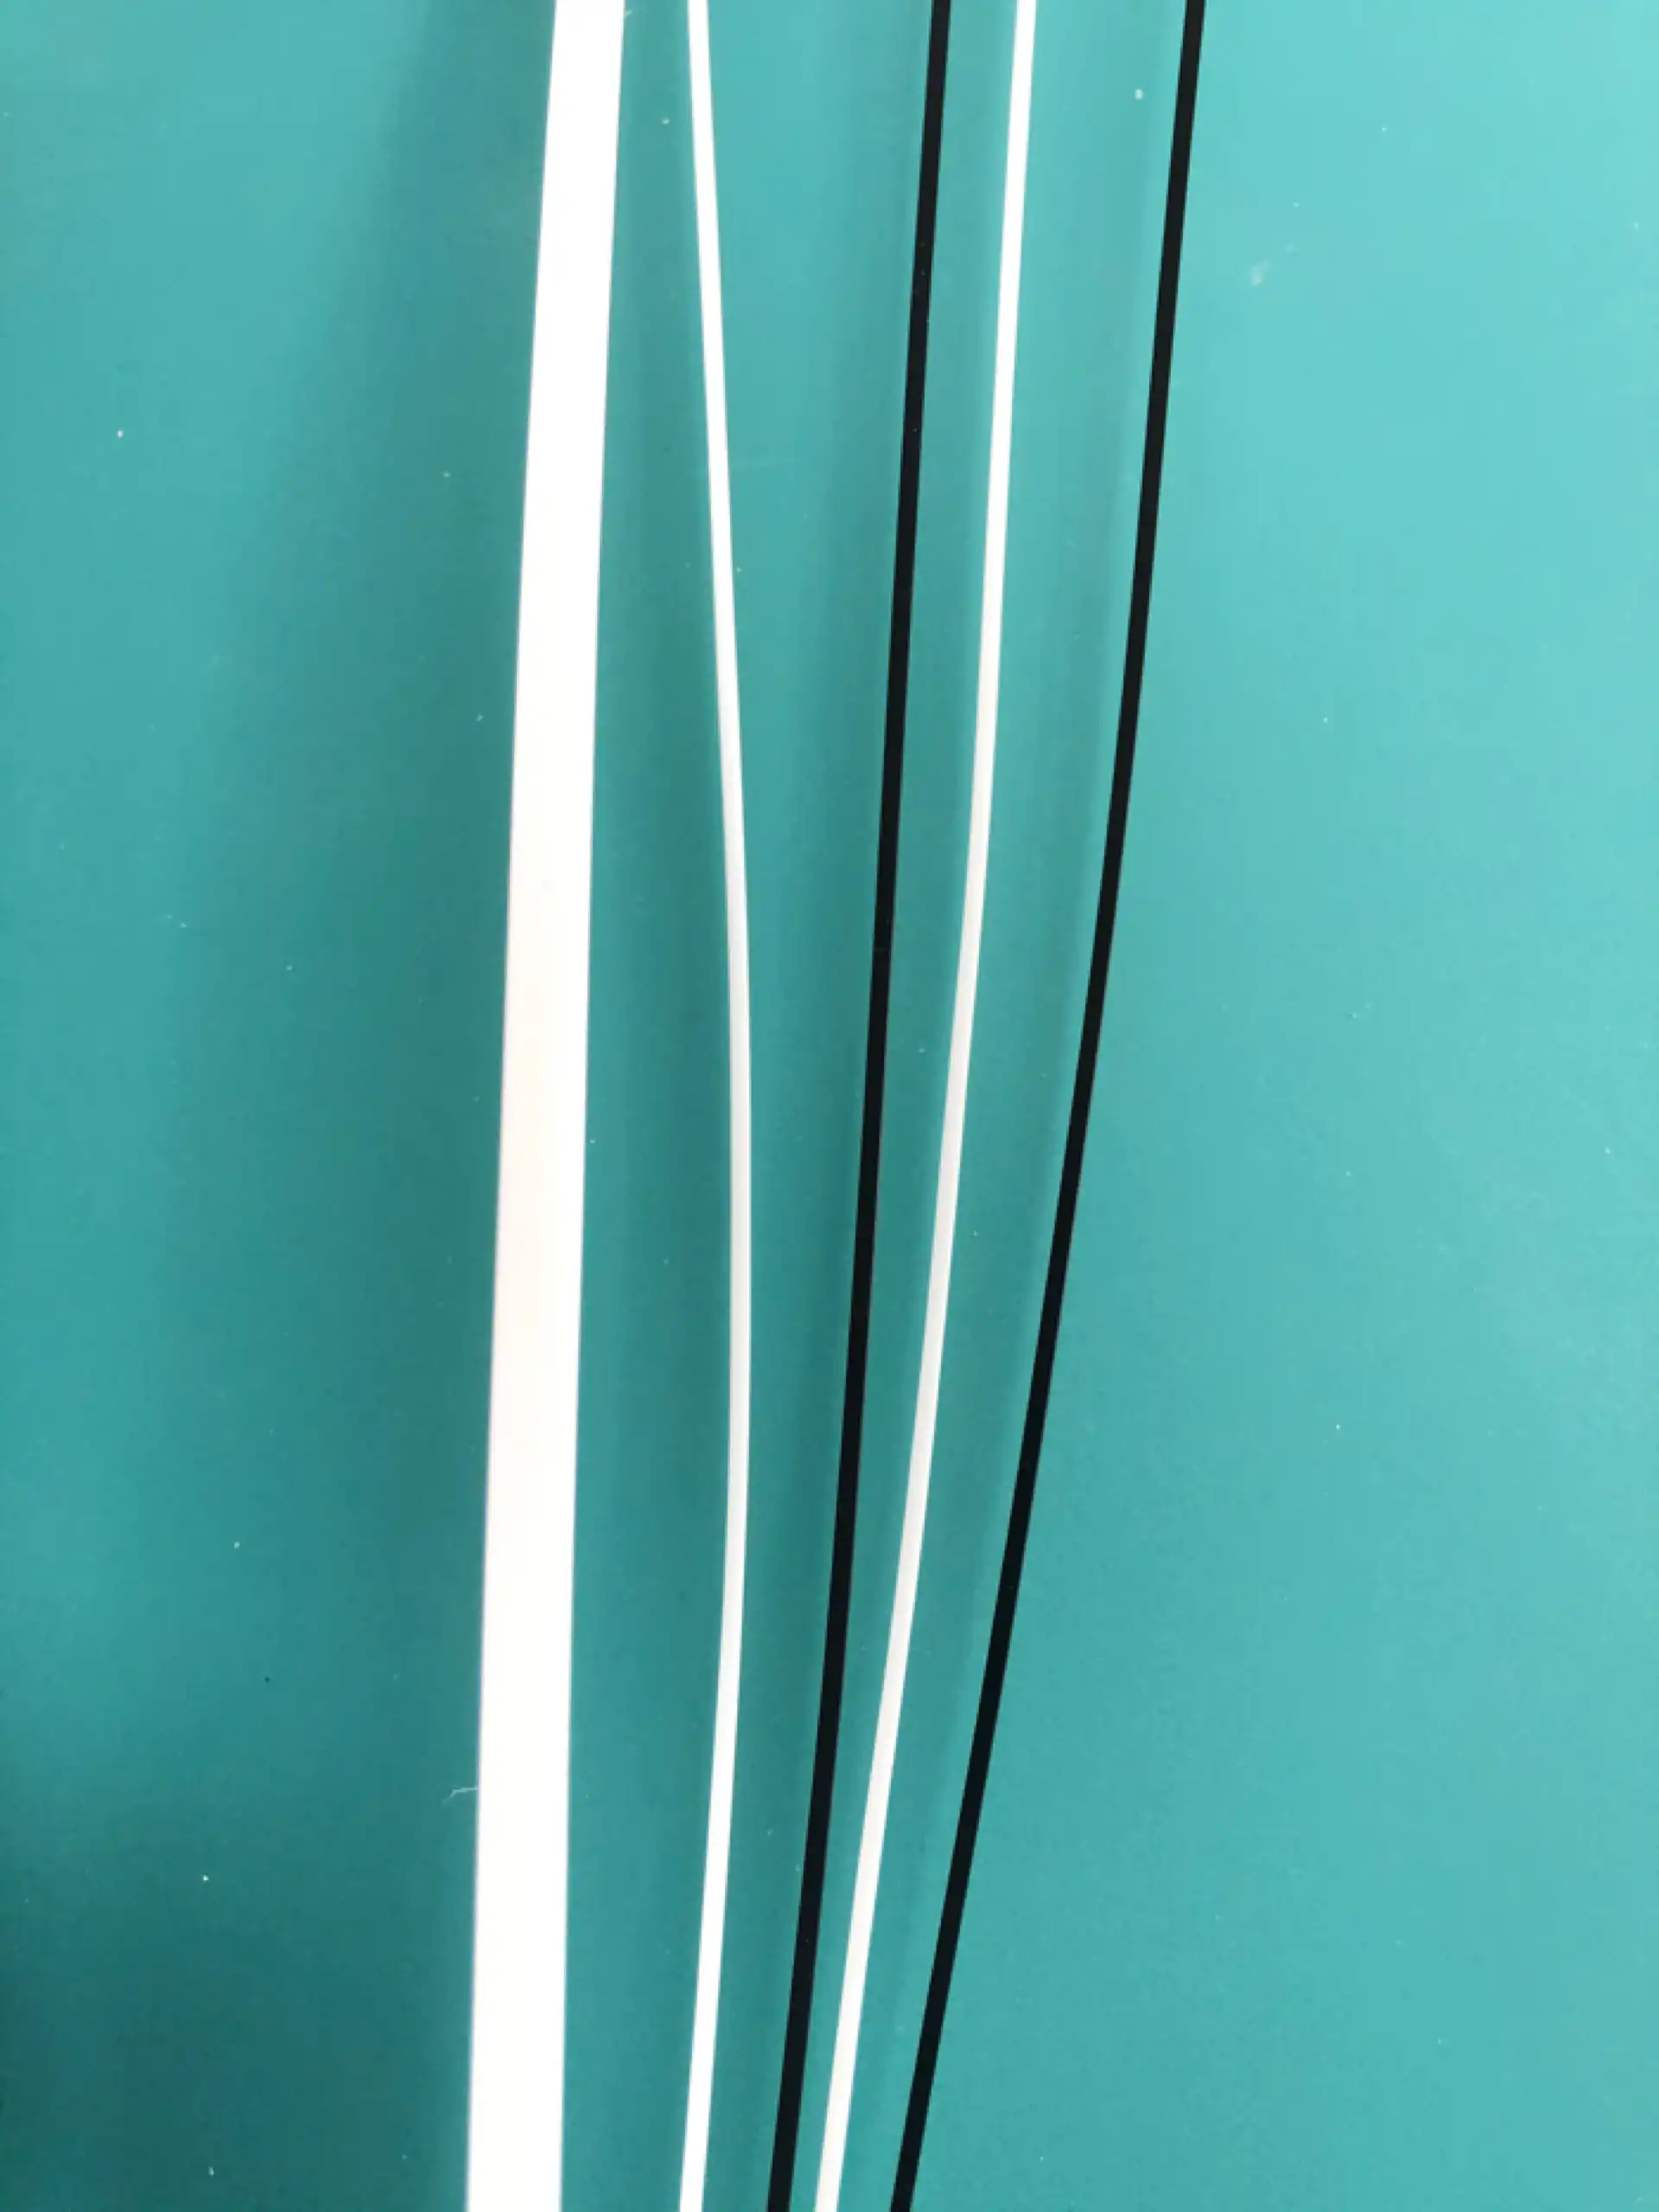
I am combining Paua (abalone) of the same width I used for the rosette with black and white plastic trim for the edge purfling around the perimeter of the soundboard. I think the Paua rosette and Paua edge purfling makes a lovely combination for a soundboard, adding an extra element to the visual appeal. I am not the only one who feels this way, as this combination appears on many guitars.
But this guitar demanded a custom touch; something distinctive... not too much, but a little extra.
I determined to add a fine “line” of Paua around the side, just below the binding. To avoid over-doing it and ending up with too much bling, I am using much narrower pieces of shell for this trim, and am only adding this closest to the soundboard - not around the back edge. This is going to look stunning!
I glue up two small sample pieces, one for the binding on the side and the other for the soundboard purfling. The purpose of the samples is to determine the depth of the router cuts. A single strip of Paua along with five (5) pieces of ABS plastic make up the side binding. The soundboard purfling is comprised a single strip of Paua along with four (4) pieces of ABS plastic. That is a total of 11 pieces of material, 9 of which are incredibly slippery, to attempt to hold in place while working with adhesives that provide little to no working time. It is much more pleasant and precise to minimize the number of loose pieces to have to manage.
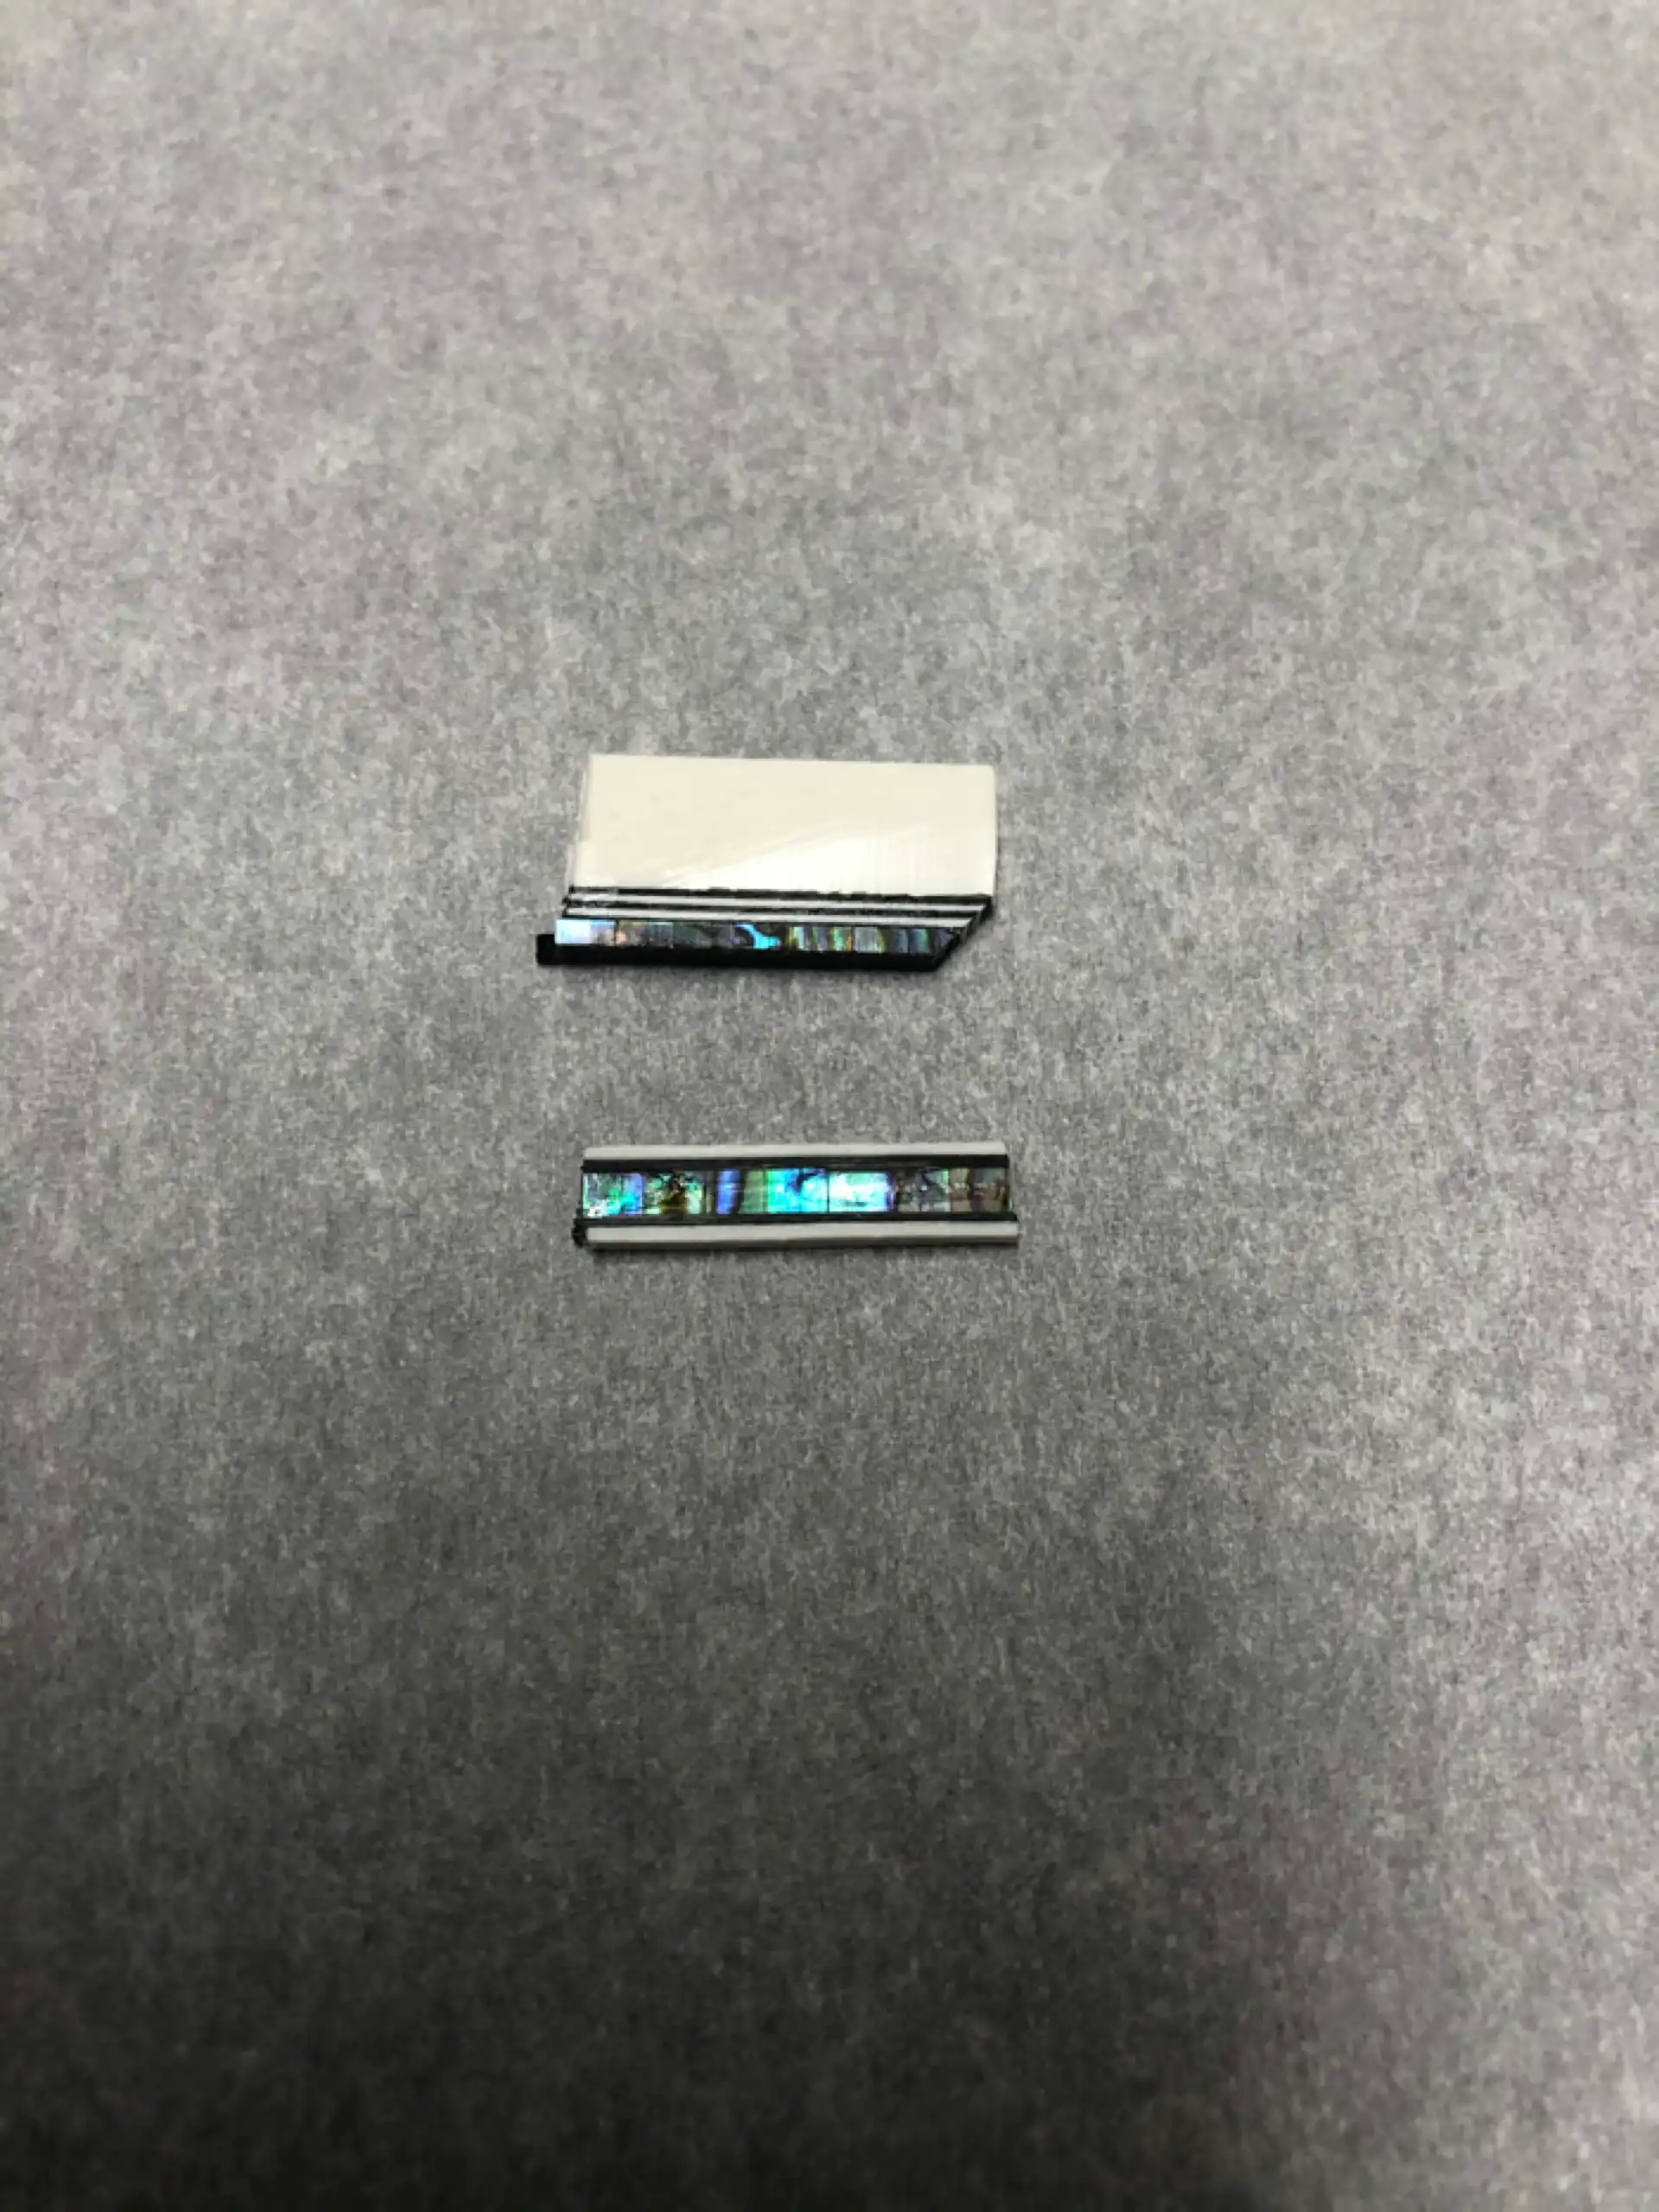
Binding Samples
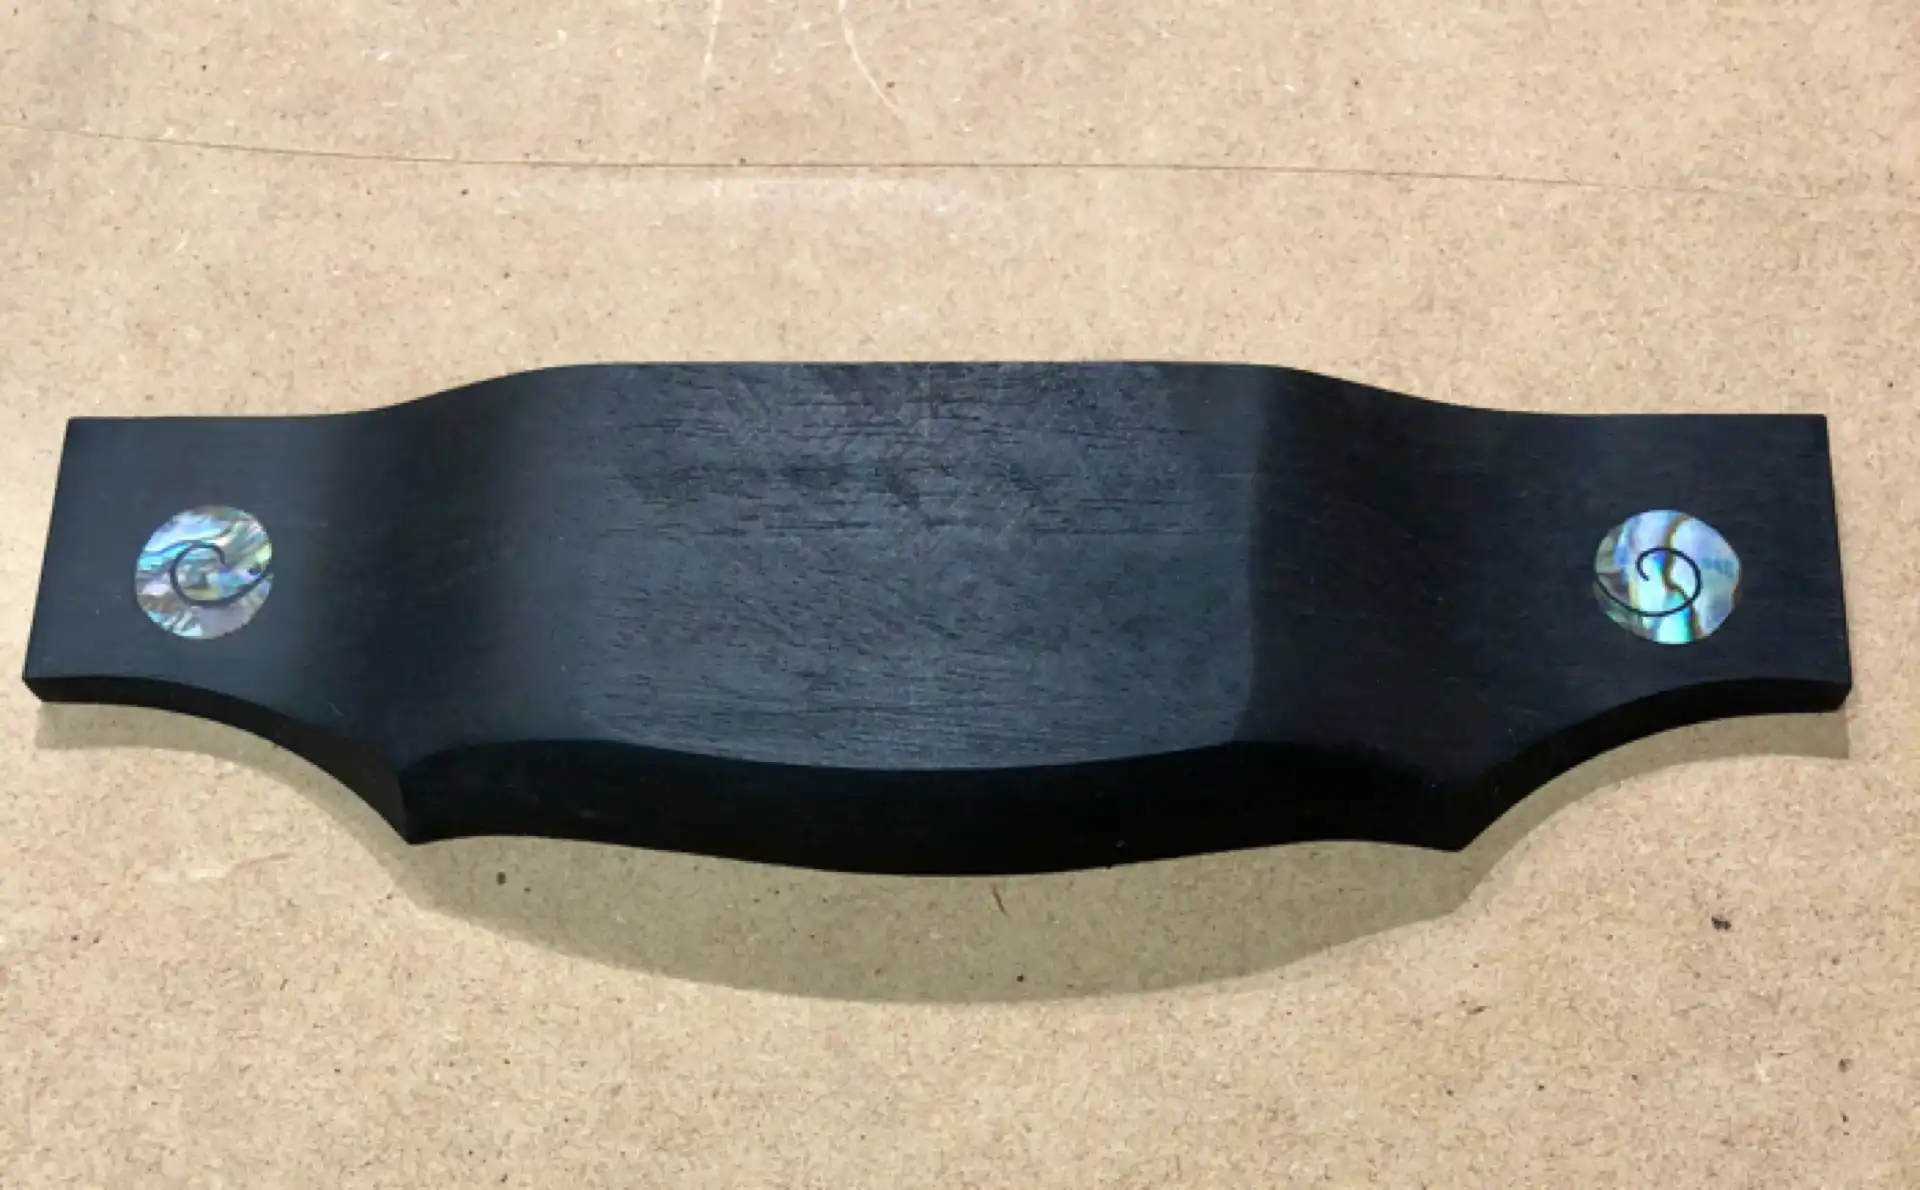
I am going to dress up the Tailpiece from a simple piece of white plastic to something more elegant and in keeping with the new look of the guitar. I use a jig to control the router for the cut.
Routing the Tailpiece
The Tailpiece wedge needs that same narrow Paua trim to trace its perimeter.
New Tailpiece
When purfling is used to form decorative lines on both the side binding and the Tailpiece, there are two ways to intersect the purfling. The more common way, and that employed by Guild on these instruments, is to simply block cut the Tailpiece wedge. Though the purfling lines of the Tailpiece and the side binding don't actually intersect, they look nice enough. The other way, the way I am fitting the trim on this guitar, is to miter the material so it appears to form a continuous visual line or string. This requires more care and attention, which translates into more time, which is why it is uncommon to see in a production setting.
Tailpiece and Binding
The multiple Paua shell trim pieces, five (5) long pieces of plastic binding that were pre-glued in an earlier step, four (4) loose pieces of plastic purfling and the multiple Paua shell pieces that make up the purfling around the perimeter of the soundboard ALL get installed at the same time! It is a tedious task that makes use of lots of tape and every finger on both hands (and you have to hold your tongue just right). Here is one side all taped up and looking like there was nothing to it.
All Taped Up
Once the glue dries the tape comes off and I use a scraper to carefully take the plastic trim down to size, all in preparation for finishing.
Scraping the binding
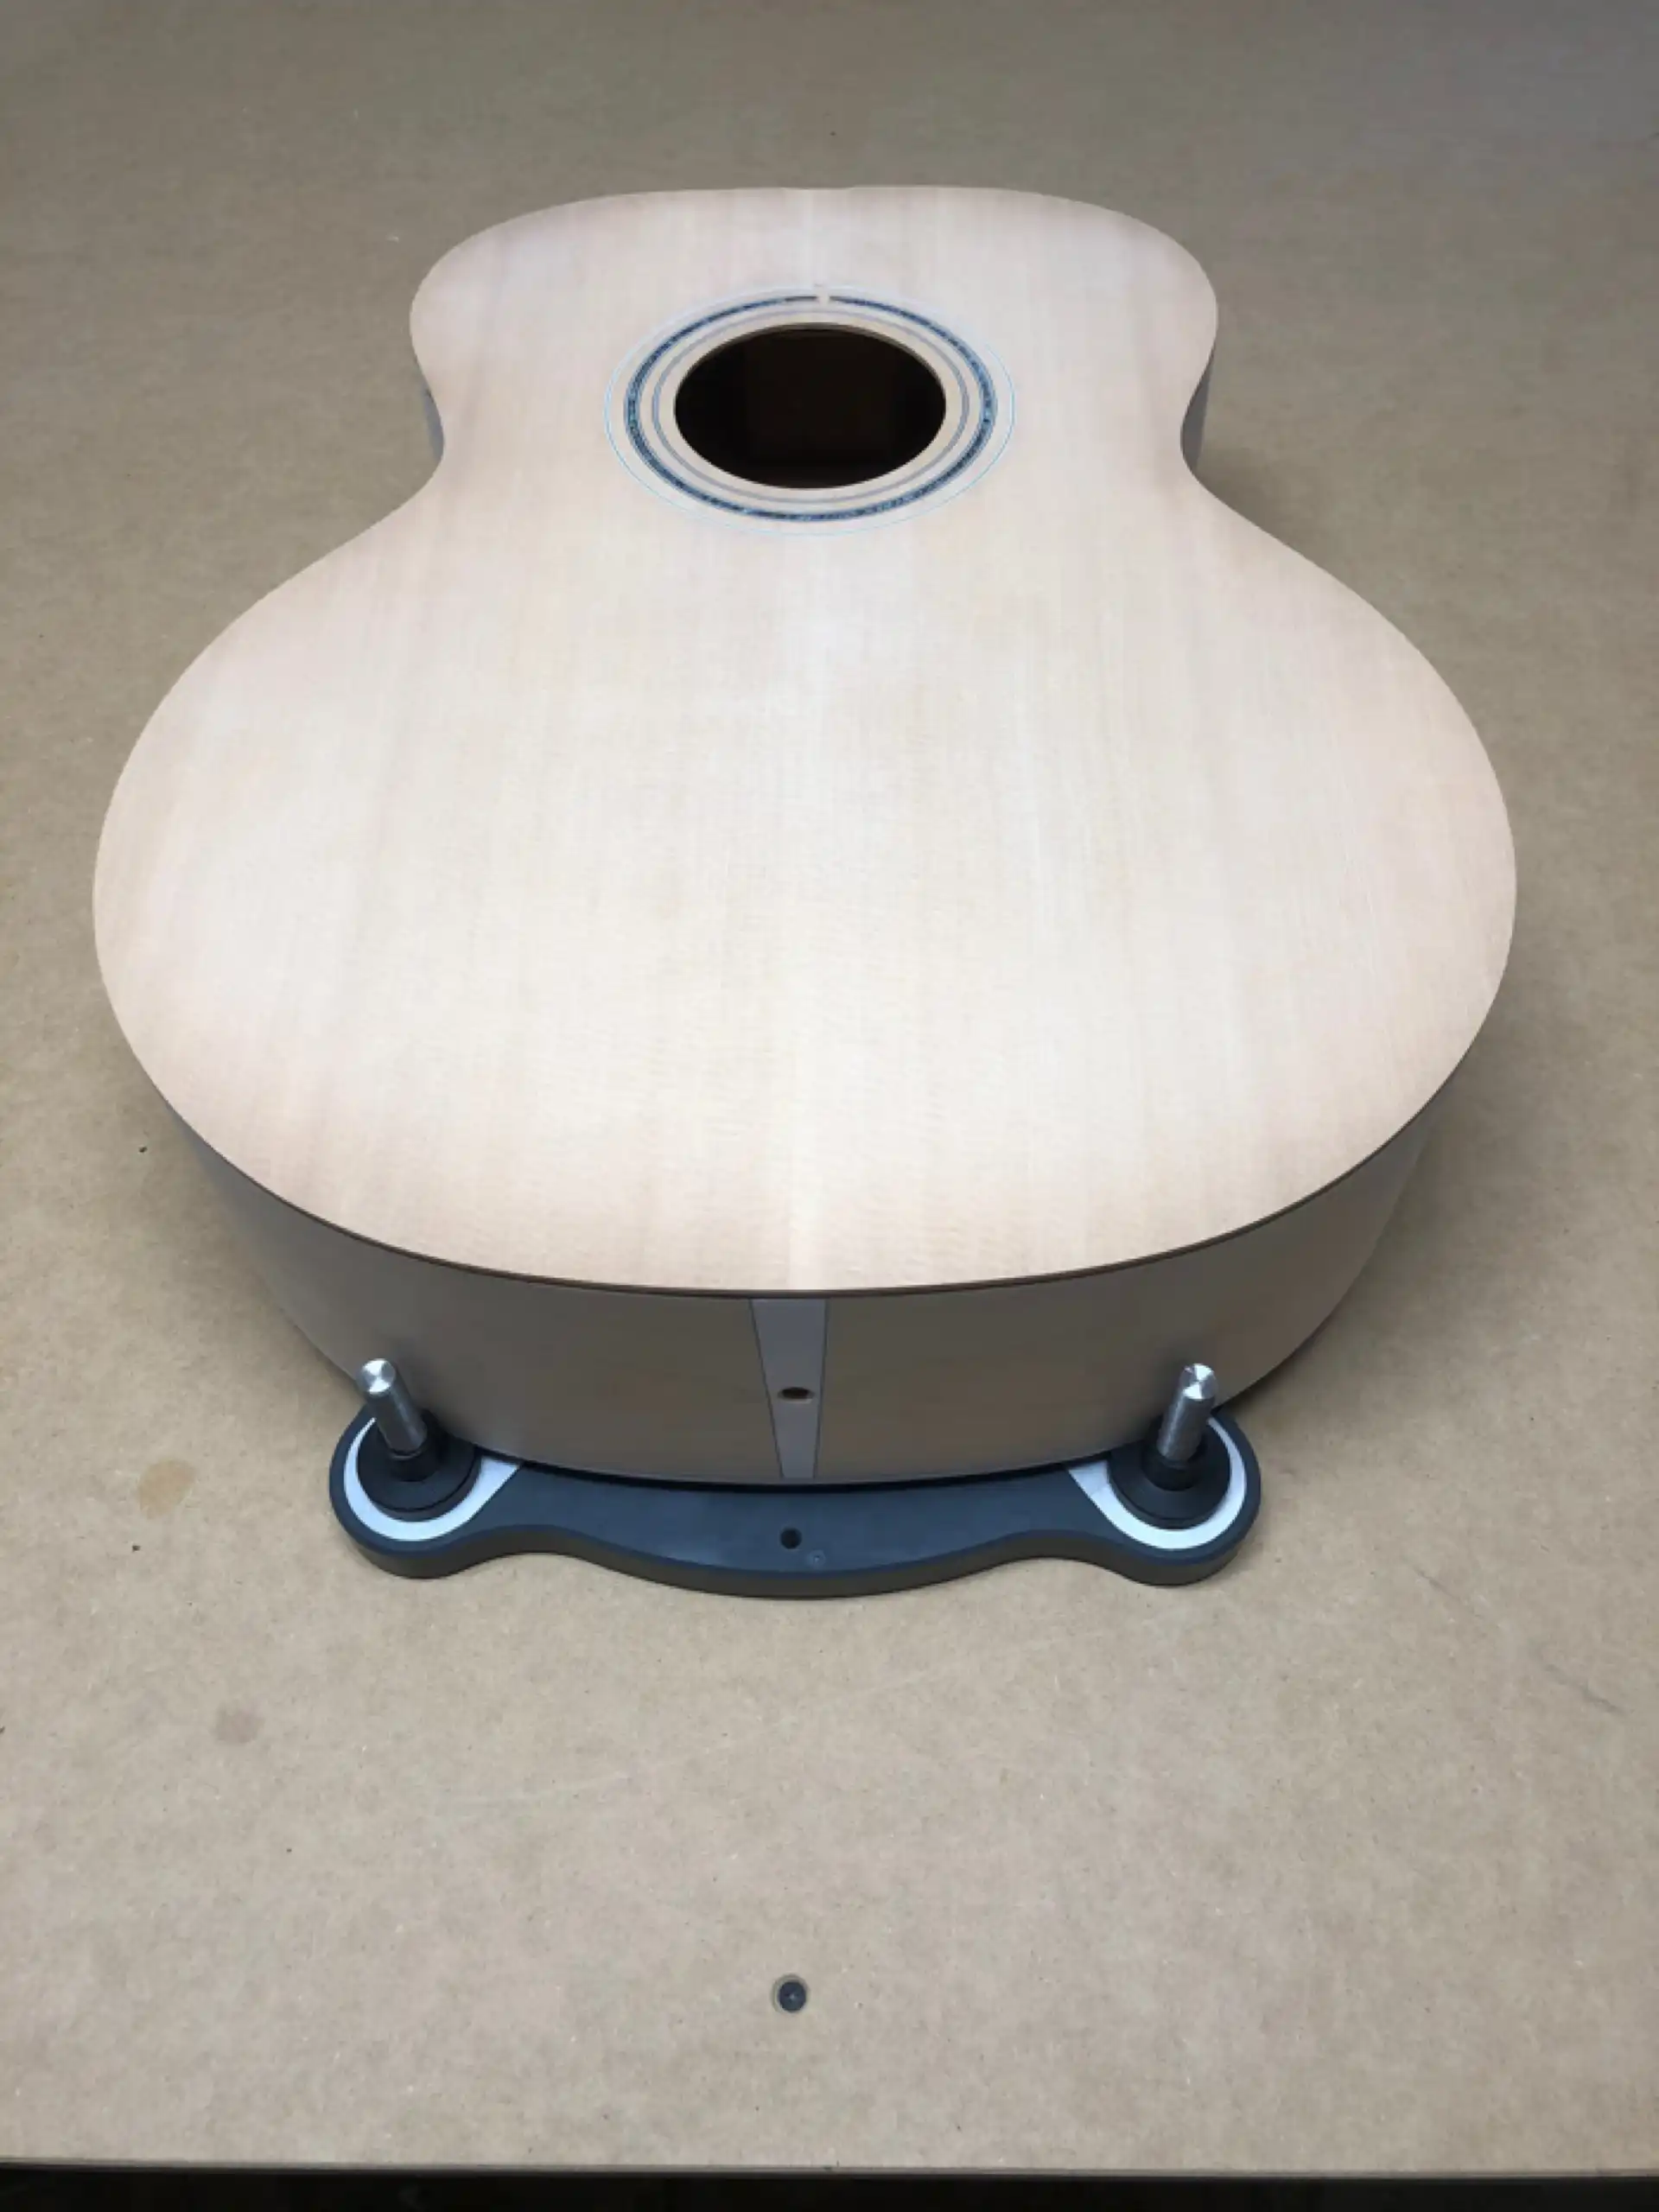
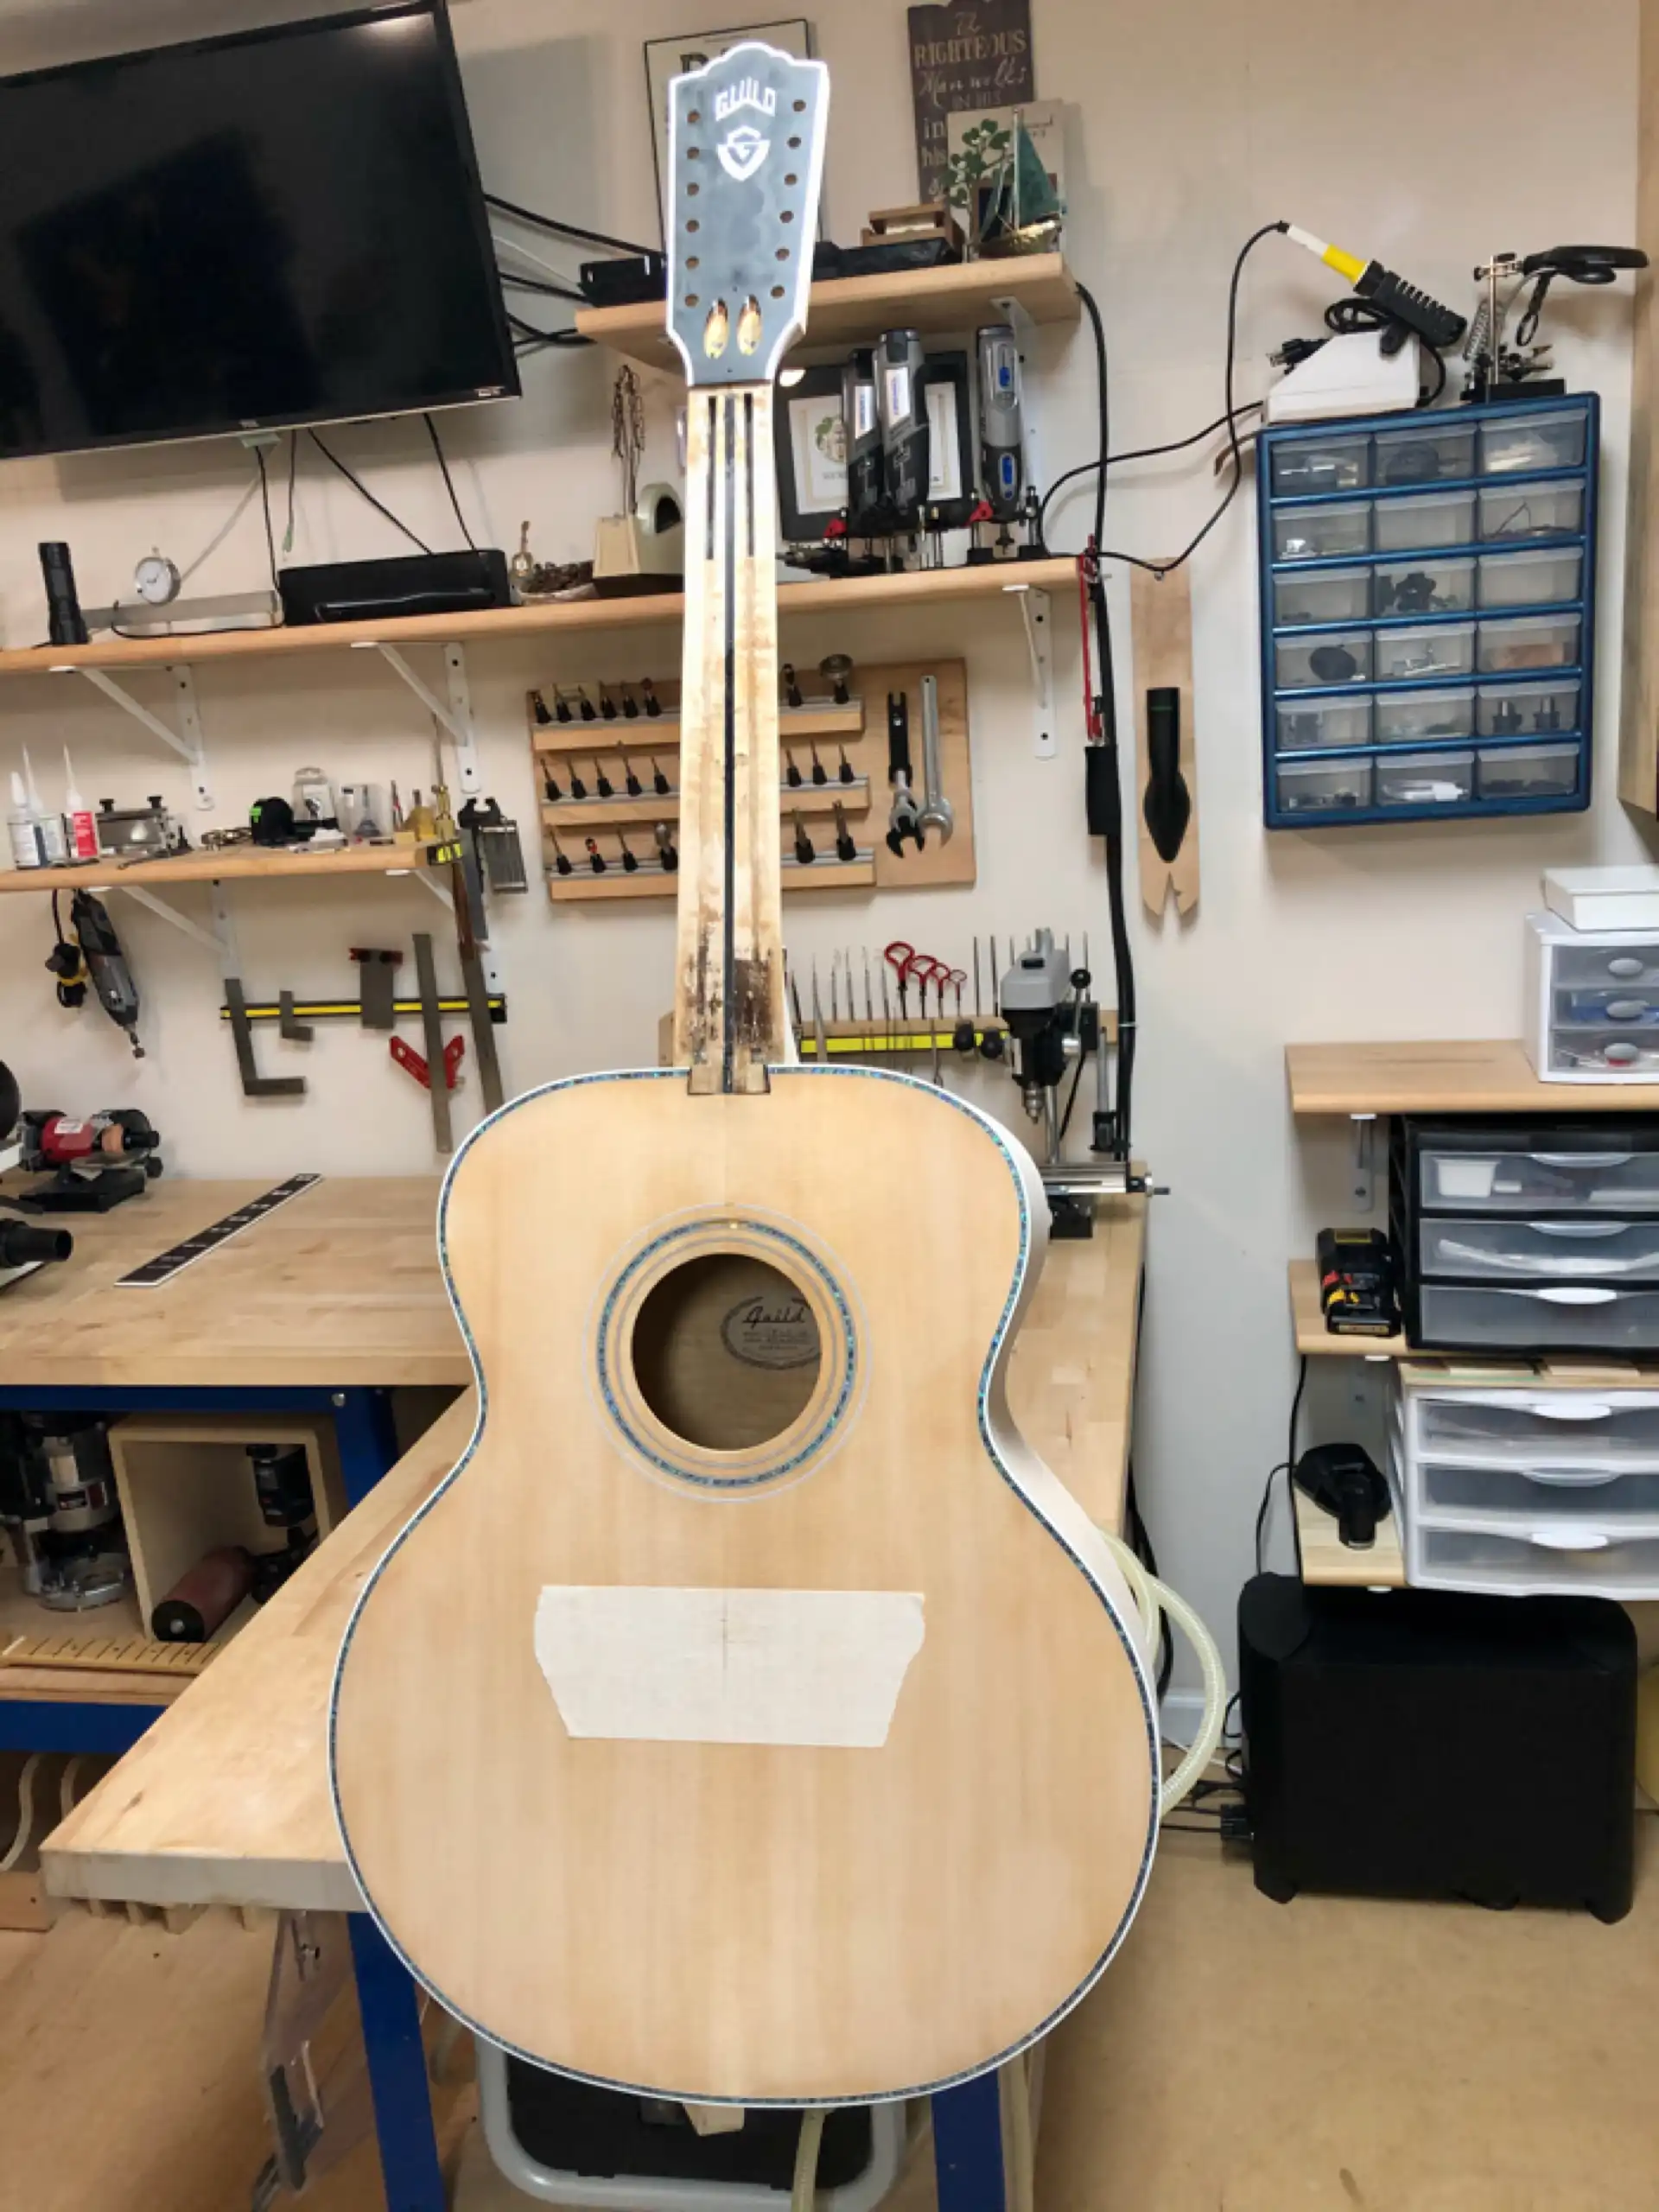
The body is ready for the next step, which is to fit the neck. I am quite pleased with how it looks, as well as how it sounds. This guitar is definitely one-of-a-kind!
Body - Front View

Body - Side View
Body - Back View

Body - Tail View
The fretboard ended up needing to be completely re-bound with new binding, as the old binding was dried out and brittle and had shrunk. Before attempting to fit, let alone glue, any binding onto the fretboard, I need to ensure the edges are perfectly clean and flat. I apply some heat and gently scrape off the old glue residue. Why not simply douse the thing with Acetone and wipe off the goo? In addition to the threat of loosening the MOP and Paua fret marker inlays, the added plastic purfling, the infamous Guild “railroad track” design, could easily be dissolved. I prefer to avoid such a mishap.

Removing the glue residue
Taking the fretboard to the shooting board accomplishes two (2) things: I am able to provide a perfectly clean surface for the binding glue to stick to, and I can ensure I have a perfectly true surface for the binding to rest against, a squared and flat wall of sorts.
The fretboard was not perfectly straight along its edges. Hmm... Neither is the neck! In fact, they are seriously crooked. Argh! A straightedge laid from the neck heel to the headstock reveals the trouble spots on both sides of the neck. I worked to carefully true up both the the fretboard as much as possible, mindful of my target widths. The neck will be adjusted to the new fretboard once it is glued in place.
To address the owner’s original request regarding improving playability, I will tighten the string width distances both at the nut and at the bridge, resulting in a more comfortable 12 string fingering experience. Back in the late 70’s a friend of mine had purchased a 6 and 12 string matched set of Epiphone guitars. His 12 string was memorably comfortable to play. Having played many 12 strings with wide (common to this day) string spacing, I quickly realized the pleasant experience of this guitar was primarily due to the close proximity of the strings, and this influenced my preference for decreasing the distance between the six (6) pairs of strings, or courses, as well as decreasing the overall distance between the first (1st) and twelfth (12th) strings.
Dressing the edges
Using a heat gun I carefully formed a section of my freshly made binding around the radius of the corners of the fretboard. The binding is a single, unified strip. Any mistake made at any step of the binding operation requires starting over with a completely new piece of binding - the same binding that is a multi-day operation to create. When the binding is not just some off-the-shelf strip of plastic, but a custom artistic creation, you can get a feel for the potential tension (or “high pucker factor”, as some refer to it).
Binding the Fretboard
The binding is test fitted, then glued and held in place while the glue dries.
Fretboard Glue-Up
The new binding gets scraped down to the surface of the fretboard.

Scraping the Fretboard Binding
The fretboard is bound and ready for fretting.
Bound Fretboard
With the body complete, and the fretboard ready to be re-attached, it is time to fit the neck. A dovetail joint already exists.

Existing Dovetail
Unsurprisingly, this existing dovetail joint is not precisely centered nor is it cut to the necessary angle for proper string height. More significant is the fact that the tenon is extremely loose in the mortise, allowing the neck to simply tilt out of the joint (no wonder so much glue had been applied). When a dovetail is properly-fitted, glue merely prevents the pieces from shifting, while the cut of the joint prevents them from coming apart.
Loose Dovetail
I carefully filled in the mortise in the body with a fitted Mahogany block. This will be likely be completely removed during the routing process, but that is not always the case, so I take the extra time to ensure a perfect joint. I then re-cut the mortise.
New Dovetail Mortise
Dovetail Mortise - Front View
Just as the mortise was not perfectly centered on the body, the tenon was not perfectly centered on the neck heel. I add material back to the neck prior to re-cutting the tenon using Maple and epoxy. Here, I am certain that the material will be needed both to ensure a proper fit as well as improve the strength of the joint. I mentioned earlier in the article that the tenon was drilled out to receive the twin compression rods, removing a significant amount of material at the top of the tenon. I choose to fill this back in, using maple dowels I had made.
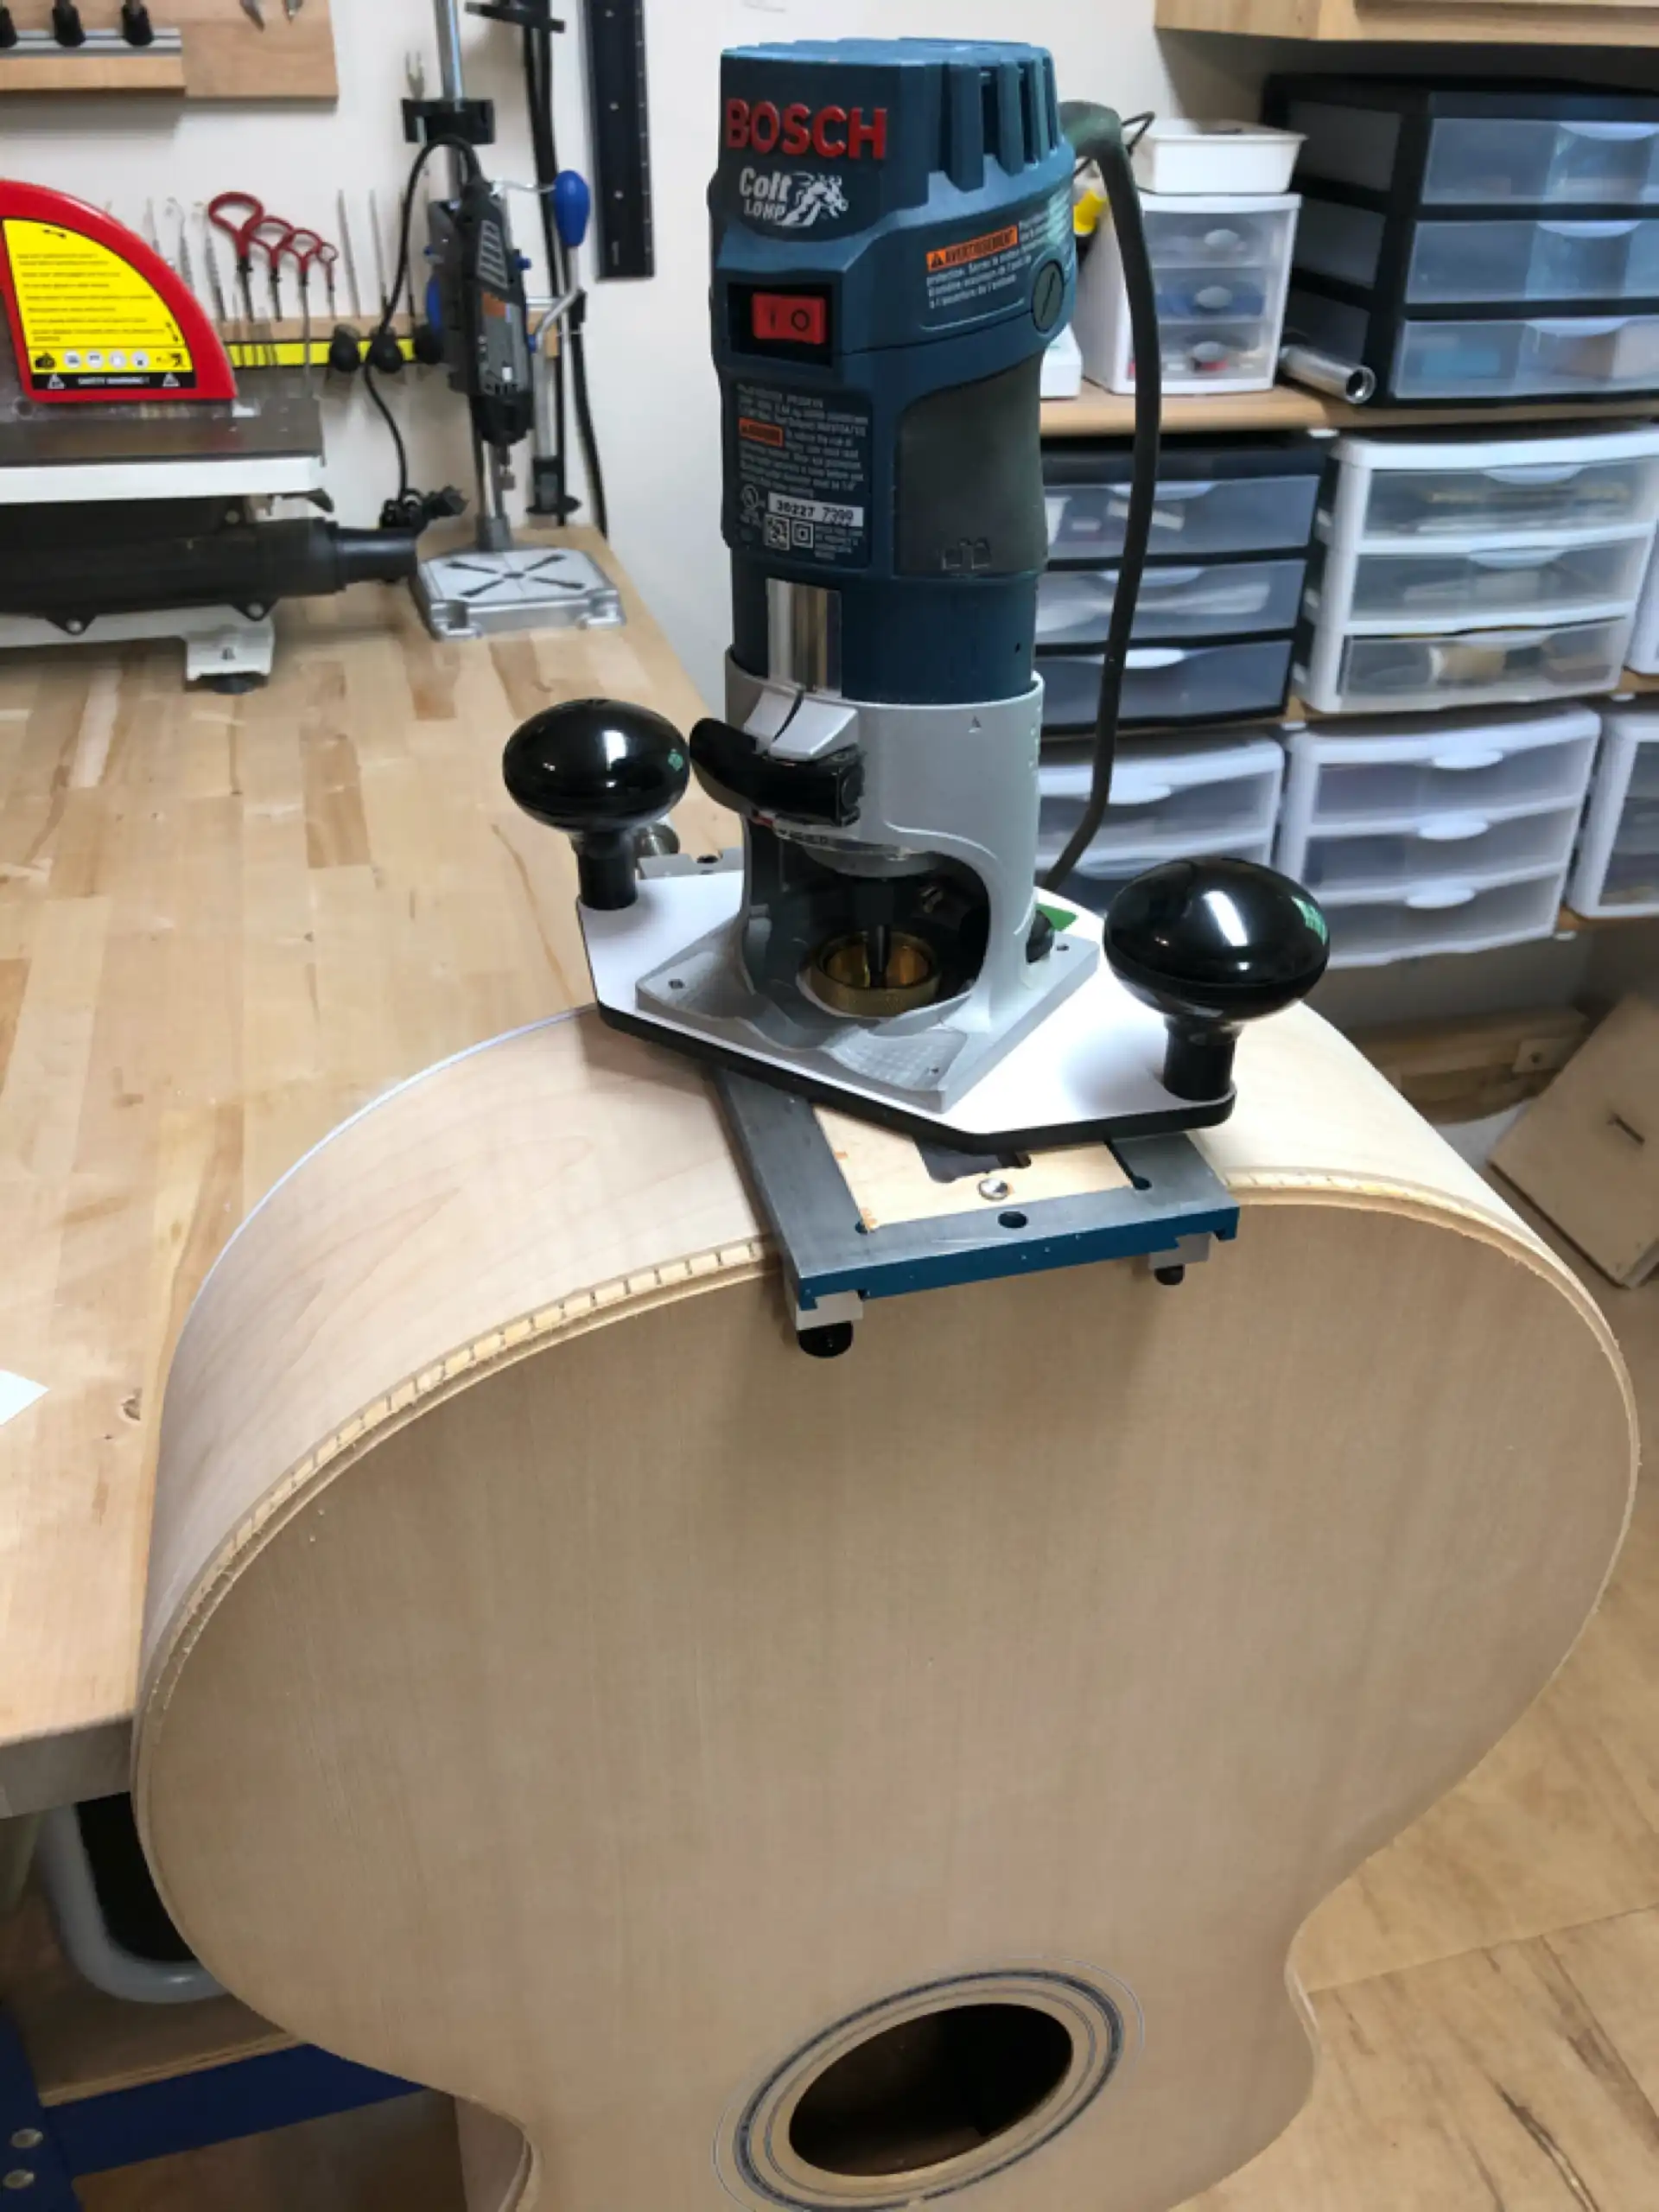
The plane of the fretboard/neck must cross the (yet to be added) bridge/saddle at a targeted measurement. That determines what is commonly referred to as the “neck angle.” I need to cut the dovetail tenon at that pre-determined angle, while also trimming the face of the heel to rest flush with the sides of the body. I use a jig for the process that helps me dial in and maintain an accurate template position for routing.
New Dovetail Tenon

New Dovetail Tenon - Top View
My last step prior to fitting the neck to the body is to add a very thin carbon fiber plate to the shoulders (or wings) of the dovetail tenon. I believe this hardens the joint face material and improves energy transfer from the saddle to the nut. I have had great results since I started doing this, so this instrument benefits from that experience.

Carbon Fiber Plate
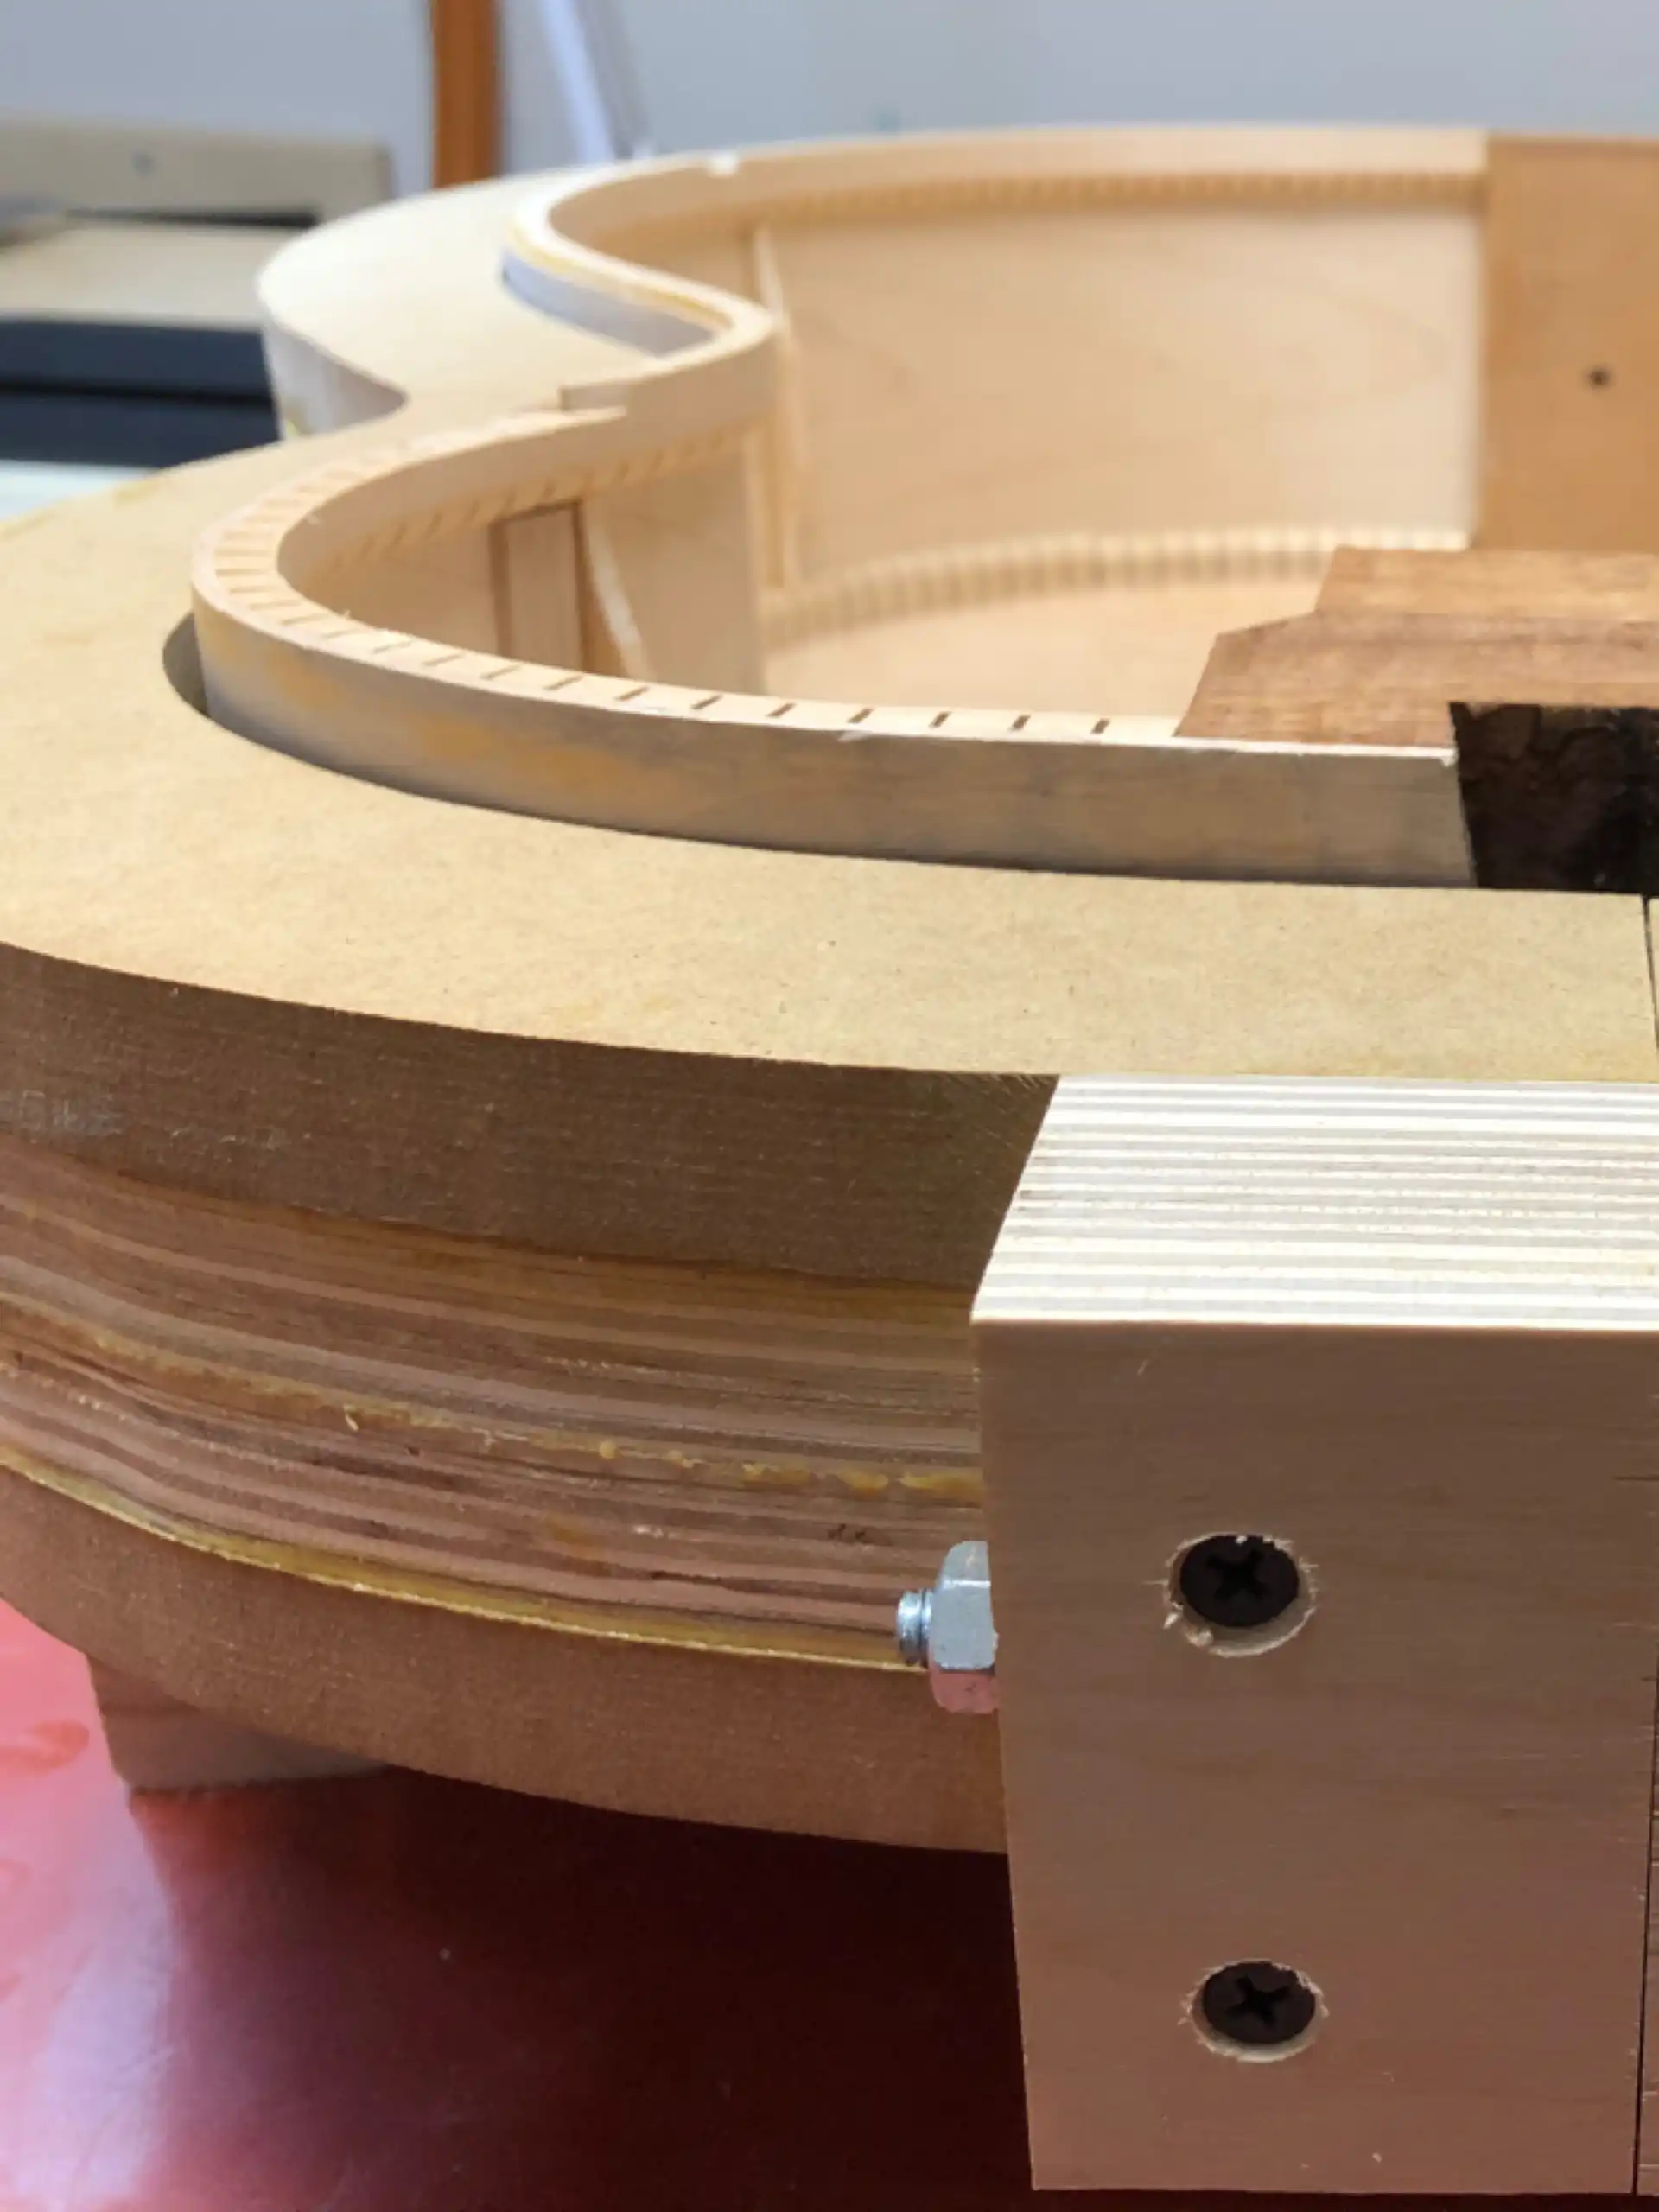
Fitting the neck to the body is an iterative process that involves sliding the neck into place with a thin strip of sandpaper positioned between components. The sandpaper is carefully slid back out and the process is repeated until everything fits perfectly tight, together. I add some glue to keep everything in place, use a clamp to set the pieces tightly together, and let the glue dry.
Neck Glue-Up
The completed fretboard is slightly narrower than the existing neck on which it will rest, but only in some places (indicating the wavy lines in place of what should be a perfectly straight neck). After the fretboard is attached to the guitar, I re-form the neck, truing it up to the fretboard. This involves re-forming the contour on the back of the neck. This particular neck was not shaped to be symmetrical across the centerline. The neck is much thicker on the thumb/bass strings side of the centerline than the other, but only in the area behind the first four (4) frets, with the most offending section being behind the 2nd fret. This is definitely a contributing factor to the level of playing discomfort experienced by the owner. I re-contour this area, and then the entire neck gets a touch-up contour. Everything is now in alignment and feels great.
Neck Contour
I will hold off adding frets to this guitar until after the new finish on the guitar has dried. The frets will be getting a facelift as well, moving to a Nickel-free golden-colored alloy. This will provide for a more consistent and pleasing color scheme for the instrument as well as add the practical benefit of increased fret life.
Here is the guitar, all re-assembled, sanded, and ready to tape off for finishing:
Before Finishing - Side View
Before Finishing - Close-Up
Before Finishing - Front View
If I was simply applying clear lacquer to this guitar, I would cover any area(s) that I did not want lacquer to get on. This would involve taping off the surface of the fretboard and protecting the inside of the body. Everything else would get sprayed.
This instrument will be getting a specialty finish. Consideration must be given to where I do not want any color applied; namely, on any of the binding, purfling or inlay (think: trim). The most common approach to dealing with tint and body binding is to simply spray color over the guitar and then scrape the binding to remove any unwanted color. Depending on how heavy the tint is and how aggressive the scraping is, this can result in a noticeable step, a ridge between tinted and un-tinted surfaces. Lacquer is suspended in a solvent and applied. The solvent evaporates and, one would hope, a residue or body of material remains, one that builds coat upon coat. Shellac works this way, but lacquer does not. As solvents evaporate, and evaporate, and evaporate, lacquer “shrinks” back into the tiniest of recesses, recesses you didn't even know you had until lacquer shrinks back into them. Needless to say, lacquer makes for a very poor pore filler, and it certainly cannot be relied upon to bridge uneven surfaces.
While not impossible, it can be difficult to use this paint and scrape method around the soundhole which is ringed with inlaid purfling and shell. I prefer to tape off the rings of the rosette, apply tint, remove the tape and touch-up any infractions. For this guitar, I opted to painstakingly tape off all the trim first. I use the same type of tape that you would find in an auto body shop. It has a high tack, is plasticized so that it can stretch around curves, and comes in a variety of widths.
Tape
The owner had envisioned a black-tinted guitar from the outset, but was looking for something different from a guitar painted solid black. On the flip side, he knew he did not want a milk chocolate brown guitar, an all-too-easy to achieve appearance when lightly tinting black over a wood surface.

Black (Brown) Guitar
To avoid the “brown guitar” look, and to accentuate the Tiger Stripe/Flame effect of the Maple back, sides and neck, I first applied stain directly to the bare surface of the wood on the back, sides and neck using a rag, similar to staining a piece of furniture. It took two applications to achieve the coverage I was after. After the material had dried, I lightly sanded all the stained surfaces. The tint had successfully penetrated the stripes and darkened them. You may wonder why I would waste time darkening a surface I am going to spray with black-tinted lacquer...
Back of the Neck
That worked beautifully for the Maple. However, lightly tinting a Spruce soundboard with black can result in that very chocolate brown appearance the owner said he didn't want, where the naturally brown wood glows through the smoky black tint. Another approach to tinting a black soundboard is to stain the tight-grained softwood, sand it back so that the stain colors only the grain lines, then apply a light tint over top. This tends to really accentuate the grain and can result in a distinctly linear appearance (like a searsucker suit), not necessarily the most sought after look. More significantly, it necessitates removing wood from the soundboard solely for appearance’s sake, and the thickness of this soundboard has already been adjusted for optimal sound.
Using the same “stain-and-sand” technique, but swapping out Mahogany for the straight-grained Spruce will achieve what Martin calls a "doghair" look. Suffice it to say, we won't be doing that.
Martin Guitar Doghair Finish
When I sprayed the soundboard I was able to avoid the chocolate brown look and get a black finish, while still retaining some translucence, where the grain was visible underneath, and thought I was good to go. For whatever reason, I had interpreted the owner's wishes to produce a mostly translucent black finish across the entire guitar when I embarked on the journey. The guitar's owner was actually hoping for something slightly different, where the soundboard was much more opaque.
Once I understood what the owner wanted to see I had two choices: strip down the soundboard and start over or spray more black tinted lacquer to hide the grain. I chose the latter approach - and paid for it - you'll see why. I added more and more tint medium to the extra coats I had to spray on the soundboard. To keep the finish thin, I level sanded several times until I got the opaque look...
...but I now had (what I believed looked like) two distinctly finished guitars stuck together, one lightly tinted and the other with a grand piano opaque finish on it. It just looked wrong! I needed to introduce a visual transition that would ease the eyes from the one look to the other and unify the guitar - a guitar that I had already completed spraying.
So I returned to the spray booth. I focused attention where the neck joins the sides. I sprayed the neck heel and the sides at the upper bout using the same process I used for the soundboard. On the body sides, I carefully transitioned from solid black at the neck heel to a tinted black where Tiger Striping was sufficient to feature. I also transitioned from the solid black neck heel to a translucent look on the back of the neck before returning to solid black again on the back of the headstock.
Black Lacquer Back
It looked great! But I was in for a big disappointment.
Up to this point I used a colorant that is specifically designed for tinting. It works fantastic when you are going for a translucent appearance, which I had already achieved. Remember those extra coats of black-tinted lacquer I had to respray with to get that more solid black appearance? I had built up (and sanded off) too many layers of this colorant. The entire process took its toll, and the finish on the soundboard eventually lost adhesion, peeling up across most of the surface. I say most, as in, not all. That would have been too easy. Remember the two choices I had when I realized I had misinterpreted the owners wishes regarding a translucent finish, where I chose to keep spraying instead of starting over? Well, I got to start over after all. I had to carefully strip down the soundboard, sides and neck heel, this time using a heavier pigmented medium in order to avoid the multiple layers.
I completely removed the finish from the soundboard and sides, as well as the back and the heel of the neck. I resprayed, this time using a heavier pigmented medium for the opaque areas (soundboard, neck heel, upper bout sides and back of the headstock) in order to avoid having to spray multiple layers.
Once the lacquer hardened sufficiently it was time to buff it out. A motorized buffing wheel is the commonly chosen tool for this operation, as it quickly accomplishes the task. In my efforts to optimize the sound of this guitar, I have deliberately applied as little lacquer as possible. I believe I have used less than 50% of the lacquer that was sprayed onto the instrument when it first left the factory - and that includes the tint! Because the lacquer has been applied so thinly, I do not wish to risk burning through it at the buffing wheel (it takes less than a moment). I chose to hand buff the finish using rags and polishing compounds, an effort that gives me complete control over the process with tactile feedback. Hand rubbing a lacquer finish can result in a stellar appearance, akin to a French Polished Shellac: very deep and lustrous. Four hot showers, three containers of sports cream, two massages and one full day later, and my shoulder is almost back to normal. 20 minutes on a buffing wheel versus 5 hours by hand... I am certain my technique will never catch on.
A black lacquered finish tends to amplify everything, every flaw, every tiny pice of dust or lint, let alone any micro-scratches. I will go over the entire guitar one final time with a very fine, high-gloss "swirl remover" level of polishing compound prior to delivery.
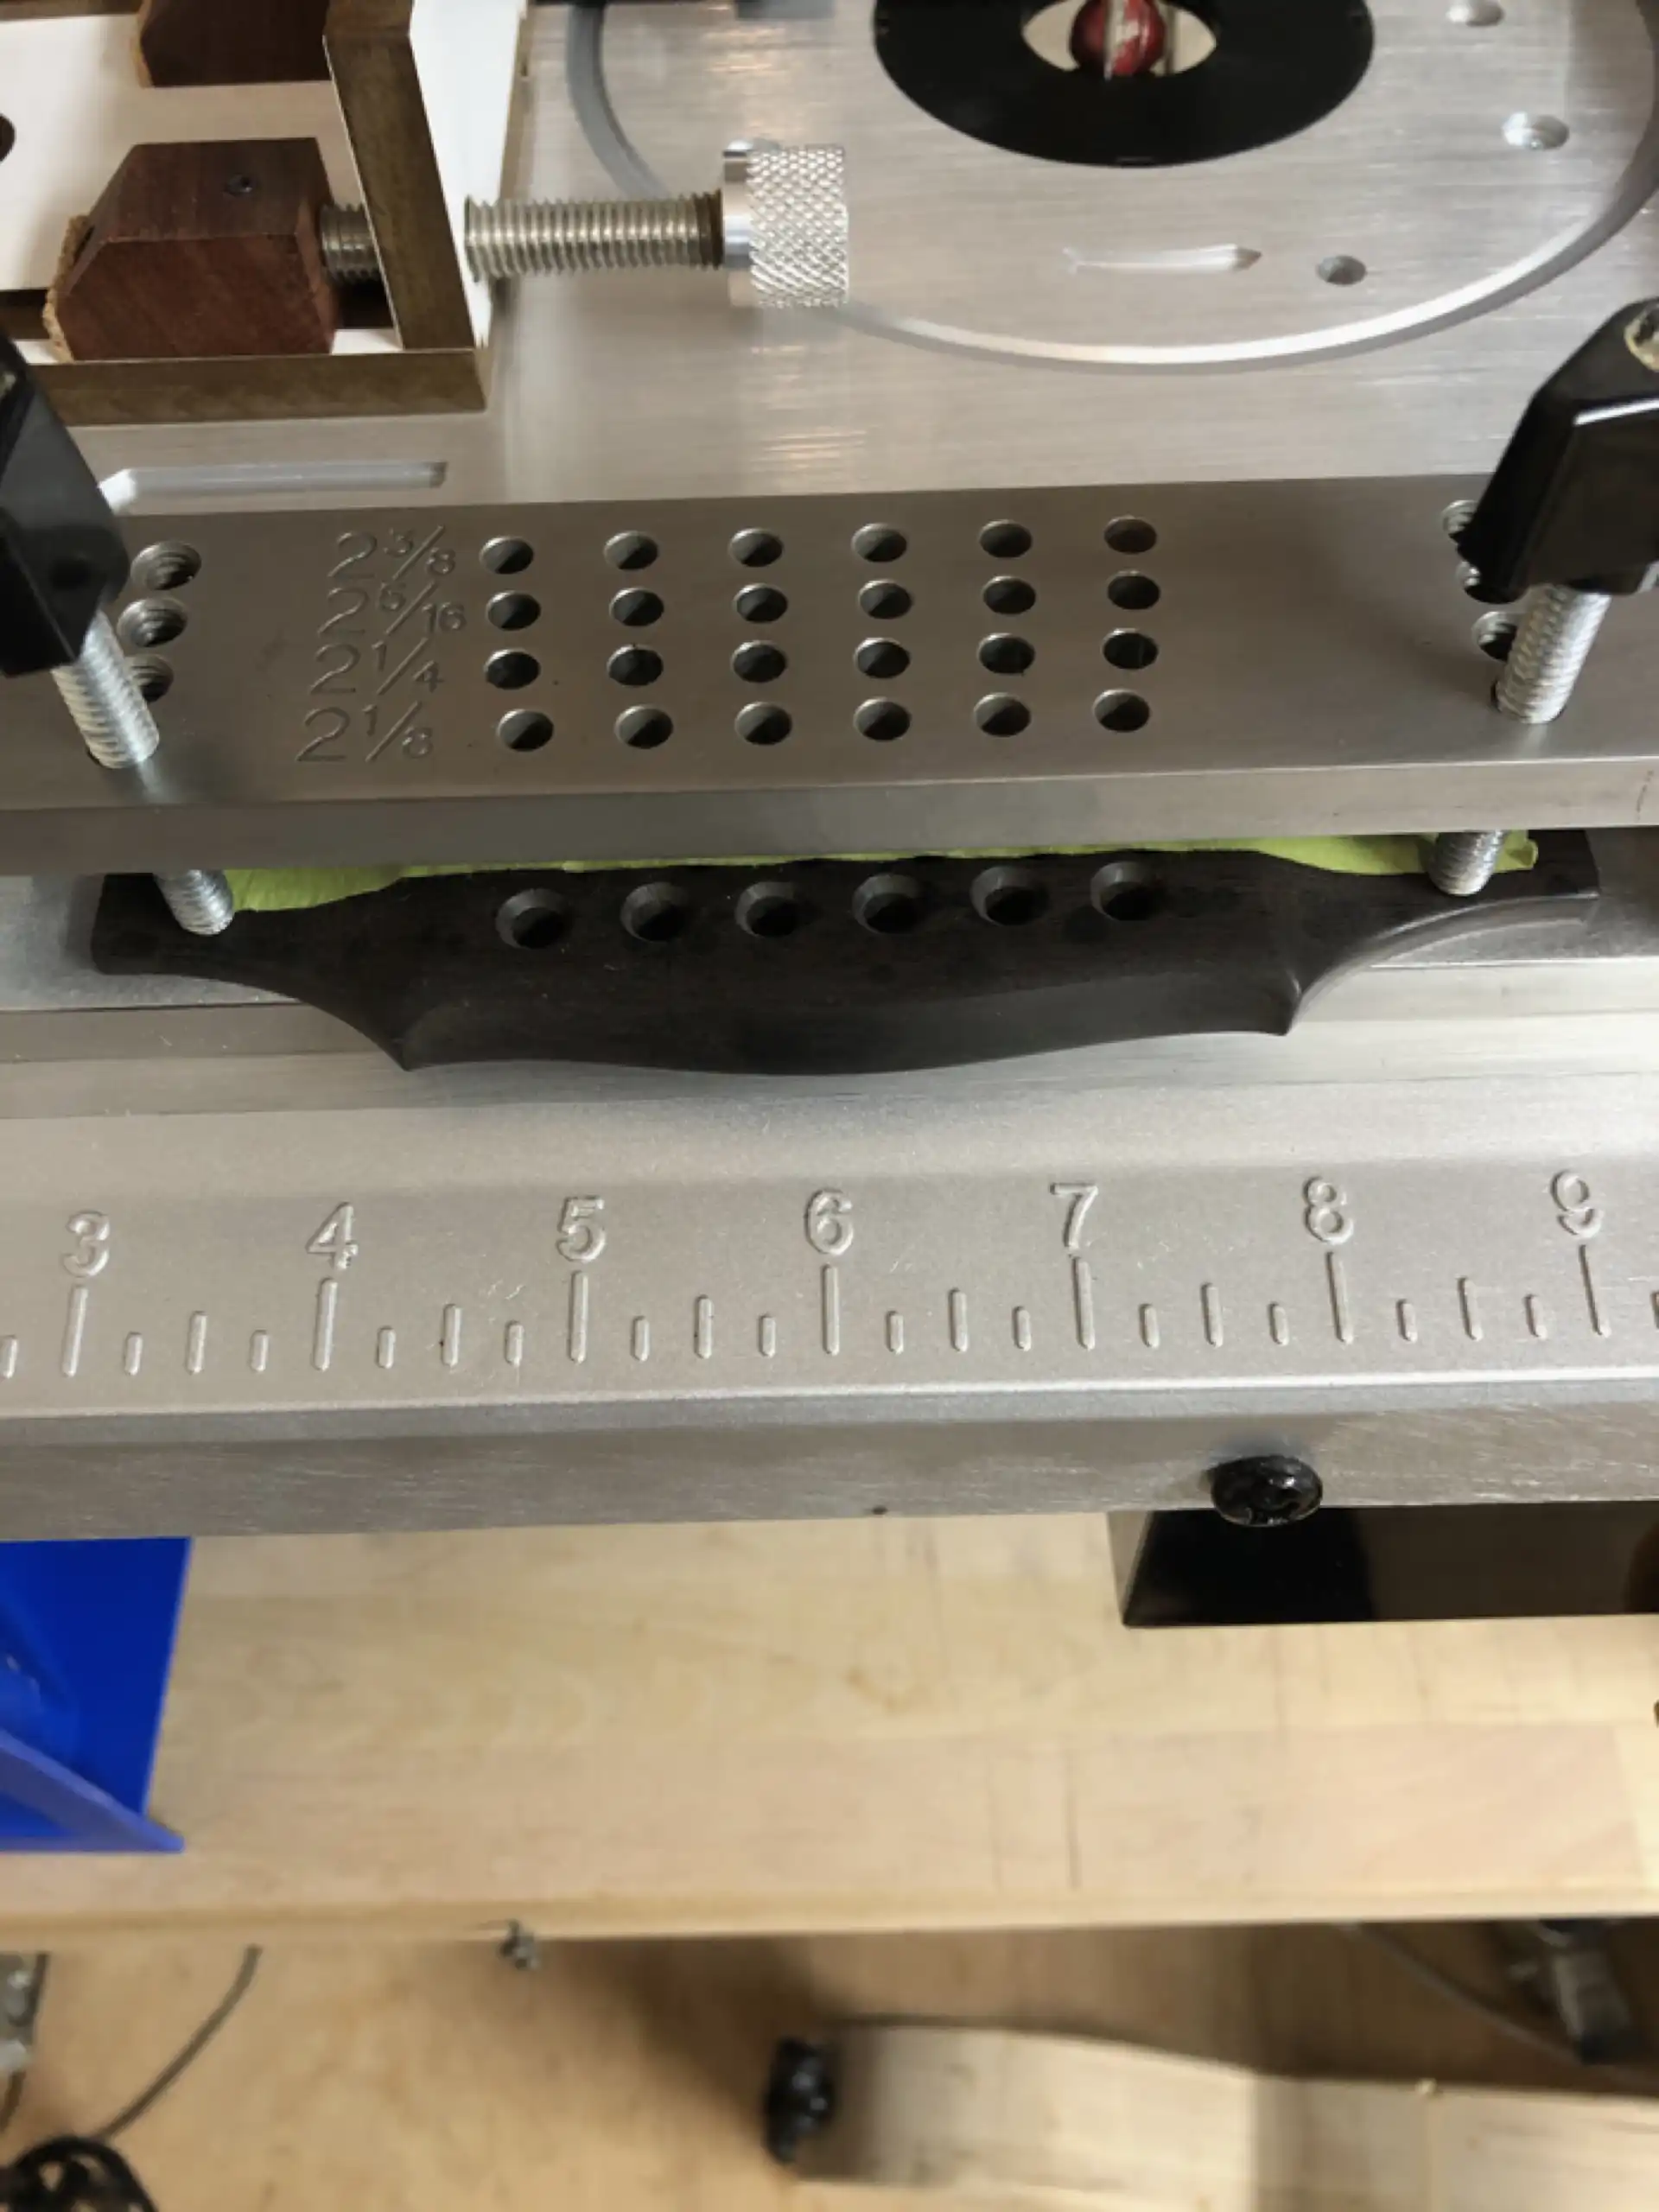
Neck geometry, in conjunction with the pull of the strings and any/all resultant changes to angle of the plane of the fretboard across the body of the guitar, has determined a target height for our bridge/saddle combination. I seek a balance between a shorter bridge/taller saddle combination and a taller bridge/shorter saddle combination. Both the weight and density of the bridge play their roll in contributing to the overall output of the guitar. Too heavy of a bridge, and you will need to really scrub those strings to set the top in motion and generate any sound. The sound you do generate will likely be overdriven. Too light of a bridge will never transfer sufficient energy to generate adequate sound, regardless of how hard you pluck the strings.
Note: For those who may be interested, I have replaced dozens of Guild bridges over the years on guitars from the 1970s forward, and have never come across any two that had perfectly identical dimensions. In fact, several bridges varied enough to permit me to form the opinion that Guild bridges, especially the older ones, were hand-shaped. I don't think that is a bad thing, but for those who may be tempted to be critical of a replacement bridge, and challenge its “authenticity”, please be aware of the wide range of shapes and sizes found in the real world of Guild guitars. For this JF65-12's new bridge, I traced the outline of the old bridge and stayed true to the dimensions and pattern, all but for the height.
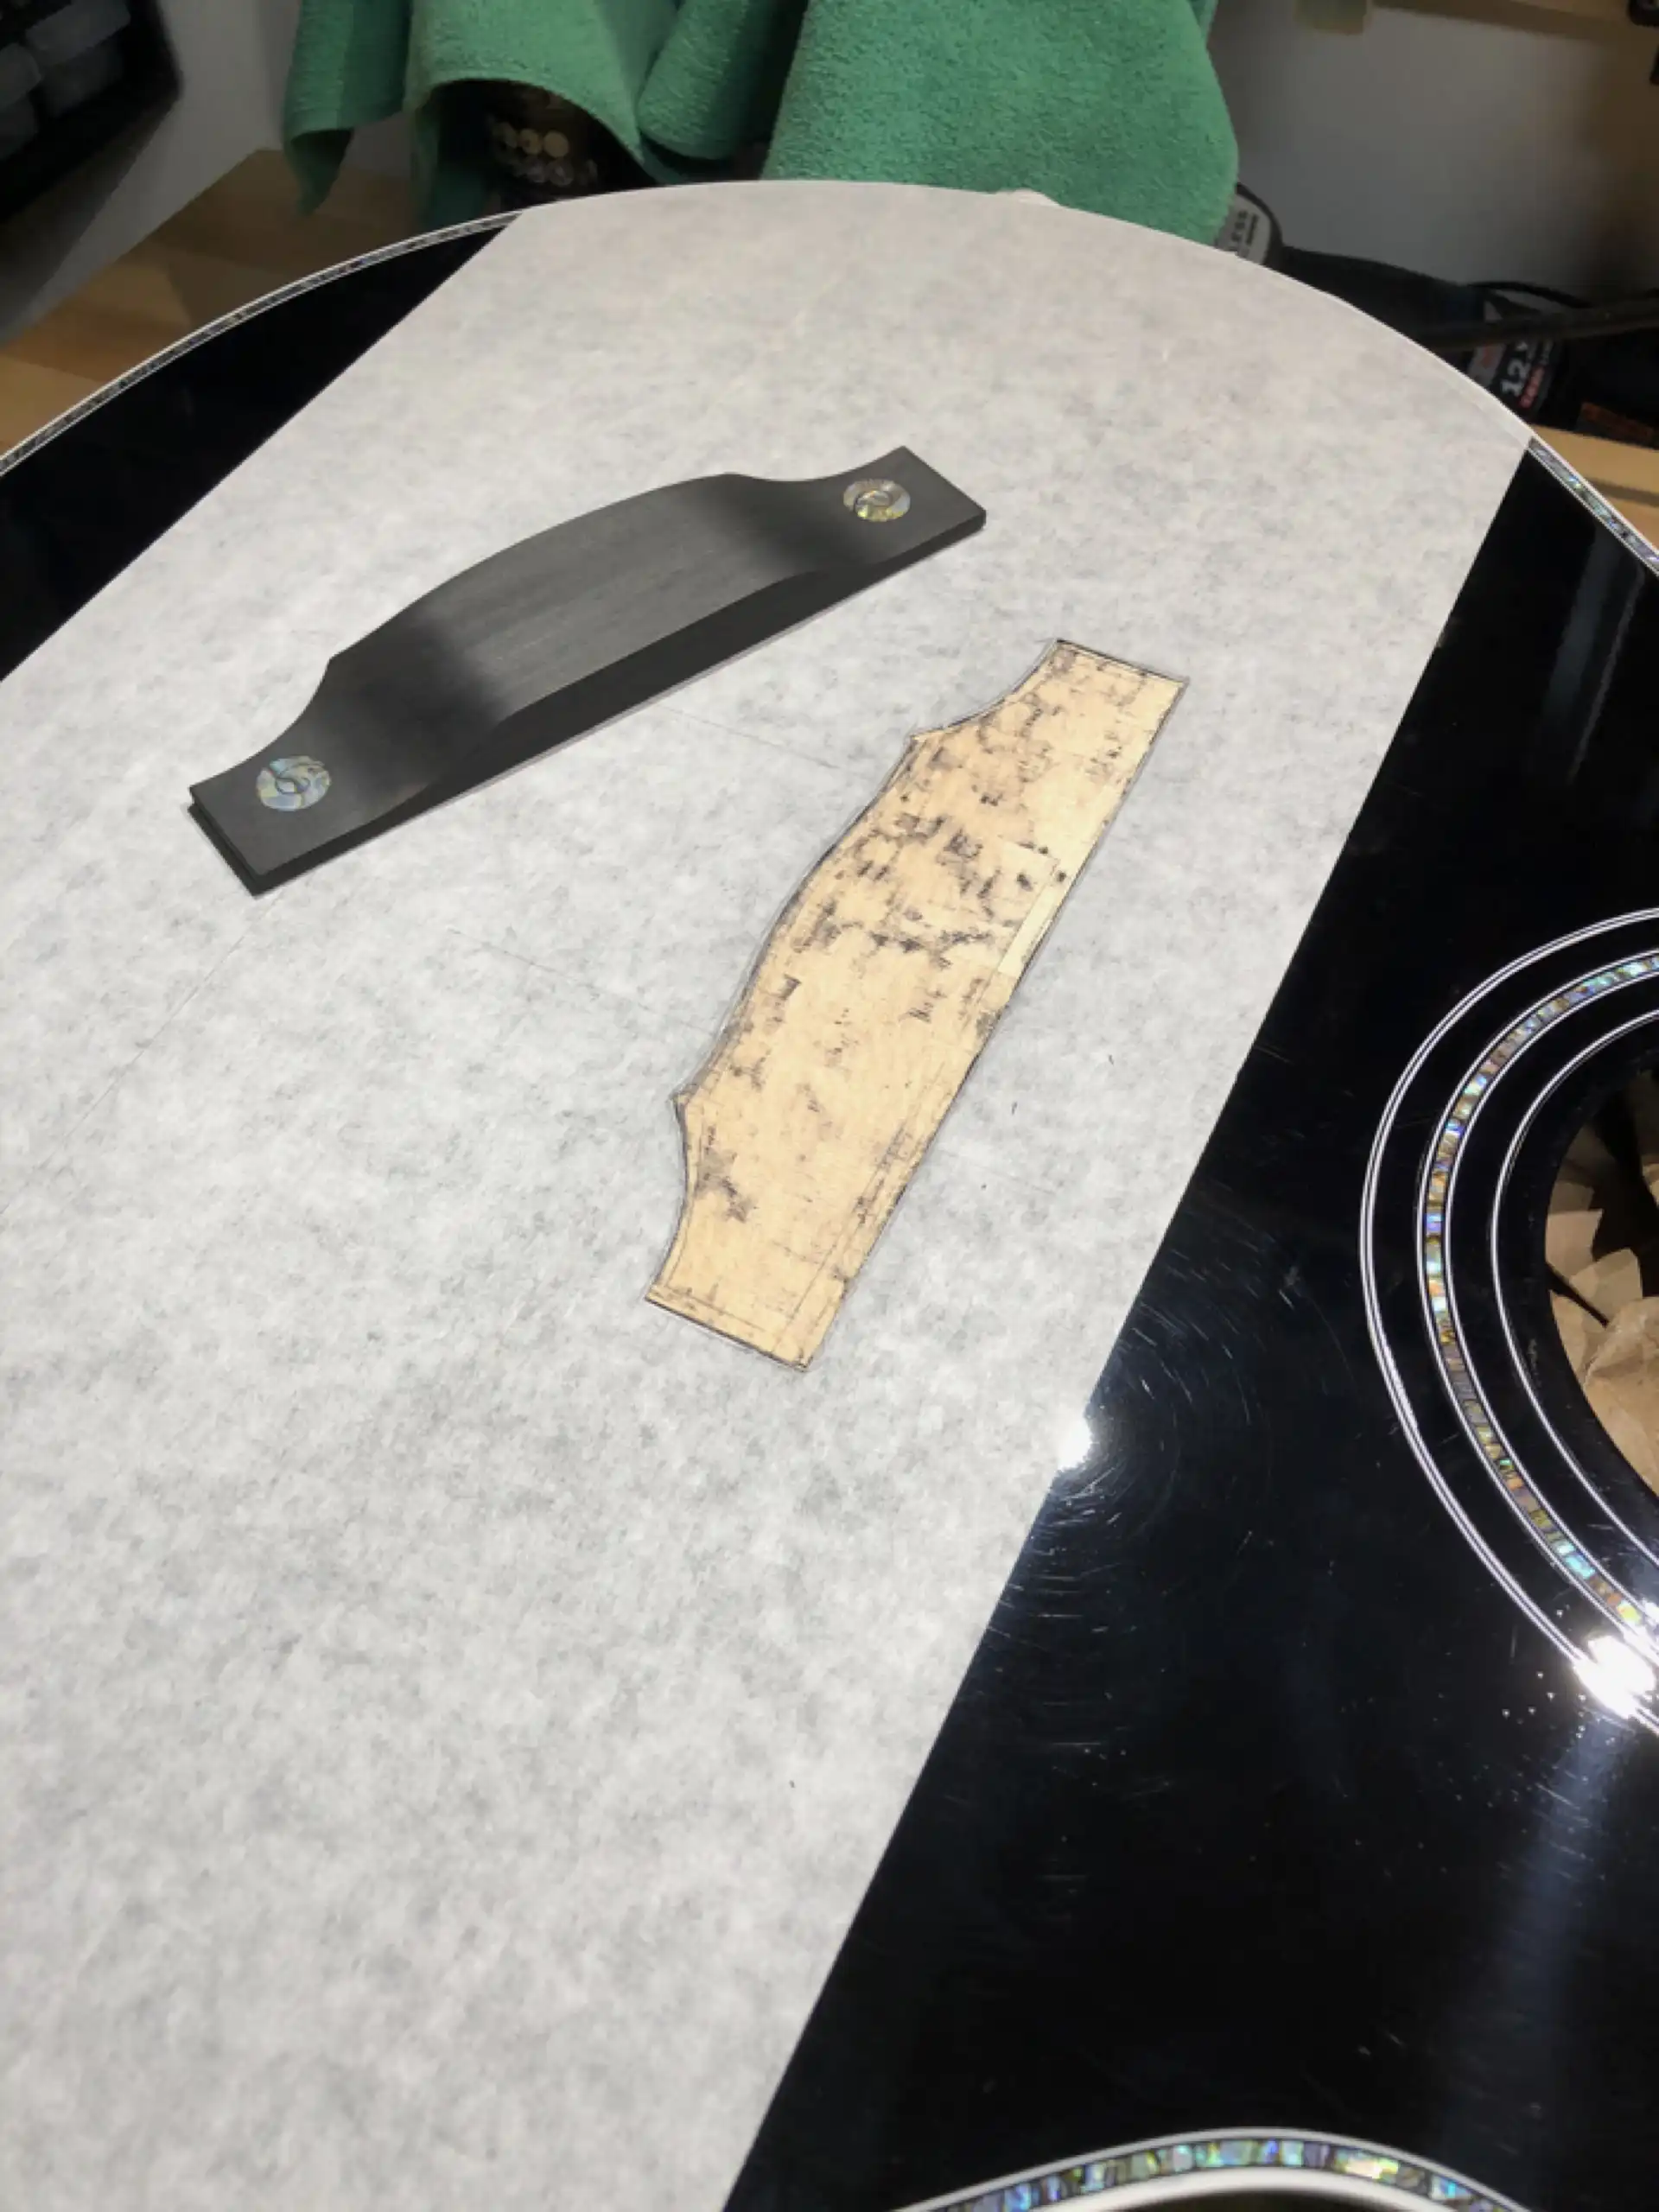
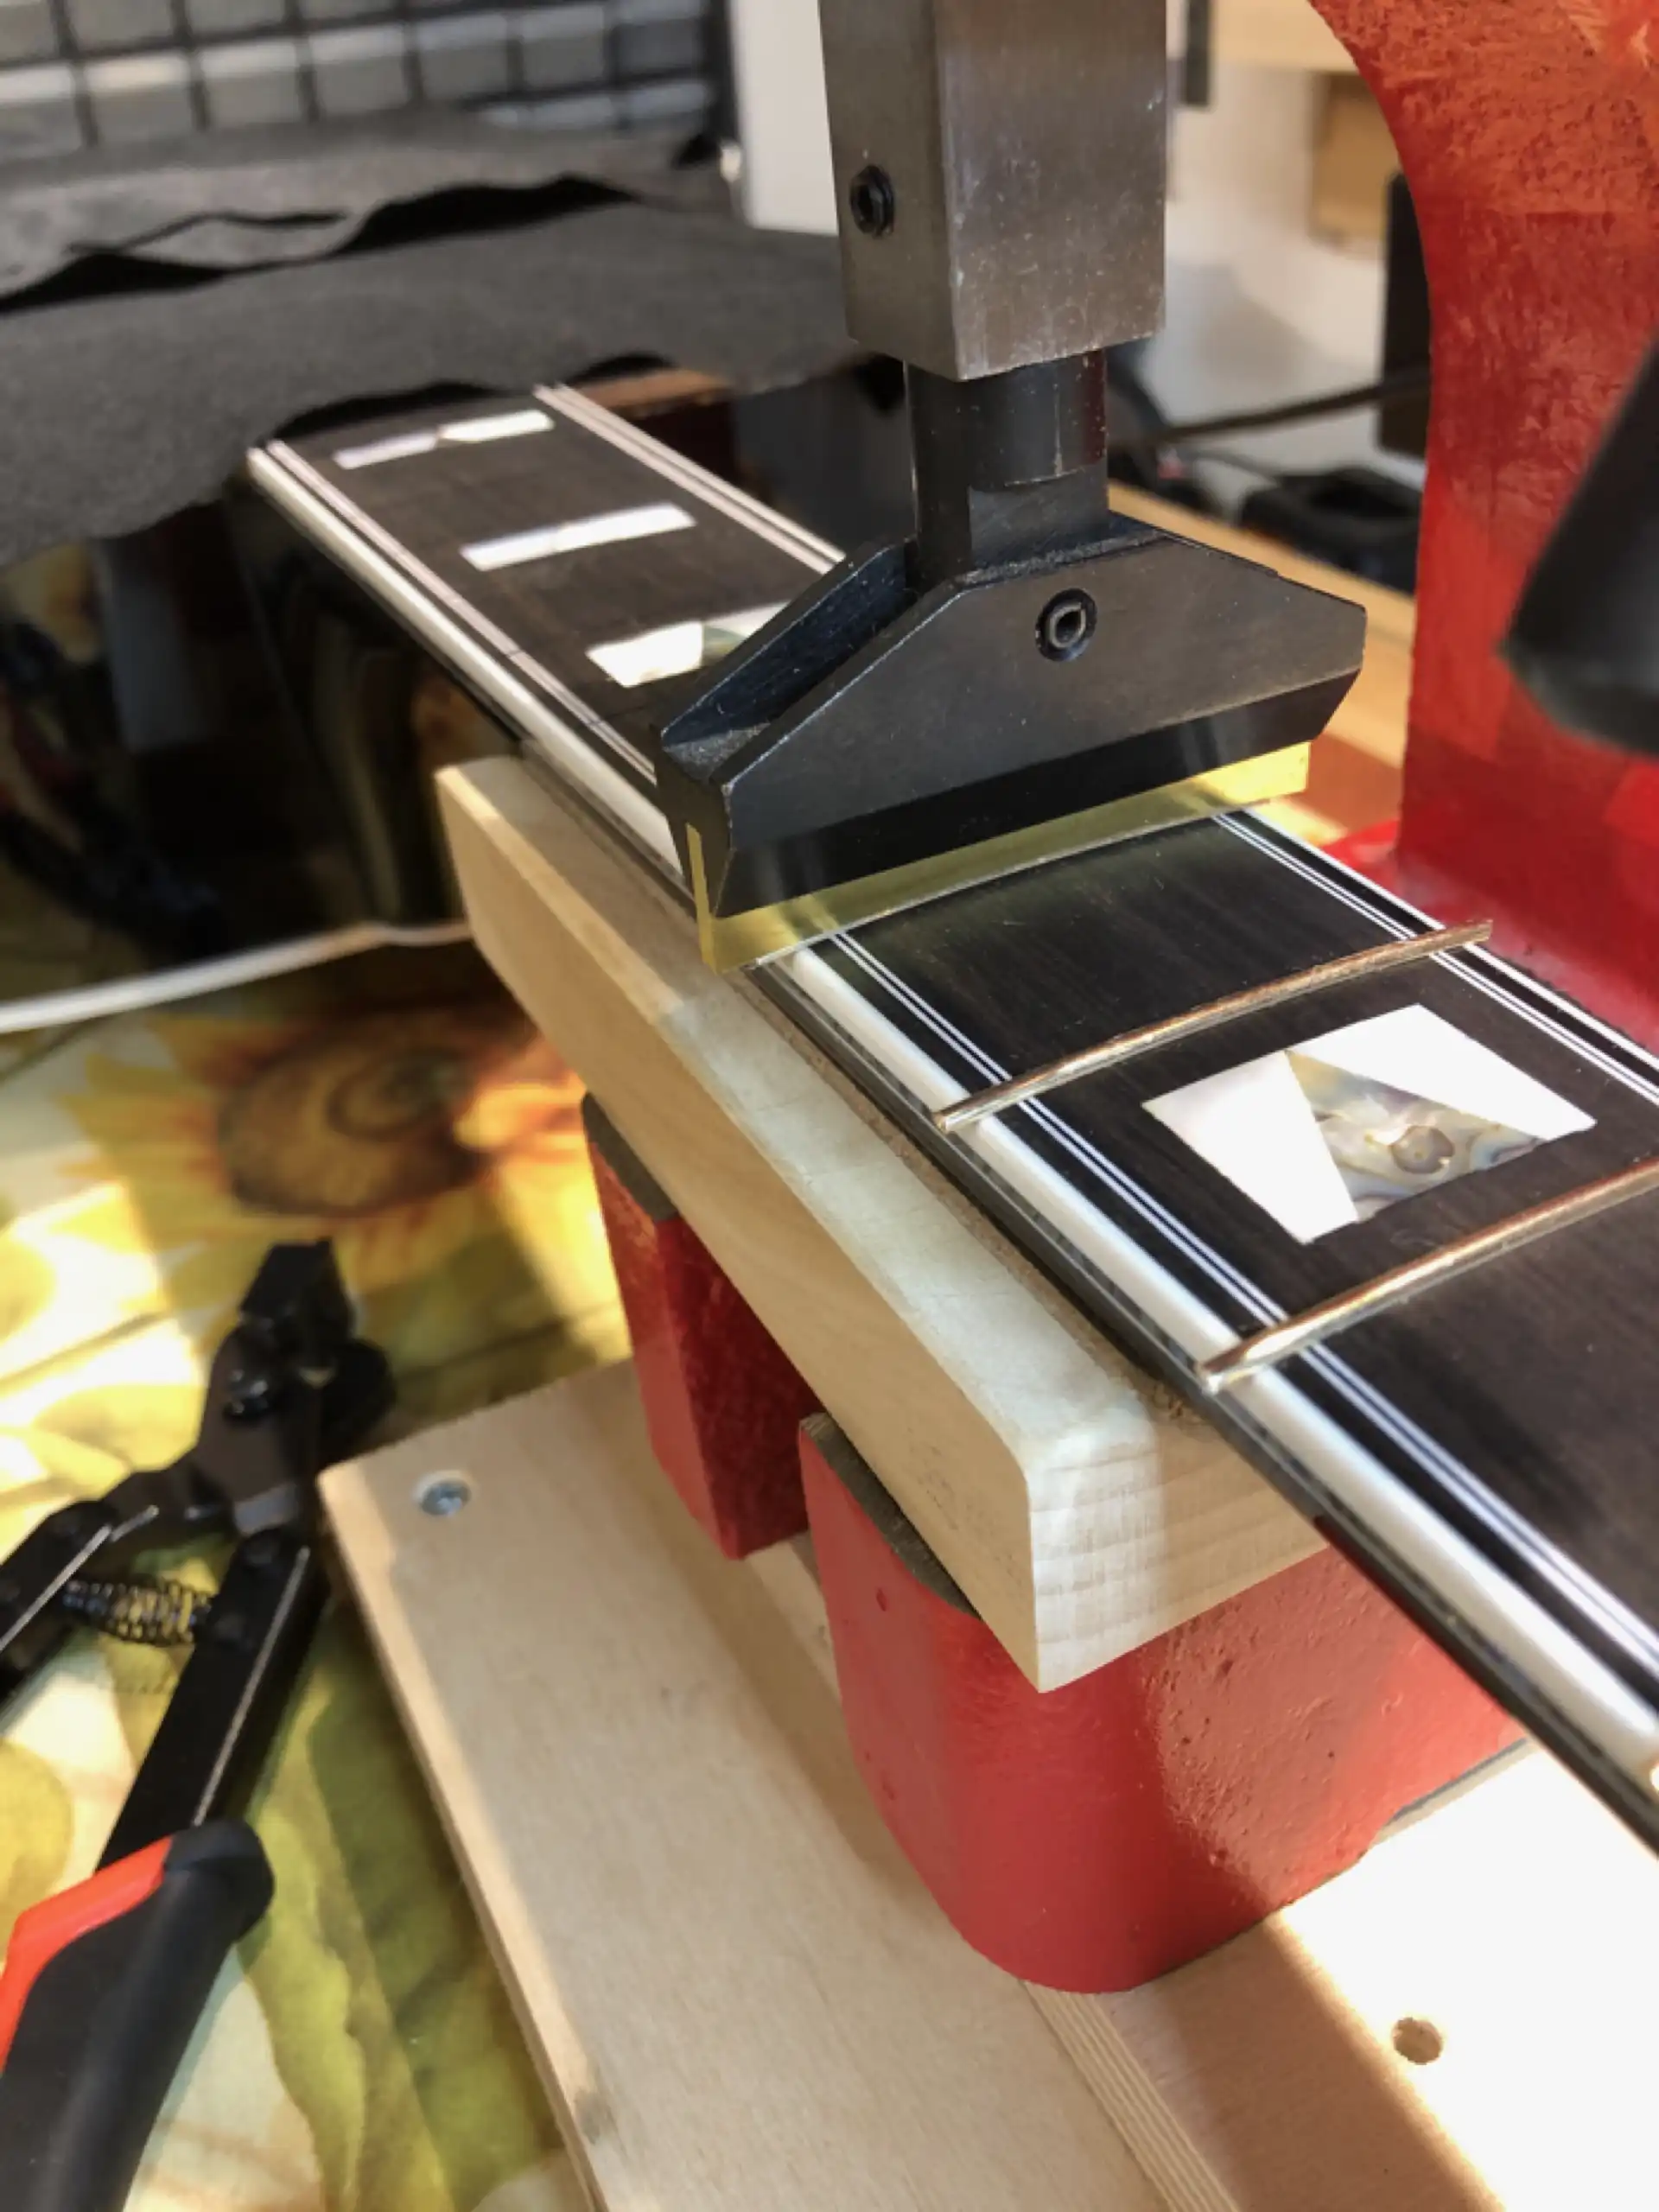
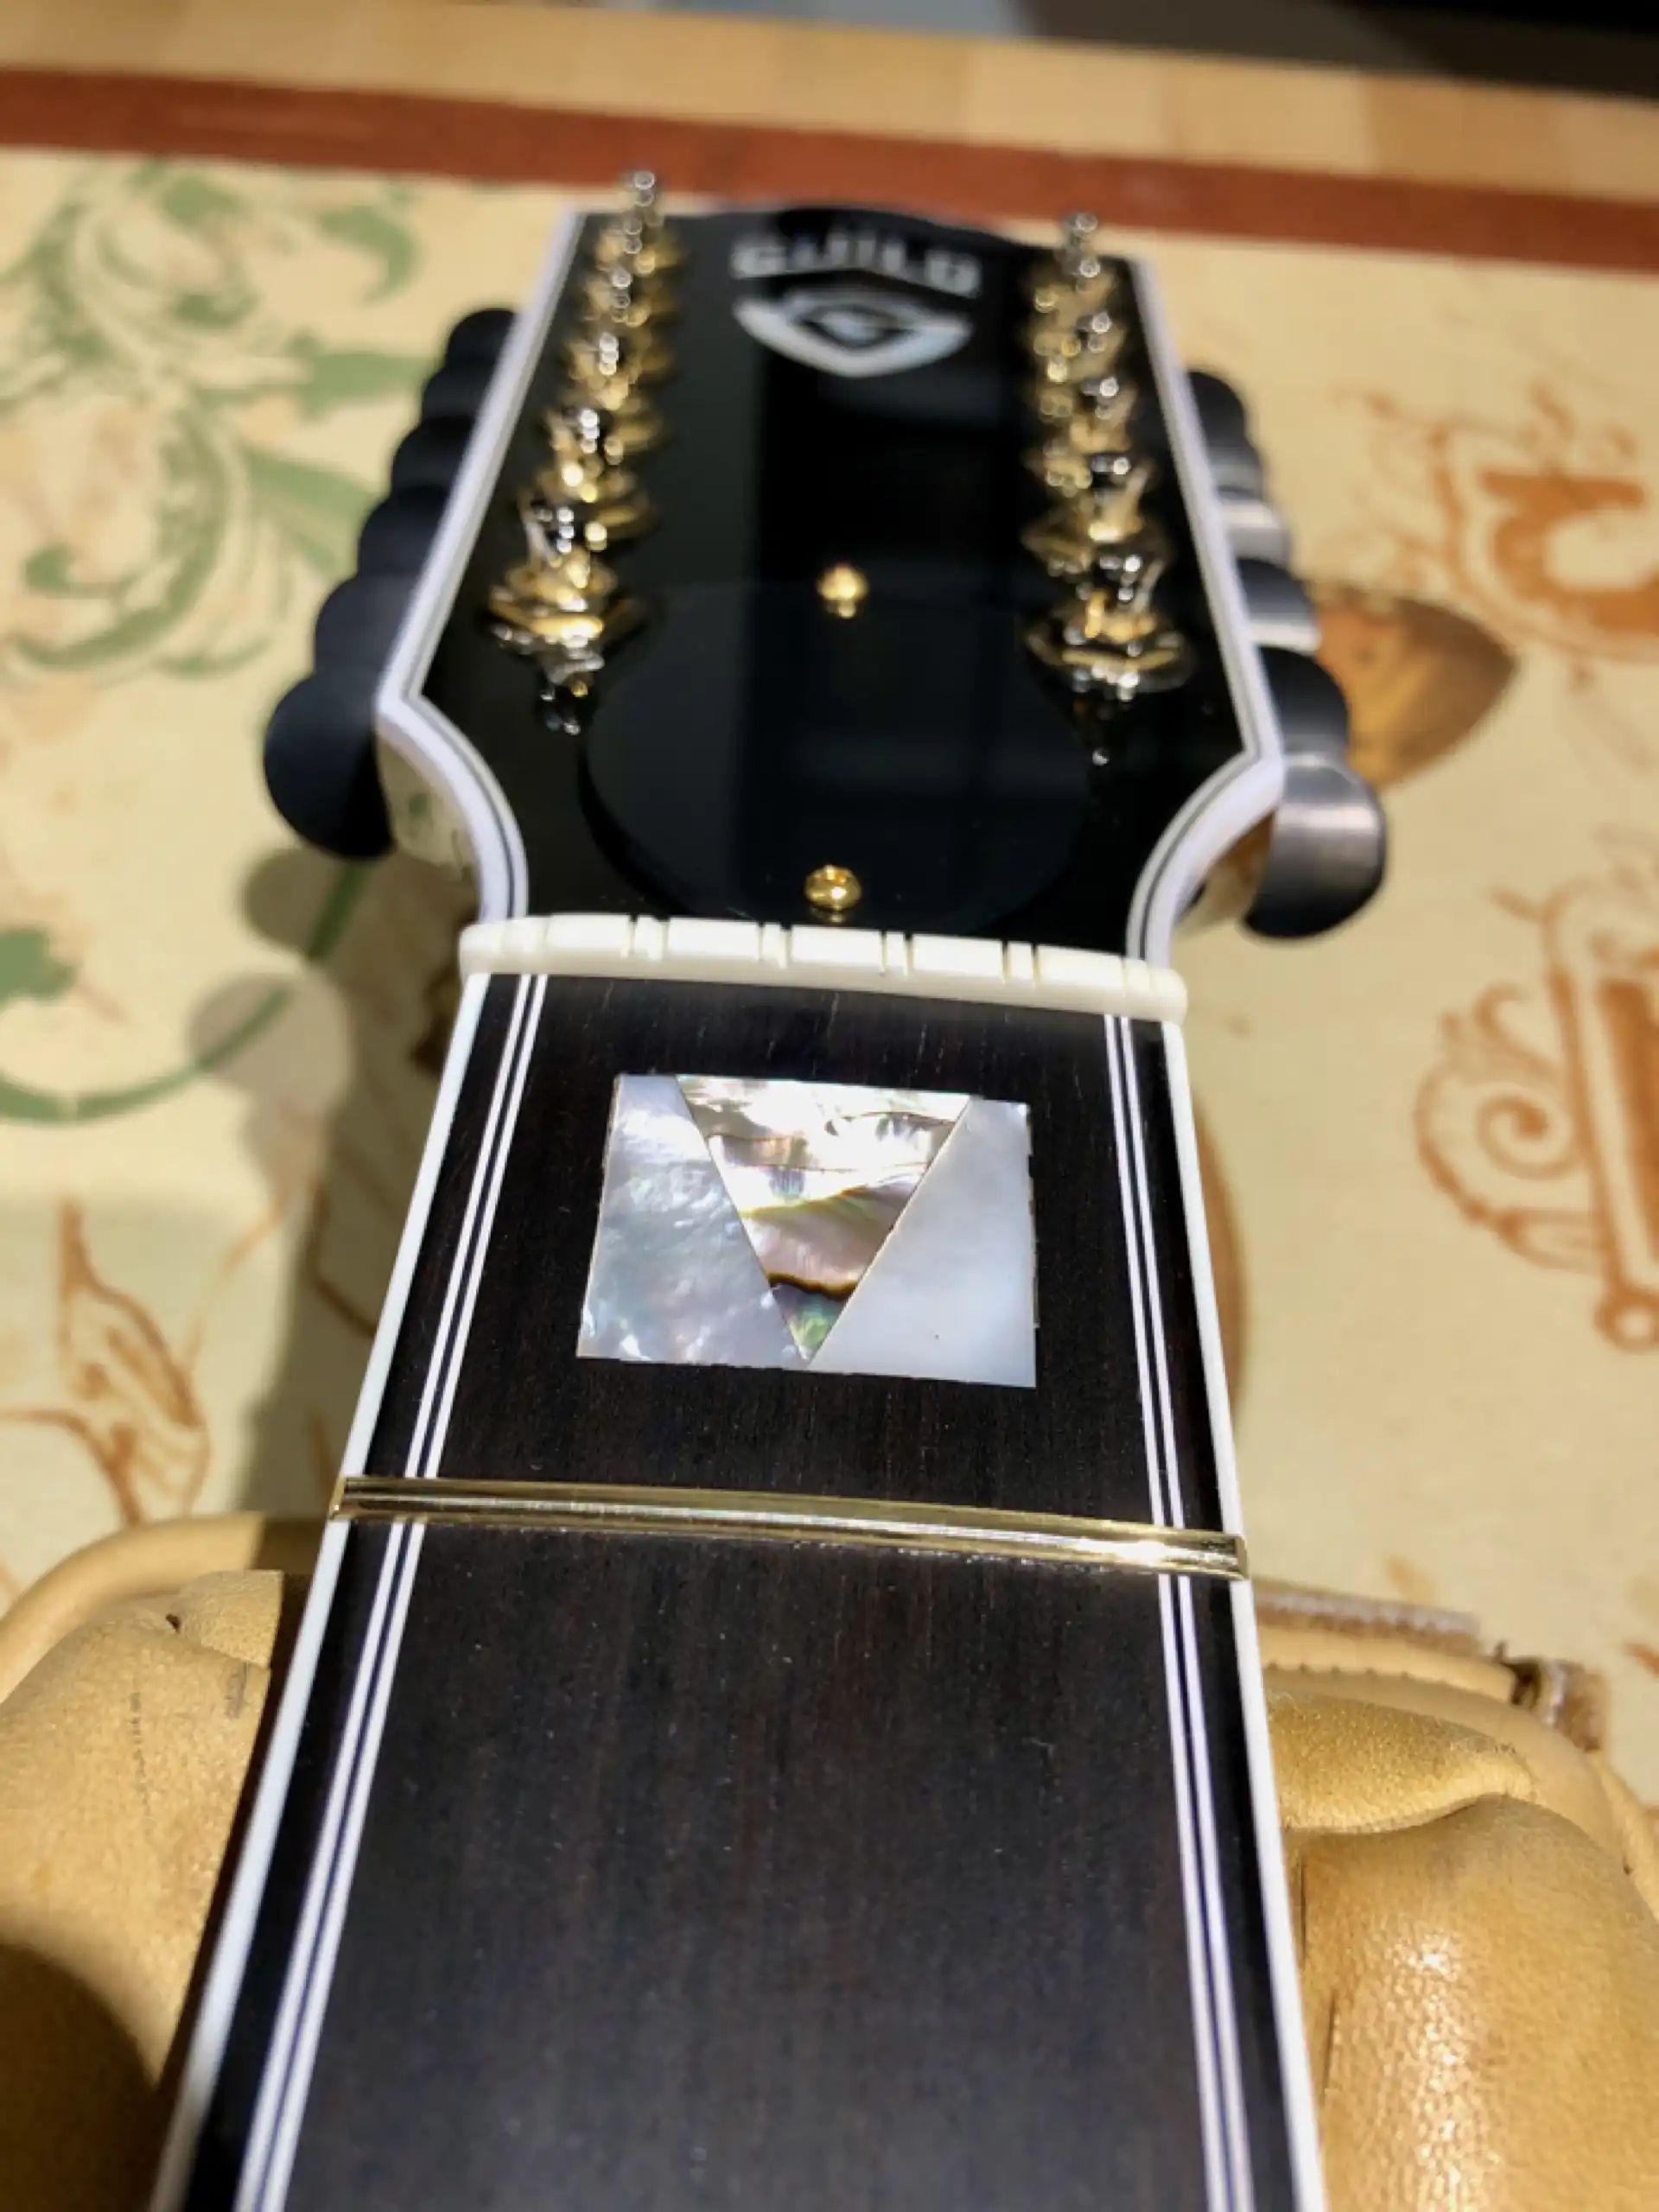
The original bridge measured a little over 0.25 (1/4) of an inch high, much too thin for my taste. Remember that issue of “bridge mass” that I was talking about? I set the neck to demand a 0.375 (3/8) inch tall bridge, which gives me a weightier brace to apply to this already well-braced, flat, stiff soundboard. Here is the rough cutout from black ebony, with the addition of a Paua inlaid representation of the tightly coiled Koru fern, emblematic of New Zealand.
Roughed Out Bridge
The placement of the string holes relative to the location of the back of the saddle is determined by a couple of factors. The angle at which the strings exit the walls of the holes and lay across the saddle is called the "break angle". There should be sufficient downward force applied by the strings against the top of the saddle to maximize the transfer of potential energy set in motion when the string is plucked to travel through the saddle, into the bridge, and across the soundboard. The ever-so-subtle rocking of the bridge when the strings are vibrating, albeit invisible to the naked eye, is sometimes referred to as "driving" the top. It has been suggested that a very shallow break angle, caused by a saddle sitting so low it is nearly non-existent, or bridge holes placed too far back from the saddle, may still create sound from the guitar, but... Sitting behind the wheel of a non-running Ferrari as it rolls 30 feet down a sloped driveway is a rather different "driving" experience when compared with pressing the accelerator of that same car out on a track with the engine running and the car in gear. On the flip side, it is possible to create too much break angle, extending the saddle so high off the bridge that the torque either tears the bridge off the top, or tears the top off the guitar. Ask me how I know.
It is undesirable to have a saddle sit so low that the strings can actually bounce out of place. As a repair, factors permitting, such a condition can be improved by "ramping" slots in the front walls of the holes. As a deliberate design consideration, strings holes can be drilled father away from the saddle and ramps can be cut that allow the string leaving the back of the saddle to make contact with the wood at a sharper angle than if the ramps did not exist. Or, string holes can be drilled close enough to the saddle to make ramps unnecessary. Available real estate on the bridge will help to determine whether ramping is in your future, or not.
The bridge on this Guild 12 string has very little room to spare. There are two rows of string holes that need to fit in the space between the saddle and the back of the bridge. By placing both rows as close as possible to the saddle, the angle of the strings exiting the bridge and crossing the saddle is sufficient to drive the top. Most importantly, the overall height of the strings off the soundboard directly in front of the bridge is sufficient to maximize both the volume and the tone. If those holes are positioned too close to the saddle, they can interfere with pickup systems that need to be mounted to the bridgeplate directly under the saddle.
I have introduced sufficient bridge height in the bridge/saddle combination target height to allow for future alteration, should it be necessary. Put simply, the bridge can be shortened without killing the output.
I prefer to pre-drill the holes for the strings prior to gluing on the bridge, as I have a steel fixture that I can hold the bridge in securely while ensuring accurate hole placement. I have taken pains to locate the pairs of holes as close together as possible to facilitate the tight pairing of the strings across the saddle. If I were to drill the holes all the way through at this time, I would have additional glue squeeze-out to deal with, as glue would ooze up through the holes. I drill the holes just shy of all the way through. I choose to wait to rout the saddle slot until after the bridge is attached. I use a very iterative, custom (aka “slow”) process to locate the slot, and create and intonate the saddle. It is much easier to pre-drill and pre-rout holes and slots on a bridge prior to its attachment, but it doesn't always work out as intended. I can get it perfect when I do it the long, hard way.
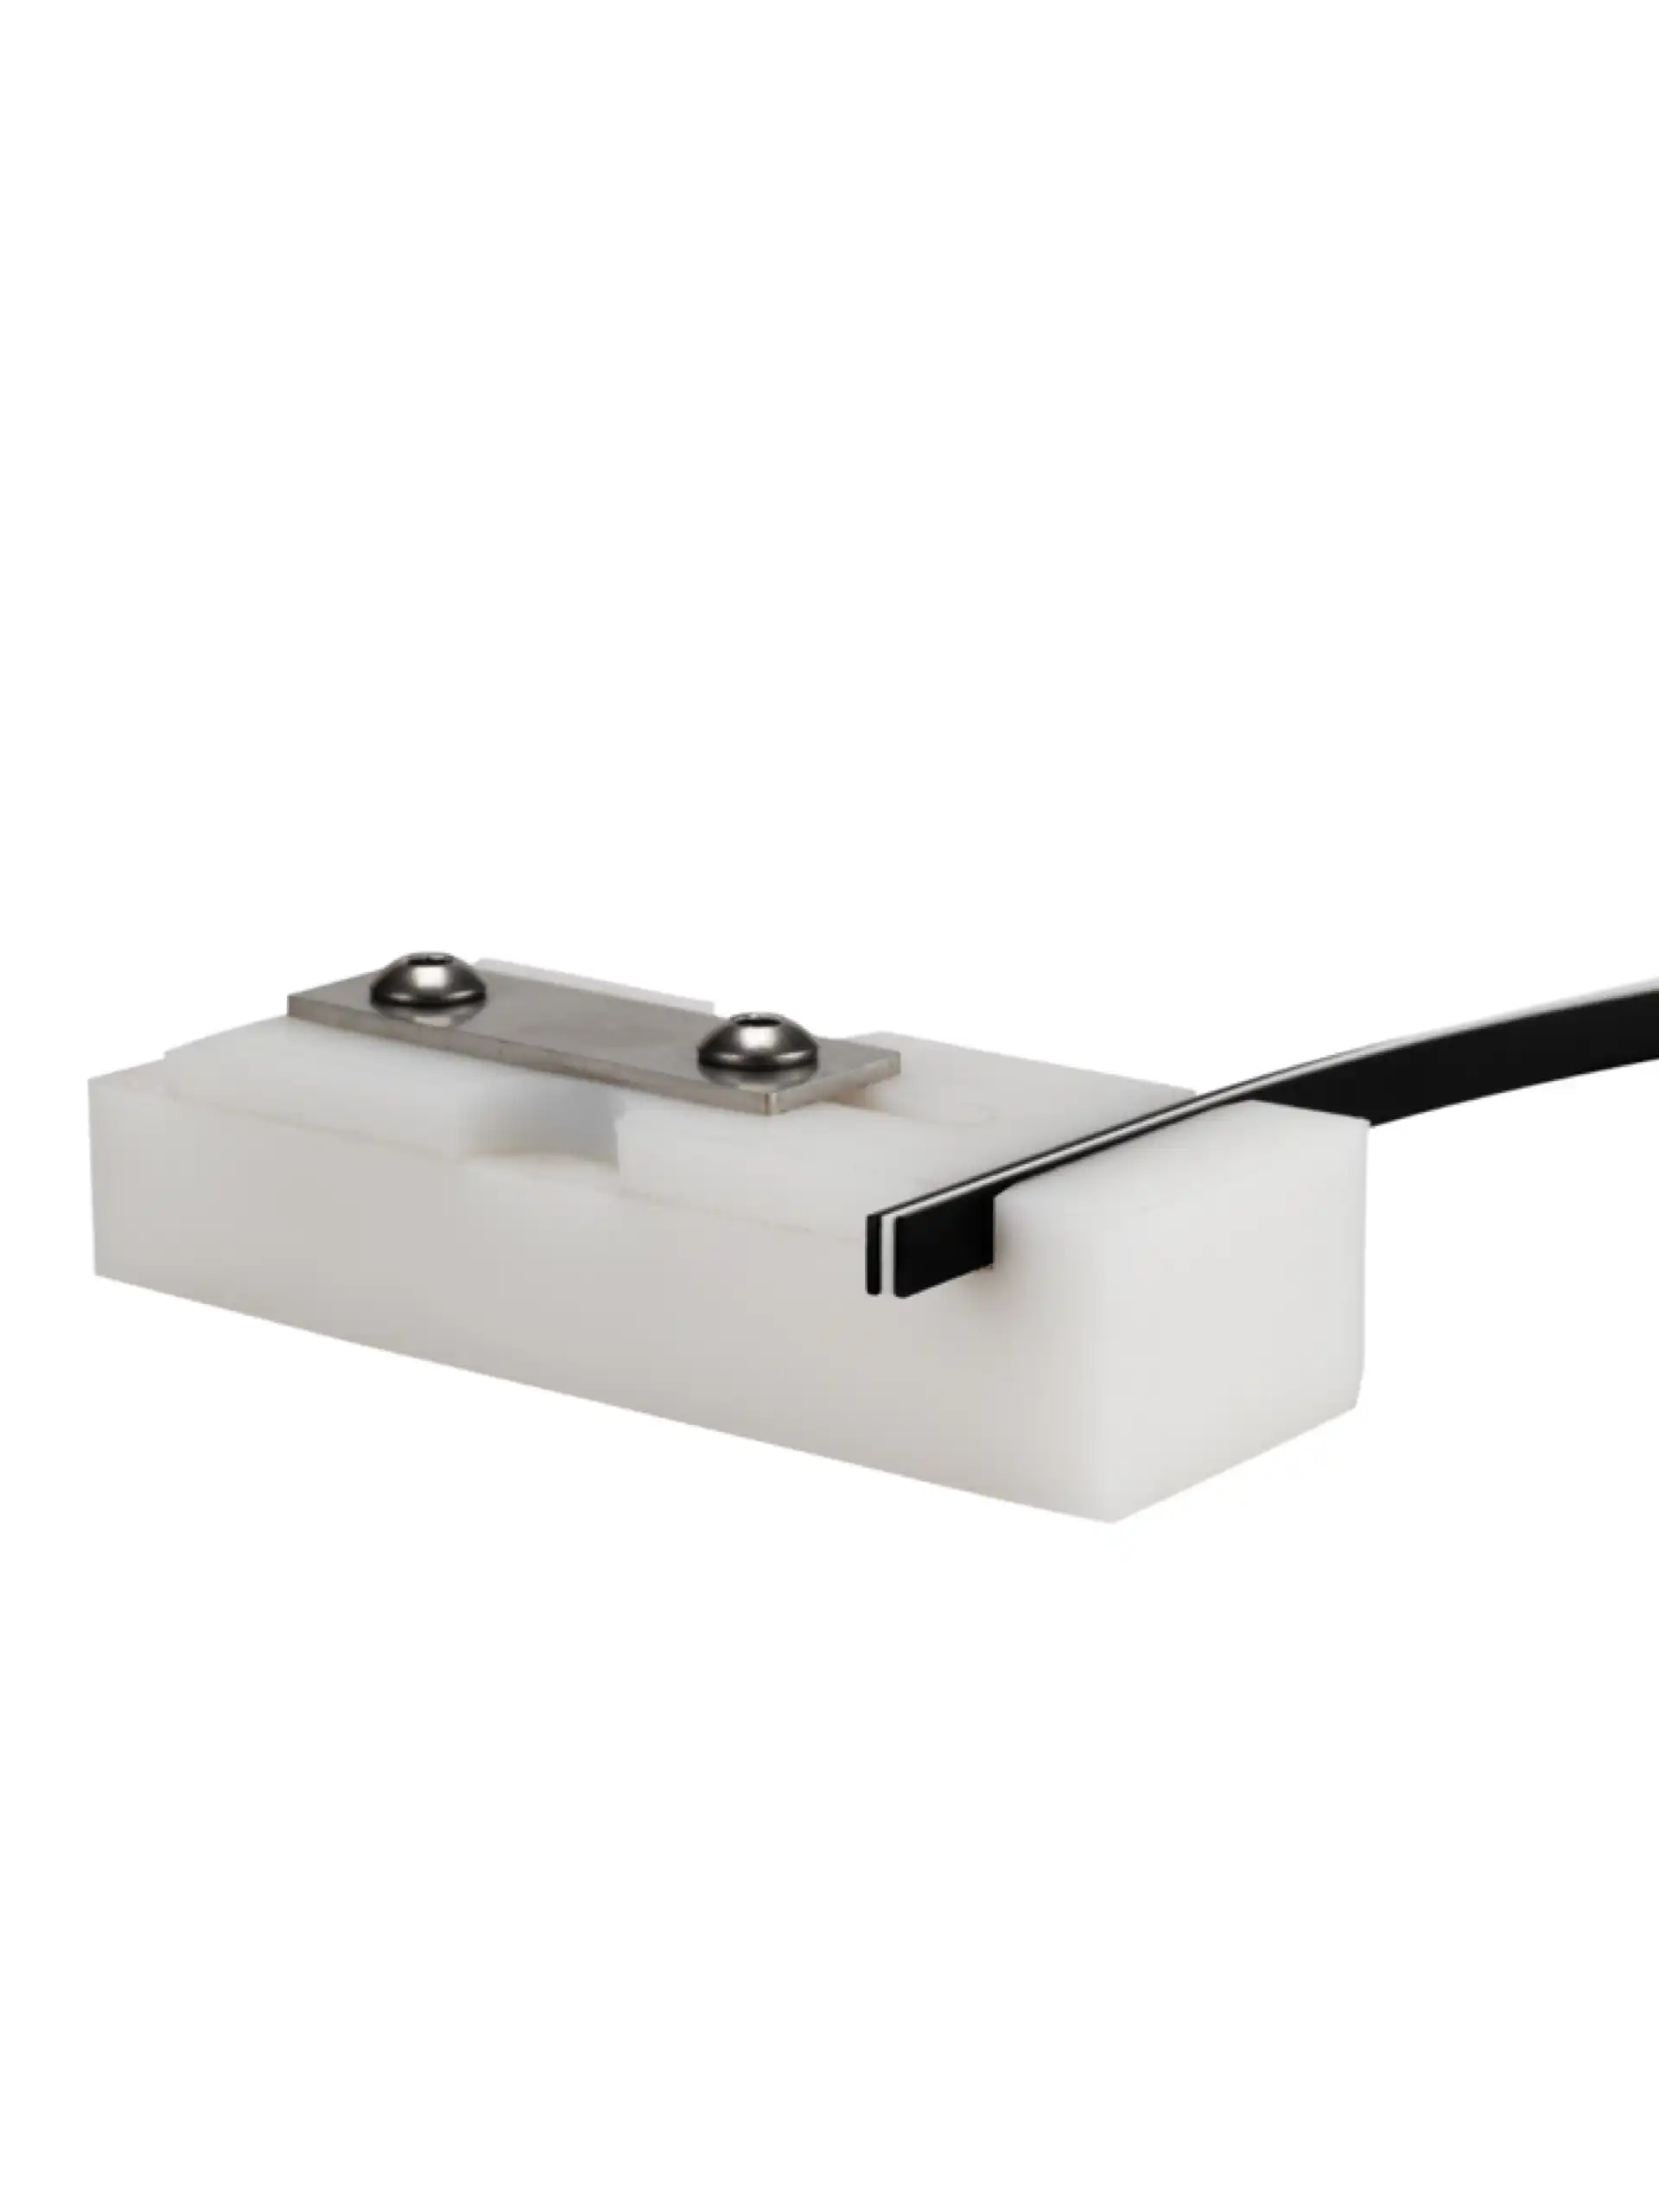
Bridge Drill Guide
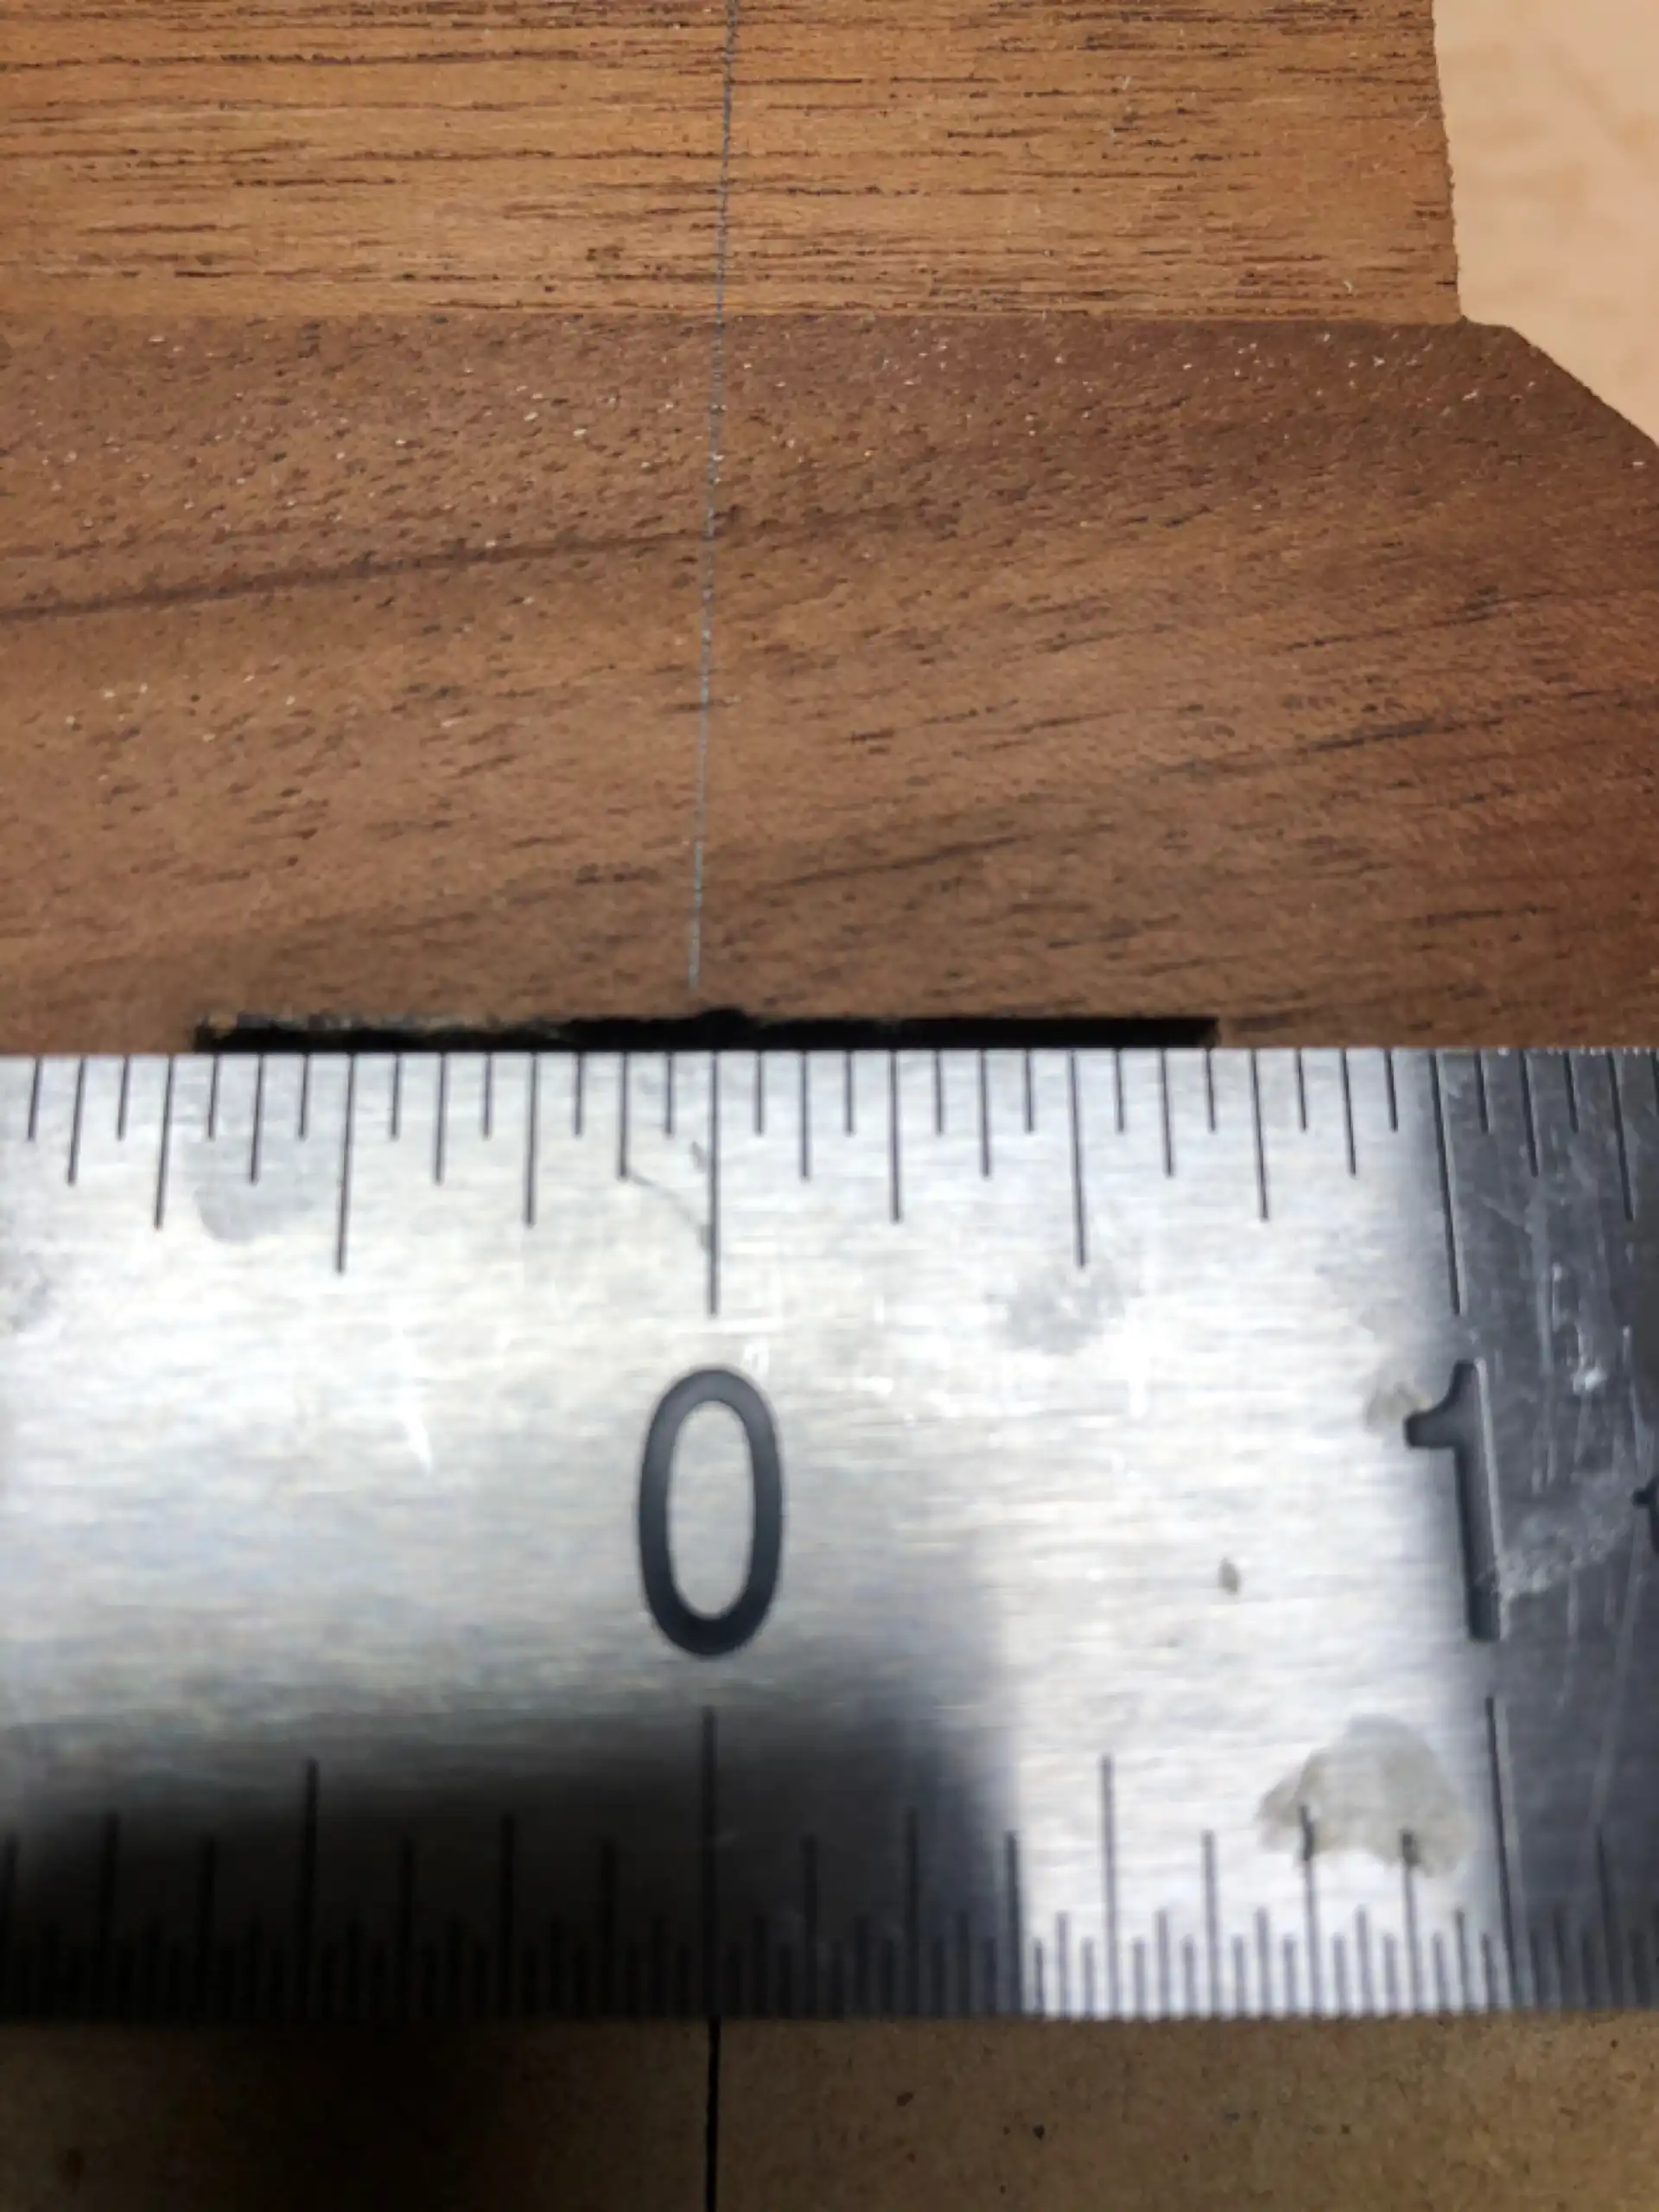
To apply the bridge, its location must first be determined, and any finish in that area must be carefully removed so as to facilitate a wood-to-wood glue-up, not a wood-to-finish or even a wood-to-sealer bond. For accurate placement, I use a fixture/tool built by another luthier that automatically centers itself on the neck and provides me with a length stop against which I can hold the bridge in place while I trace its outline onto the low-tack tape I have applied to the surface of the instrument, below. The length I am referring to is measured from the front edge of the nut to the front edge of the bridge. This length is calculated by first determining the scale length to be used on this guitar. Scale length refers to the distance from the nut to the saddle, pre-compensation, and dictates the precise placement of the frets to achieve accurate sounding of the notes.
The fretboard is already slotted, so I reverse engineer the scale length by doubling the distance from the nut to the center of the 12th fret slot. This totals just a wee bit less than 25.6″, or precisely 650mm. This is typically the measurement used to locate the front edge of the saddle at the first string. When compensation is applied, an additional 1/16th to 1/8th of an inch (1.5 to 3mm) or more may be added to that measurement. Once the saddle location is determined, the space in front of the saddle is deducted to determine to front edge of the bridge. Whew! I trace just inside the pencil lines of the Bridge outline with a scalpel, and remove the tape. The quick and dirty method of performing this task leaves a safety zone of finish all around the edge (exposing bare wood beyond the edges of the bridge is downright ugly). I have seen as much as 1/4″ of overlap on guitars suffering bridge pops (where the Bridge releases and peels up from the soundboard due to insufficient bond). I live dangerously and take the lacquer right to the edge of the bridge. Using a razor-sharp chisel I carefully remove the lacquer in many, many micro-deep passes, just down to the wood. I do not permit myself to ever gouge the wood, and never cross the scalpel line around the perimeter.
Bridge Location
The ebony Bridge gets a final surface preparation wipe of Acetone prior to glue-up to remove any residual oils. Glue is applied to both the bottom of the Bridge and the Spruce of the soundboard. This results in more squeeze-out to clean up, but ensures the Spruce doesn't arbitrarily soak in glue that should have been dedicated to forming the bond. The bridge is carefully clamped in place with a deep-throated C-clamp through the soundhole and left to dry, overnight.
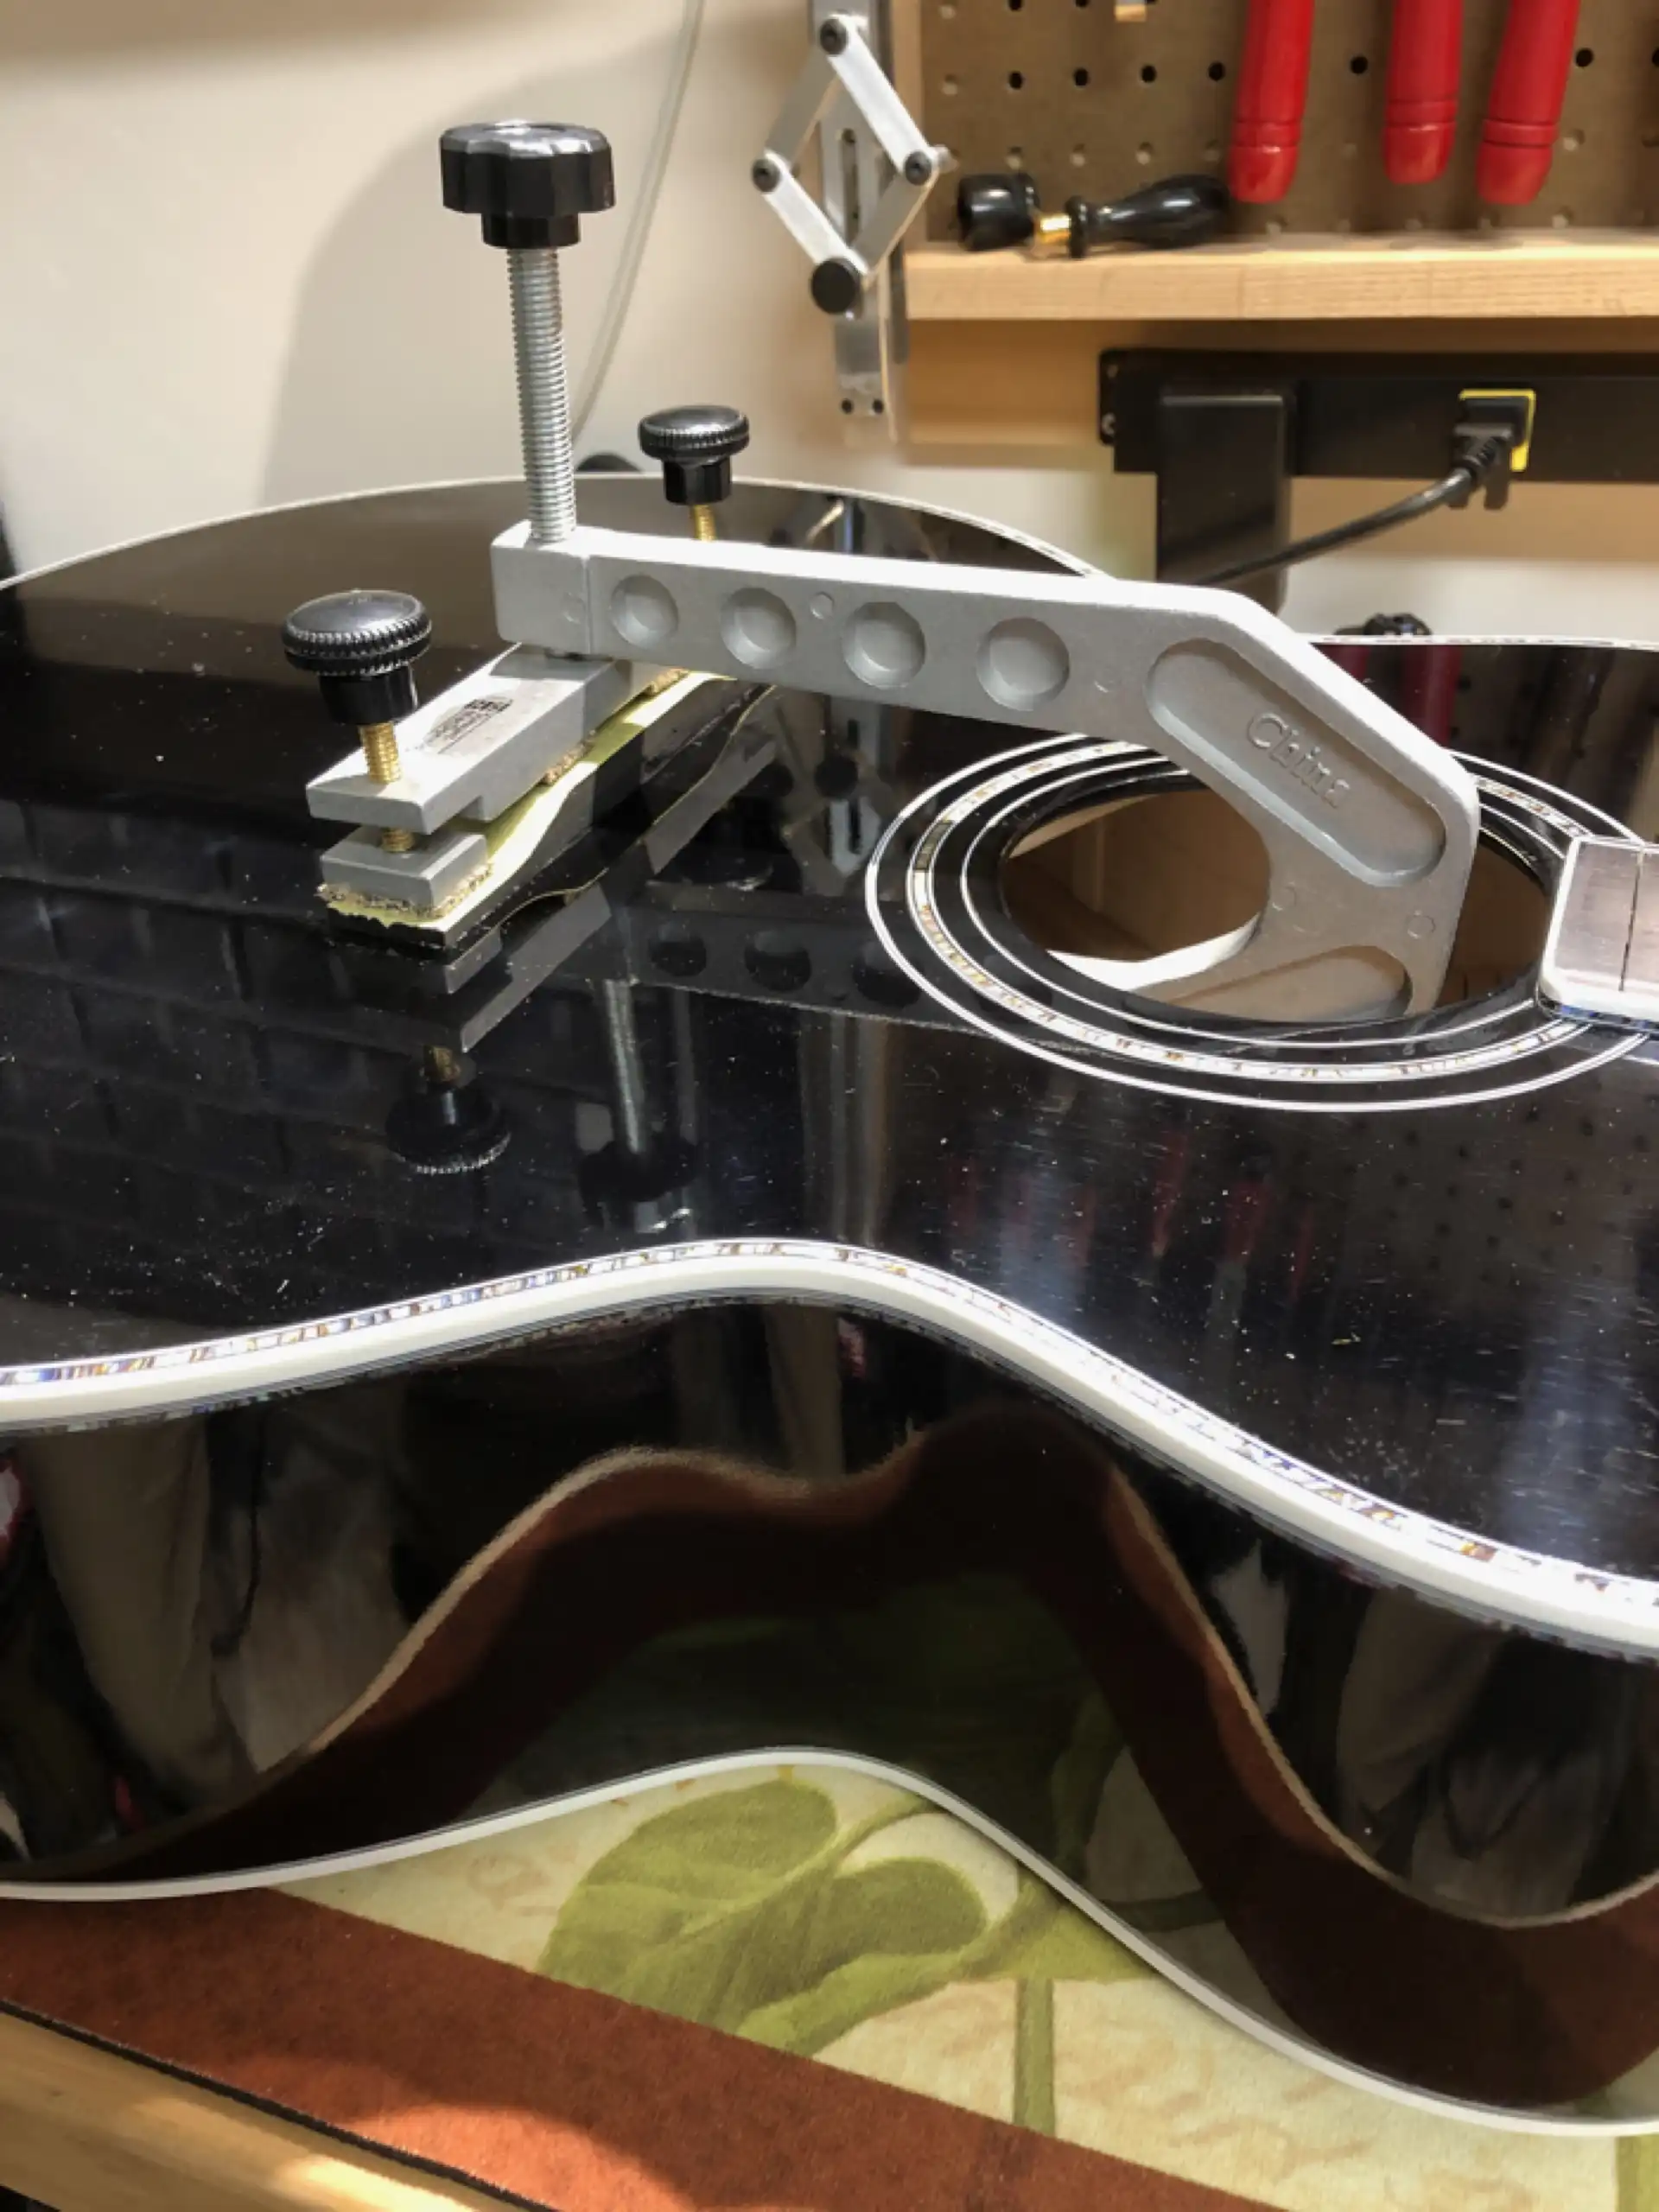
Bridge Clamp
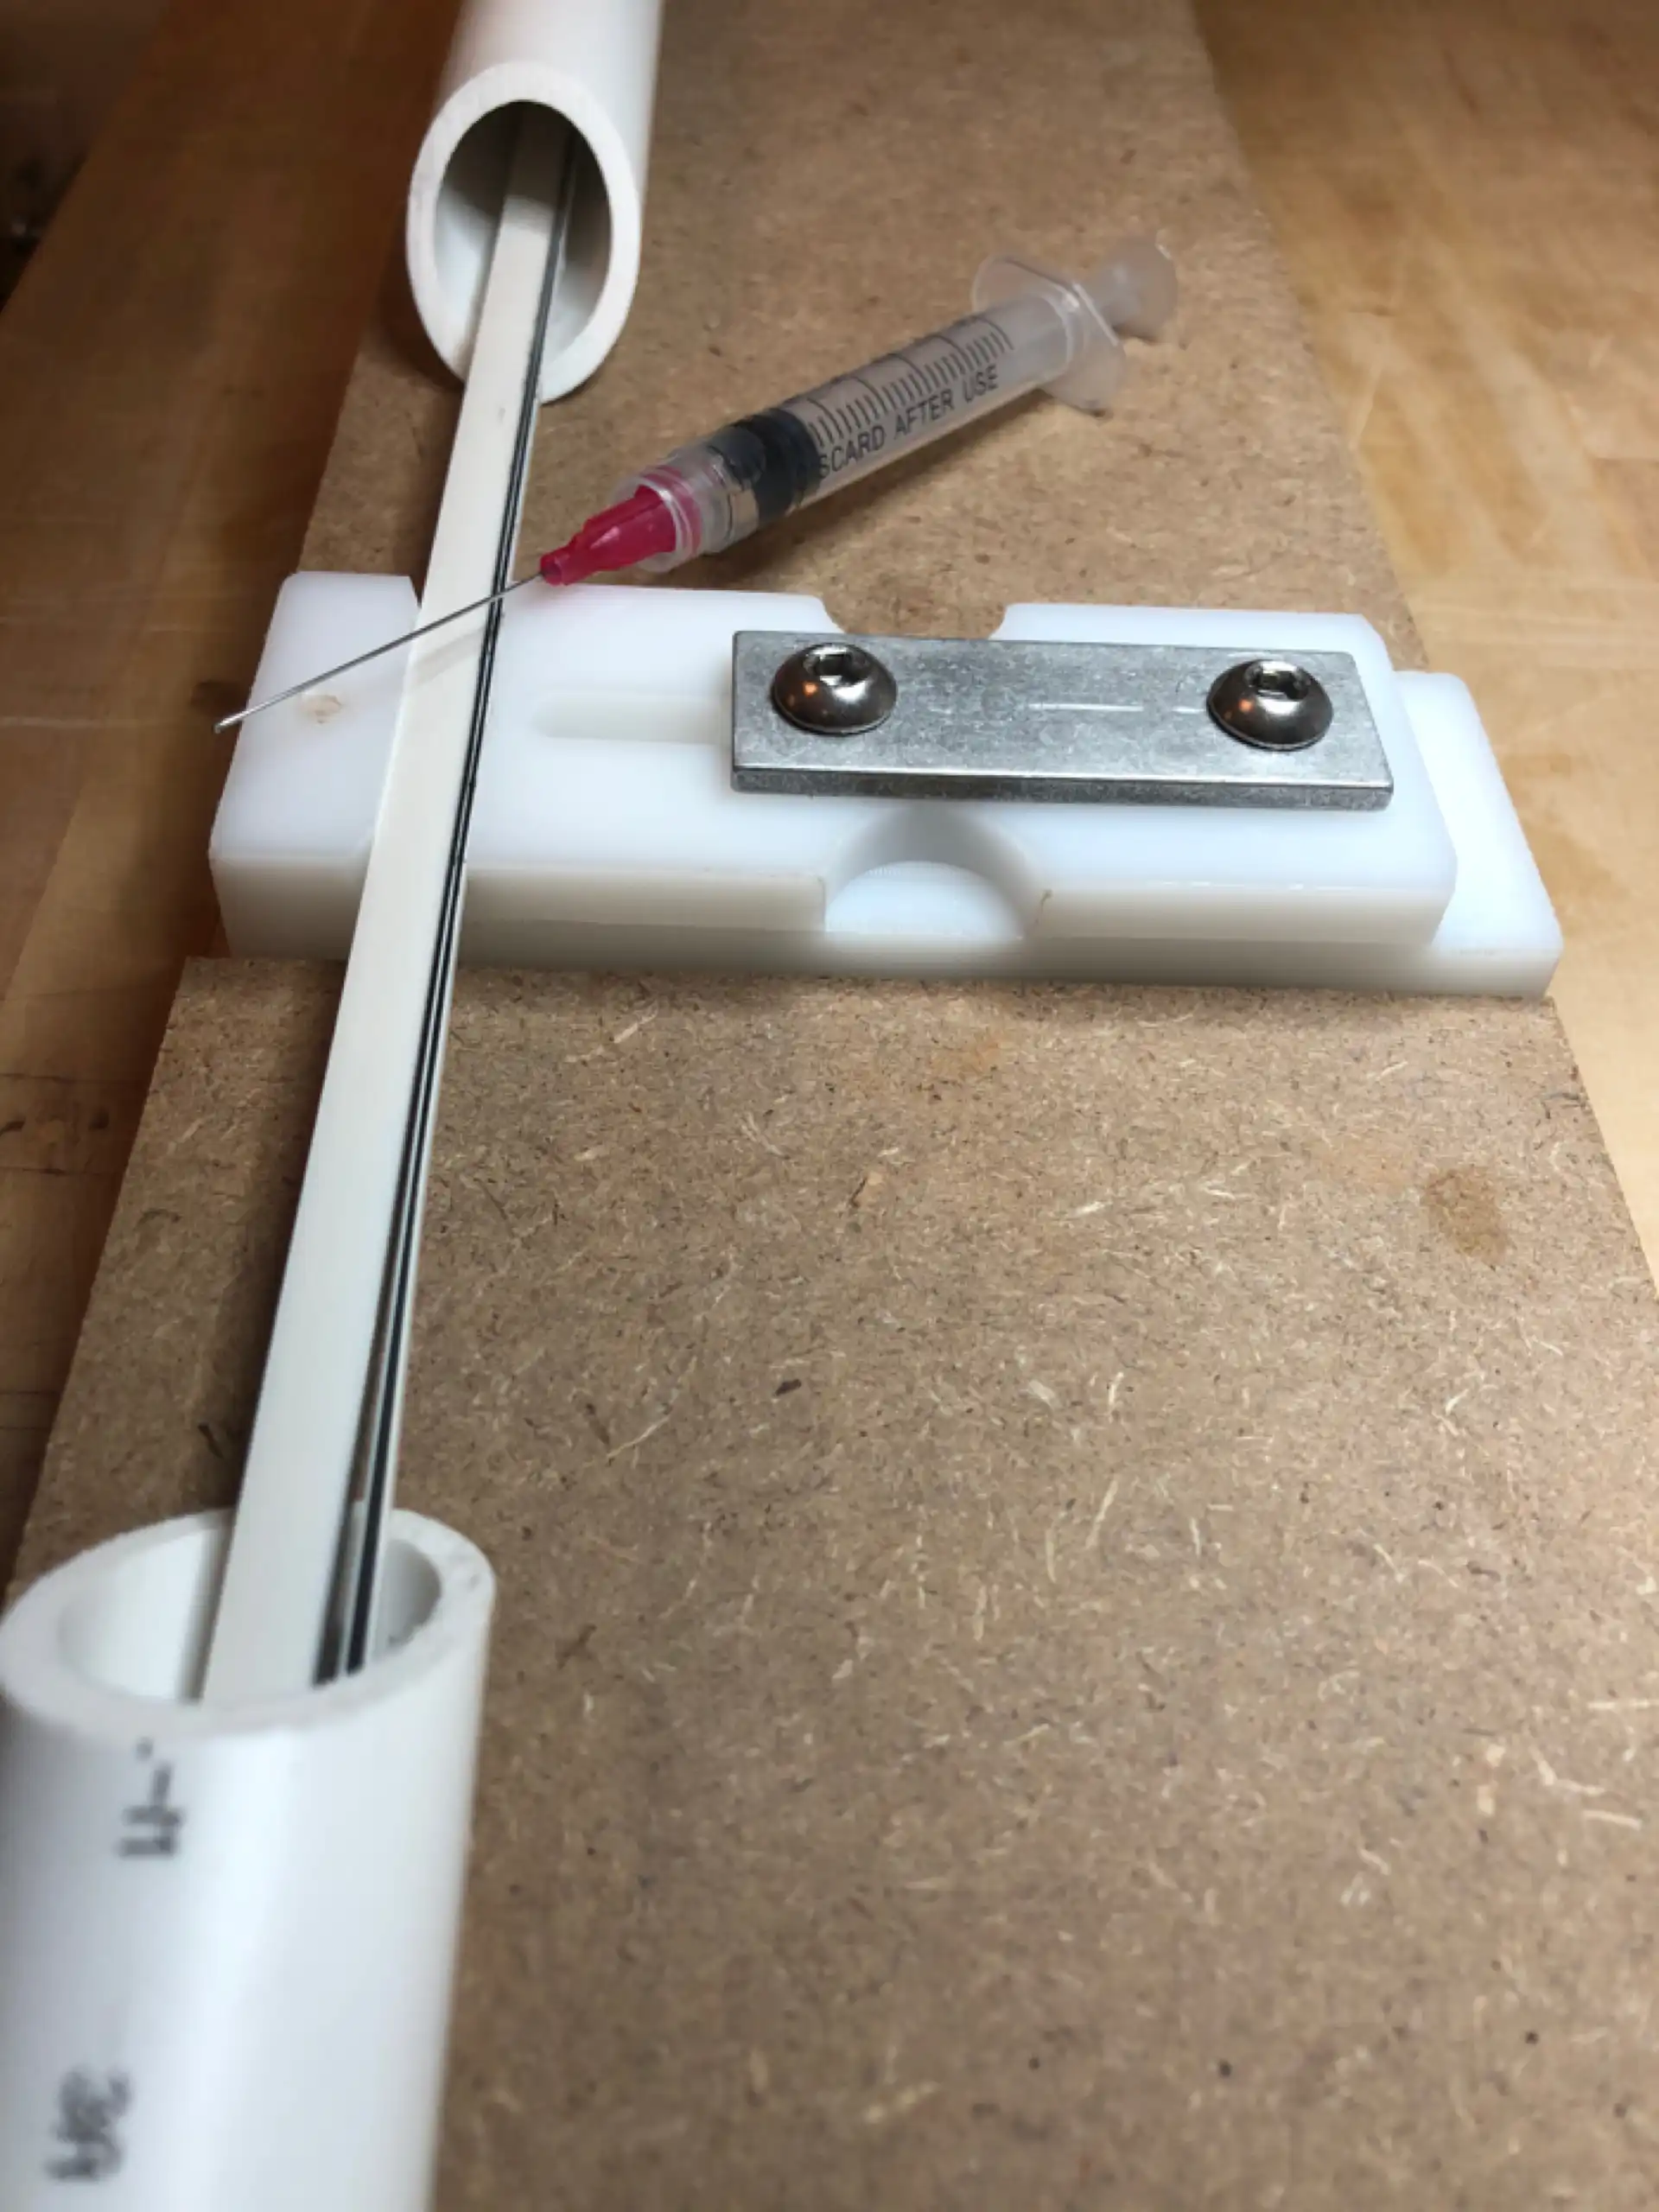
Once dry, the clamp is carefully removed and the Bridge is inspected. I use a tool from Stew-Mac called a “Brace Repair Jack”, to hold a small piece of sacrificial wood up tightly against the Bridgeplate, directly beneath the area I will be drilling, as I do not want any tear-out in the Bridgeplate. It is essentially a small turnbuckle fitted with non-marring, glue-resistant end caps.
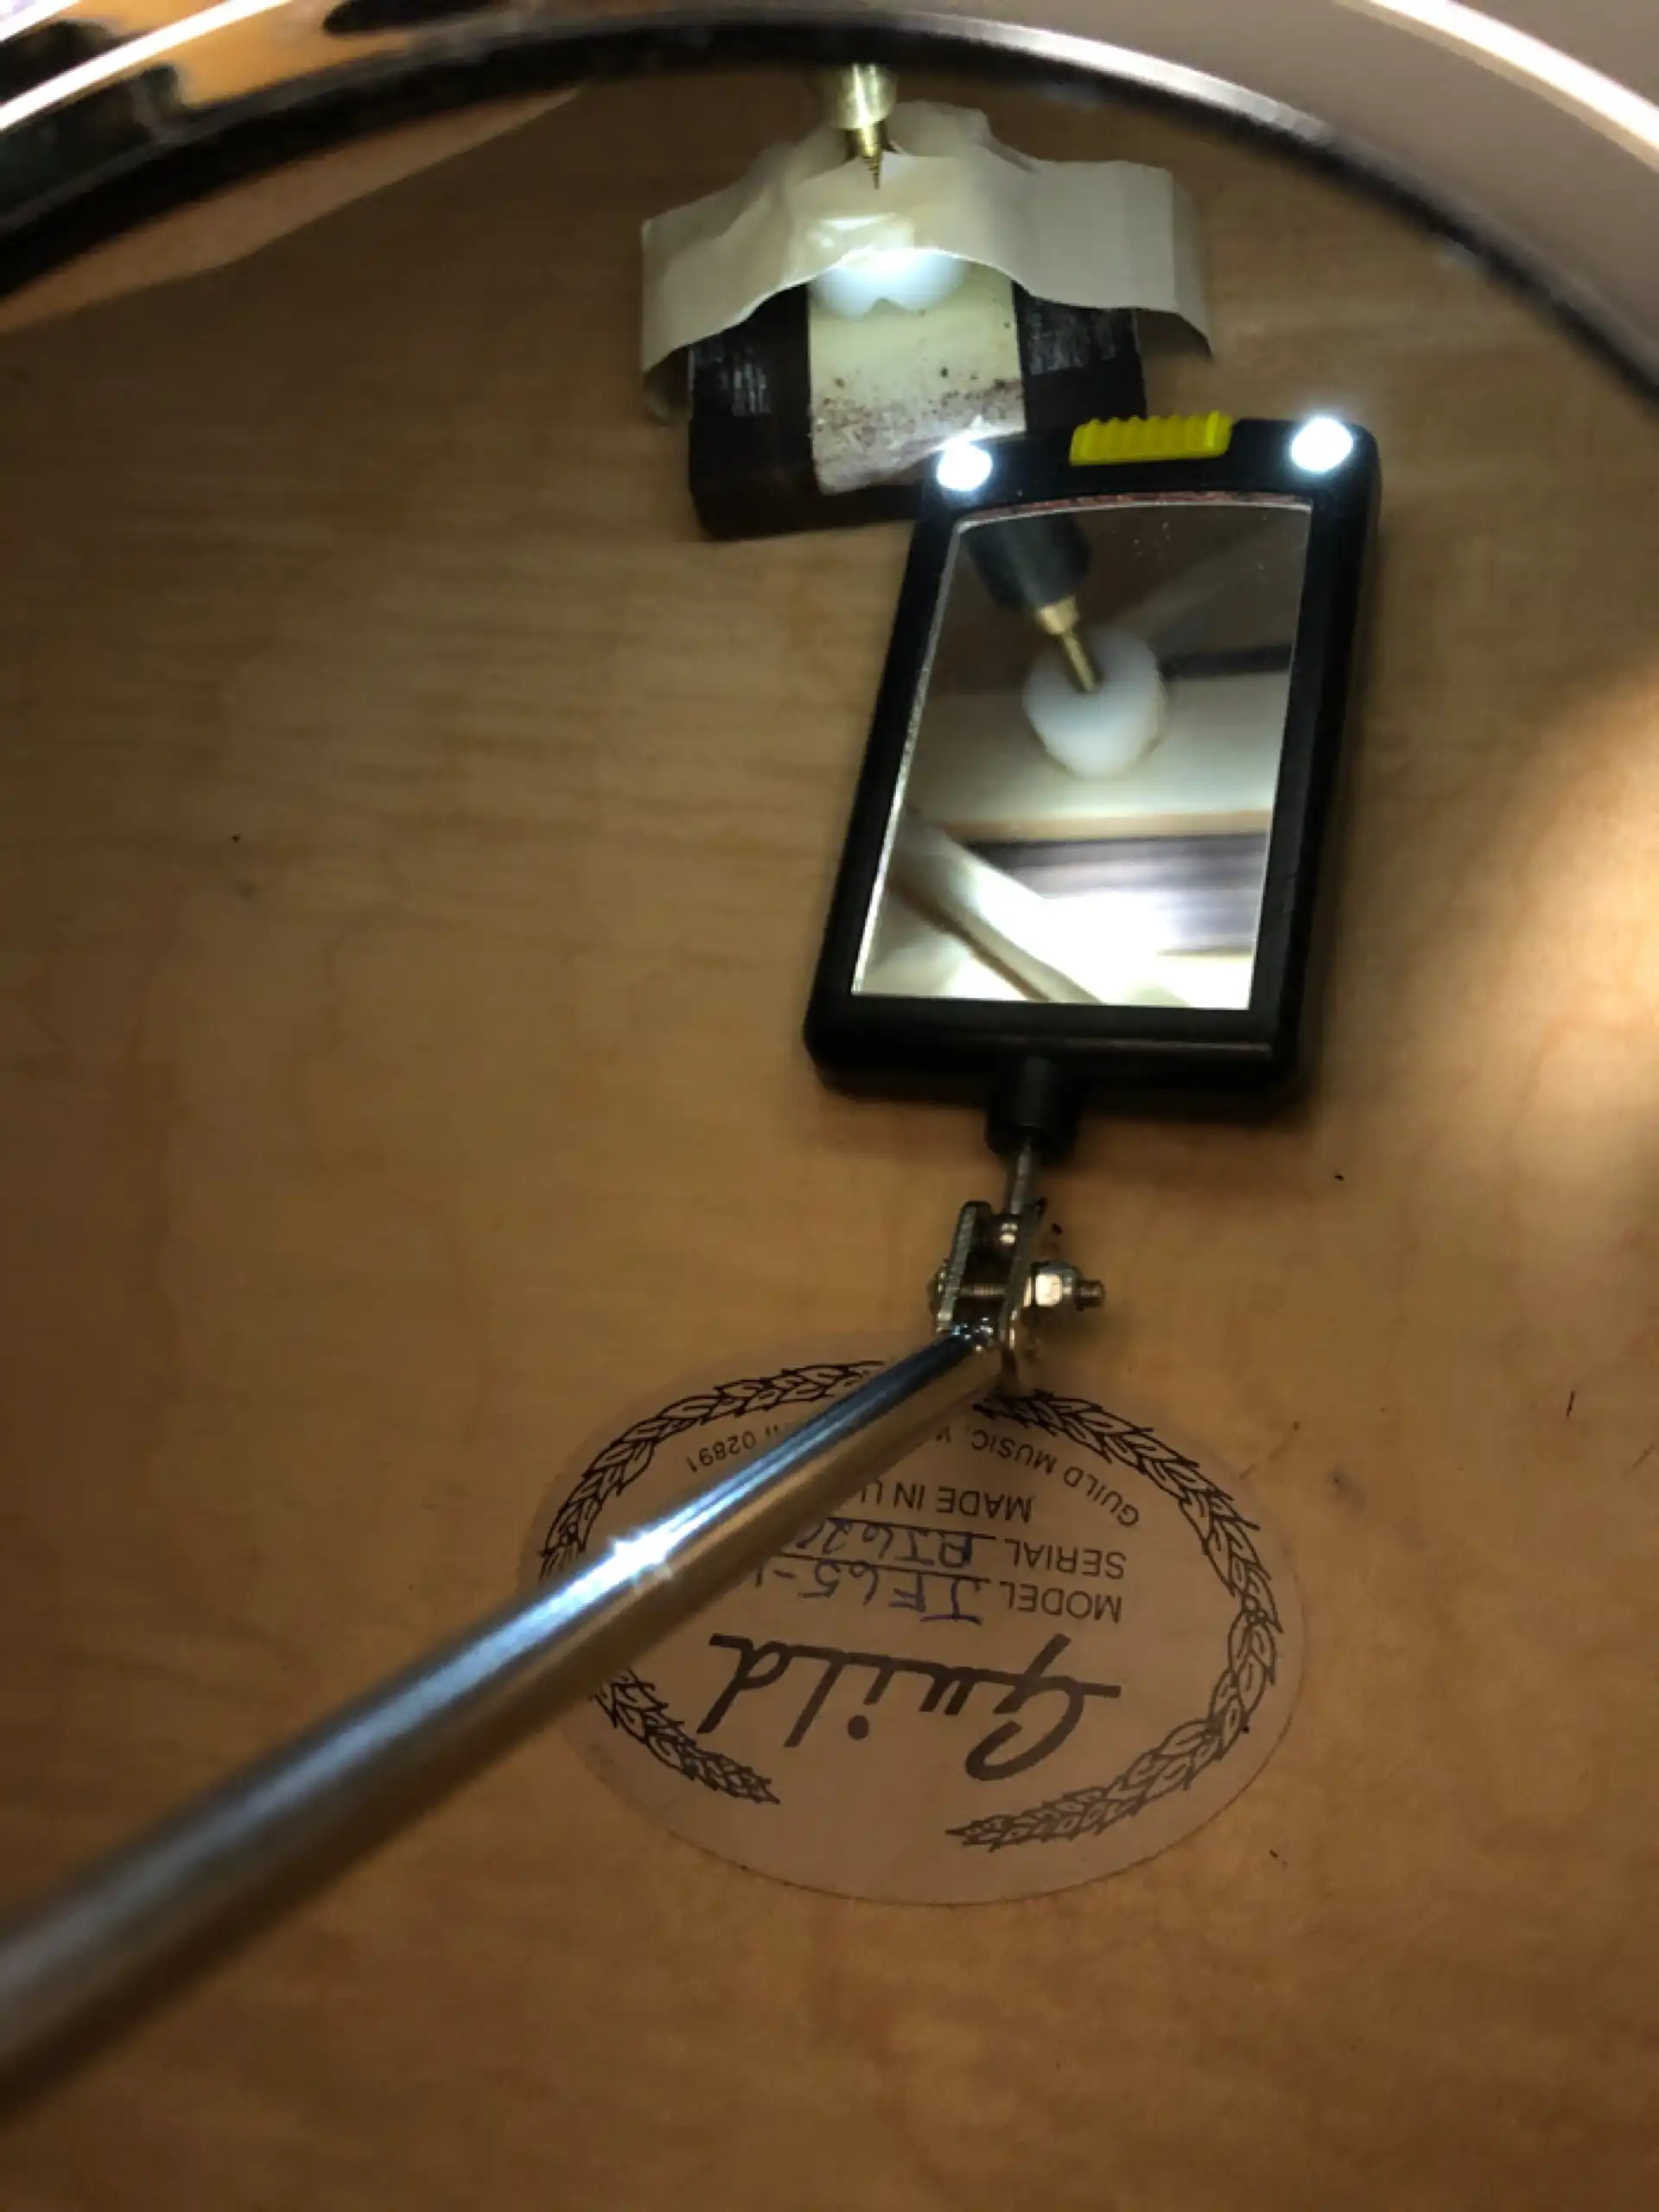
Brace Repair Jack
I can now complete drilling the strings holes the remainder of the way through the Bridge and all the way through the Spruce soundboard and Maple/Rosewood laminated Bridgeplate.
Drilling String Holes
Without the piece of wood held tightly up against the Bridgeplate, the drill will splinter the wood of the Bridgeplate (in this case, Rosewood) as it exits the hole. Those splinters can range in size from tiny to “Oh No!”, and they all leave divots behind, small craters that compromise the proper seating of the ball end of the string which should rest tight up against the plate. Holding the sacrificial wood in place during the drilling results in very clean holes having no tearout.
Clean Holes in the Bridgeplate
The holes through the bridge get countersunk then reamed to match the taper of the bone bridge pins.
Bridge Pin Holes
A few steps back I mentioned the new frets would be Gold, not Nickel. I maintained the original fret dimensions, though the new frets will initially stand a bit taller, as they are both new (not worn) and will be crowned (not filed flat). Being a harder material, the new frets will perform well.
The fretboard is bound, resulting in the damming up of the ends of the fret slots which have been cut across the full width of the board. The tang of each fret end must be removed to prevent the metal tang from crushing and destroying the binding.
Fret Tang
There are two methods commonly used to seat the frets down into the slots. I can hammer them in or press them. Having done my share of both, I am pressing these frets into place.
Fret Press
The extra fret material gets trimmed off with a pair of nippers. Then the top of the frets are leveled. Even though the fretboard was leveled (sanded flat across its length) prior to adding the frets, it is essential to ensure the tops of the frets, the initial point of contact between the neck and the strings, is perfectly level. Not doing so will result in string buzz and/or string to fret contact in unexpected locations, and the sounding of wrong notes. By placing a straightedge atop the frets it is possible to see any variations from perfect, and correct them, if necessary.
Fret Leveling
Depending on the degree of correction (how much of the rounded top of the fret get filed during the leveling process) the frets need re-crowned (rounded). First, a ramp or bevel is filed into each fret end, then the frets are crowned, filed smooth, and polished.
Frets Complete
I have threatened to write an article dedicated to the topic of tuning machine heads (or tuners) for years and years. Each time I start, I end up exhausting myself trying to articulate the simple concept of tightening a string to pitch that has so many (patented) variations in approach. This will not be one of those attempts.
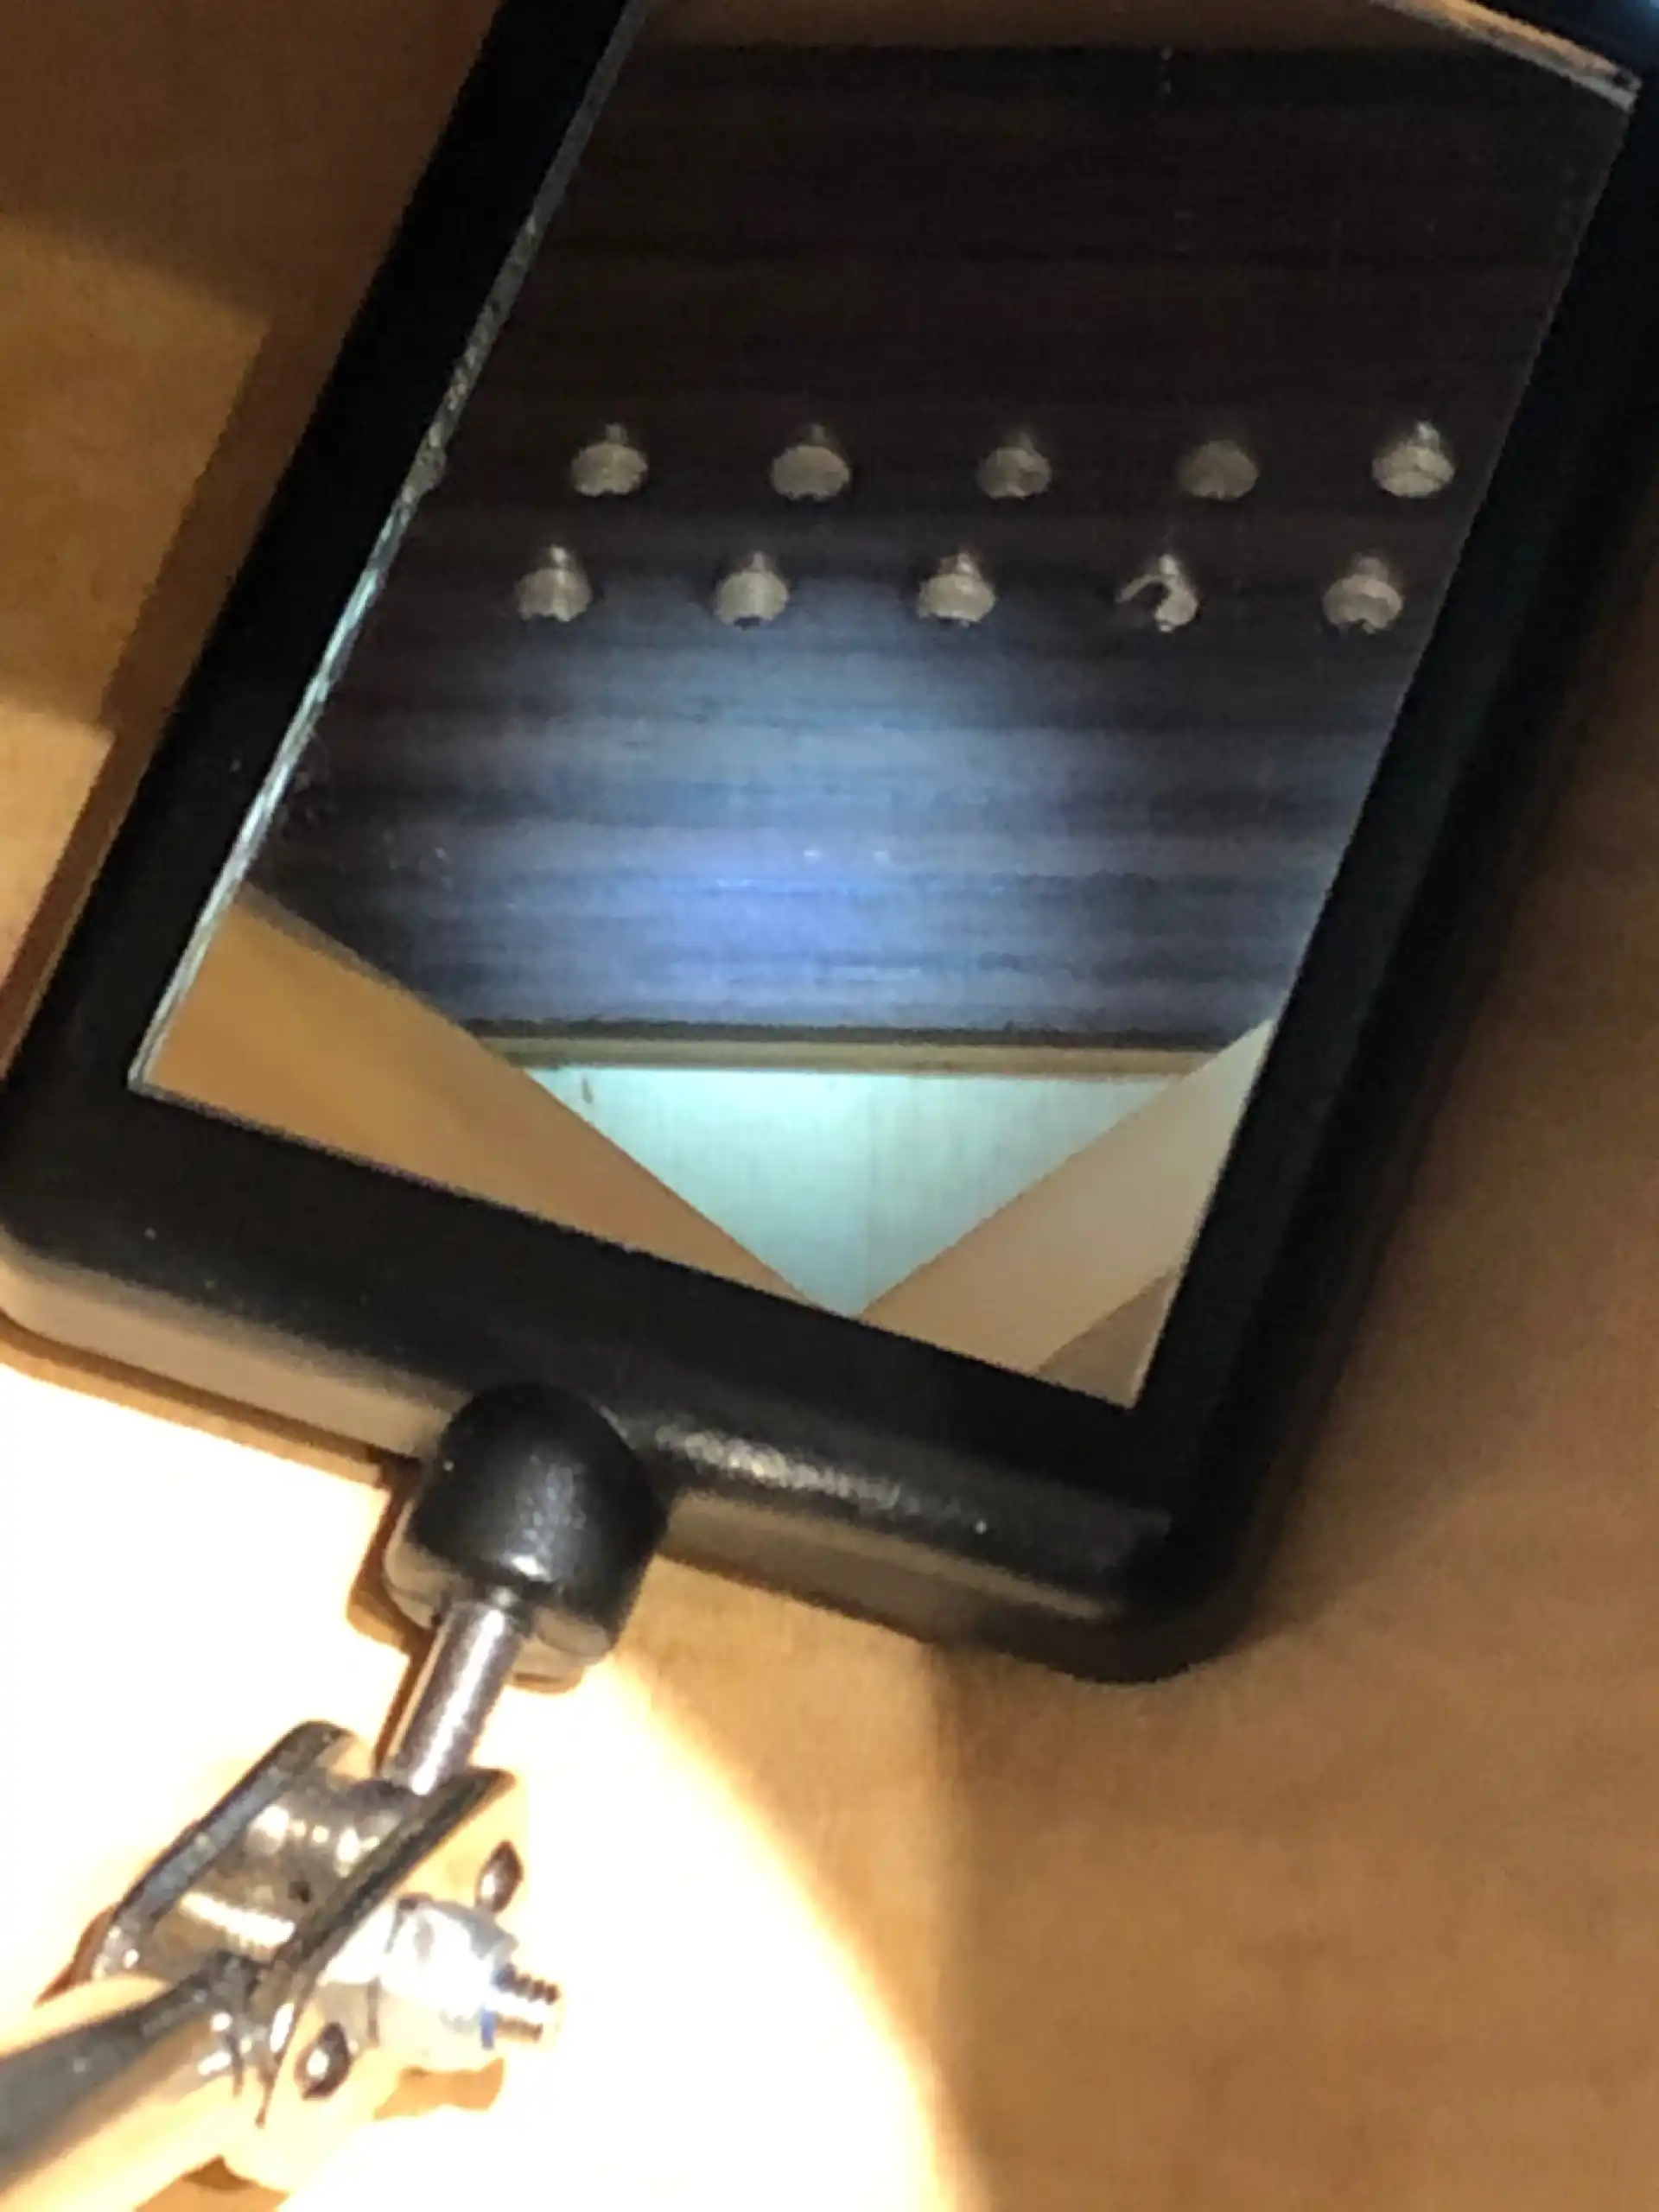
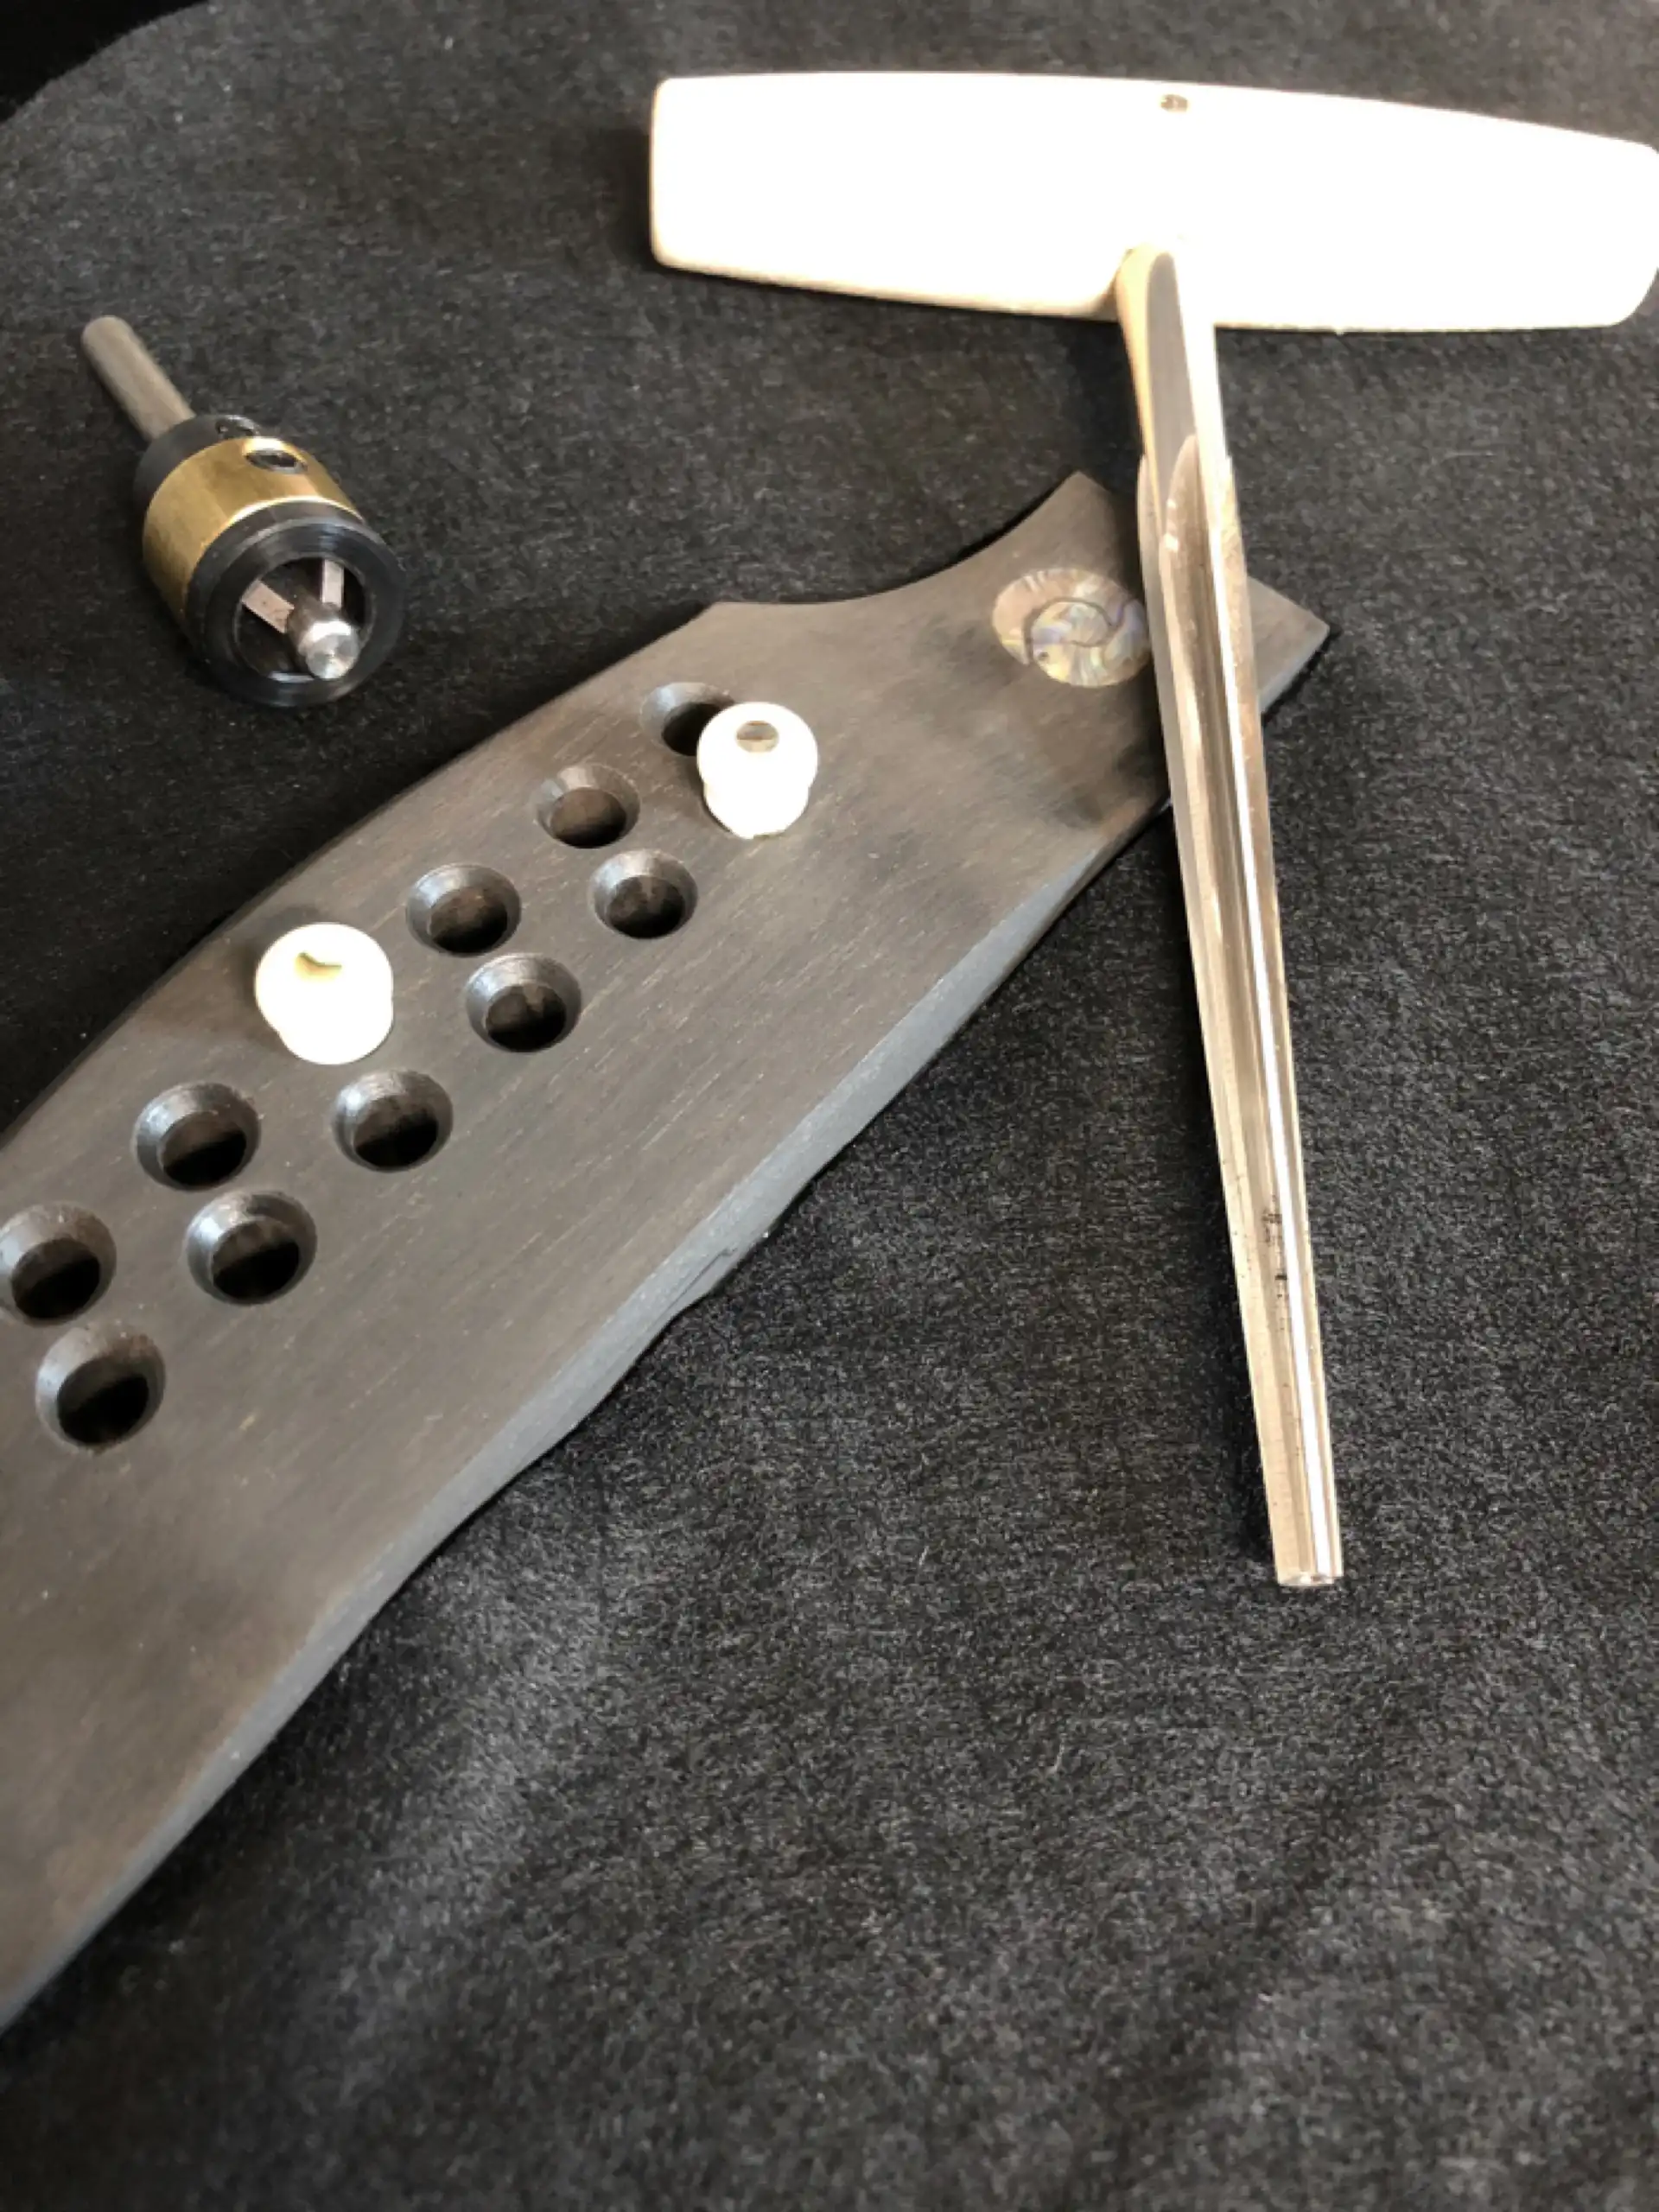
Here is the pertinent information: The Guild 12 string headstock will not accommodate any and every machine head ever designed; there is a limited offering that will fit. Happily, one of the industry leaders, Grover Musical Products, has a set of tuners that is perfect for the job. The Grover 505G12 Gold-plated, Locking, Mini-Rotomatics fit like a glove, look great, and work even better than they look. The only upgrade I made to the stock tuners was to swap out the gold metal buttons for Grovers' black Ebony buttons. Absolutely stunning!
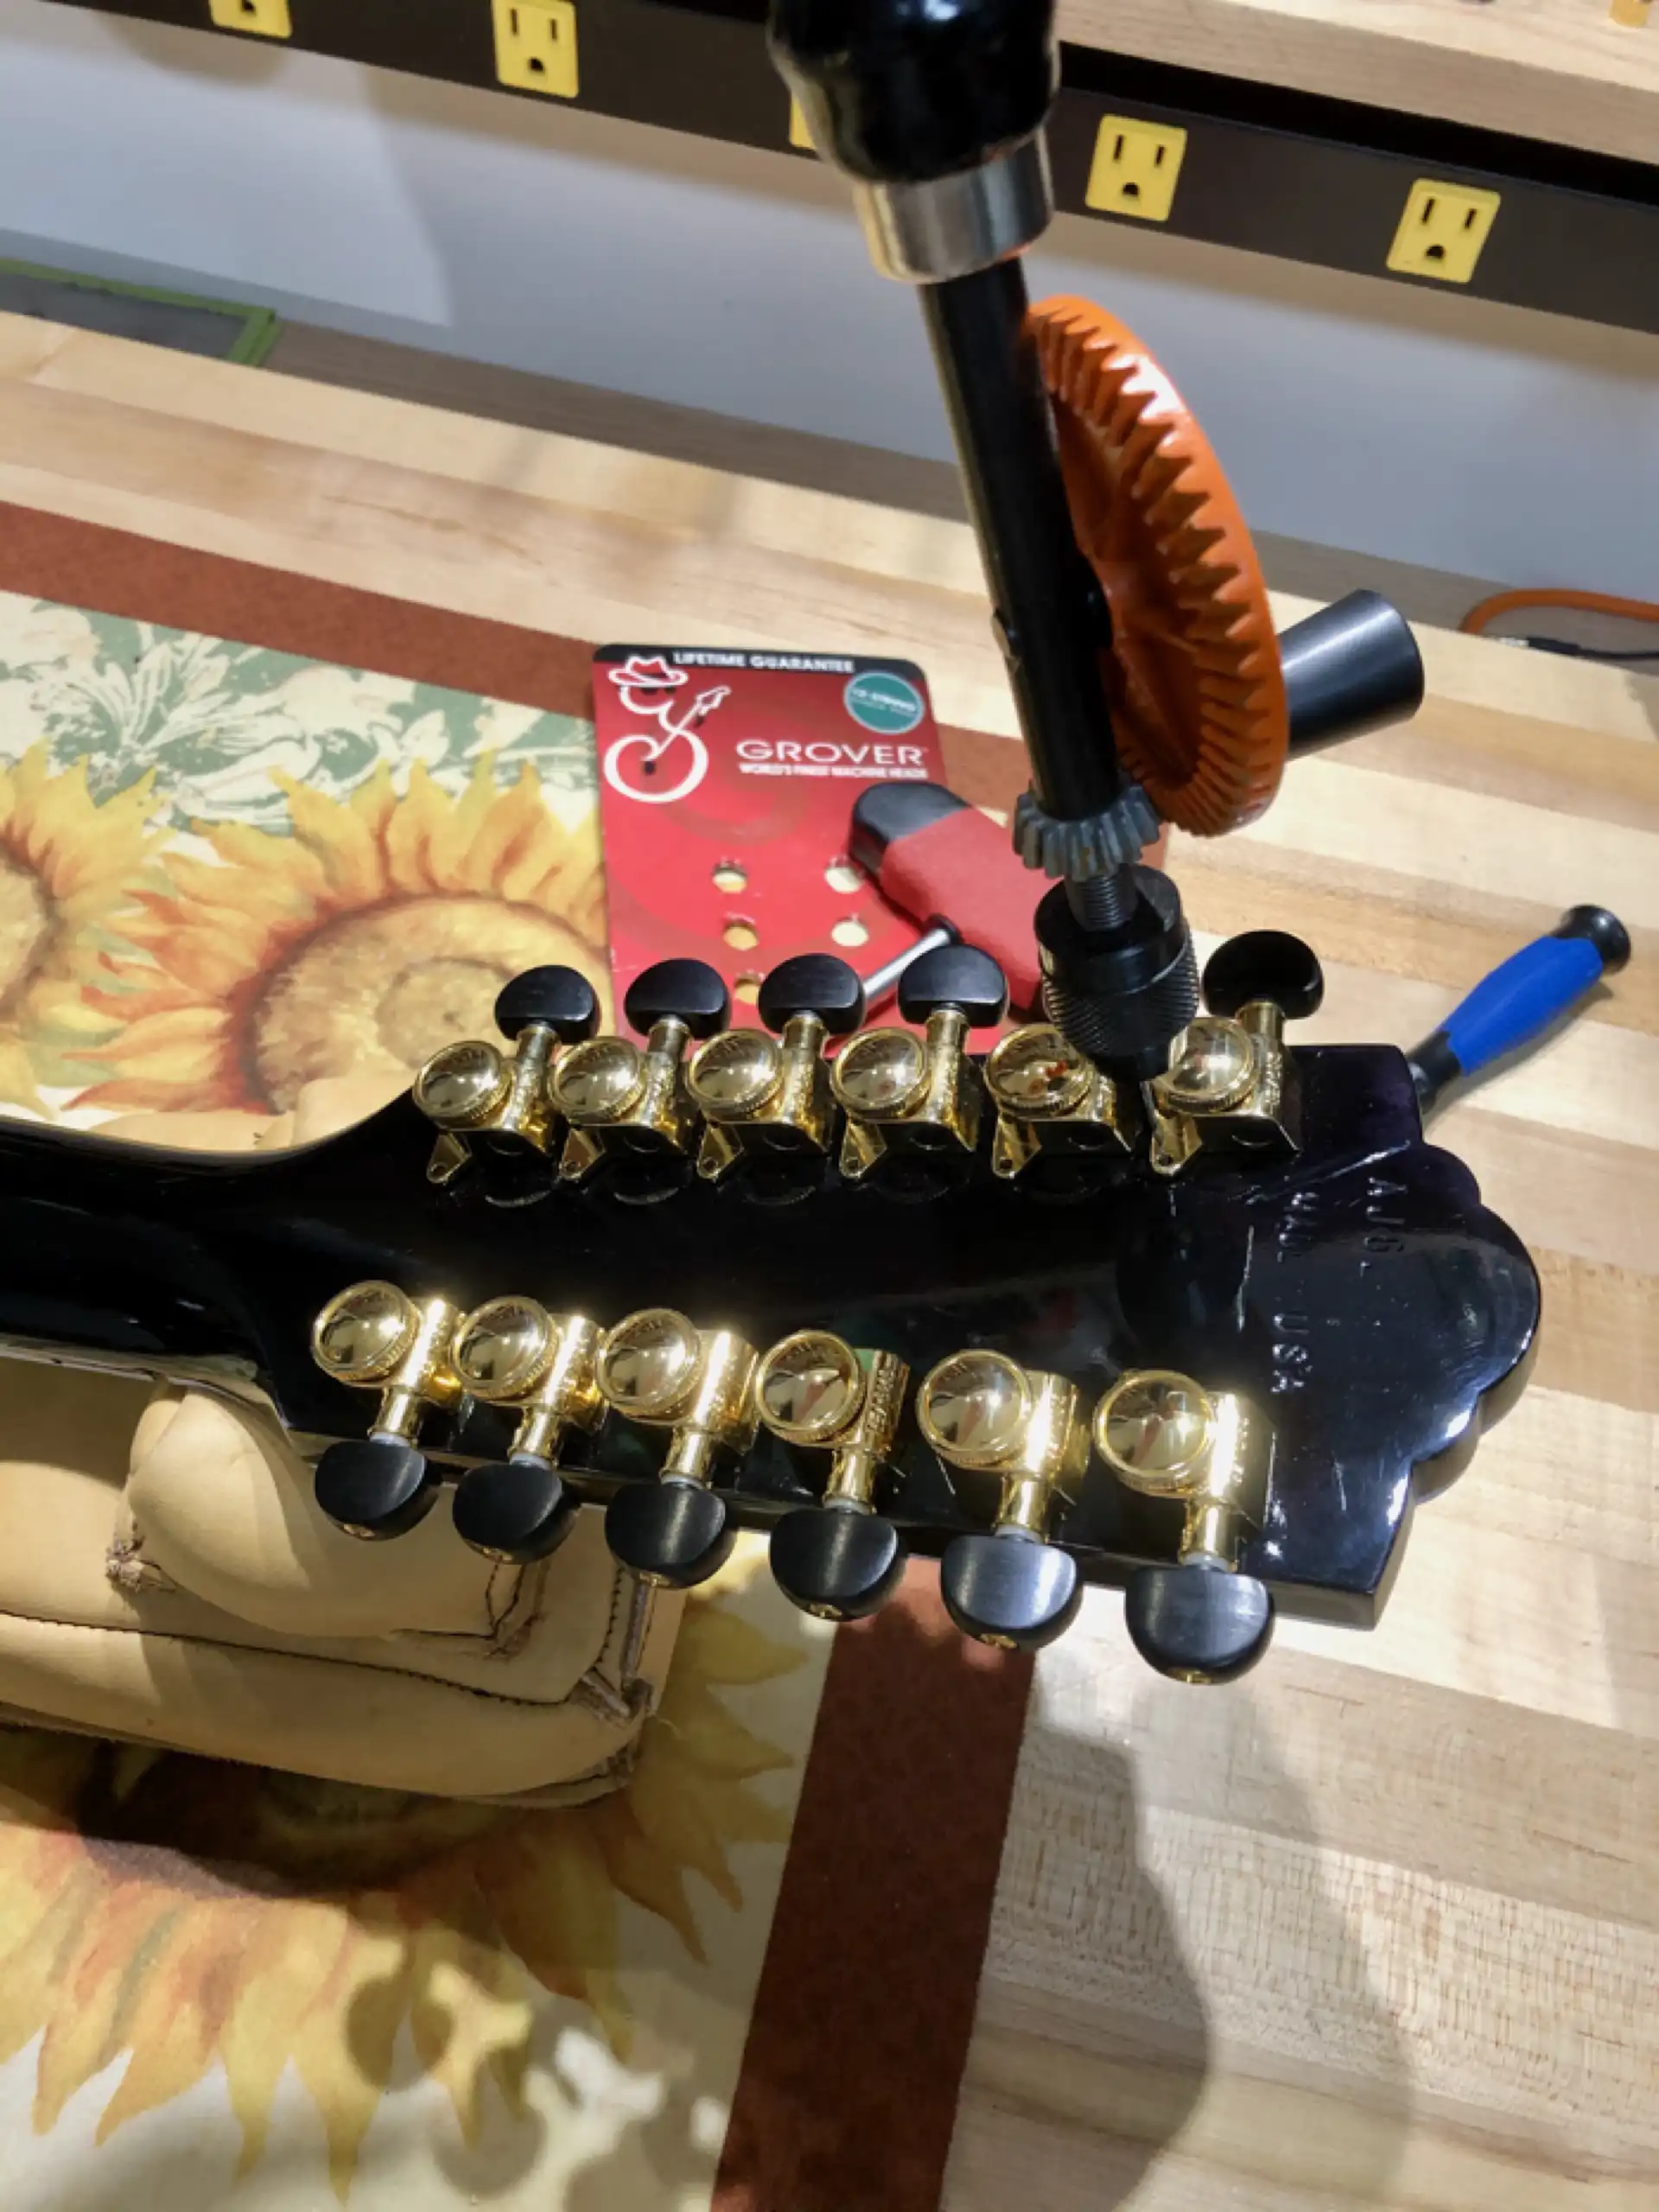
Grover 505G12 Tuners
A new nut gets fashioned from a choice piece of bone. Bone has a lovely, vitreous quality about it. When dropped a short distance onto a hard surface, you can hear the glass-like “tink, tink” sound as it makes contact. This property contributes to the much-loved sound of an acoustic guitar fitted with new strings, tuned to pitch, and strummed across “open” strings (nut to saddle), when contrasted with fretted strings (metal fret to saddle). I begin with a squared blank.
Nut Blank
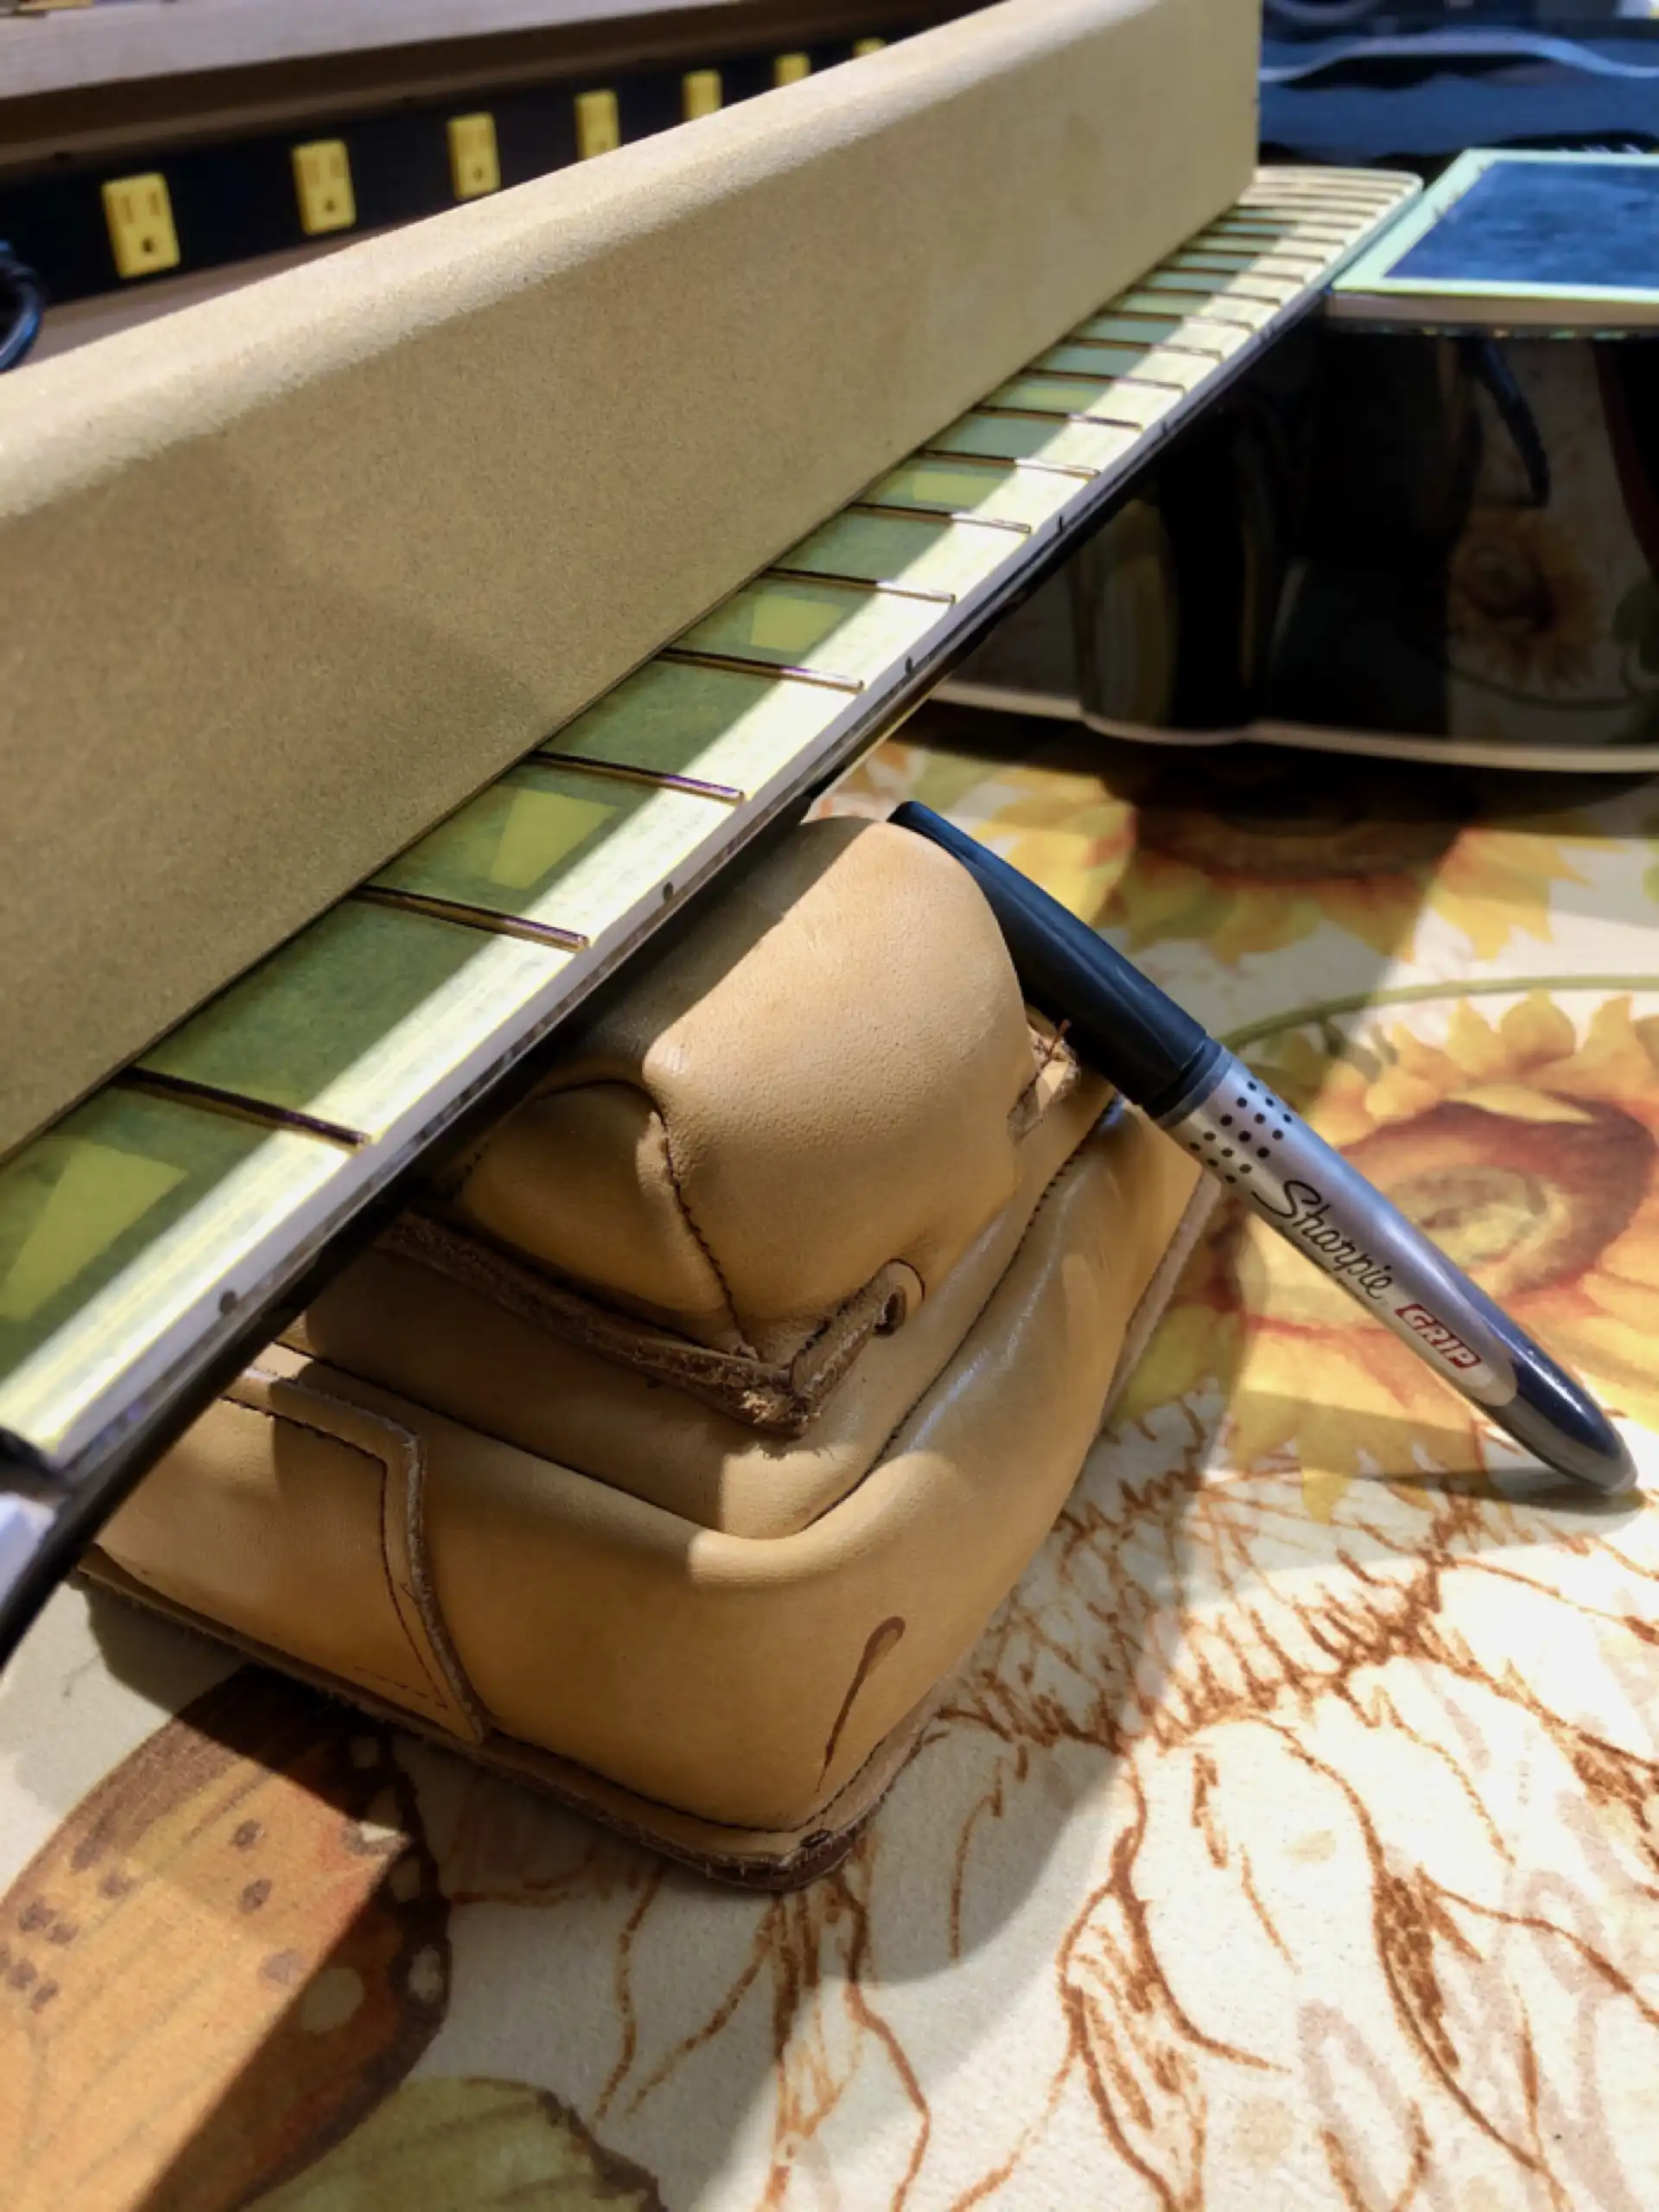
The blank needs sized to fit between the headplate on the headstock and the end of the fretboard. All these surfaces need to be flat and planar. Bone is a rather hard and brittle material. Attempting to remove small amounts is best done via sanding and/or filing. Holding an already small piece of bone up against a scrap of wood using double-stick tape preserves my fingers for another day.
Nut Blank Dimensioning
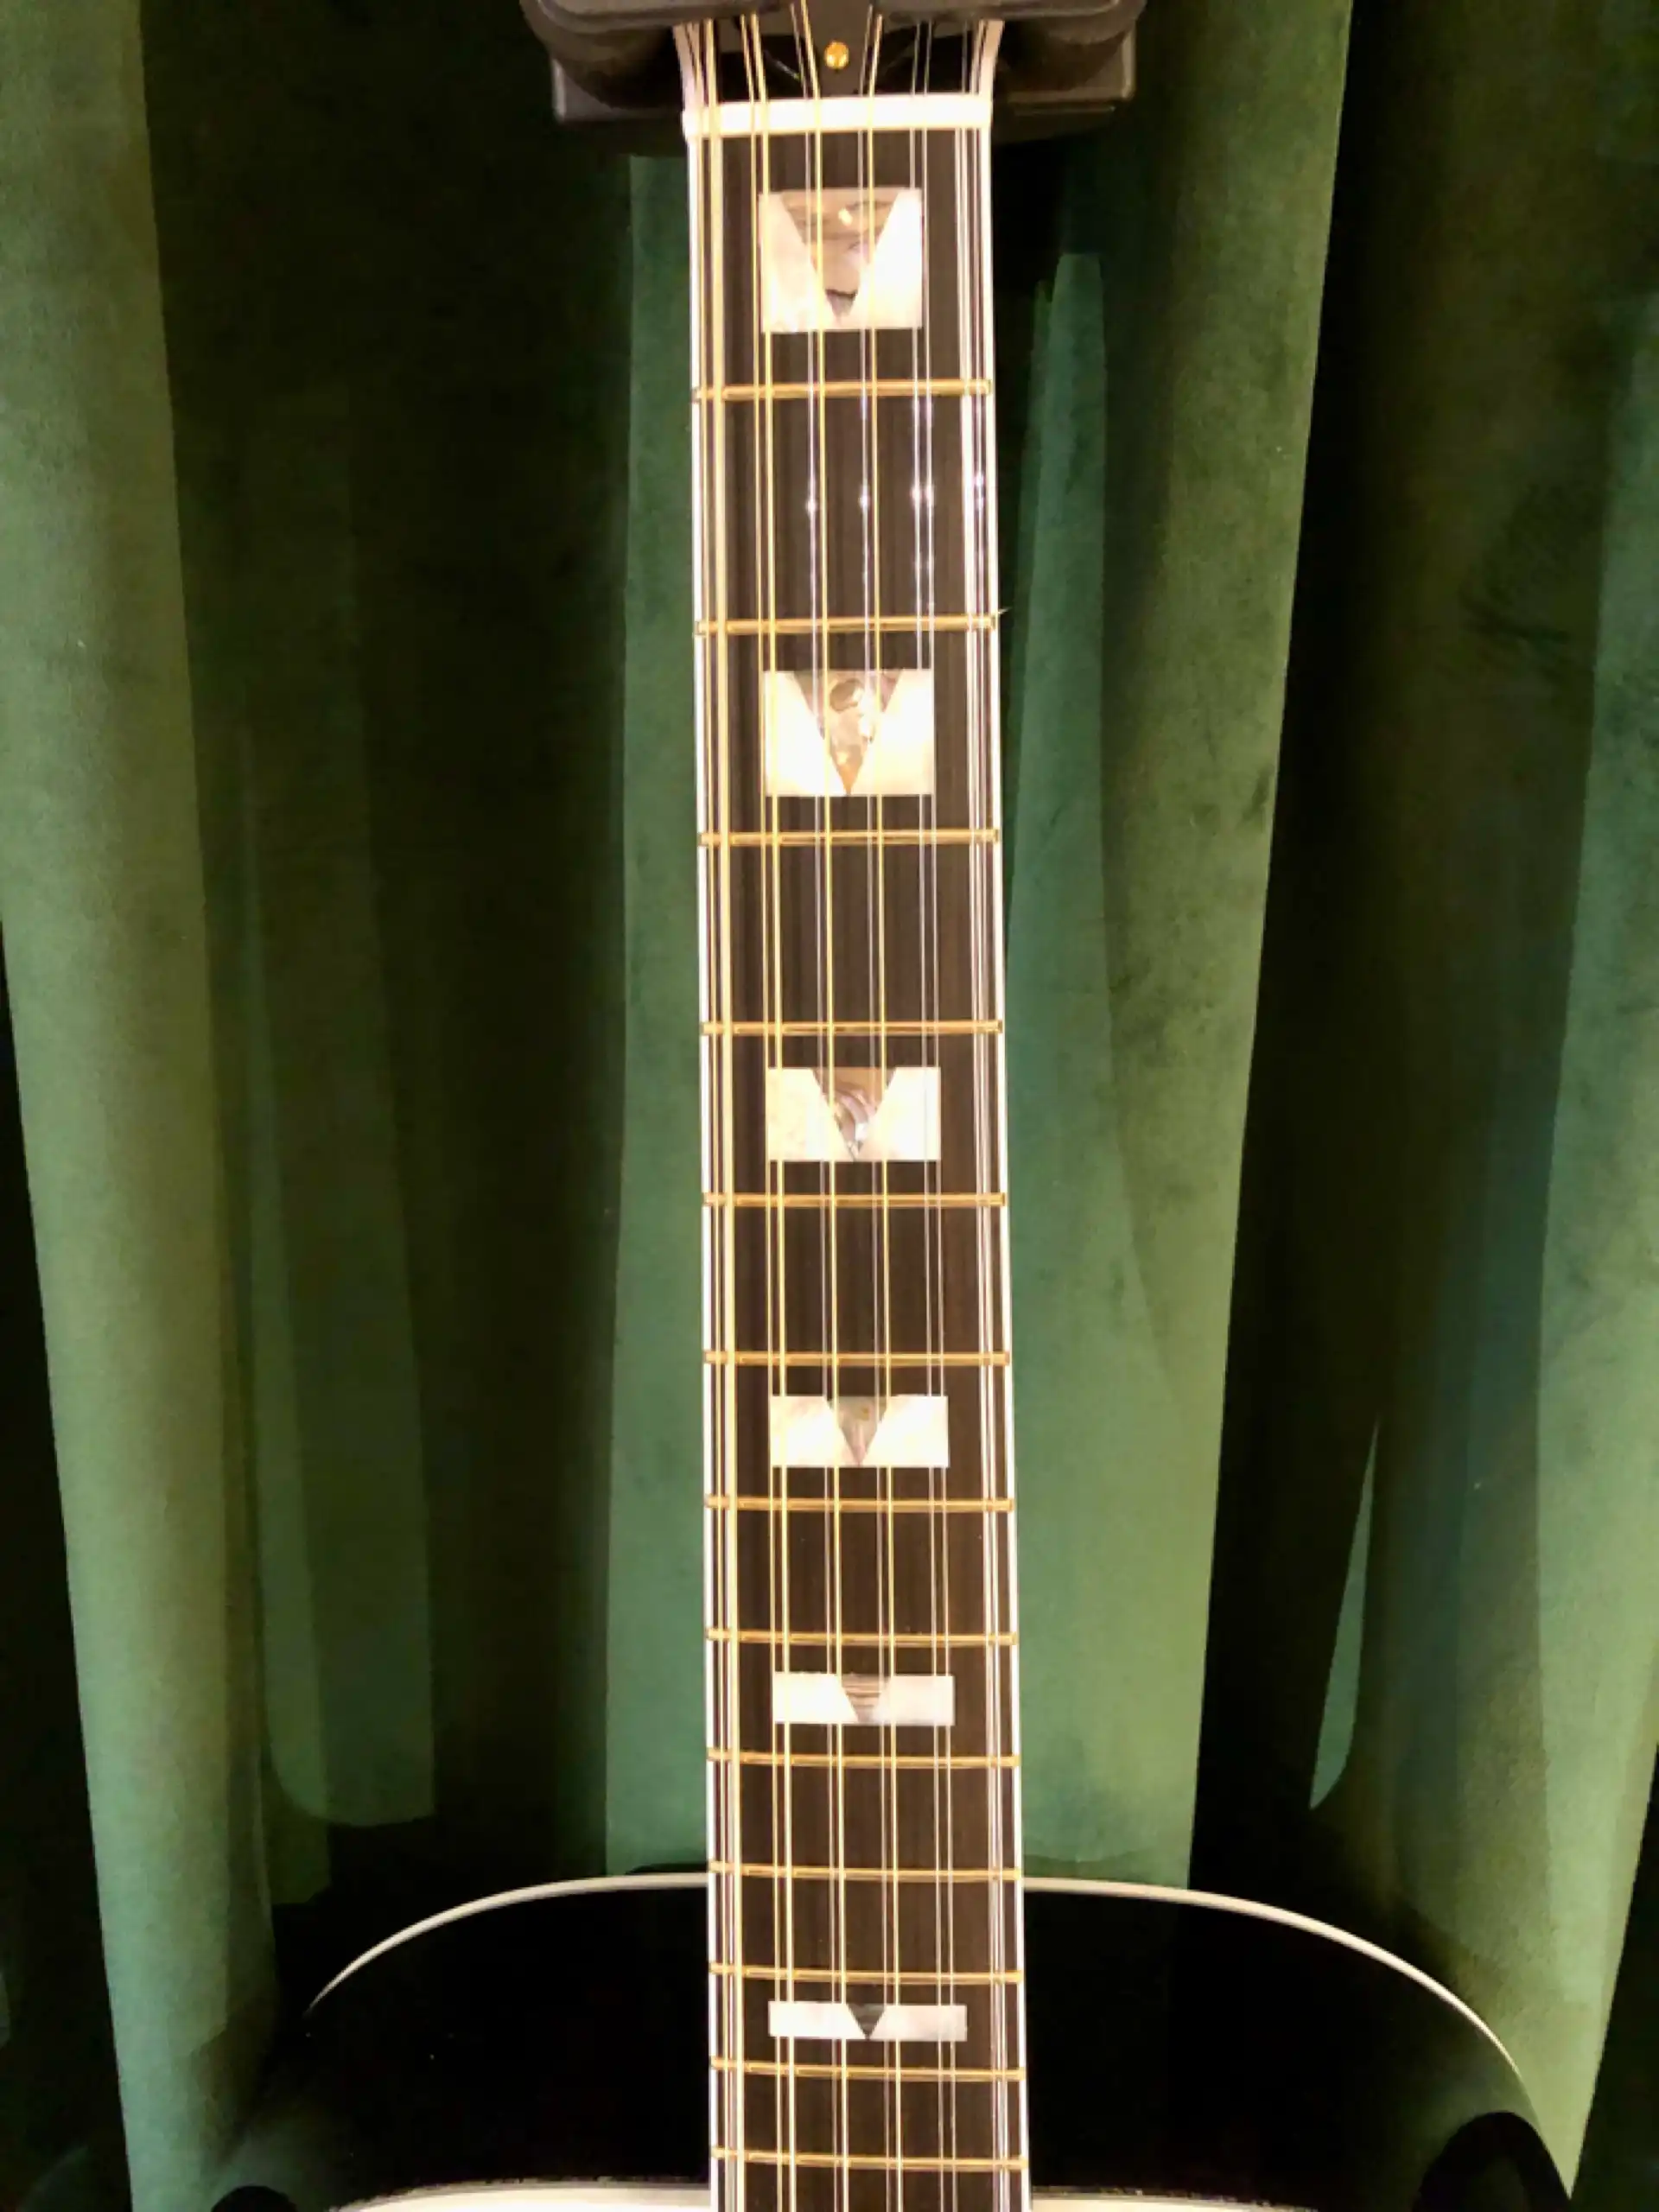
The top of the nut gets shaped to follow the radius of the fretboard at the first fret.
Nut Radius
The strings rest in rounded slots cut into the top of the nut. The purpose of the slots is to retain the strings in precise position. Without the slots, as a result of the placement of the machine heads (tuners) on the headstock, the strings will slide together under tension and make the instrument unplayable. This nut gets slotted in such a way as to deliberately position the courses of paired strings closer together for improved playability.
Nut String Slots
Each string slot in the nut must be properly radiused and sloped away from the front edge of the nut. The height of the fretboard to each string has to be perfect. Too low and the strings will buzz. Too high and unnecessary pressure is required to fret the strings.
12 String Nut
The distance of the string measured from where it leaves the nut to the point it crests the saddle, in relation to the spacing and placement of the frets, determines whether all the notes of a fretted instrument play in tune up and down the fretboard.
Intonation is a general term that helps to describe the cold, hard reality that an acoustic guitar is an analog (not digital) instrument and, regardless of scale length and/or fret placement, it can be very difficult to get every note to play in perfect pitch. When a so-called open string is fretted, the distance from the fret to the saddle is shortened, resulting in a higher-pitched note. The scale length has been shortened, momentarily. In order to achieve that shortening, the overall length of the string has been increased, as measured from nut to saddle (the shortest distance between two points is a straight line). Fret placement is based on open string scale length, which deviates each time a string is fretted. To accommodate the ever-changing string length madness, compensation can be made to each string's open string scale length adjust the intonation (think: perfect pitch capacity) for each string. Even if we get a guitar set up to play in perfect pitch, as any guitar player knows, all one has to do is depress a given string just a wee bit harder when fretted, thereby shortening the scale length once again from its theoretically perfect length... and the string pitch sounds sharp. Worse yet, most guitars set up to play in uber-perfect pitch cannot be played in concert with other instruments (hint: unless everybody else has done the same with their instruments). This was a fascinating phenomenon to witness in the infamous Buzz Feiten Compensated Nut era, but that is a topic for another day.
Compensation is a term that describes the effort made to most accurately provide the correct scale length for each individual string. This is typically accomplished by angling the saddle slot such that the length of the highest tension string(s) are at scale length (or set slightly longer) and the length of the lowest tension string(s) are more dramatically increased. Shaping the top of the saddle to correct the intonation for the balance of the strings provides for the most accurate playing experience.
The bone saddle that shipped with the guitar is quite thin, a mere 3/32″ thick. The saddle slot (cut into the old bridge) was only slightly compensated (the slot angled back slightly on the bass side), but the saddle contains no additional intonation adjustments of any kind. This type of setup is fine for an occassional strum or two, but would drive a serious player crazy over time.
It has been common for some time now to file (or sand) a contour across the top of straight saddles (even thin ones) so that the bass-most string crests the saddle at the back of the material (farthest from the nut) and graduates forward so the 3rd string (or 5th and 6th strings on a 12 string) is cresting at or near the front of the saddle. The crest for the 2nd string (or 3rd and 4th string of a 12 string) is moved to the back of the saddle and the 1st (or 1st and 2nd of a 12 string) is cresting again at the front (closest to the nut). Here is a visual, for comparison:
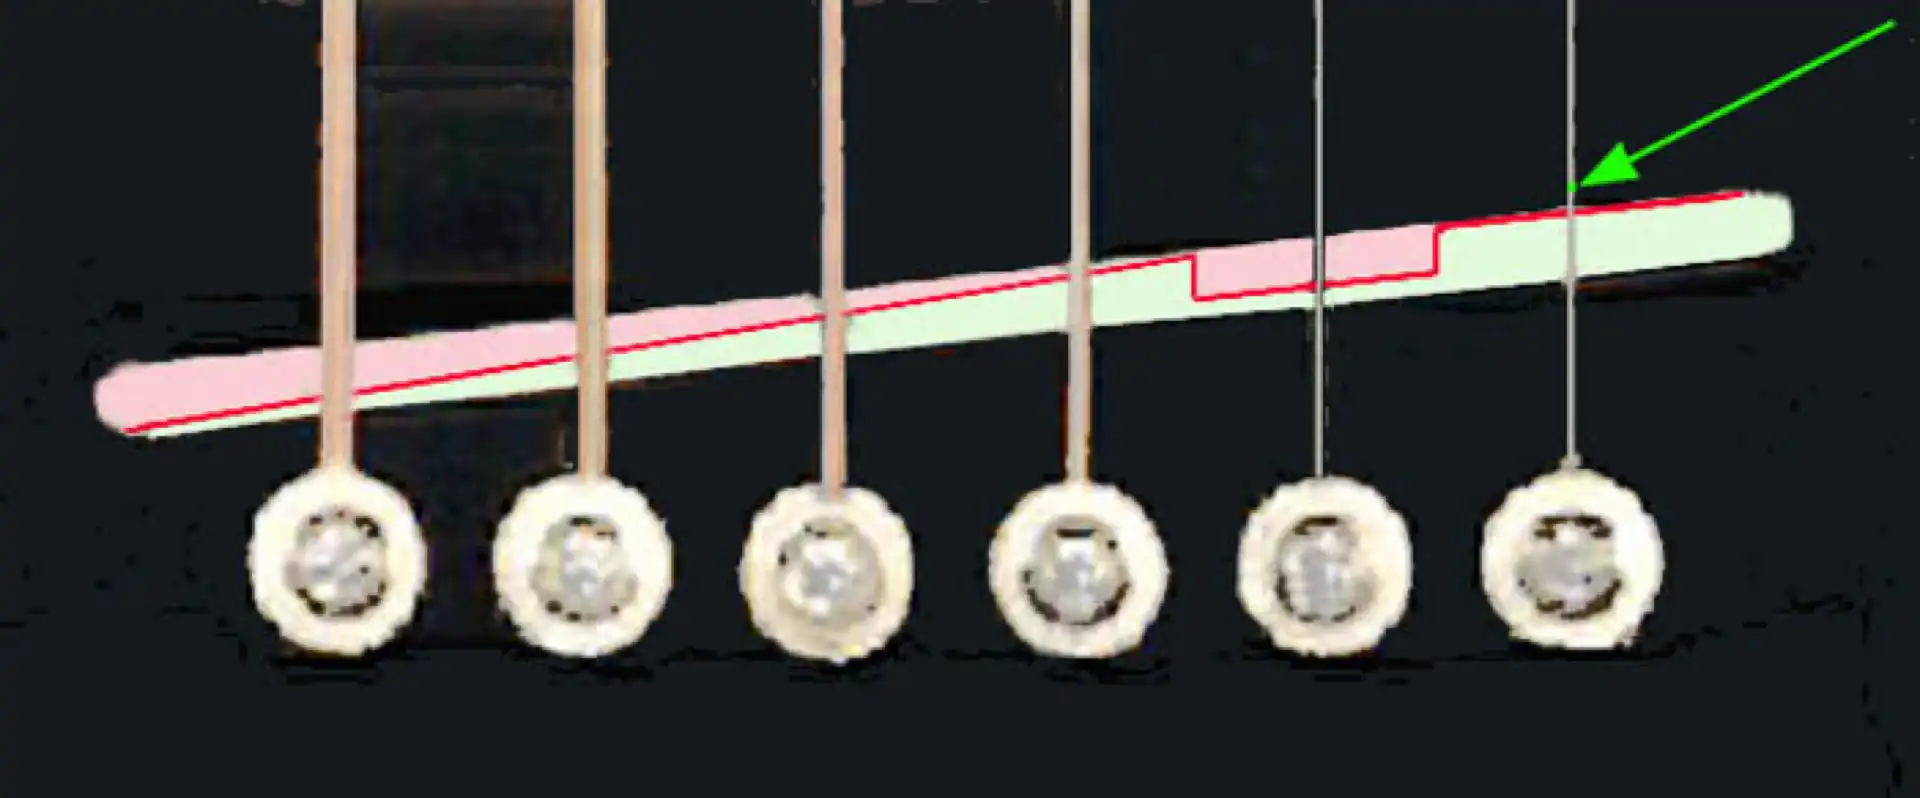
Intonated Saddle
My preference for a 12 string saddle is to begin with a much wider piece of bone, such as 7/32″, and fit it to a 3/16″ slot. Compensating this saddle begins with angling the saddle slot in the bridge so that my thicker saddle provides me with sufficient real estate to perfectly compensate for each and every string's intonation, independent of the other stings. Prior to filing the individual string compensation into the saddle, I need (want) to first identify the position of the strings. I have drilled the holes and fitted the bone bridge pins to position the string pairs closer together.
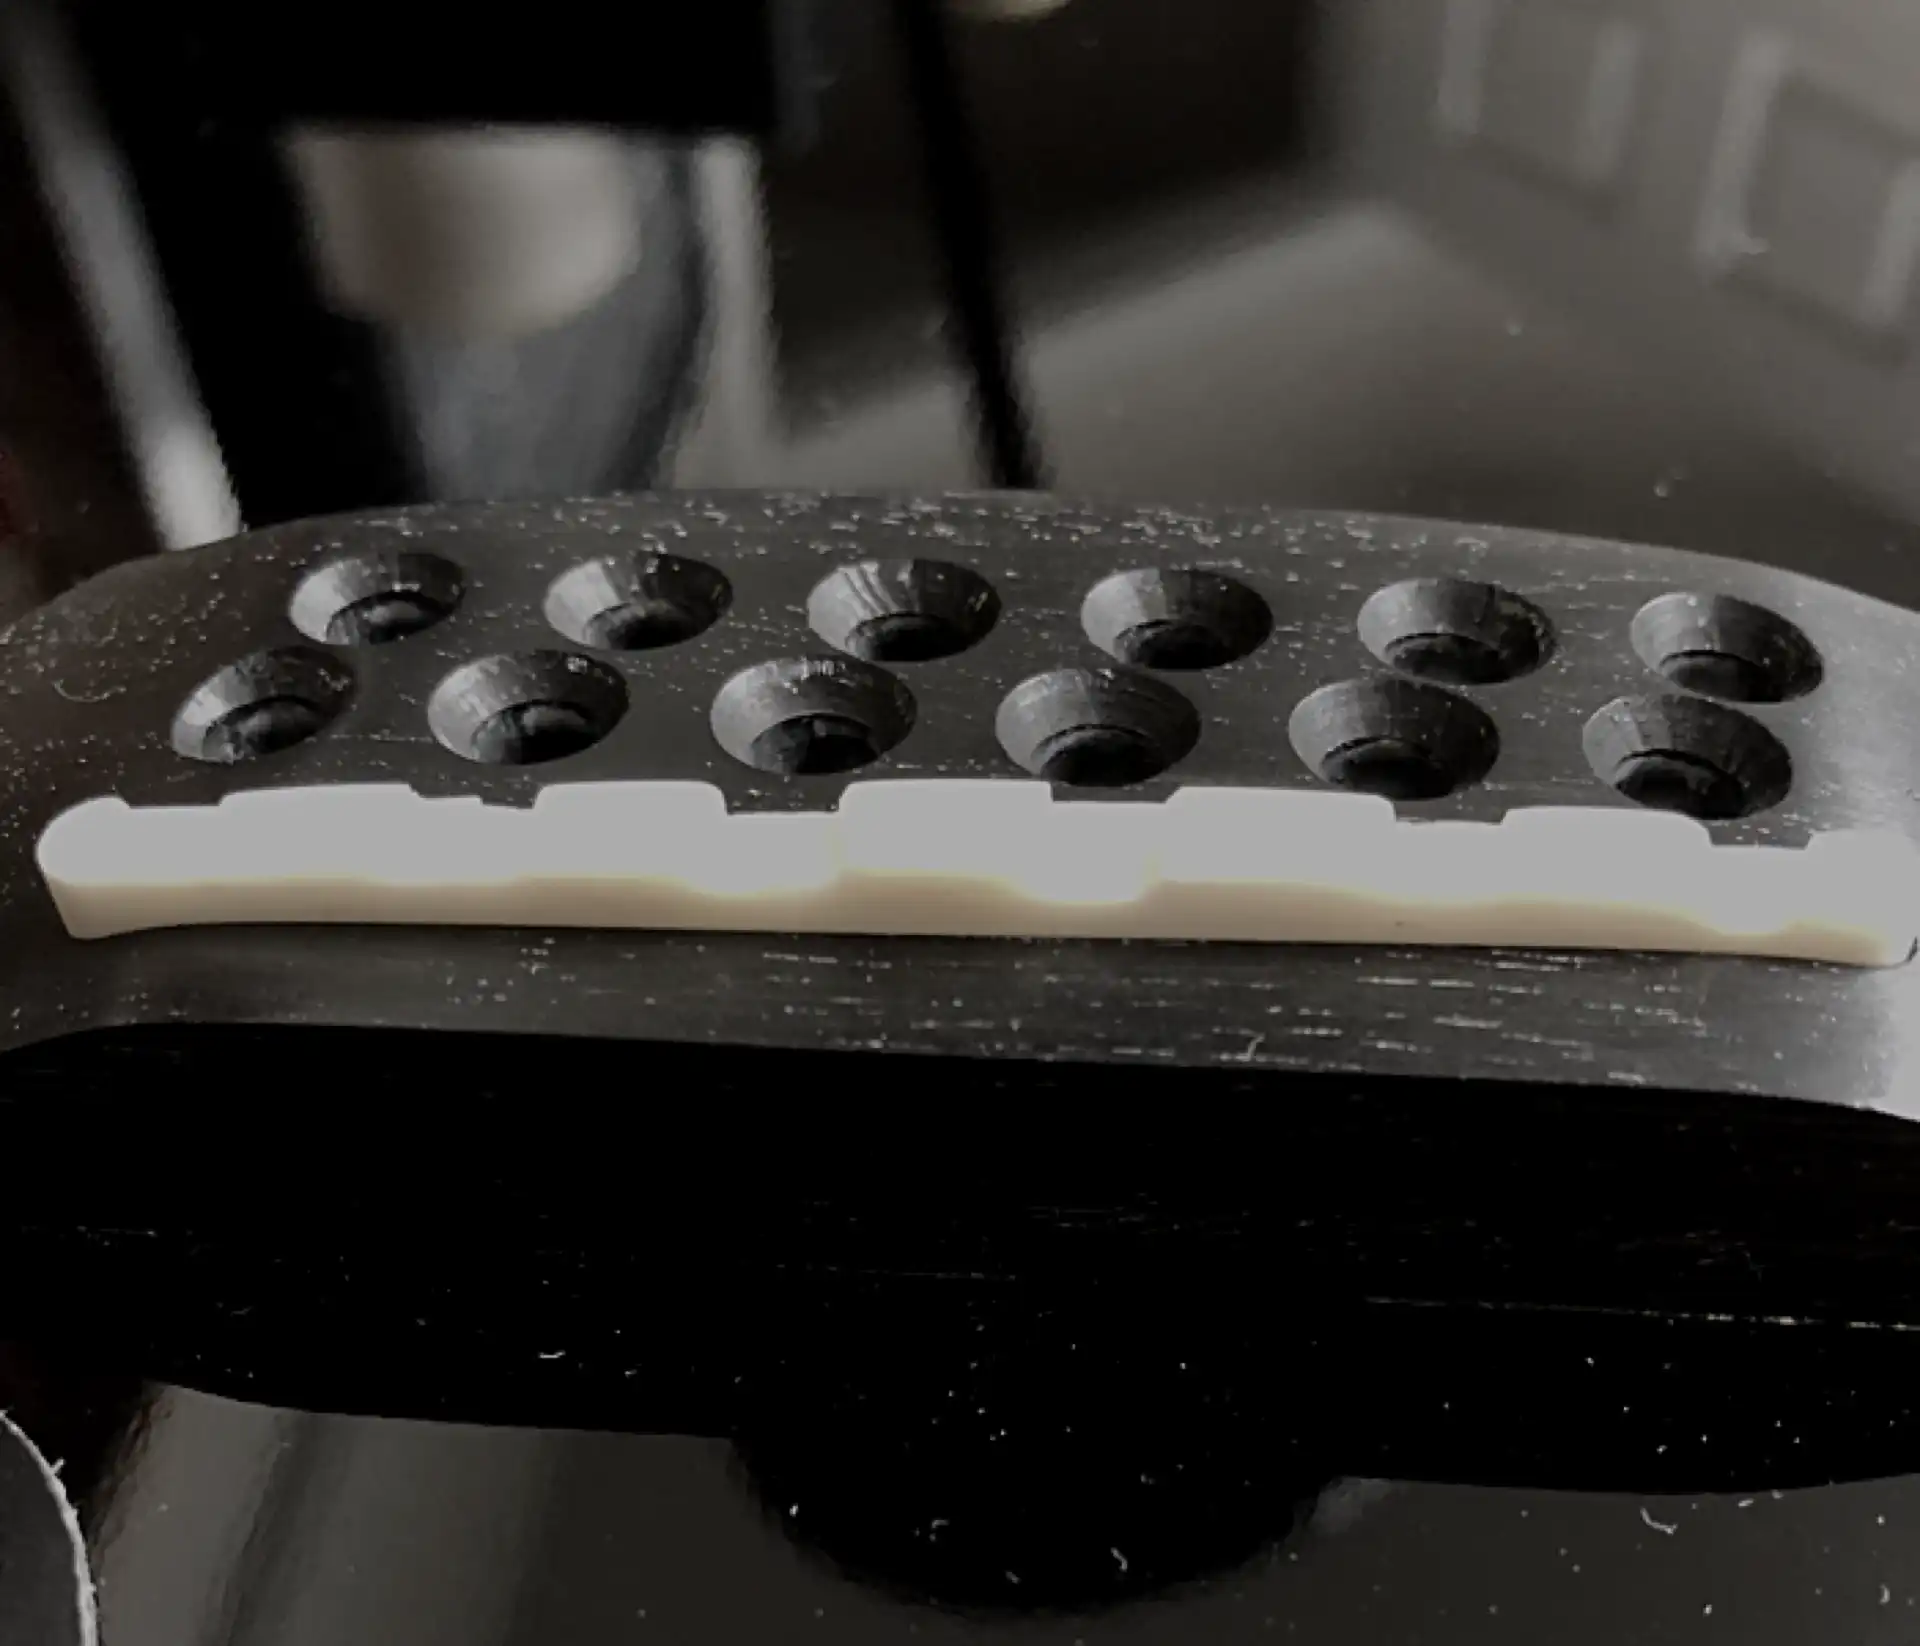
String Positions at the Bridge
When a house is constructed, the new owner(s) cannot move in until a certificate of occupancy is issued. But throughout the entire construction process the house is increasingly visible and can even be walked through by prospective buyers who can envision the home of their dreams. They may not live in the house, yet, but there is little left to the imagination. In like fashion, a guitar being built takes shape before our very eyes, so we know early on what it is going to look like. However, no one, including the builder, can sample the sound of the new instrument until it is complete. You don't put strings on the guitar until the bridge has been attached. And you don't attach the bridge until the finish has been applied. And you don't apply the finish until the fully constructed guitar has been sanded. Et cetera. A given builder's experience will steer him in the direction of a predetermined outcome; it will drive her toward a particular goal. Overall design, wood selection, thicknessing and bracing, along with fine adjustments made to the braced plates, all contribute to what the guitar will be, providing subtle clues along the way and helping to build confidence that the builder is on the right path. But nobody can confirm what the guitar will ultimately sound like until it is strung up for the first time. Anyone thinking that a given luthier doesn't have (at least some) butterflies in anticipation of the first pluck of the strings is kidding themselves.
This instrument can easily handle medium gauge strings, let alone light gauge. But the owner of the guitar wishes it to be set up for extra-light gauge strings. Here is my smartphone video capturing that first strum...
The guitar sounds magnificent! The bass response, which was very weak on the original instrument, is now in perfect balance with the lush, bright midrange that we expect from a well-built Maple 12 string. The highs no longer require a well-placed microphone to hear, thanks to the increased output of the soundboard. They are also now in balance with the lows and mids. I couldn't be happier with the overall sound.
The balance of the work on this guitar is now done for improved playability.
Compensating this saddle involves angling the saddle slot in the bridge so that my thicker saddle provides me with sufficient real estate to perfectly compensate for each and every string's intonation, independent of the others. The 1st and 2nd string pair share the same distance from the nut, which is also the shortest overall string length. The 3rd and 4th string pair are also equidistant from the nut. The remaining 8 strings are all different, and are determined one-at-a-time. The longest string length (the crest in the saddle that is farthest from the nut) is reserved for the string having the least tension, largest diameter and tuned the lowest. In this case that will be the 11th string.
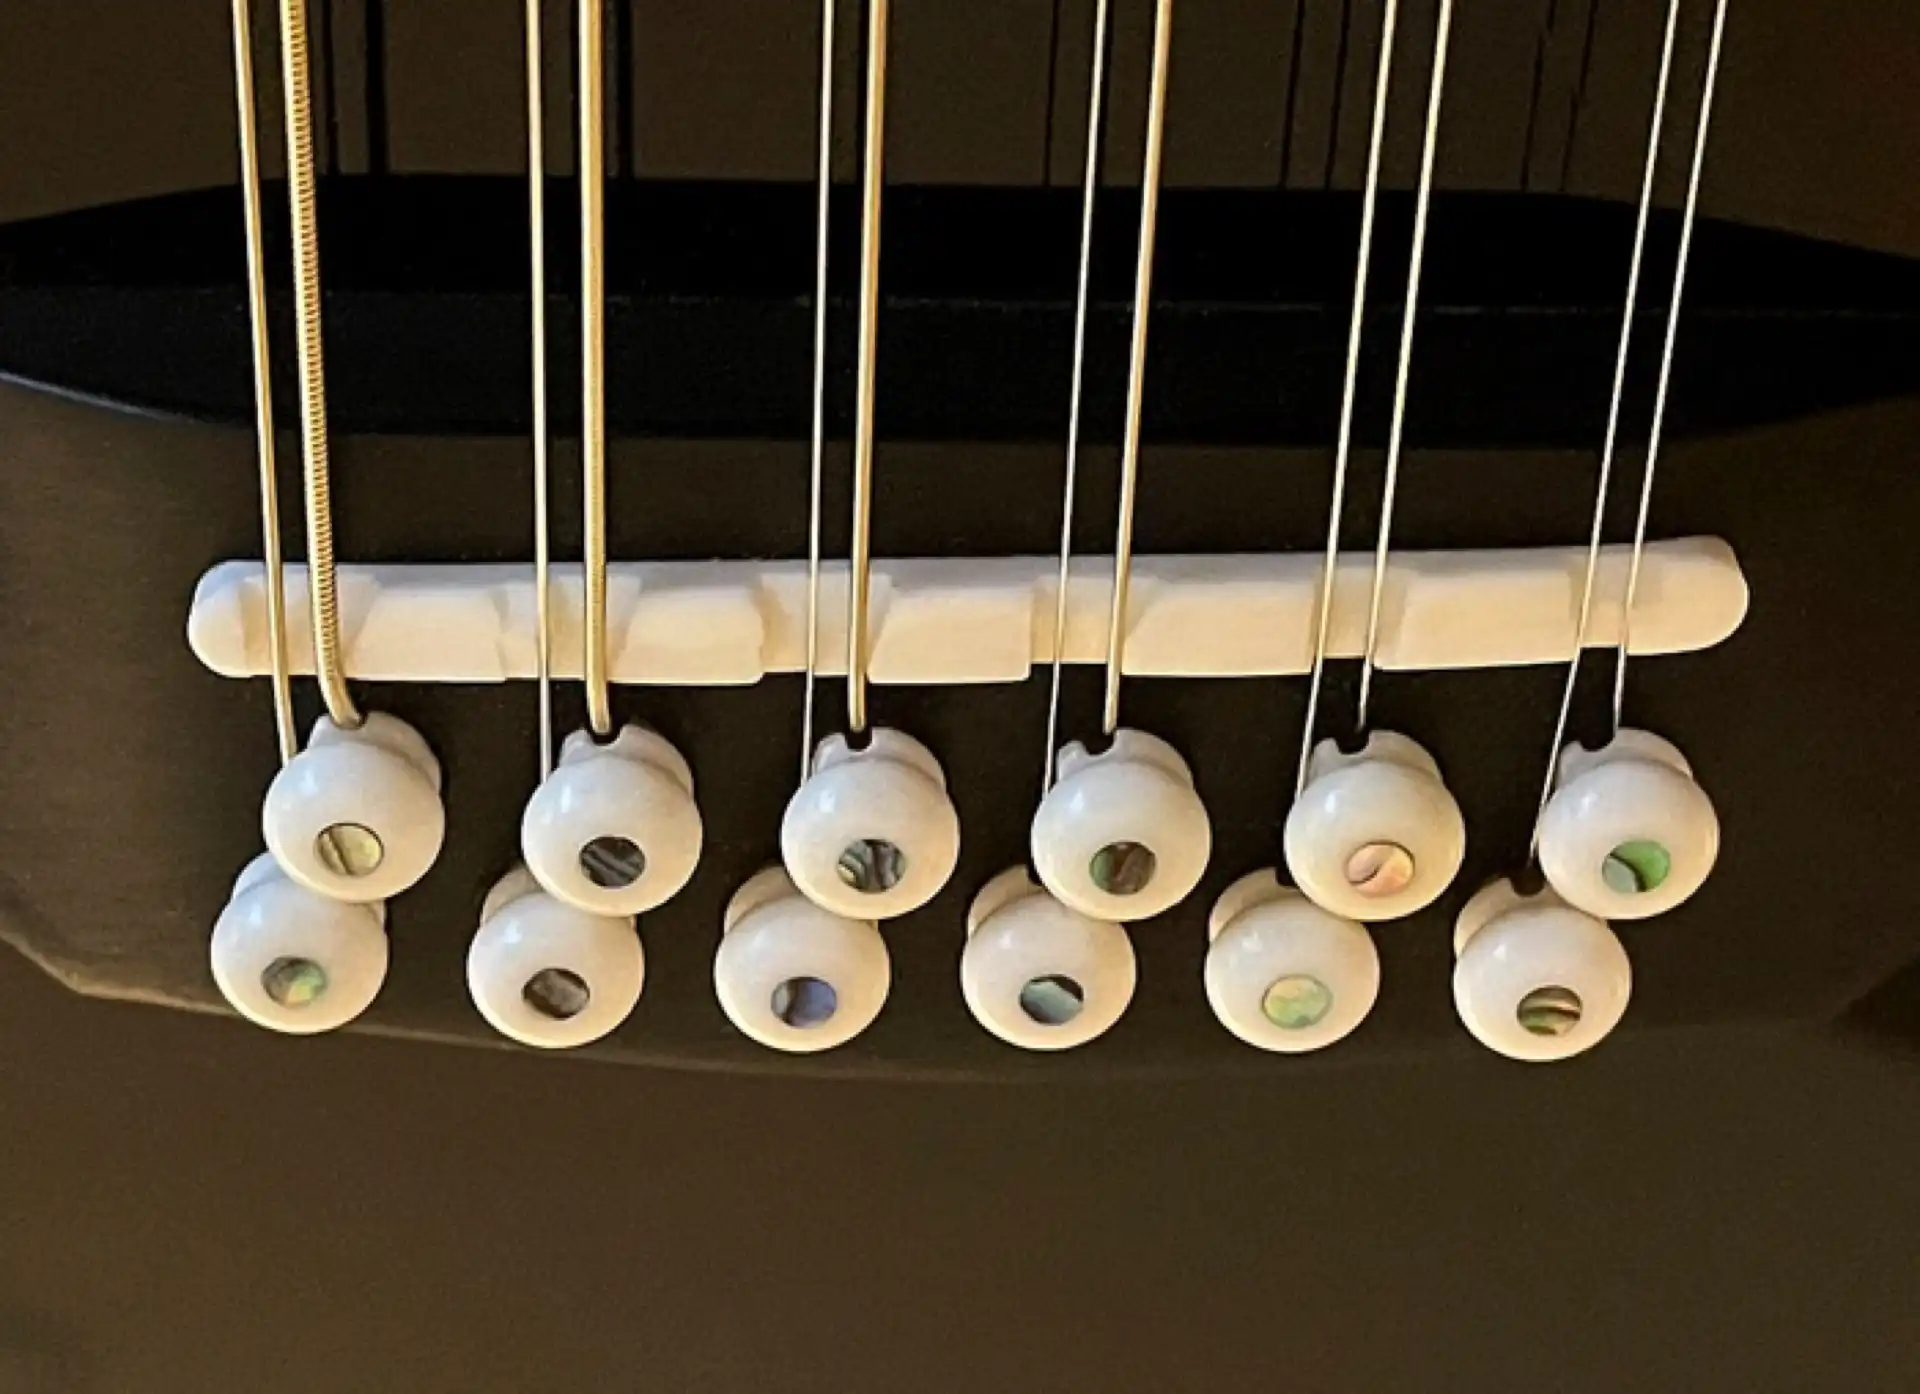
12 String Compensated Saddle
The role of a truss rod in an acoustic guitar neck (or, in this case, twin compression rods) is to compensate for the string pull resulting in a forward bow. That is, IF and WHEN there is a forward bow that exceeds comfortable playability (*some* forward bow, referred to as RELIEF, is preferred in order to mitigate string buzz). The carbon fiber in this neck is doing a commendable job of resisting the pull of the strings, so I will give it some time to settle. If needed, I can tighten the nuts on the ends of the rods, forcing them to straighten and bow the neck backwards.
Neck (or string) “relief” is a deliberate introduction of a some forward bow, said to mitigate string contact on the upper frets. This may be more beneficial for some players than others. More aggressive playing styles that focus on fretting the first three (3) frets can benefit by having a "low action" near the nut while allowing for greater string travel, thus mitigating fret buzz. Sadly, many dual-action truss rods simply bow the neck in the wrong place, resulting in a higher-than-necessary action in the area of the 5th to 7th frets.
These Guilds were built with extremely thin necks having no stiffeners. Without the twin compression rods (or a stiffener of some sort) a Guild 12 string would be unplayable, as the neck would bow forward dramatically under the slightest tension.
I added carbon fiber to this neck, setting it to be dead flat without strings on it. Extra-light gauge strings will apply the slightest forward bow. Light gauge will bow forward slightly farther. Medium gauge strings, which would typically only be used by the most aggressive of 12 string players, would increase the tension by nearly 100 pounds, and introduce sufficient forward bow to provide any "relief" needed for wide string paths. Any unwanted forward bow could be countered with the compression rods.
Forward neck pull (governed by string tension) and Saddle height (which is adjustable) will determine our target action. Step one (1) is to adjust the string height at the nut. I set the strings as low as possible while avoiding fret buzz at the first fret. Step two (2) is to select the strings and install them. They will pull the neck forward, depending on their collective tension, so I allow the neck to settle into its new position. Step three (3) is to adjust the compression rods, if needed, to compensate for forward bow. Extra-light gauge strings require no compression rod tightening. Light gauge strings require only the slightest tightening. Step four (4) is to adjust the saddle height, thus setting the overall string height. I have left greater clearance for the so-called bass strings, as they have a greater tendency to buzz when lowered as far as the treble strings.
I was unable to satisfactorily polish out the scratches on the pickguard that came with the guitar, otherwise I could have reapplied it. During the years Fender owned the Guild brand, slimmer pickguards were introduced. I fashioned a new pickguard, following the slimmer design of the original pickguard, altering it only slightly around the soundhole.
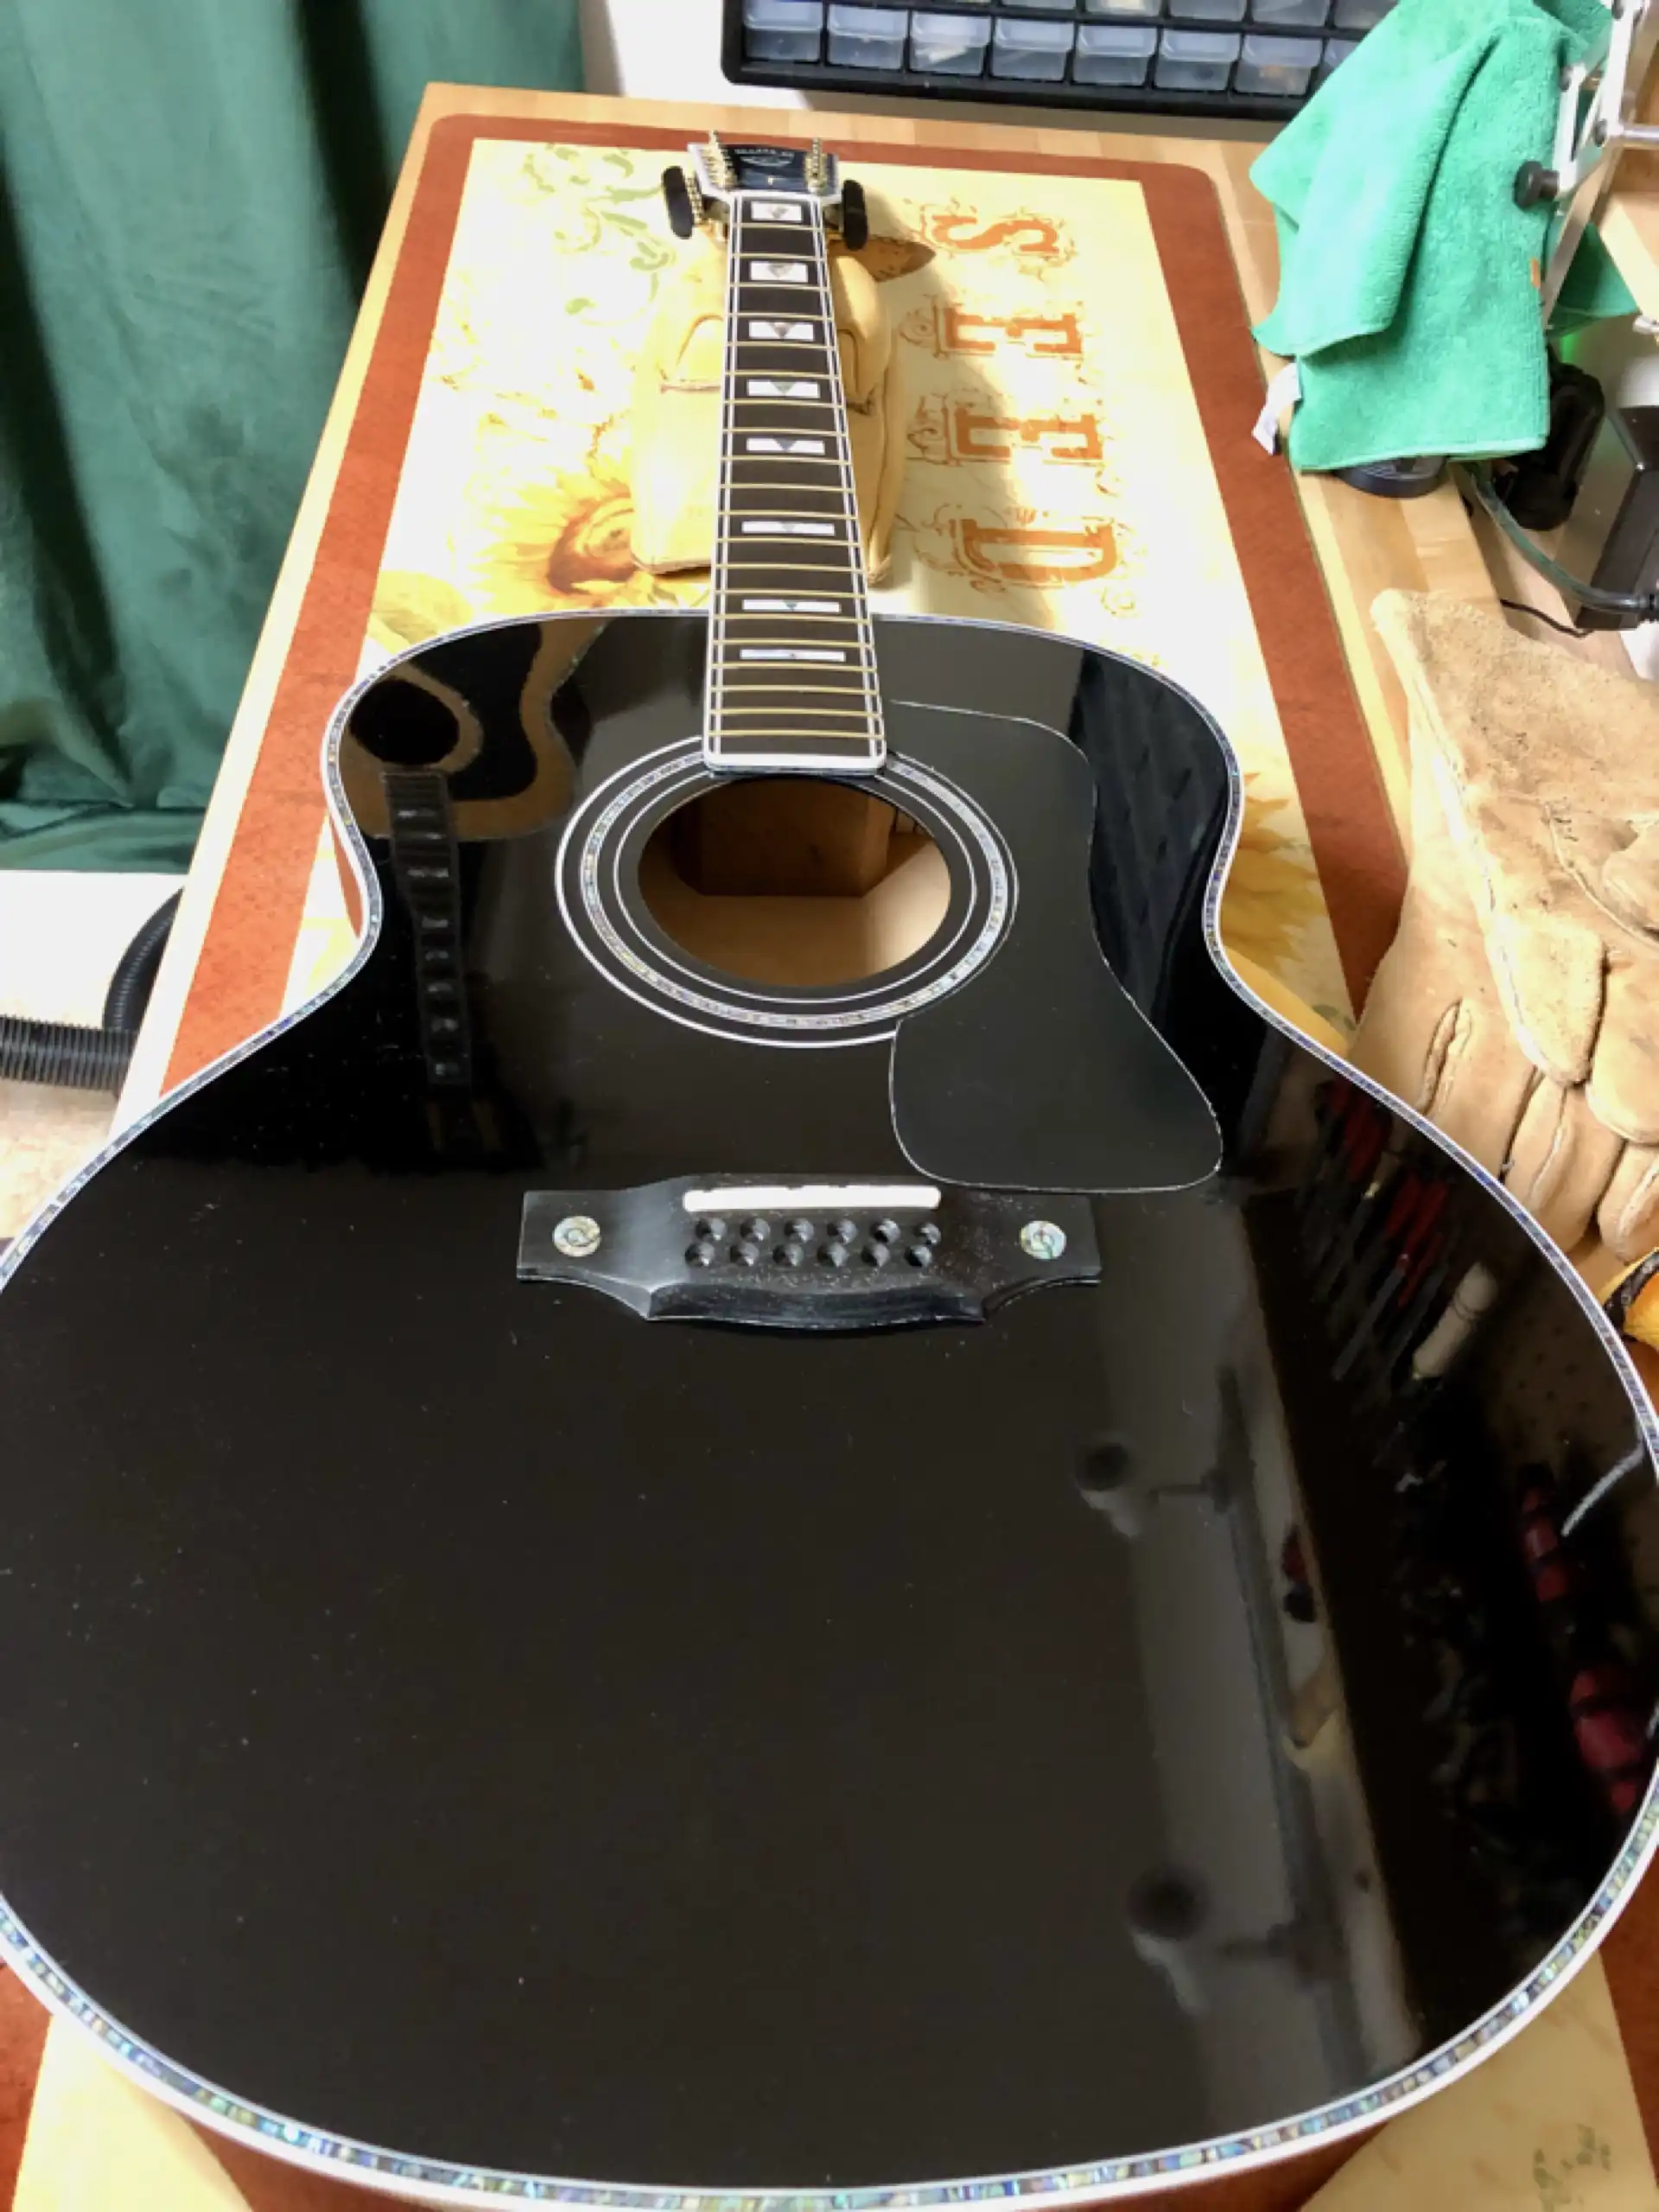
Polished Front with New Pickguard
If a picture is worth 1000 words, how valuable is an audio recording? Here is a before and after collection of recordings of this 1999 Guild JF65-12, featuring my instrumental called "The Ascent". I attempted to use the same settings, same microphones, same location, etc. for the two recordings. Play a section from each recording stopping and starting for comparison:
To use a guitar strap, whether standing or seated, it is necessary to add an endpin. I will drill and ream a hole to accommodate an endpin jack that doubles as a strap holder and an output for a pickup.
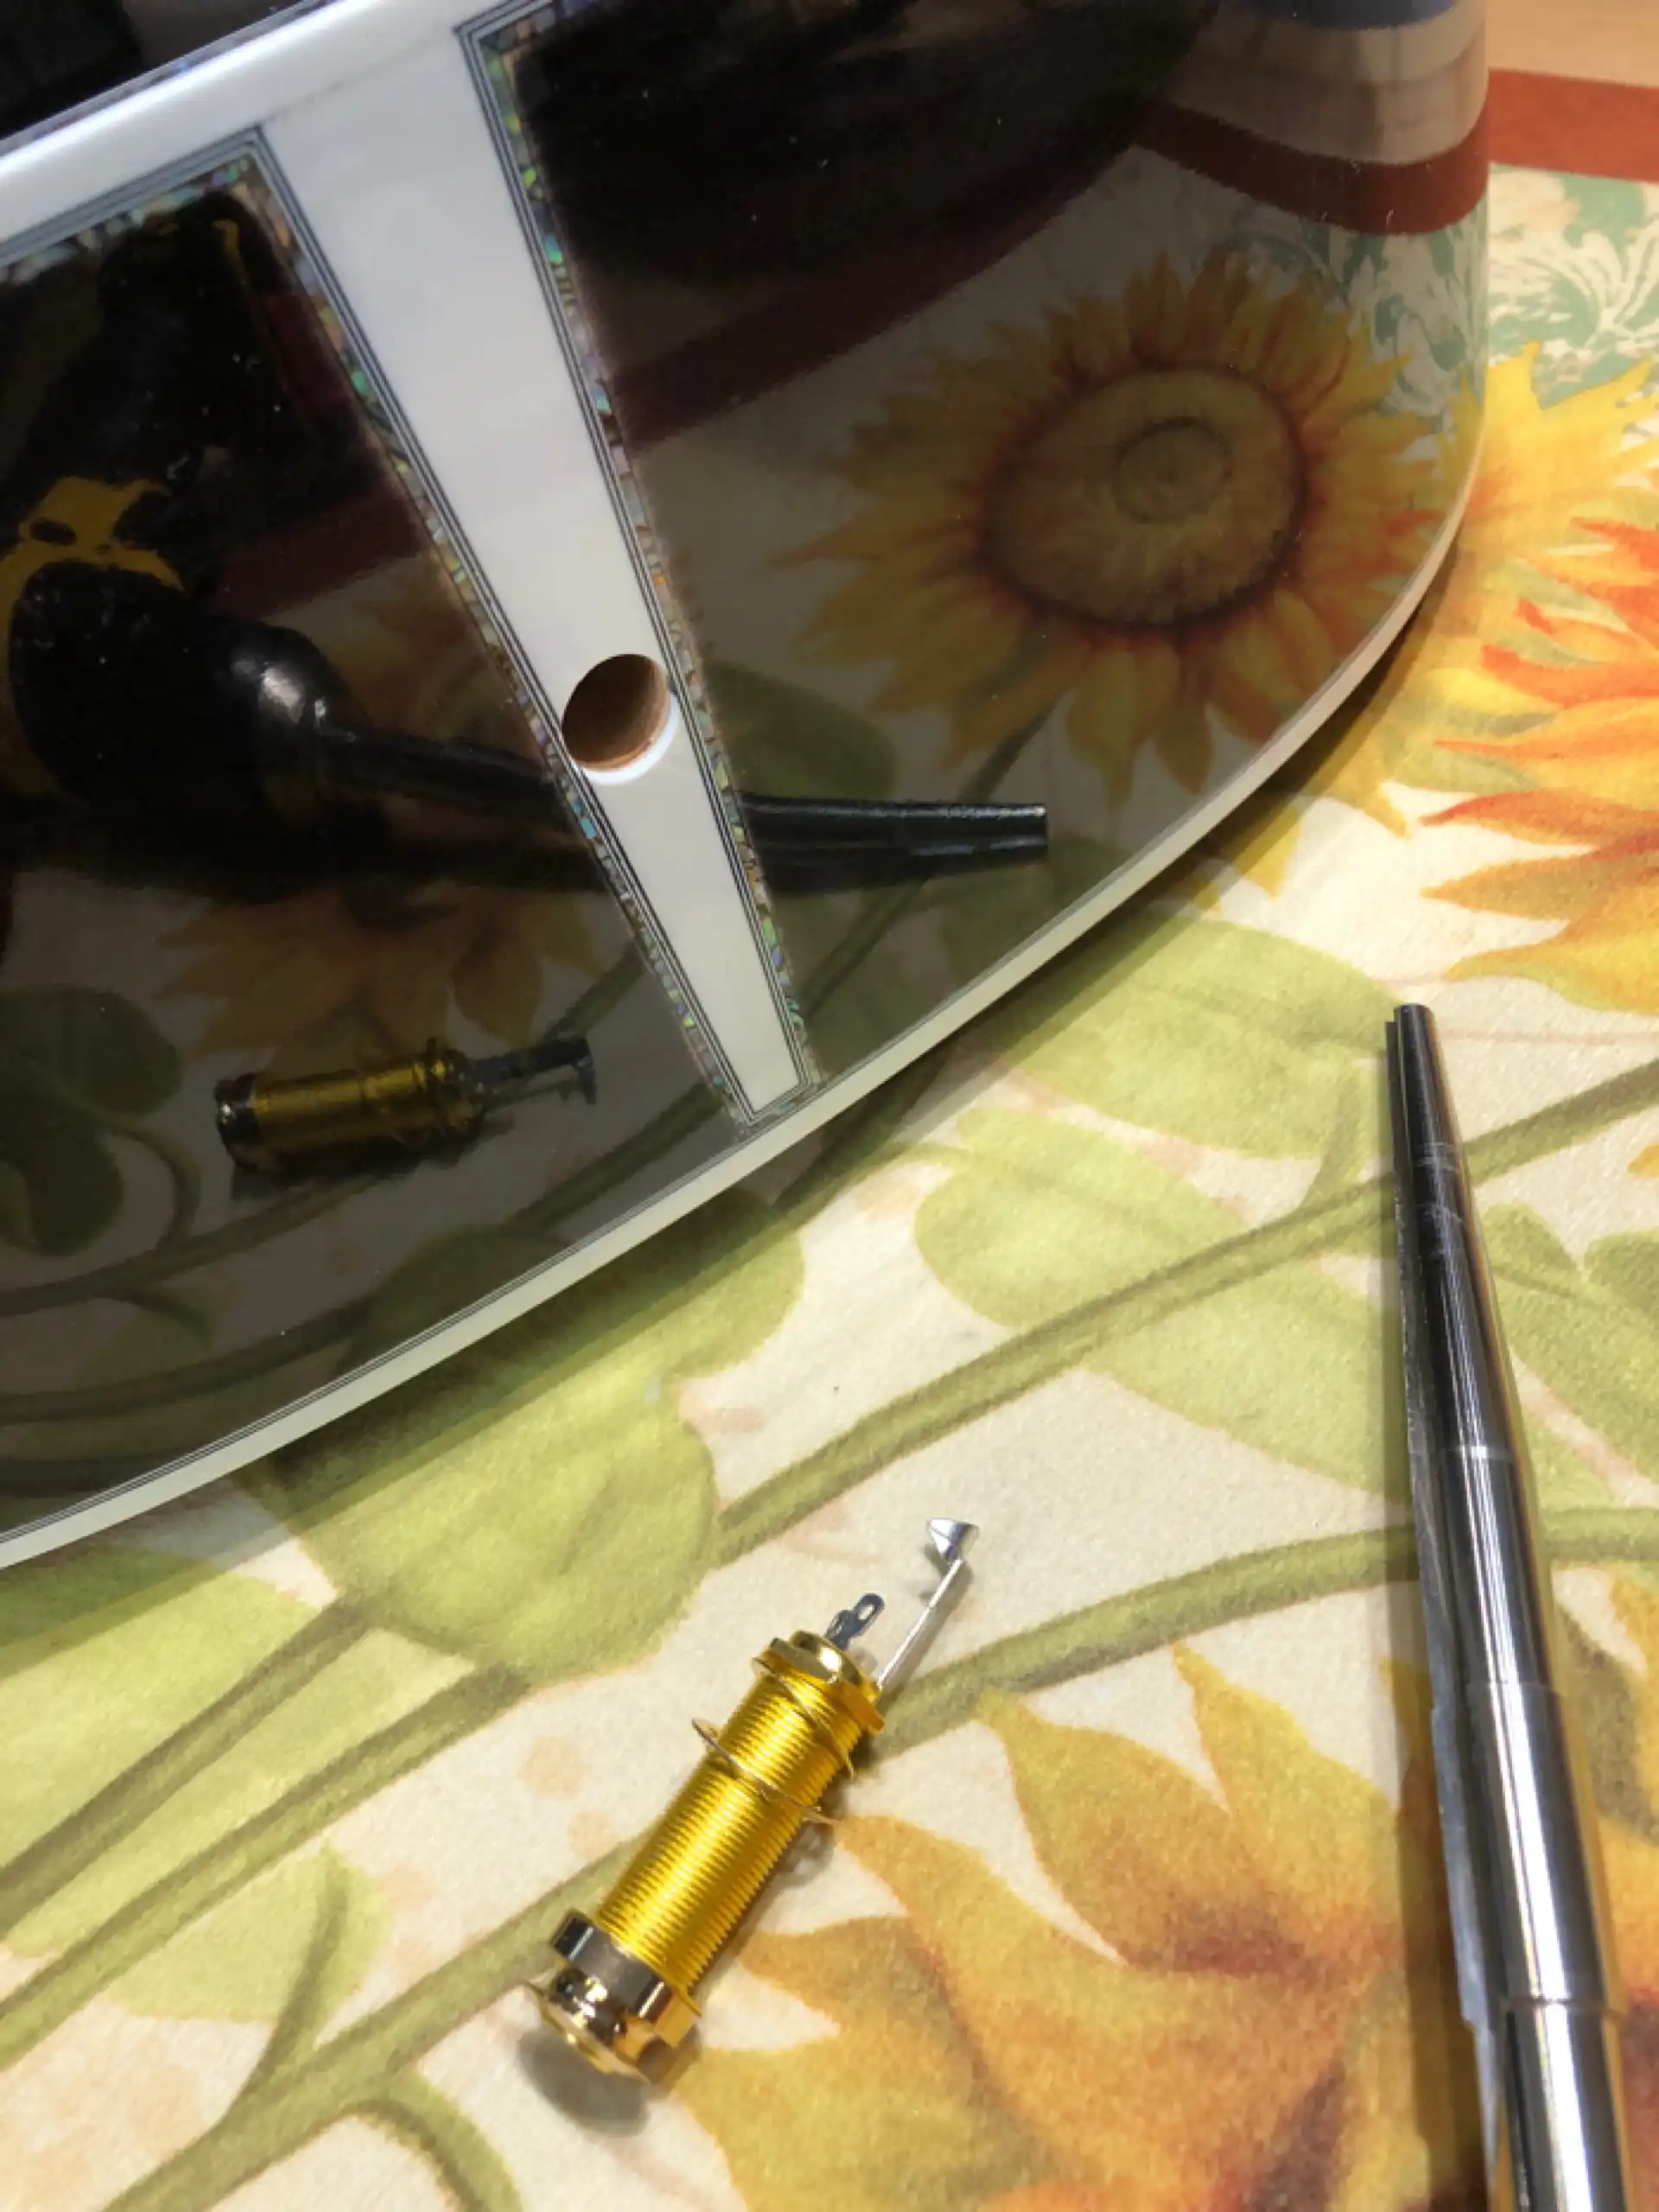
Endpin Jack Hole
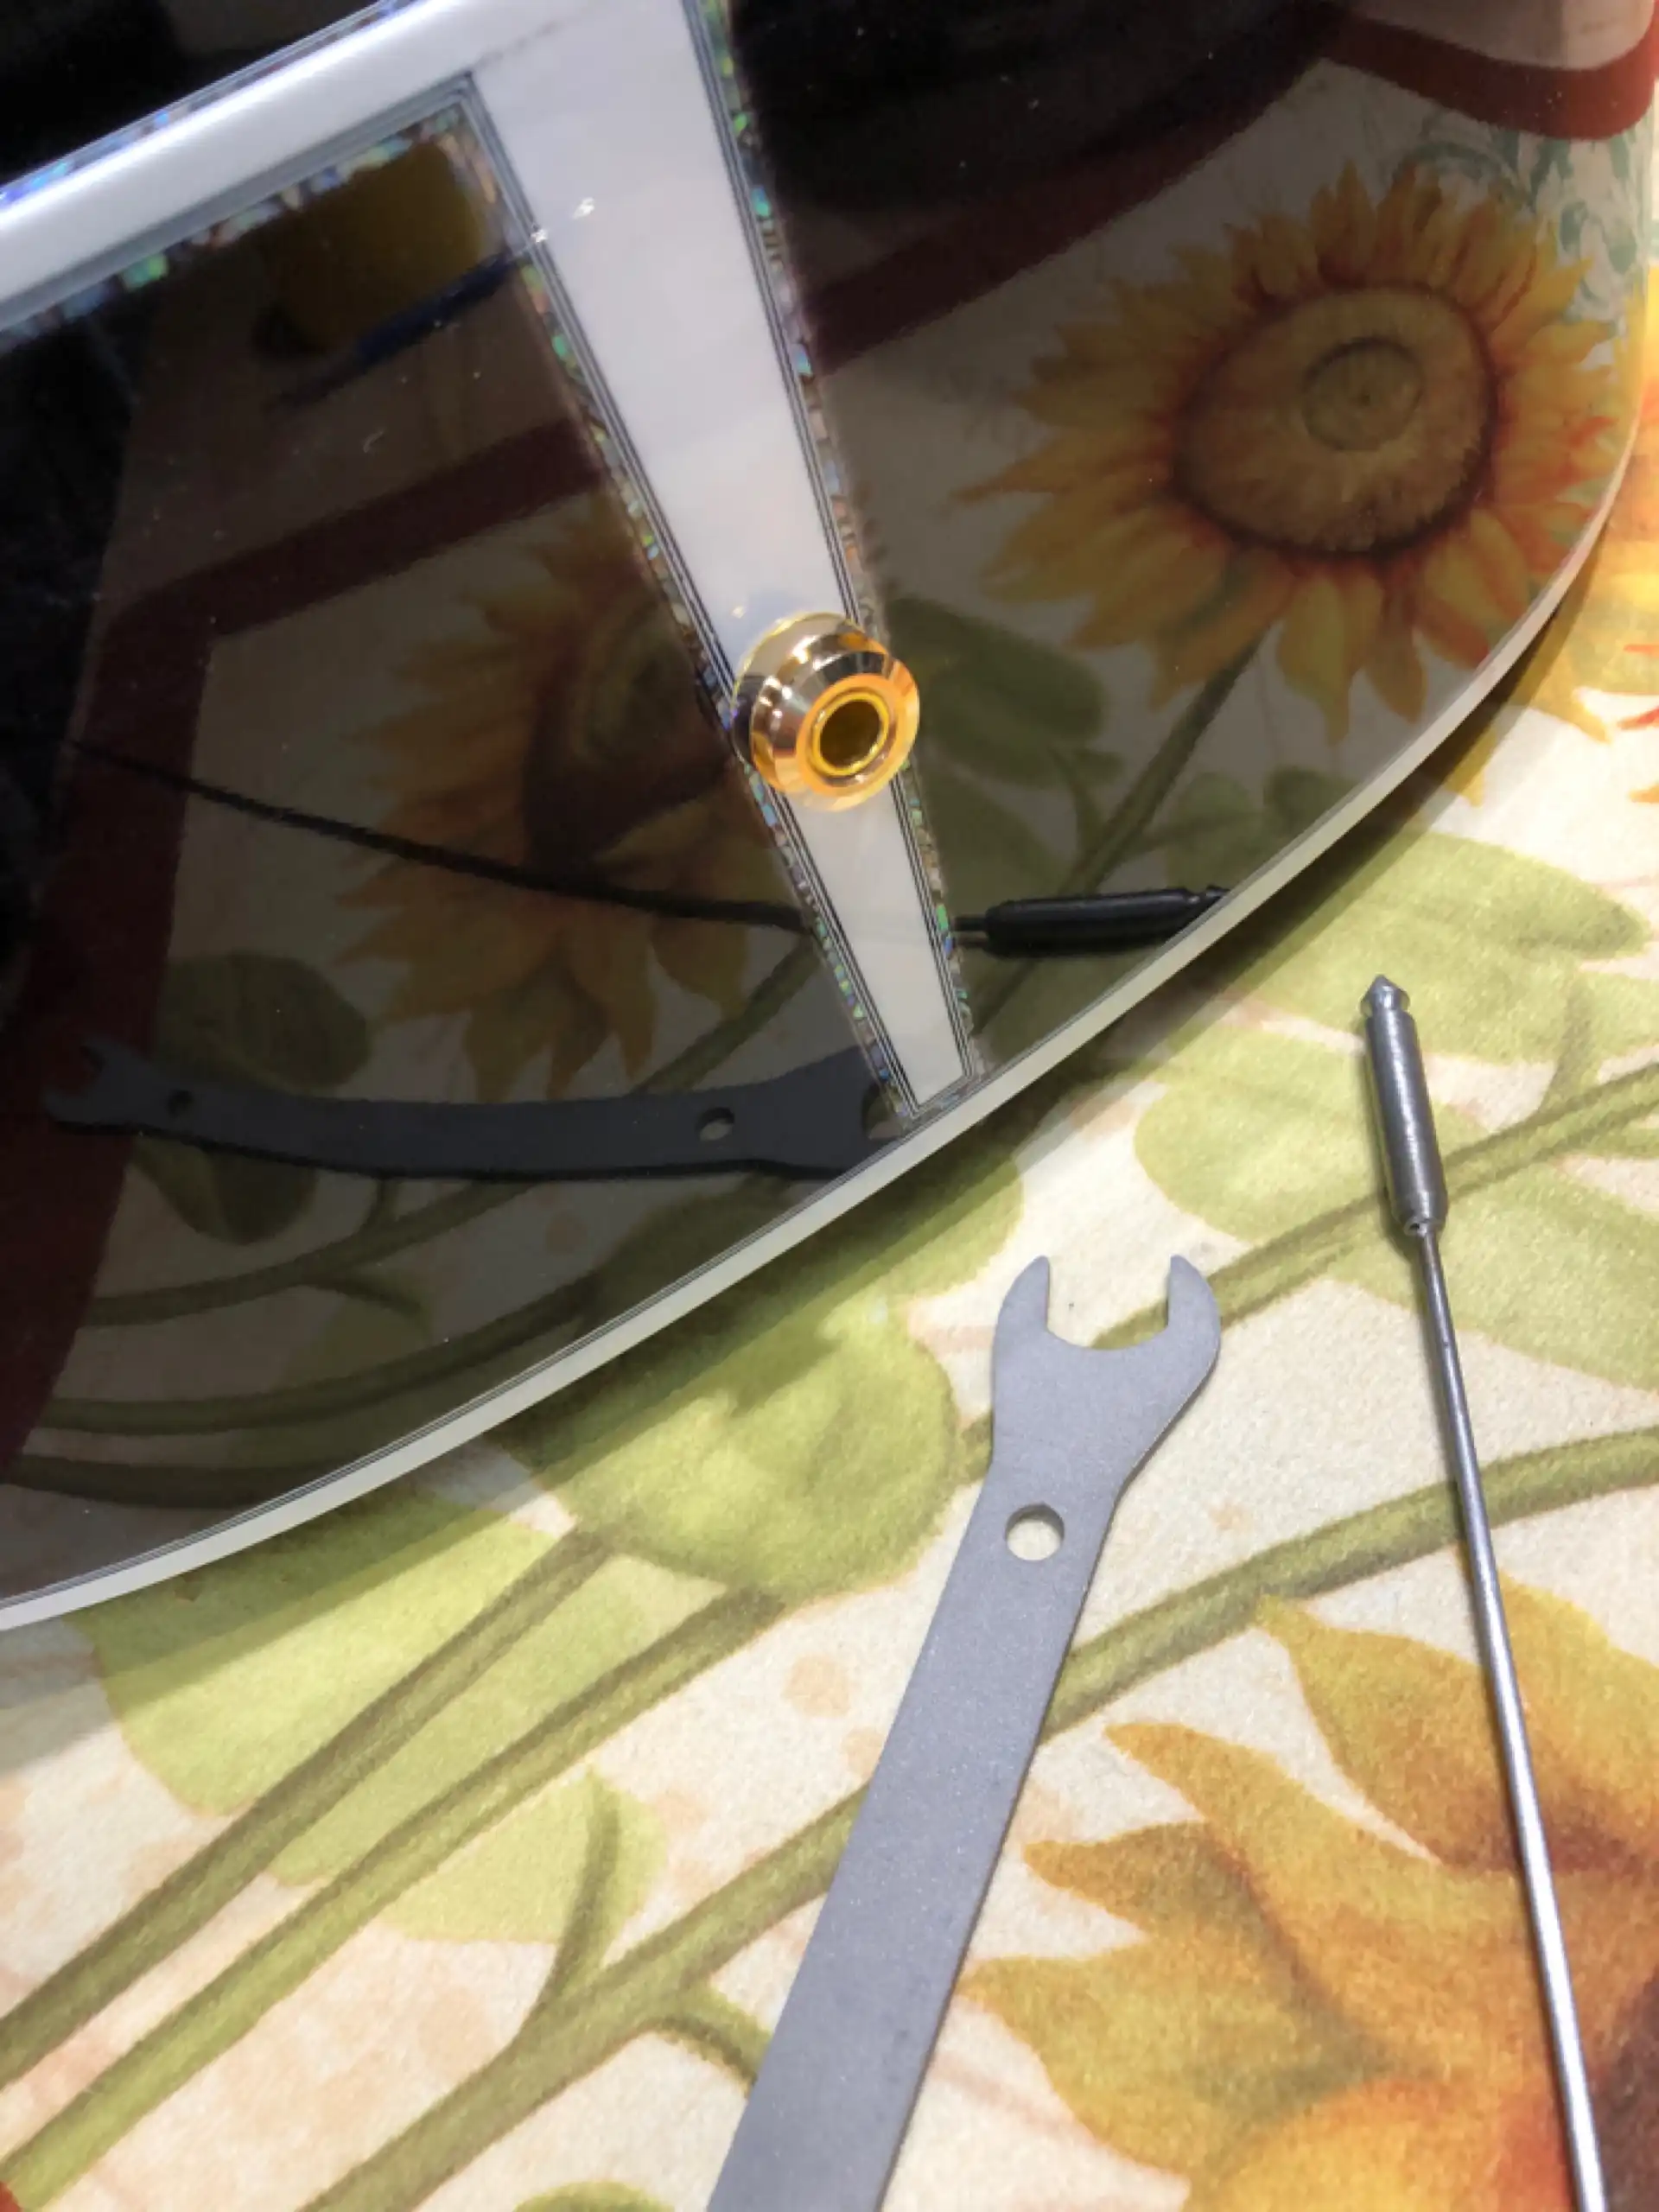
Endpin Jack
The more comfortable strap attachment at the neck is a carefully placed button in the heel. A felt washer allows the screw to be tightened snug without cracking the finish, let alone crushing the wood.
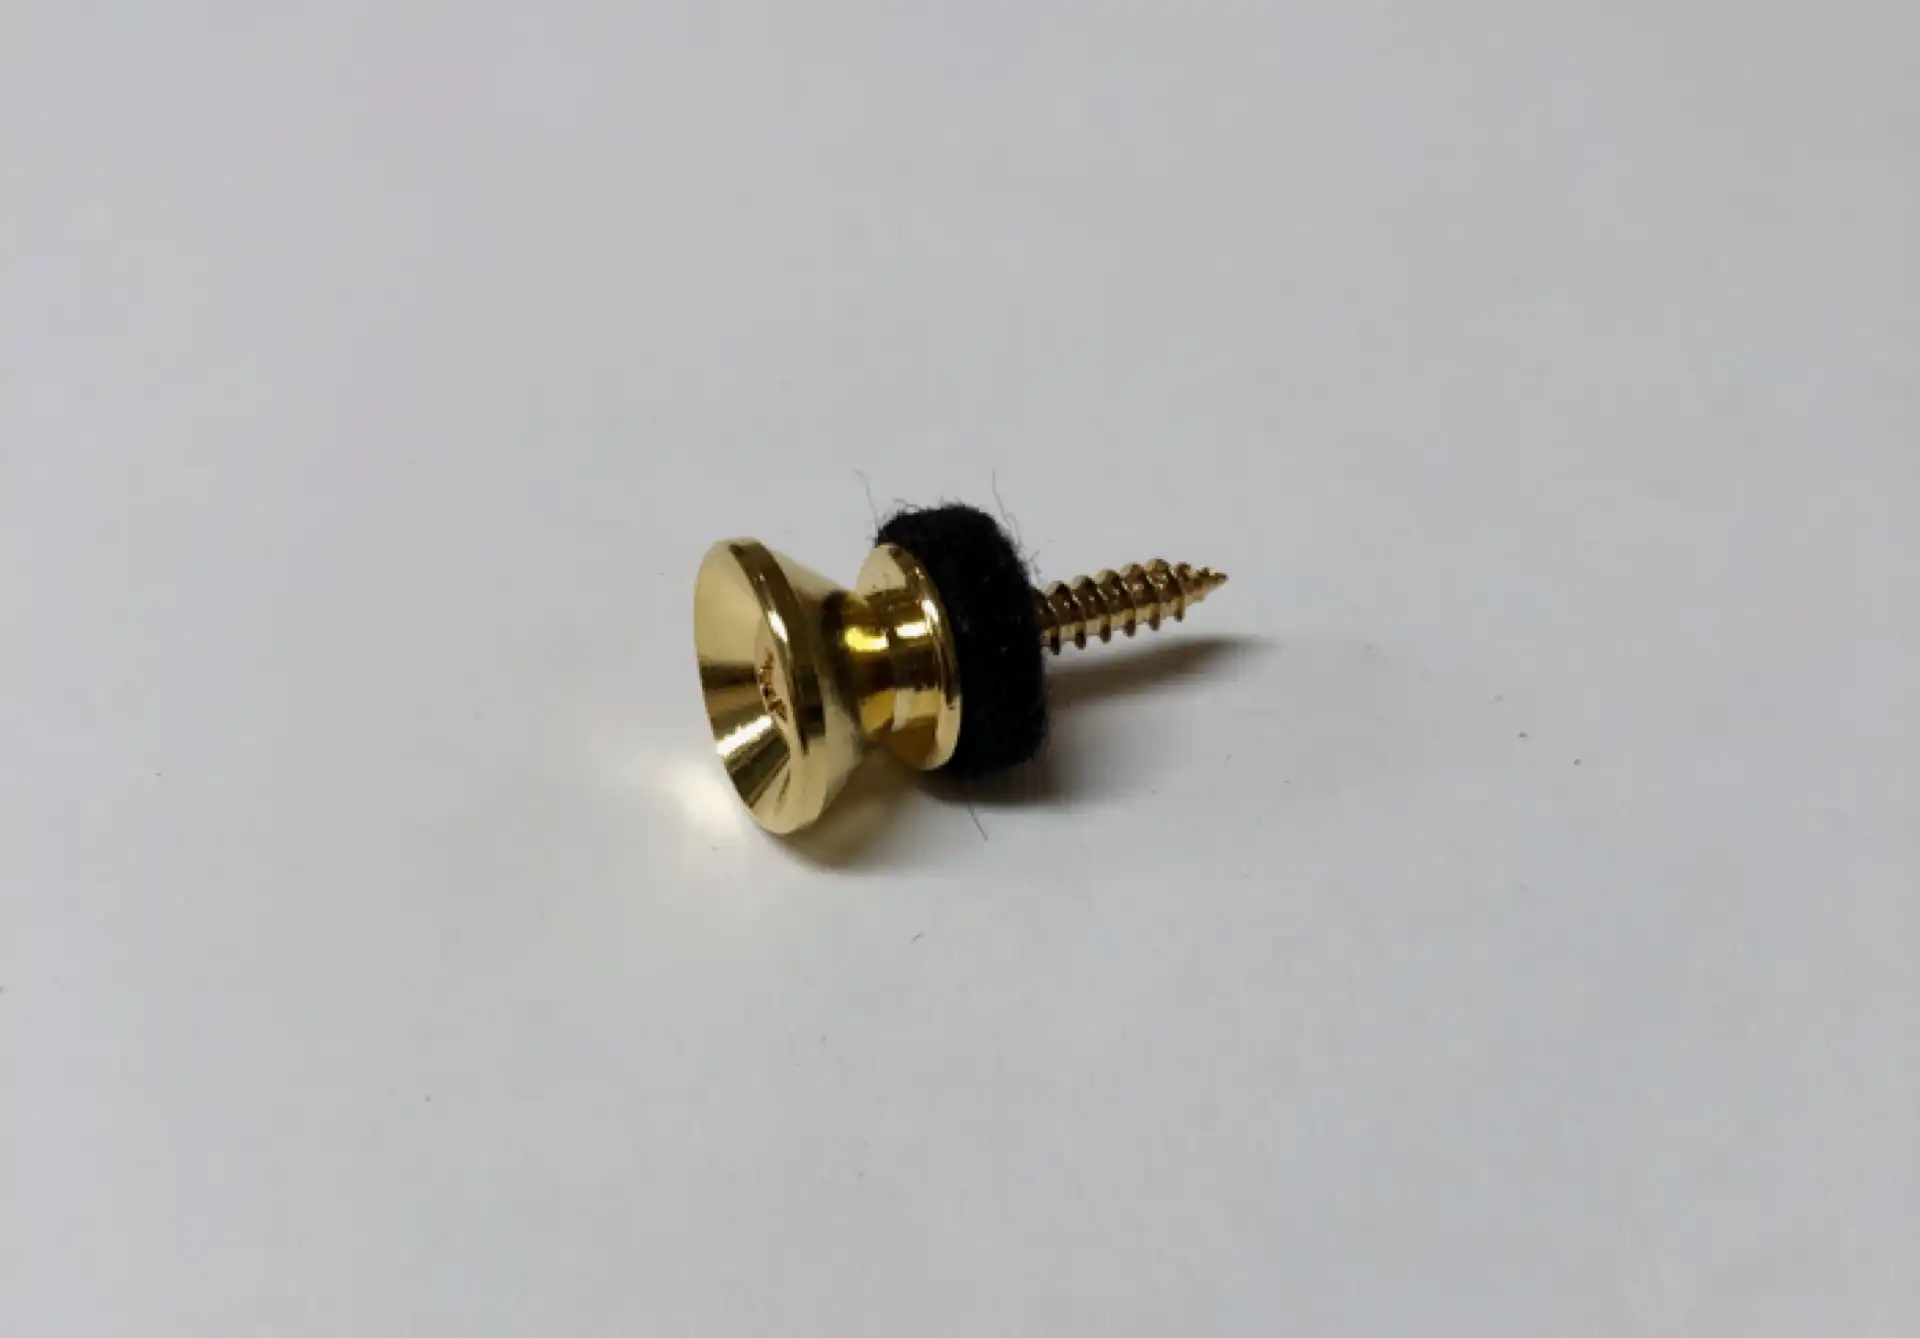
Strap Button
The owner requested the installation of a pickup I had no previous experience with, and I am so glad for opportunities like this. I phoned Trance Audio and learned all about the Amulet Acoustic Lens™ pickups. I ordered an Amulet M-VT Phantom, a phantom powered version of the pickup that includes both a volume and tone control that are mounted inside the soundhole. The Amulet includes an onboard preamp (two preamps, actually, summed mono) that is integrated into the endpin jack. An active system, the preamp is powered via a custom cable that supplies 48 volt phantom power. The cable features a 90° 1/4" TRS jack on the guitar end and a 3-pin XLR connector to plug into your amp (mixer, P.A., etc). The pickup itself is actually two separate polyplanar transducers, small 1 inch x 3/8 inch "boxes" that plug into the preamp/endpin combo inside the guitar. These boxes, the "Acoustic Lens", are each affixed to the bridgeplate directly under the saddle using a very effective adhesive strip. The installation was very straightforward and without incident. In addition to sounding great, my own tests demonstrated it is capable of producing very high volume without feedback.
You can read more about the pickup in my article » Trance Amulet M-VT Phantom
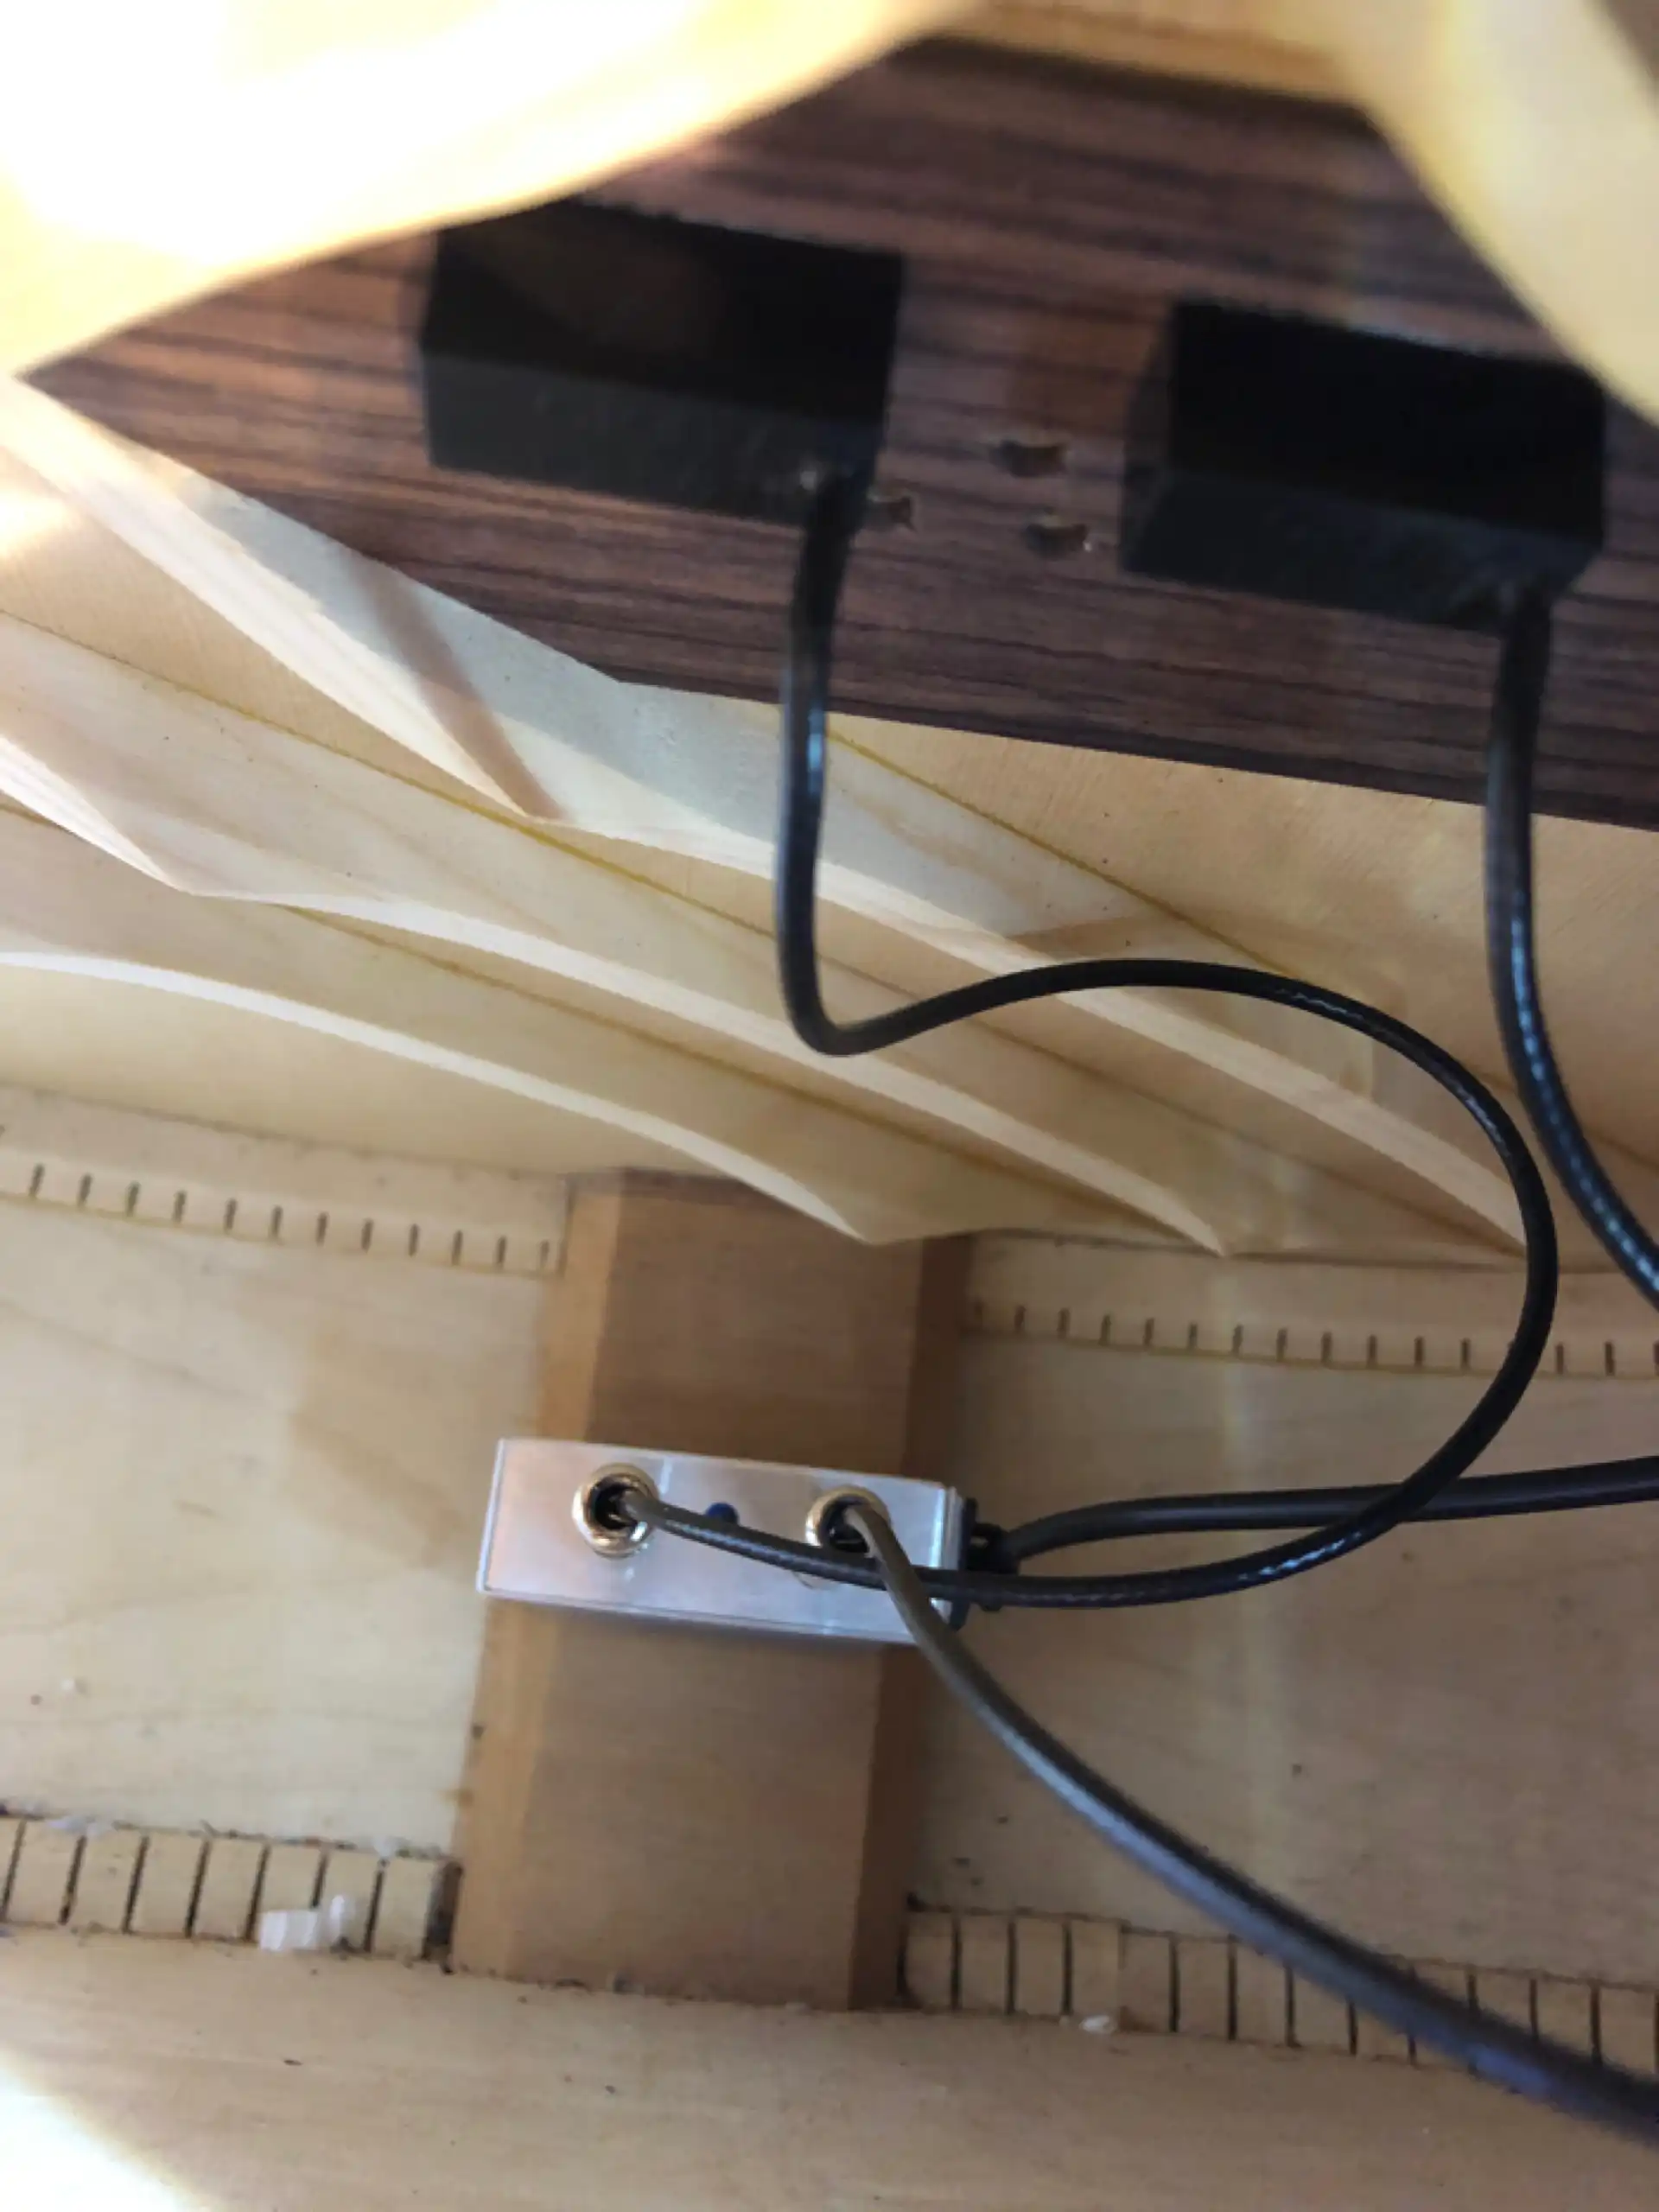
Trance Amulet M-VT Phantom
Complete
The owner's vision eventually materialized as an homage to fond memories from his youth of the black sands of New Zealand. Contrasting black tint with stark white binding accented with New Zealand blue Paua shell inlay completed the theme.
It was a long journey, but a delightful one! This 12 string is most impressive visually and aurally, and a delight to play, all a direct result of the wise decision on the part of this guitar's owner to have me reconstruct it. :-)
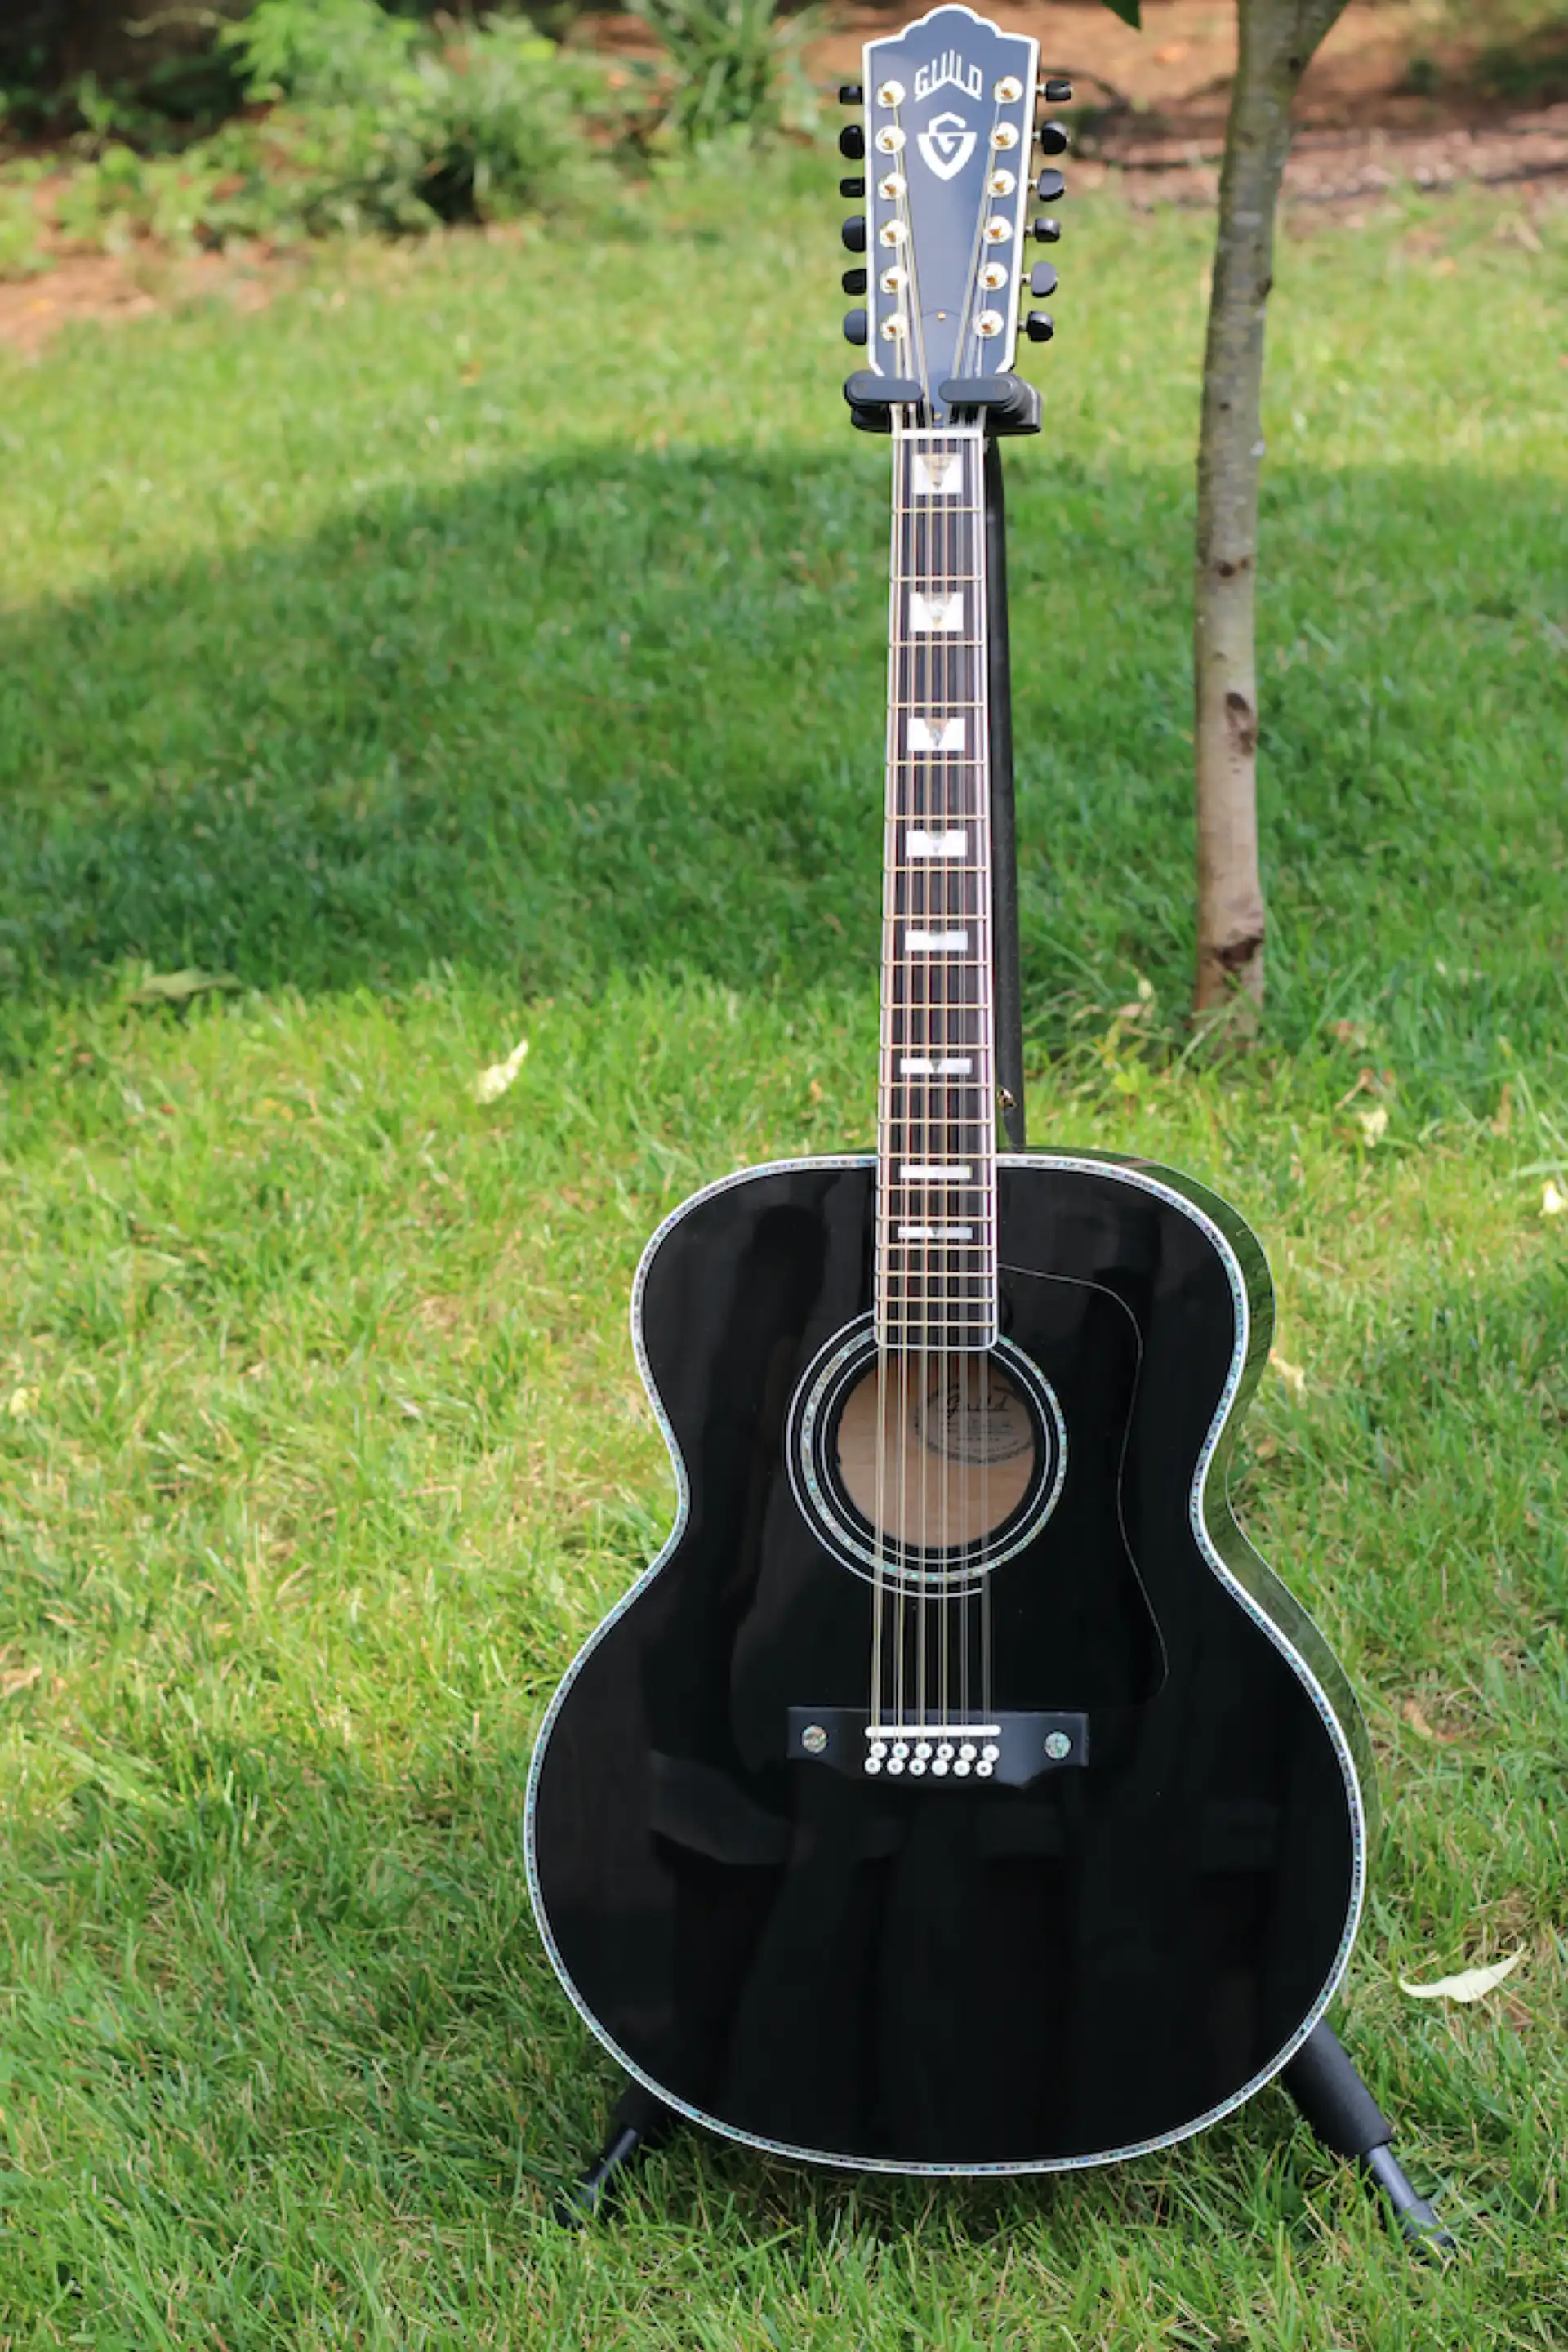
Front Complete
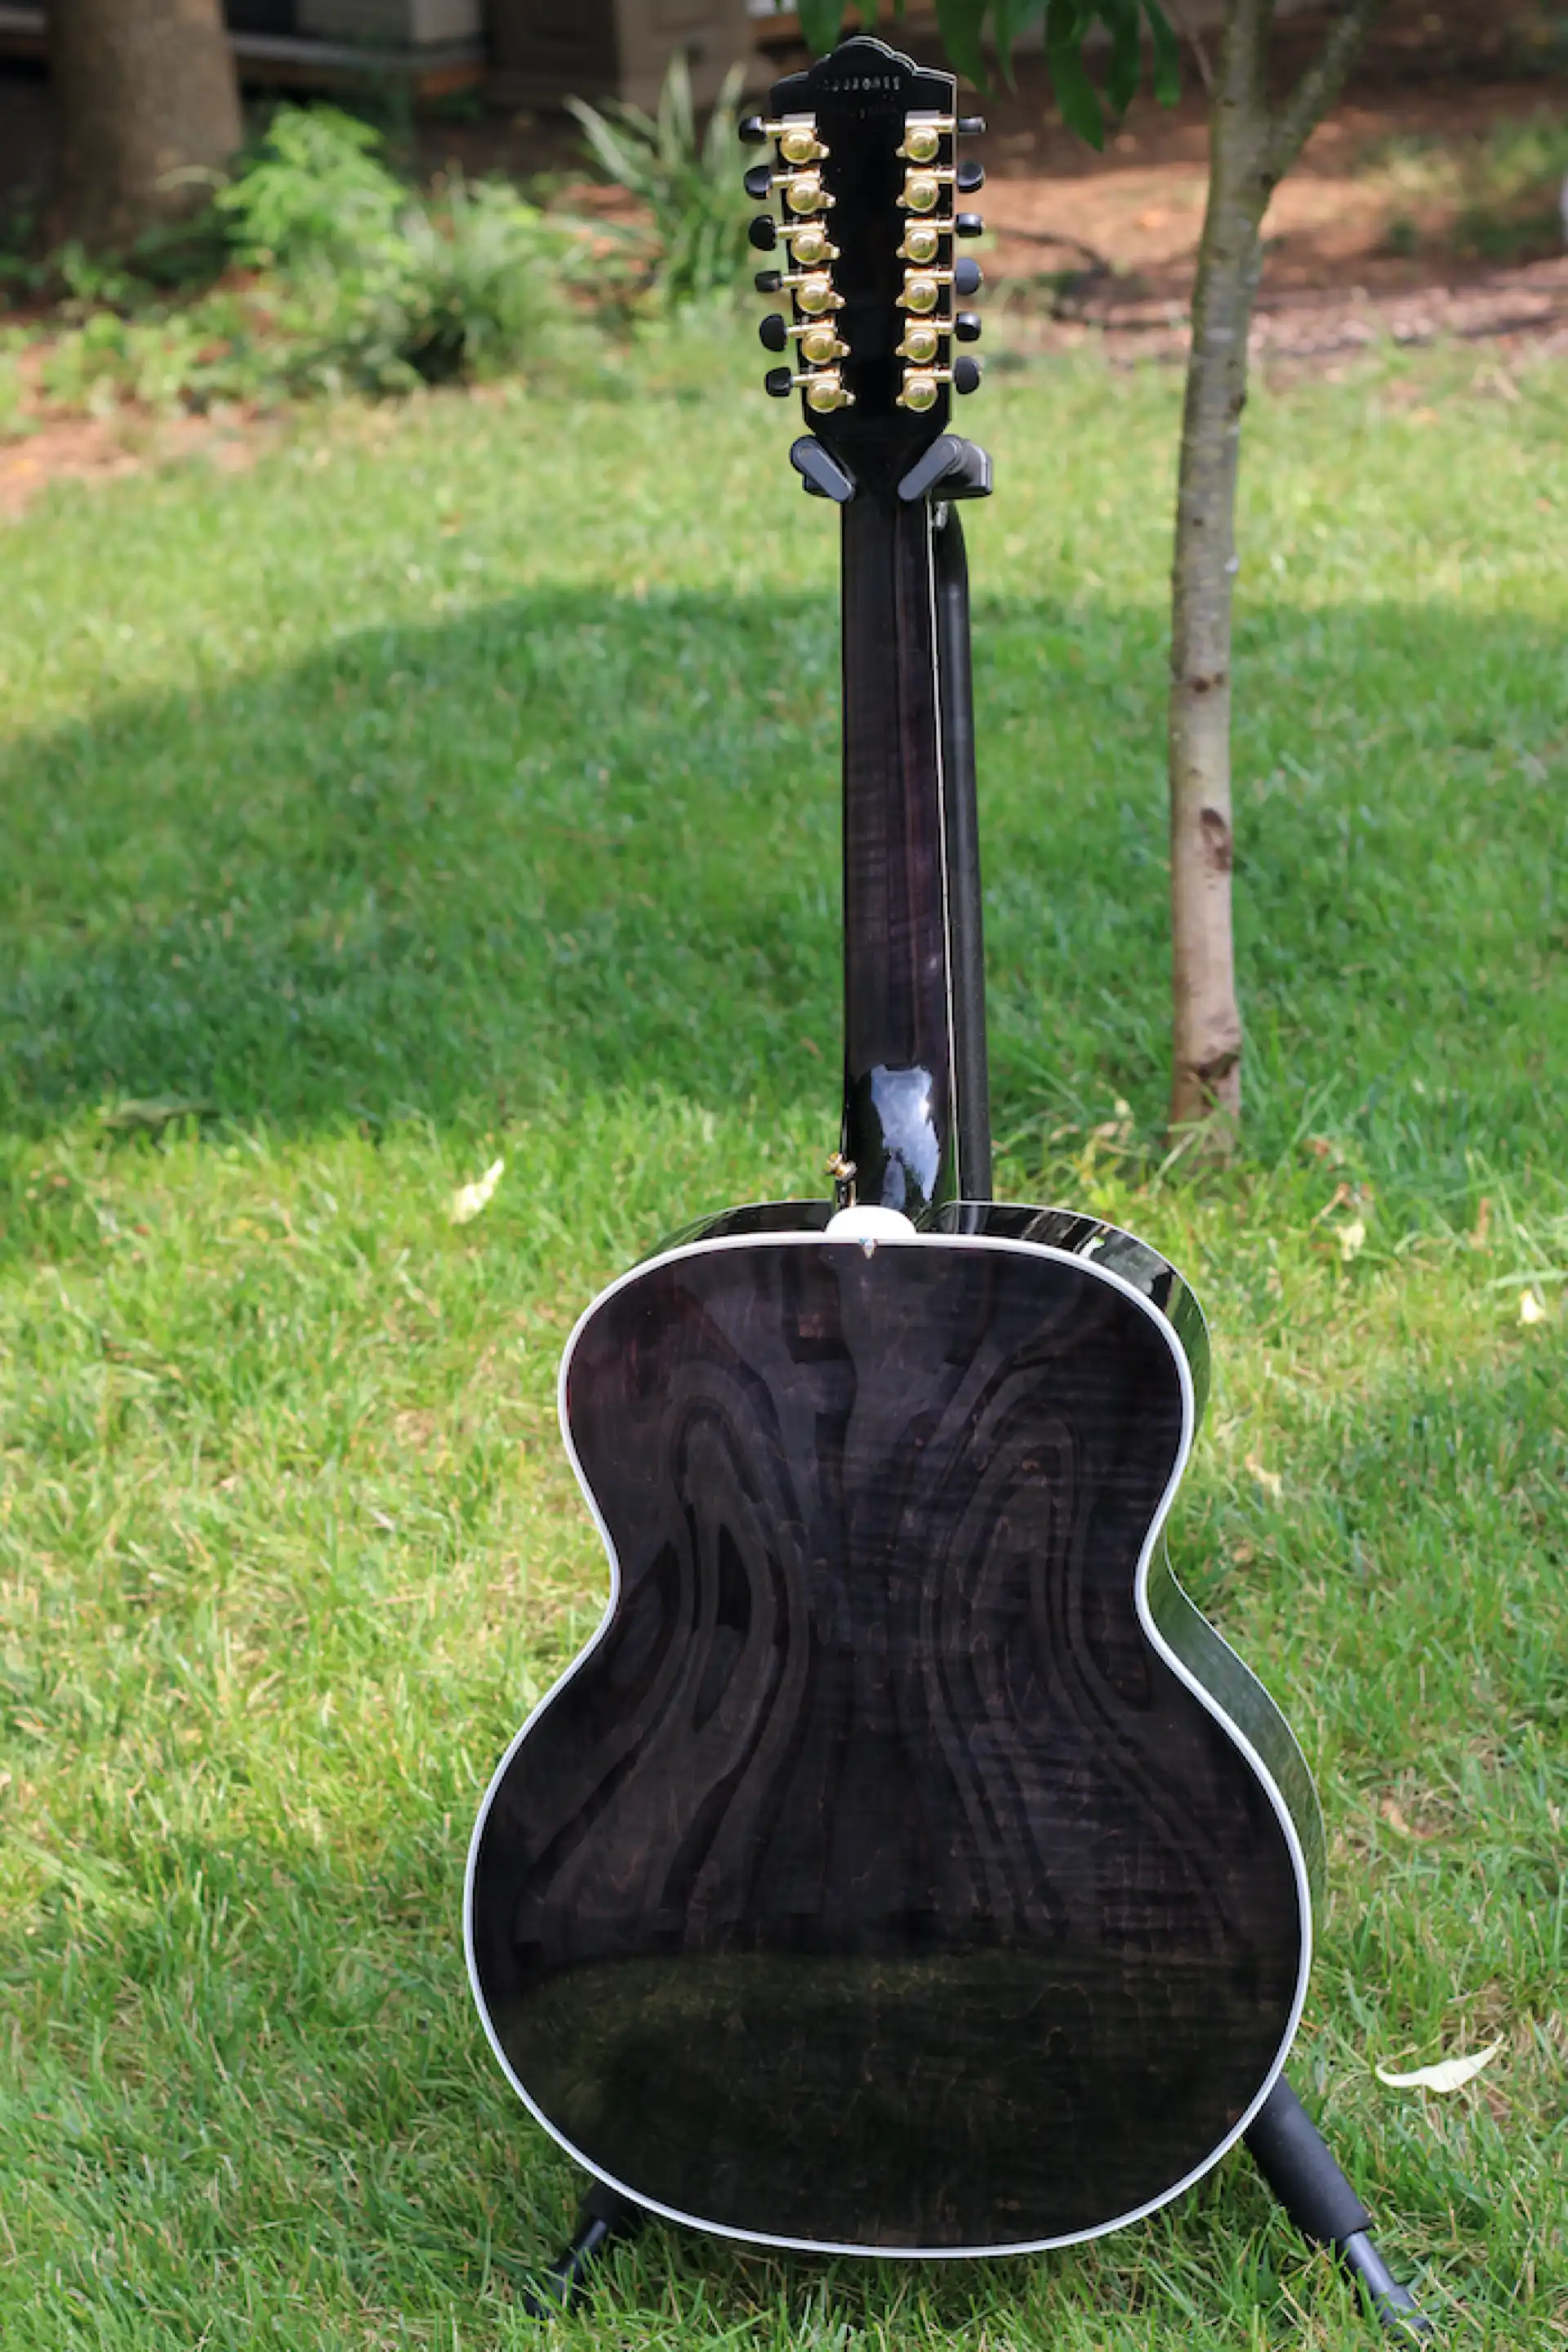
Back Complete
The 12 string is back in the shop to address three issues with the finish on the headstock and neck.
Issue #1 - Finish cracks, the result of moisture being trapped beneath the lacquer.
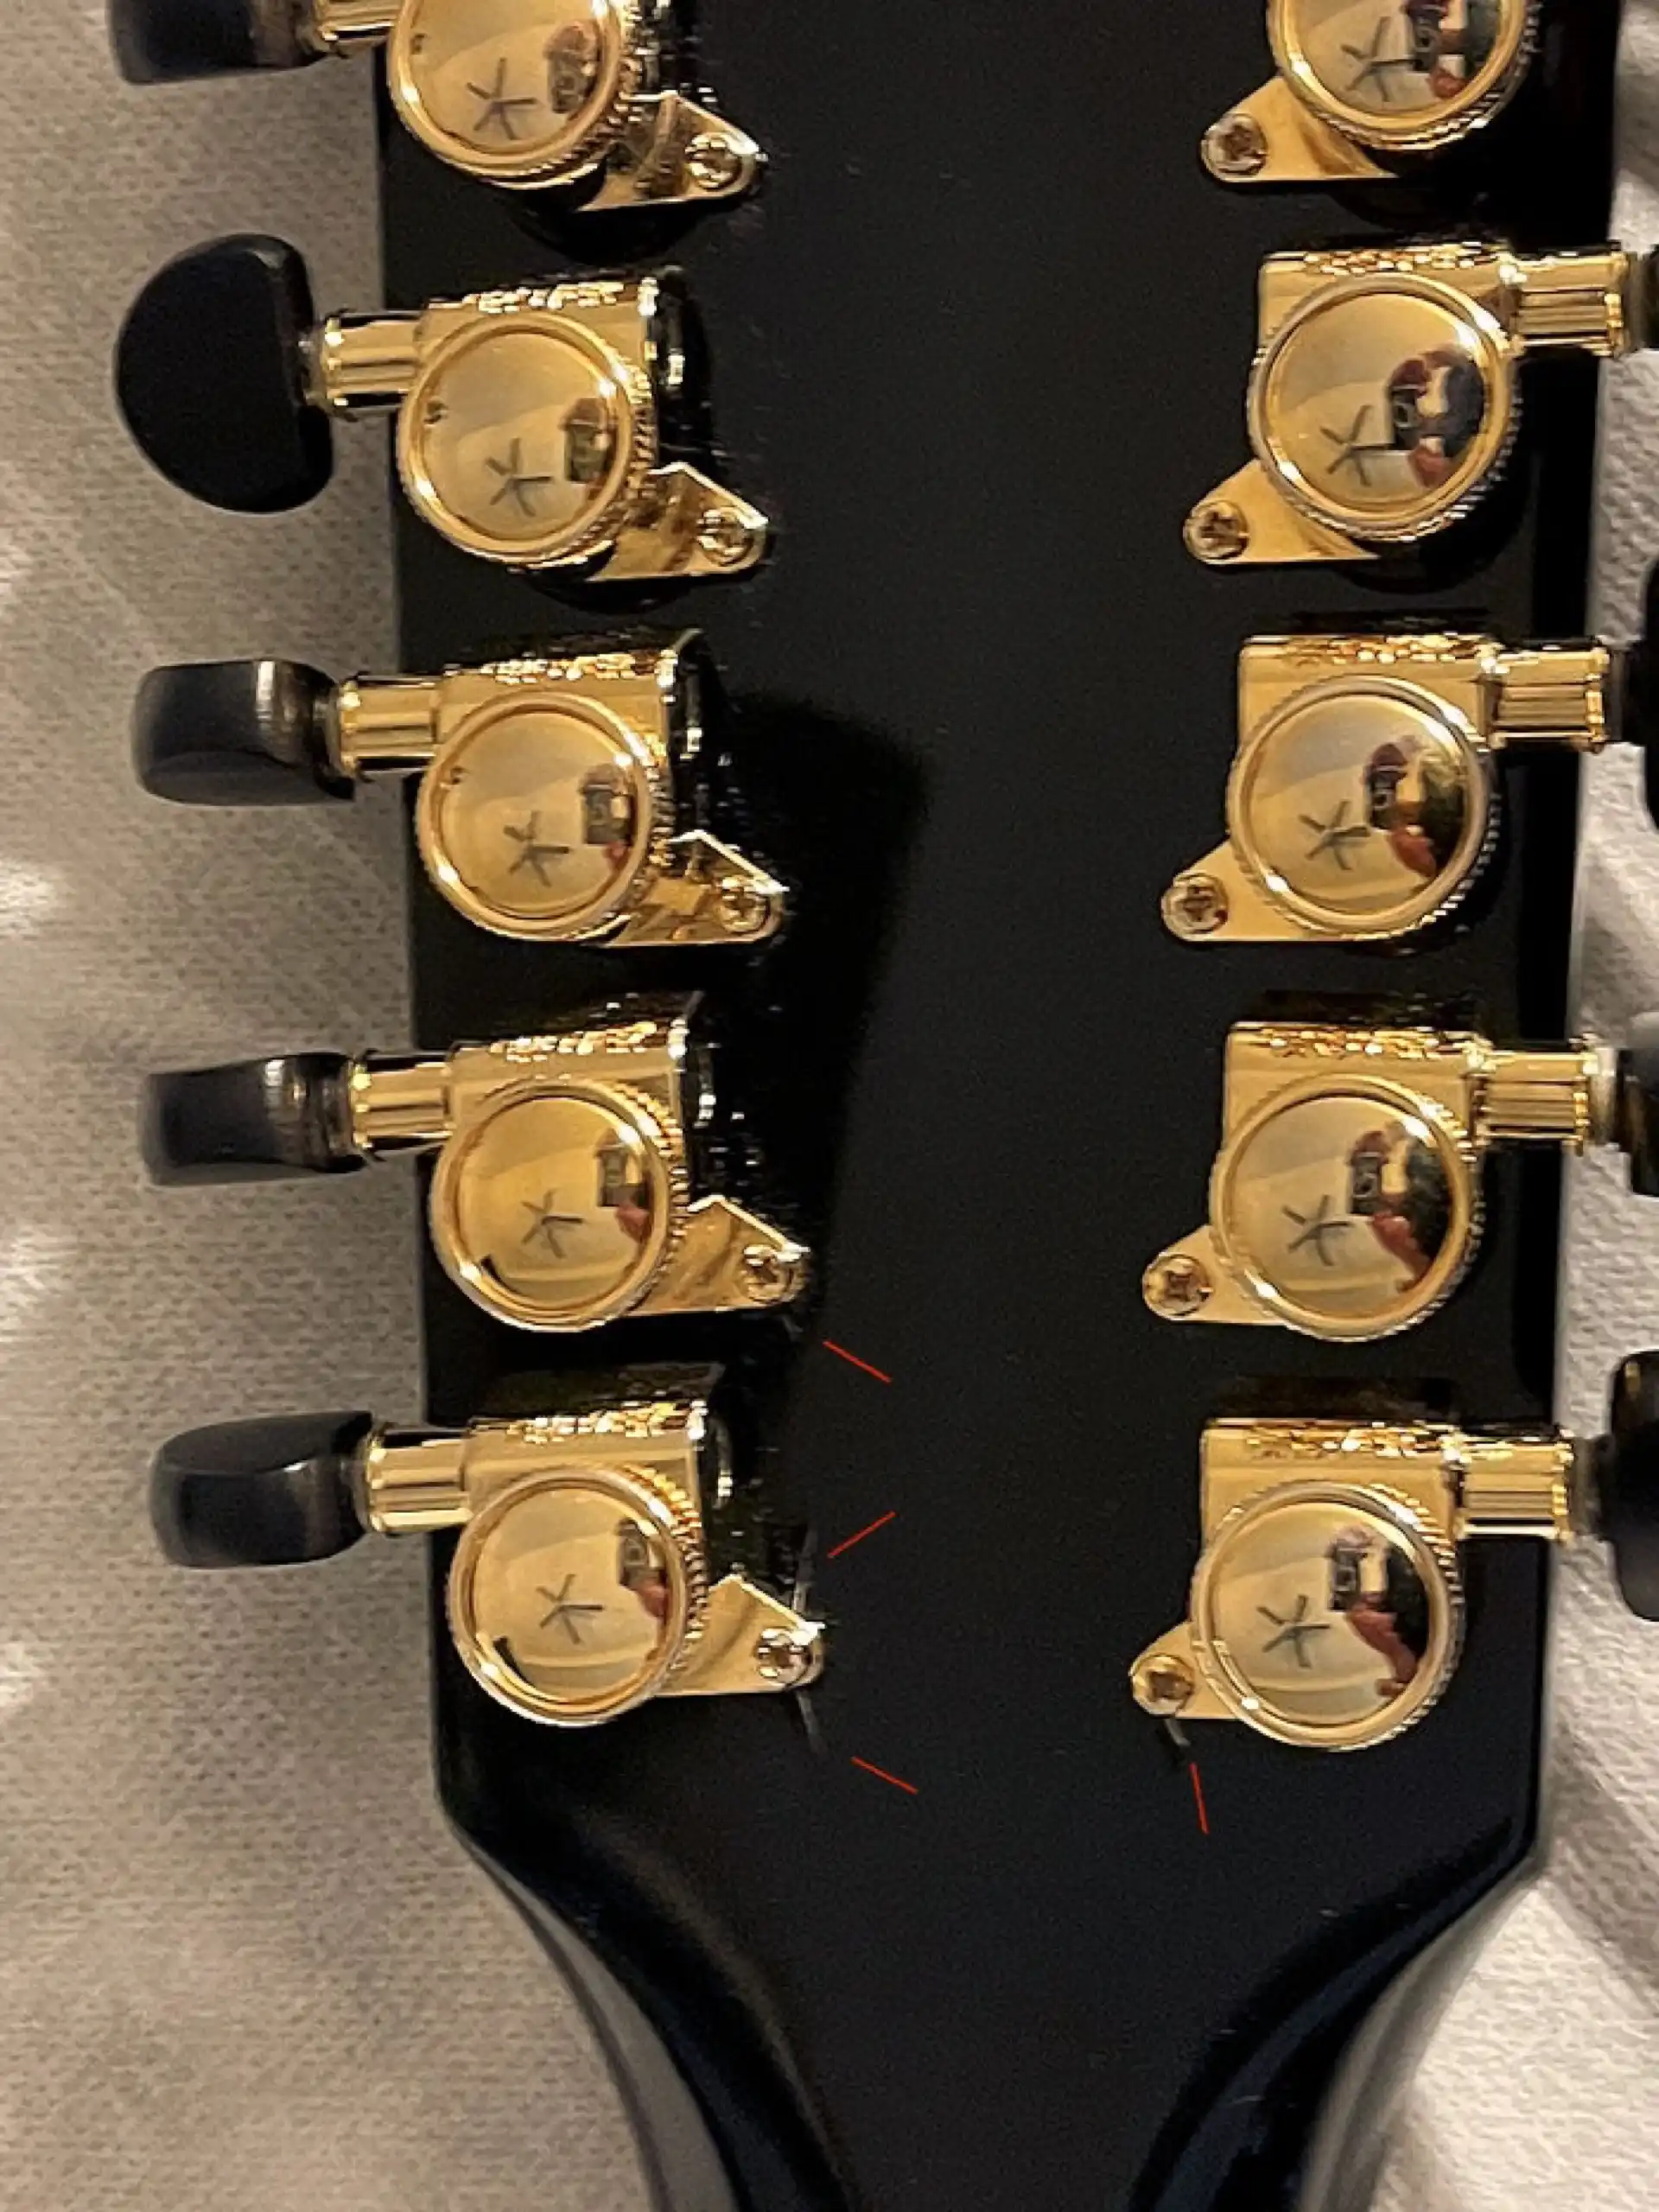
Finish Cracks
Issue #2 - Lifting finish, poor adhesion as a result of too much lacquer.
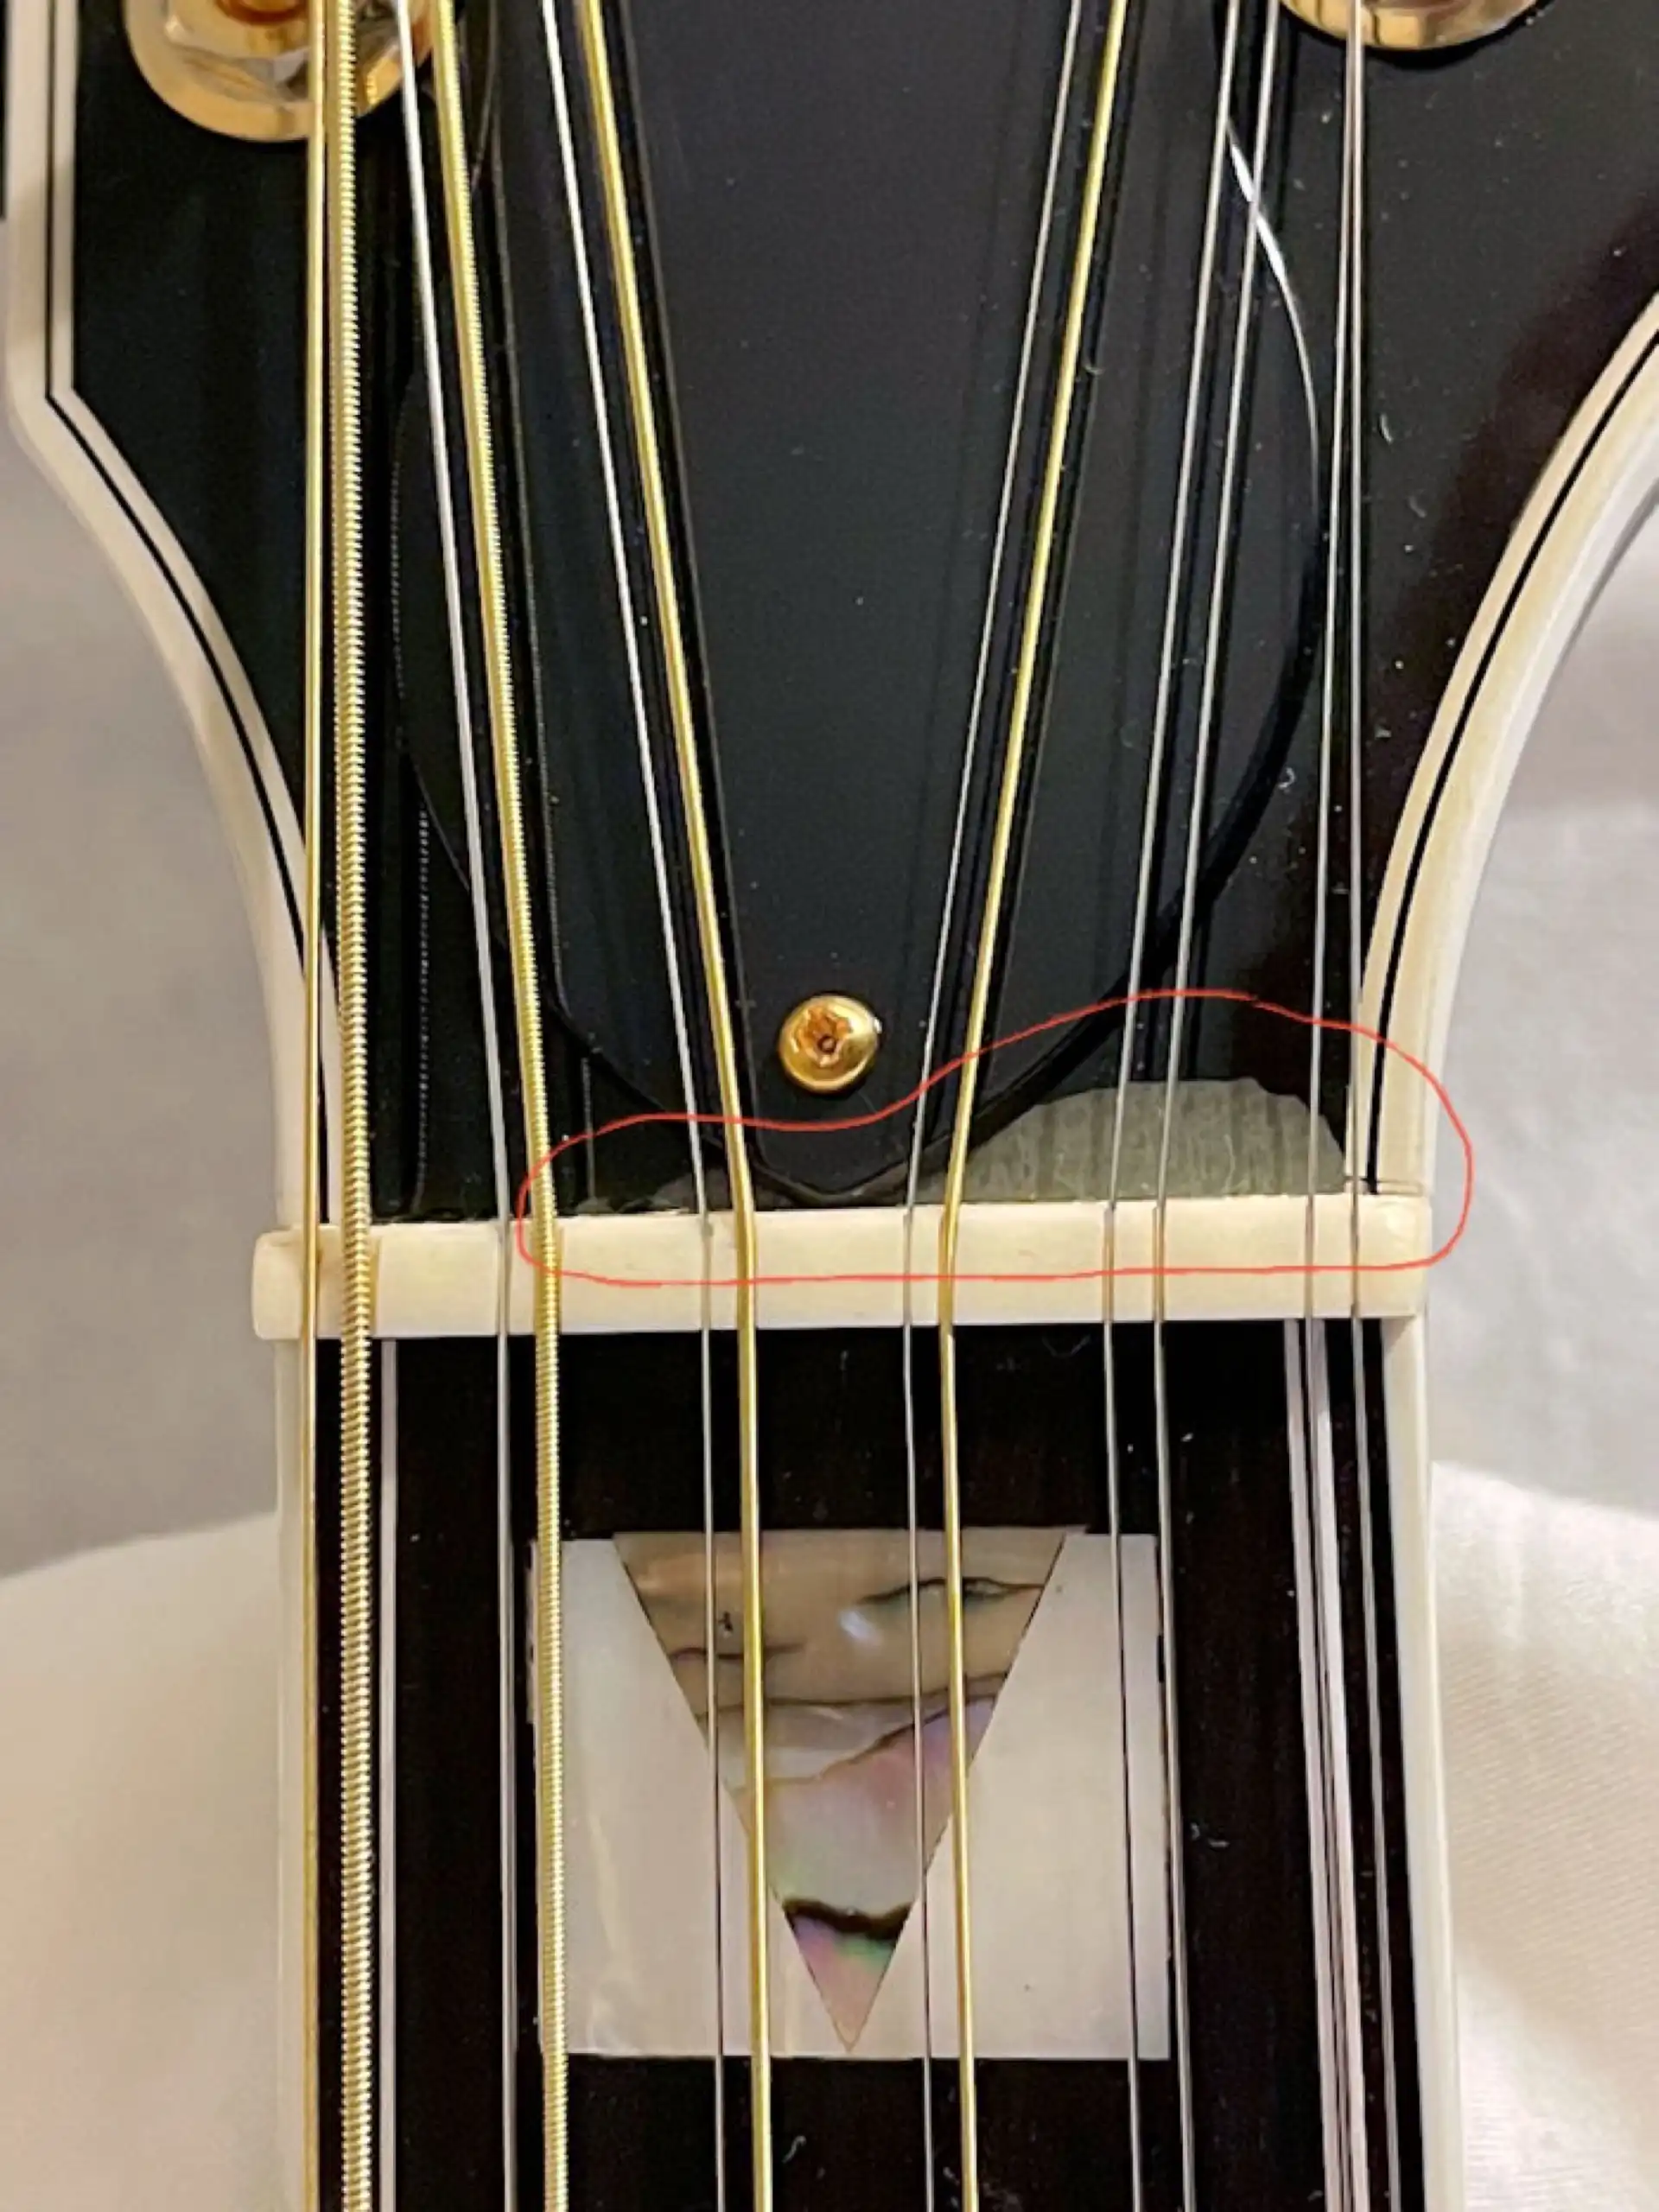
Finish Lifting at the Nut
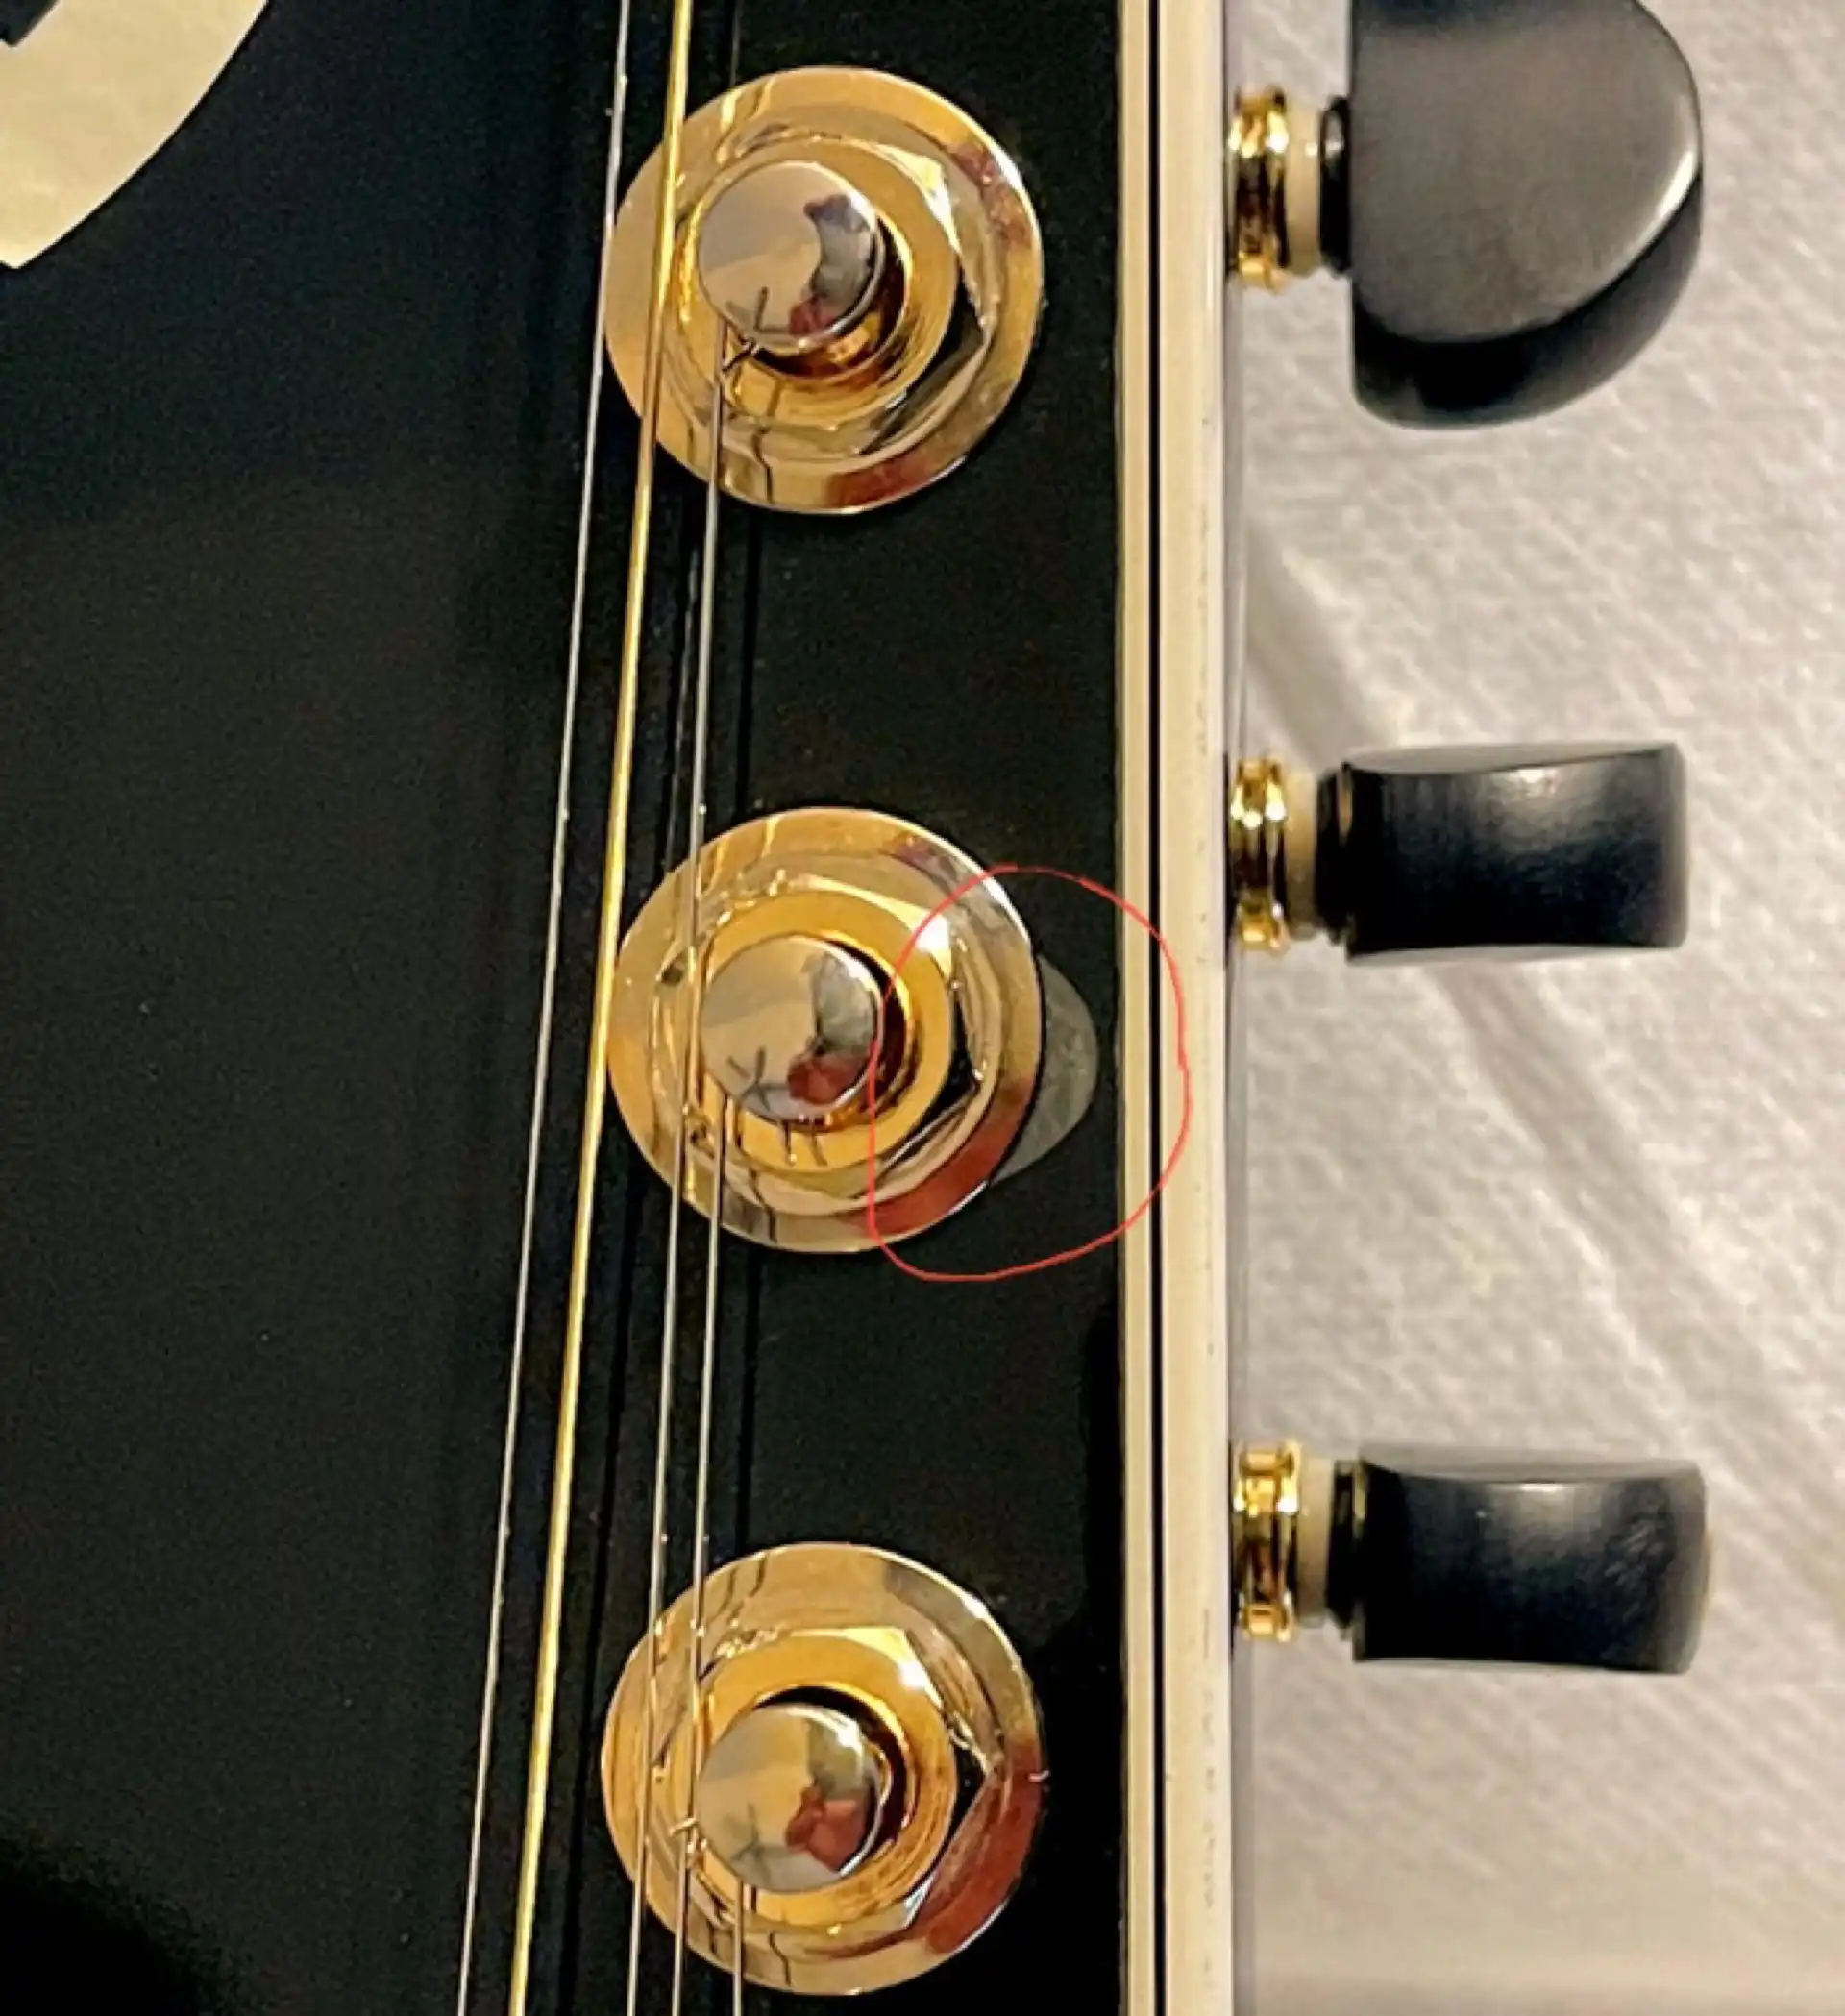
Finish Lifting at a String Post
Issue #3 - Mottling, the result of improperly combining two separate colorant mediums.
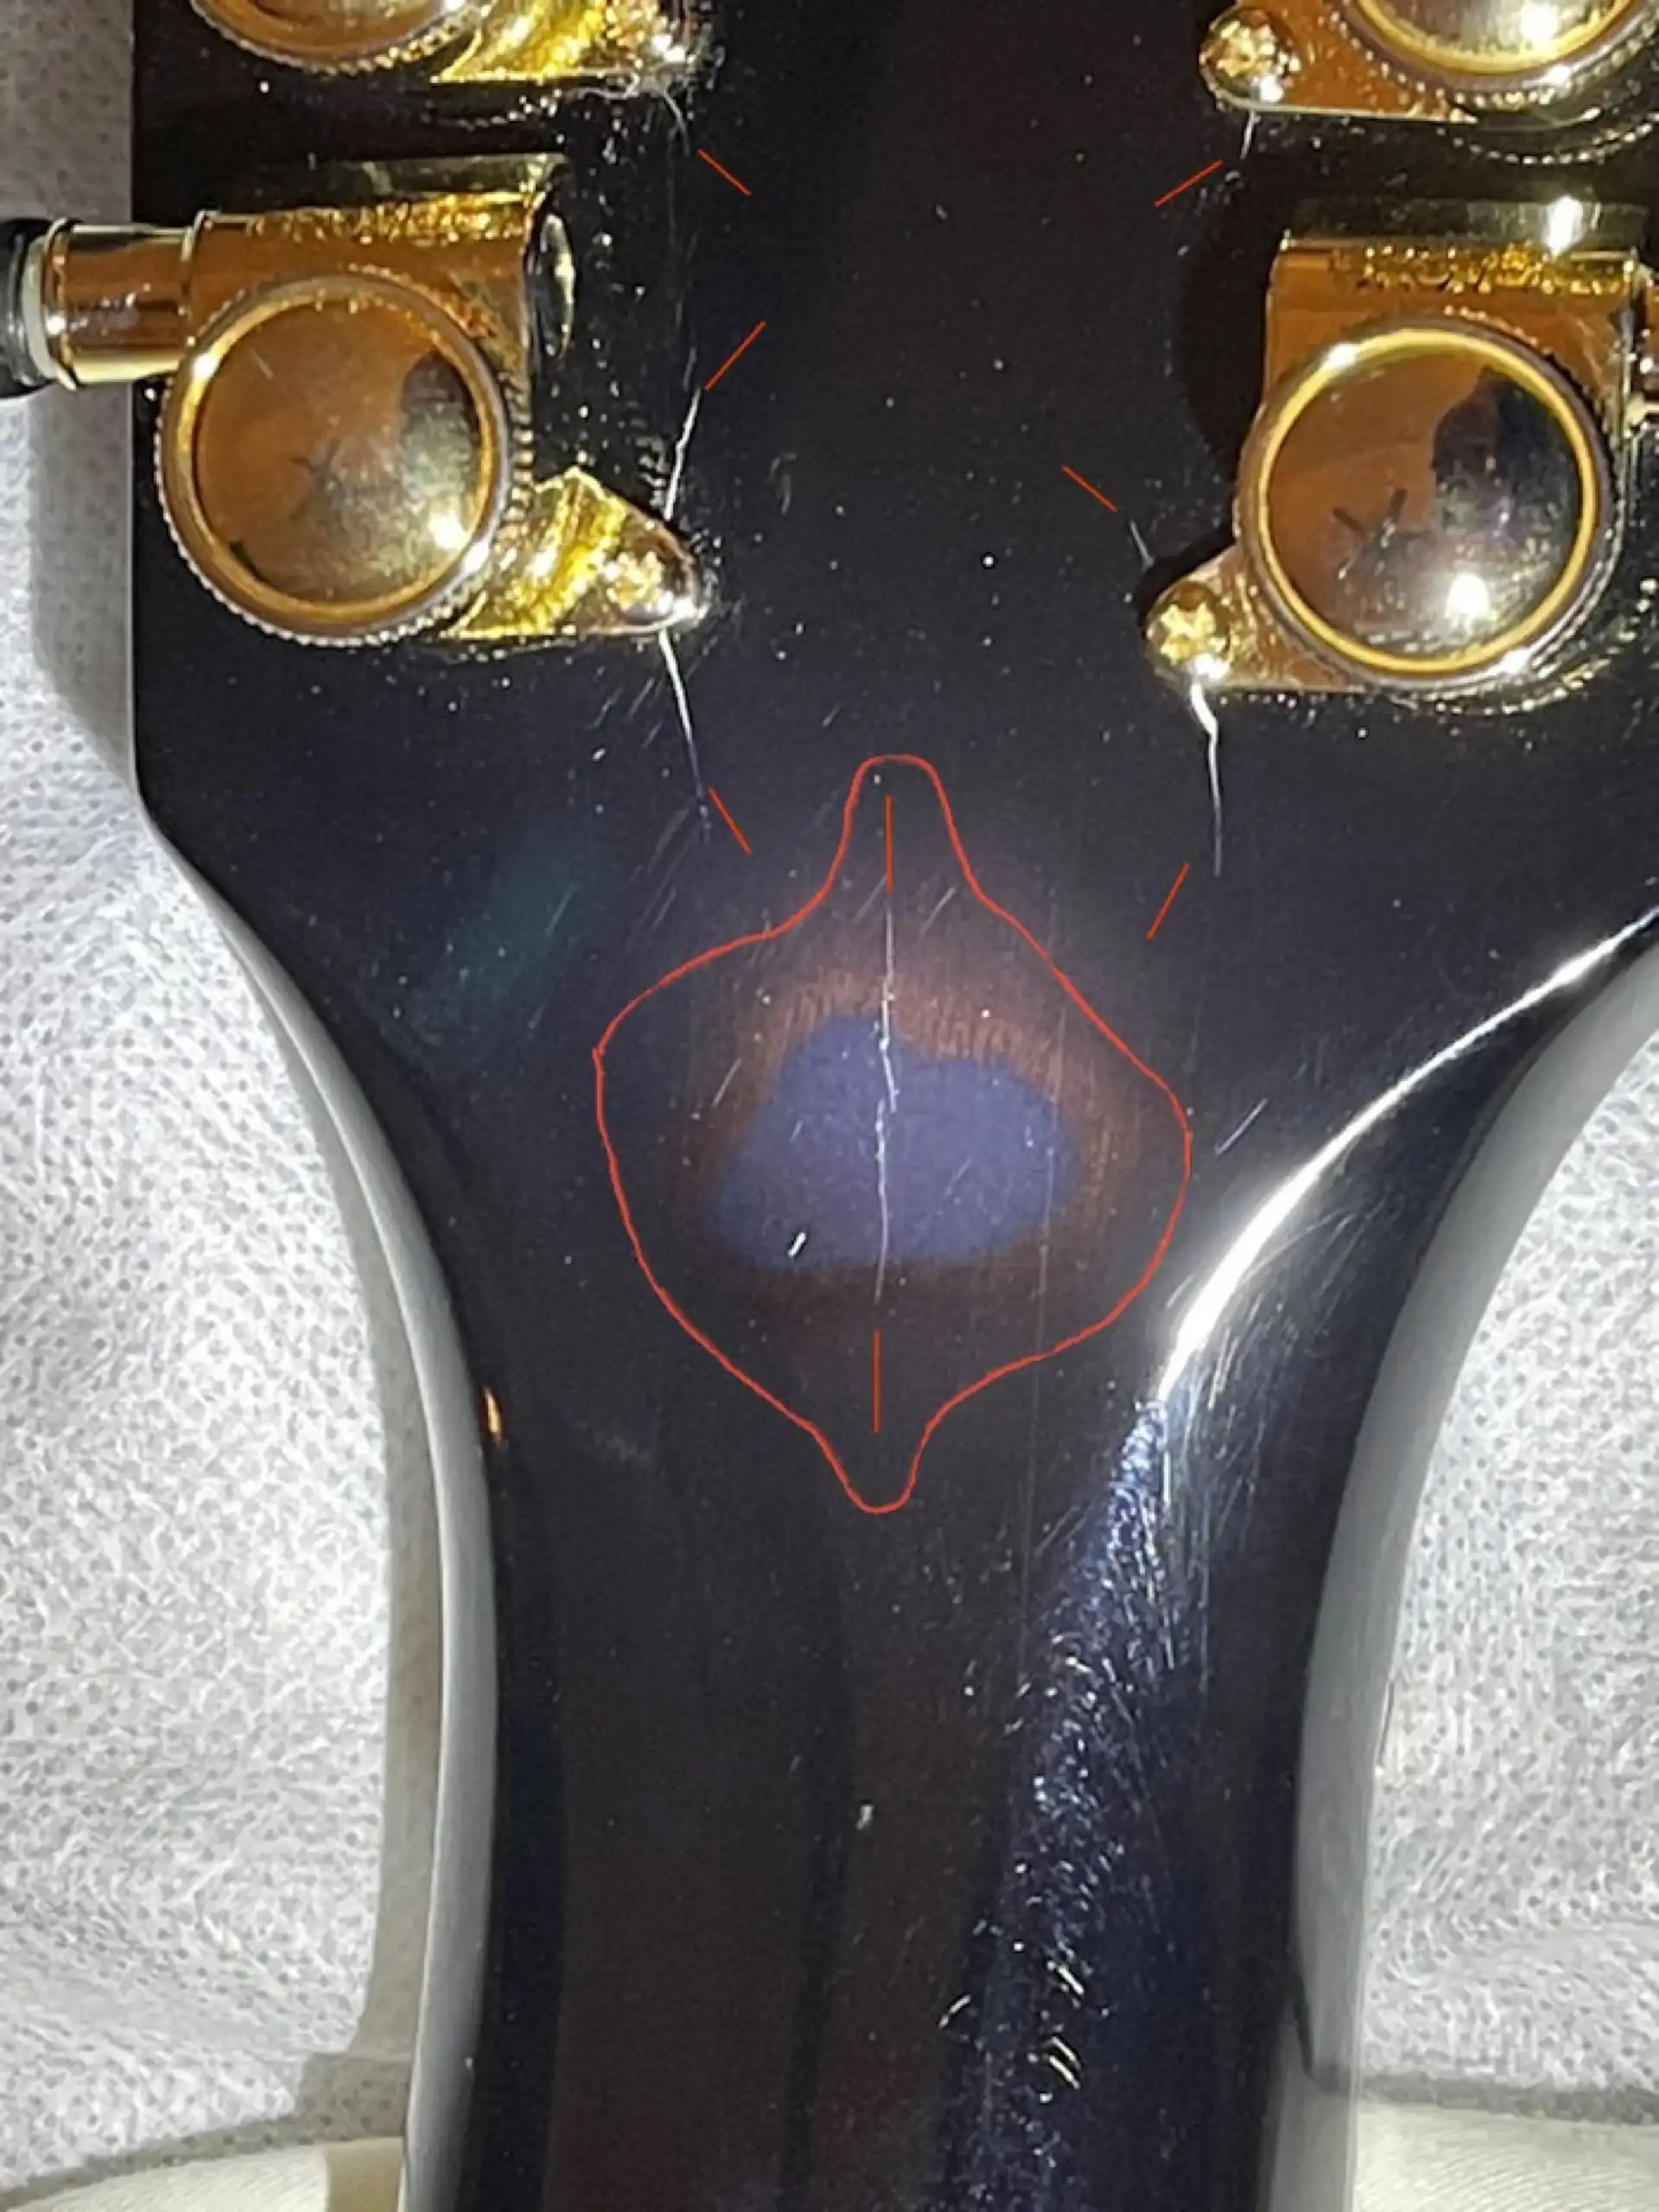
Two Colorant Mediums
Due to the nature of the the finish issues I will not attempt to repair the finish or touch it up. Instead, I will strip the finish off the neck and headstock and respray. I will detail what I believe caused the trouble and what I do to remedy it.
You may recall that I had already removed most of the finish (the translucent finish that I had applied) as it had lost surface adhesion in places. The neck was fine, so I did not strip it. But I had sprayed the headstock with my multiple layers of tint to hide the wood beneath. I should have stripped the neck and headstock at that time...
After removing the strings and saddle, I taped off the fretboard, bridge and soundboard, then covered the body in a soft fabric to preserve the (painstaking effort that went into the) body finish. I then removed all the hardware from the headstock and scraped away the finish from the back of the headstock. I filled both sets of screw holes, the first set from the original Grover tuners, the second set from the new locking Grovers. This second set, the holes I created, are the ones that I let moisture get into when I wet sanded the lacquer prior to buffing, and ultimately resulted in the finish cracks at those screw head locations, as well as another crack at the volute.
Scraped Back of Headstock
So now I get to do what I should have done, earlier. Even though the finish on the back of the neck is fine, I am removing it in order to avoid any problems. I have to be extra careful to not alter any wood dimensions. I will be working on this for awhile, so here is a preliminary view:
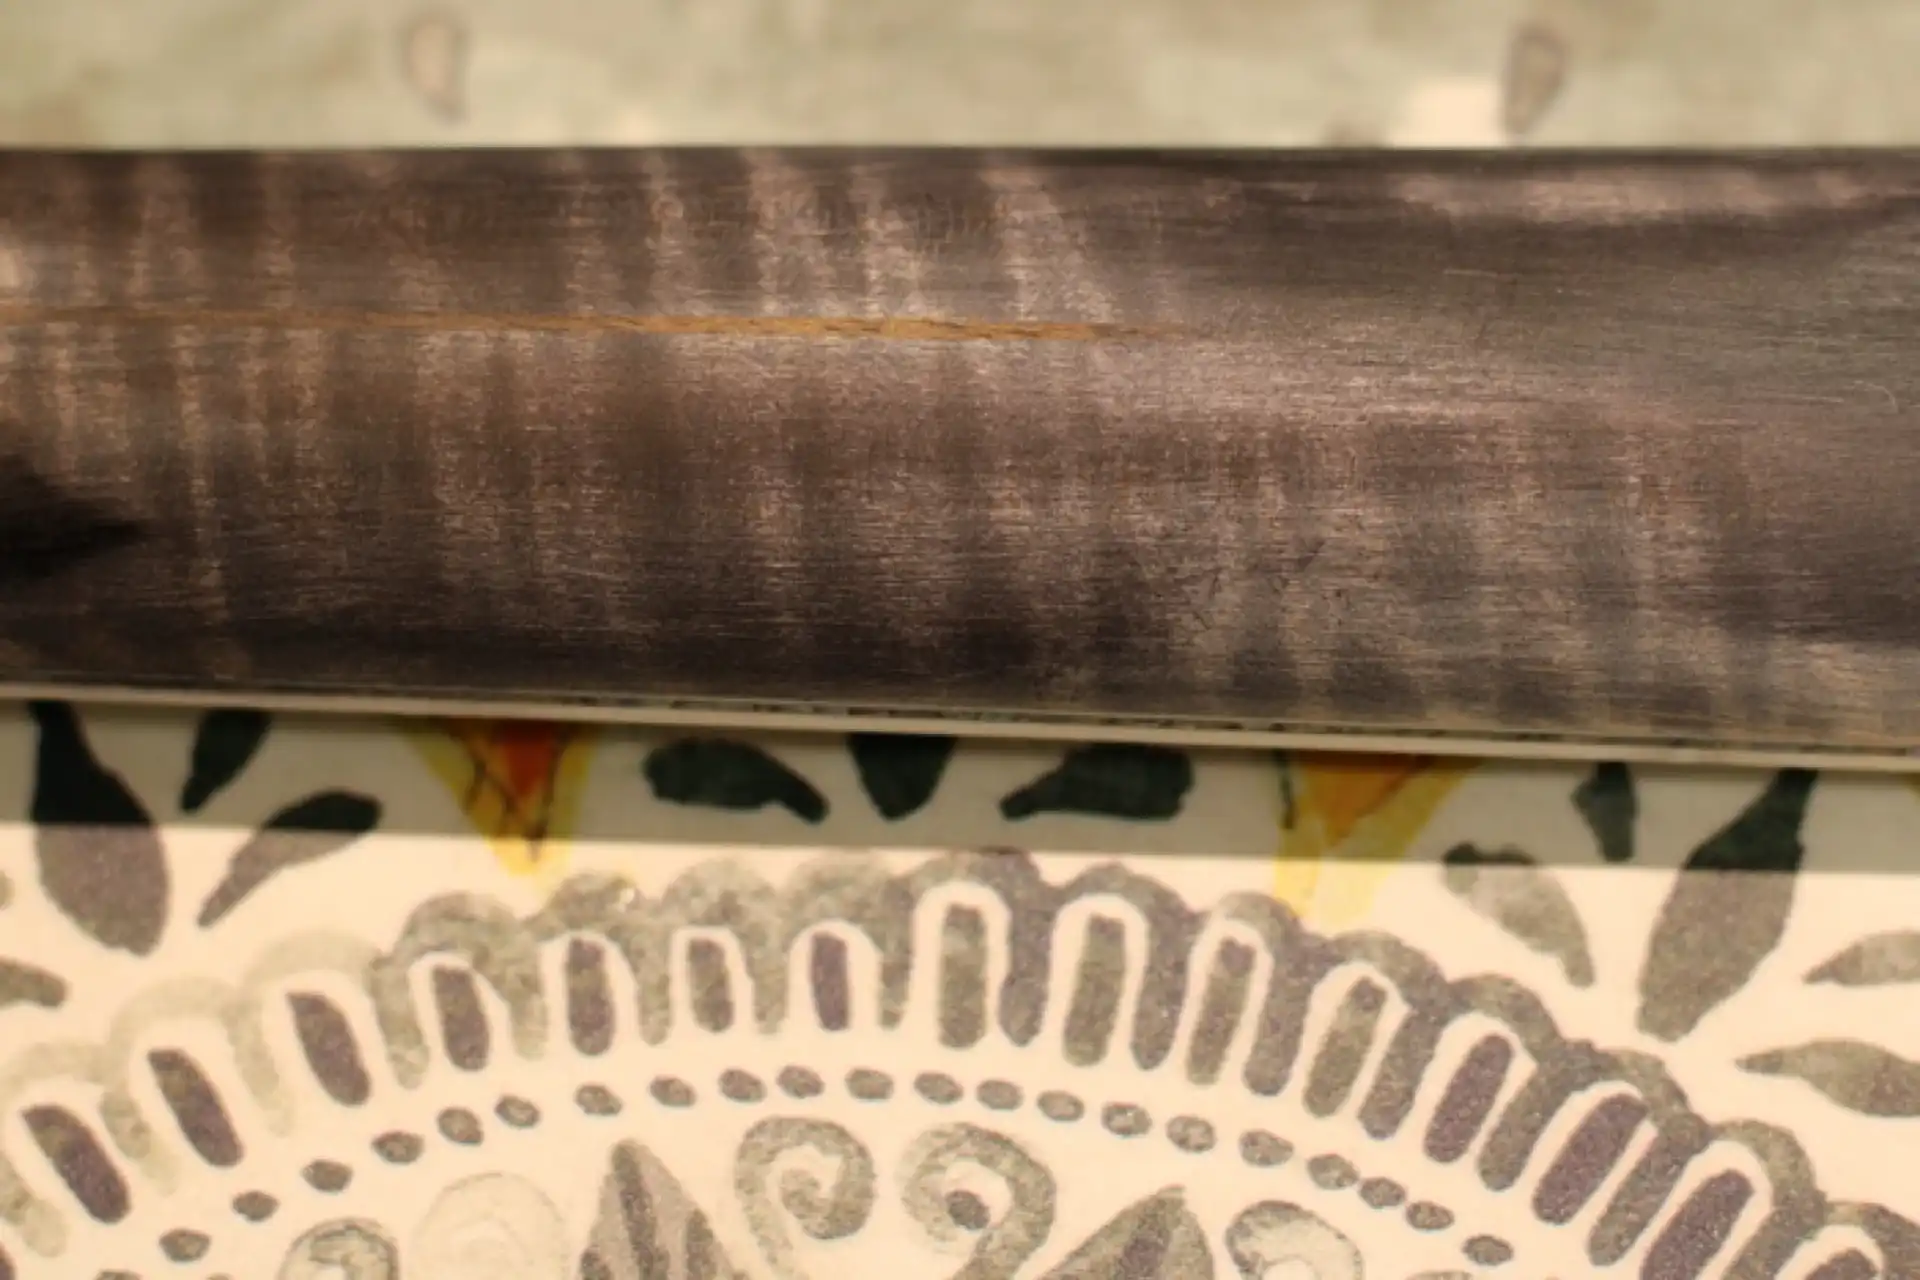
Scraped Back of Neck
Next I scrape the clear lacquer off the face of the headstock to prepare it for a fresh new coat. Poor adhesion can be due to contaminants on the surface being sprayed. I take great pains to NOT introduce contaminants, so I know this is not to blame. The “blistering” that occurred on this headstock is simply the result of too much lacquer being applied too quickly during at least one of several spray sessions.
Scraped Headstock
After scraping the majority of the finish off, I carefully sand the neck and headstock to remove the last vestiges of lacquer and sealer.
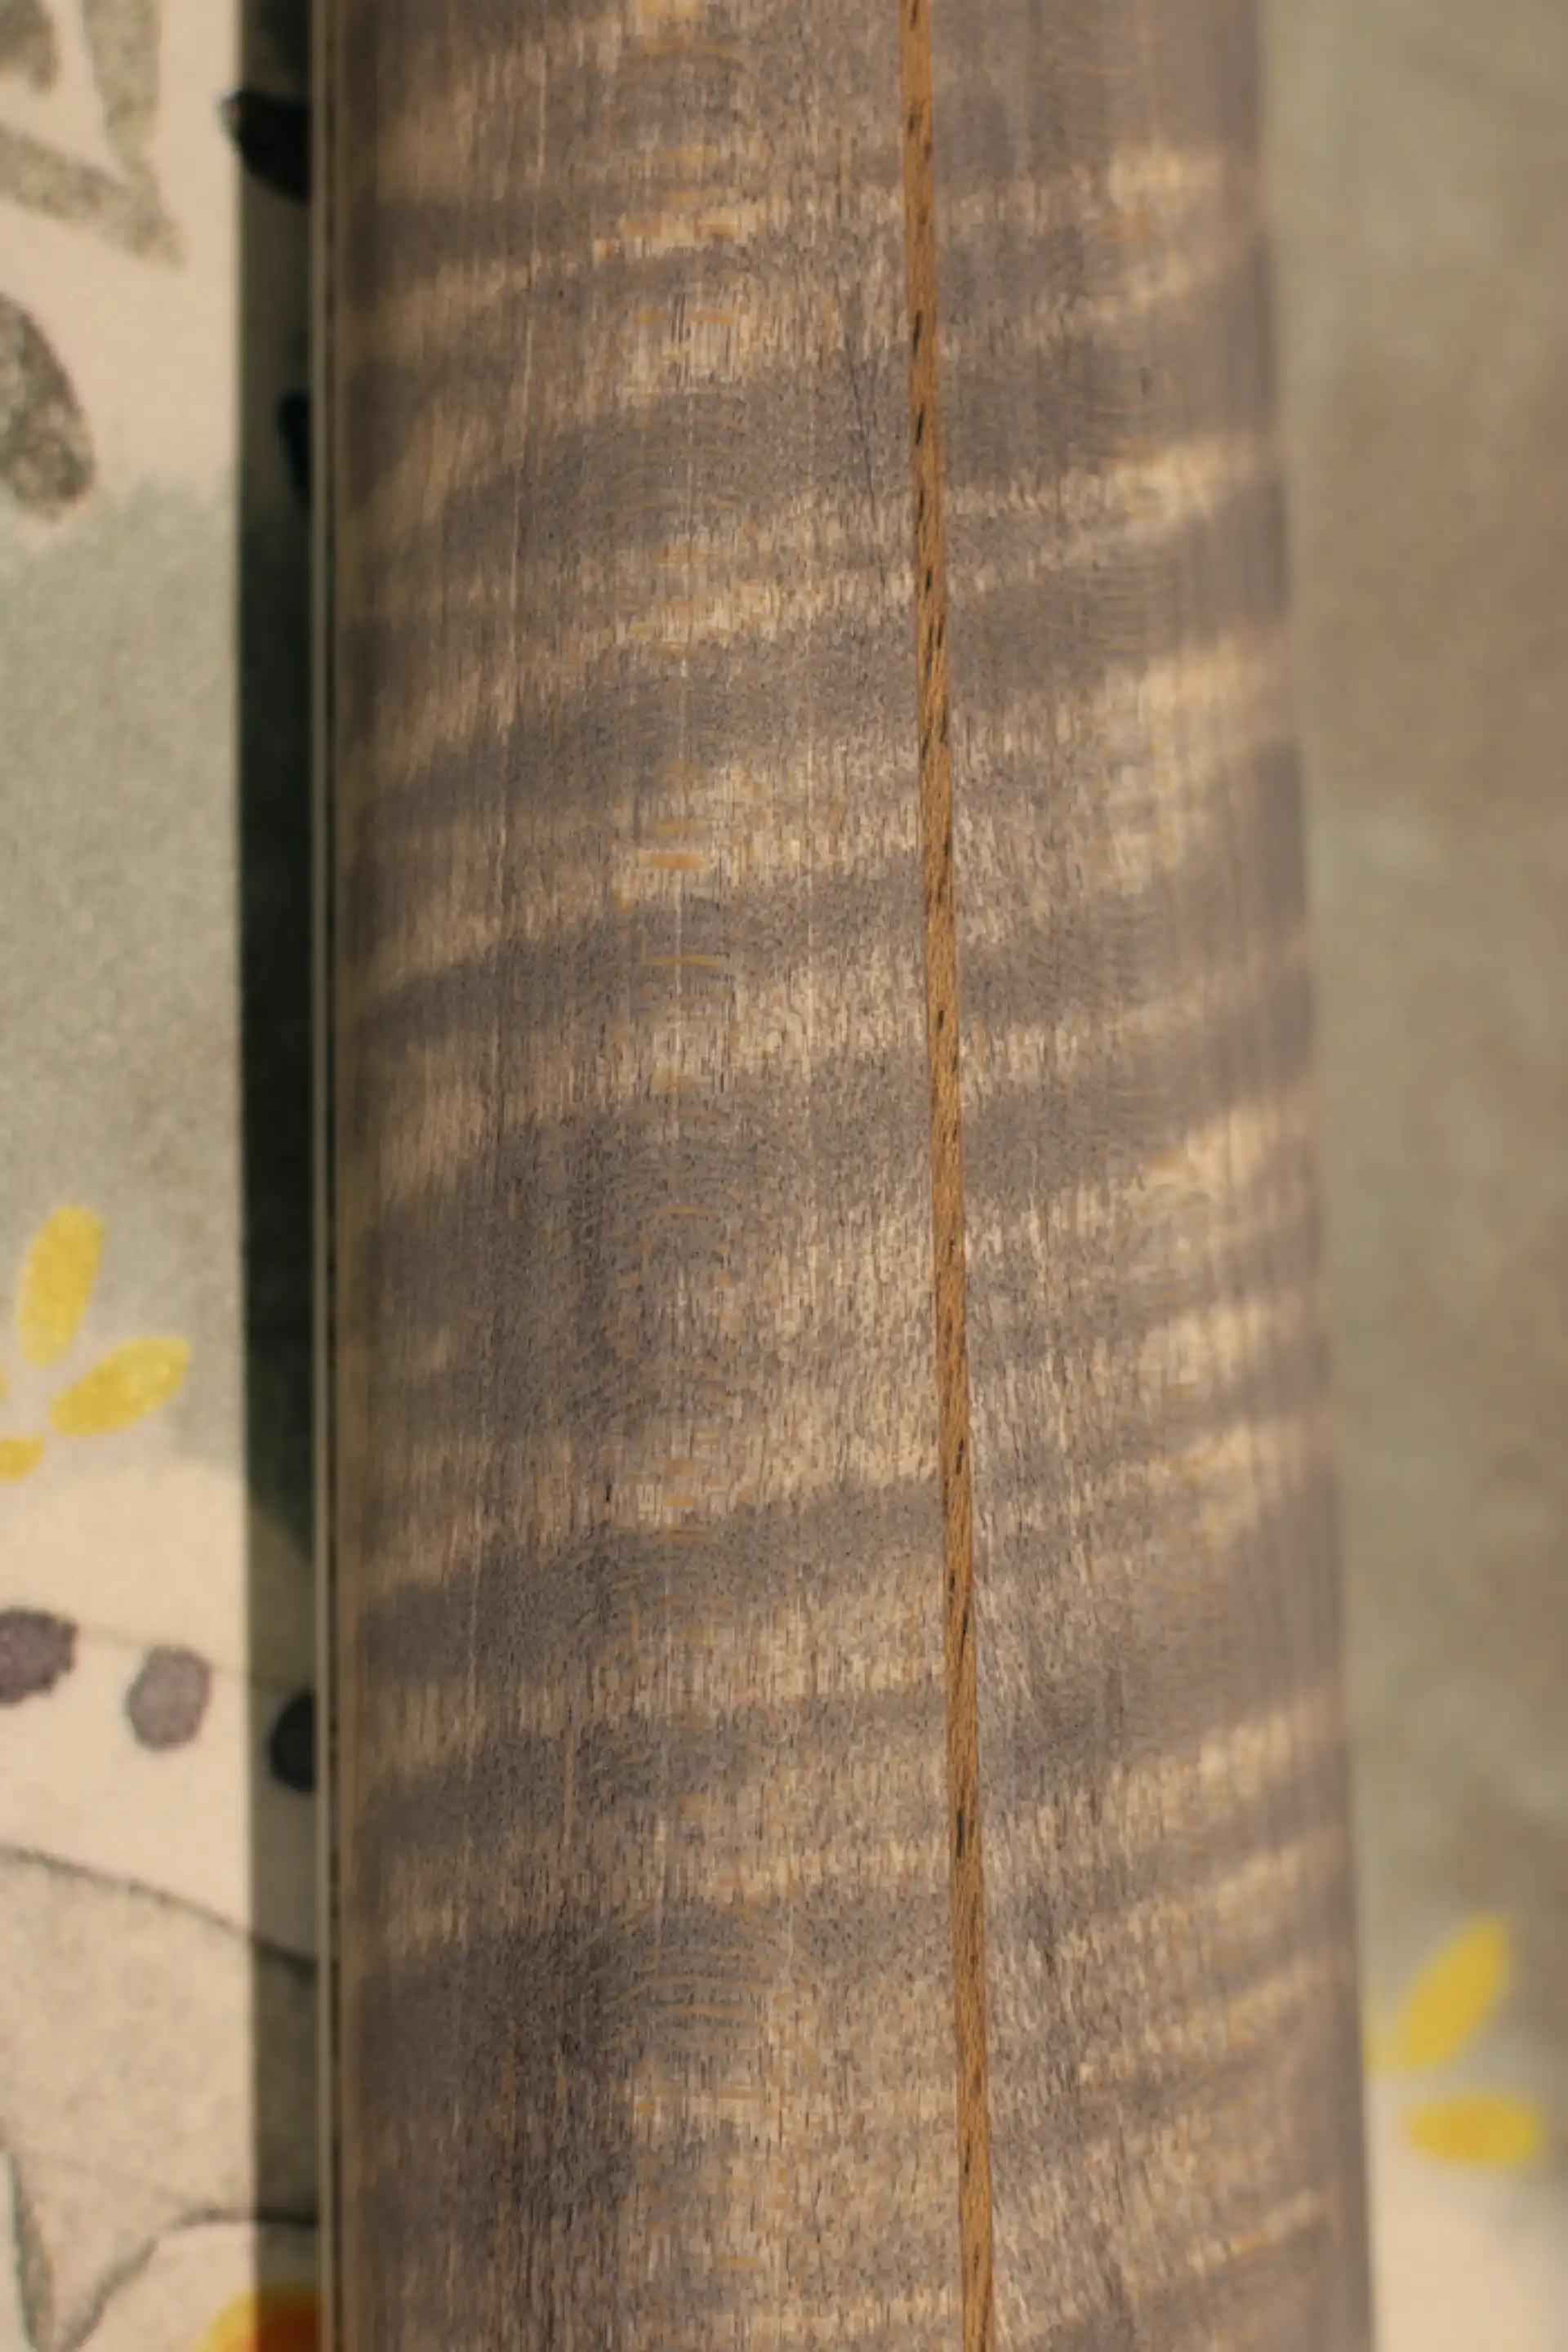
Neck Finish Removed
While the neck doesn't look “bad” after sanding, it can look better. To improve the final results, I need to first stain (re-stain, in this case) the wood. For this I use a product developed by renowned Finisher Jeff Jewitt, TransTint Black #6023. It is important to allow the stain to dry thoroughly before proceeding.
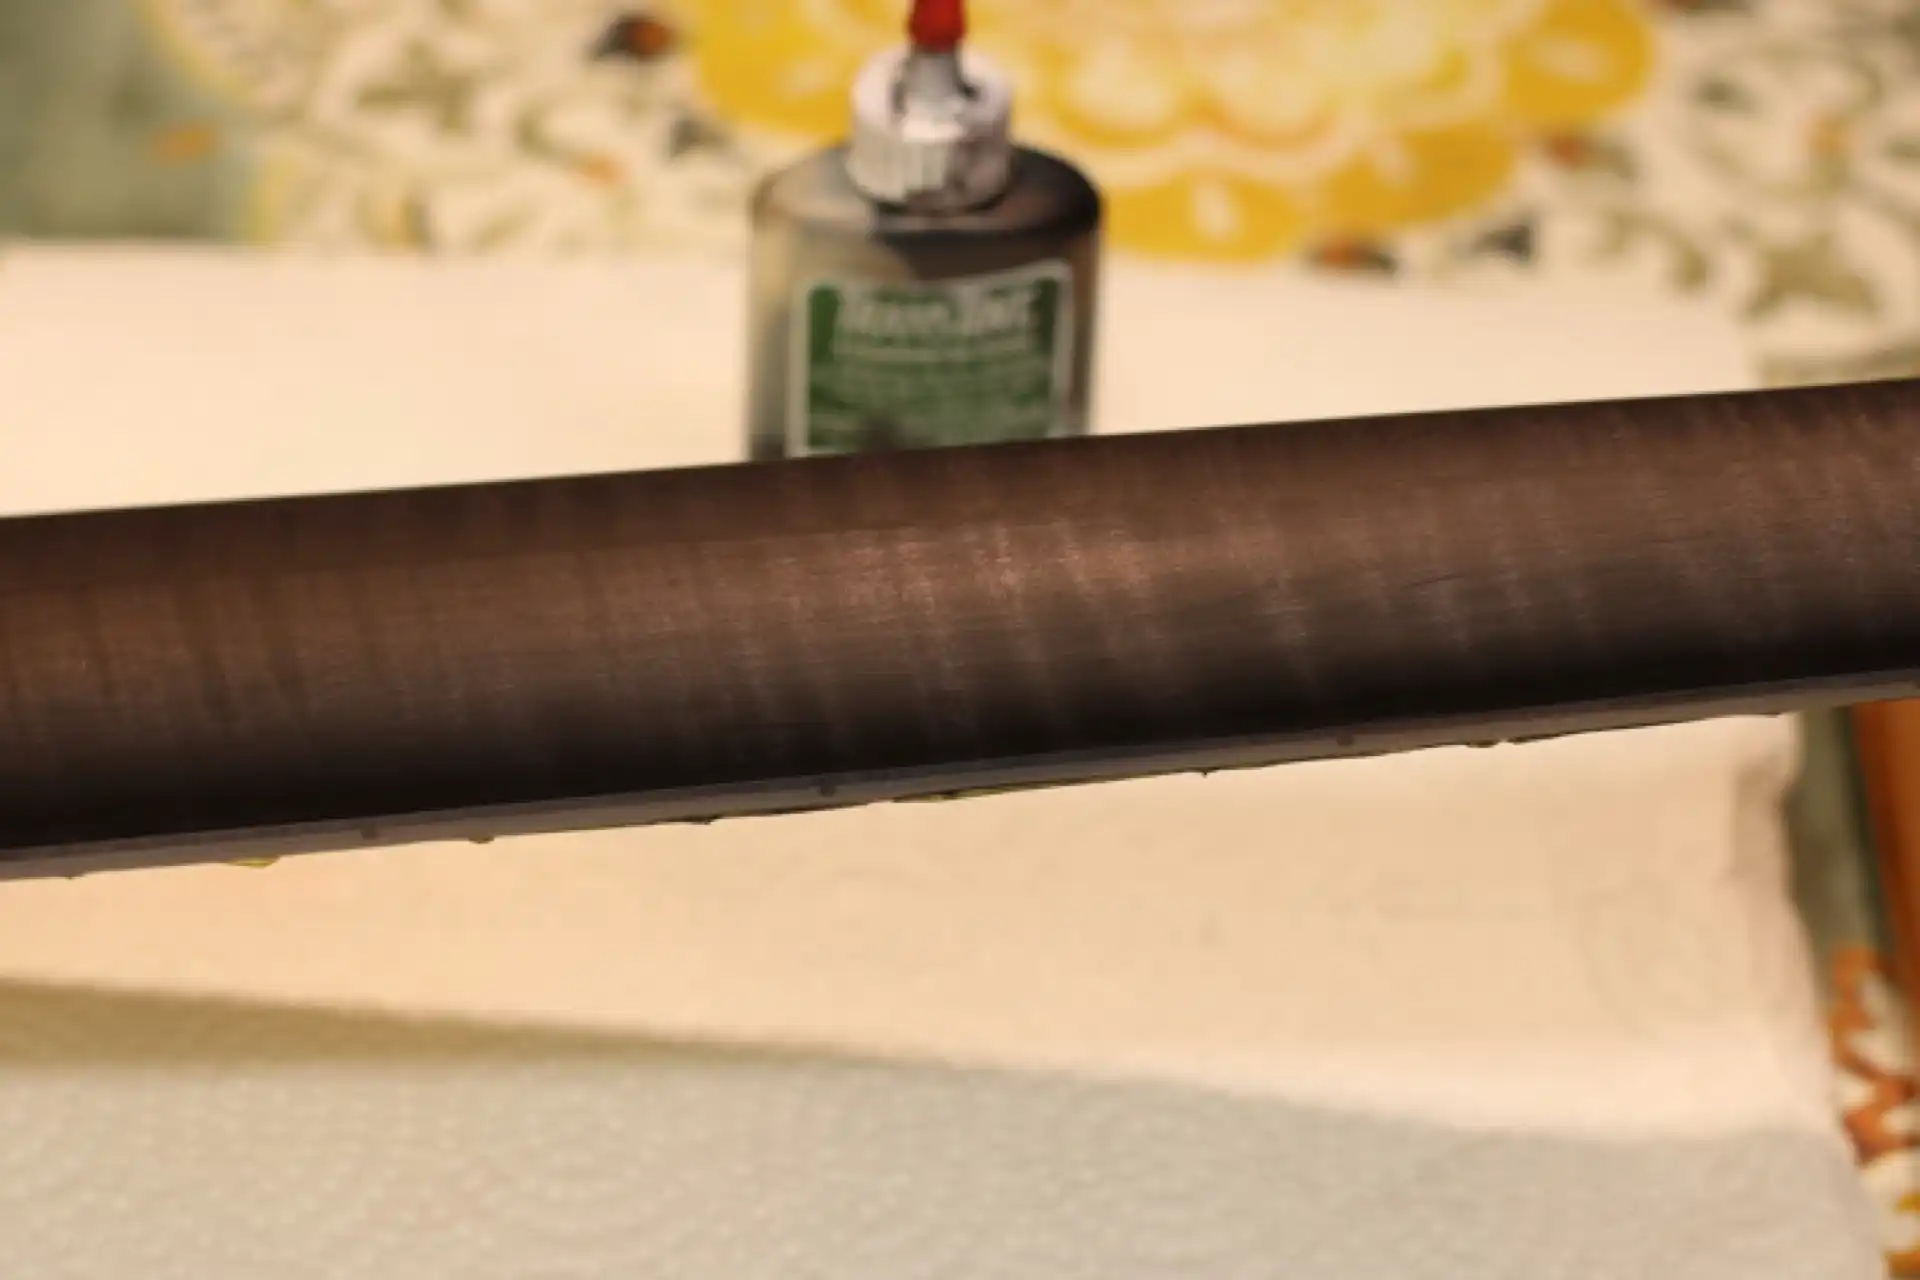
Neck Stain Applied
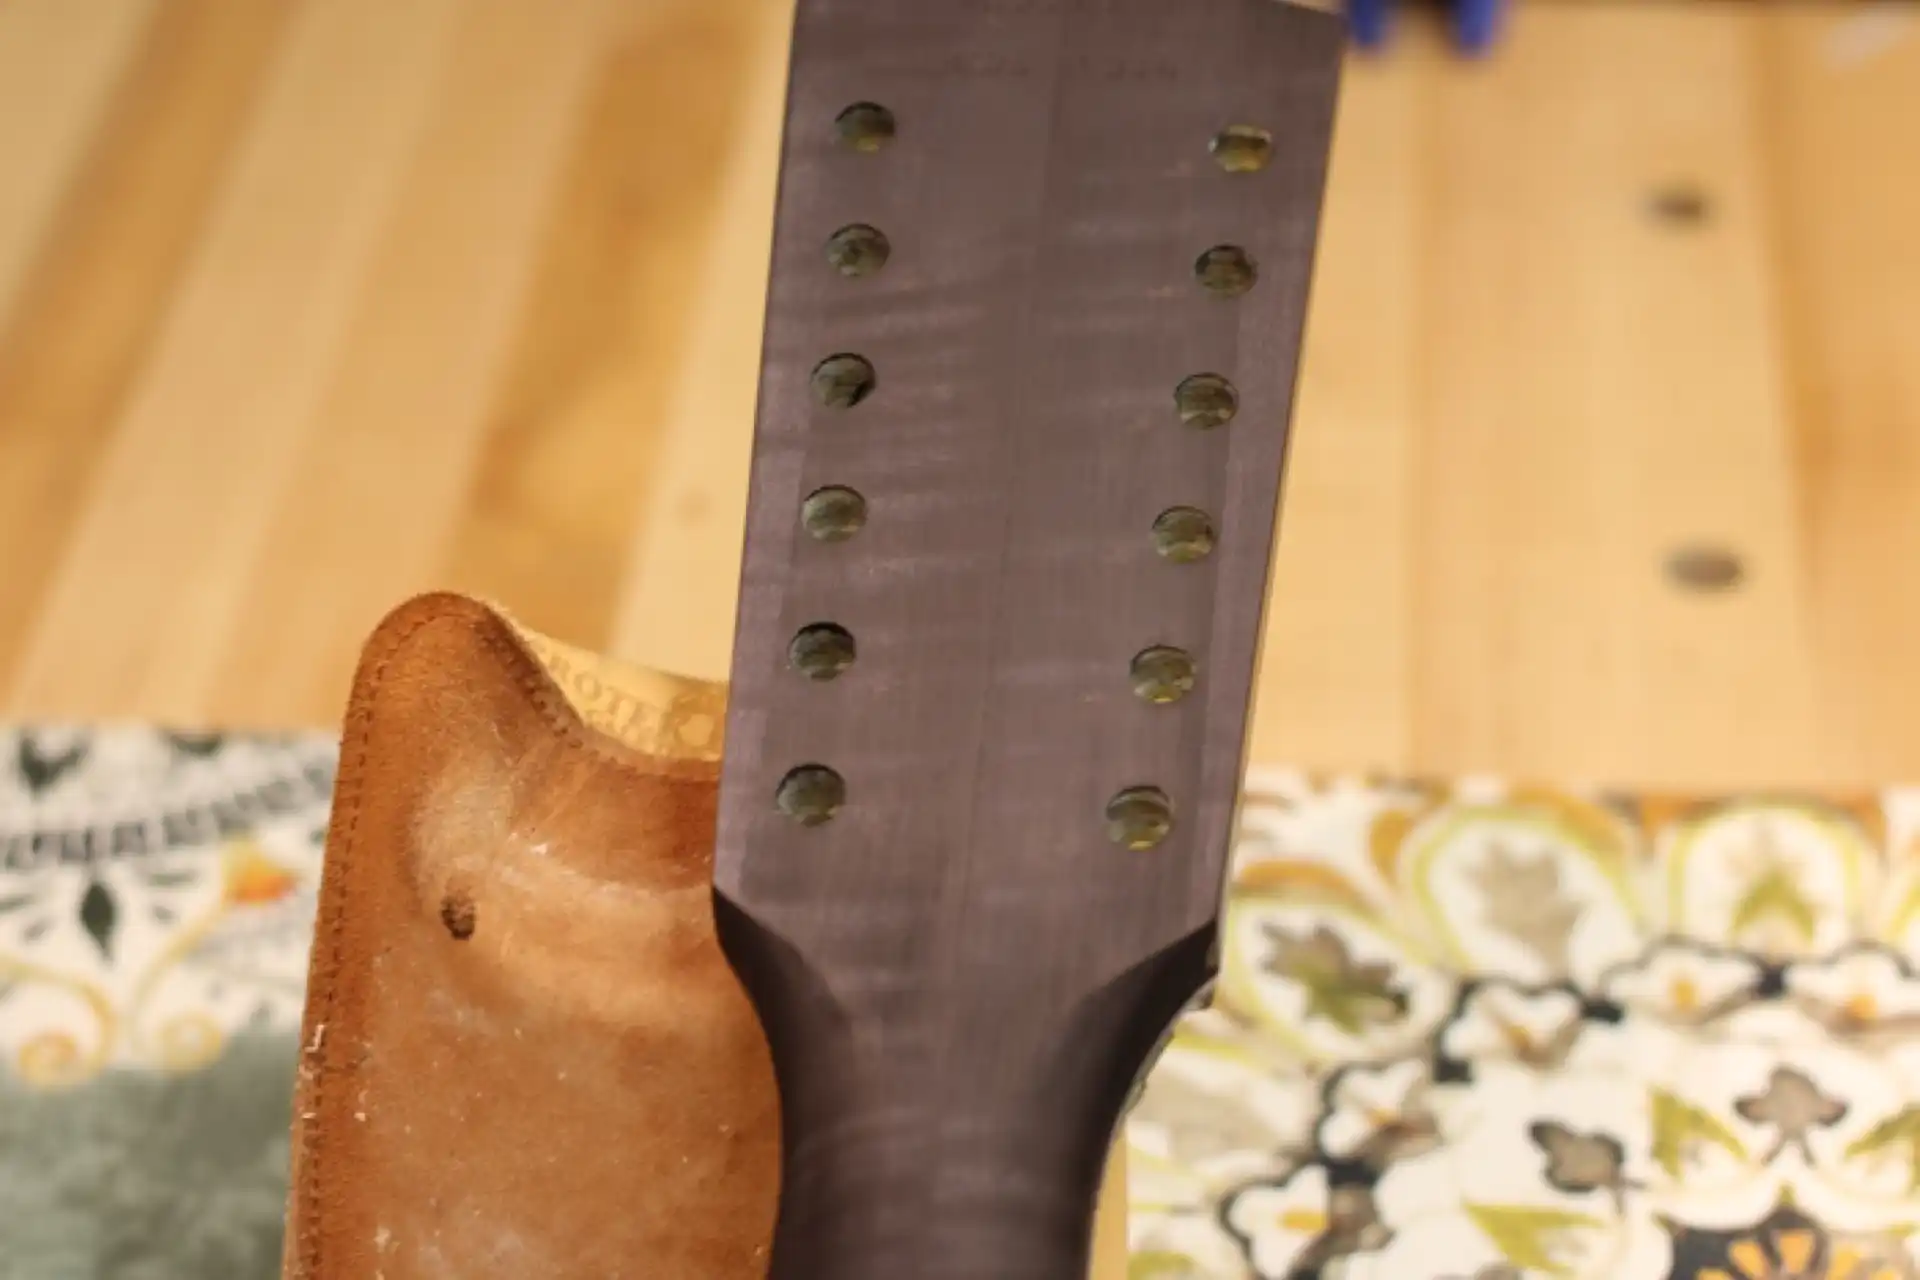
Headstock Stain Applied
After the stain is dry, it is necessary to lightly sand back the stained wood in order to reveal a deeper contrast in the wood grain. This stain and sand effort is made to more heavily emphasize the Tiger Stripe, and not rely on lighting and shadowing alone to see the effect. This step is as much art as it is science. Sanding too much, and unevenly, will generate an undesirable mottled look, as well as set us back two steps that would need to be repeated. Good lighting, a light touch, and constant checking and re-checking the overall appearance is critical...
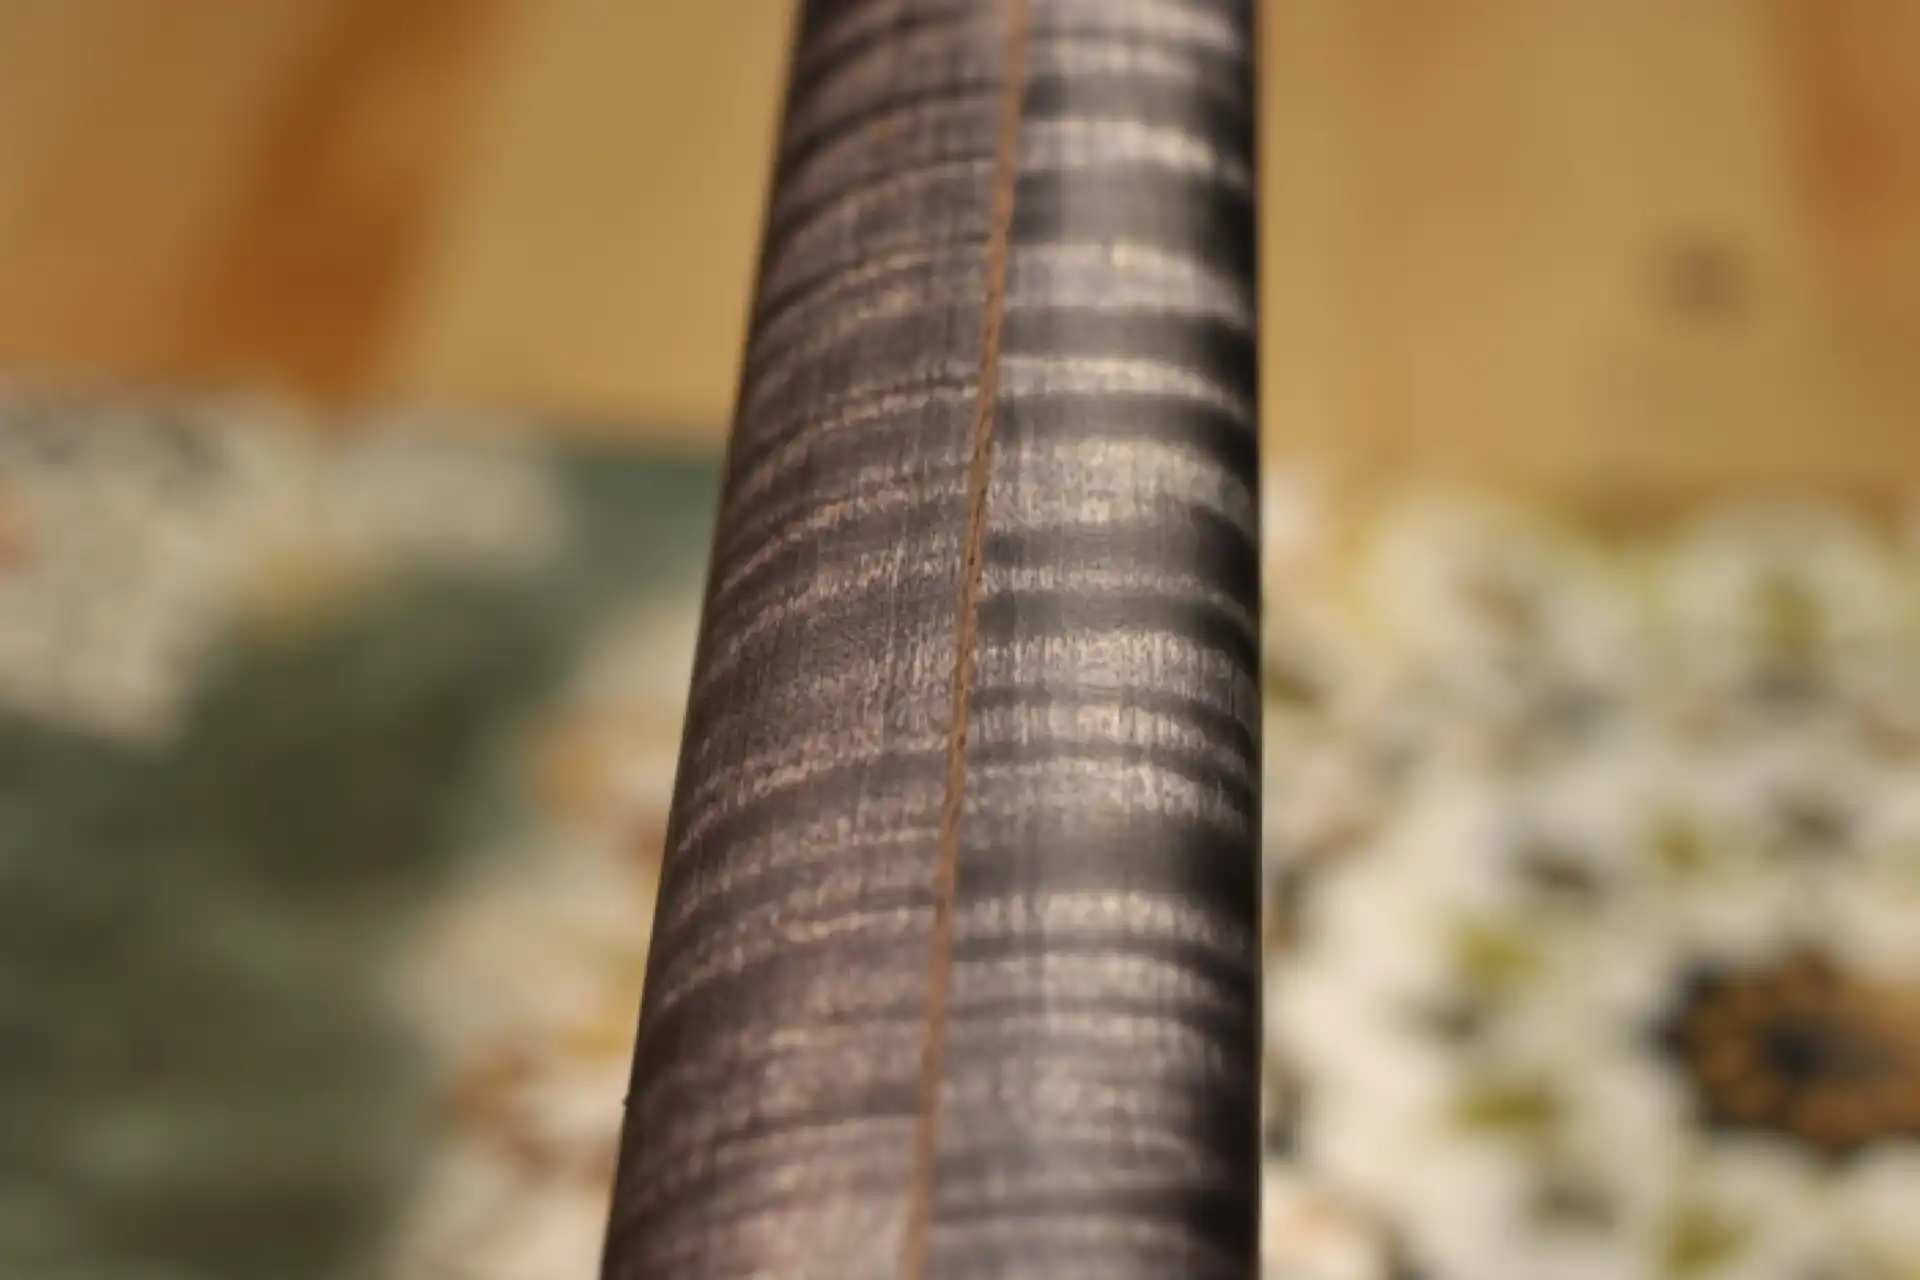
Neck Stained and Sanded
Ahh... much better!
Next up is some minor pore filling. The center stripe looks, smells and tastes like Walnut. It is definitely a very porous hardwood, and cannot receive lacquer, as is. If I were to spray it in an attempt to fill the pores, I would need to spray a lot of lacquer. As the solvents flash off over time, the lacquer would shrink back into the recesses and divots would eventually reappear. And that's hoping the very heavy spraying didn't one day up and lose adhesion and lift off.
I use a combination of ebony dust and a medium viscosity CA glue to fill the pores, sanding the area smooth.

Neck Pores Filled
If the neck was separate from the body, I would have scraped the entire thing clean, effectually starting over. But the neck is attached to the instrument at this point, and I have no intention of removing it. Instead of scraping up close to the body where I am guaranteed to have a permanent witness line after adding the new lacquer, I will attempt to melt the new finish into the old (at the heel) and, at the same time, transition from opaque (again, at the heel) to translucent up the back of the neck... (lest I minimize the challenge ahead, this is a high pucker factor path I am taking. I already have multiple layers of color (black) applied using two different mediums with varying levels of transparency, and I am planning on removing some of that tinted finish, adding new tinted finish, and making it all look as though I was never there. Sure. Easy, right?).
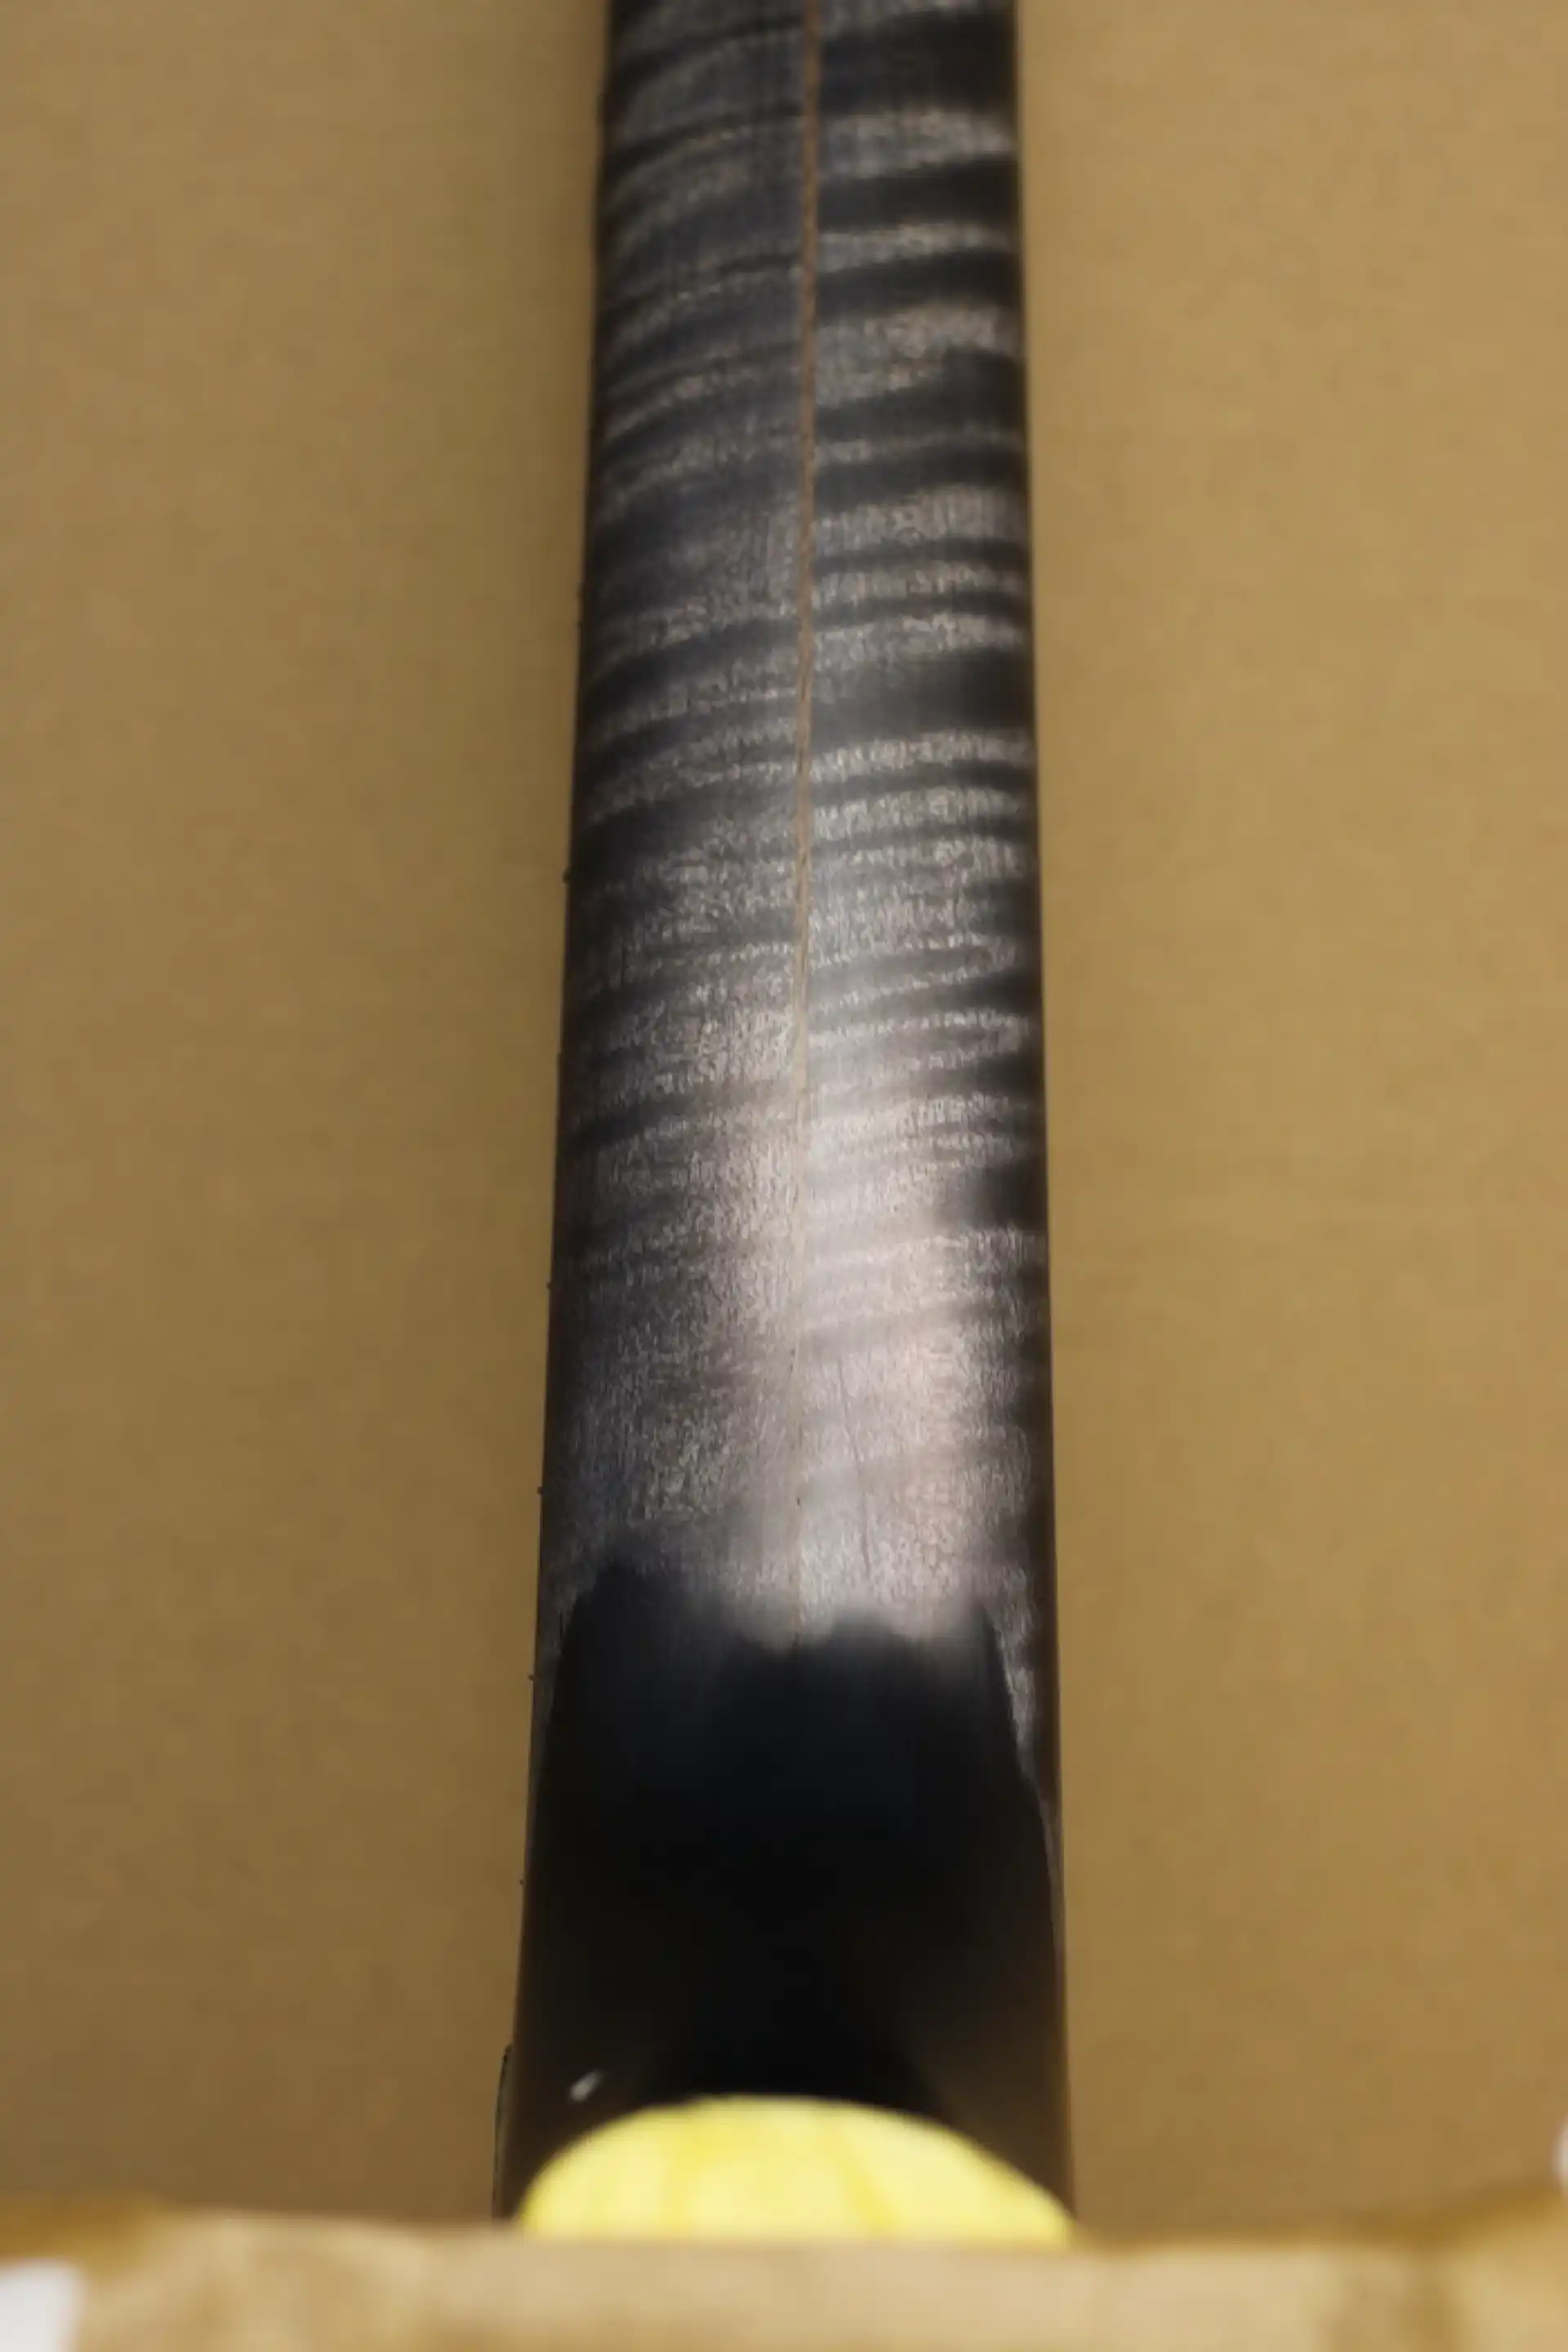
Neck Finish Transition (Before)
Worth noting, here, is the construction of the headstock which pretty much dictates my approach to this finish. It consists of five (5) pieces of wood: the 3-piece laminate of the neck plus the 2 “wings” (added to widen the headstock). In my opinion, the appearance of the mismatched grain is less than desirable. It was not as noticeable when the guitar was originally sprayed clear and everything was blonde, but now thanks primarily to the heavy contrast that the black stain provides, every detail is amplified. The first time I finished the neck I simply hid the back of the headstock under solid black. This time I am going to attempt to allow some of the Tiger Stripe down the center of the headstock to be visible. This will be the section that shows between the tuners. I will create an opaque finish around the edges which will hide the glue joints of the wings.
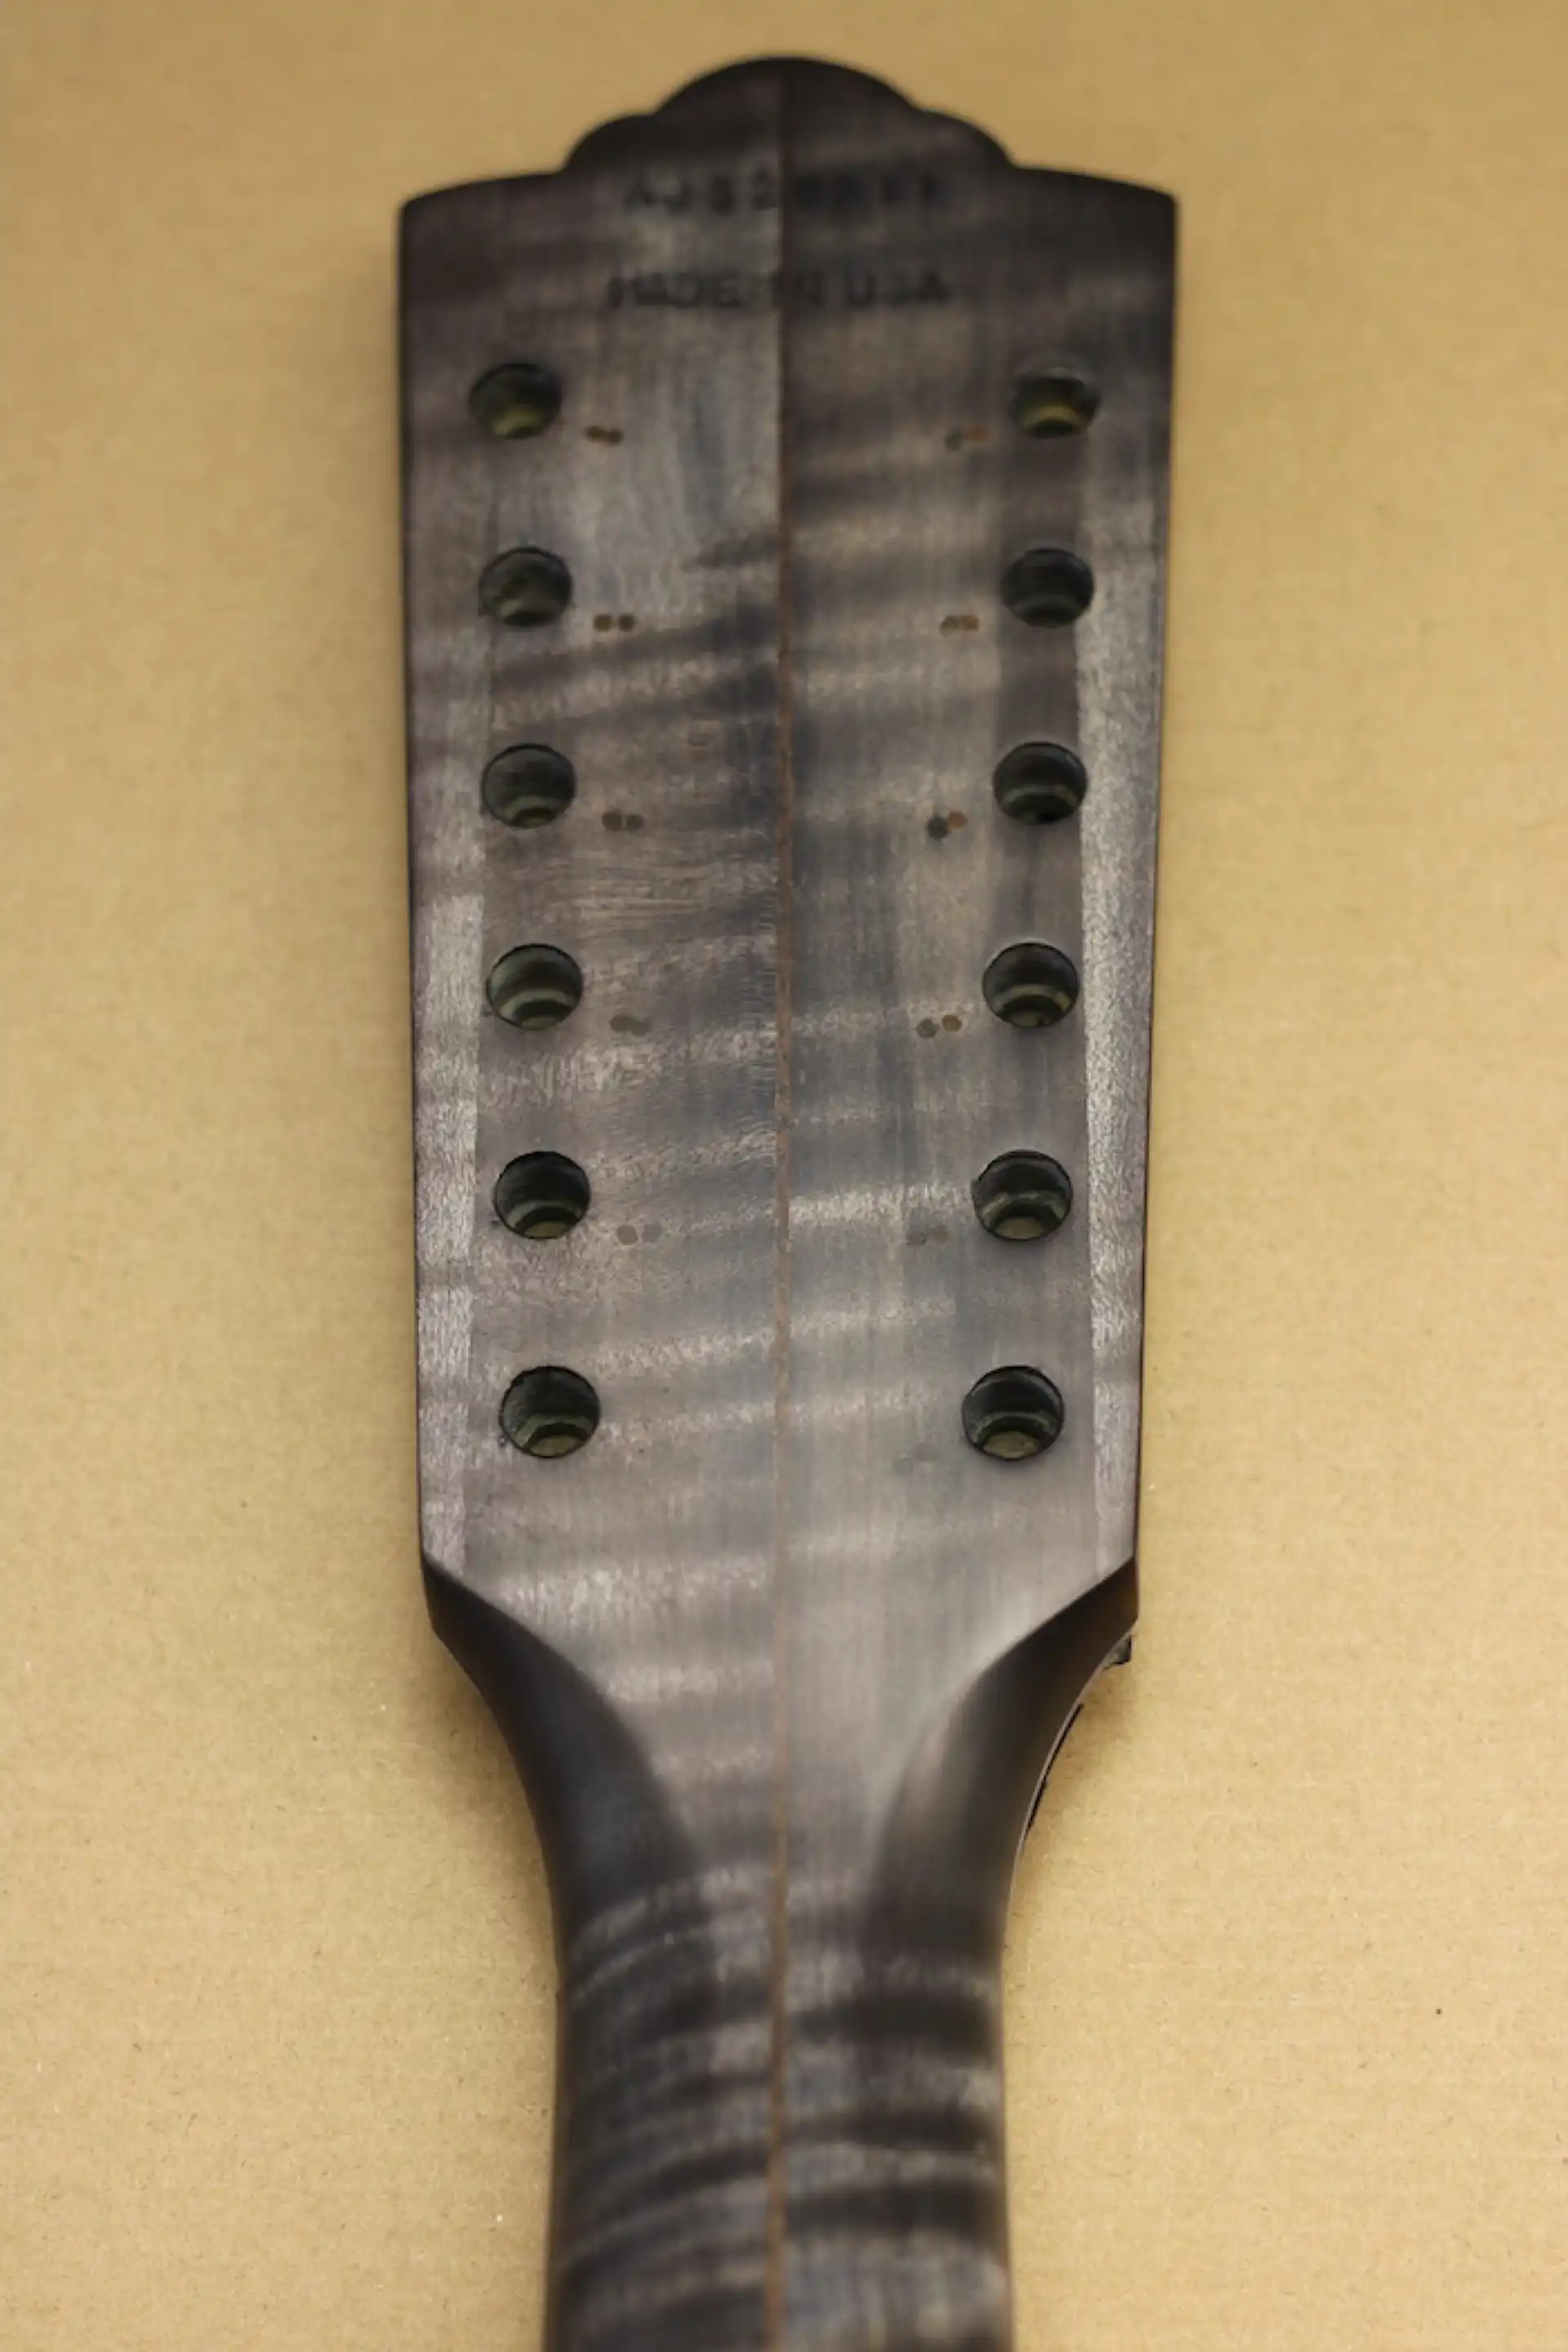
Back of Headstock (Before)
To accomplish this little finish feat, I will rely on a template technique similar to that I use for ’burst effects. I cut and shape a piece of foam board that I stand off the back of the neck, high enough to allow some overspray to sneak under it but low enough to prevent me from spraying the neck solid black. Maneuvering the spray gun up and down the neck while maintaining the correct angle to control the overspray produces the blending effect.
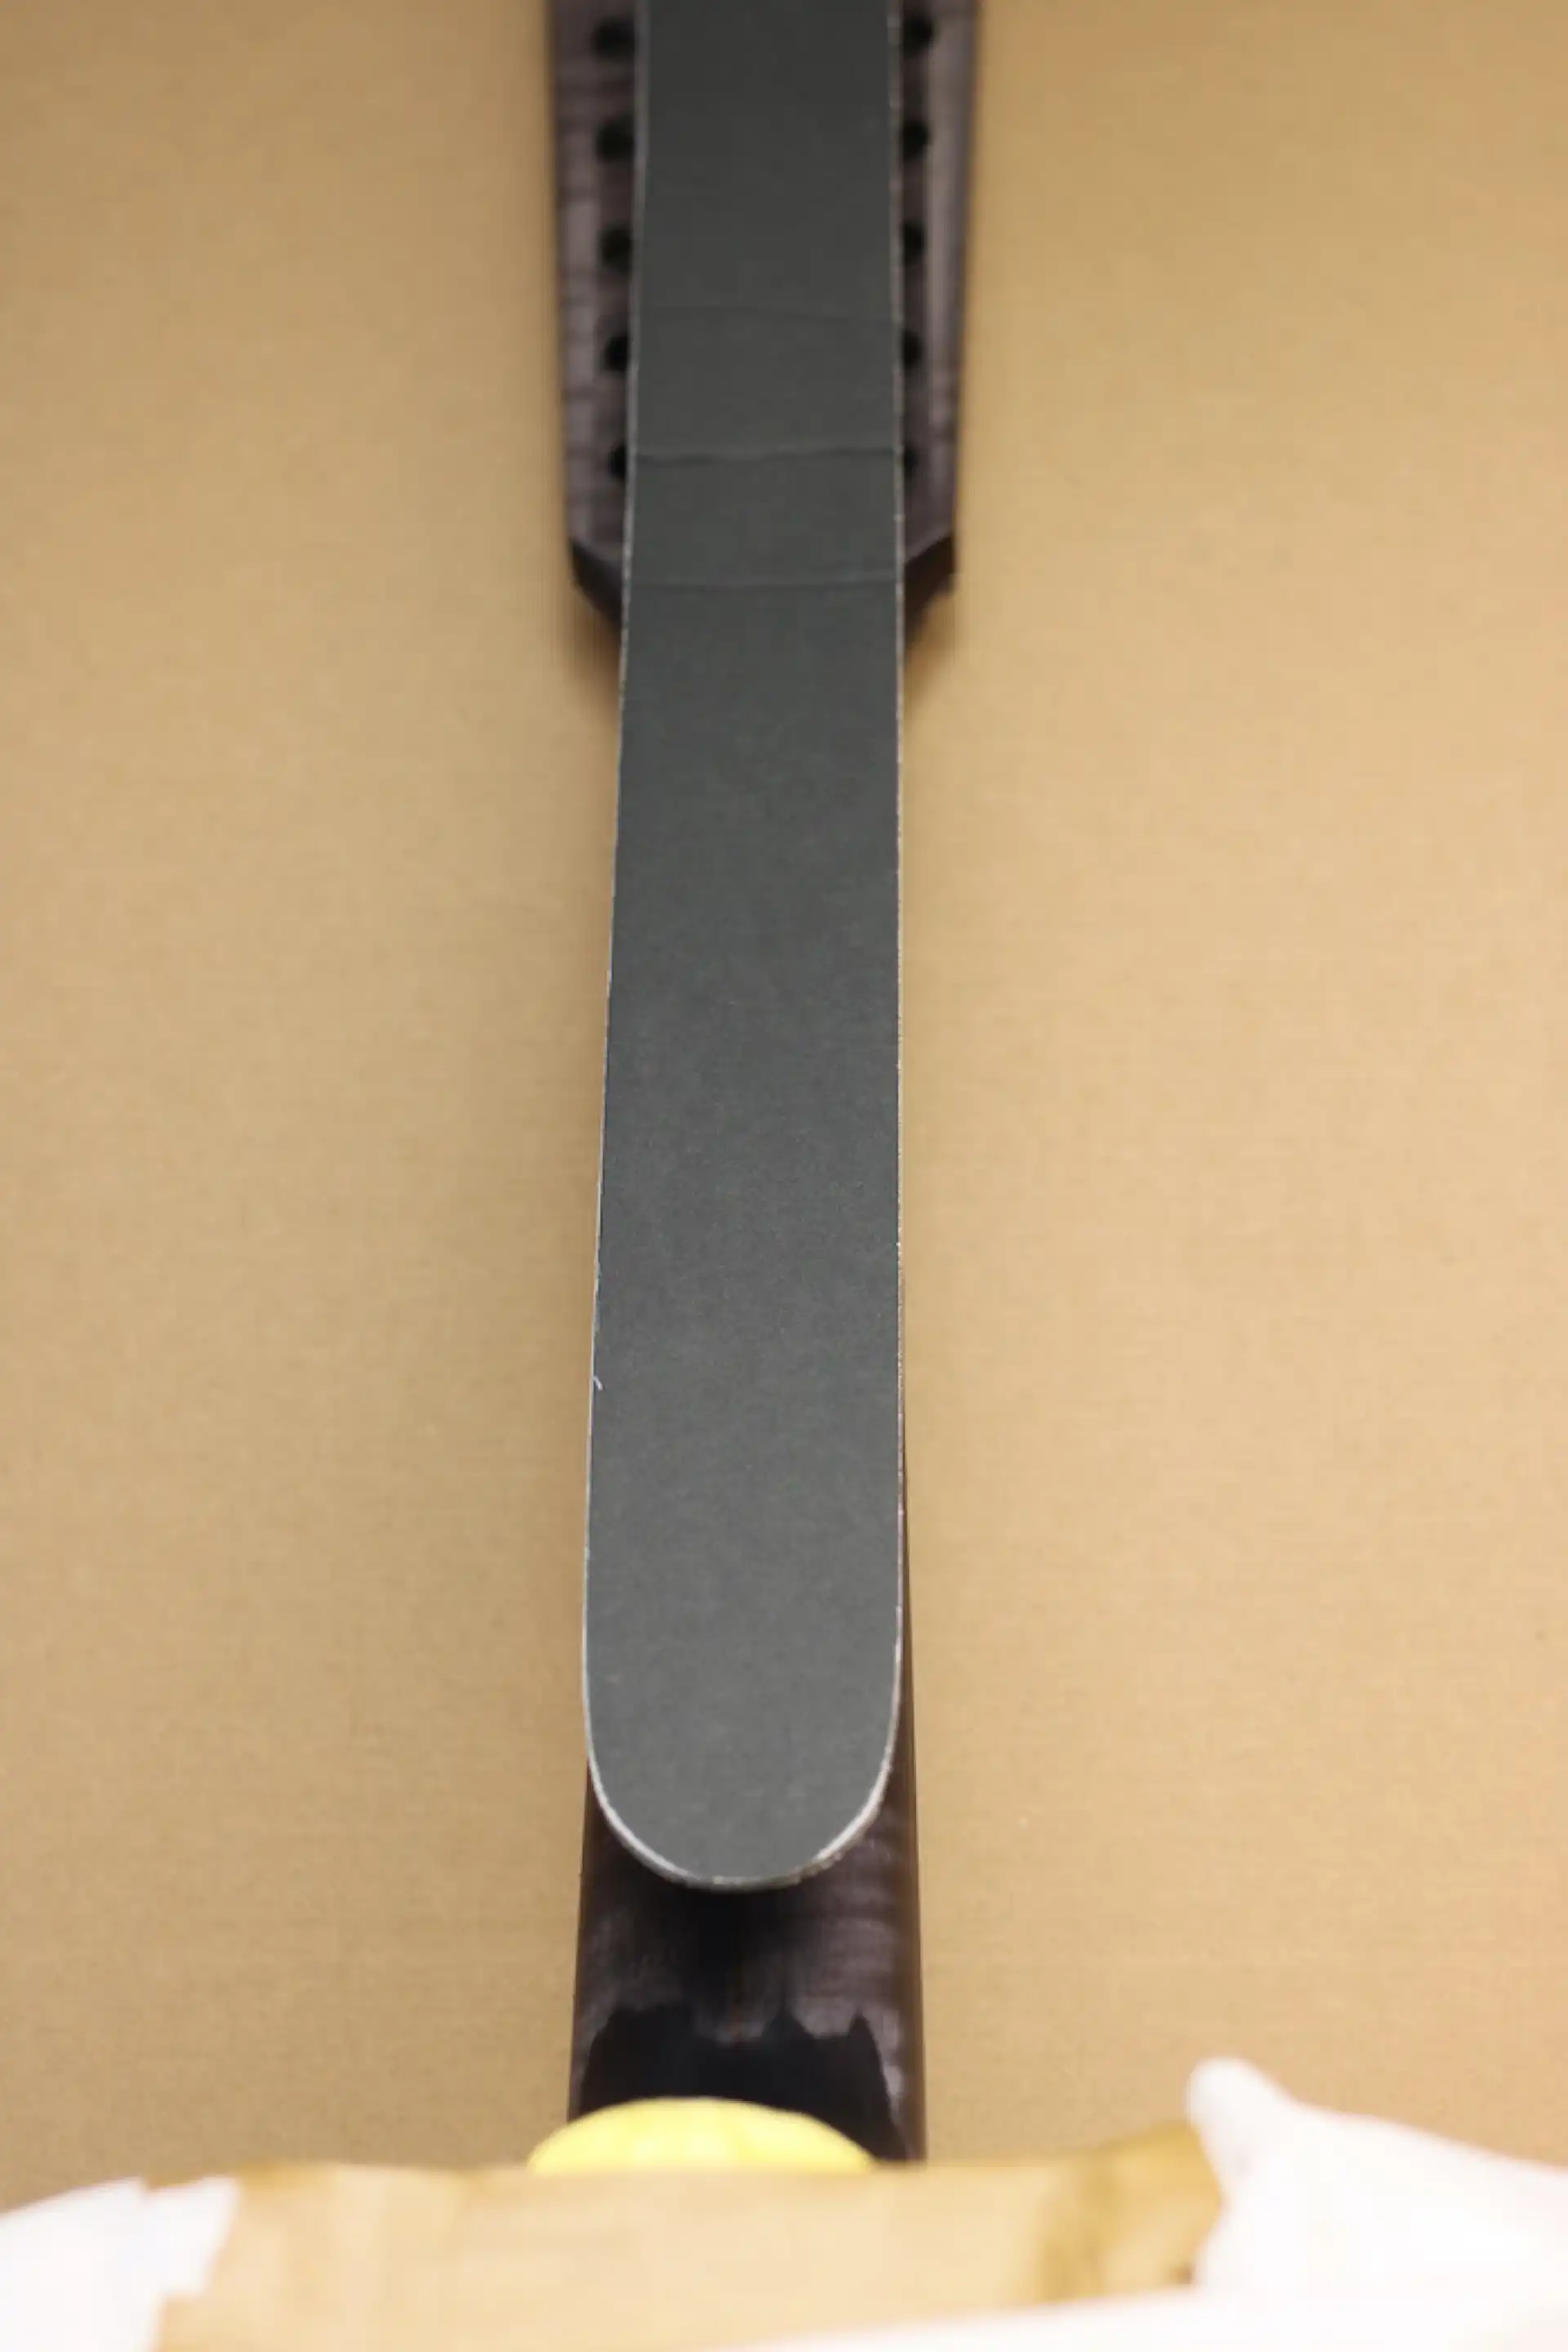
Neck Burst Effect Template

Neck Burst Effect Template
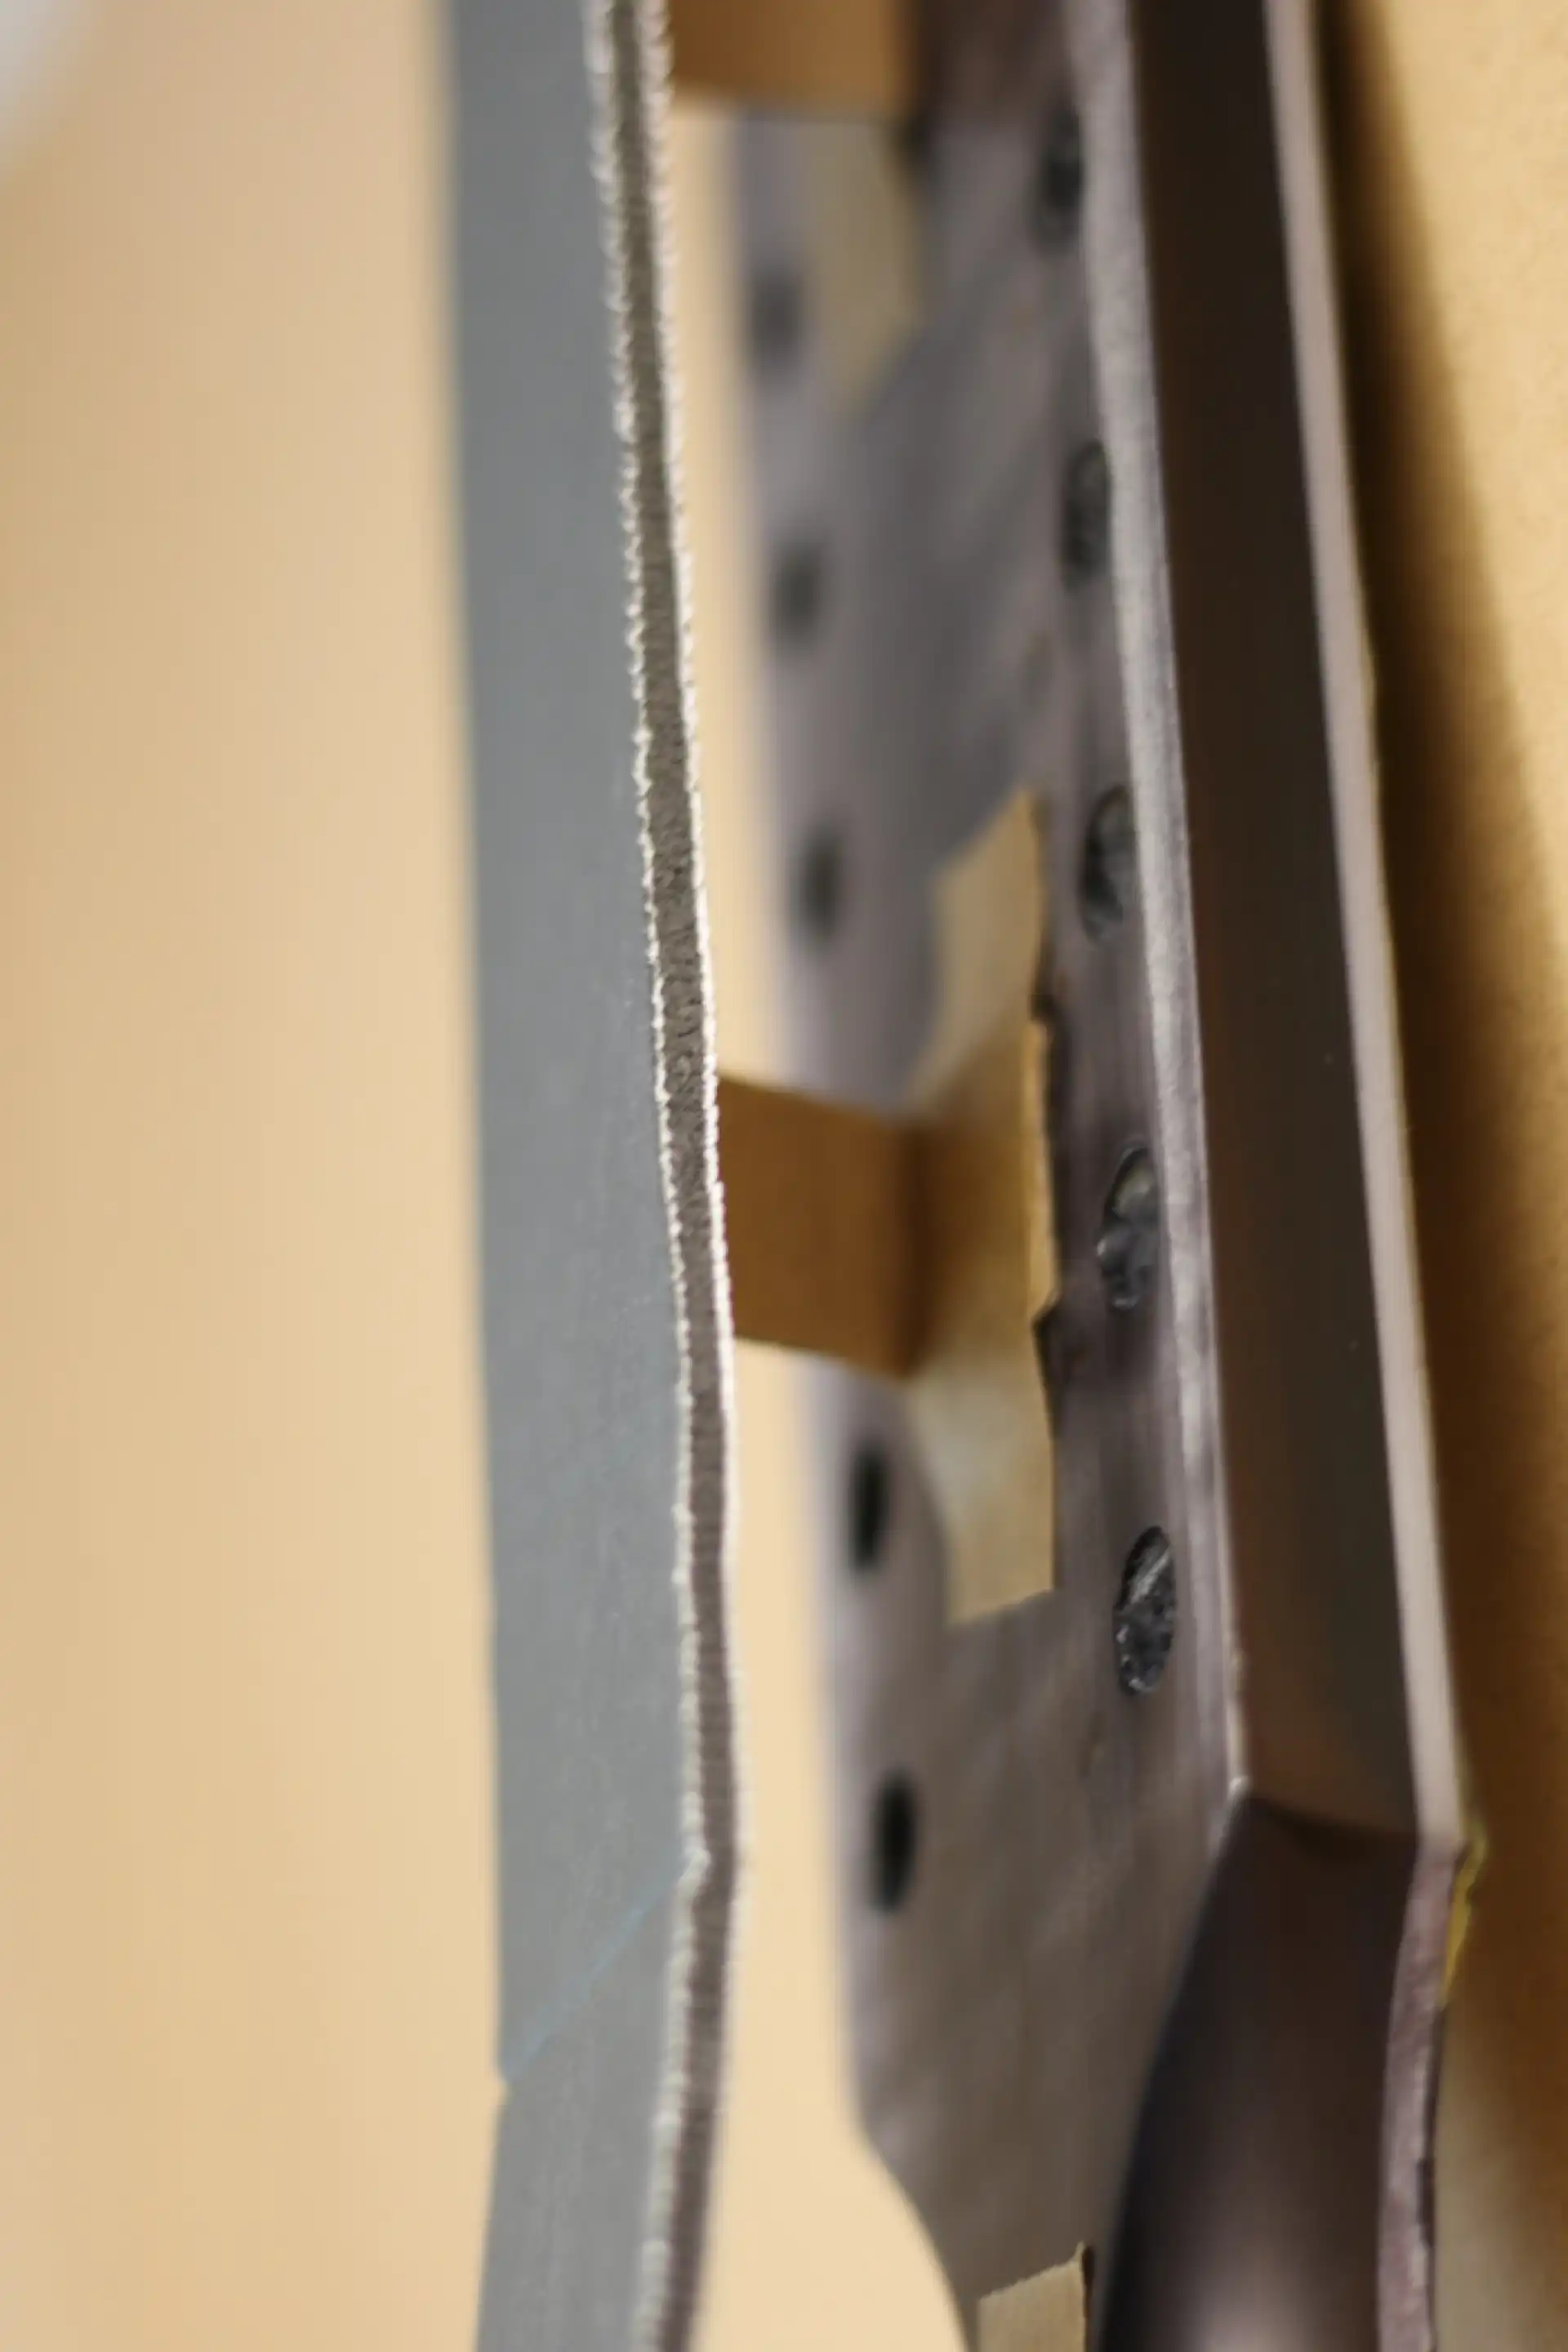
Neck Burst Effect Template
The neck gets sprayed with the heavier tint medium. For this, I use Mixol Universal Tint, #1 Black. A little goes a long way. With a few light passes I am able to get coverage around the edges and, most importantly, transition back into the already painted neck heel. To ensure bonding, I spray a mixture of thinner, retarder and a little bit of clear lacquer followed immediately by an opaque coat of black. This is a lather, rinse, repeat operation until I am satisfied.
At the Spray Station
Next, I sand back the "wear" portion of the neck, and this time I include the back of the headstock. I want to "feature" the Tiger Stripe emerging from the black edges. It is a bit stark, but we will rectify that, soon.
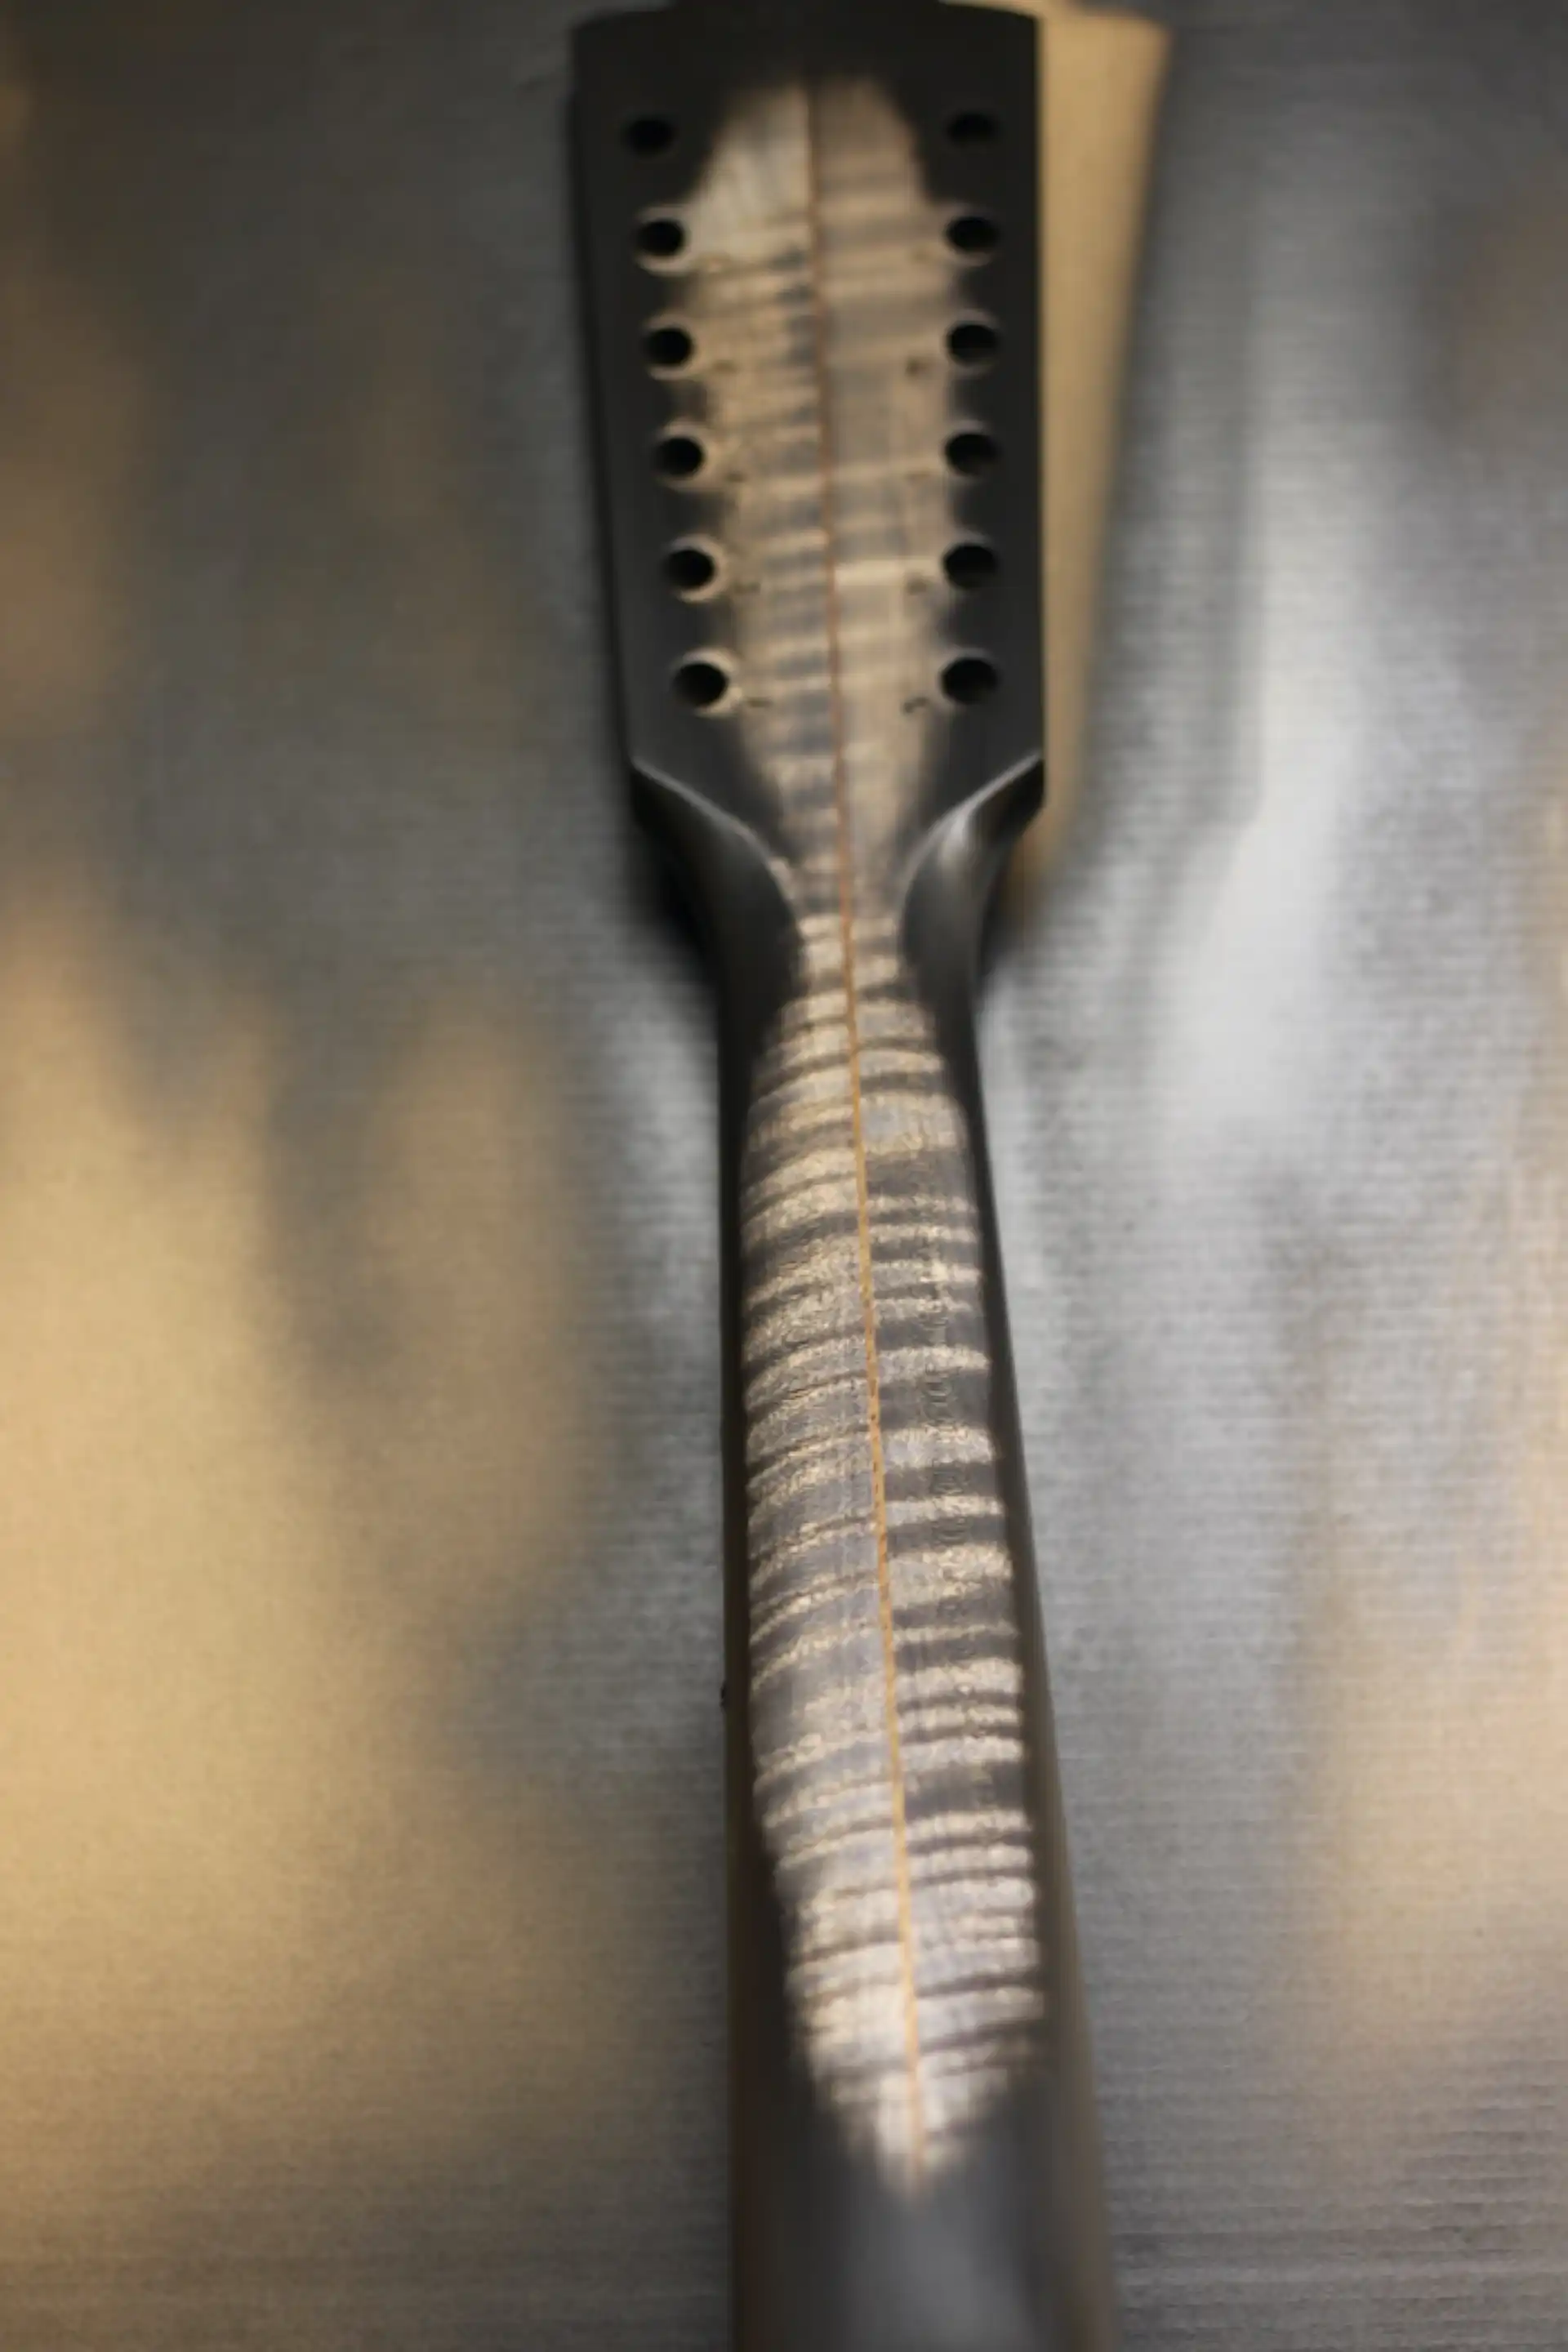
Neck - Opaque Edges
Up to this point, the efforts that have been made are primarily for coloring purposes. The next step is to switch back to the TransTint mixing in more clear lacquer and spray over the blond Maple. This is a finer tint medium and disperses evenly in the lacquer. This step serves a dual role: visually controlling the contrast between the Tiger Stripe and the opaque black, as well as laying down the first few coats of protective lacquer.
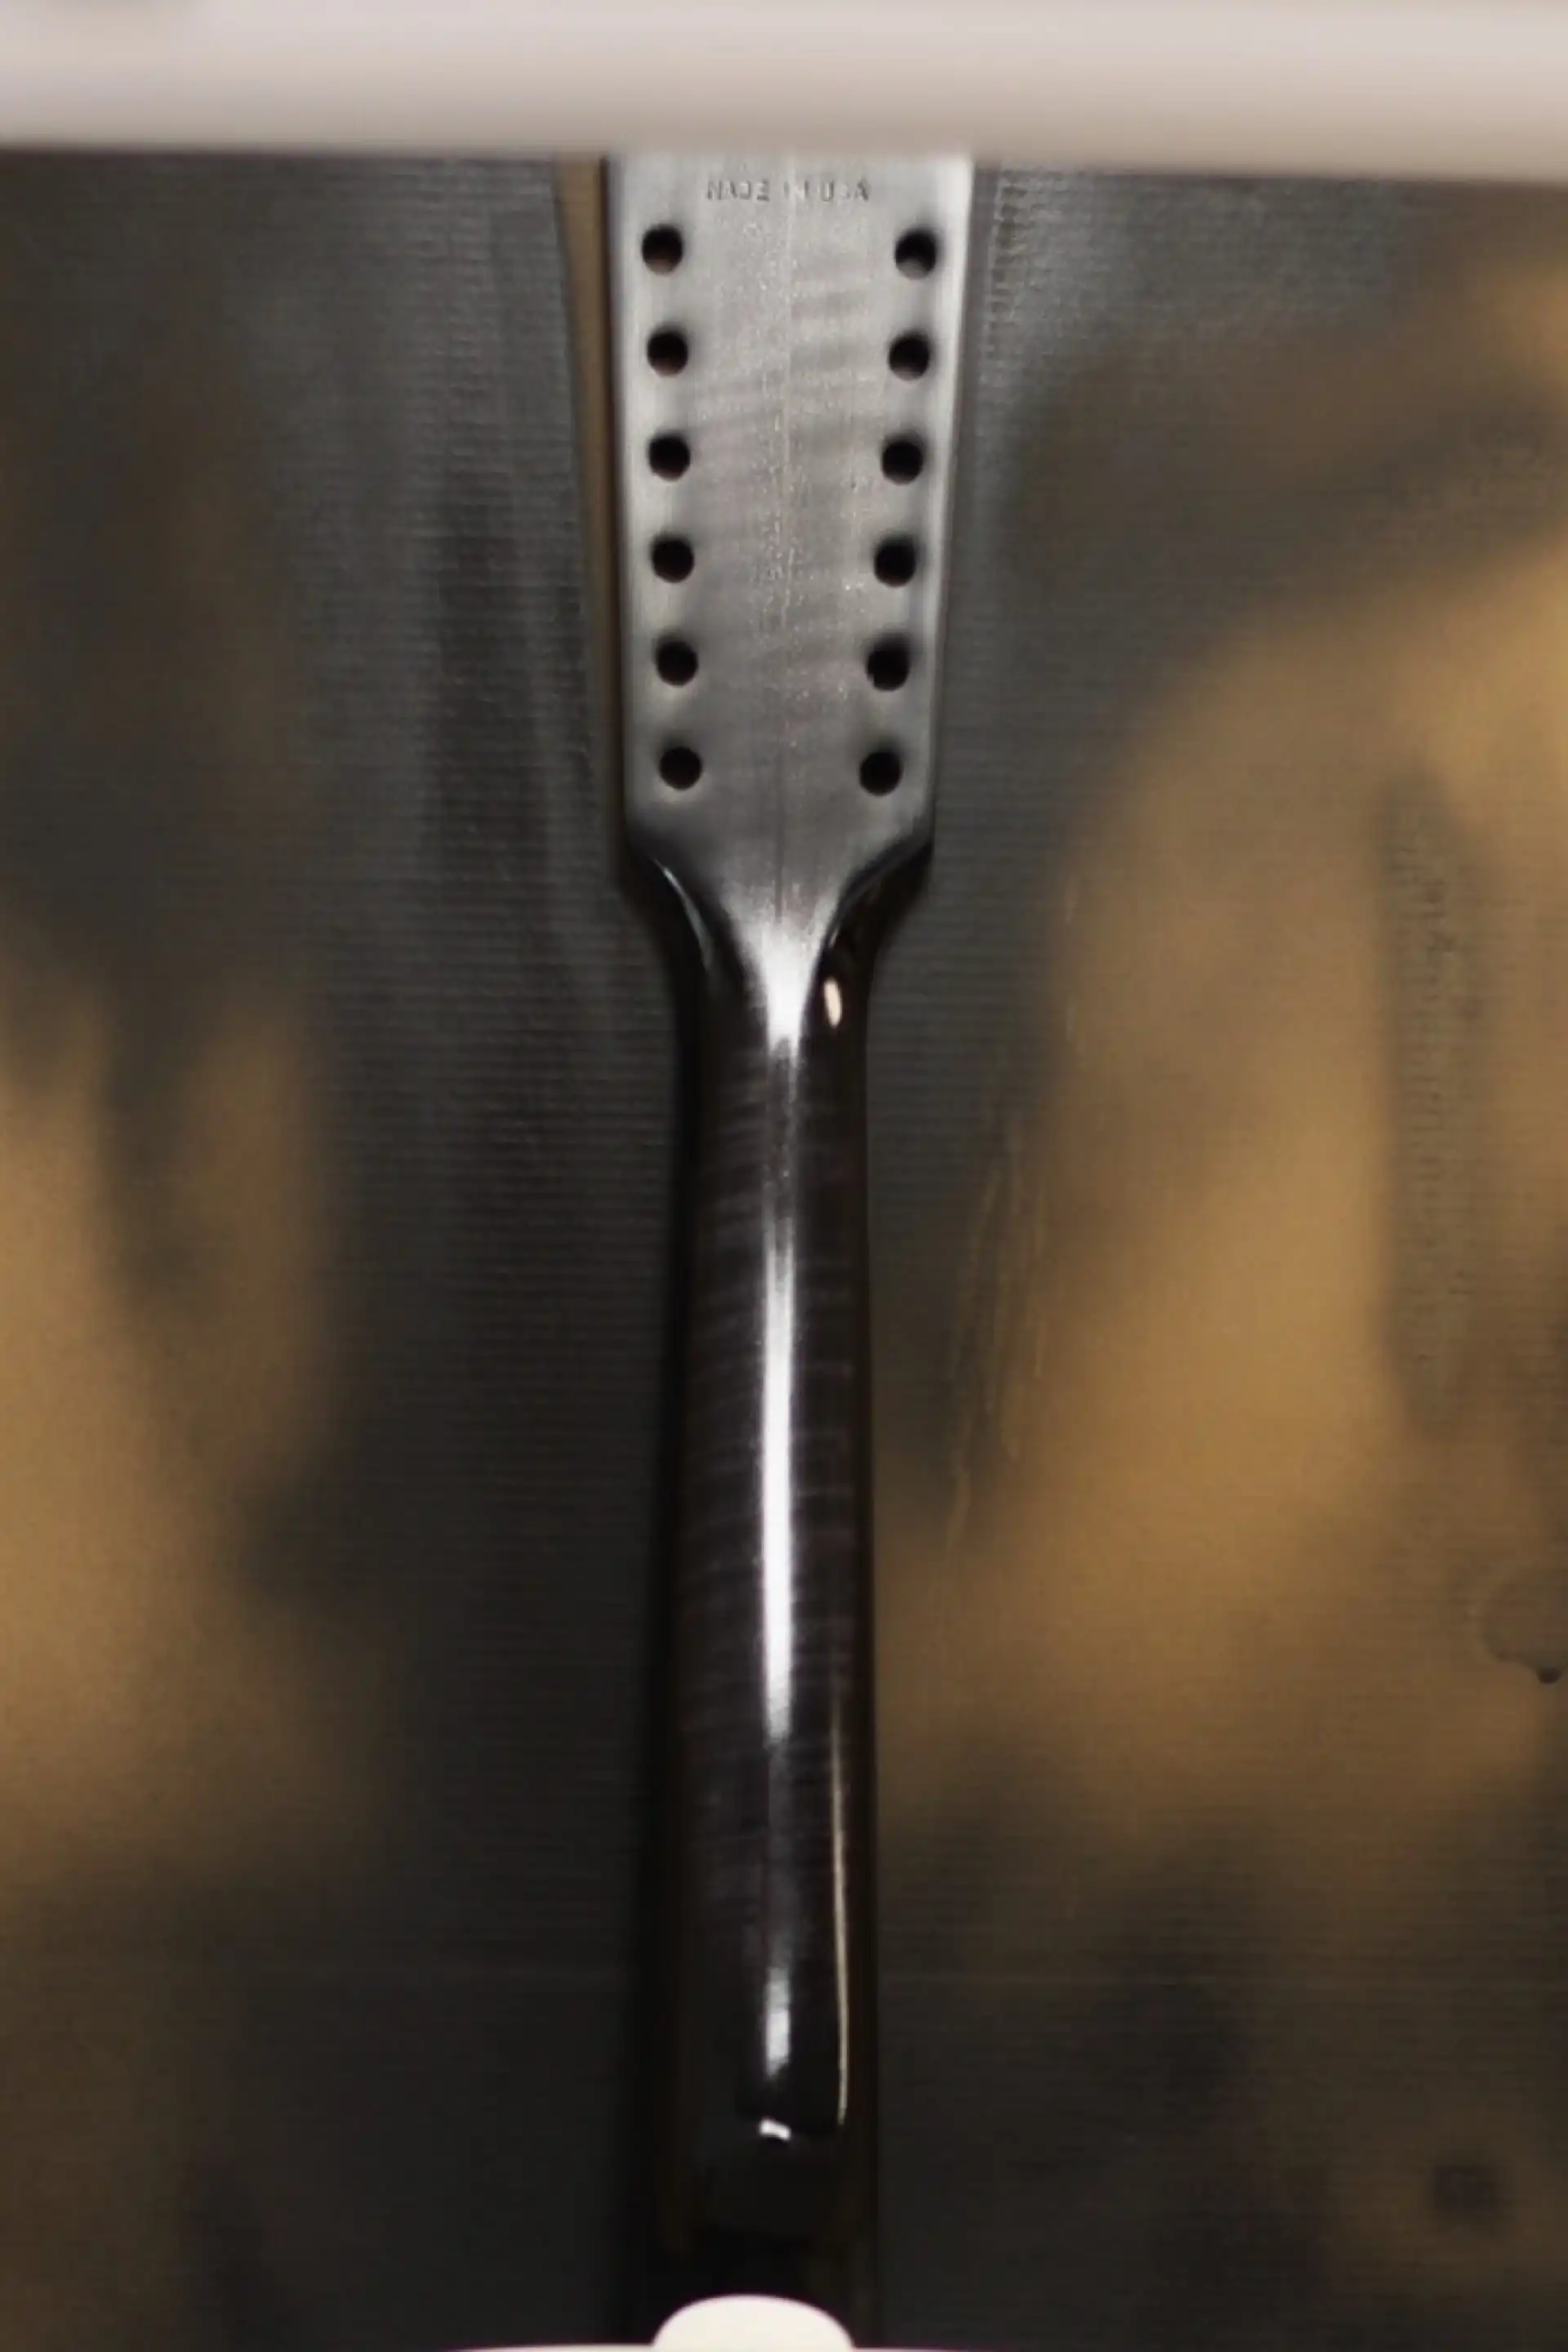
Neck - Translucent Black
A little more tint here, a little less tint there... sand a little, tint a little, sand a little, tint a little, sand, sand, sand, tint a lot, sand a little more... LOL
For any who are contemplating finishing a guitar as I have done with this one, please note: TransTint is too fine a tint medium to produce a thin, opaque coverage WITHOUT risk of applying way too much lacquer - which can result in the loss of adhesion (grrr...). Carefully applying Mixol for the opaque sections, then switching to TransTint and making the (artistic) effort to blend from opaque to translucent, focusing on a smooth transition, may be a bit more tedious (okay, a LOT more tedious), but this produces a better result, overall. No adhesions issues, no aberrant tinting issues.
It is time for the unveiling.
After coloring was completed, the neck was sprayed with several light coats of clear lacquer, then allowed to sit for several weeks to harden. To level the clear lacquer and prepare it for buffing, I used a product that has gained notoriety in the Urethane coatings industry, a flexible sanding medium called Super Assilex, produced by the Japanese firm Kovax. This material let me step through grits from 800 through 5000, all without a drop of water! Even more impressive is how little loading is experienced. But this product's greatest feature is its unique grain structure combined with an innovative latex backing that produces really shallow scratches. This gives me much more control over the scratch patterns in a significantly reduced period of time than I can ever get with wet sanding using wet/dry mediums.
I was then able to switch to buffing compounds to produce the final gloss (I use both Festool and Meguiar's for the task). Remember that throughout this process of tinting, clear coating, sanding, buffing and polishing, the fretboard, bridge and soundboard have been taped off. The bridge and fretboard are “raw” wood that are treated with oil. The soundboard is already tinted (opaque), top-coated with clear, and polished to a mirror finish. New lacquer mist would need to be scraped off any raw wood surfaces and would ruin already finished surfaces. Unless you are trying to put a high gloss on your fretboard and bridge, raw wood elements cannot be touched with polishing compounds.
After a successful buffing and polishing, adding back the hardware (including the pickup), and restringing with a fresh set of John Pearse 80/20 Bronze Lights, this guitar is (once again) ready to ship.

Back of Neck
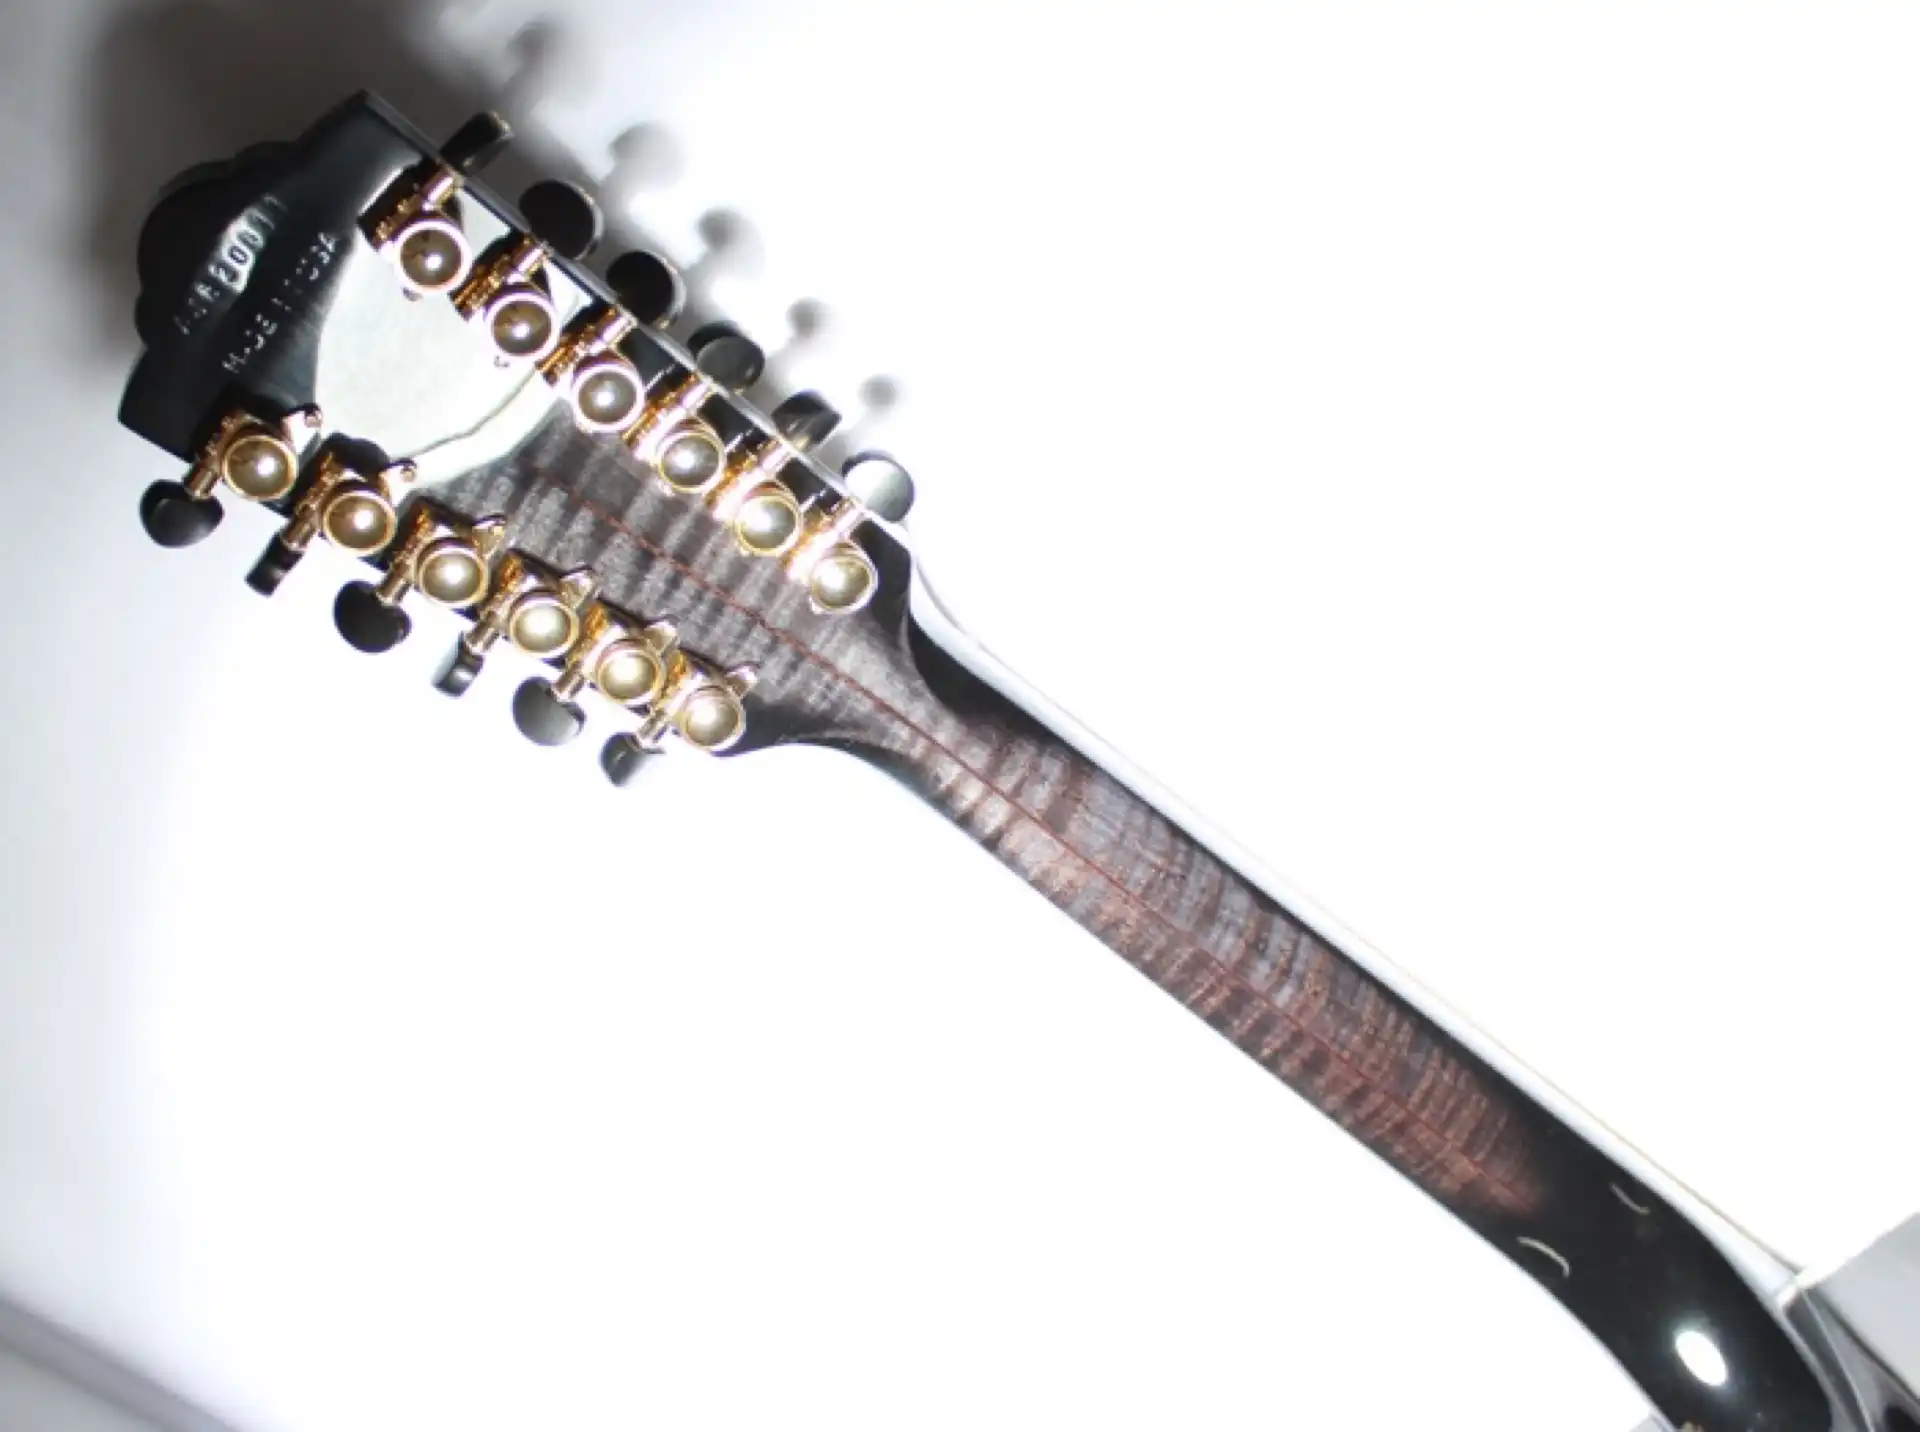
Back of Neck
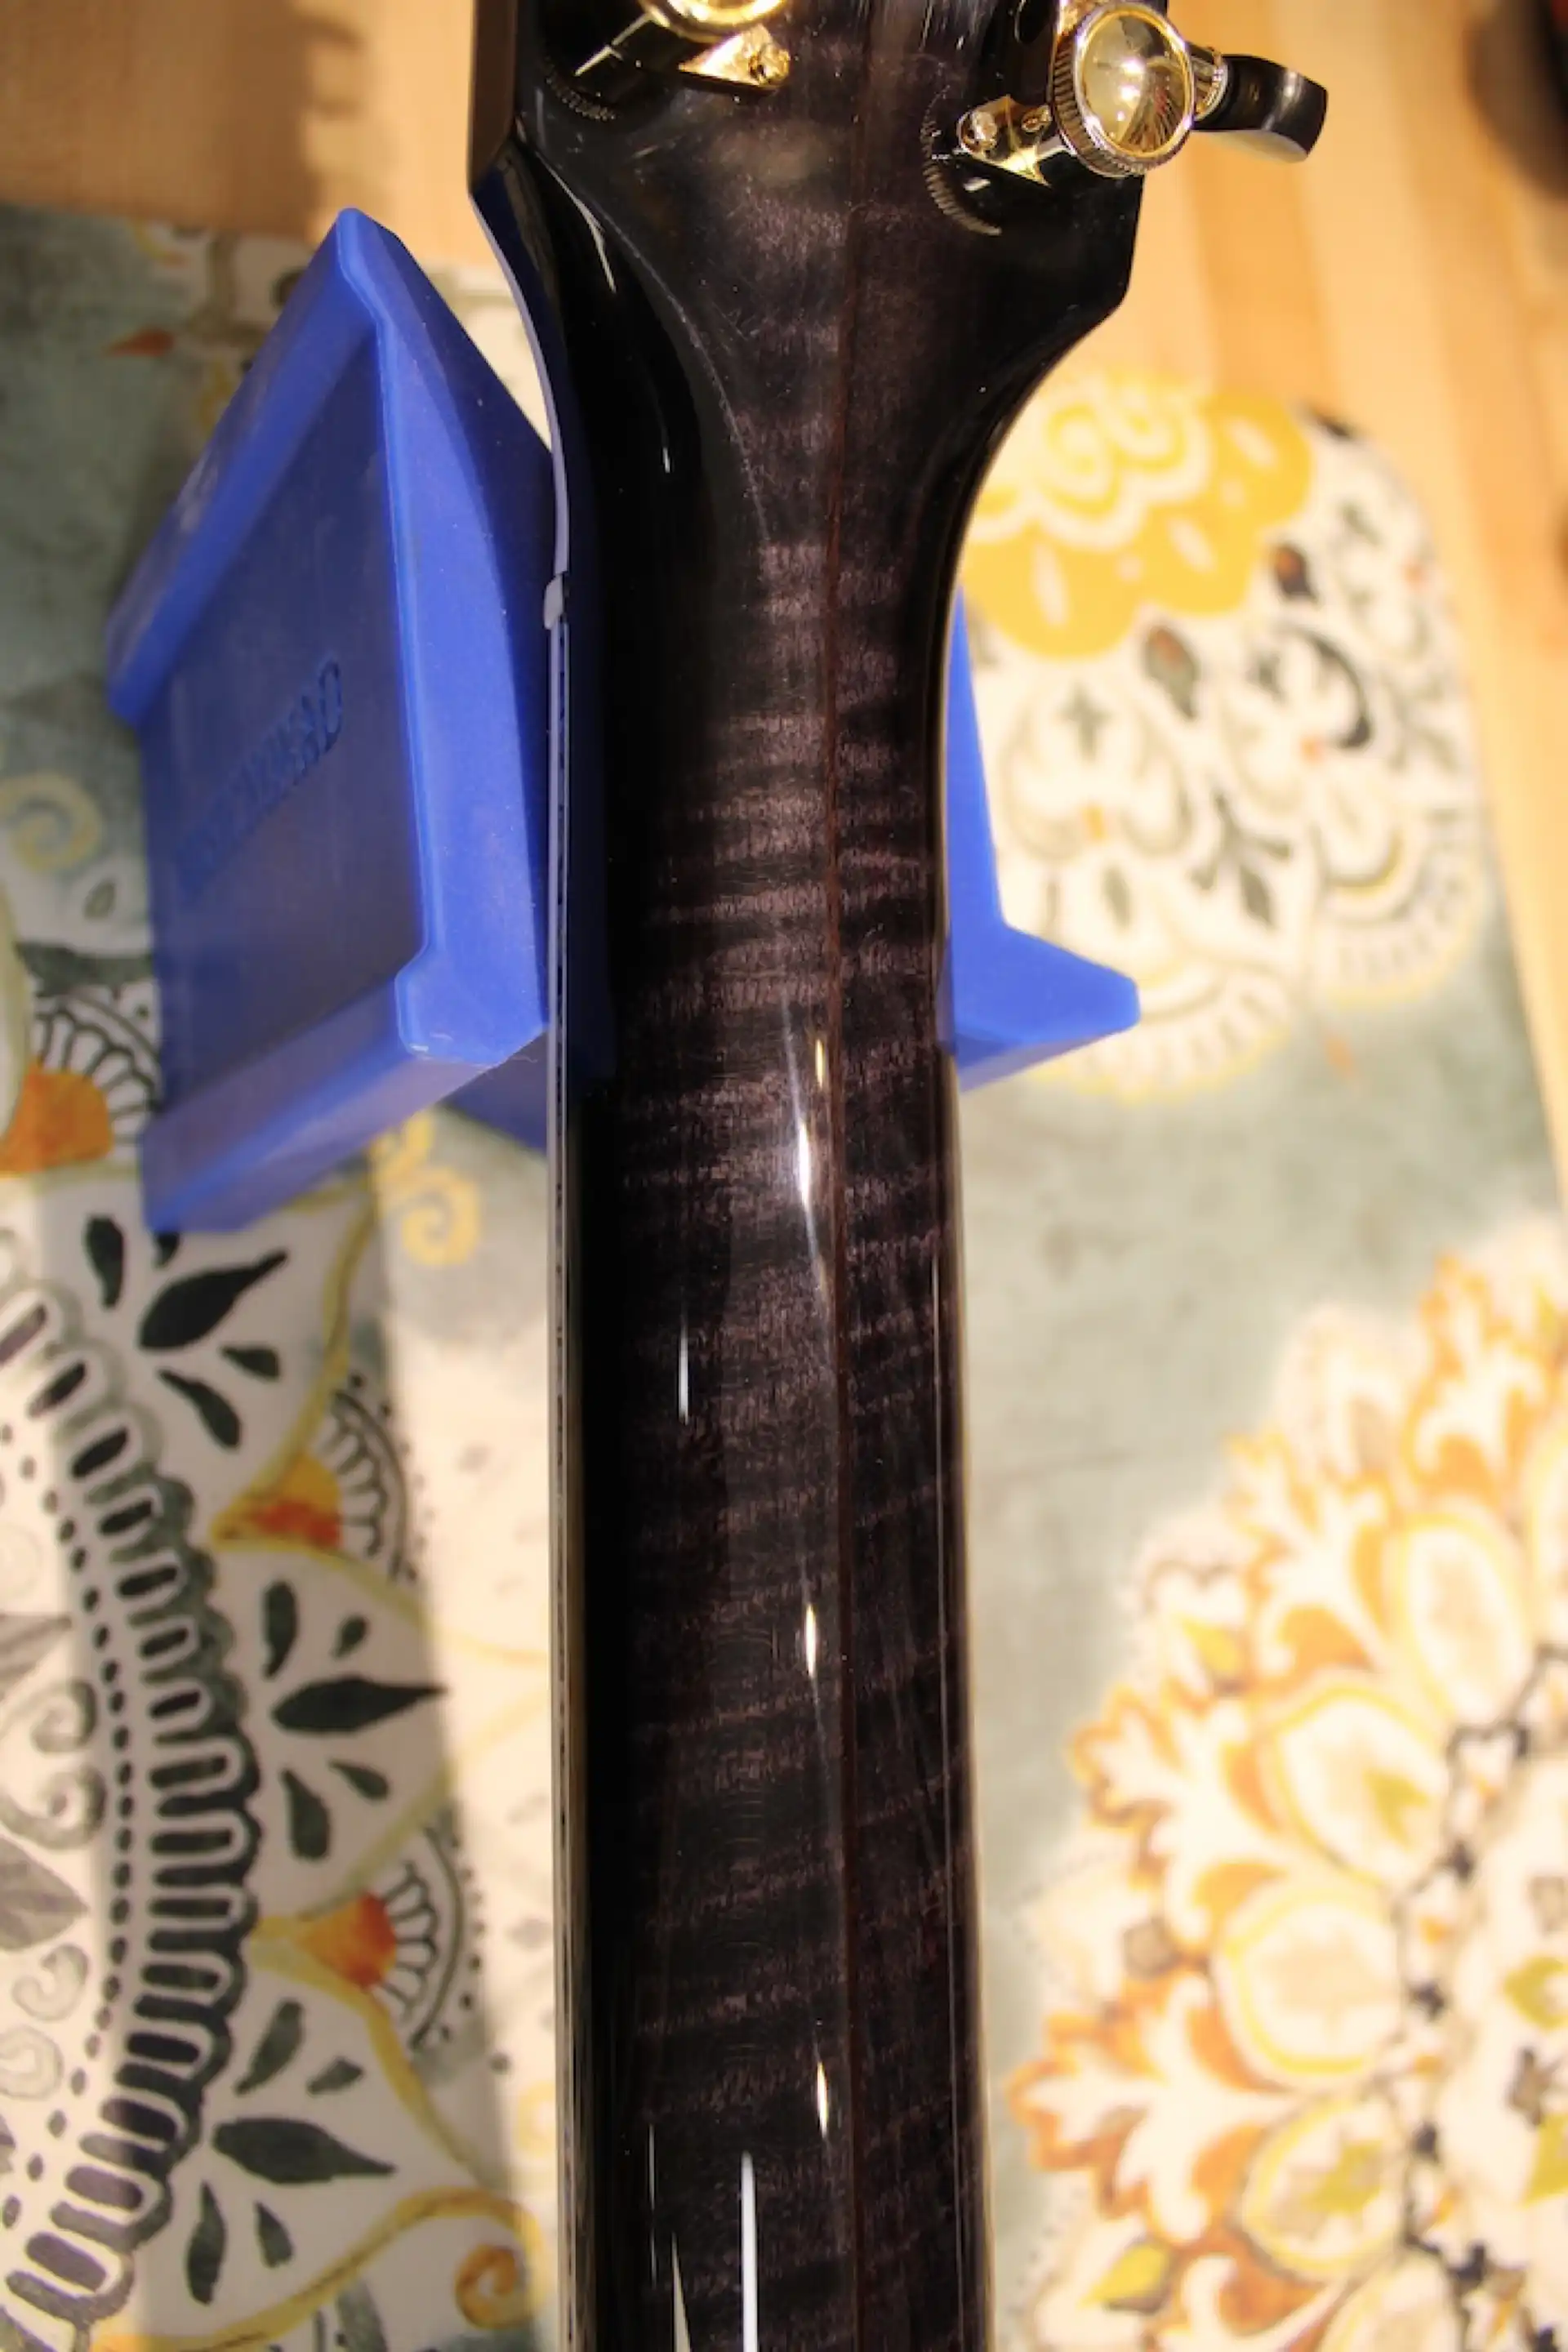
Back of Neck
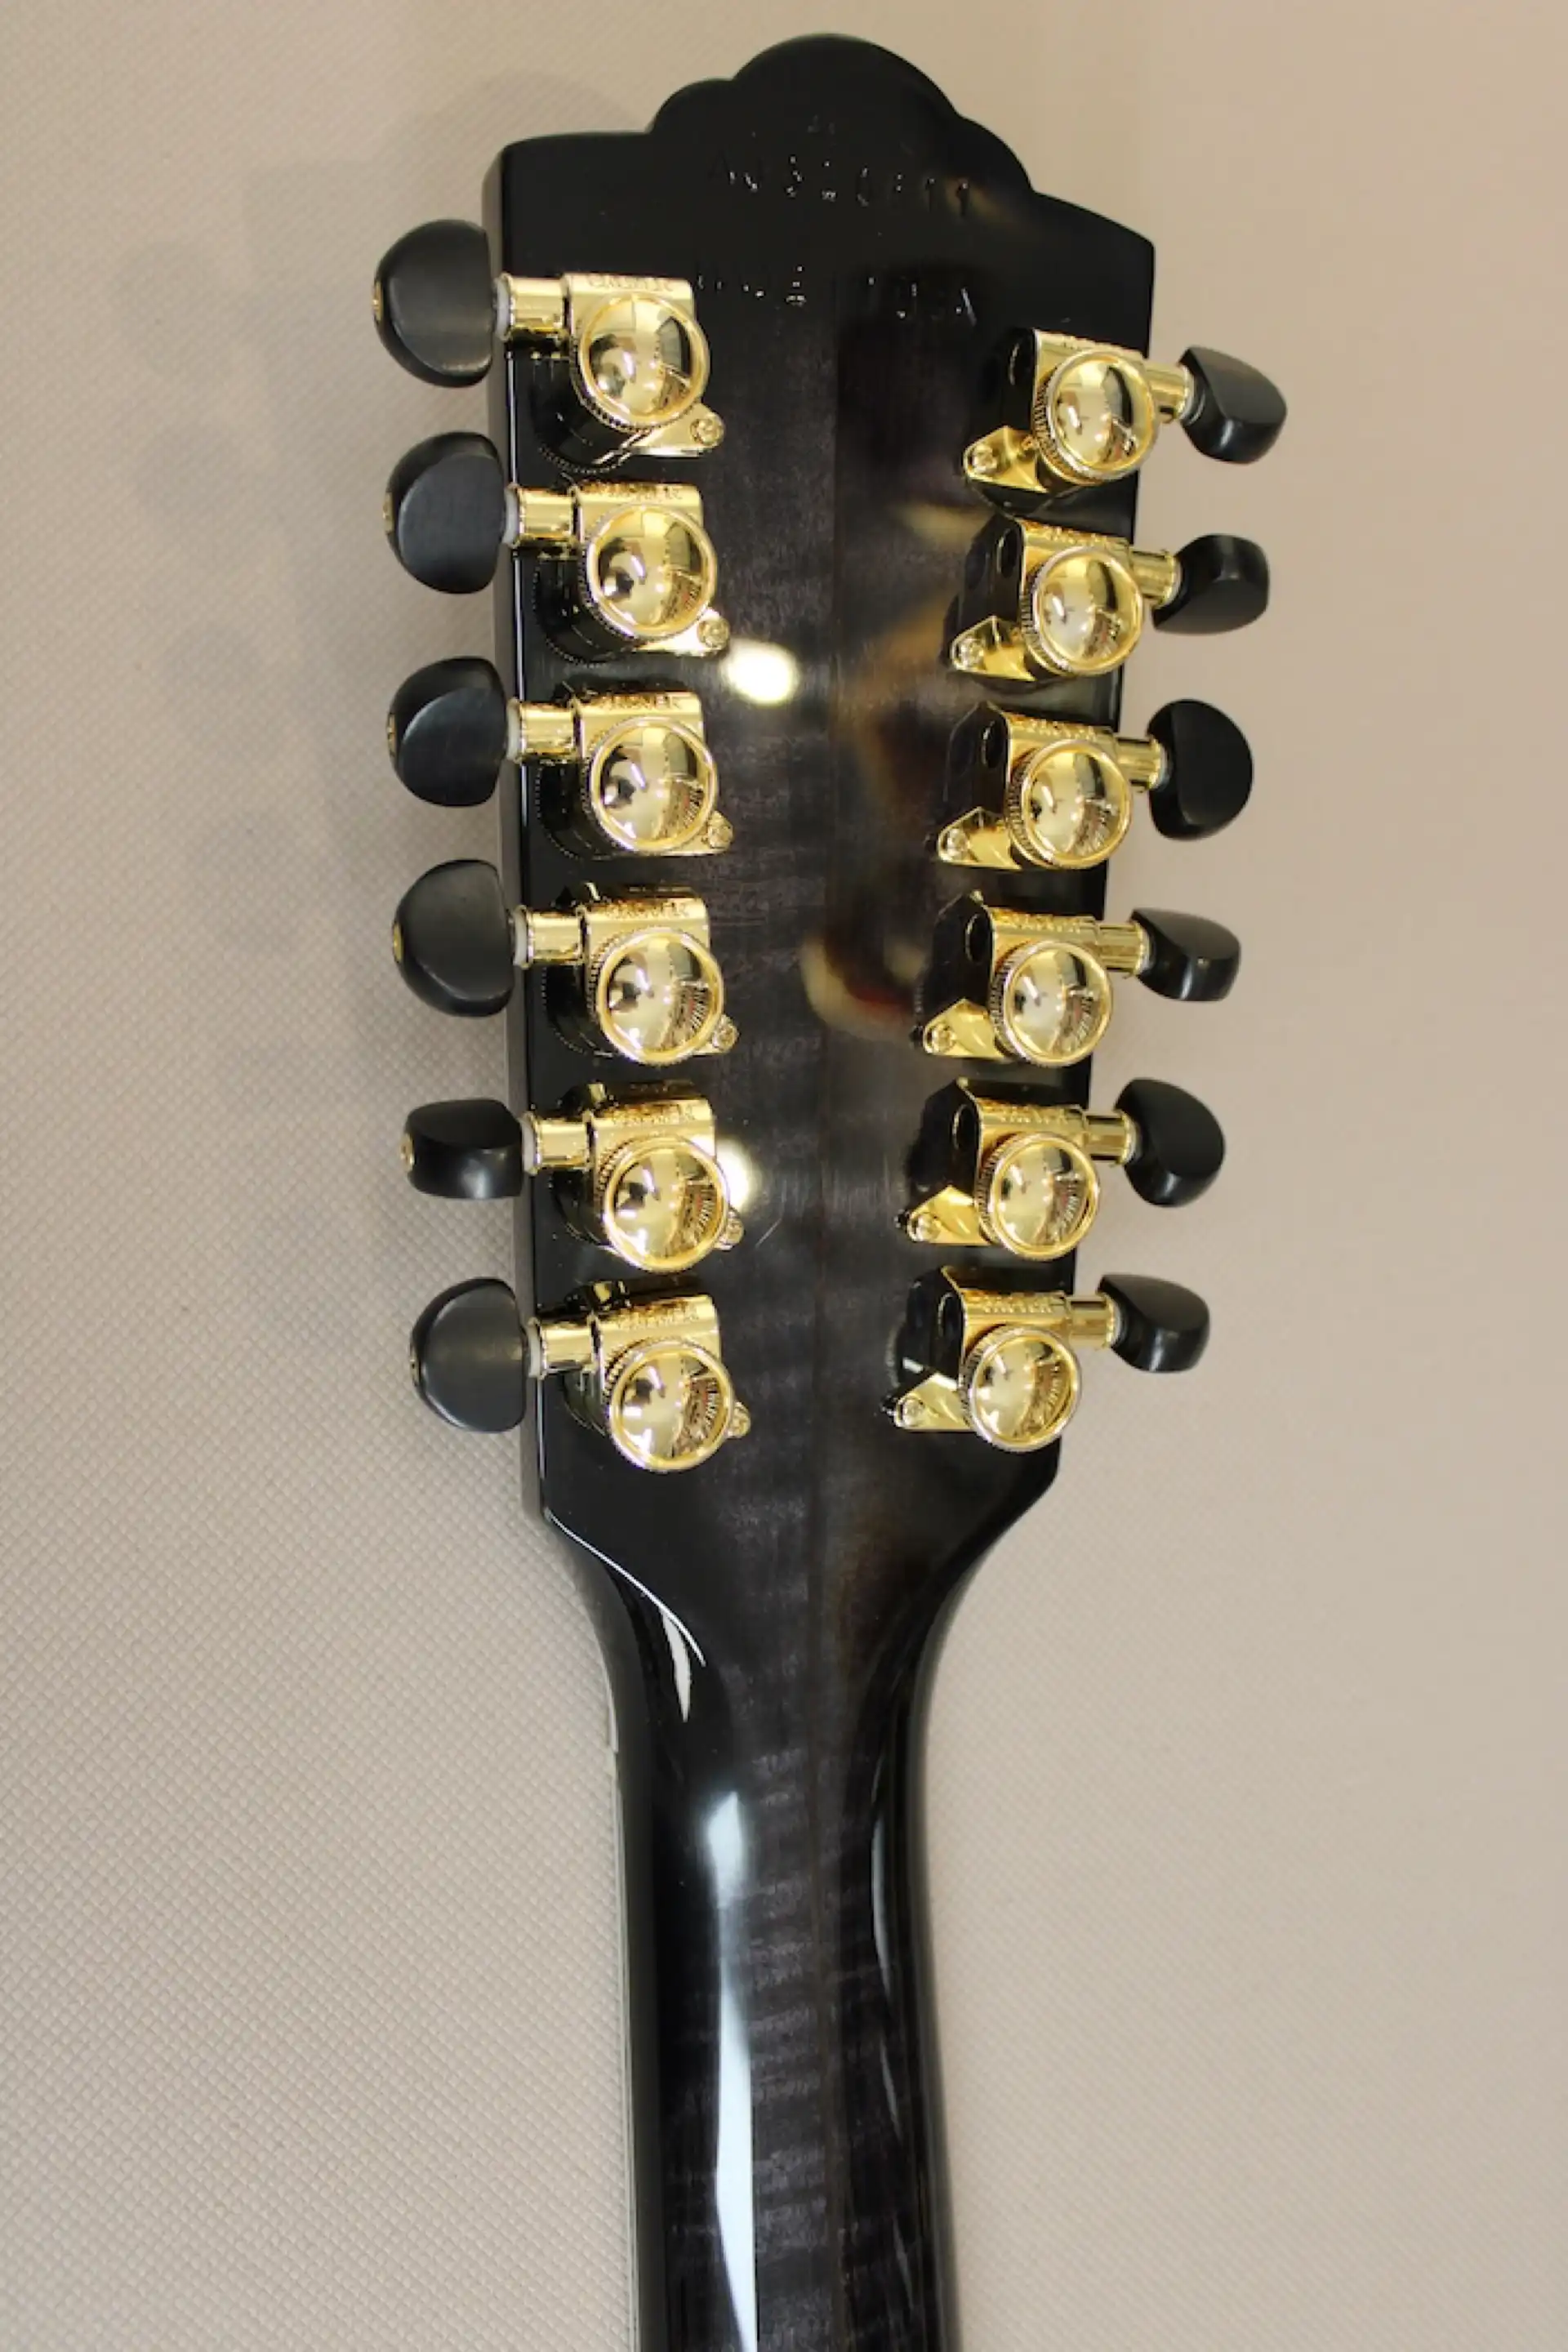
Back of Headstock (After)
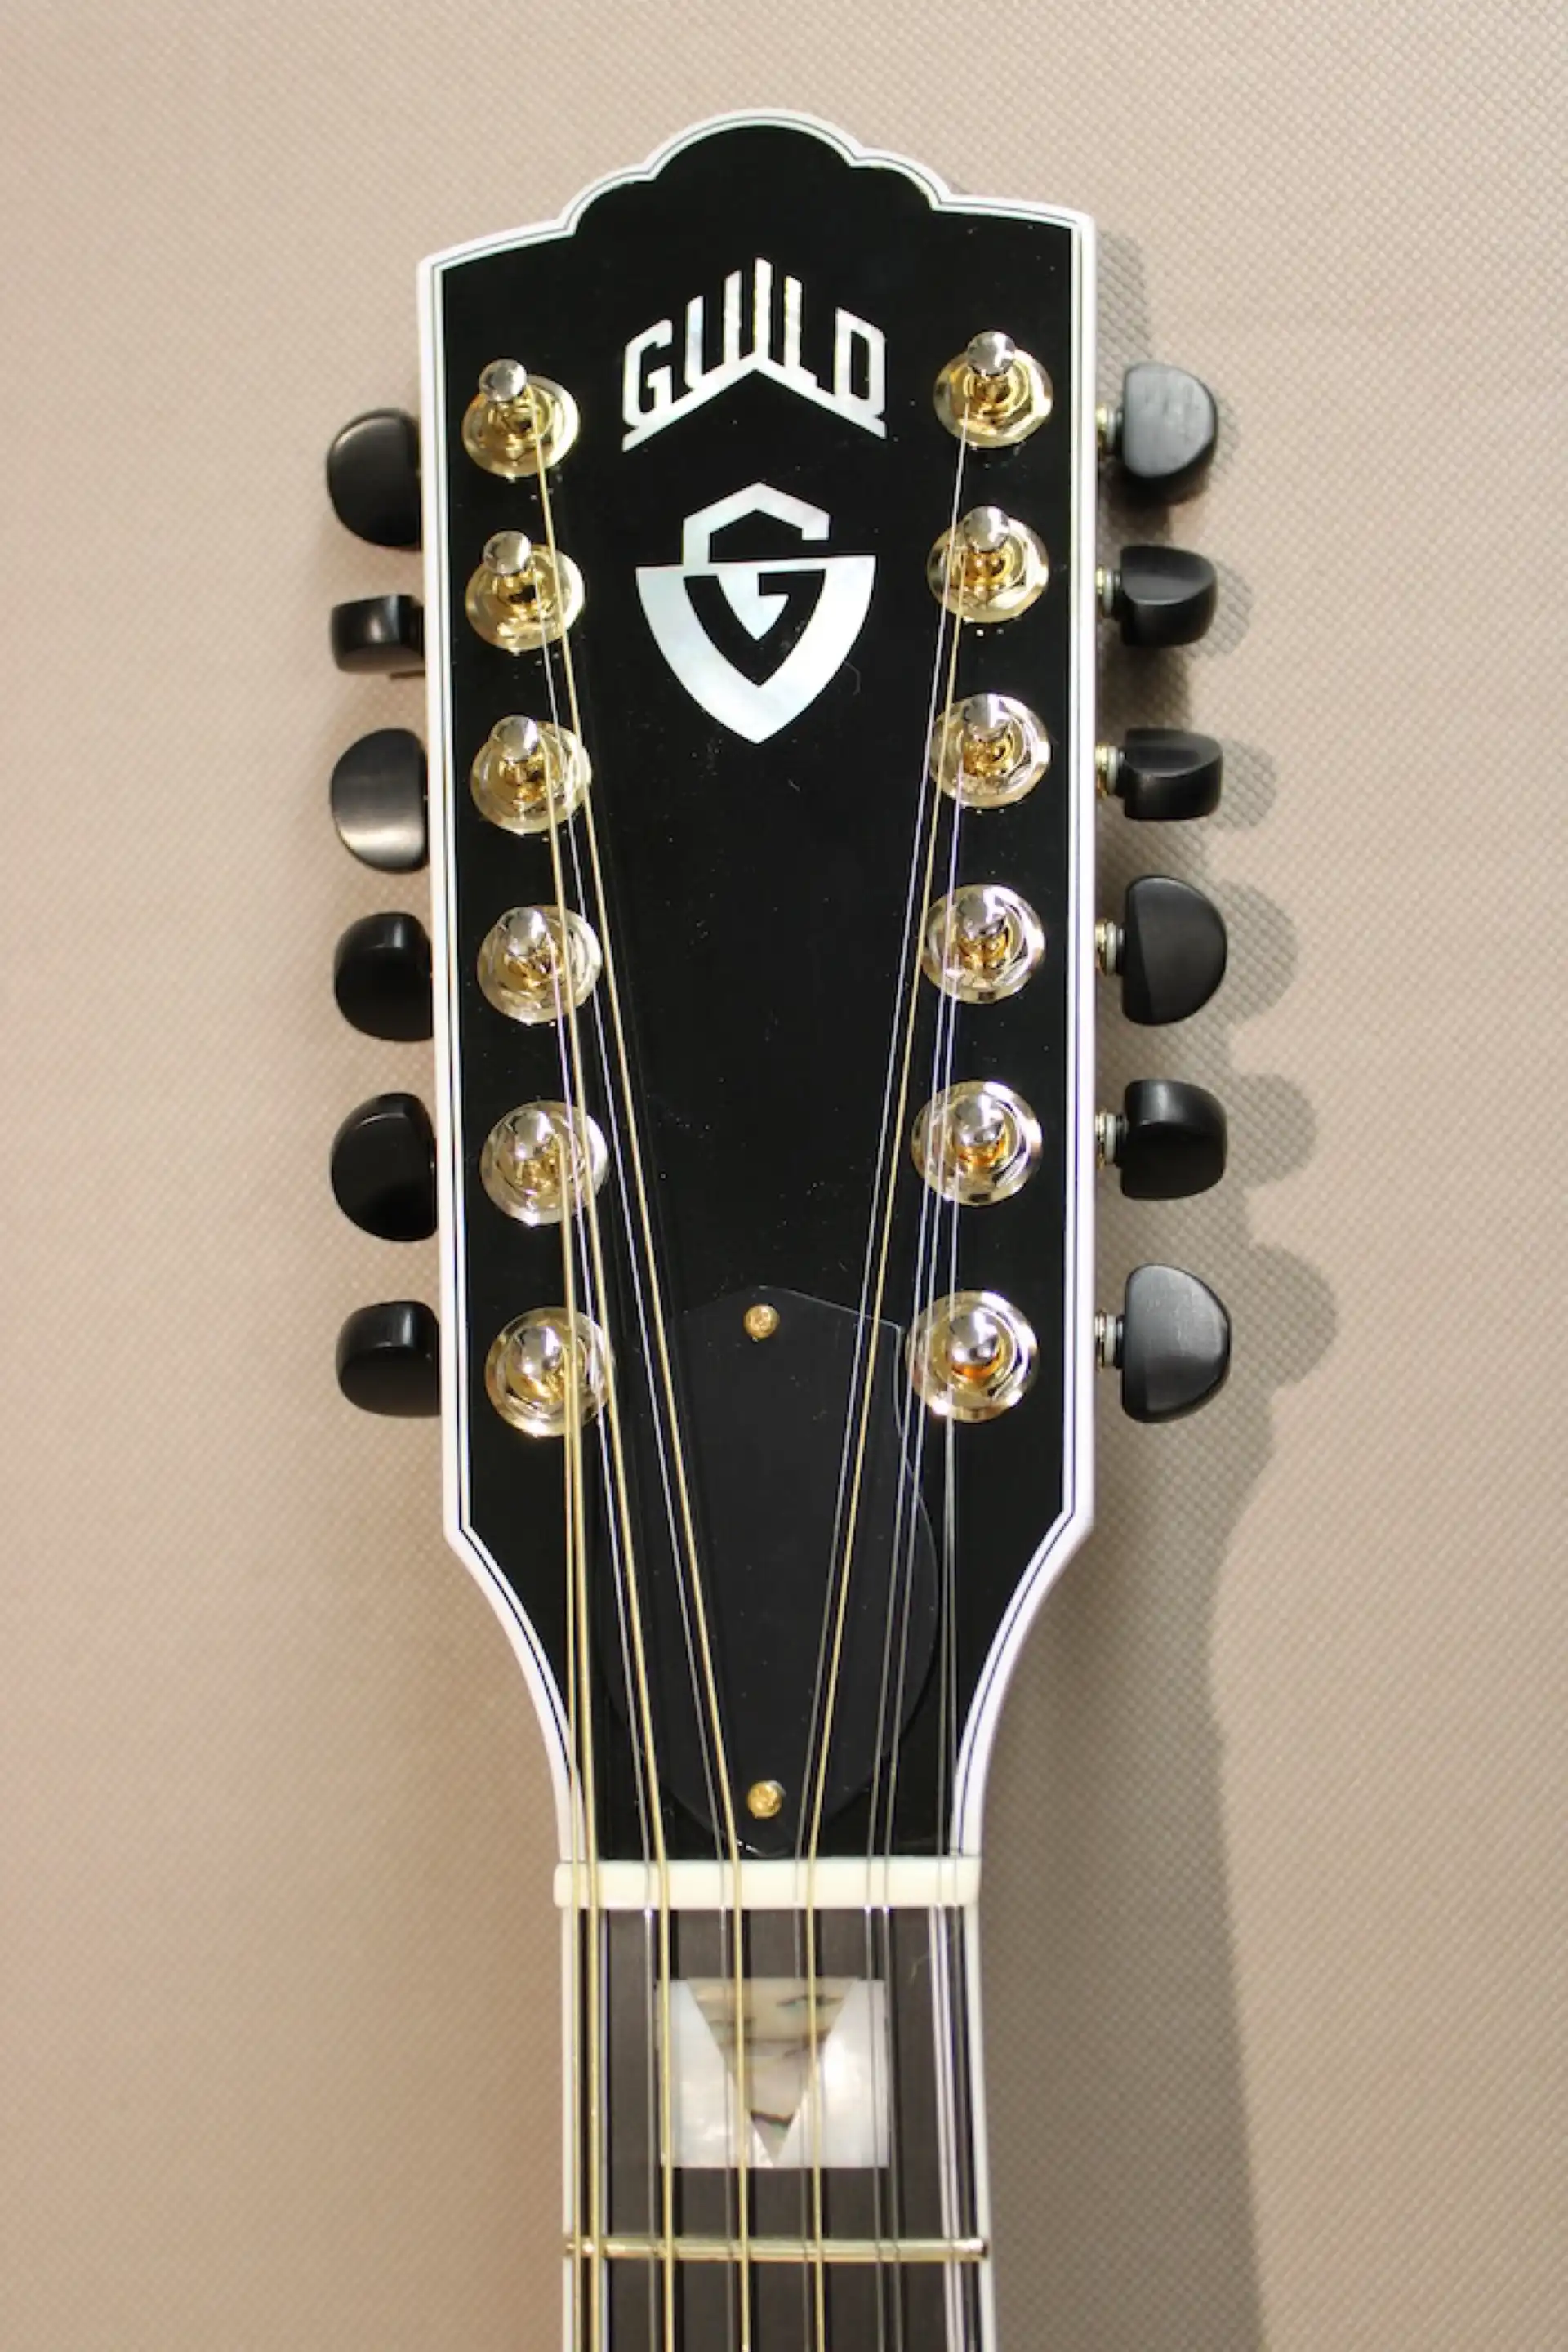
Front of Headstock (After)