
Of all the fixtures and jigs in my shop, perhaps the single most important is the body mold, a wooden form that holds the precise shape of the guitar body during construction. There are several acoustic guitar body molds readily available for purchase, so long as you happen to be building the instrument the mold was sized for. But what do you do when you set out to build something different, a guitar that deviates from the popular, factory-made guitar shapes and sizes? You make your own body mold, of course! This article details my particular approach.
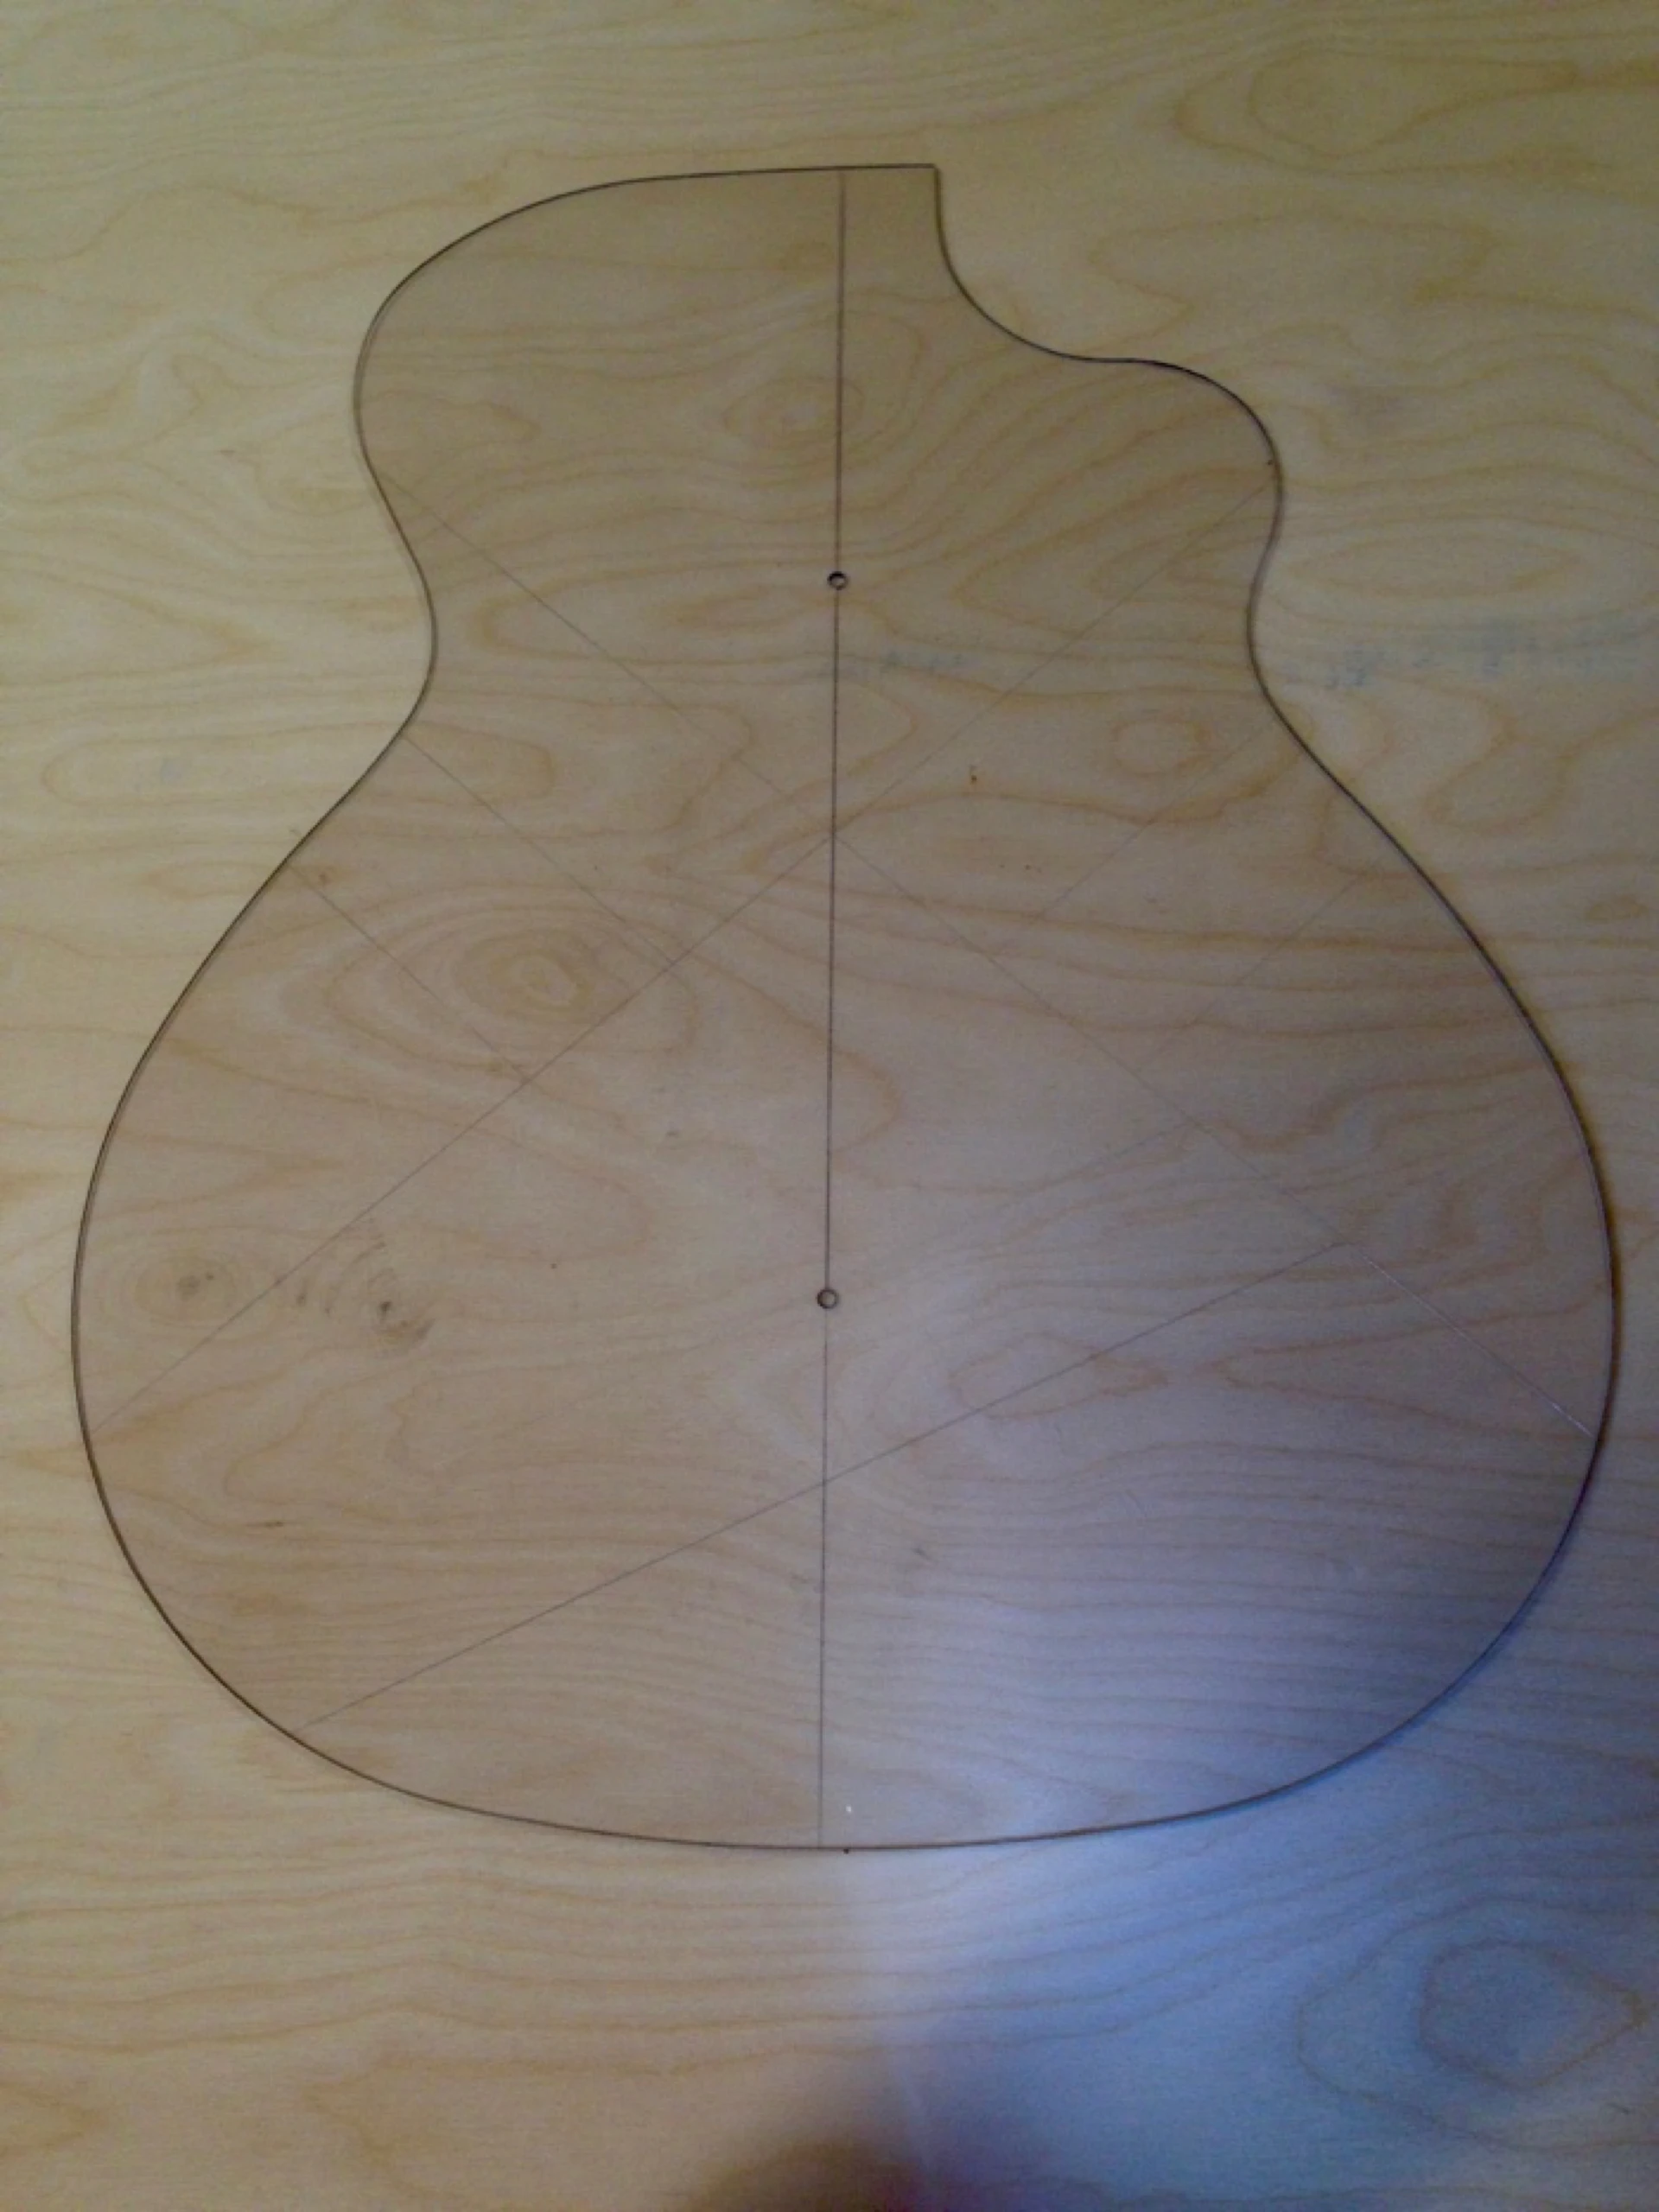
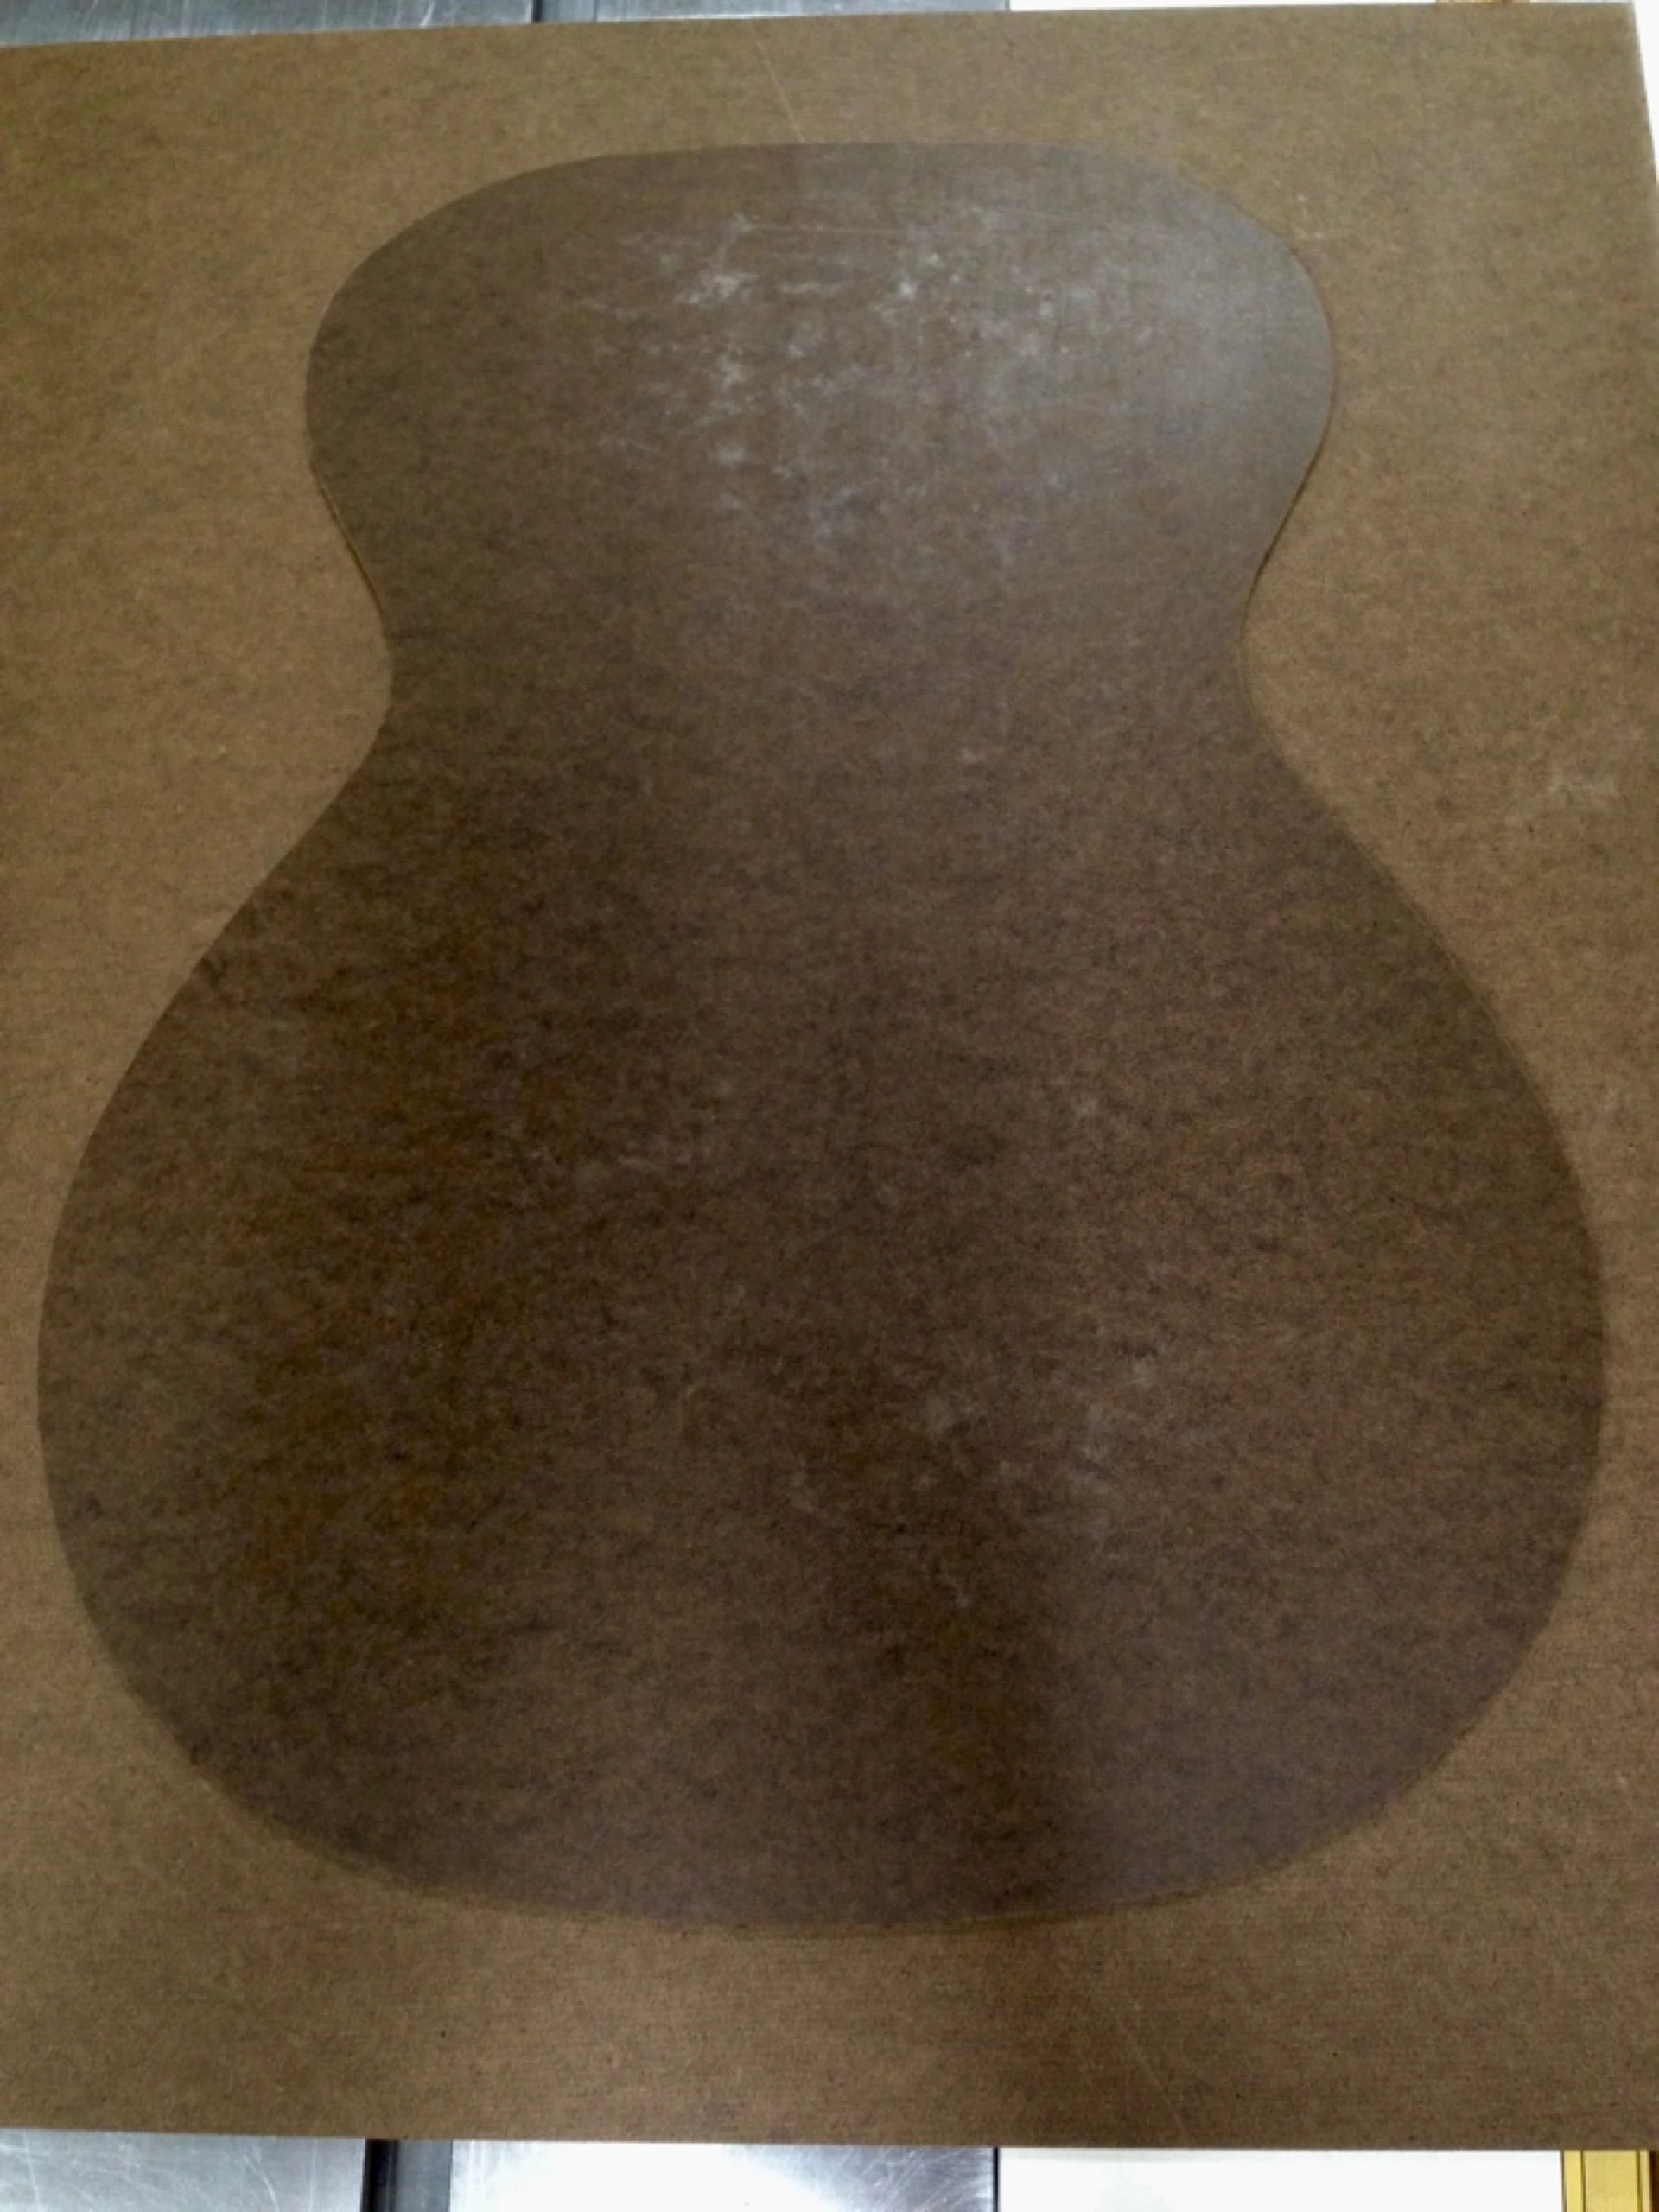
When I alter or introduce a new guitar shape, I will first lay it out on paper. Paper is great for sketching out concepts and making measured drawings for future reference, but a paper template wouldn’t have a very long or useful life in my workshop. I will create a set of acrylic or hardboard templates from the paper drawing.
Creating a body pattern template out of clear, hard plastic by hand may seem a bit tedious, but it will serve multiple purposes and withstand repeated use, so it is well worth my efforts. My shop-made templates are sized to the outer dimensions of the guitar body. I scribe the body shape onto my choice of template material, rough it out on the bandsaw, clean it up at the disc and belt sanders, and perfect it by hand.
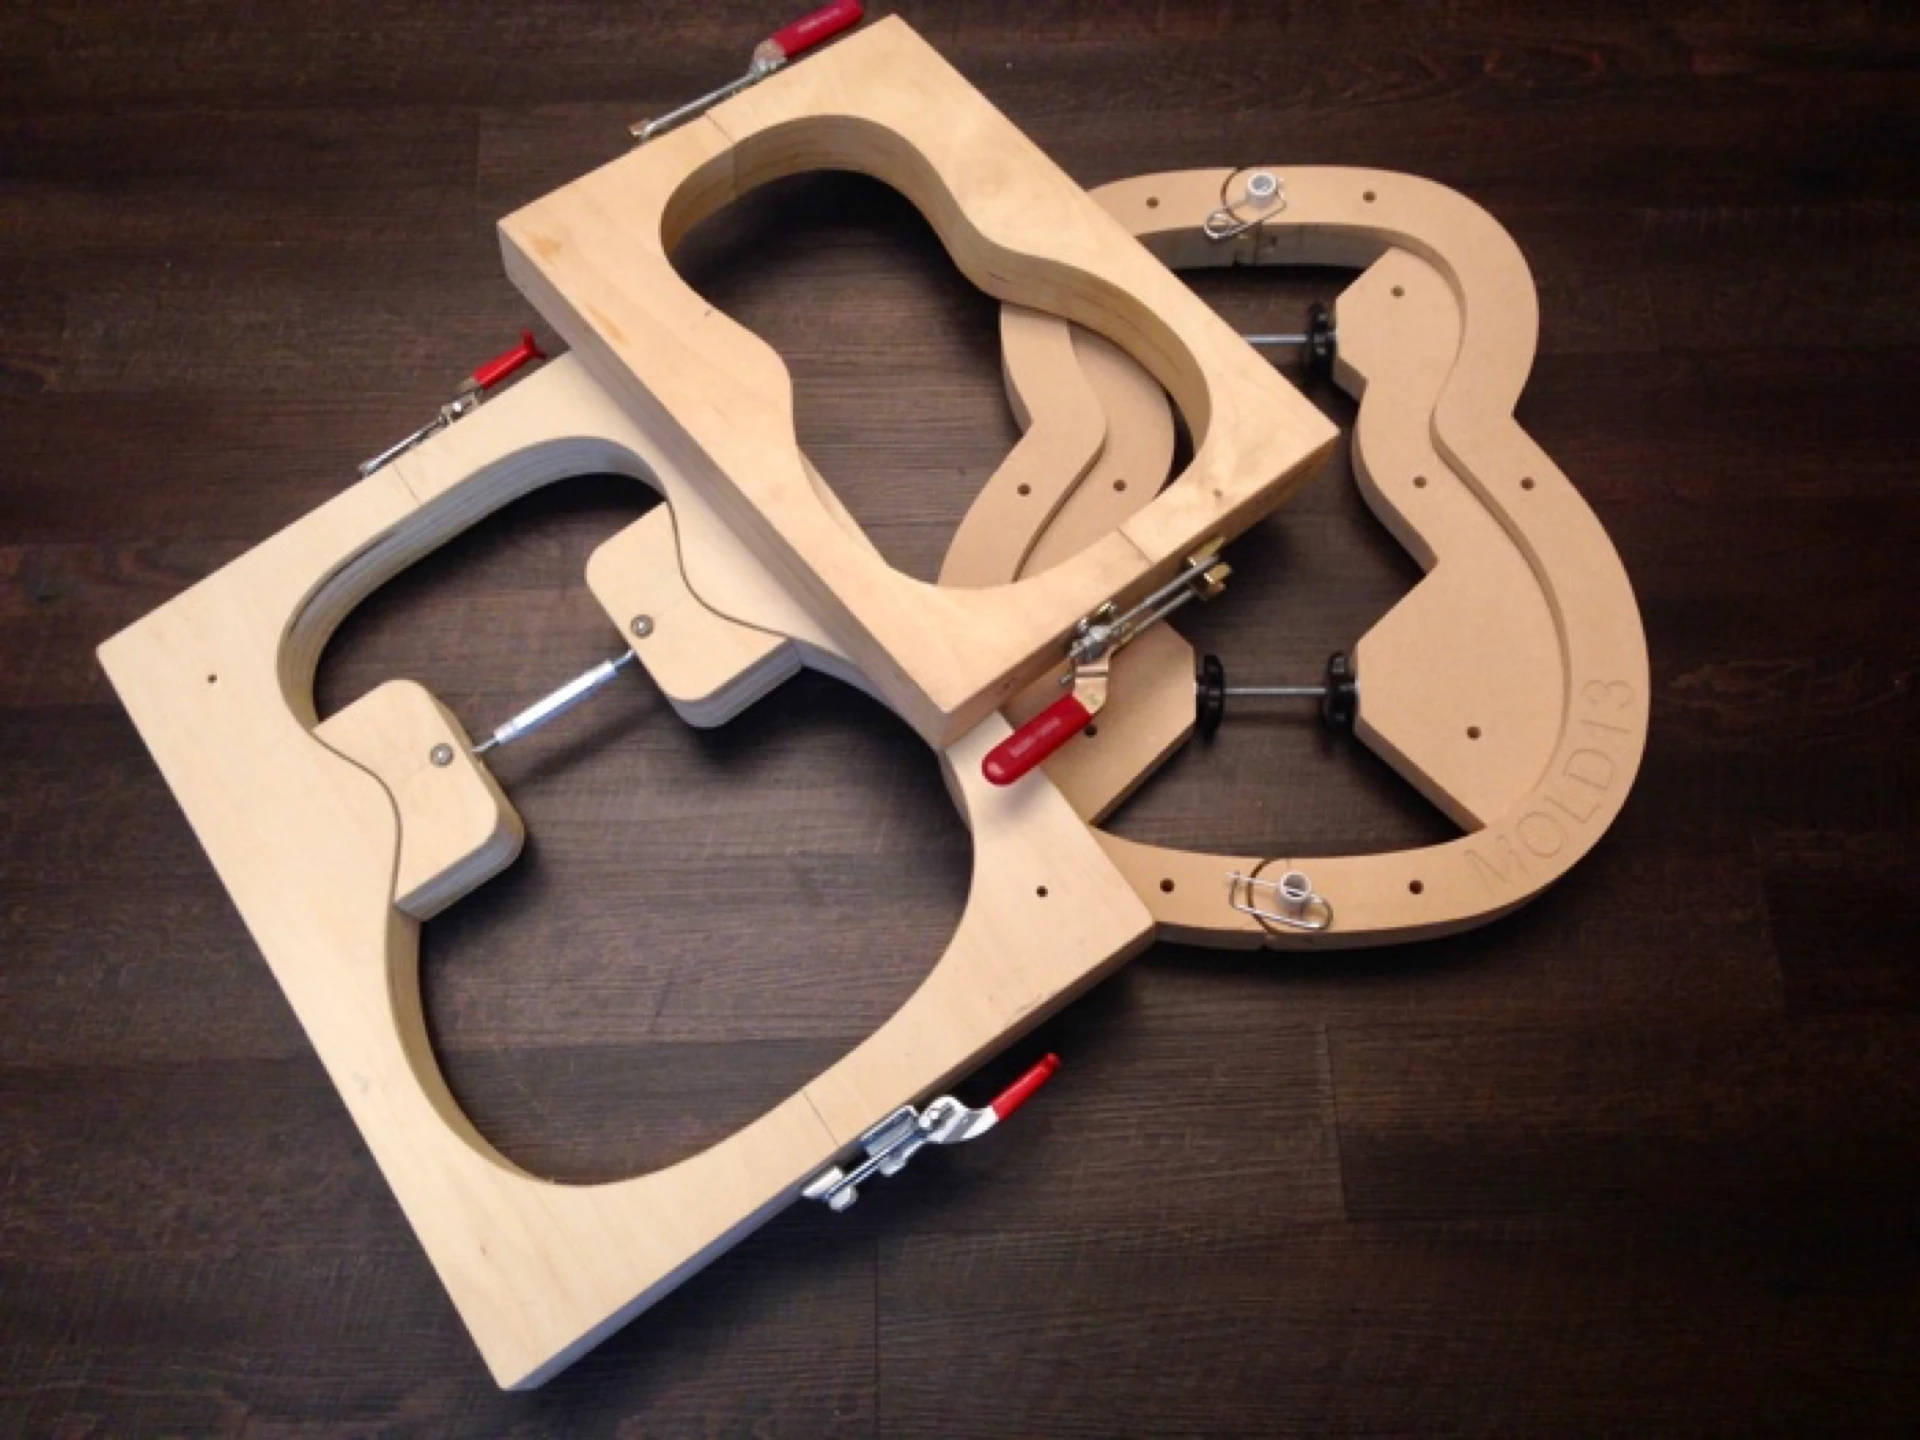
A simple shop-made body mold is constructed by laminating multiple layers of a strong, stable material into a block, band-sawing the block lengthwise into two pieces along the centerline, tracing the outline of the body of the guitar onto each half, band-sawing the contours out of each piece, and utilizing some method of holding the two pieces together. If you are curious as to why the mold is cut in half, as opposed to being left intact, it is to allow for disassembly and removal once the guitar body is complete. It could be risky to build an entire guitar body in a one-piece mold and then attempt to remove the body from the mold once complete. It is much easier to spread the mold apart and take the body out.
Body shape templates
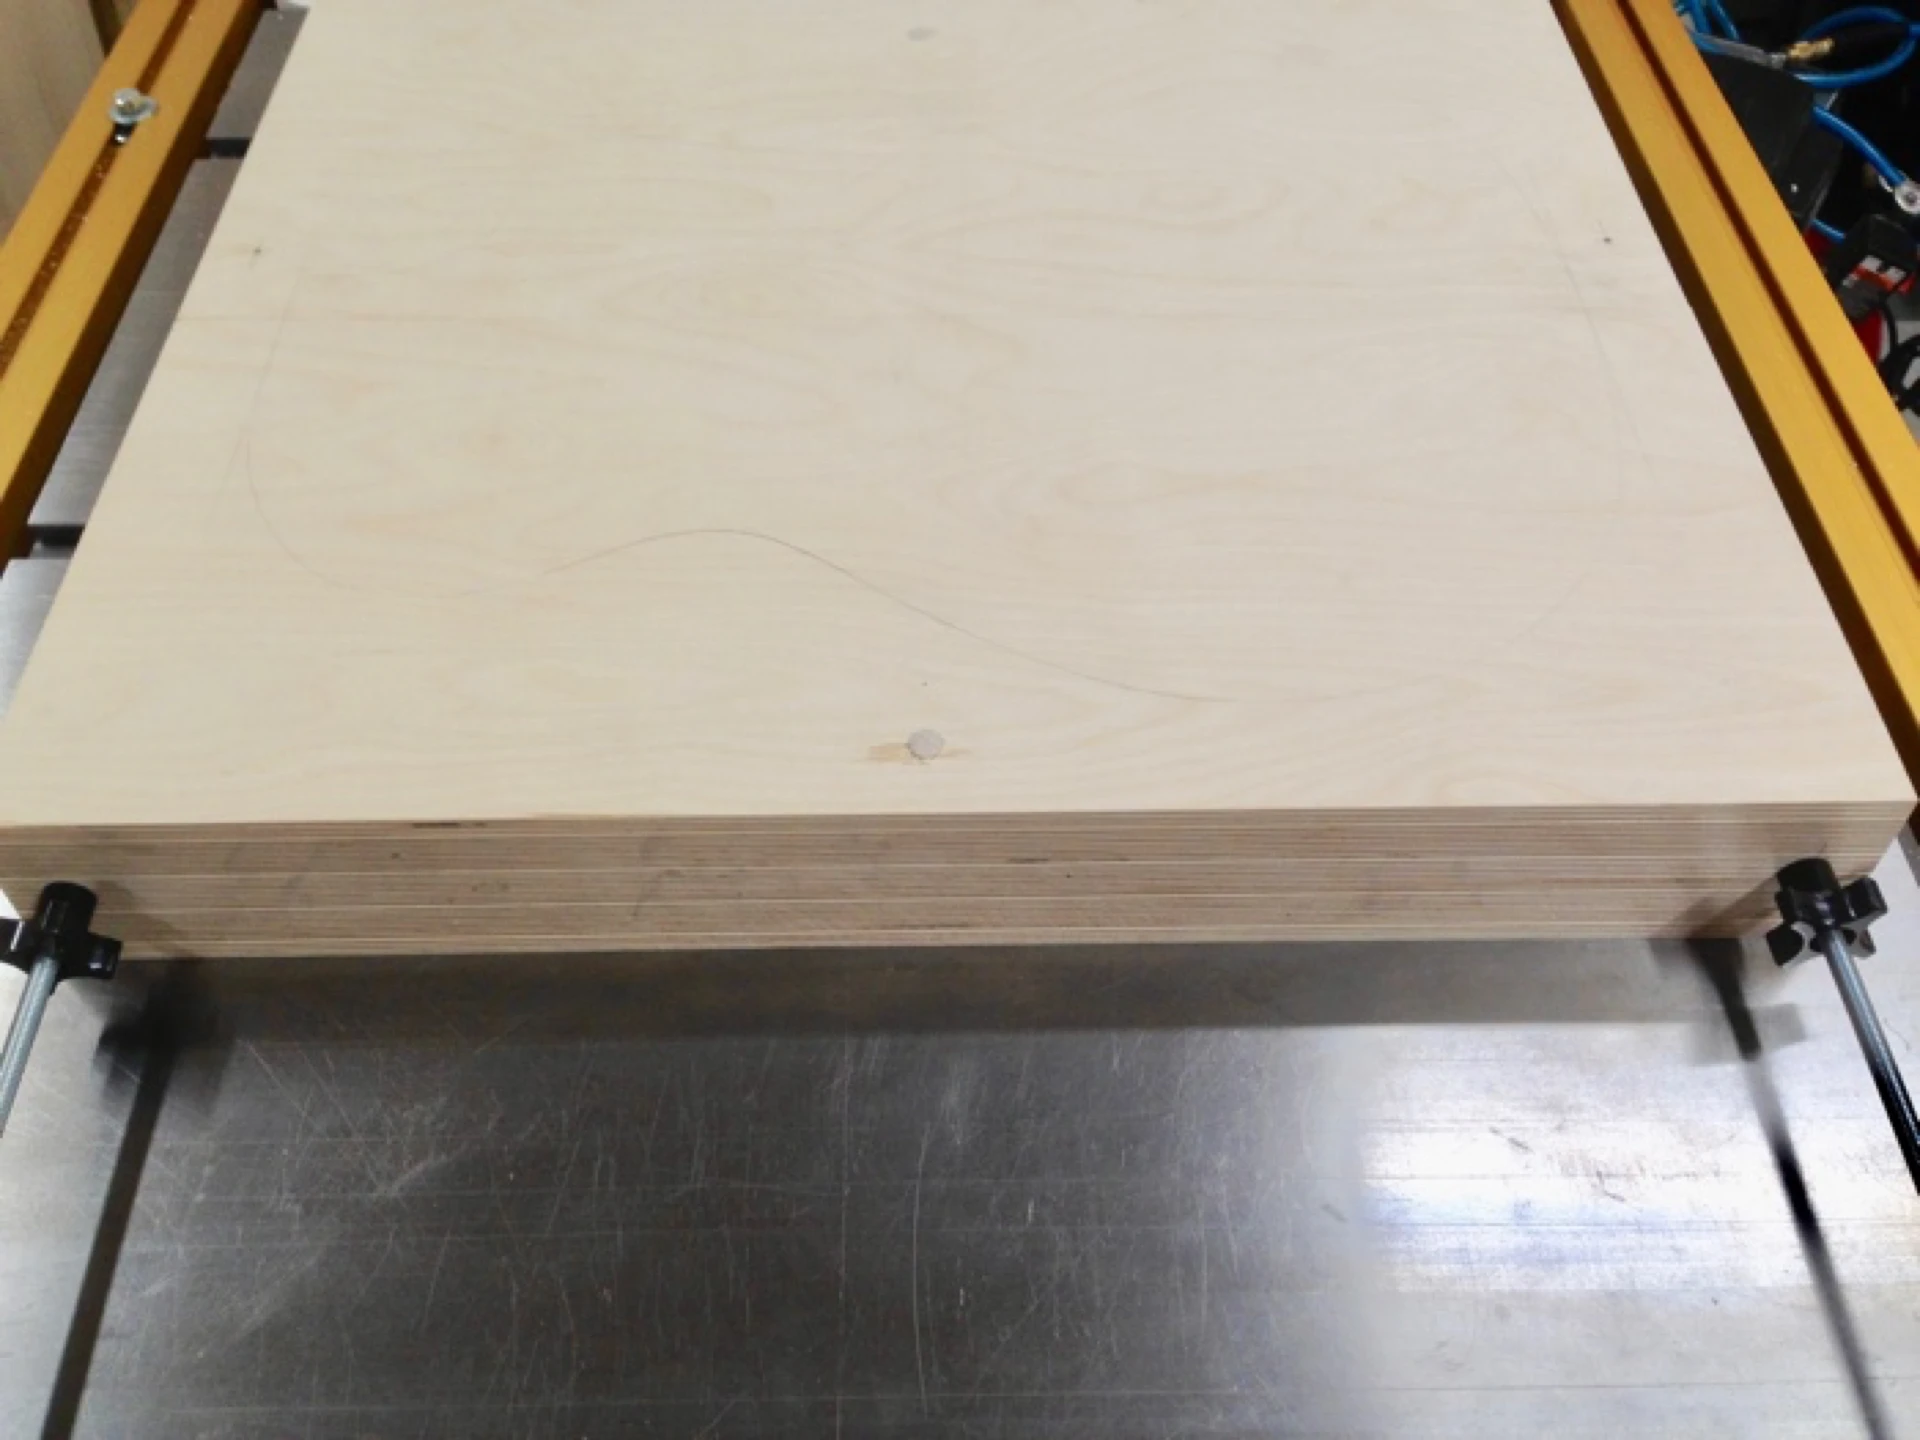
I prefer to use plywood for my mold and jig construction. I don’t much care to deal with MDF sawdust, anymore, and cut it as little as possible. I would not recommend using the cheapest plywood available, as the voids in the plys can introduce inaccuracies in your finished work if ignored (and they are just aggravating to deal with). I prefer at least five (5) layers of plywood; three (3) inner layers of 3/4″ and two (2) outer layers of 3/8″ or 1/2″. All five (5) pieces are cut roughly to 24″ x 24″ square.
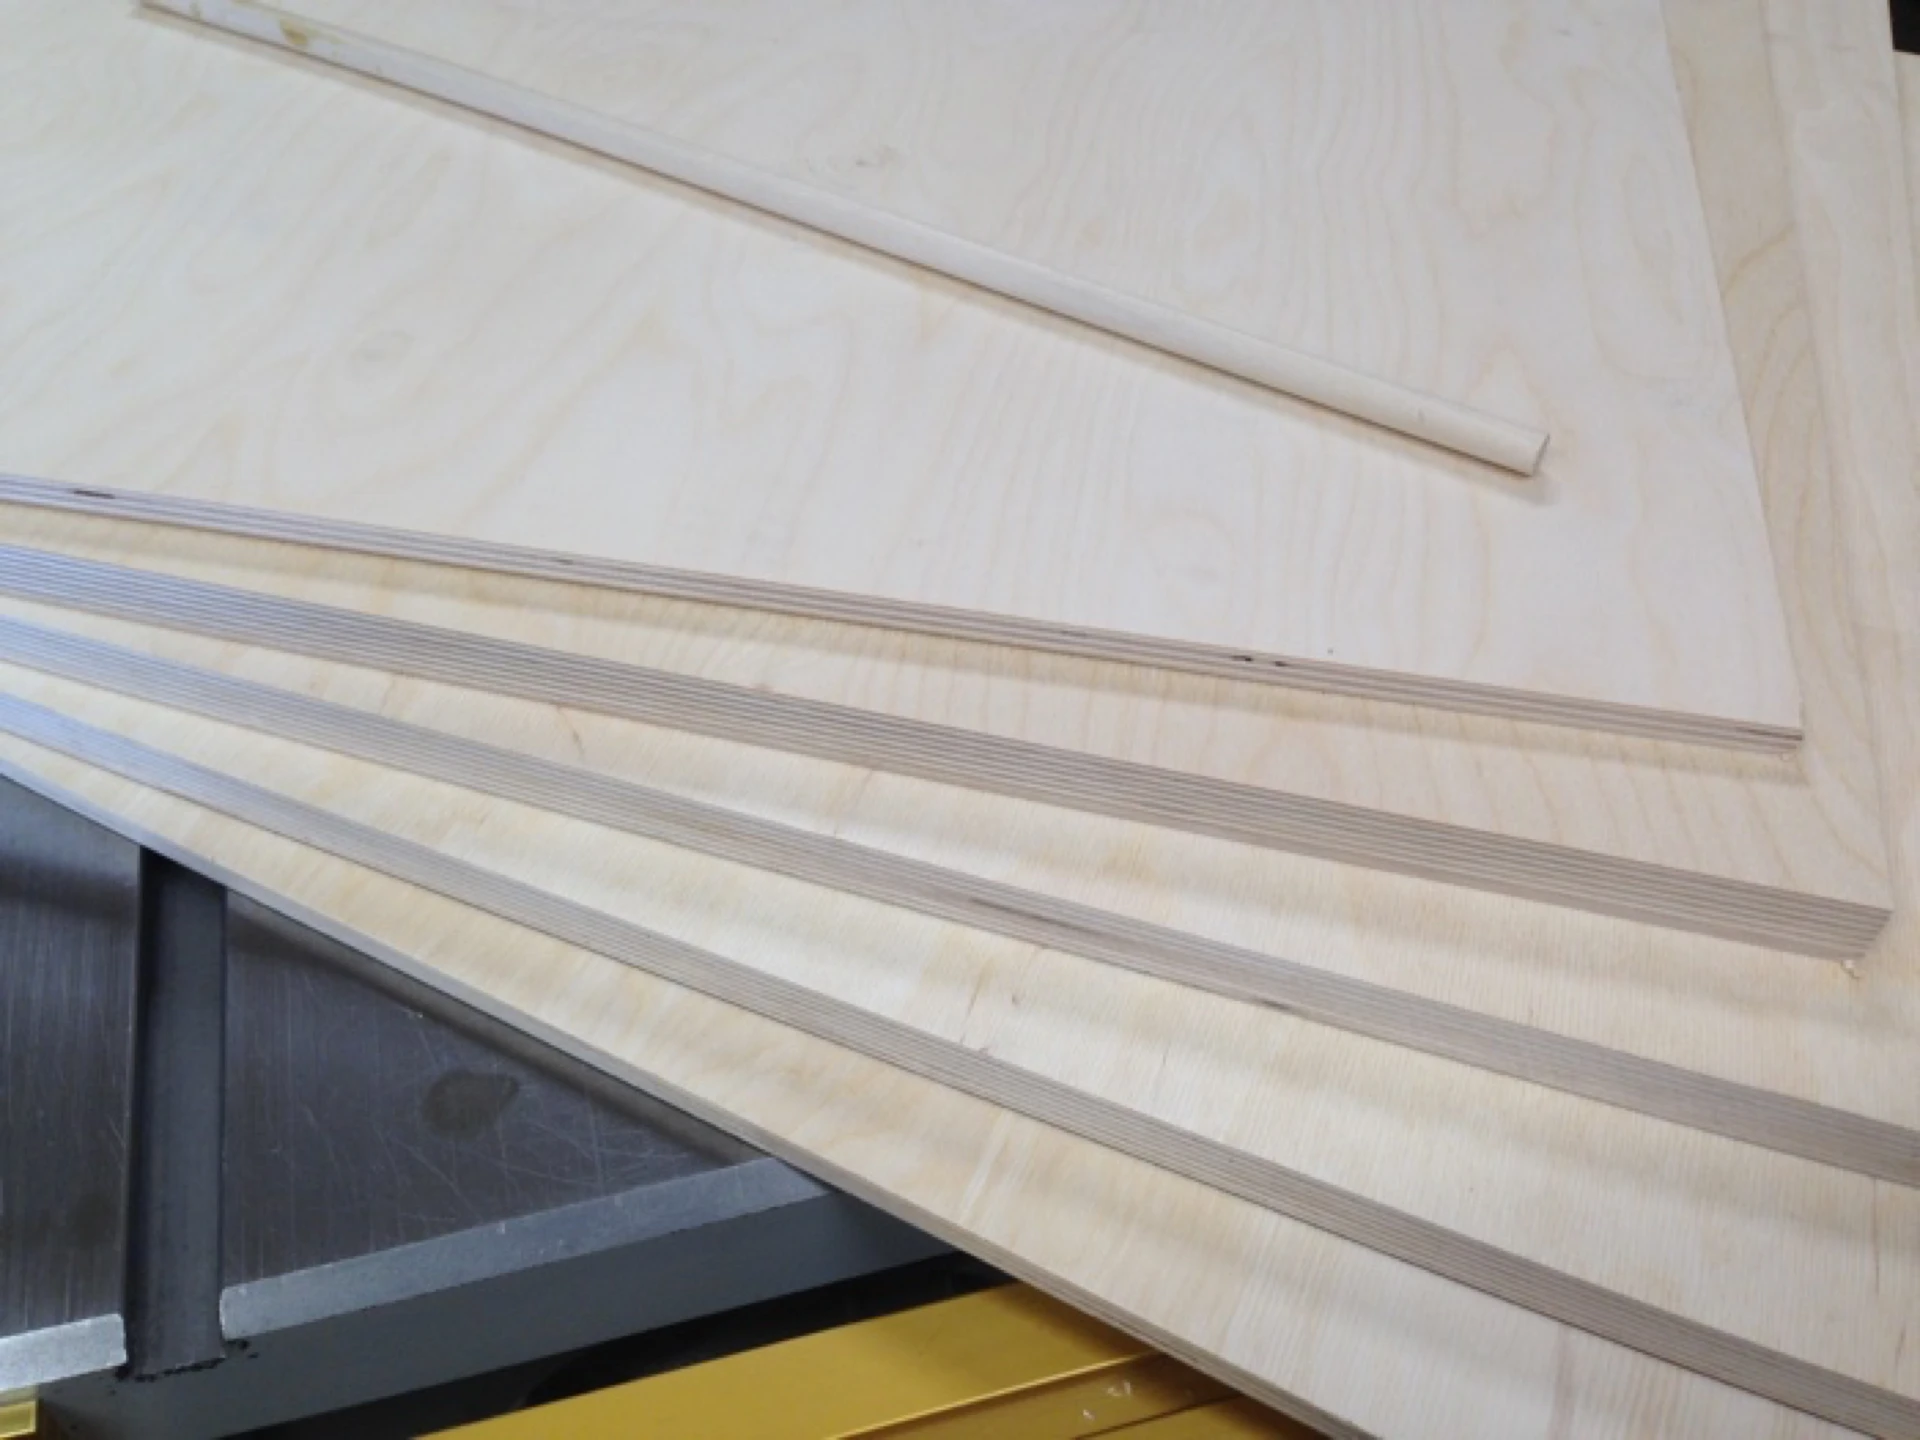
Plywood pieces
I dry-assemble the plywood pieces (without glue), check them for square them on one corner and clamp them together. I lightly draw my guitar body shape on the plywood as a reference, only (these are not cut lines). Two (2) holes are drilled completely through all five (5) layers in (what will become) the waste area of the plywood, into which dowels will be driven after applying glue.
Doweling the plywood pieces, while entirely optional, allows me to focus my attention on simply clamping the plywood together, instead of having to also worry about keeping five (5) separate pieces of wet, gooey, glued wood aligned. I drill a 3/8″ hole into which I will hammer a 3/8″ hardwood dowel. While most any diameter of dowel will do (1/4′, or 1/2″, etc), too small a diameter and the dowel can break while I am hammering it in.
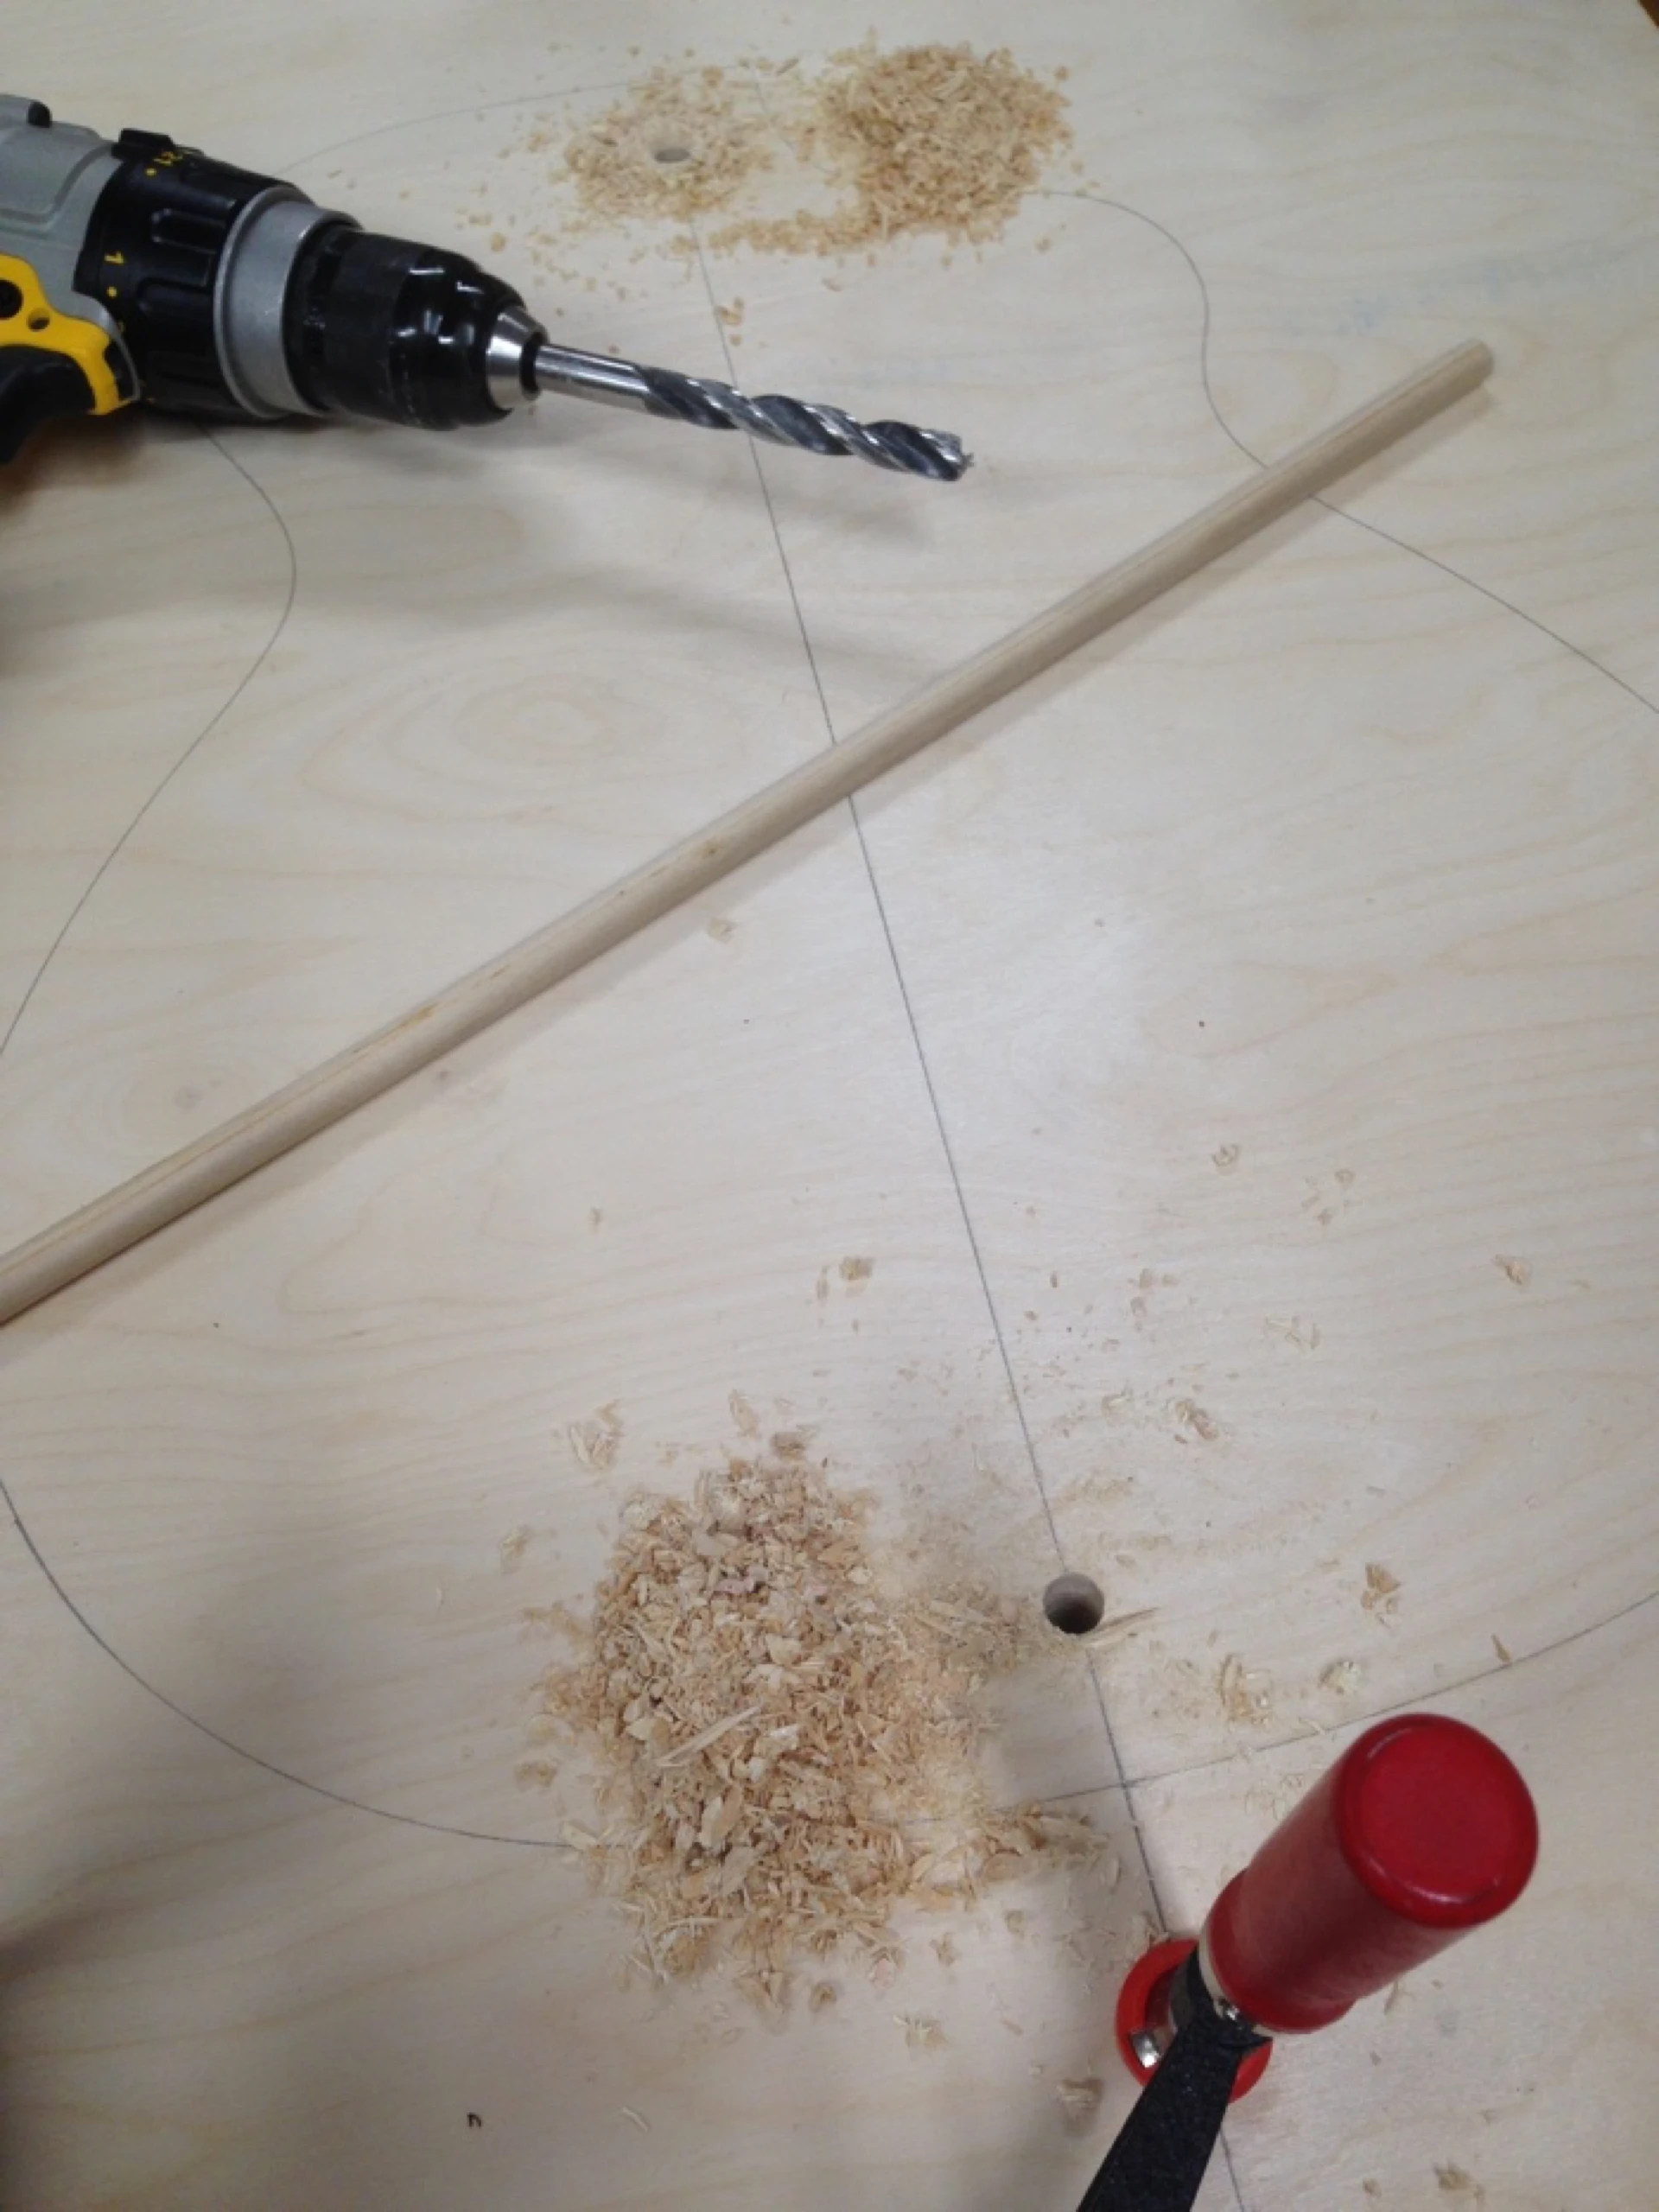
Alignment holes
The plywood pieces are clearly marked for re-assembly.
Reassembly marks
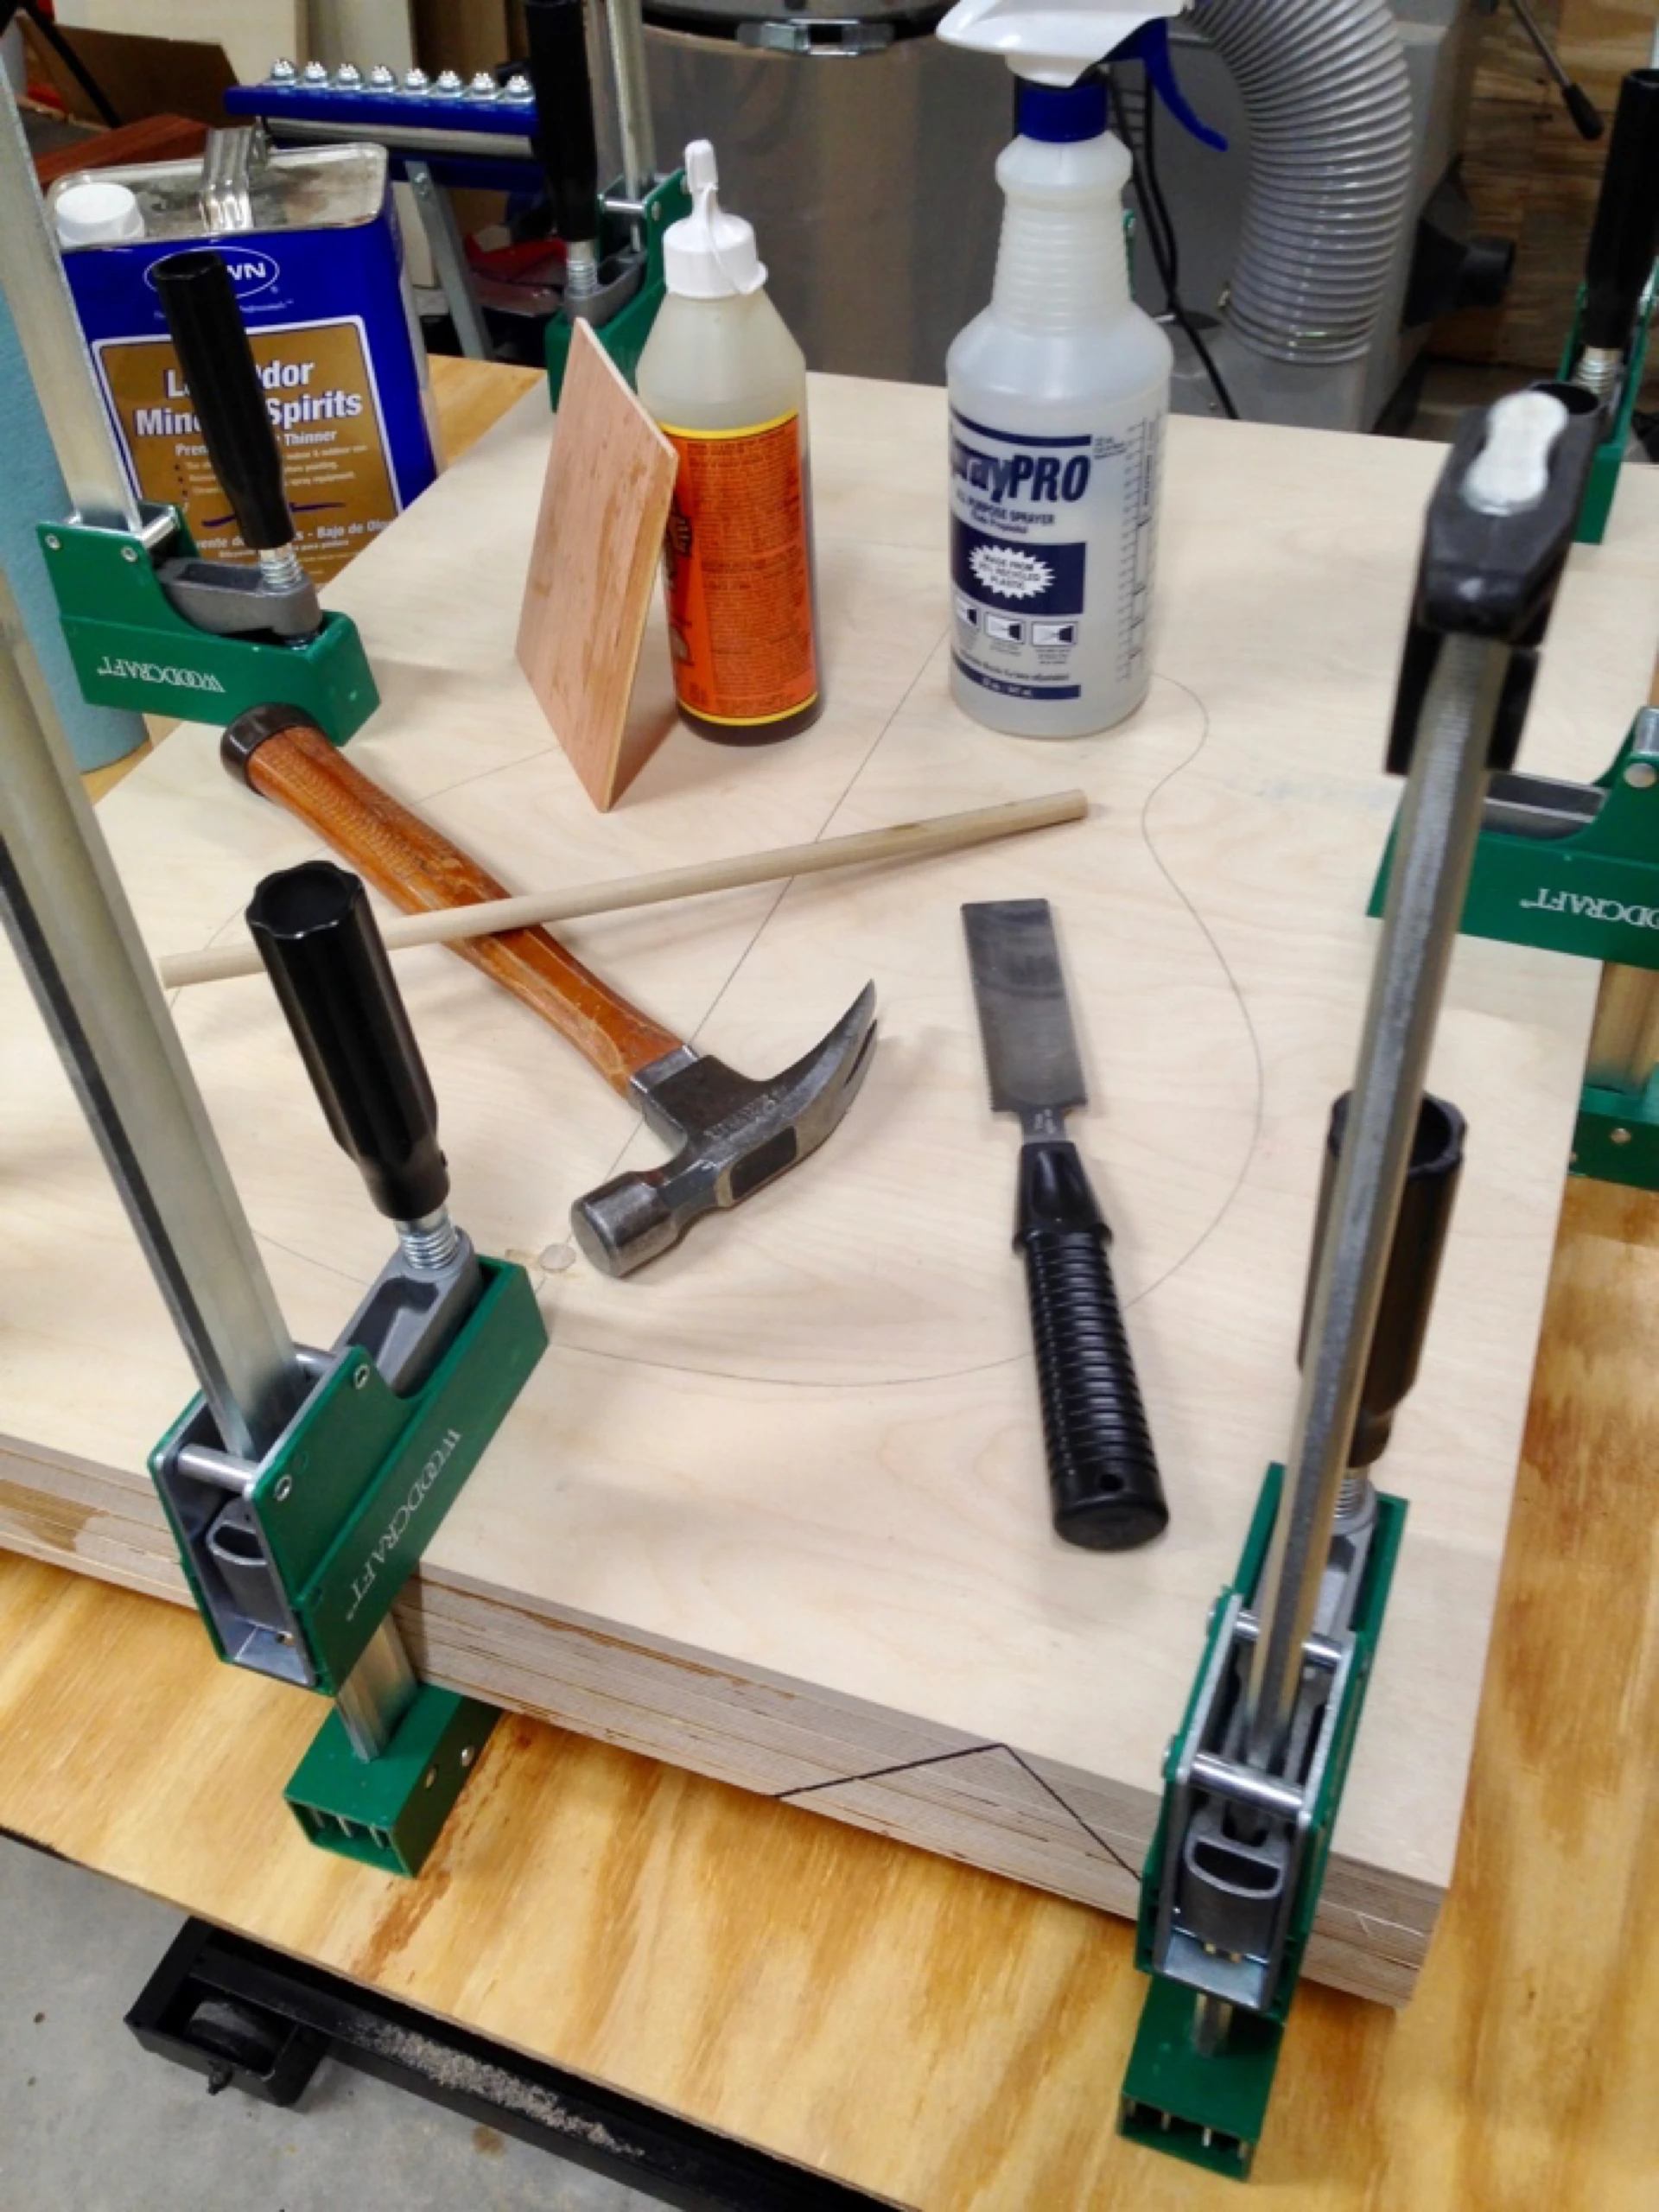
The plywood pieces are unclamped, staged, glued, re-assembled, pinned together using the dowels (for alignment), and clamped back together again. Your favorite wood glue is applicable, here, as most anything will do. I have probably used all of the available glues over the years: whites, yellows, epoxies, though I have been using polyurethane glue for lamination projects like this, more and more. If you do choose to use (or audition) a polyurethane glue such as Titebond or Gorilla, be sure to lightly wet the wood prior to thinly applying the glue. Polyurethane glue depends upon moisture in order to cure. I apply the glue to one face using a card scraper or thin piece of wood, and I wet the other face with a spritz bottle of water. Polyurethane glue will expand up to three (3) times it’s volume as it dries, so a little goes a long way.
Clamp while glue dries
Once the clamps are removed the (extremely heavy) plywood block gets trimmed and trued up. The length of my finished body mold will be equal to the length of the guitar body plus 1-5/8″ at both the neck and tail block areas (2 x 1-5/8″ = 3-1/4″). The width is equal to the width of the guitar body at it’s widest point, the lower bout, plus that same 3-1/4″. This block is heavy at this stage, so trimming it to size now reduces the weight I have to deal with in subsequent steps.
“It is critical to the design of my guitars, particularly regarding how the neck joins to the body, that the portion of the body mold supporting the neck block be perfectly true. It must measure 90° perpendicular to the centerline (which I derive from one edge) and be cut at a 90° right angle from the face.” — Christopher Cozad
Block trimmed and trued
It is time to cut the block in half, lengthwise, a step I can perform at the bandsaw or tablesaw. If I cut the block in half on the bandsaw, I pass the cut blocks across the table saw to perfect the bandsawn edges.

Block cut in half
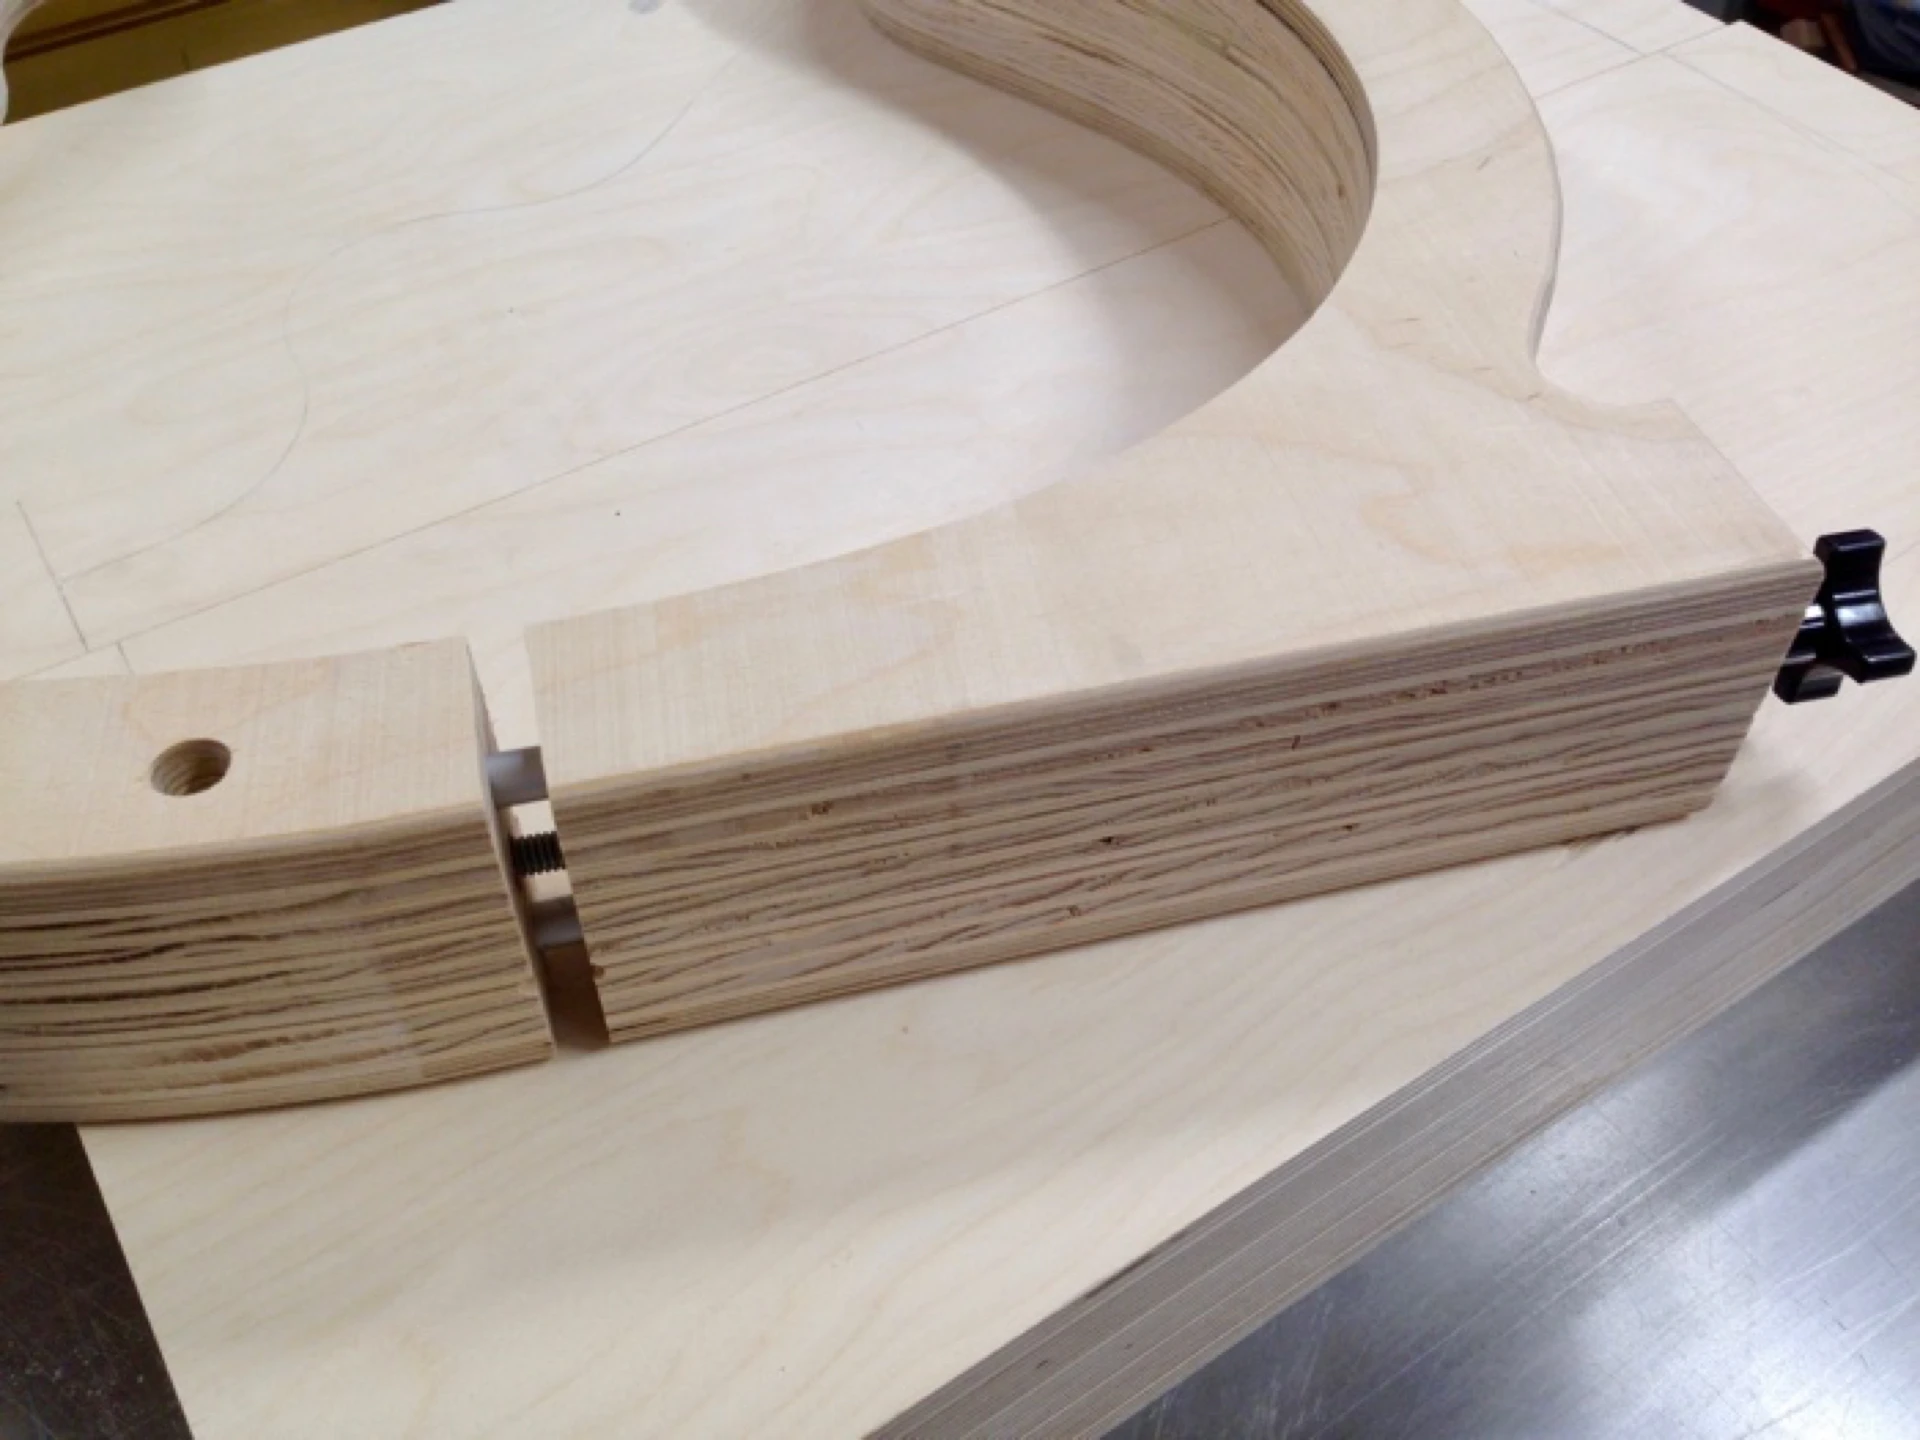
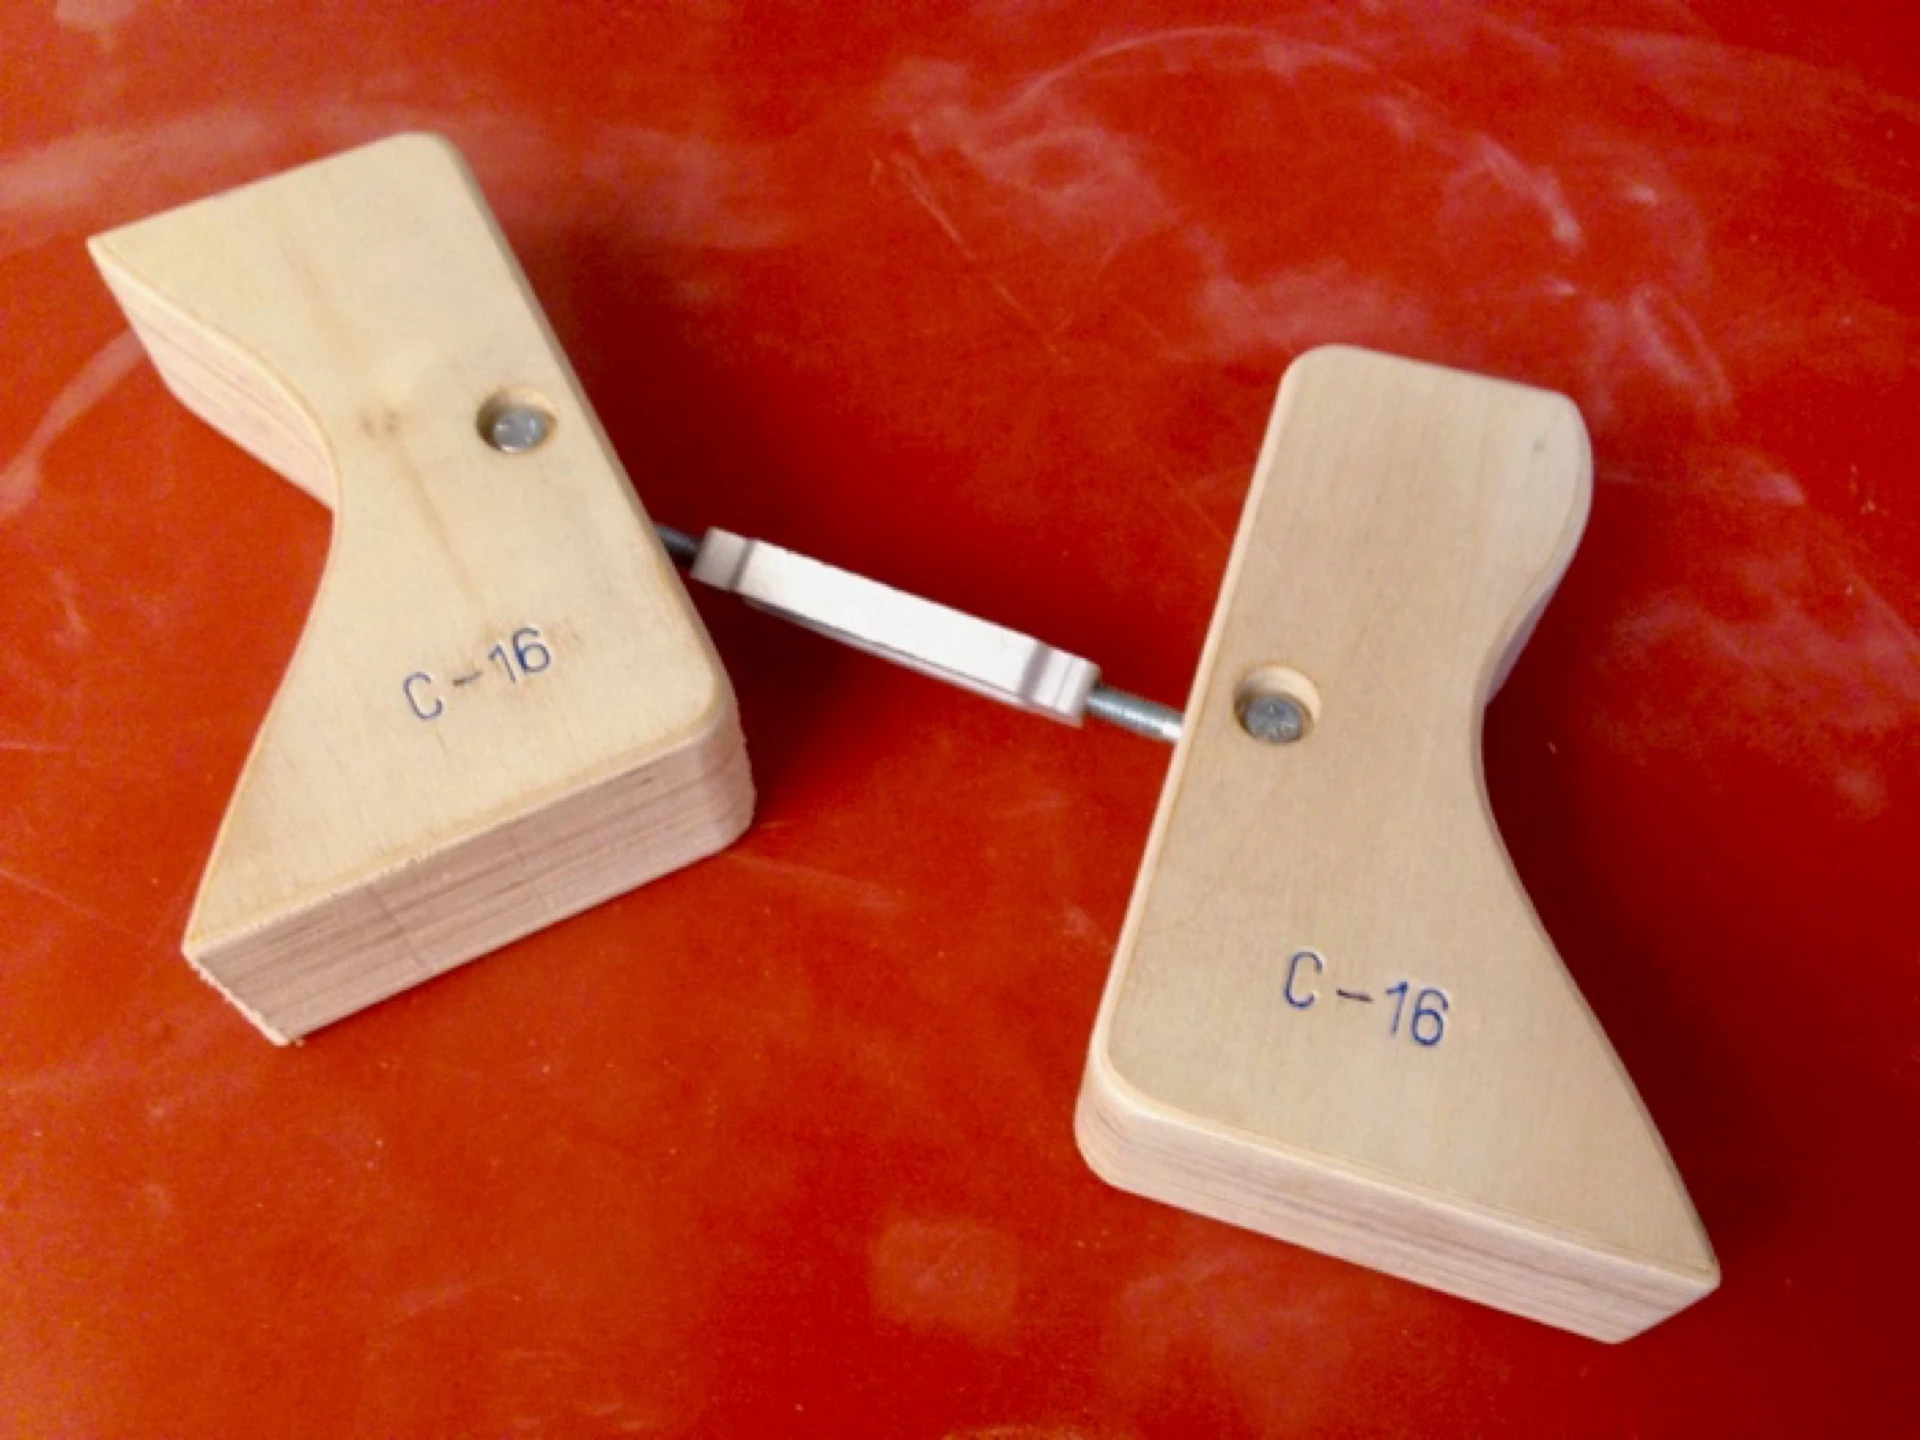
While the block is still relatively square (no curves or shapes have been cut into it), I will add the clamping mechanism(s). There are many ways to hold these plywood blocks together, including using a large wood screw. It is very common to see DESTACO clamps used, either on both the neck and tail block ends, or a single clamp on one end and a hinge on the opposite end. I find these clamp parts tend to get in the way of trying to clamp head and tail blocks to the sides during glue-up.
Body mold Clamp and Hinge
Another popular method extends the mold at both the neck and tail blocks, and a bolt is used to clamp the two sides together. This extension can be integral to the plywood (when each laminate layer was cut), or it can be attached as a block, later.
Body Mold Bolt
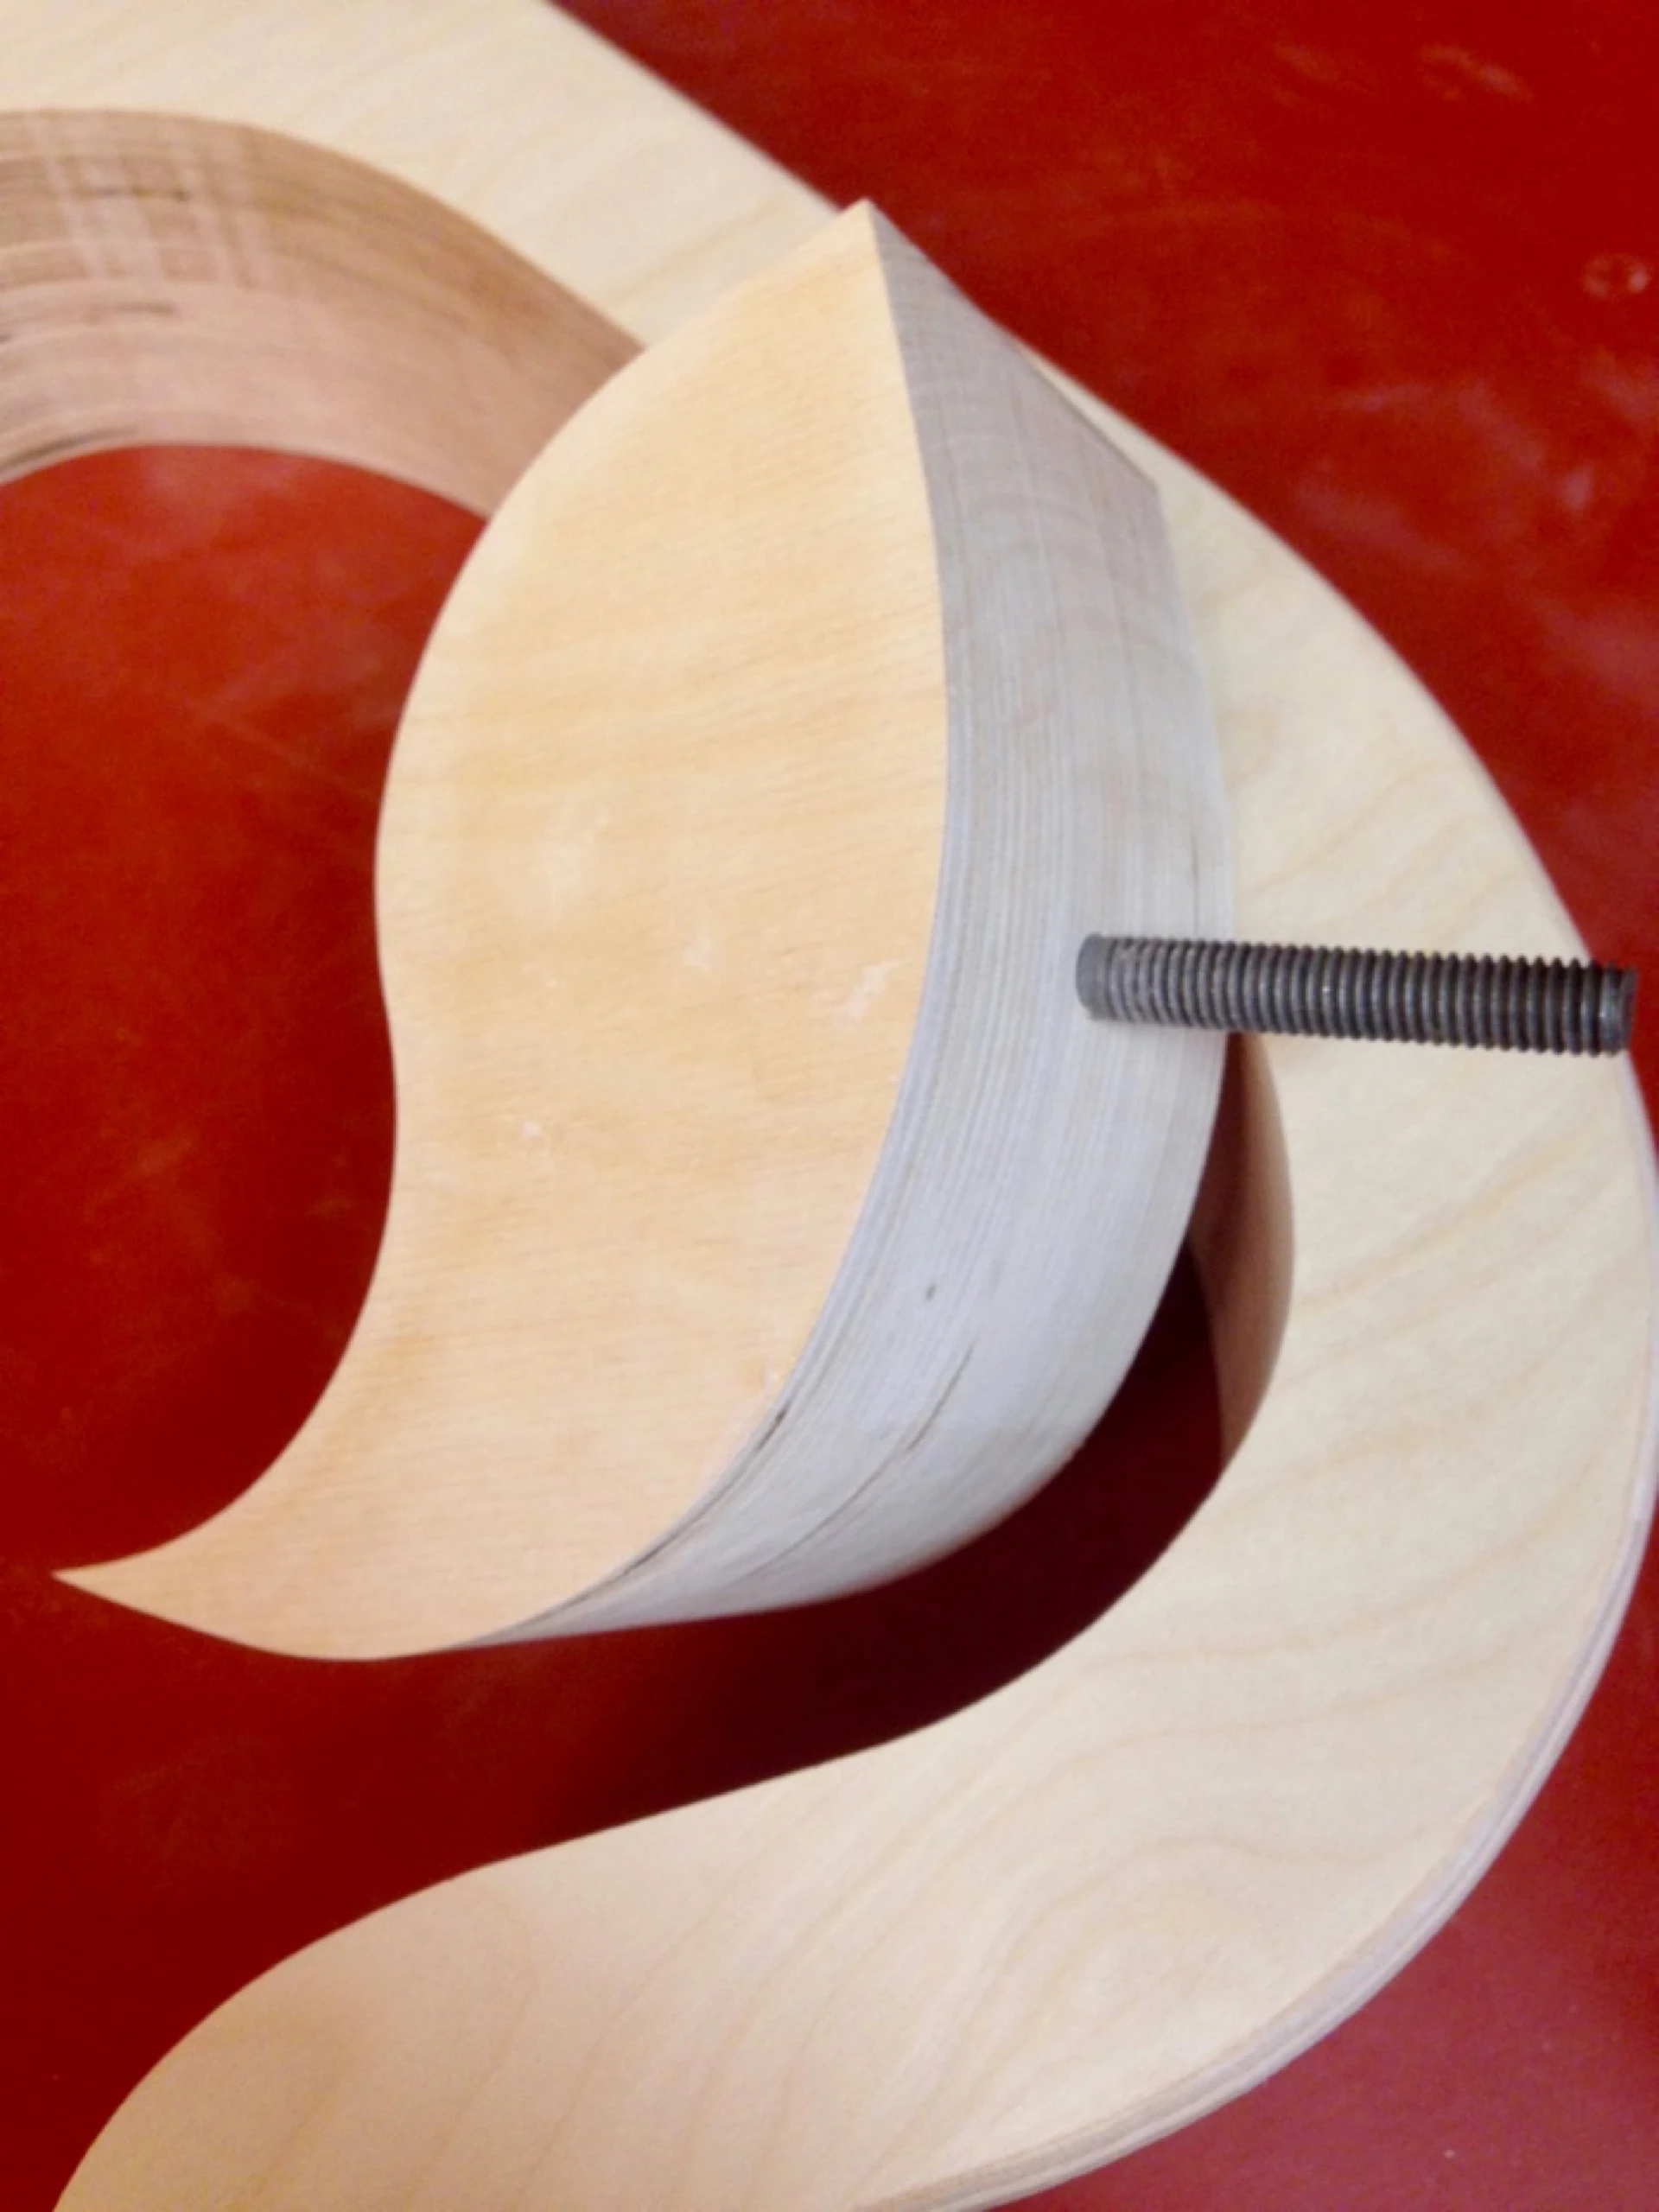
I have developed a slightly different approach to those described, above. I have never had a reason to completely disassemble my body molds in order to remove a guitar body. A simple loosening is all that is needed to extract the tightest of guitar bodies.
Body Mold Positioning
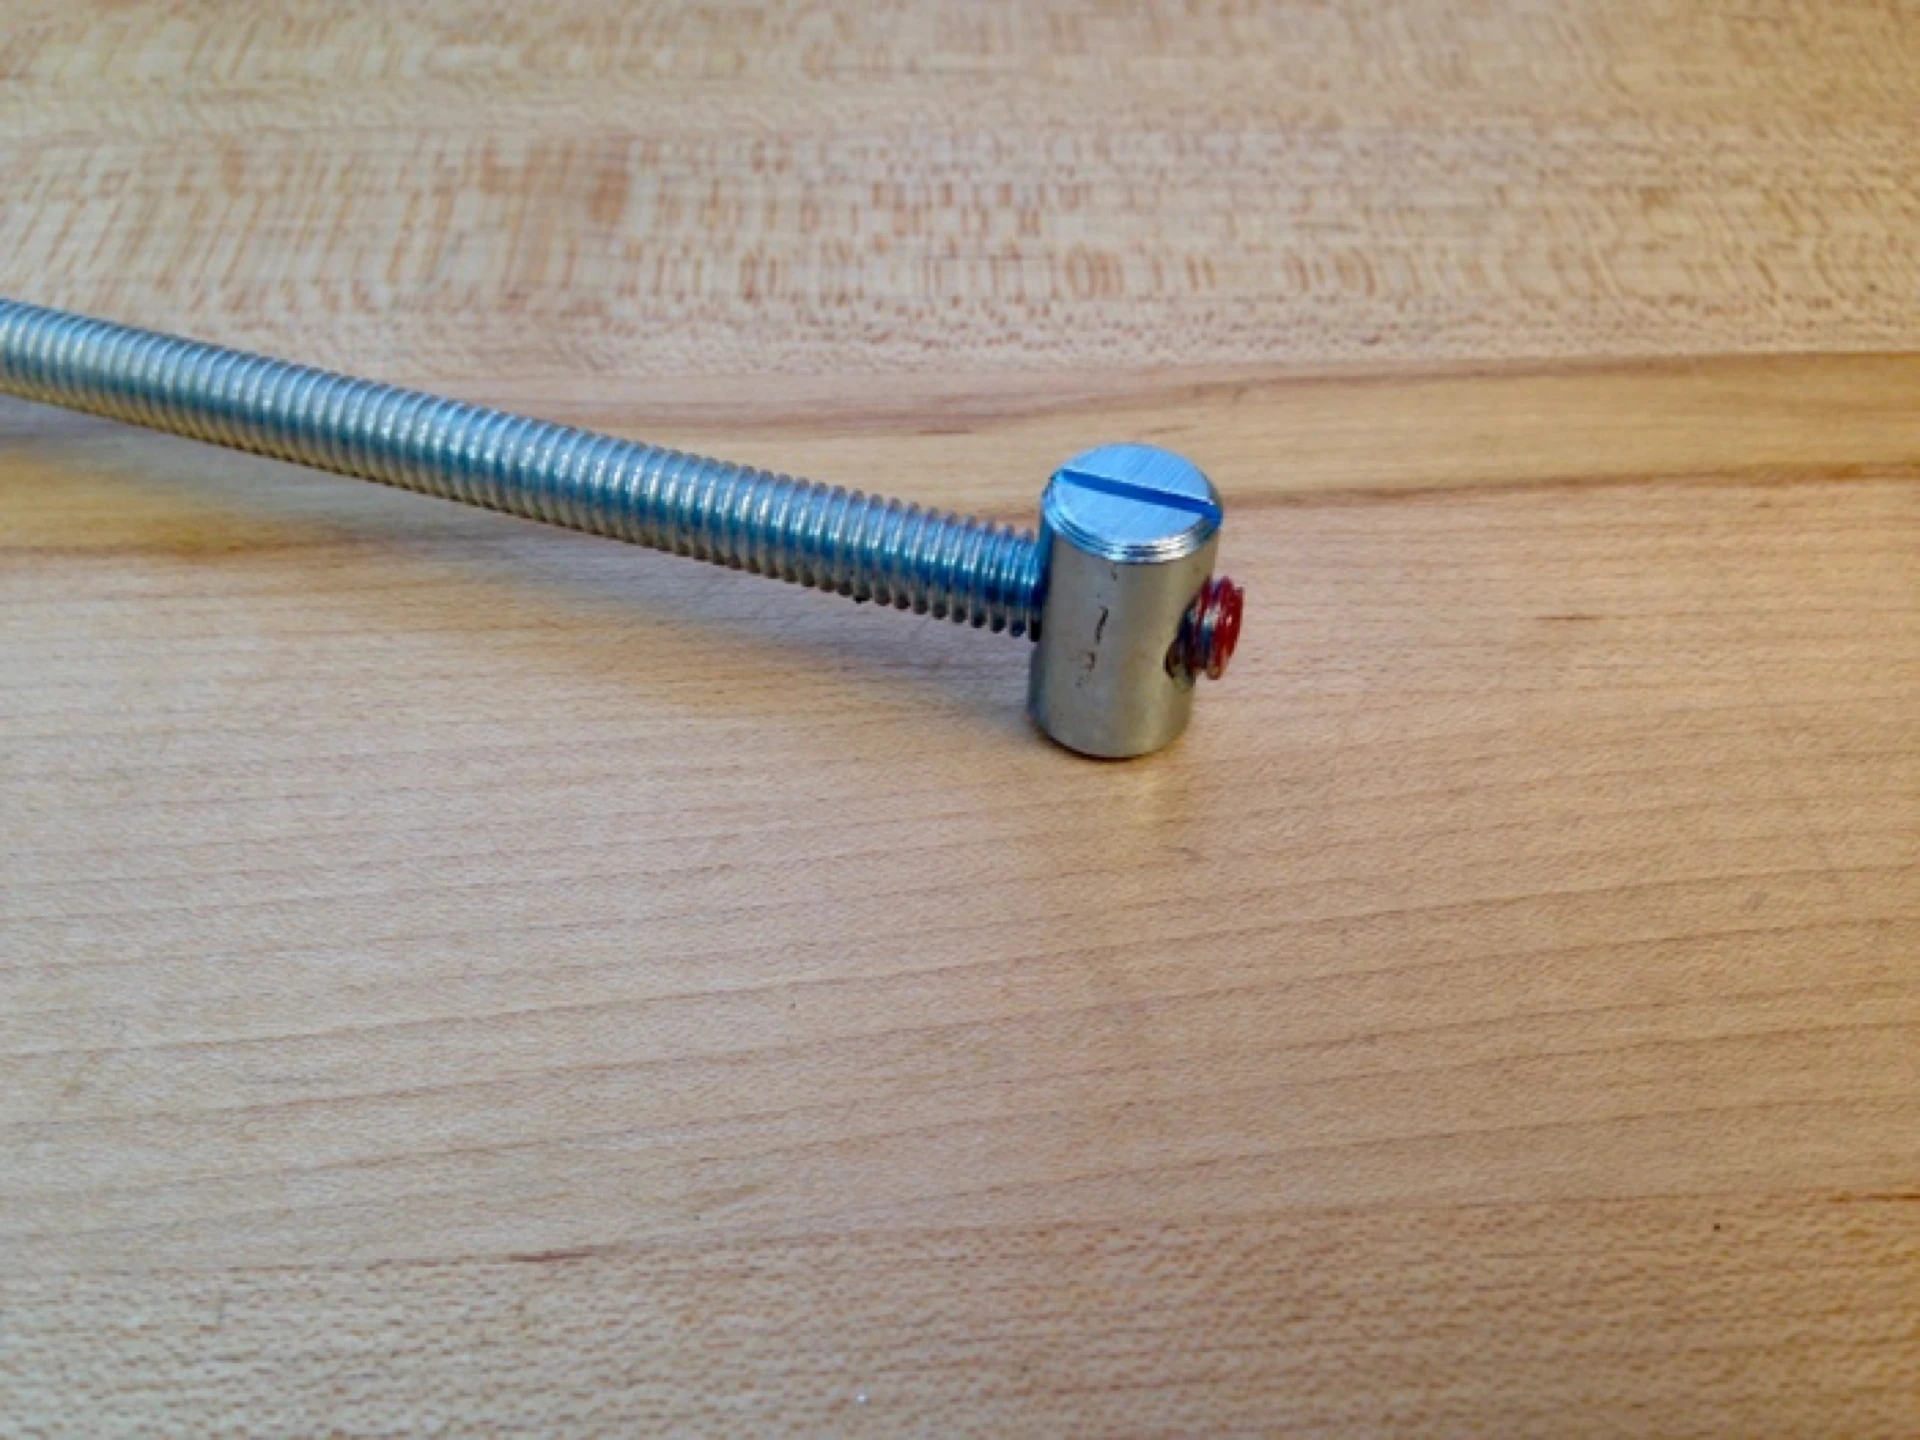
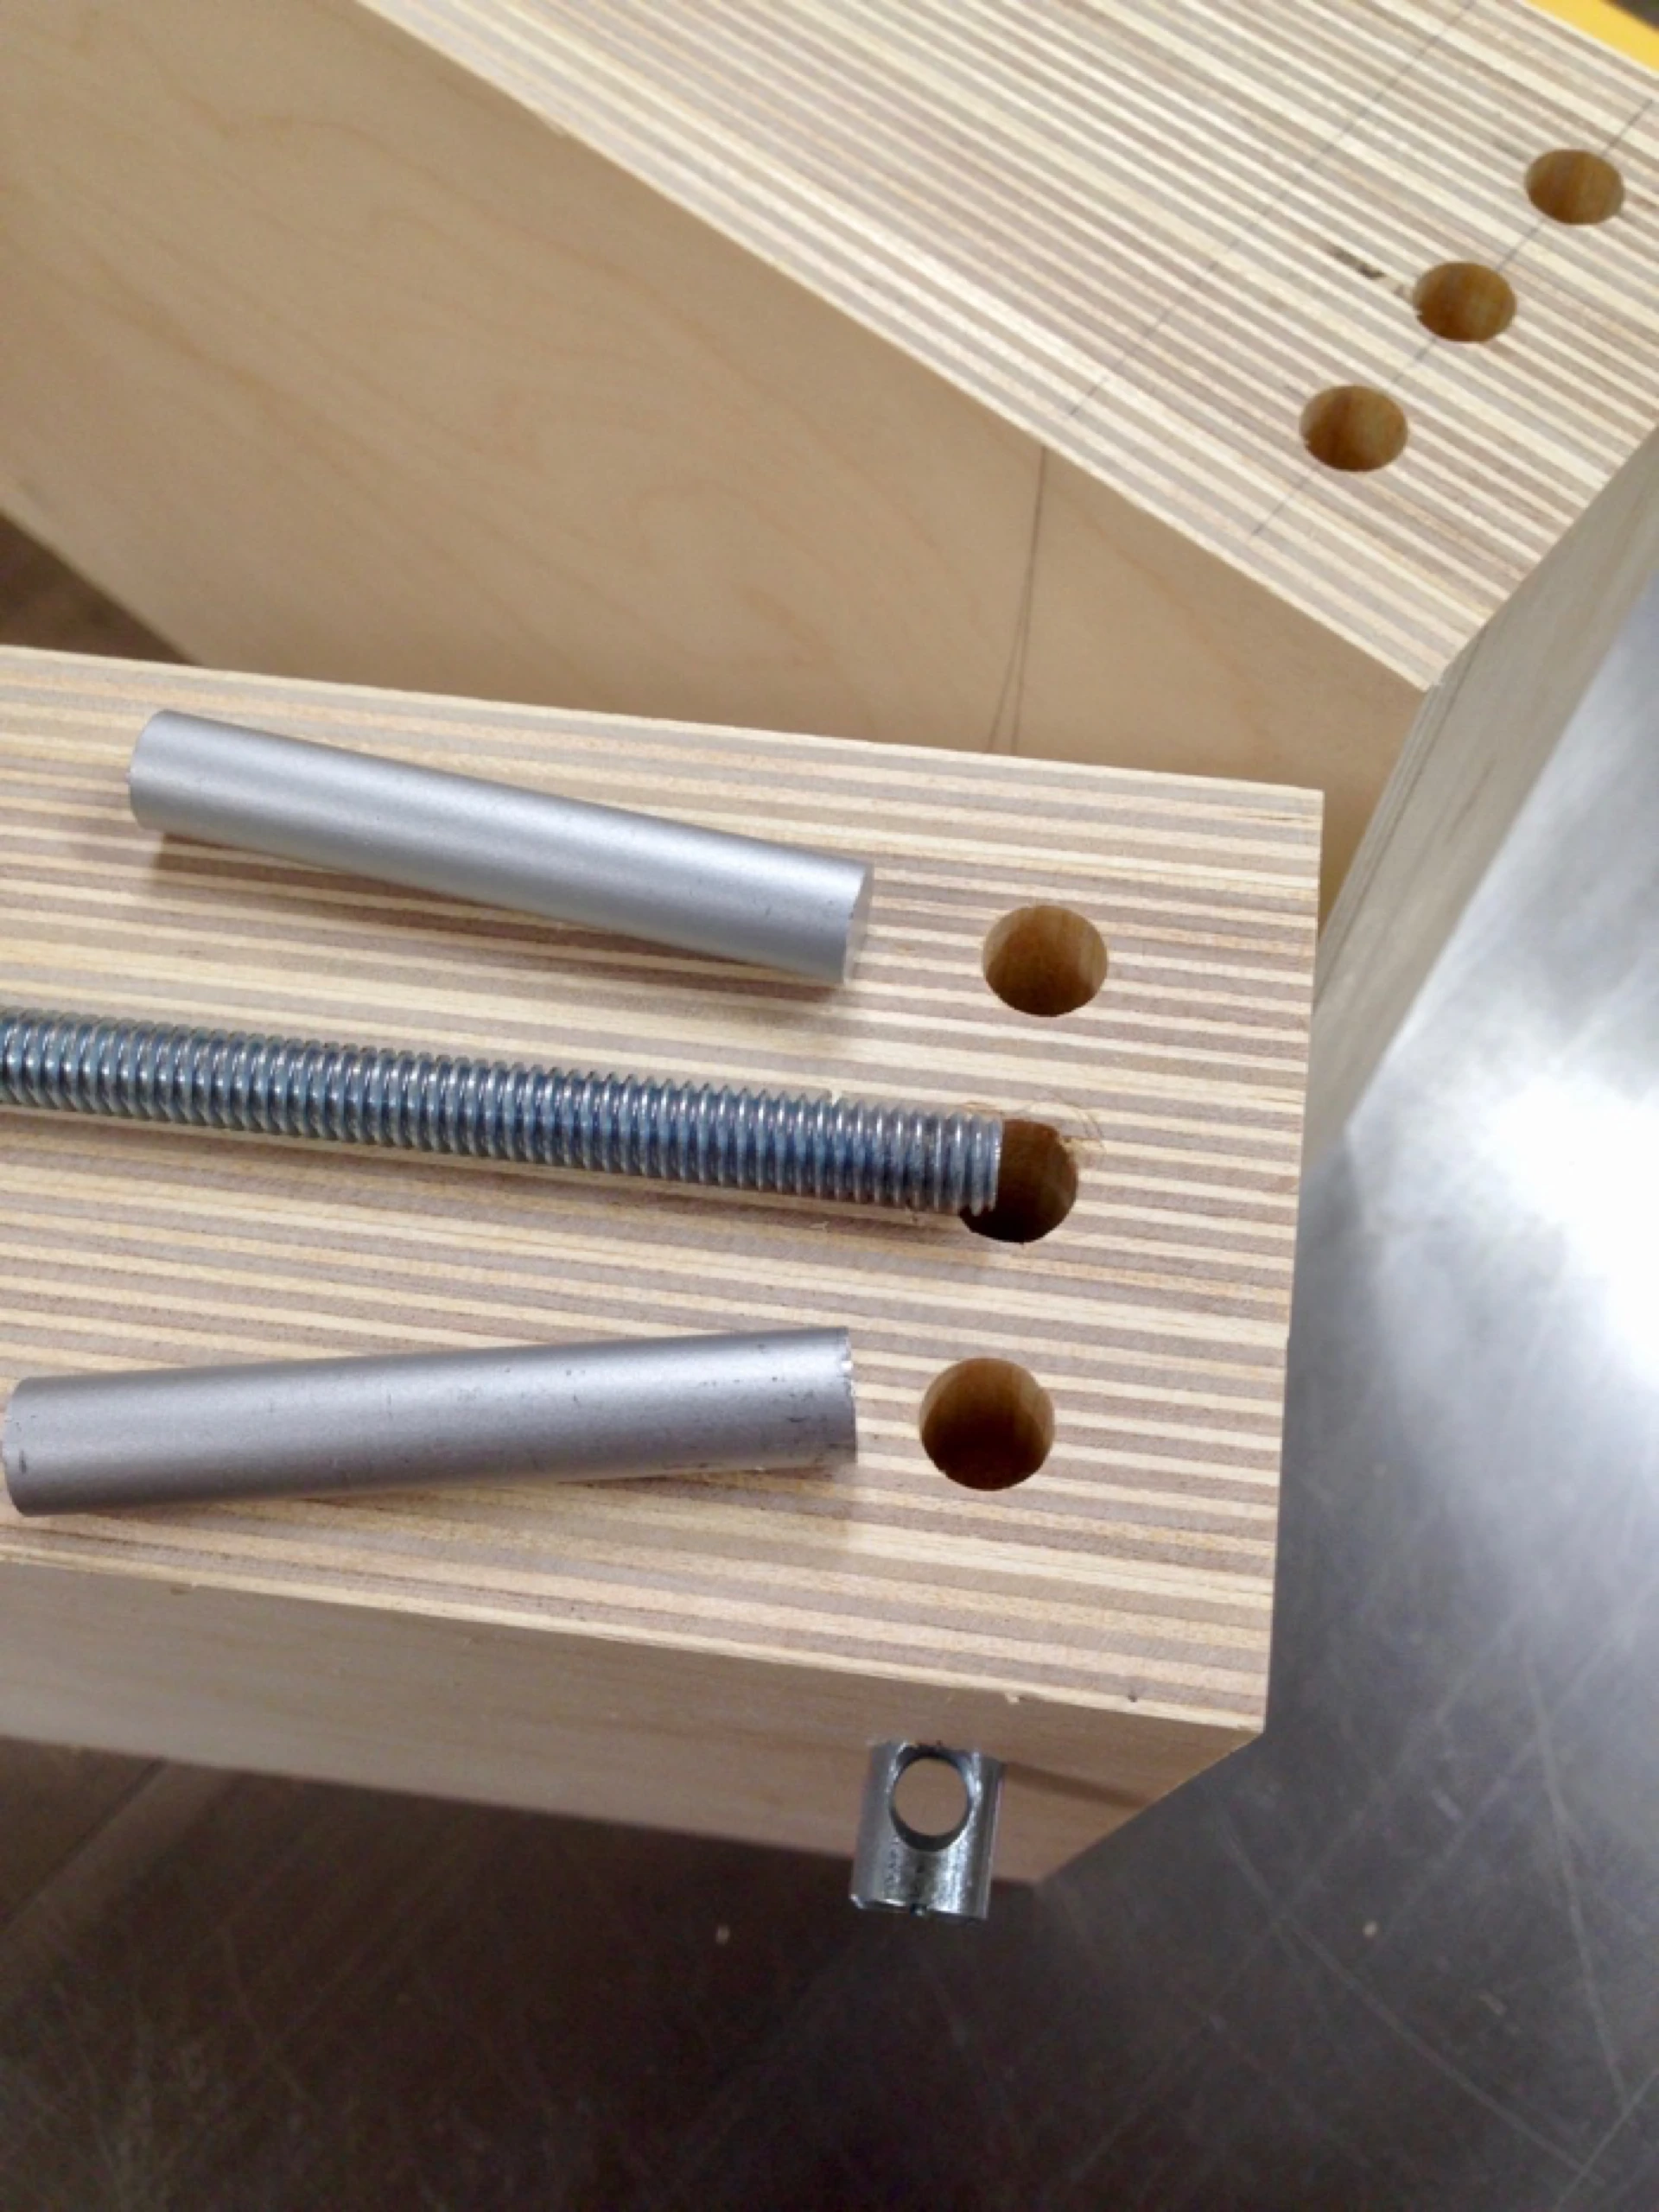
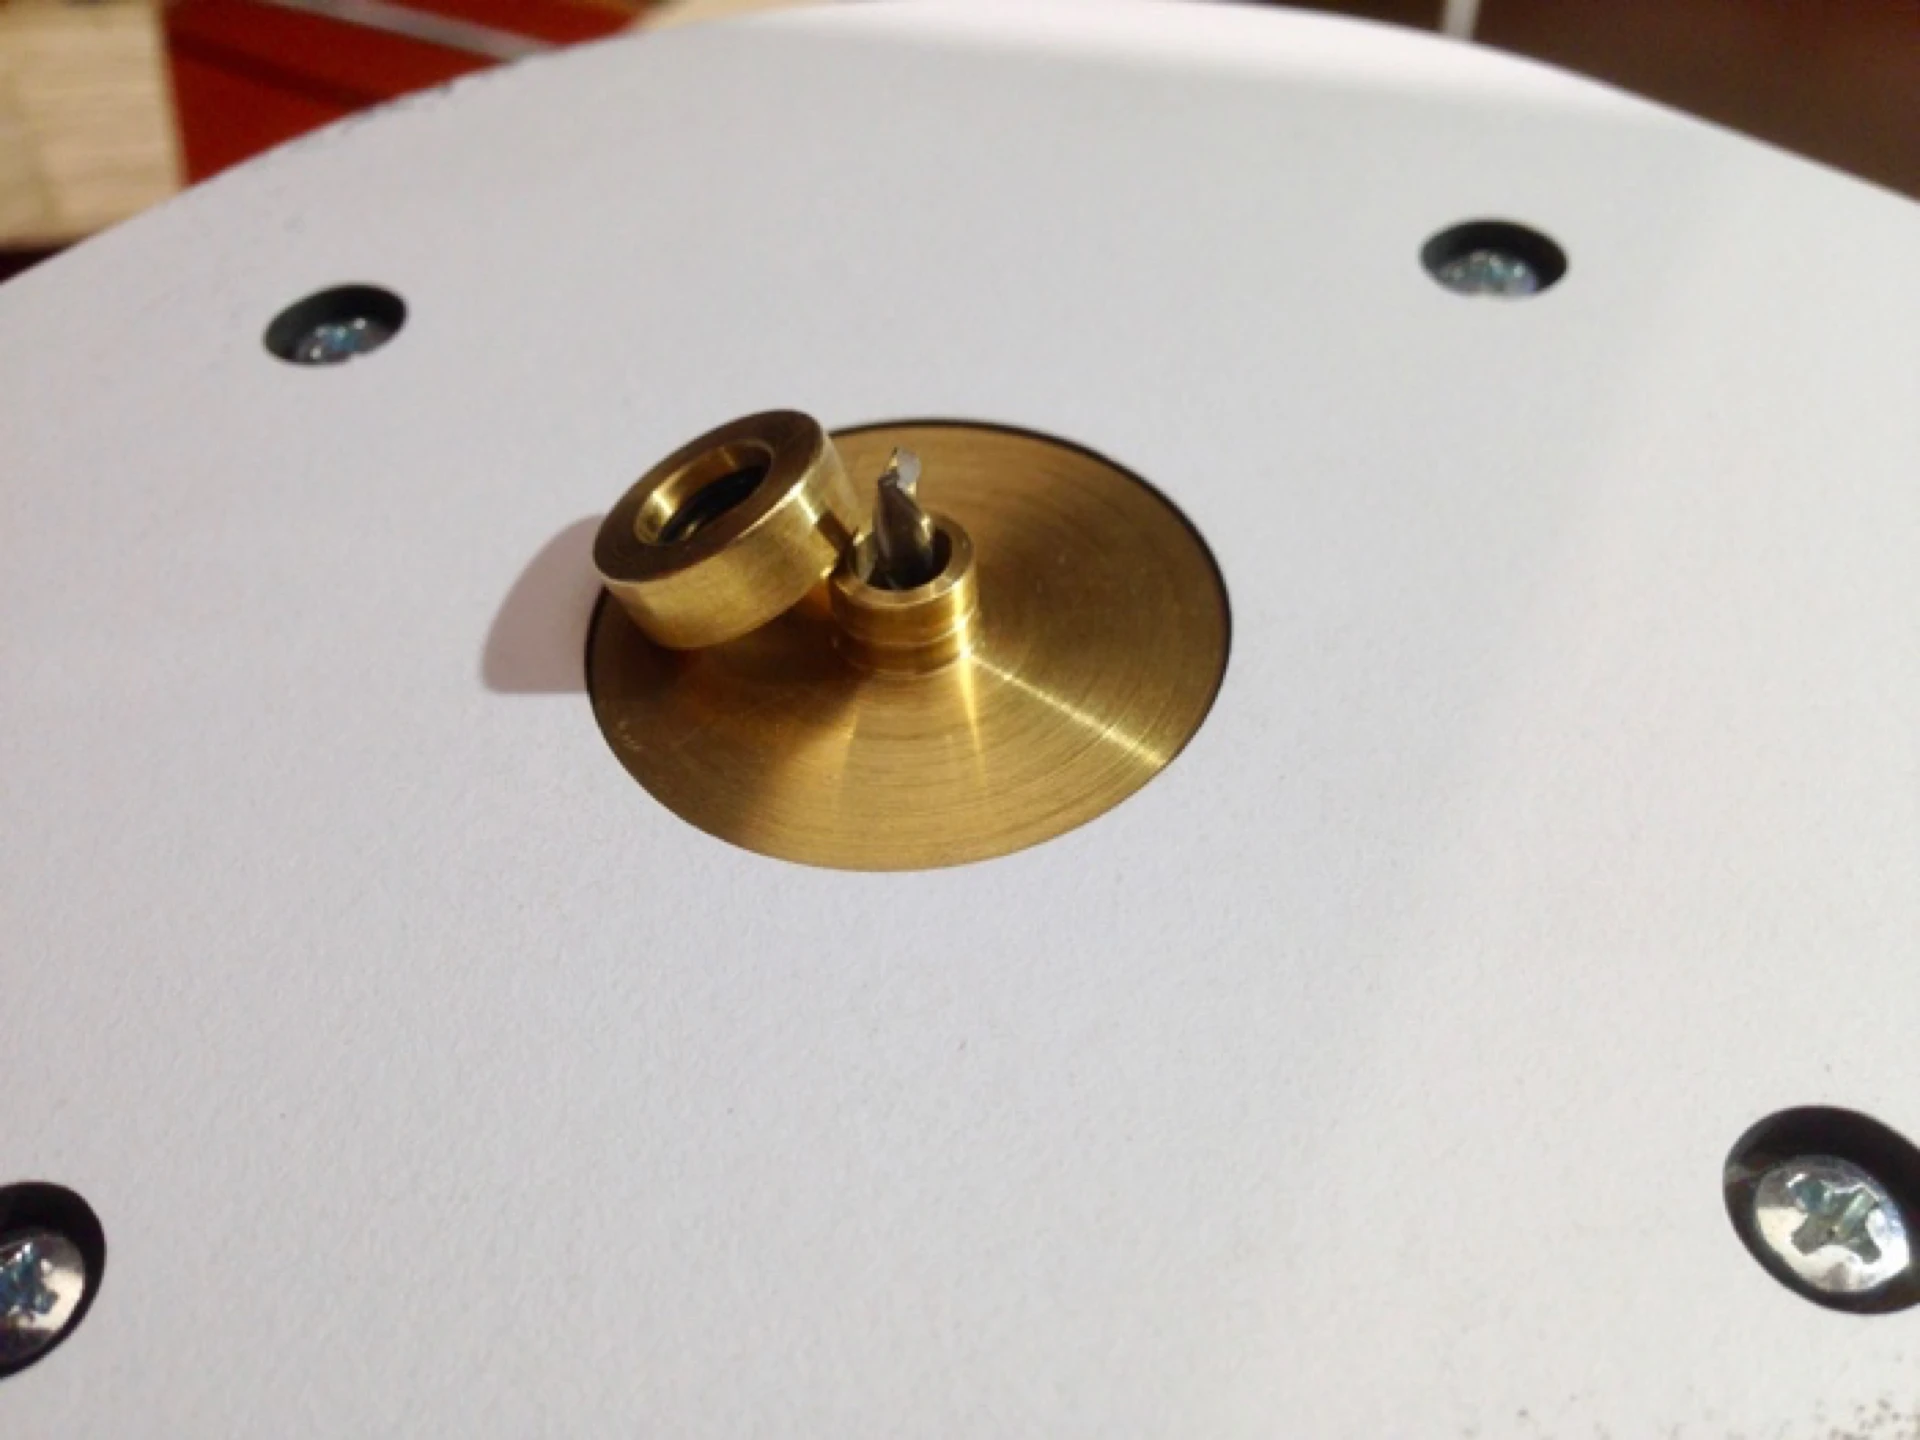
At each end of one of the mold halves, on the inside edge, I secure a 5/16-18 threaded rod into a cross dowel. The 3/8″ hole for the rod is centered across the width of the five (5) boards, set back 13/16″ from the end of the block, and drilled 2″ deep, where it intersects the hole for the cross dowel. This 7/16″hole is also set back 13/16″ from the end of the block, though it is drilled on the face of the block 1-3/4″ from the inside edge. Two (2) 3/8″ aluminum dowels (hardwood dowels will also work), 2-1/4″ long, sit parallel to each rod. These rods act as alignment guides, keeping the mold from shifting out of place when it is opened and closed again.
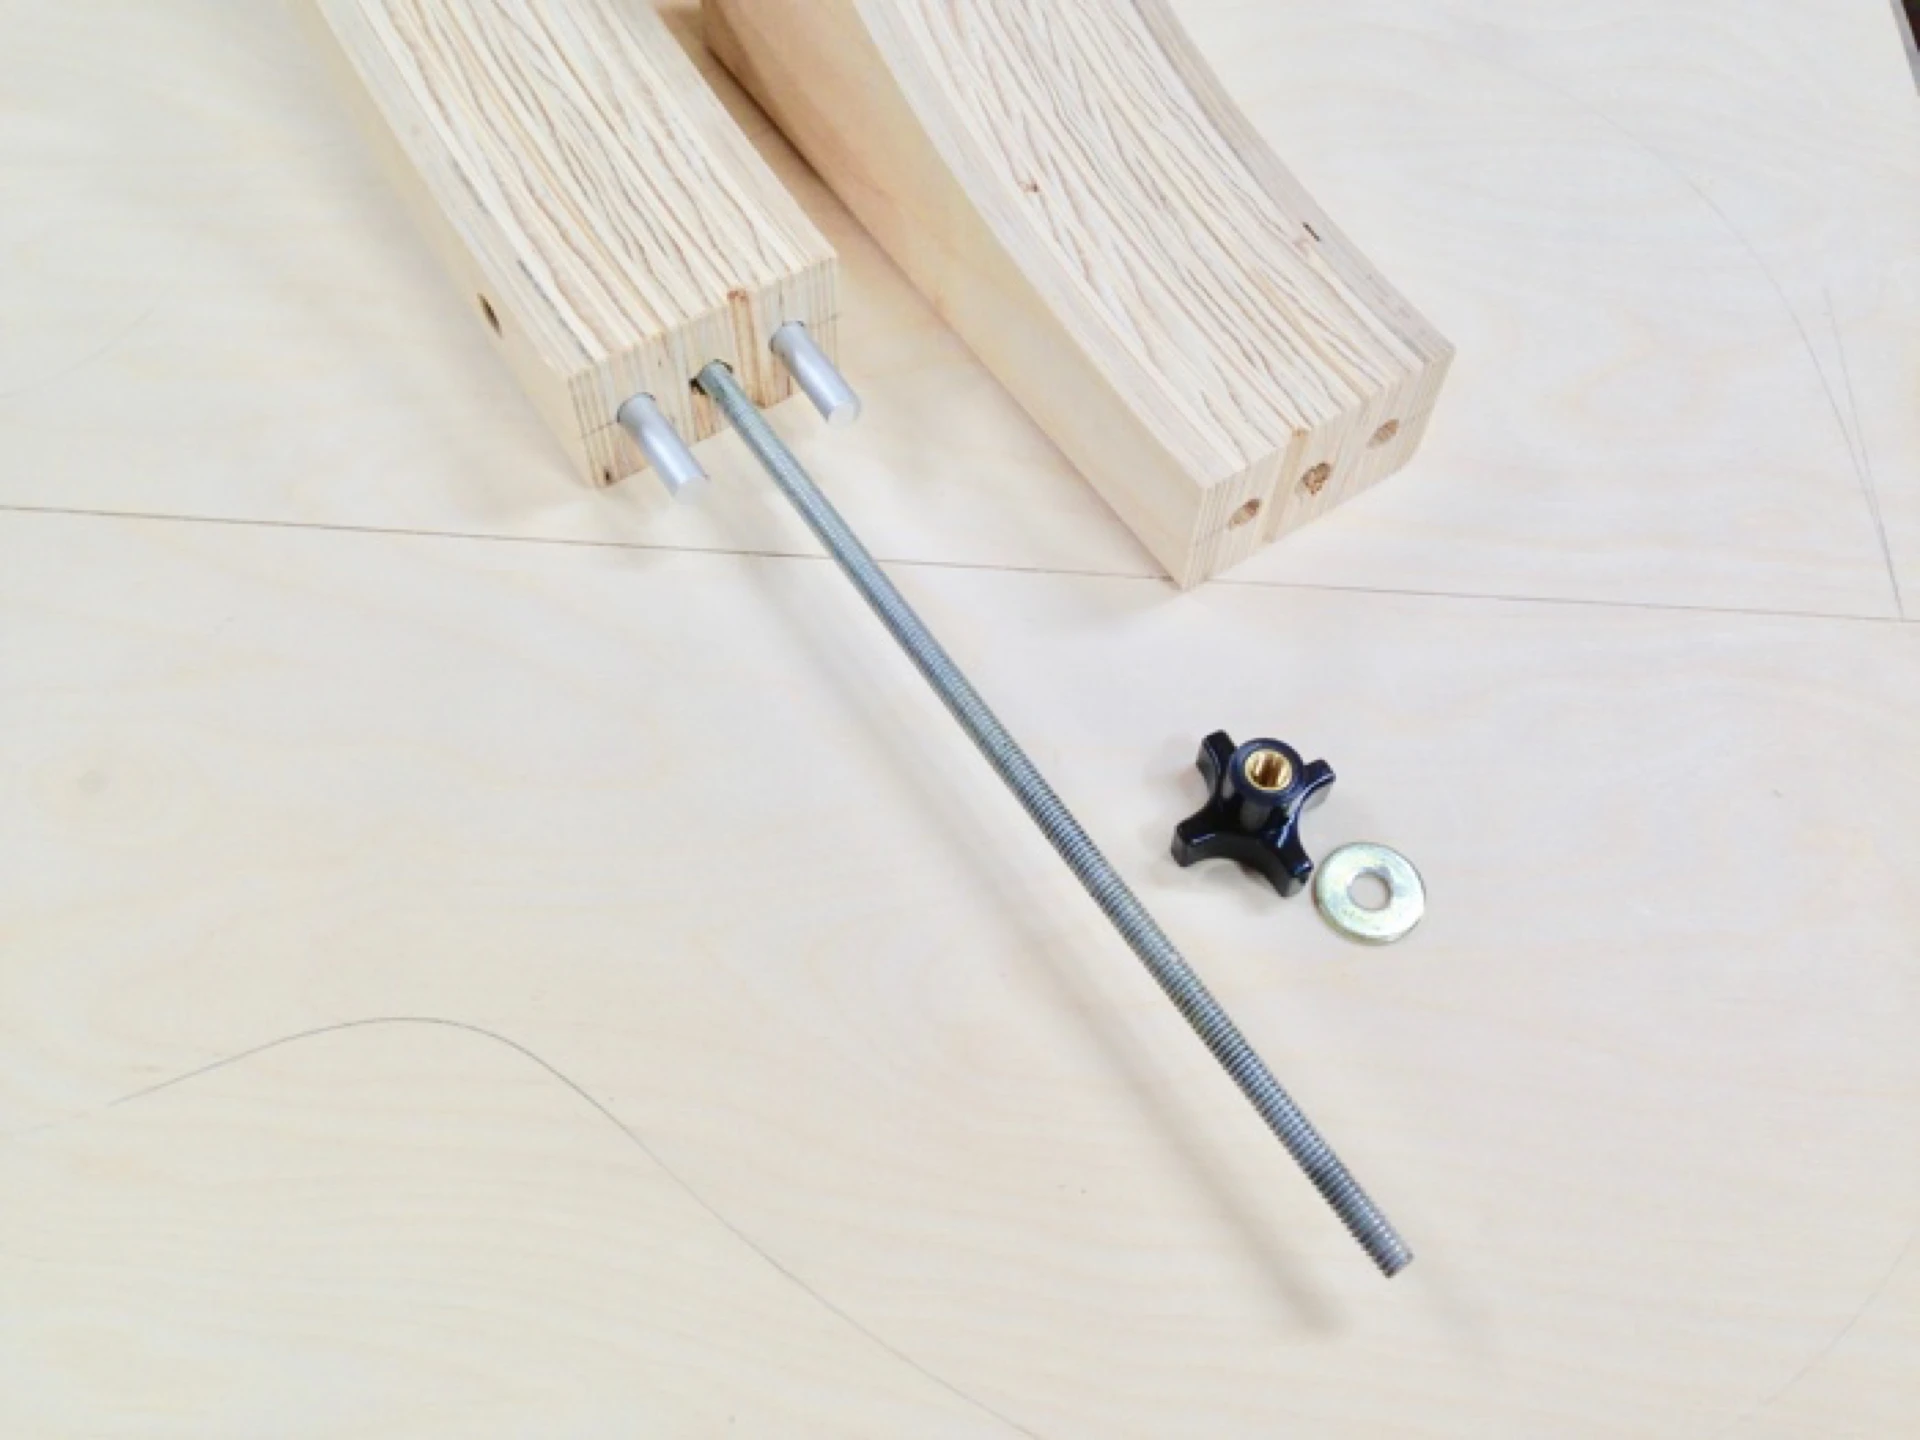
Body Mold Components
Note that the 3/8″hole for the cross dowel does not extend all the way through, though it would be fine if it did. It is replaced by a small hole, just large enough to access the cross dowel for positioning, if needed, during initial assembly.
Threaded rod and cross dowel
Each half of the wooden mold gets mirror image holes drilled into it’s edge. I can accurately position these holes by first laying out and drilling holes in the edges of one of the halves. Into those holes I place small inserts known as dowel centers, lay the two halves together, edge-to-edge, and press them together. The dowel centers mark the exact centers of the drilled holes in the one half onto the correct location on the opposite half.
Dowel centers
The twin holes that house the aluminum dowels are drilled to the same depth, 1-1/8″, as their mirror mates. The center hole housing the threaded rod, however, gets drilled all the way through to the opposite edge of the wooden block. I have a long drill bit just for the task. A secret to getting a manually drilled long hole to work each and every time is to drill from both edges and meet in the middle. The hole is a bit oversized (larger than the threaded rod), in order to provide a margin for error. You do not want to make a mistake at the edge of the material, where the pieces mate up.
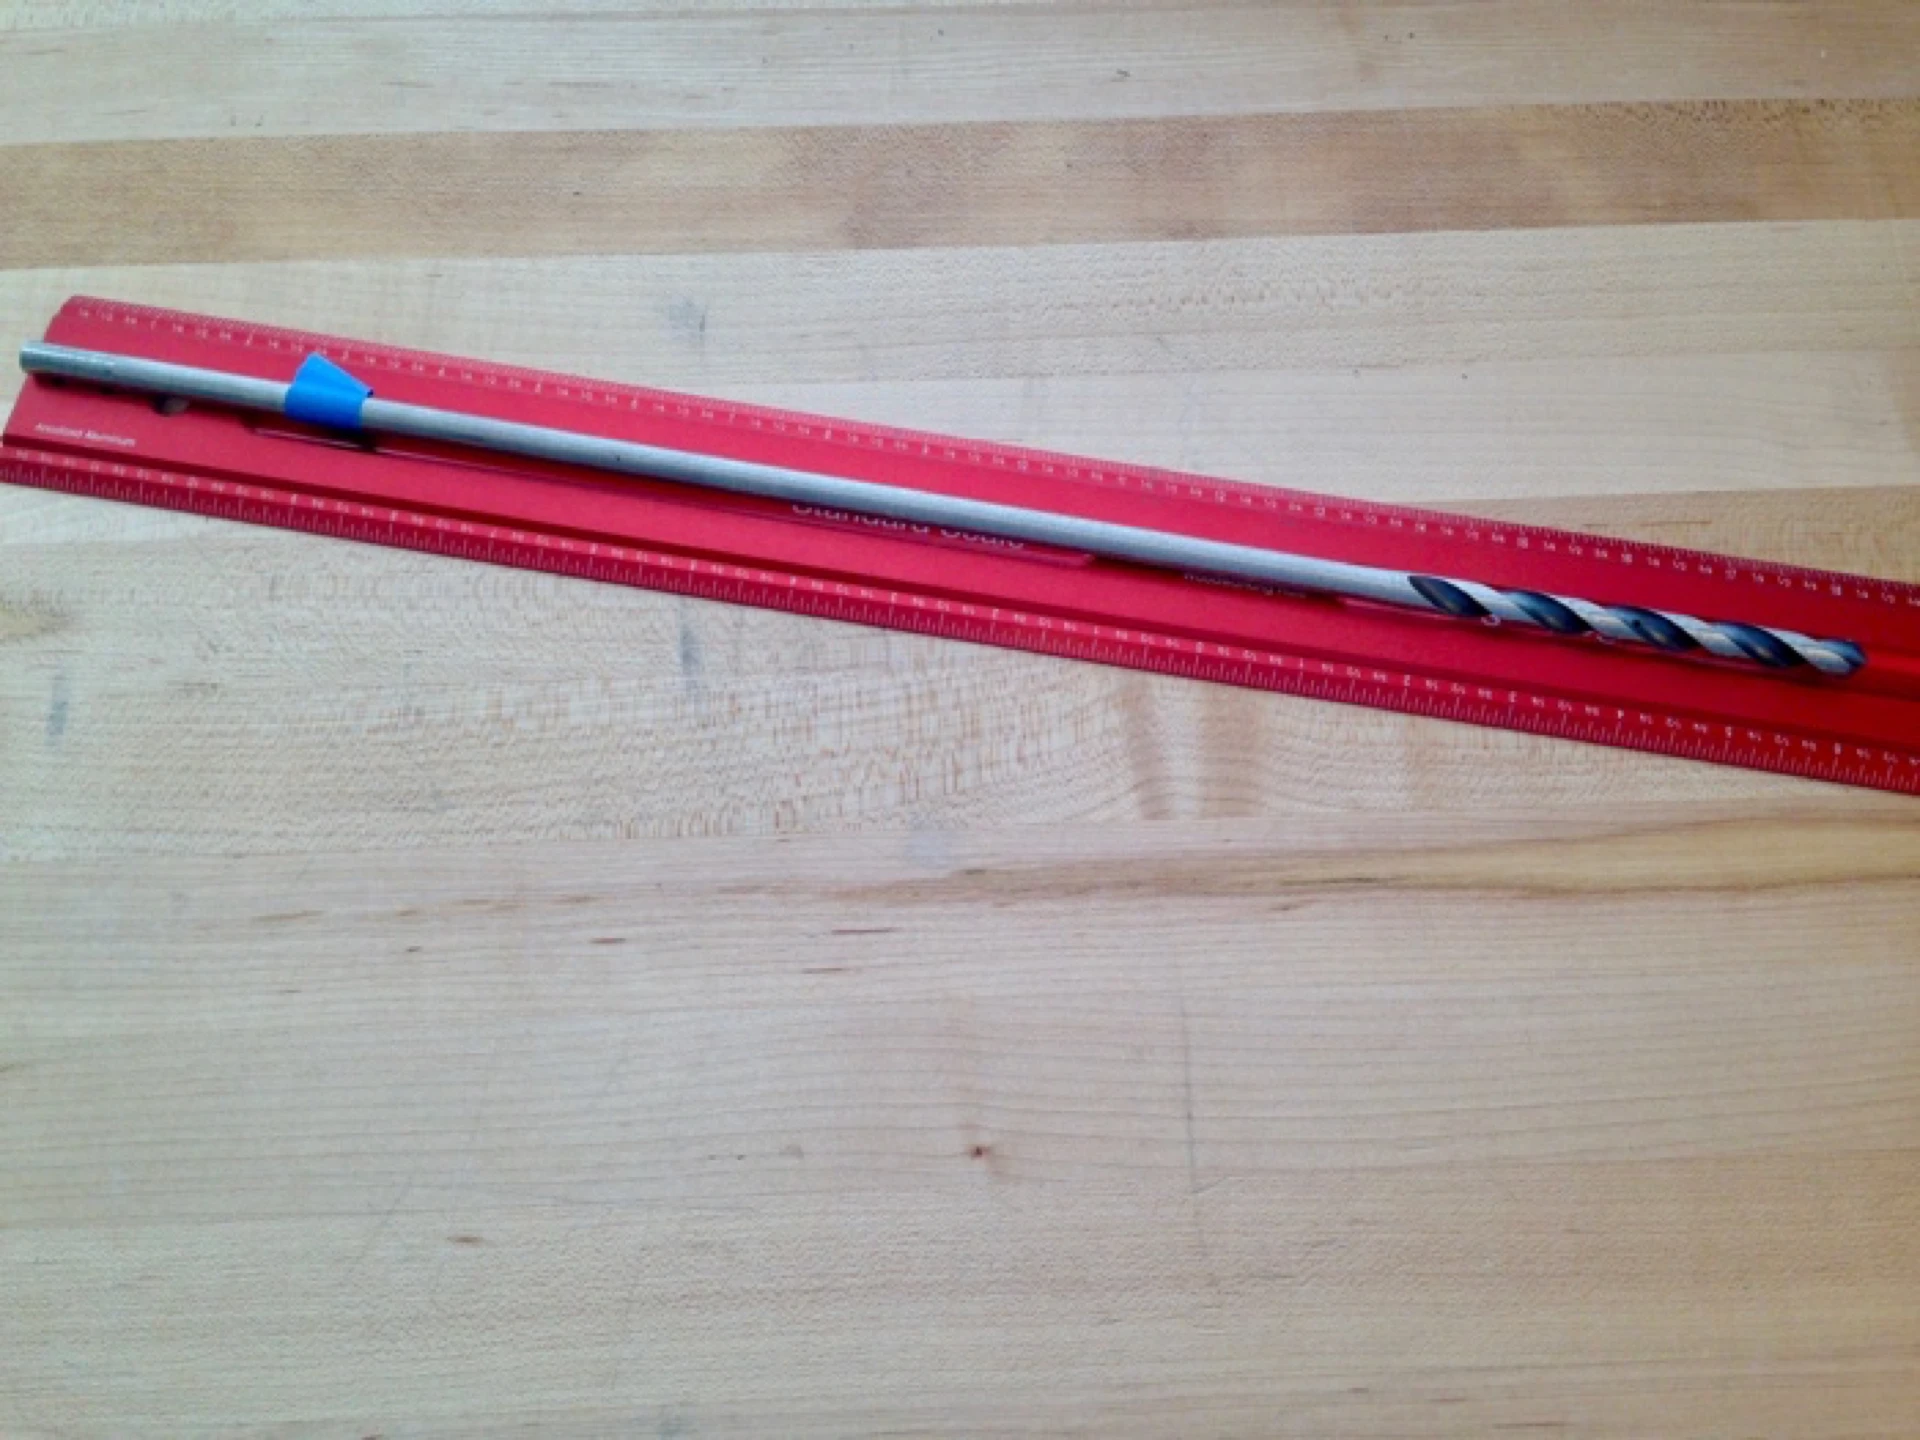
Long drill bit
 Holes Drilled
Holes Aligned
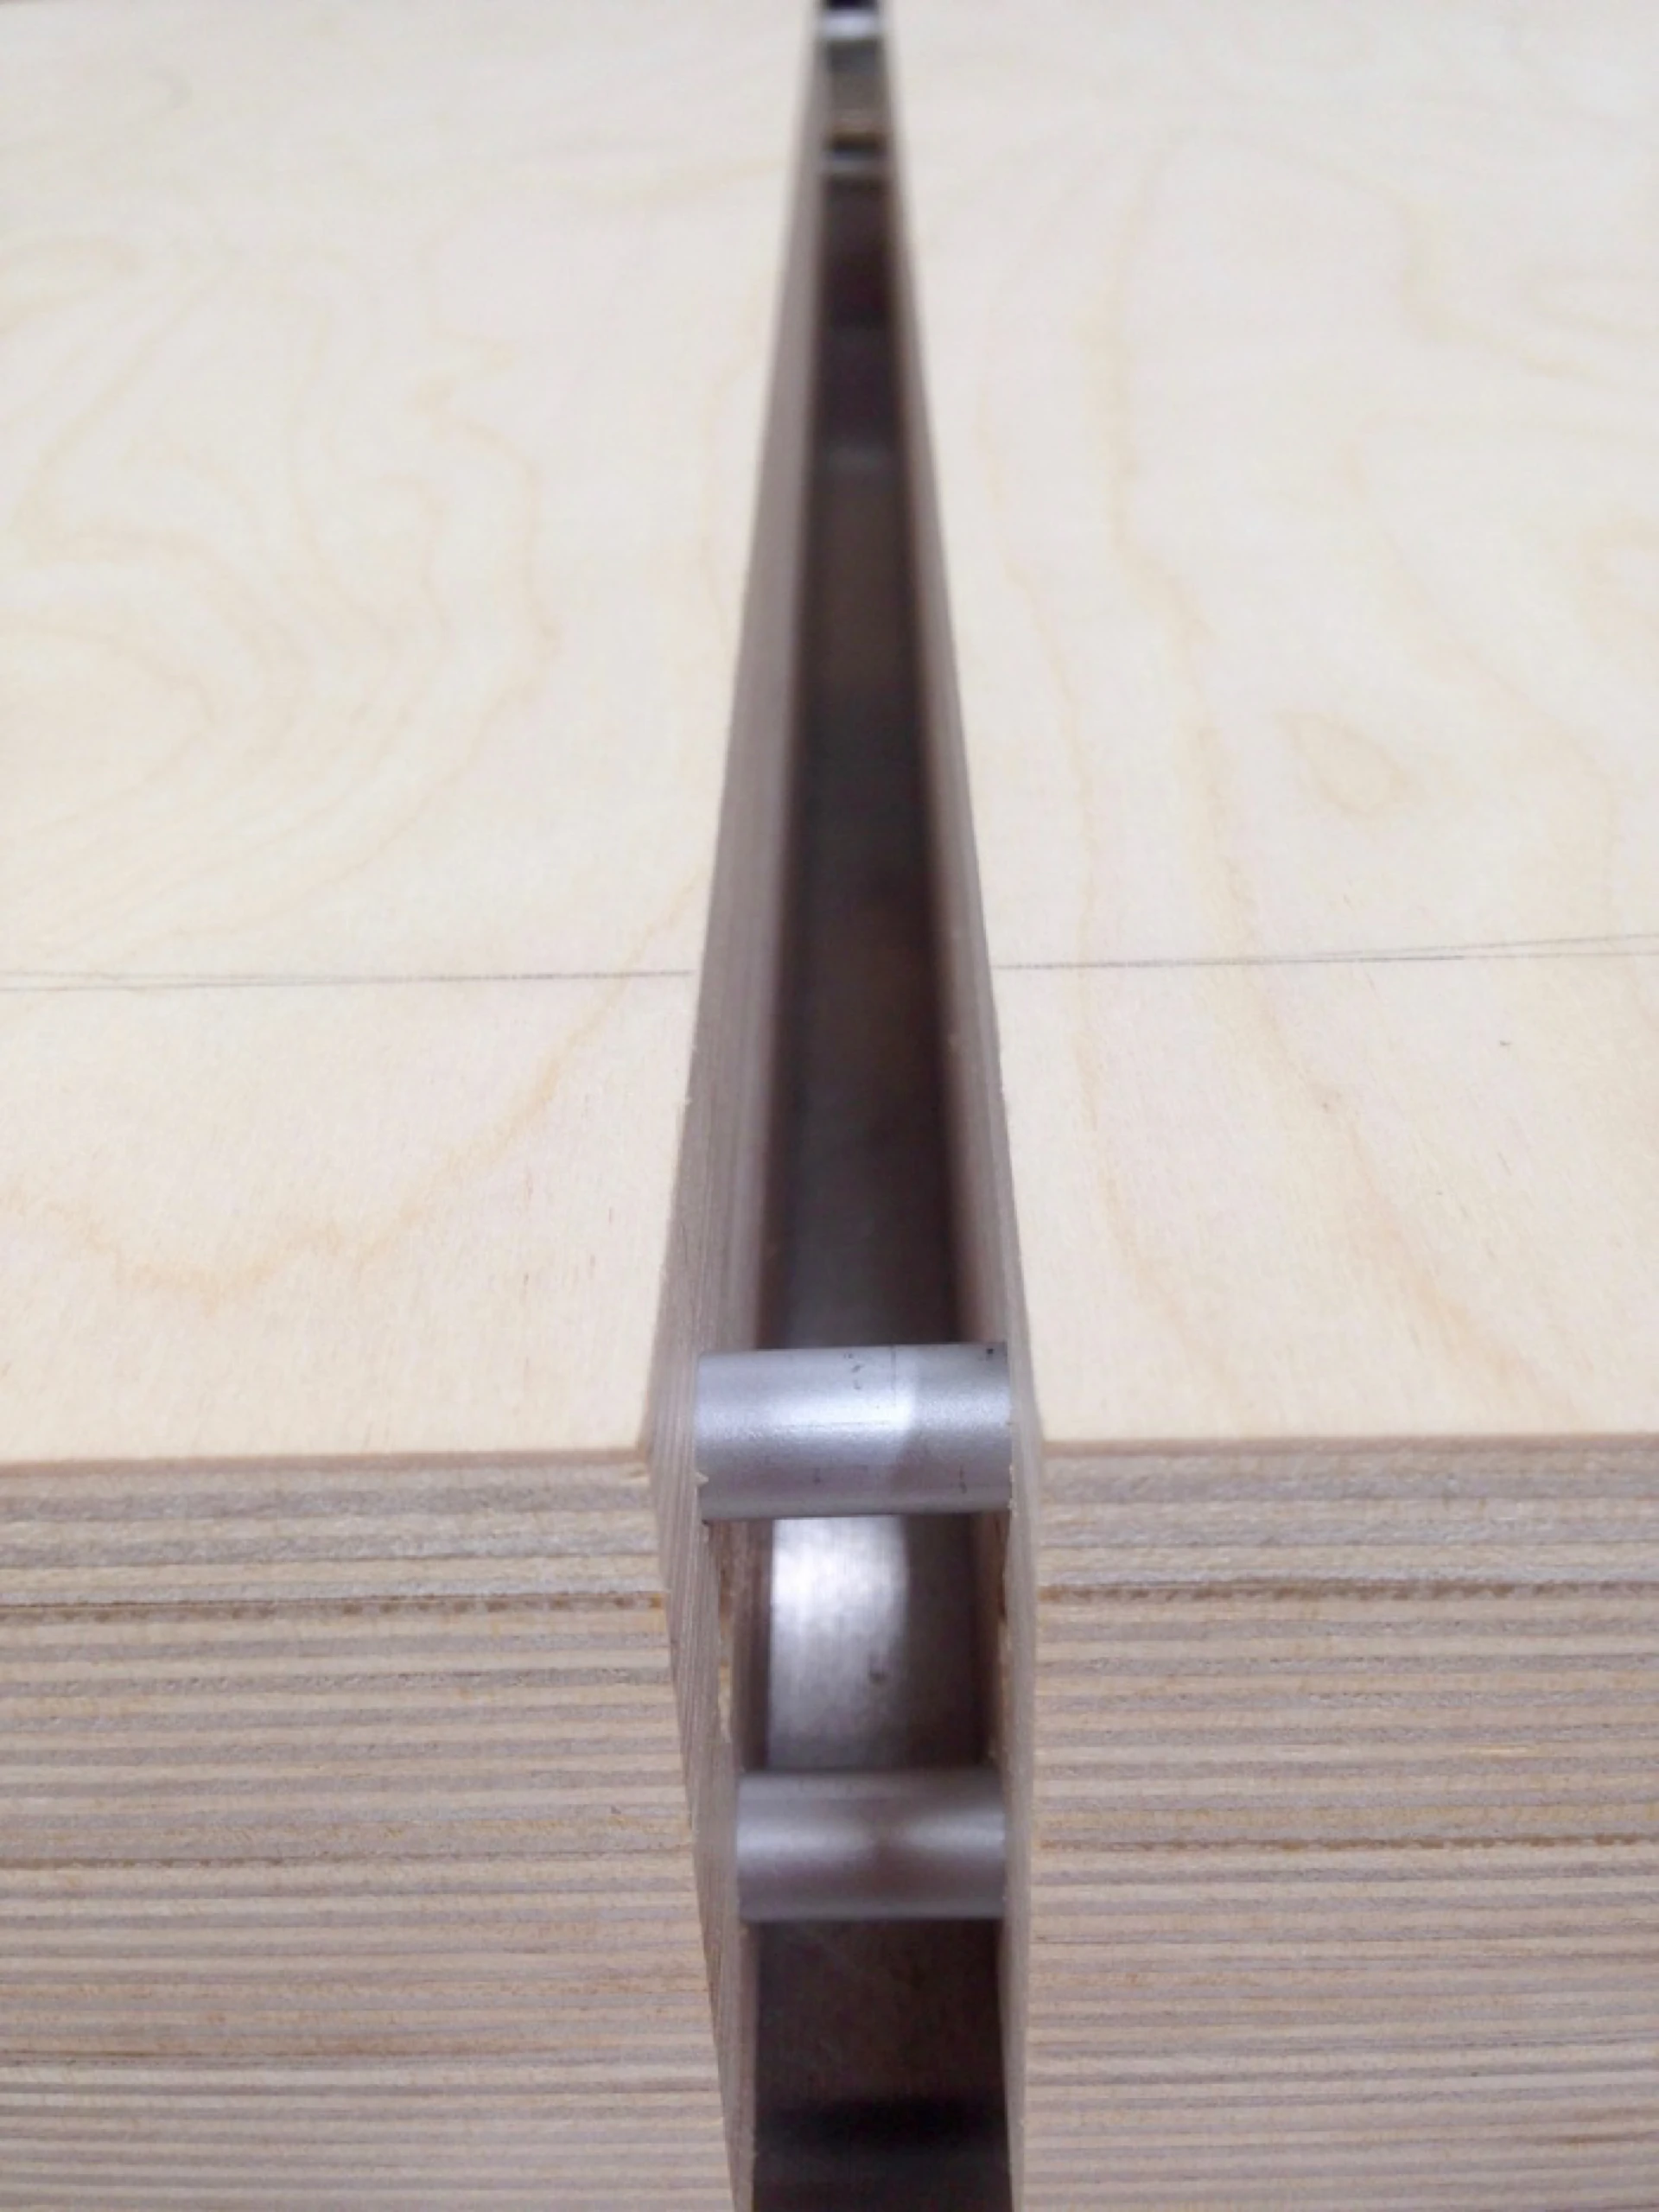
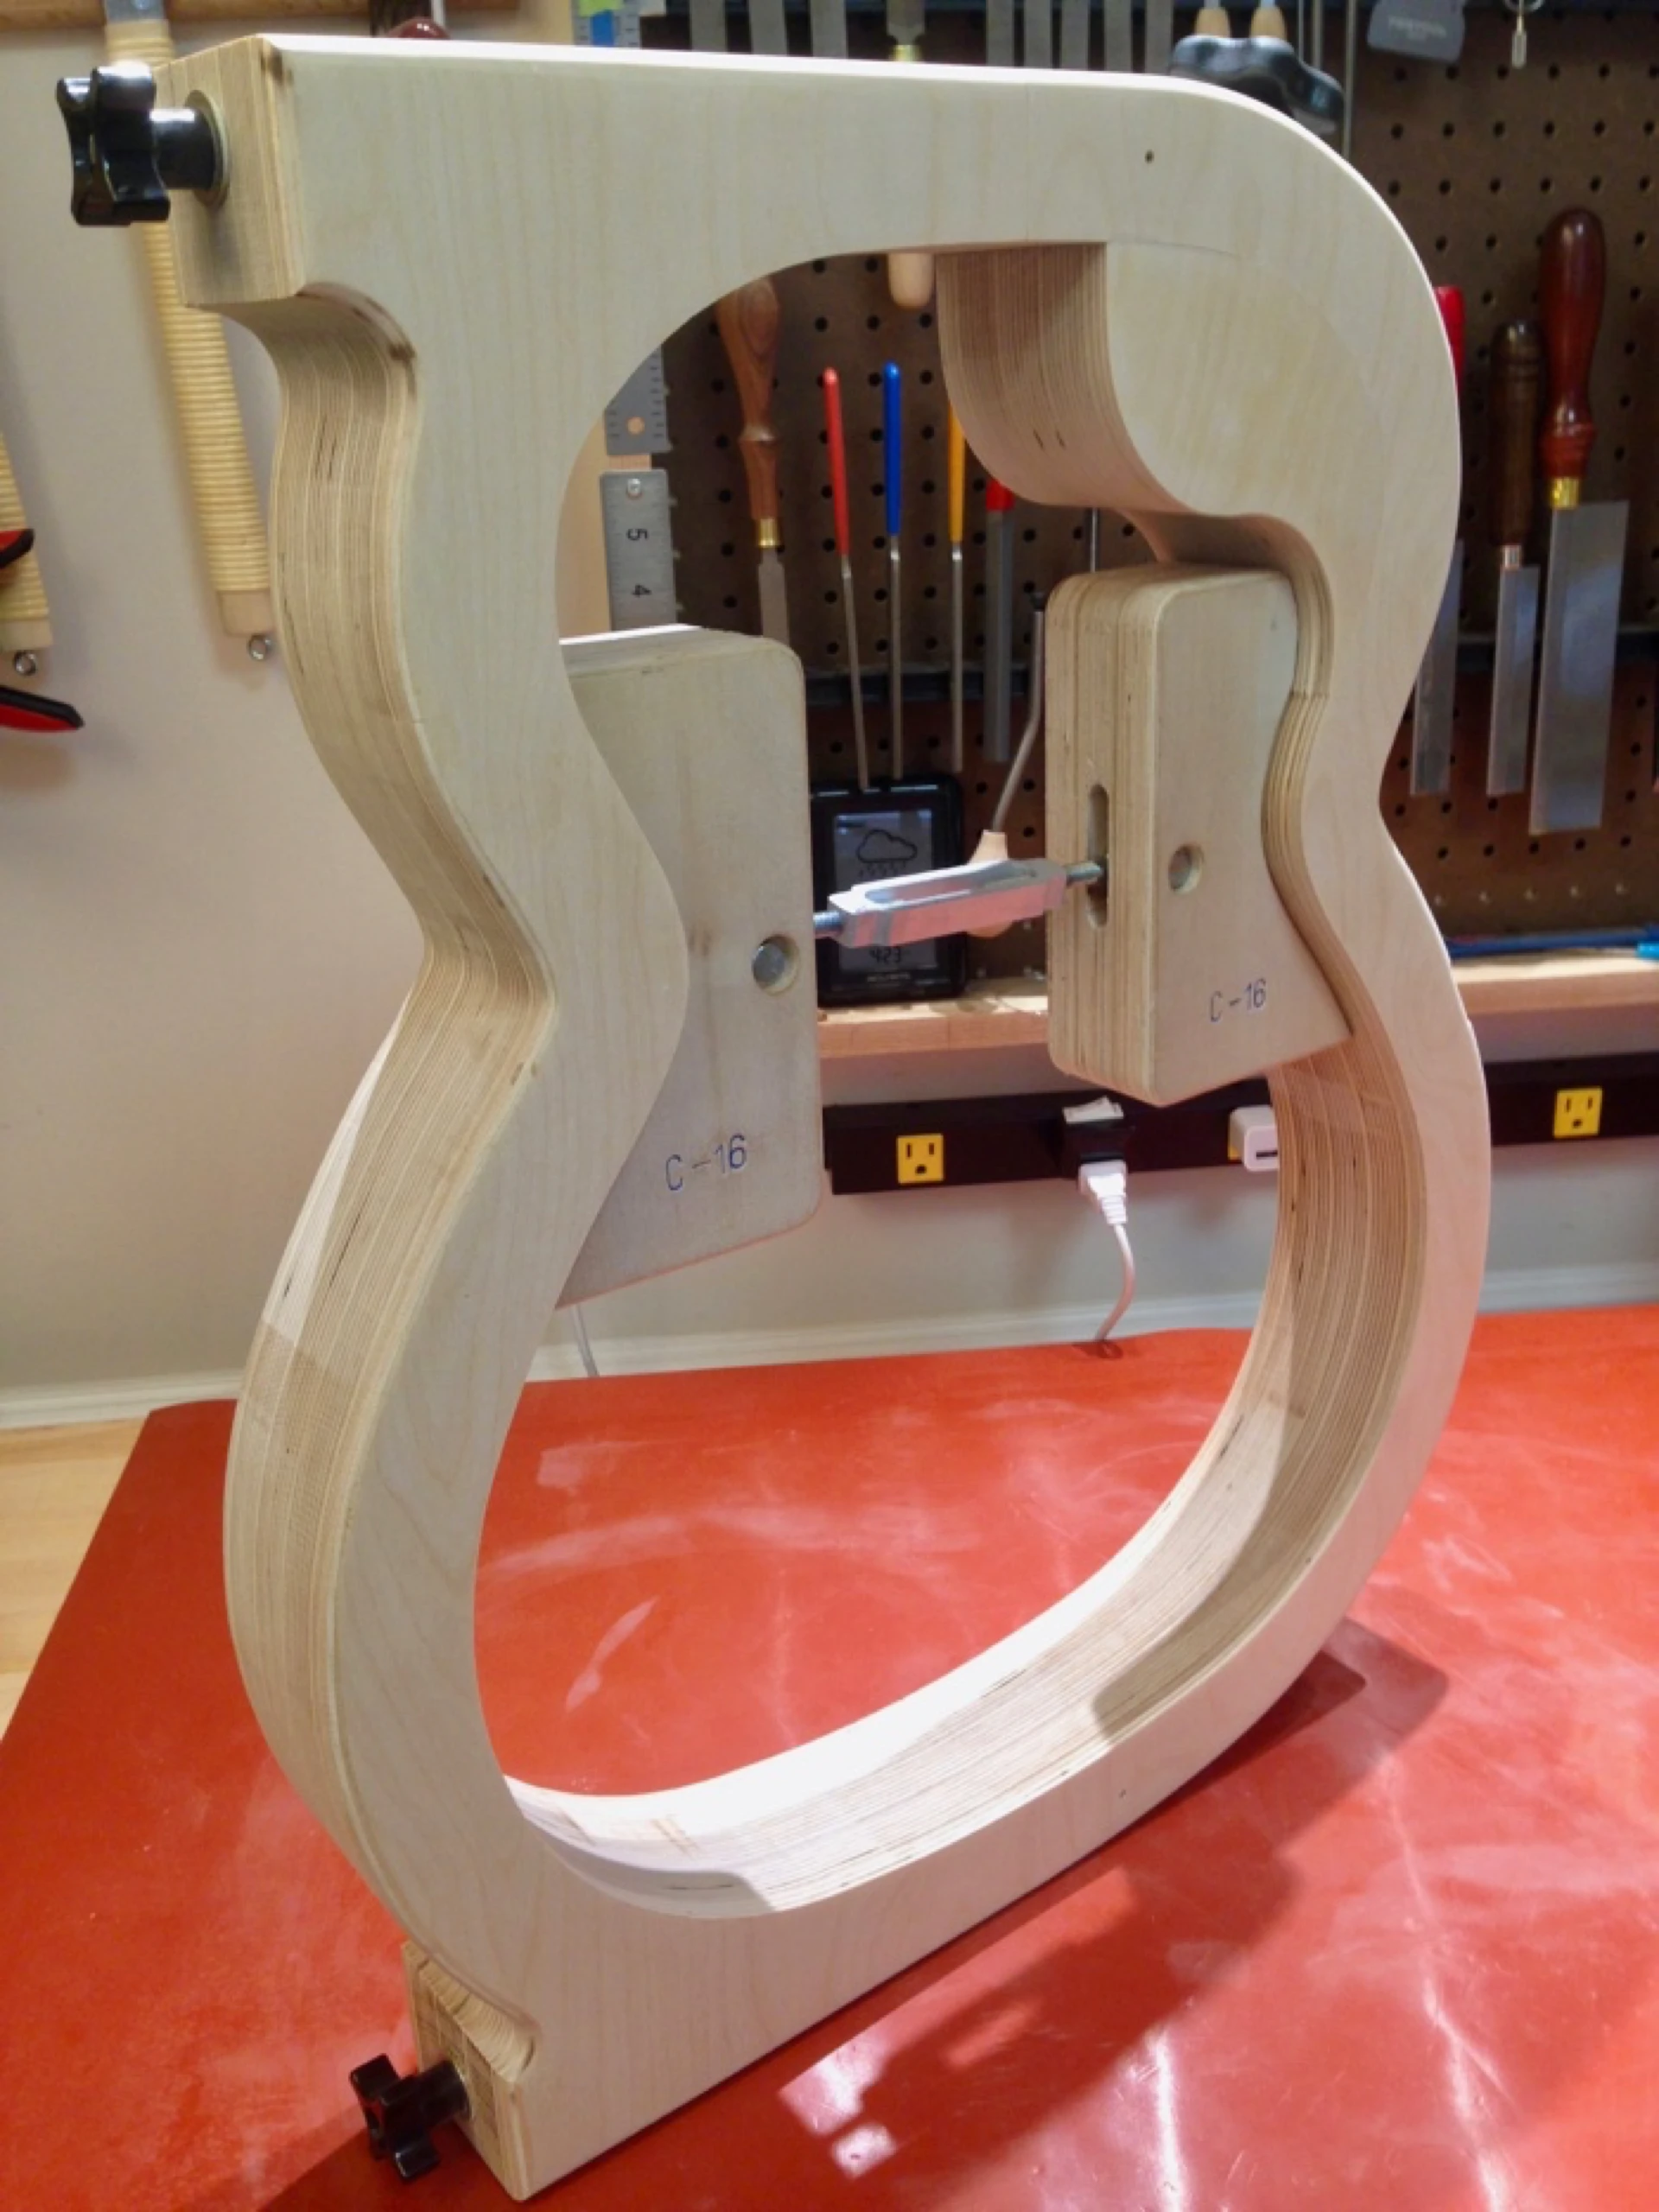
Body Mold Assembled
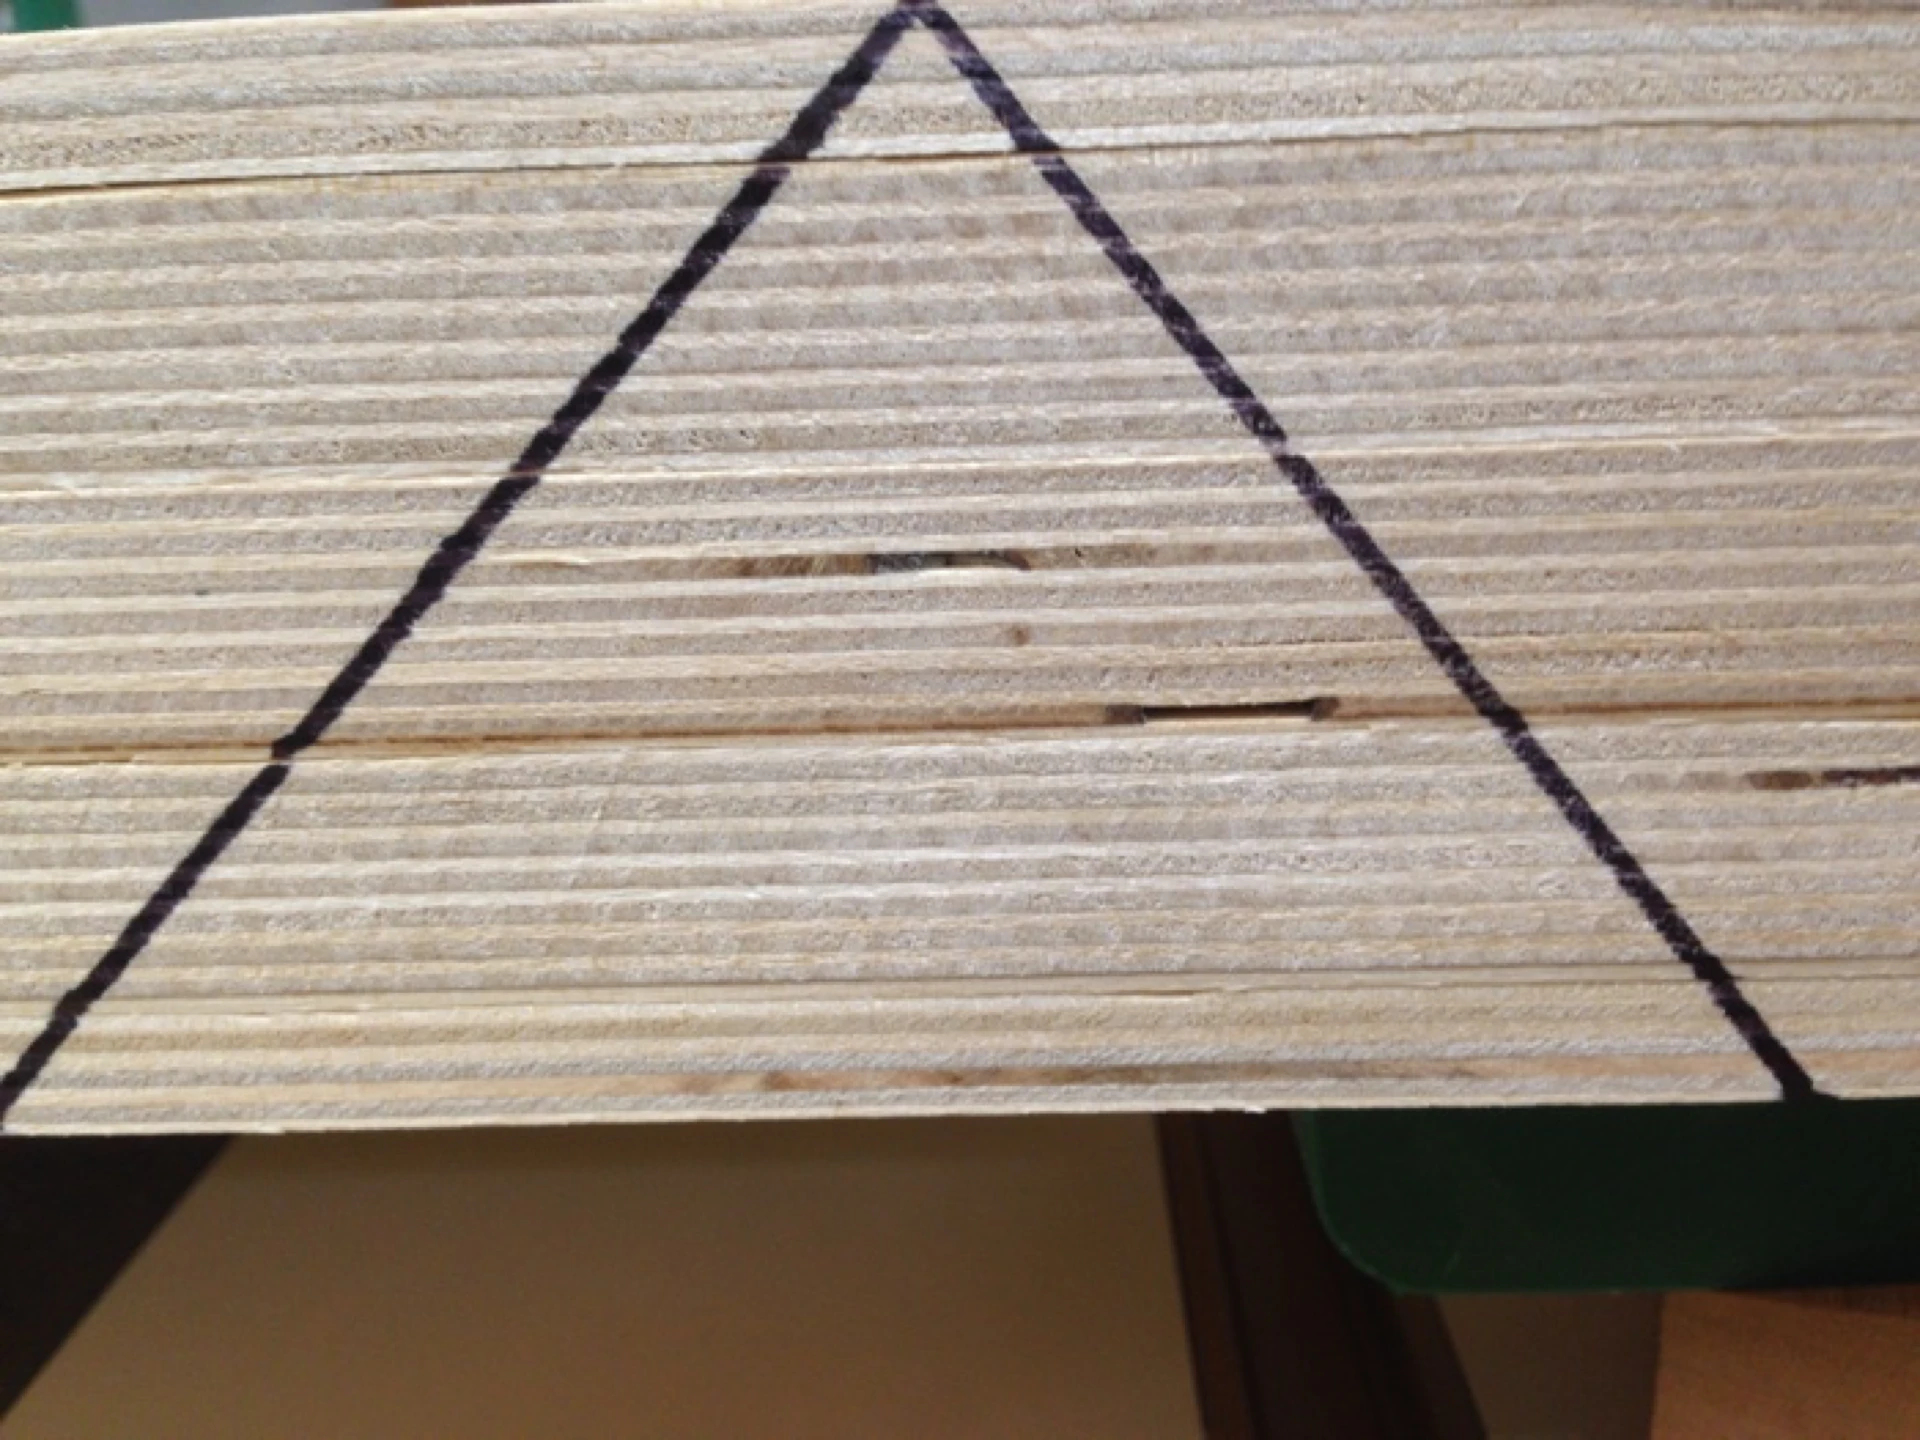
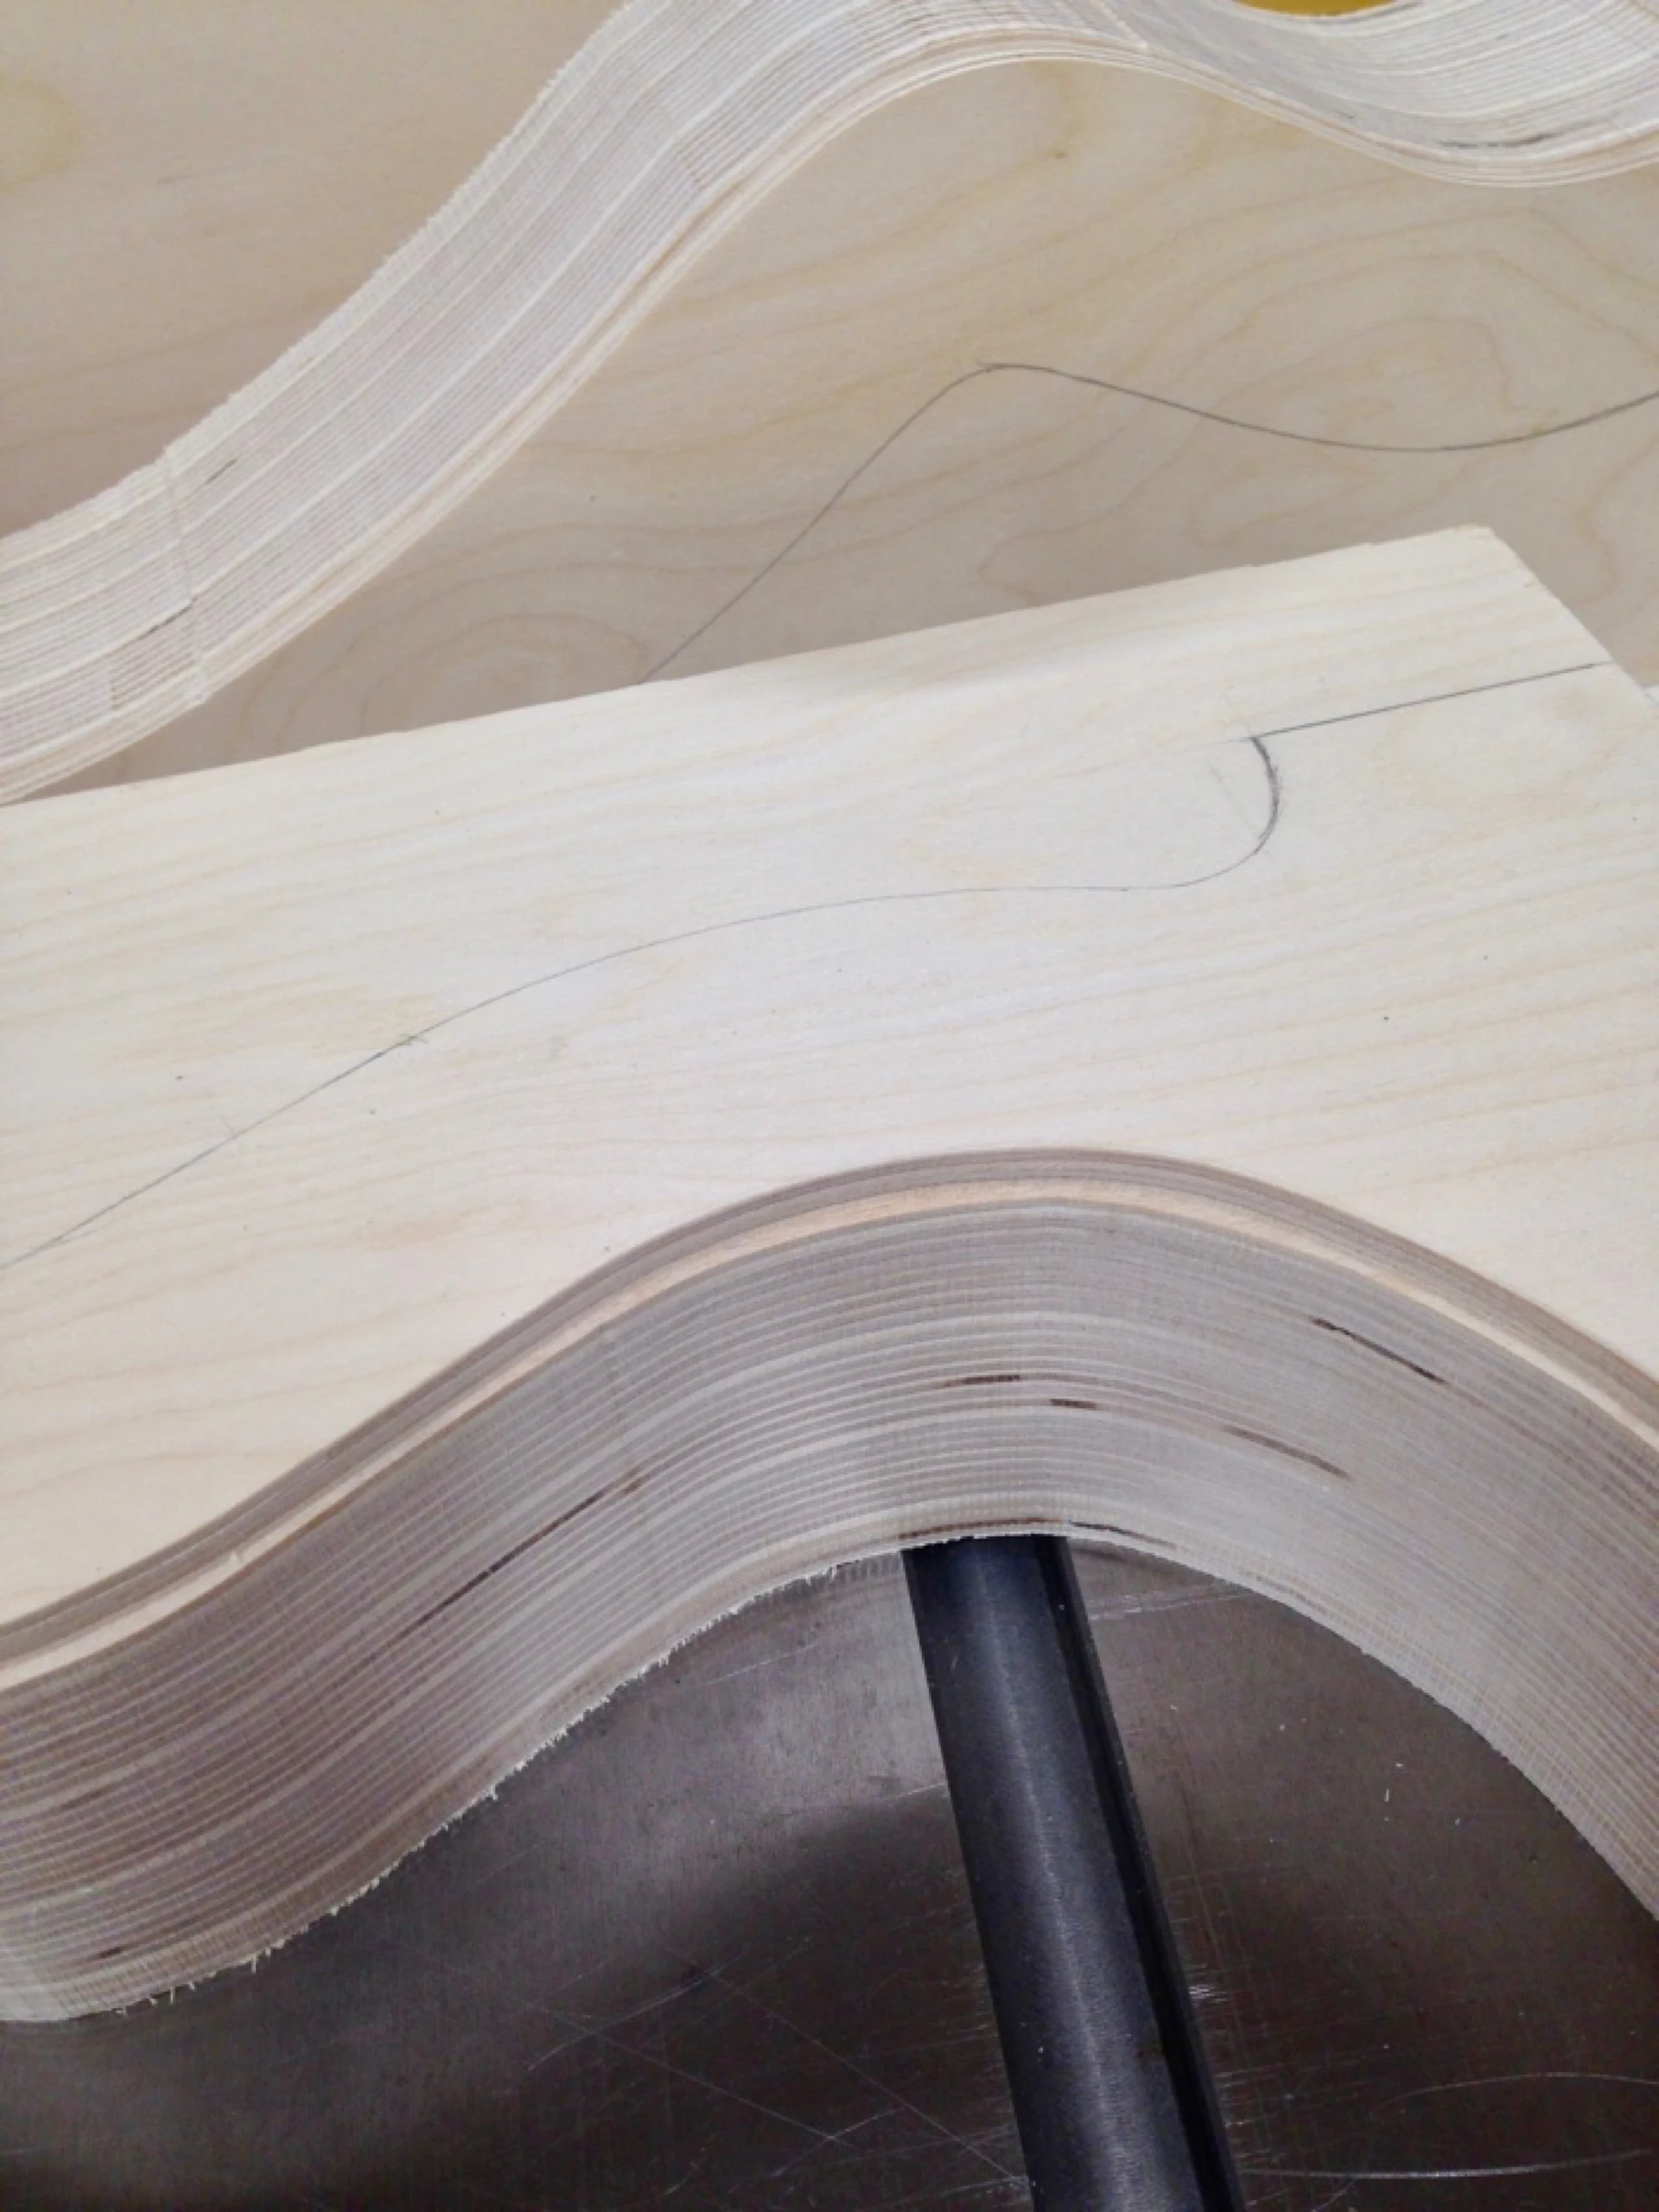
The block can now be assembled and accurately secured in a closed position. It is time to layout the body shape.
CRITICAL - Had I attempted to cut the shape of the guitar out of the plywood block PRIOR to cutting the plywood block in half (and securing it back together), I would have reduced the width of the body mold by the width of the saw blade used to cut the mold in half. In other words, I would have altered the shape of the guitar, making it narrower than my template (or drawing).
For more traditional body styles, my body molds are cut with symmetrical interiors, to which I add a cutaway insert. This gives me more flexibility with one body mold, as opposed to building at least two molds for each guitar size, one for a cutaway and a second for a non-cutaway.
Prototypes, fixed cutaways and asymmetrical body designs are built without inserts.
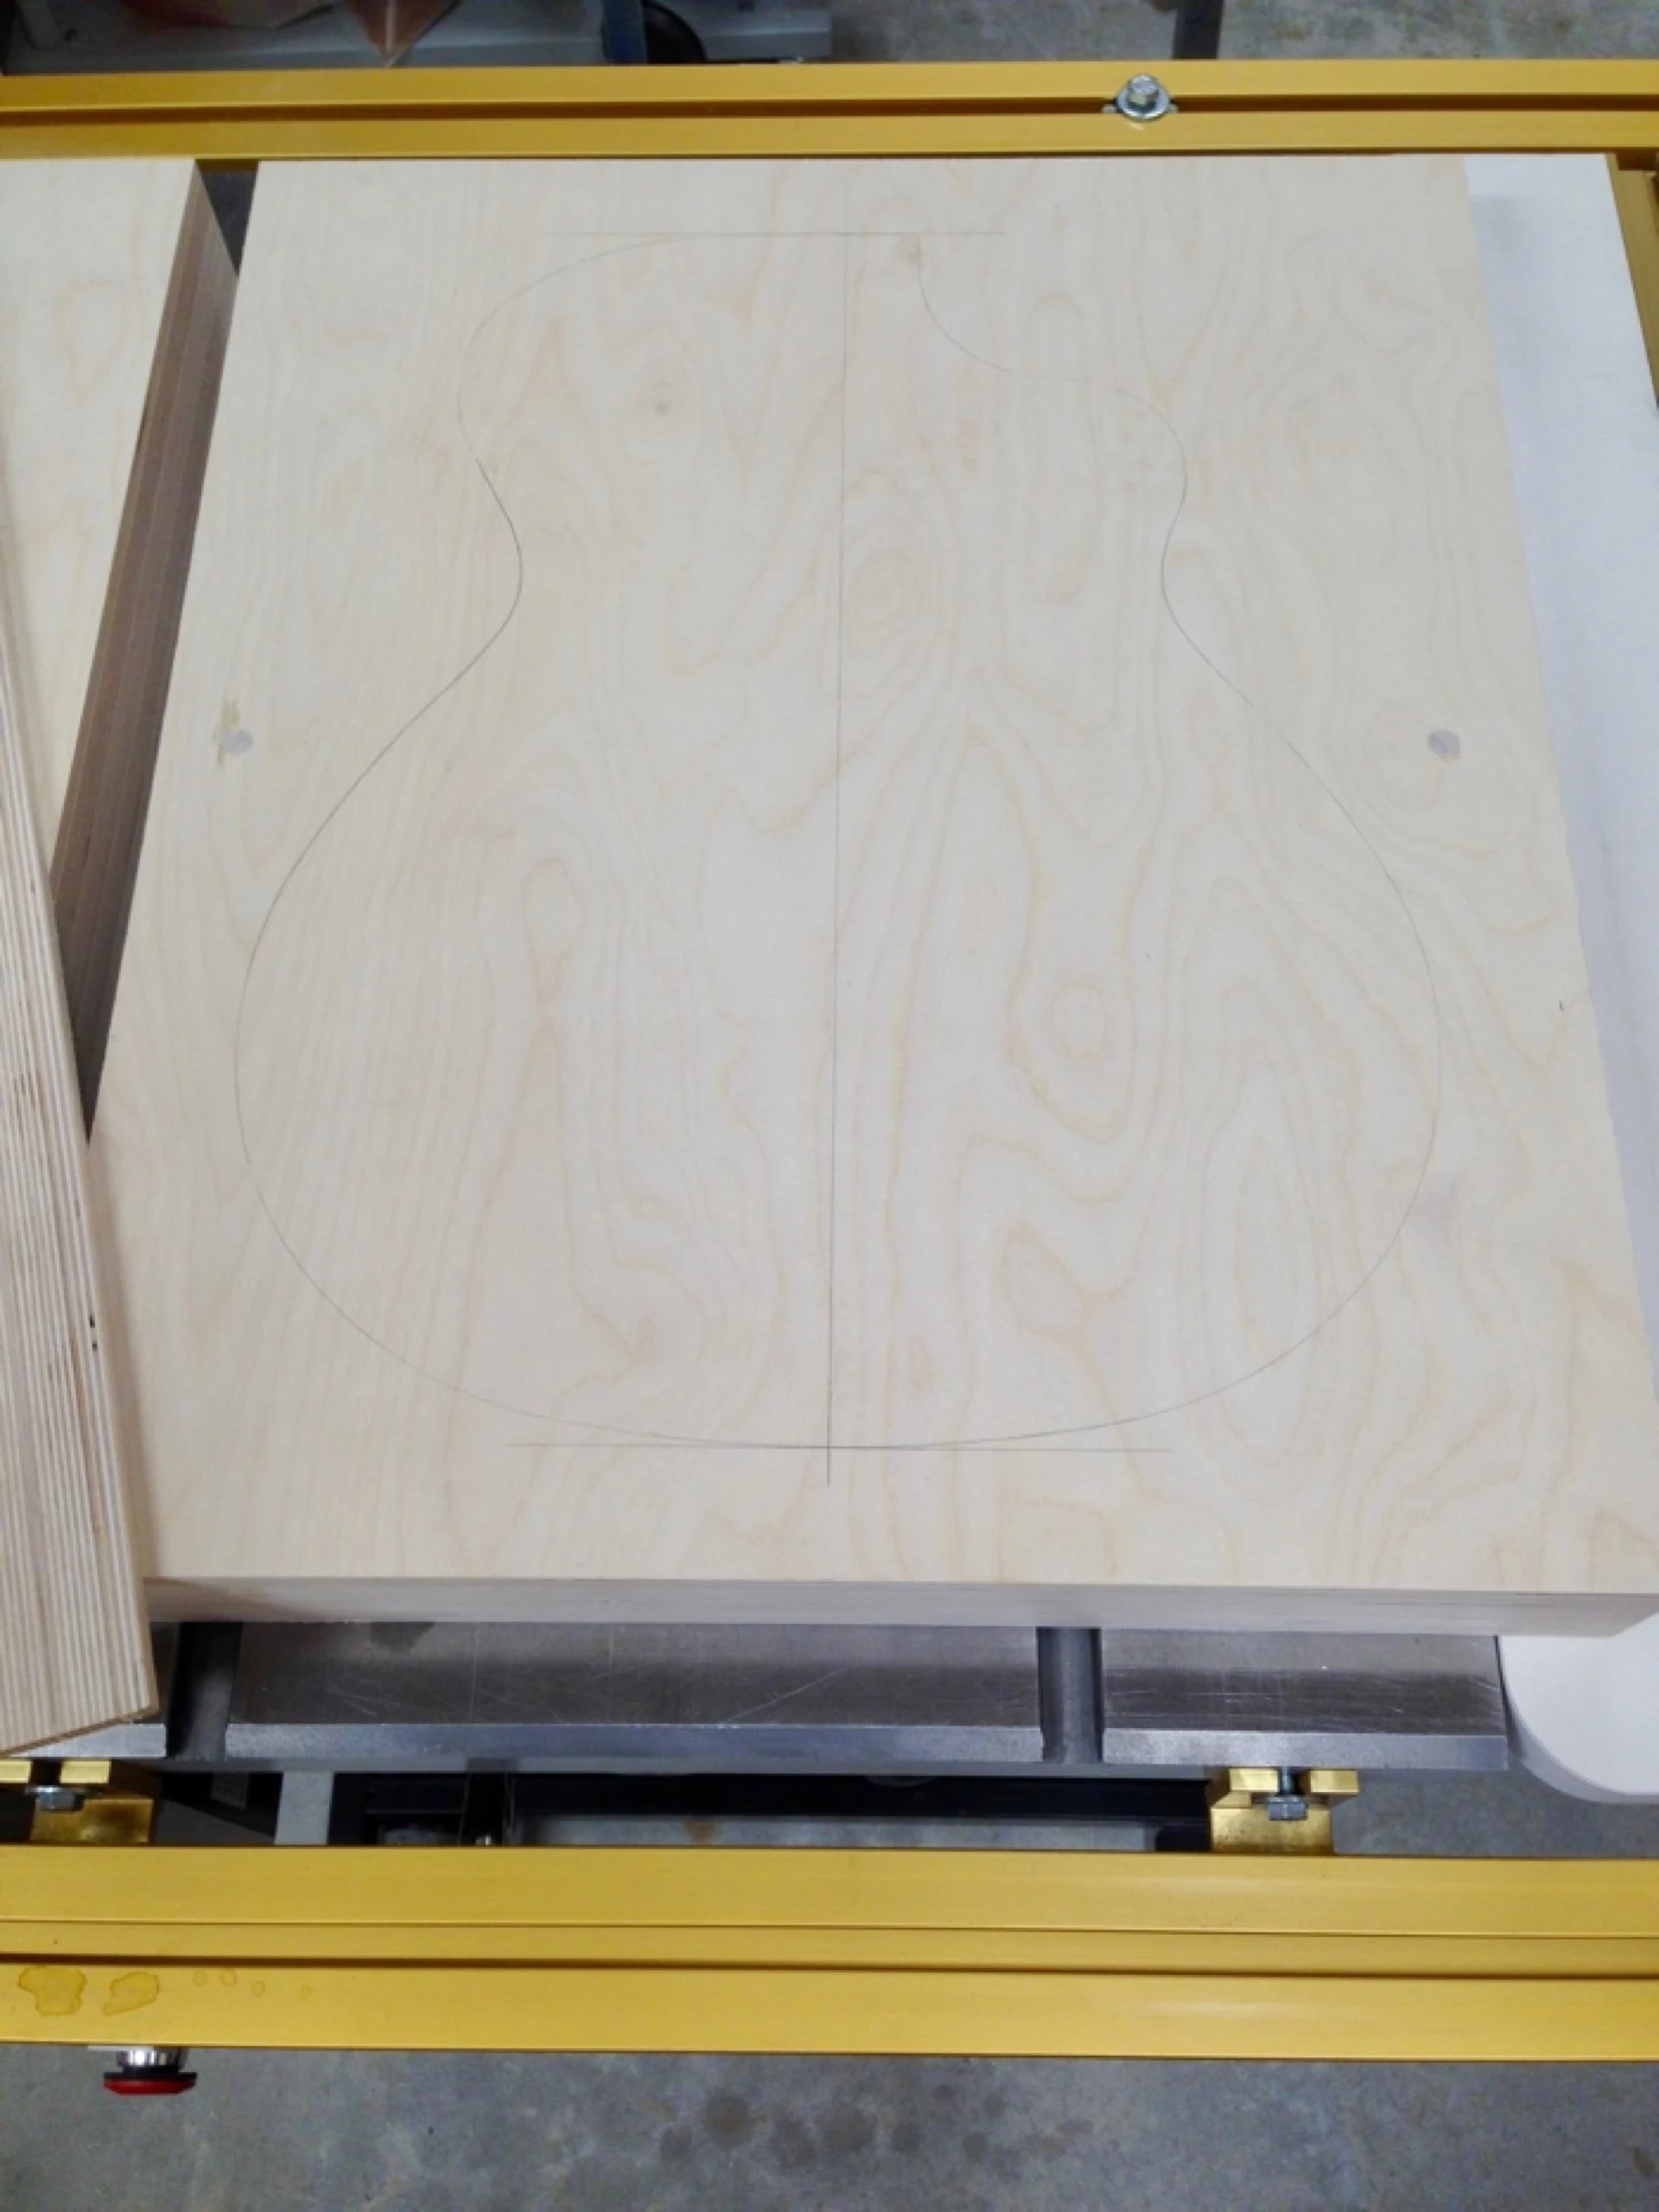
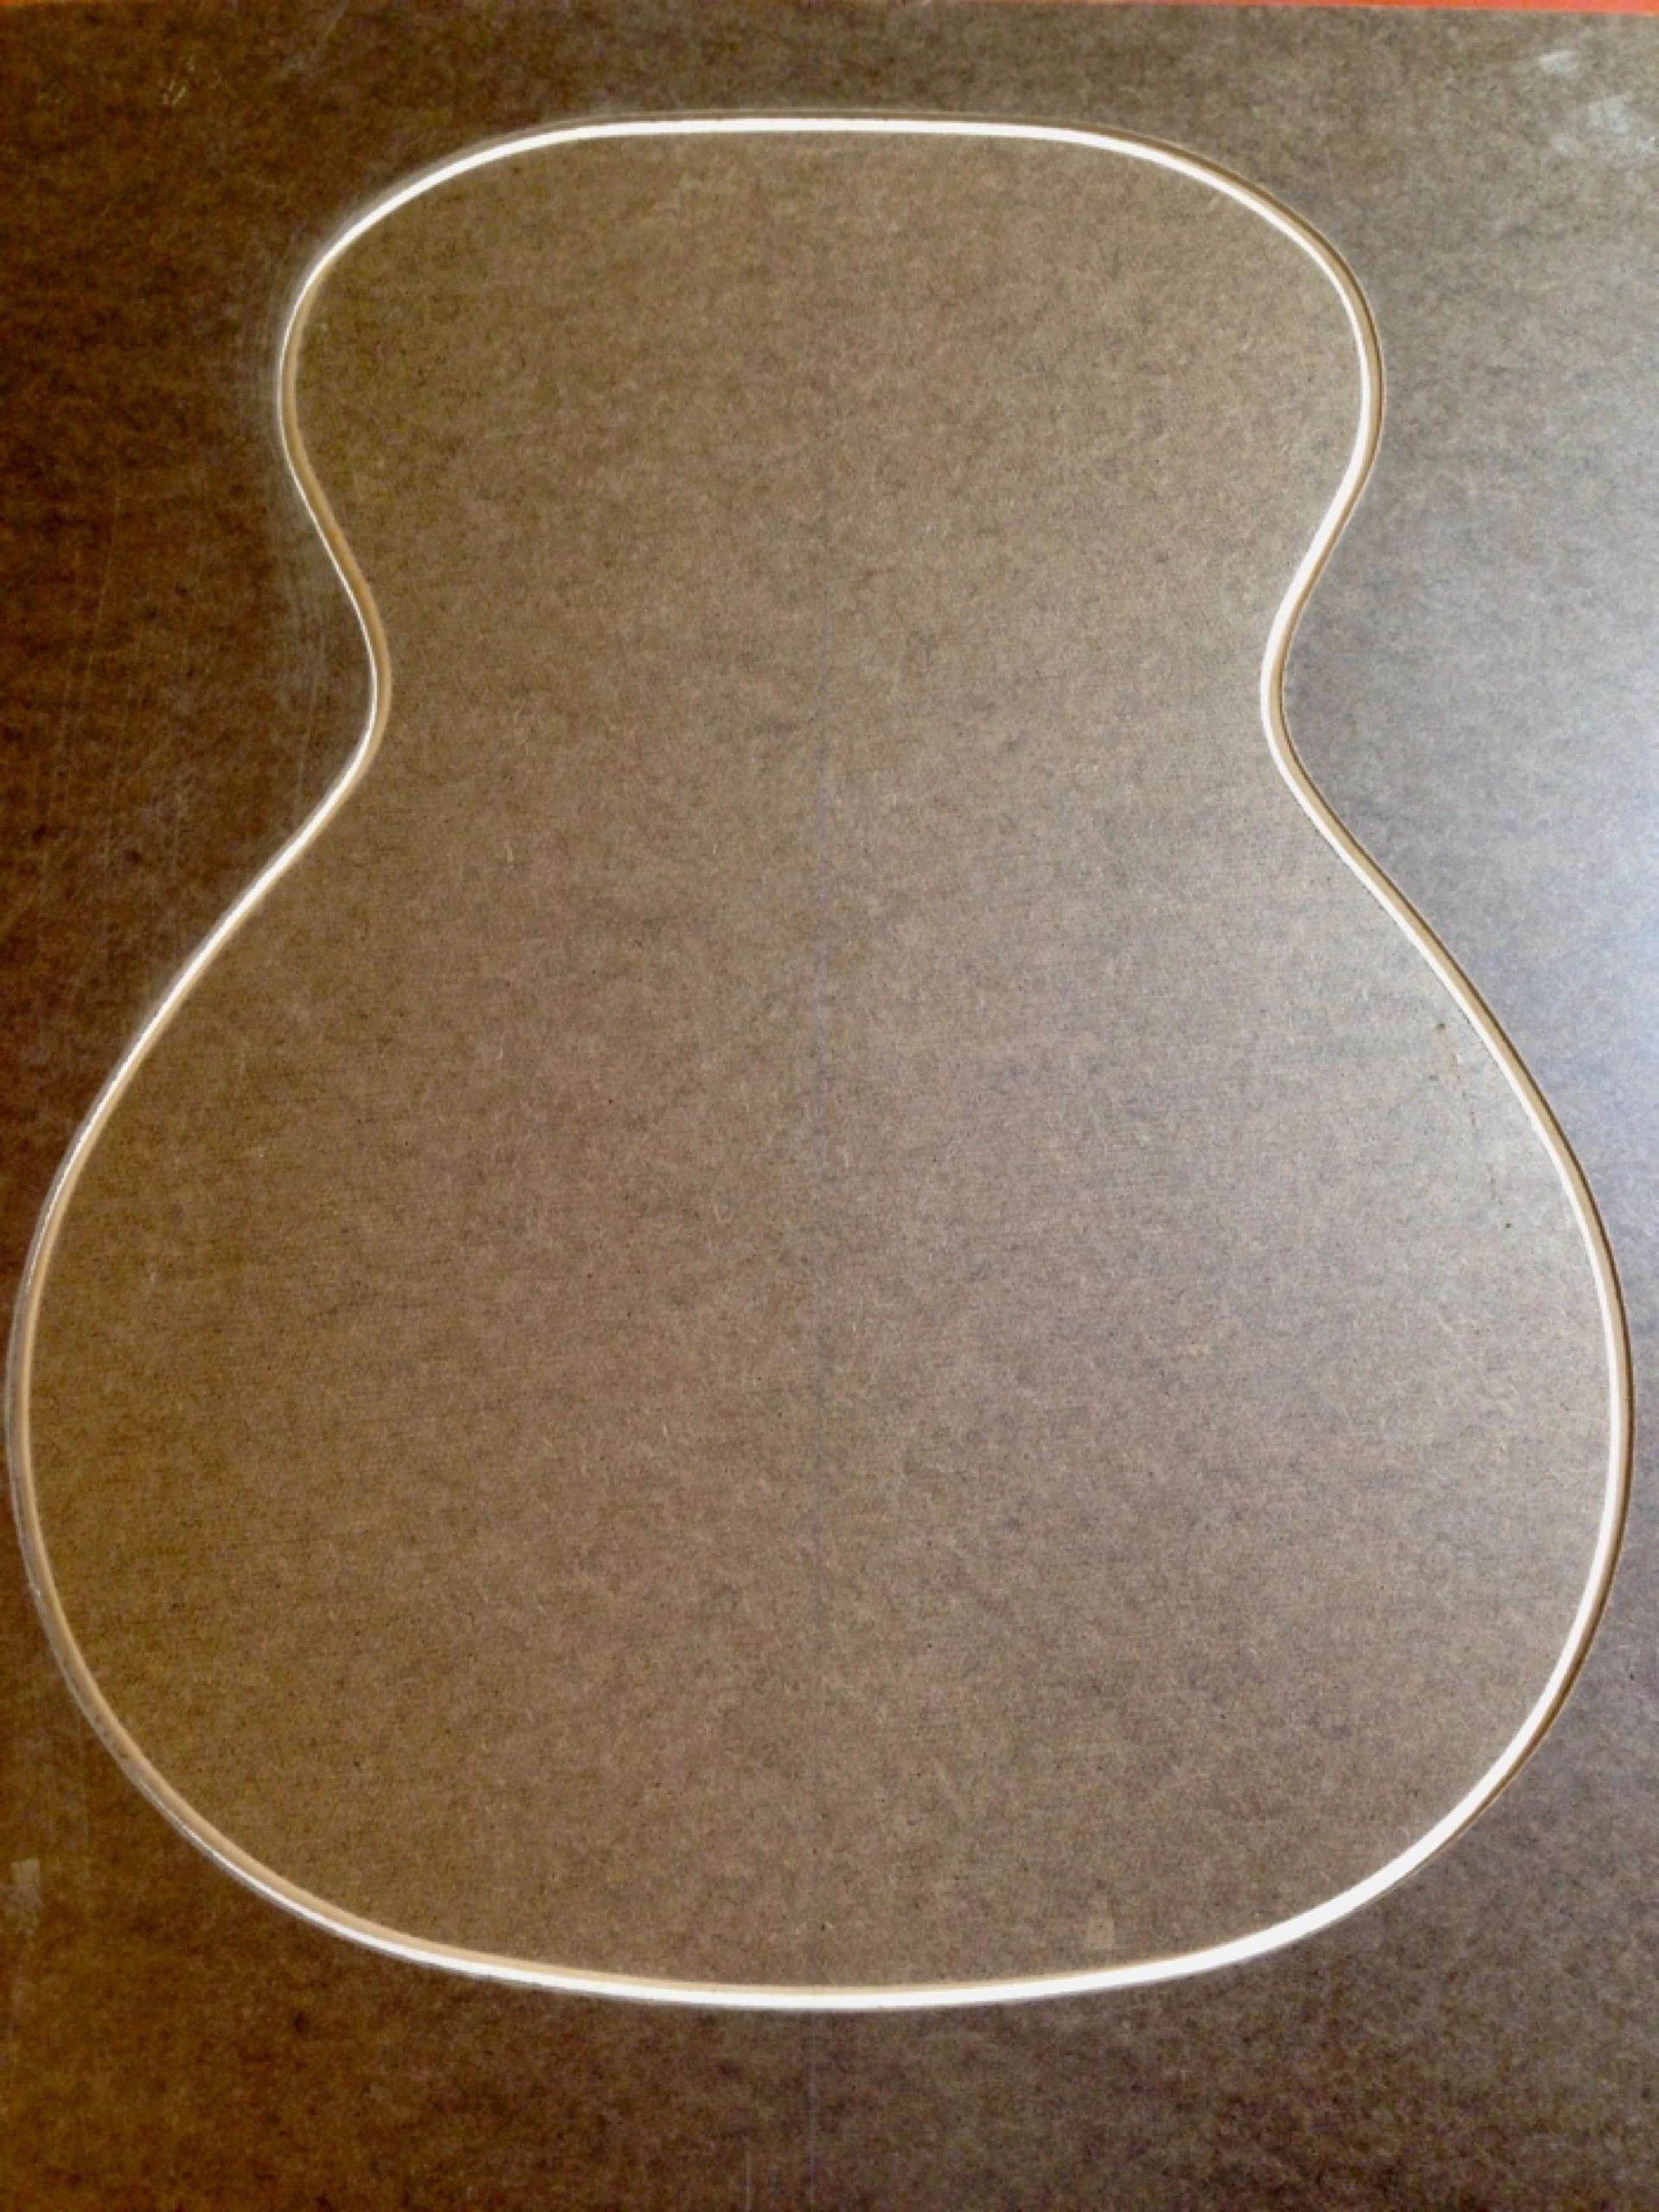
You may recall reading that my template was sized to the outer dimensions of guitar body. The template must fit perfectly within the finished body mold. I use a router inlay process to transfer the shape of my template to the plywood block. First, I create a slightly oversized cutout in hardboard (or some suitable material) using the template as a guide and then, using that hardboard cutout as a guide, I rout a perfectly sized shape into the plywood.
I double-stick tape my template onto a thin piece of hardboard (Any thin, flat board would do). I have marked the center of the hardboard, lengthwise, and am careful to center the template over that centerline.
Template taped to hardboard
Having a properly-sized template made from a hard material makes this next step easy. Using a brass inlay set (Whiteside 9500) along with a 1/8″ spiral bit (Whiteside RU1600) I rout around the outside of the template, creating a slightly oversized cutout in the hardboard. It is necessary to remove the outer collar from the router guide bushing prior to tracing around the template. This inlay set requires a two-step process to achieve a reverse image.
Whiteside 9500 Inlay Set
The difference between the size of the guitar body, here represented by a hardboard body shape template, and the oversized cutout is cleverly controlled by the thickness of the offset bushing plus the diameter of the router bit. No calculations are necessary to achieve this.
Hardboard cutout taped to plywood
I double-stick tape my newly made hardboard cutout onto my plywood block, careful to center the hardboard along the split in the block.
After fitting the inlay collar onto the router bushing, I rout around the inside edge of the hardboard cutout, routing the shape into the plywood (into which, by the way, my body shape template will fit with precision).
Why not simply drill and saw out the center waste material and use a pattern bit to follow the hardboard template? Because there are two (2) steps needed to make a reverse image. The hardboard template is still slightly oversized, and only by first fitting the special collar onto the router guide bushing and then tracing along the hardboard can I achieve that mirror image at the exact size.
Tracing the cutout
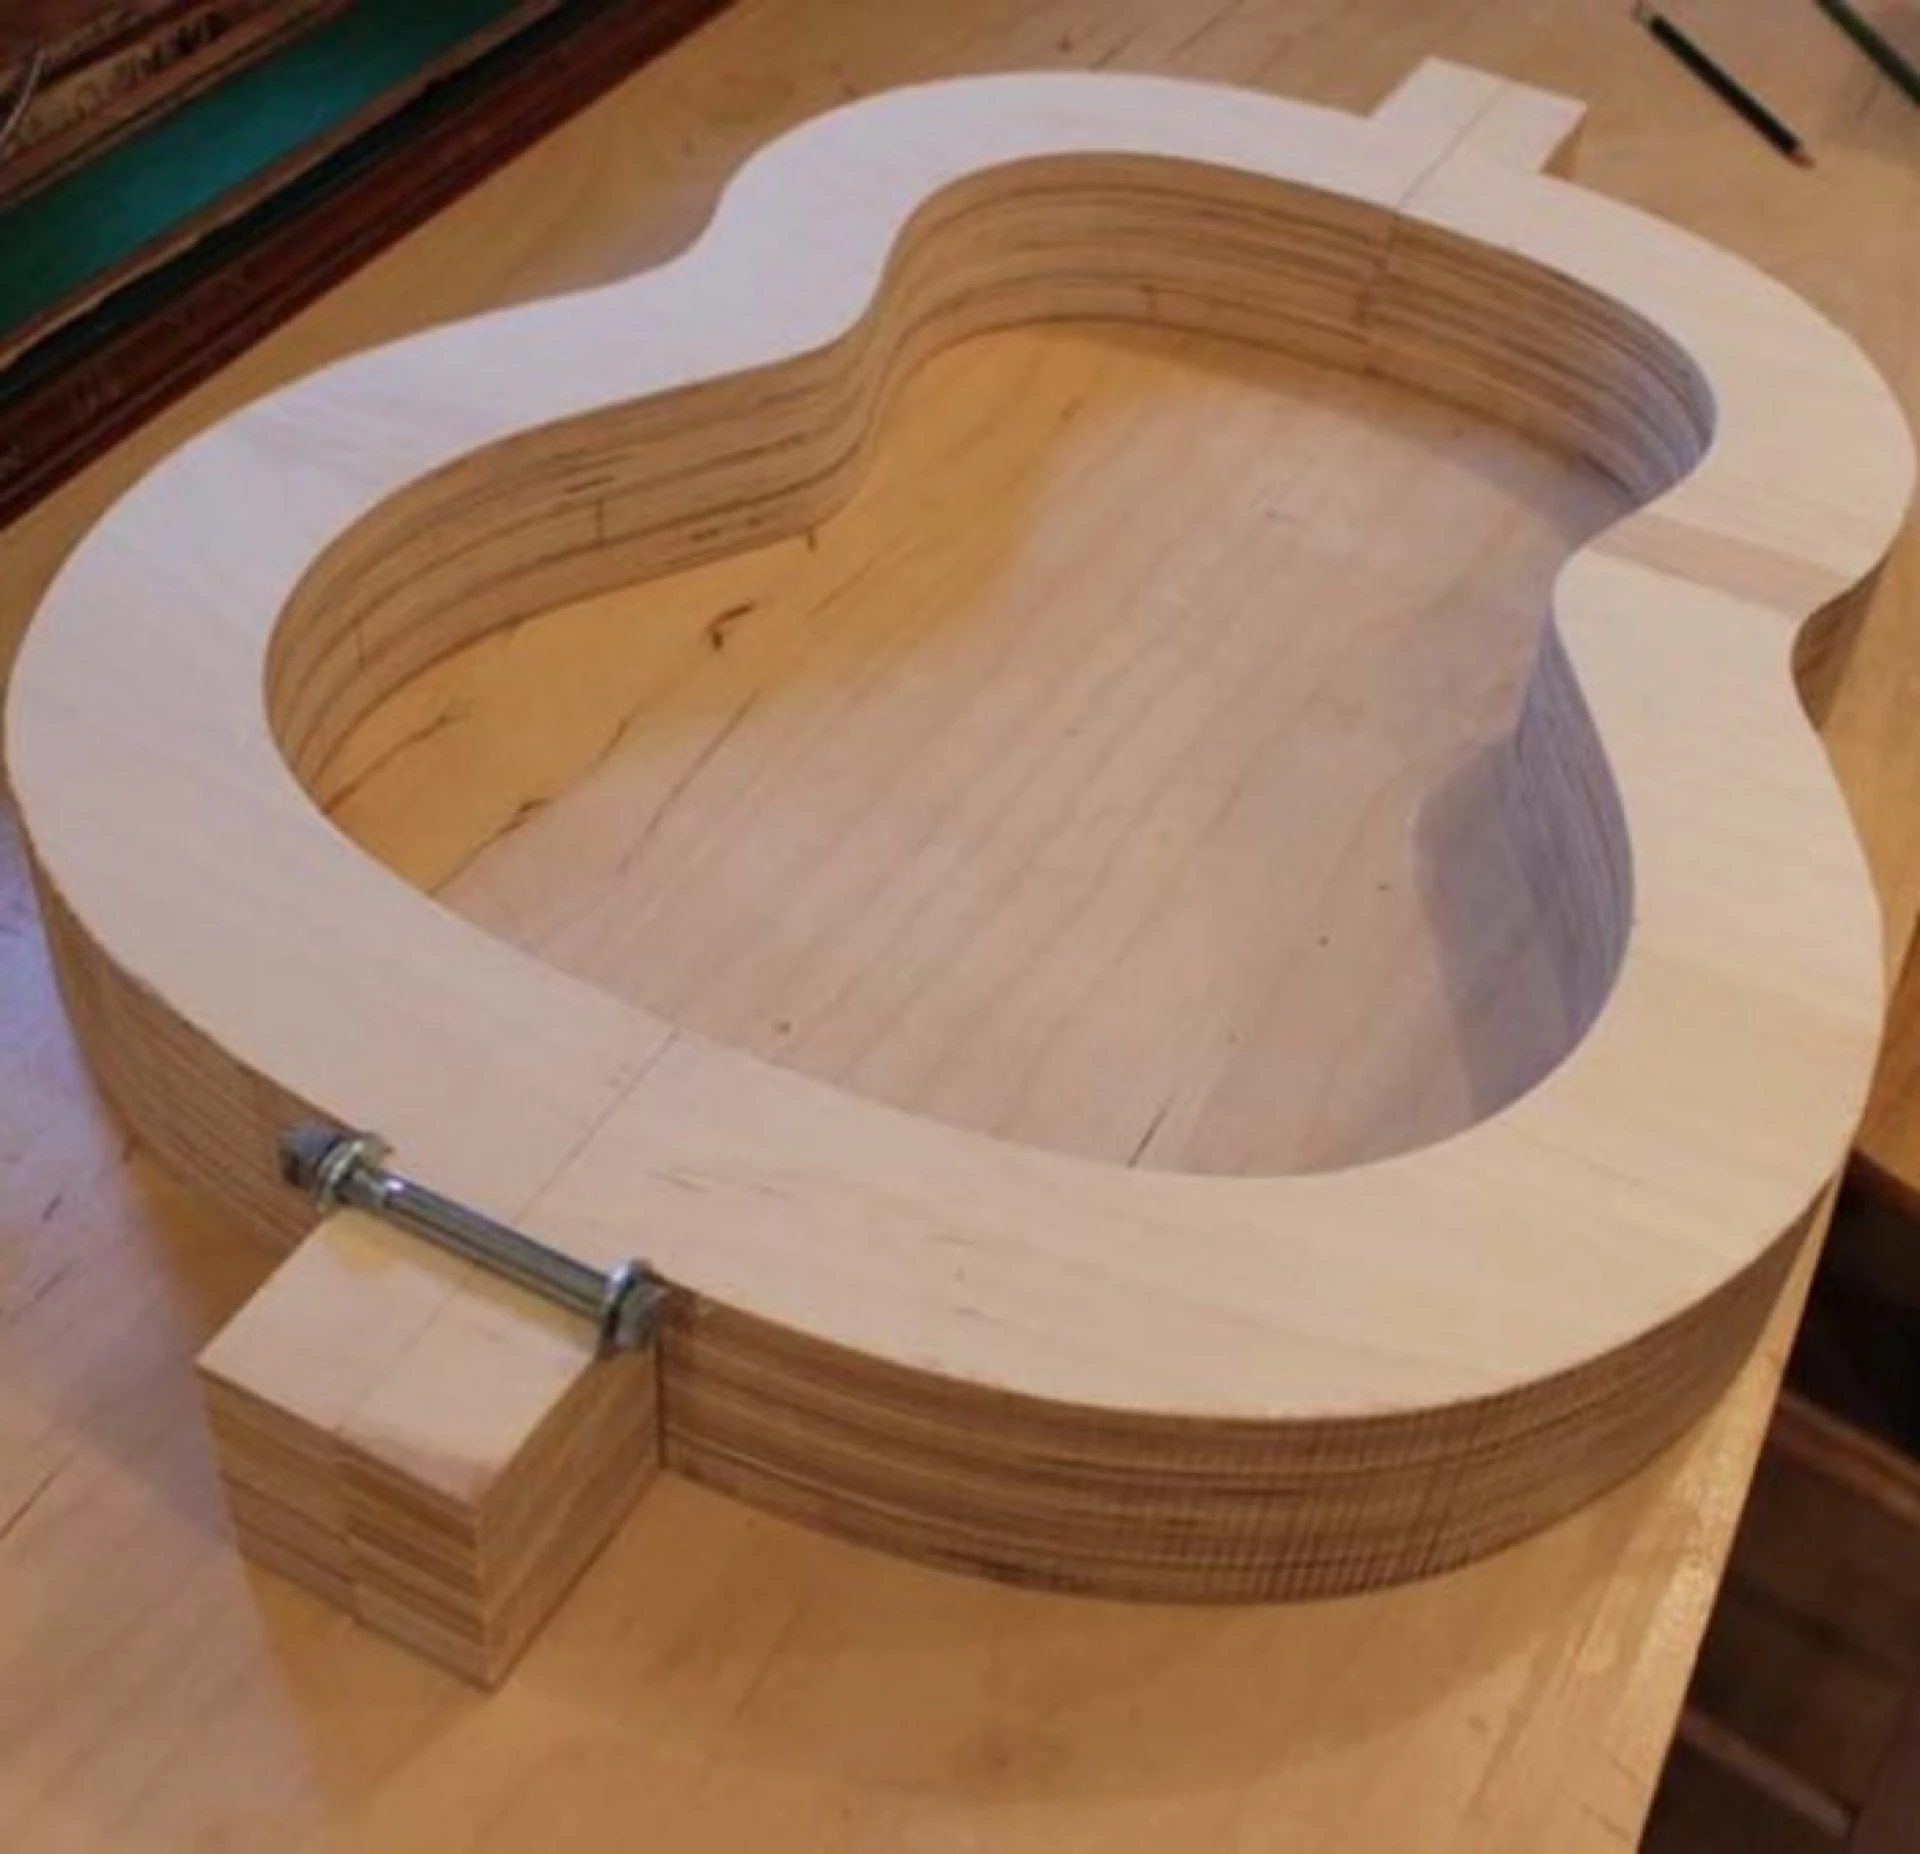
Only now am I free to disassemble the plywood block and carefully remove the waste material from each of the two (2) halves at the bandsaw. I stay close to the routed groove, but I am careful to not saw into it.
Waste removed
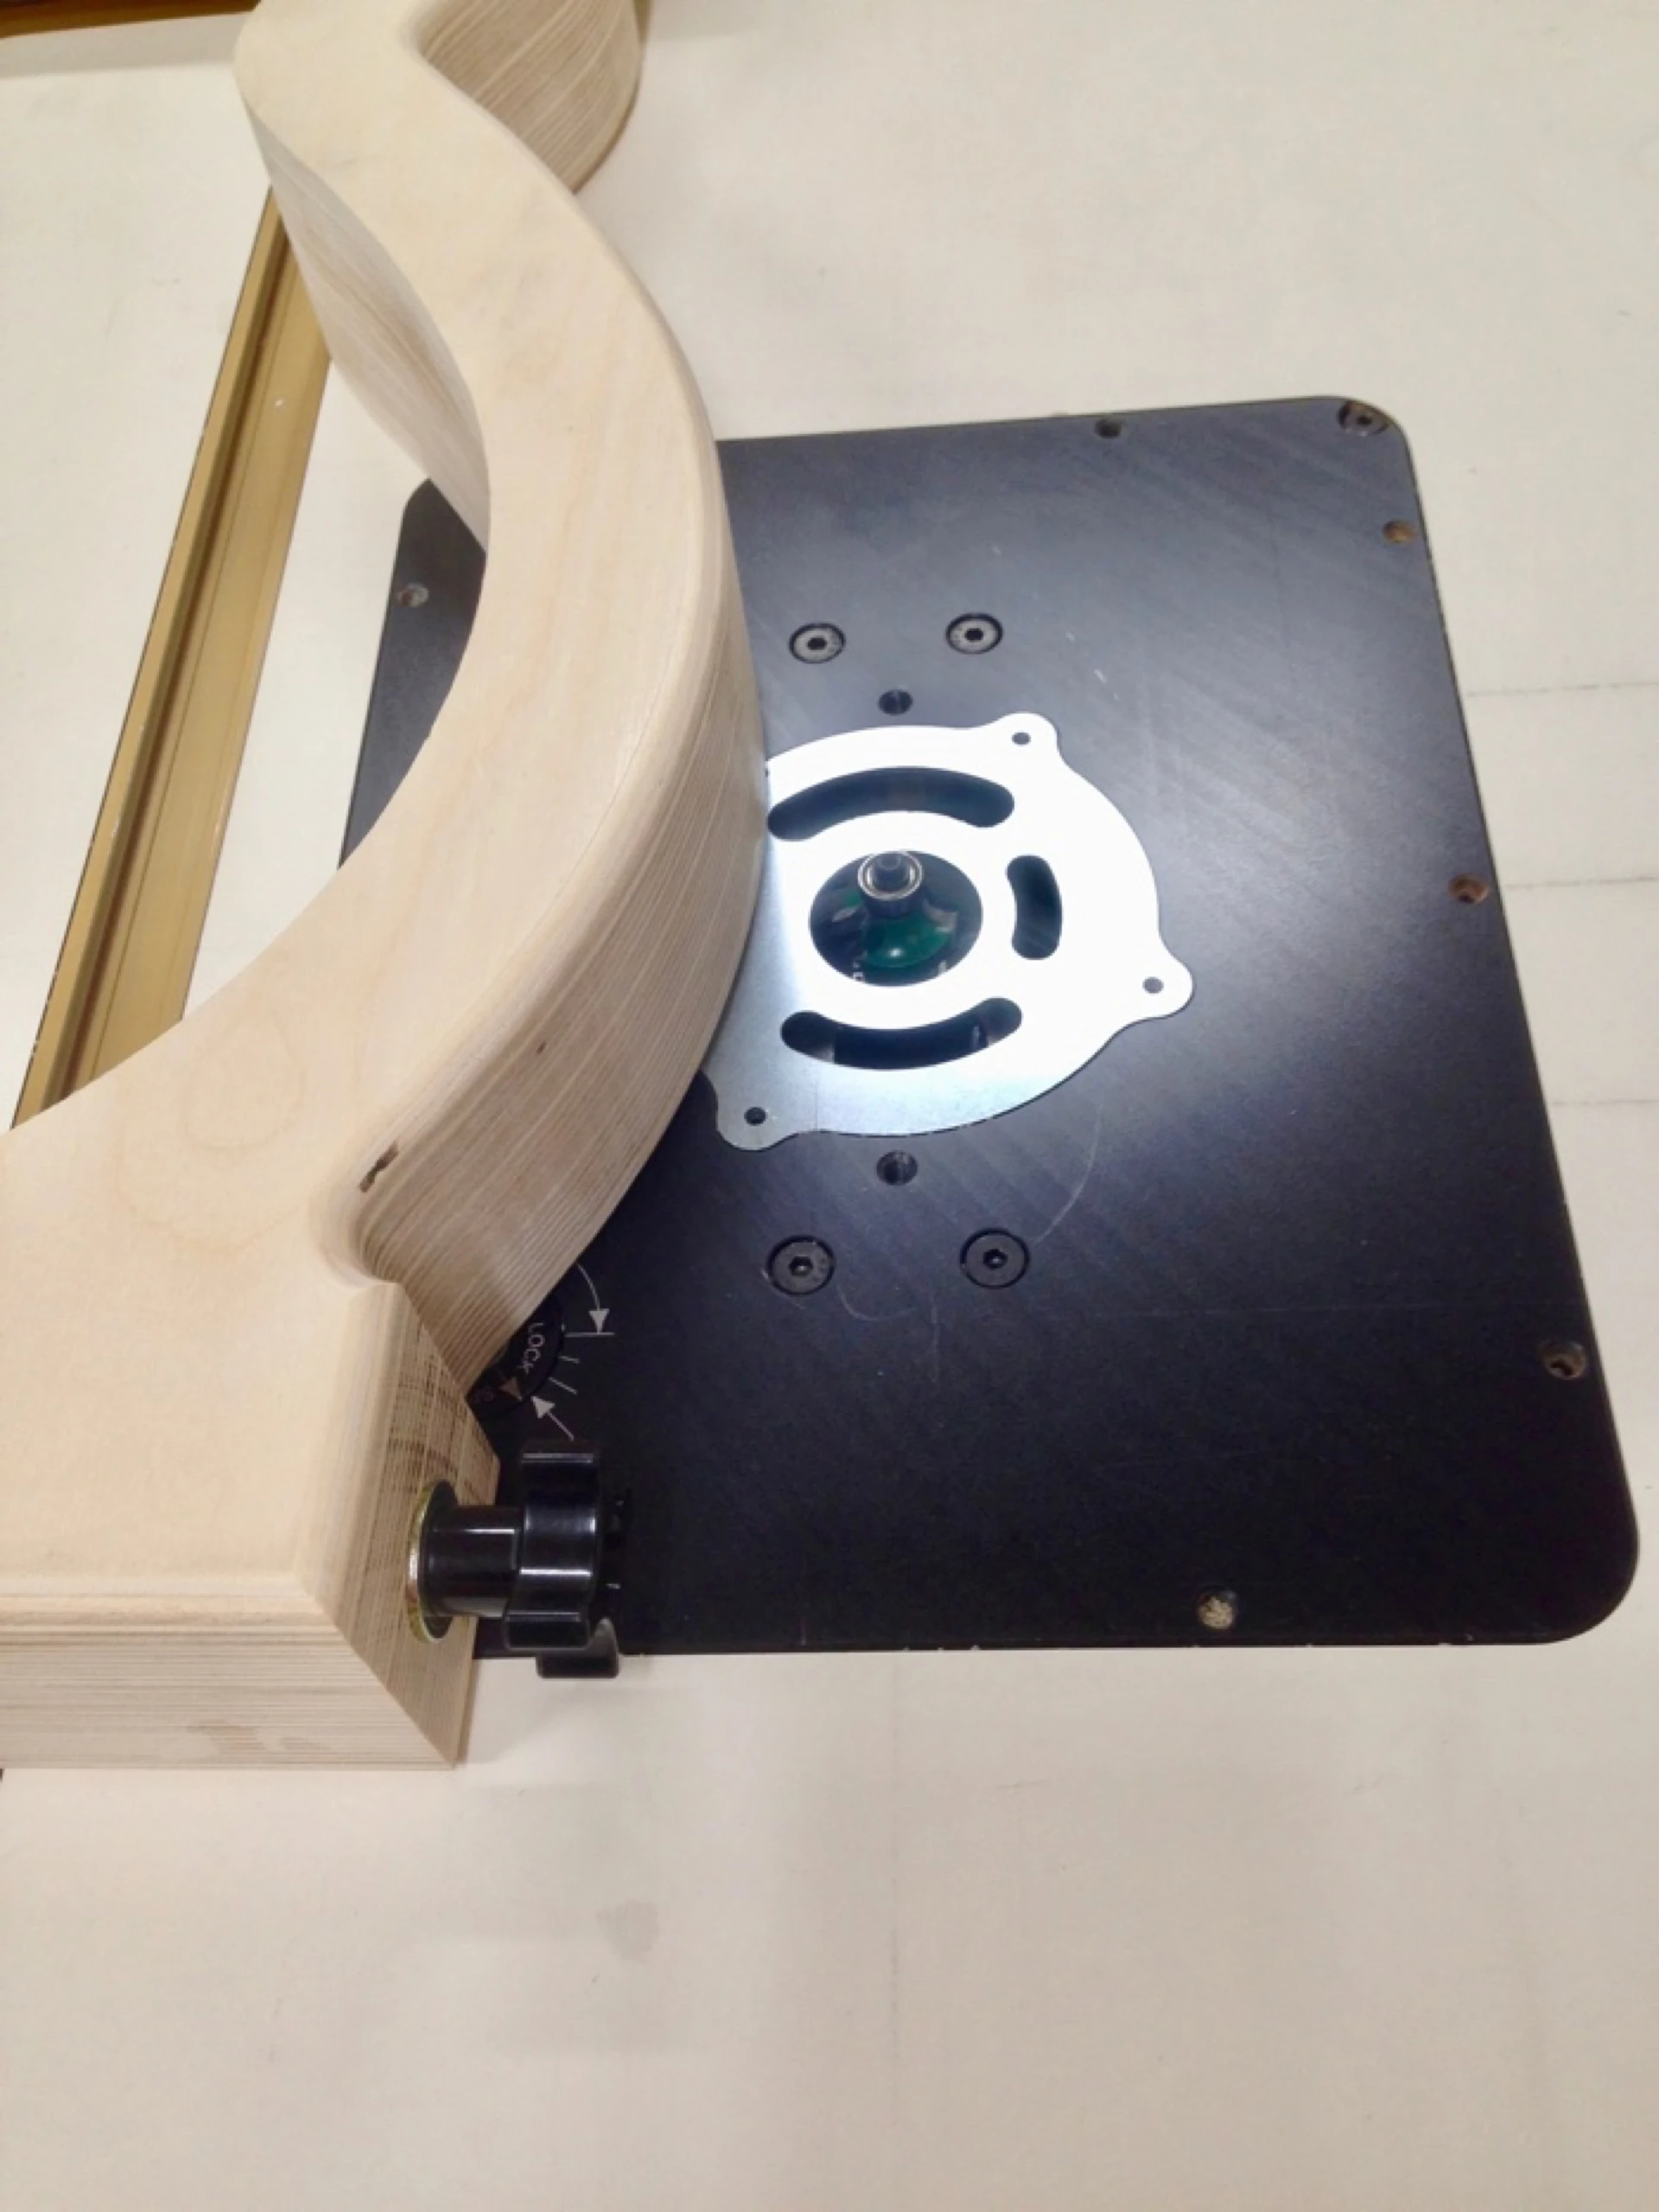
It is now necessary to follow the routed groove with a pattern bit in order to clean up the bandsawn lines. I set a bit into the router table and follow the routed path, trimming the material away from the inside of the body mold. I could stop at this point, as the body mold is completely usable, though it is still a bit heavier than it needs to be.
And, in the event you were wondering, the guitar shape template fits PERFECTLY inside the newly-dimensioned body mold!
Using a compass opened to 1-5/8", I trace around the inside edges of the mold, drawing a line I can cut with the bandsaw. I am careful to remember where my threaded rods reside so as not to attempt to saw through them. A short time at the oscillating drum sander lets me to clean up the lines. Using a roundover bit at the router table, I soften the outside edges of the entire body mold for more comfortable handling.
Outside Complete
I fashion a spreader to hold the sides tightly against the body mold at the waist of the guitar. It can be made from the waste material, though this can result in a rather heavy spreader. A turnbuckle and eye bolts are all that are needed to assemble the spreader. I keep the blocks squared on the inside edges and shape the edges that mate with the waist. I have seen some pretty elaborate spreader schemes, and created a few of my own. The more spreaders added (or the larger the spreader blocks) the less access I have to the body cavity. This can become an issue when attempting to clean up glue squeeze-out along the kerfing or solid lining, or when adding side braces, so more is not always better.
At the very least, a horizontal spreader across the waist is essential. Some builders will add a vertical spreader between the head and tail block. I find it preferable to simply clamp those two blocks to the mold and maintain interior access, which is easy to do with my body mold design.
If you wish, you can also screw or bolt those blocks to the body to maintain precision during the build. Drill a hole through the end of the mold just large enough to house your screw of choice. The neck block will likely be receiving a mortise of one kind or another which will swallow any hole(s) made in it by an attaching screw and, if you use an end graft and/or will drill for a endpin or endpin jack, that hole will disappear, as well. Lest you scoff, more than a few high-end guitars have been held in their respective molds using drywall screws.
Spreader
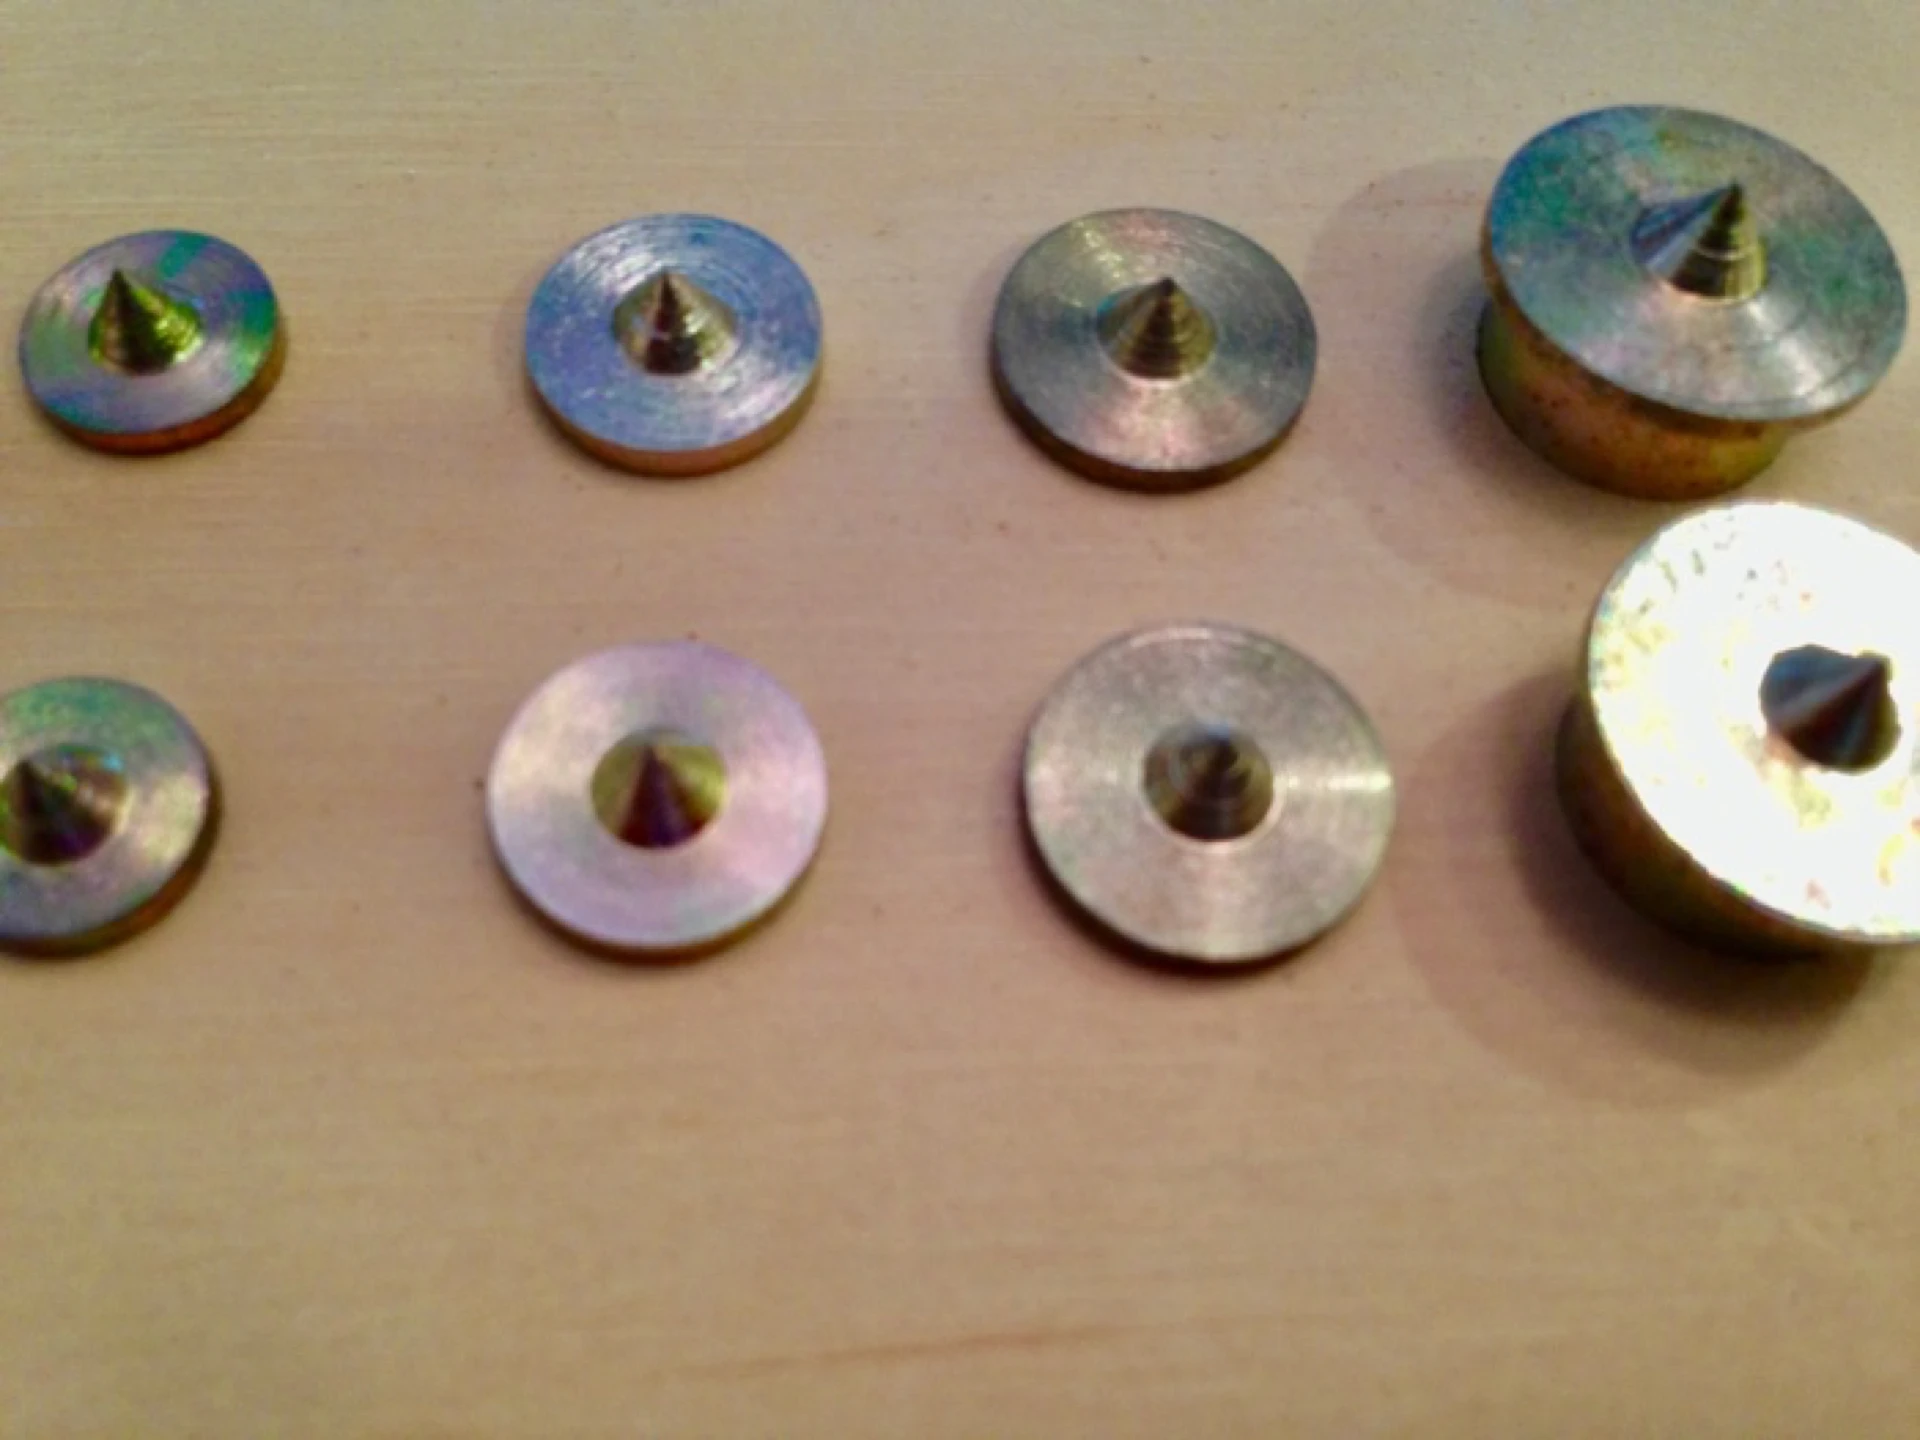
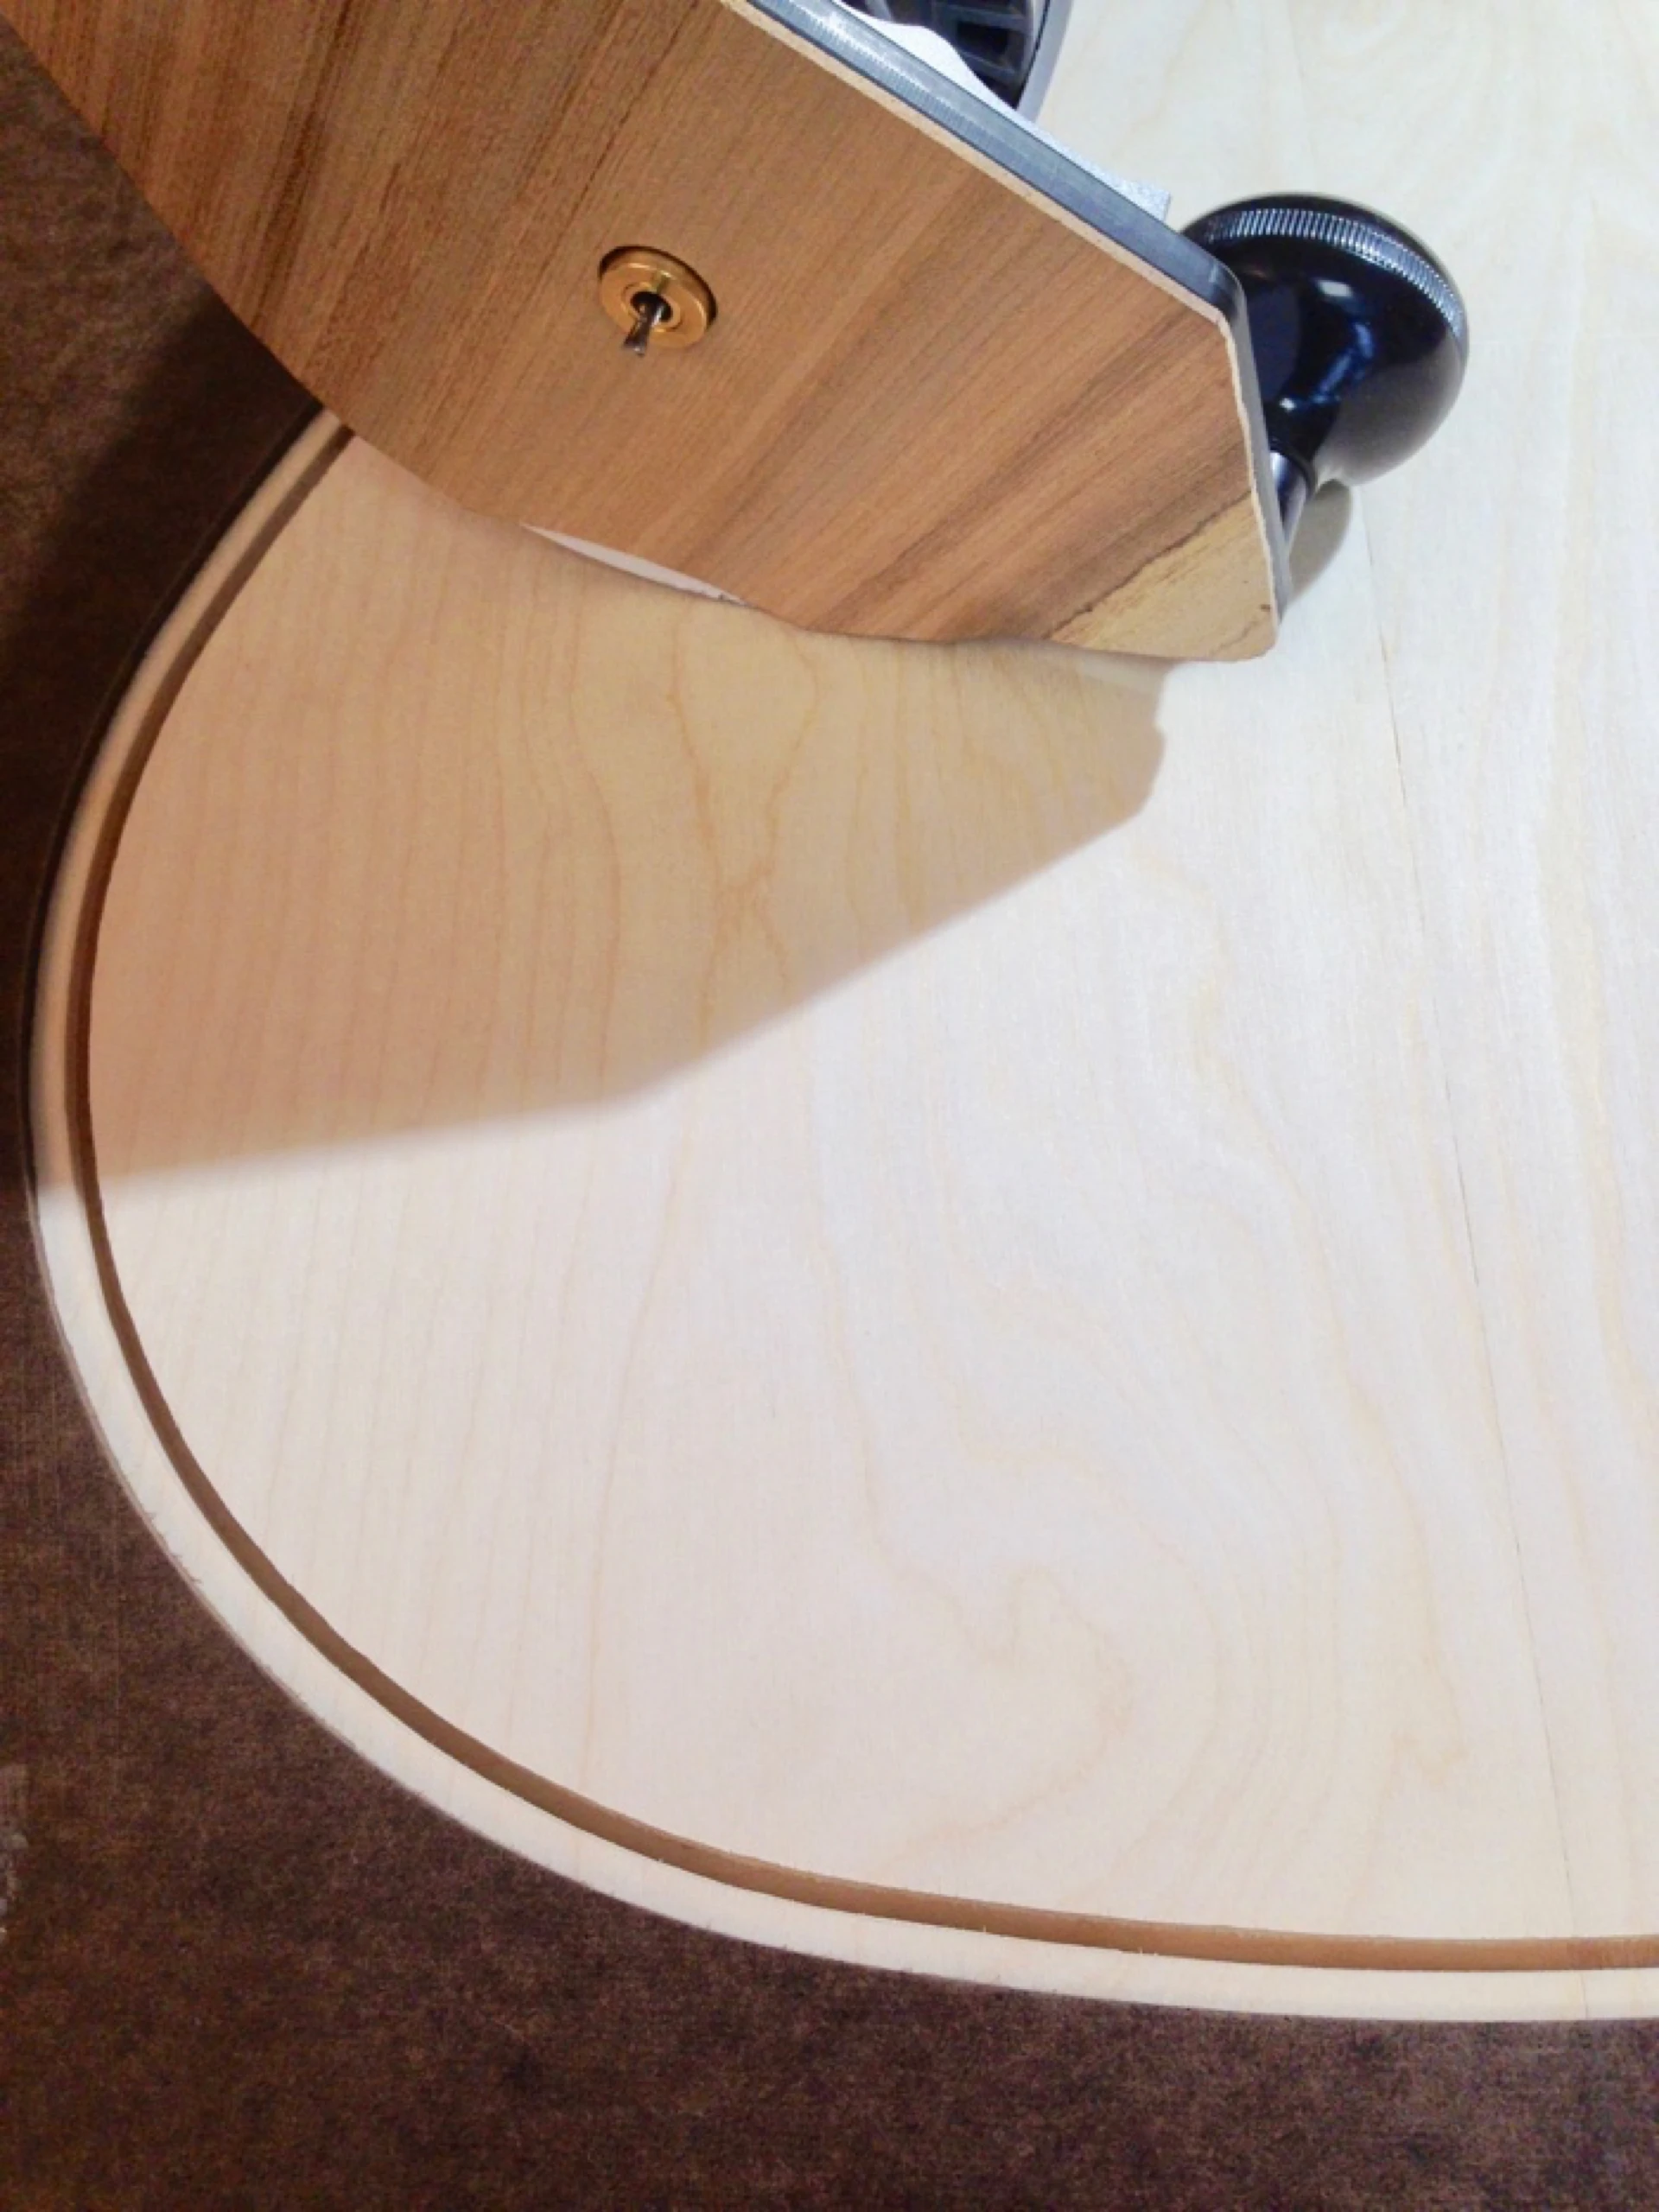
I fashion a cutaway insert to hold the specially shaped cutaway side tightly against the body mold at the upper bout. It is made from the waste material of our original block. It is shaped to follow both the contour of the upper bout, against which it will reside, as well as contain the shape of the cutaway. Once I have achieved a good fit, I clamp the insert in place and drill a hole from the outside of the mold into the insert. My favorite bolt for the task is a 3/8″ x 4″ hangar bolt. The threaded portion of the bolt will pass through a tight 3/8″ hole in the body mold, where the screw portion of the bolt will need a 5/6″ hole drilled into the insert. It can be retained with a simple nut and washer, although a plastic Star Nut is a nice alternative.
Cutaway Insert
For cutaway designs, I carefully position and cut a 3/8″ to 1/2″ deep slot into the body mold to allow a slightly oversized side to pass just beyond the neck block and be retained by the body mold - not the neck block - as the glue dries. This excess material (that which projects beyond the neck block) will be trimmed away at a later stage.
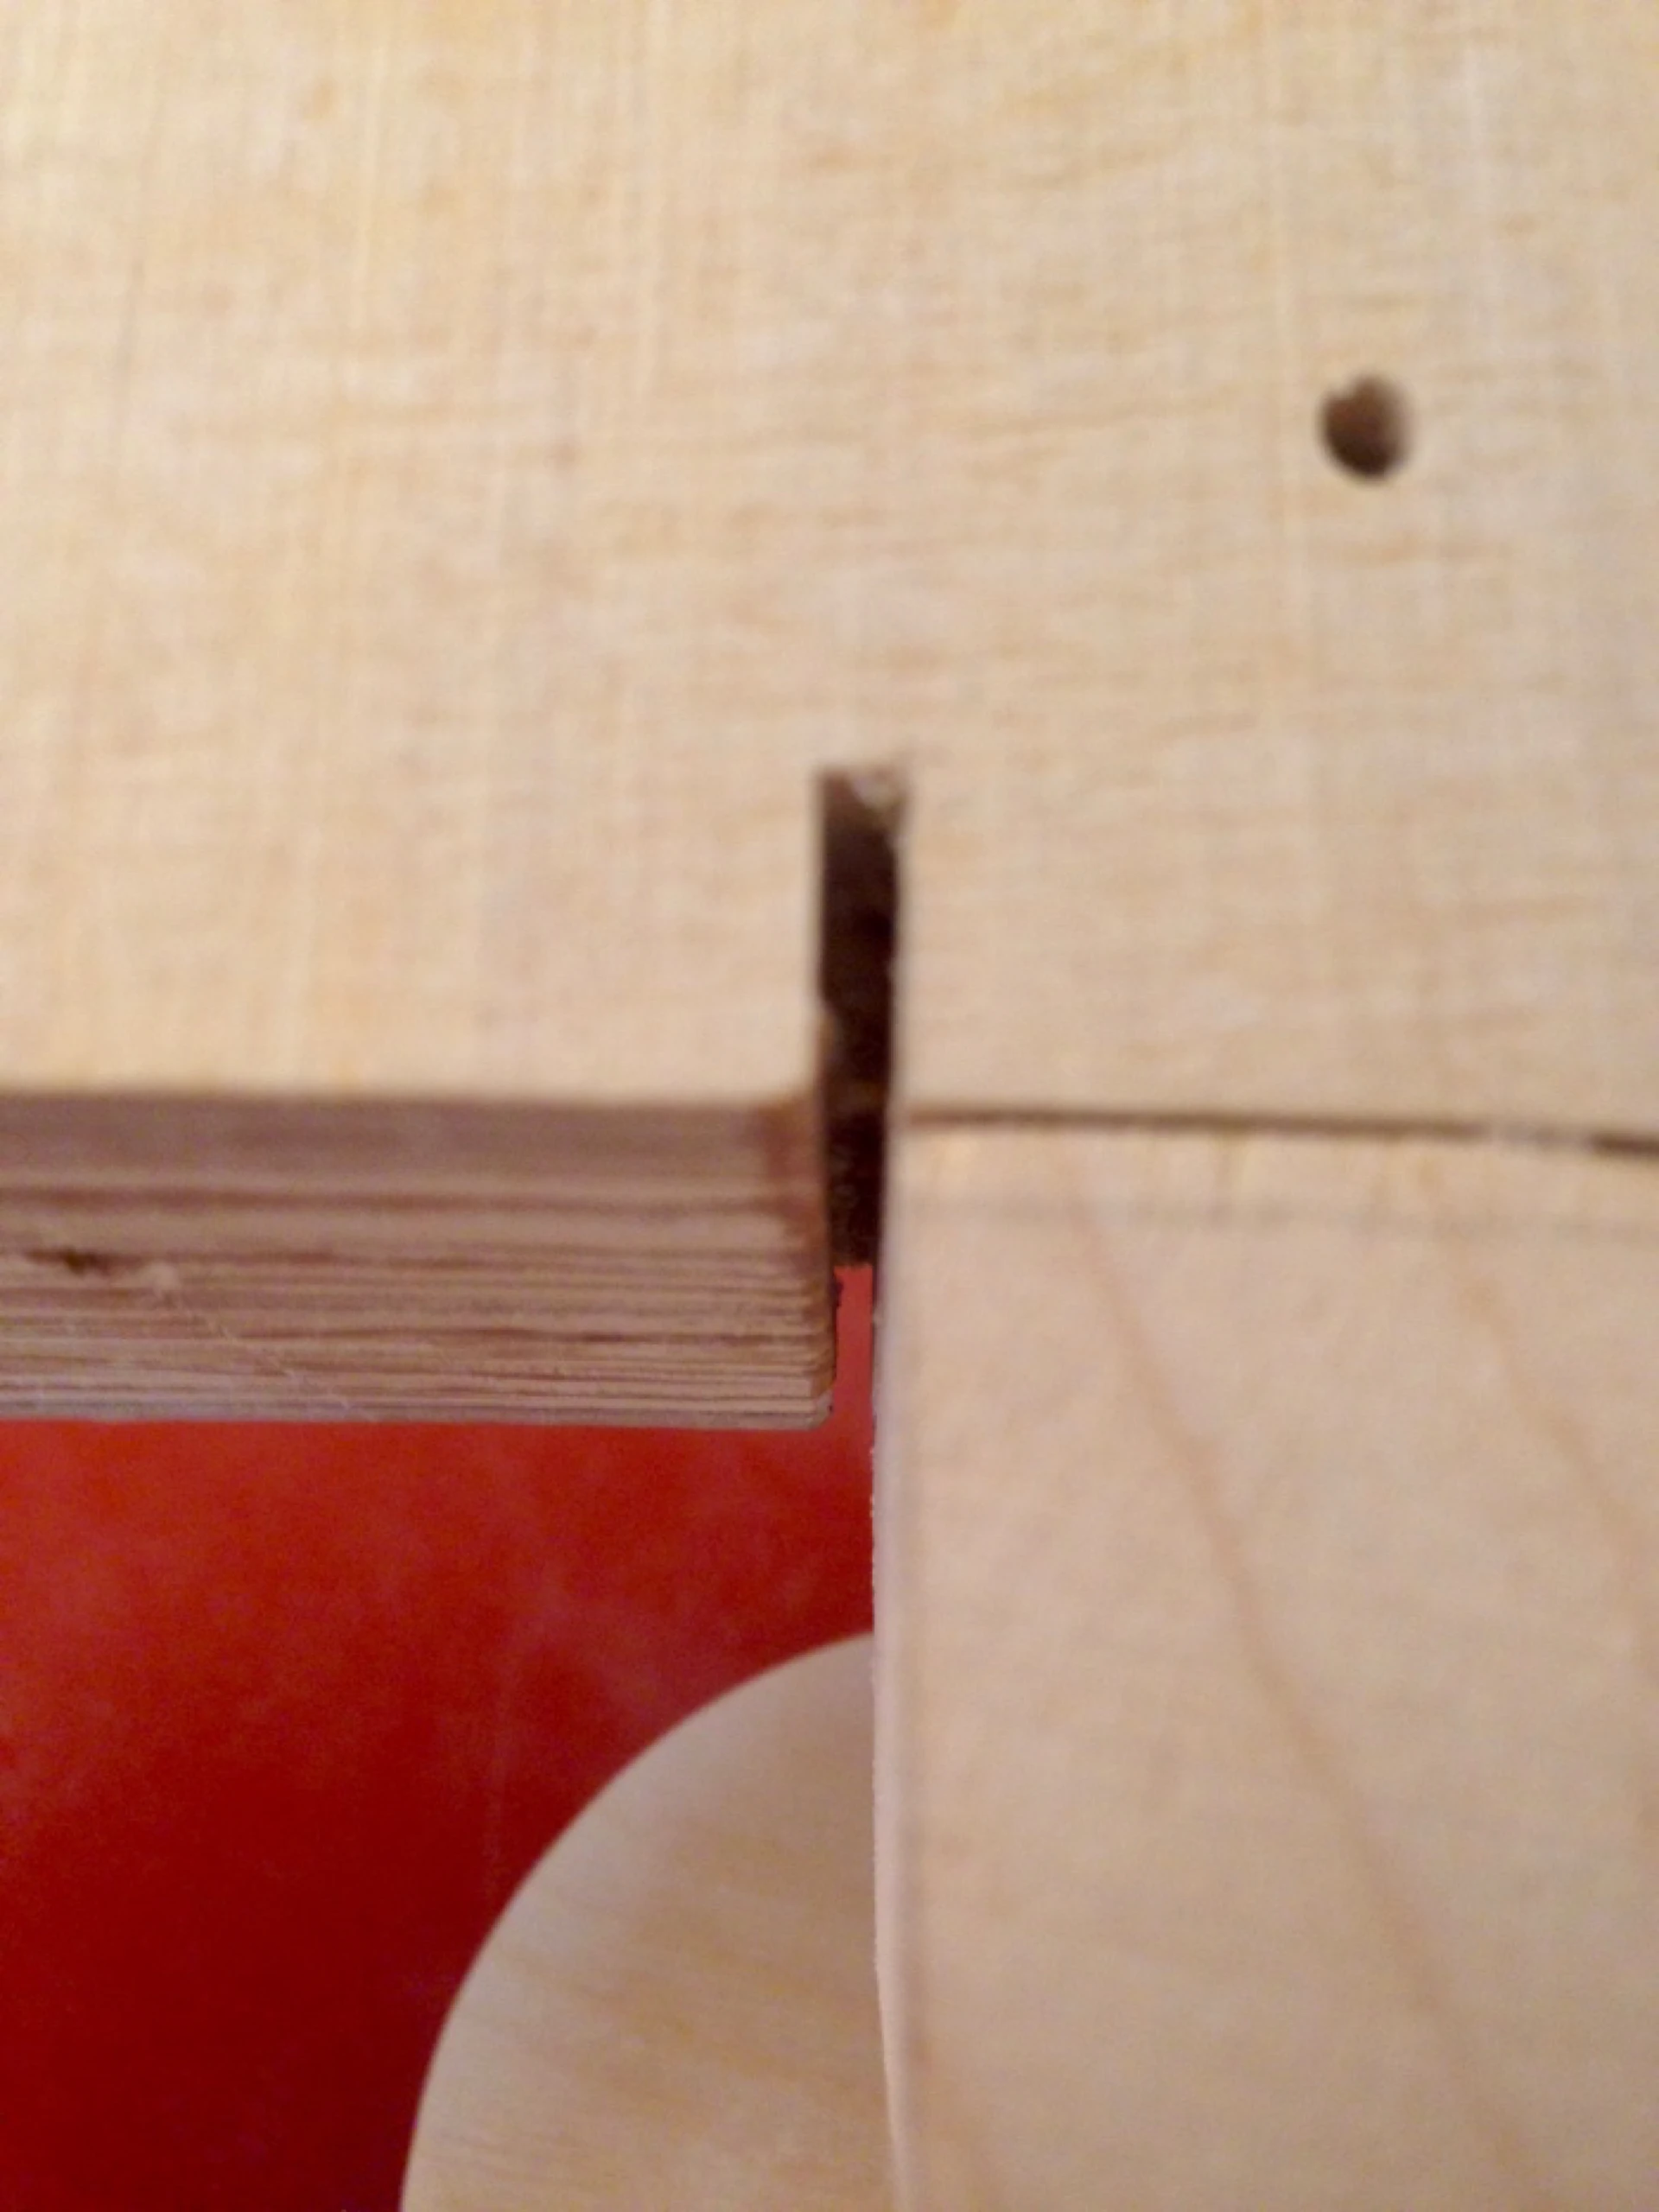
Cutaway Slot
Note that I do not round over the interior edges of the body mold, as I do not want to alter the 90° walls that the sides clamp to. However, I will ever-so-slightly ease the sharp edges of the plywood using some sandpaper in order to make handling the mold a more pleasant, splinter-free experience.
I can certainly slap a body mold together more quickly, and have done so. Spending a little more time and care on what may be the most significant fixture in my shop, a fixture that will easily outlast me, just makes more sense.
Cozad Body Mold