
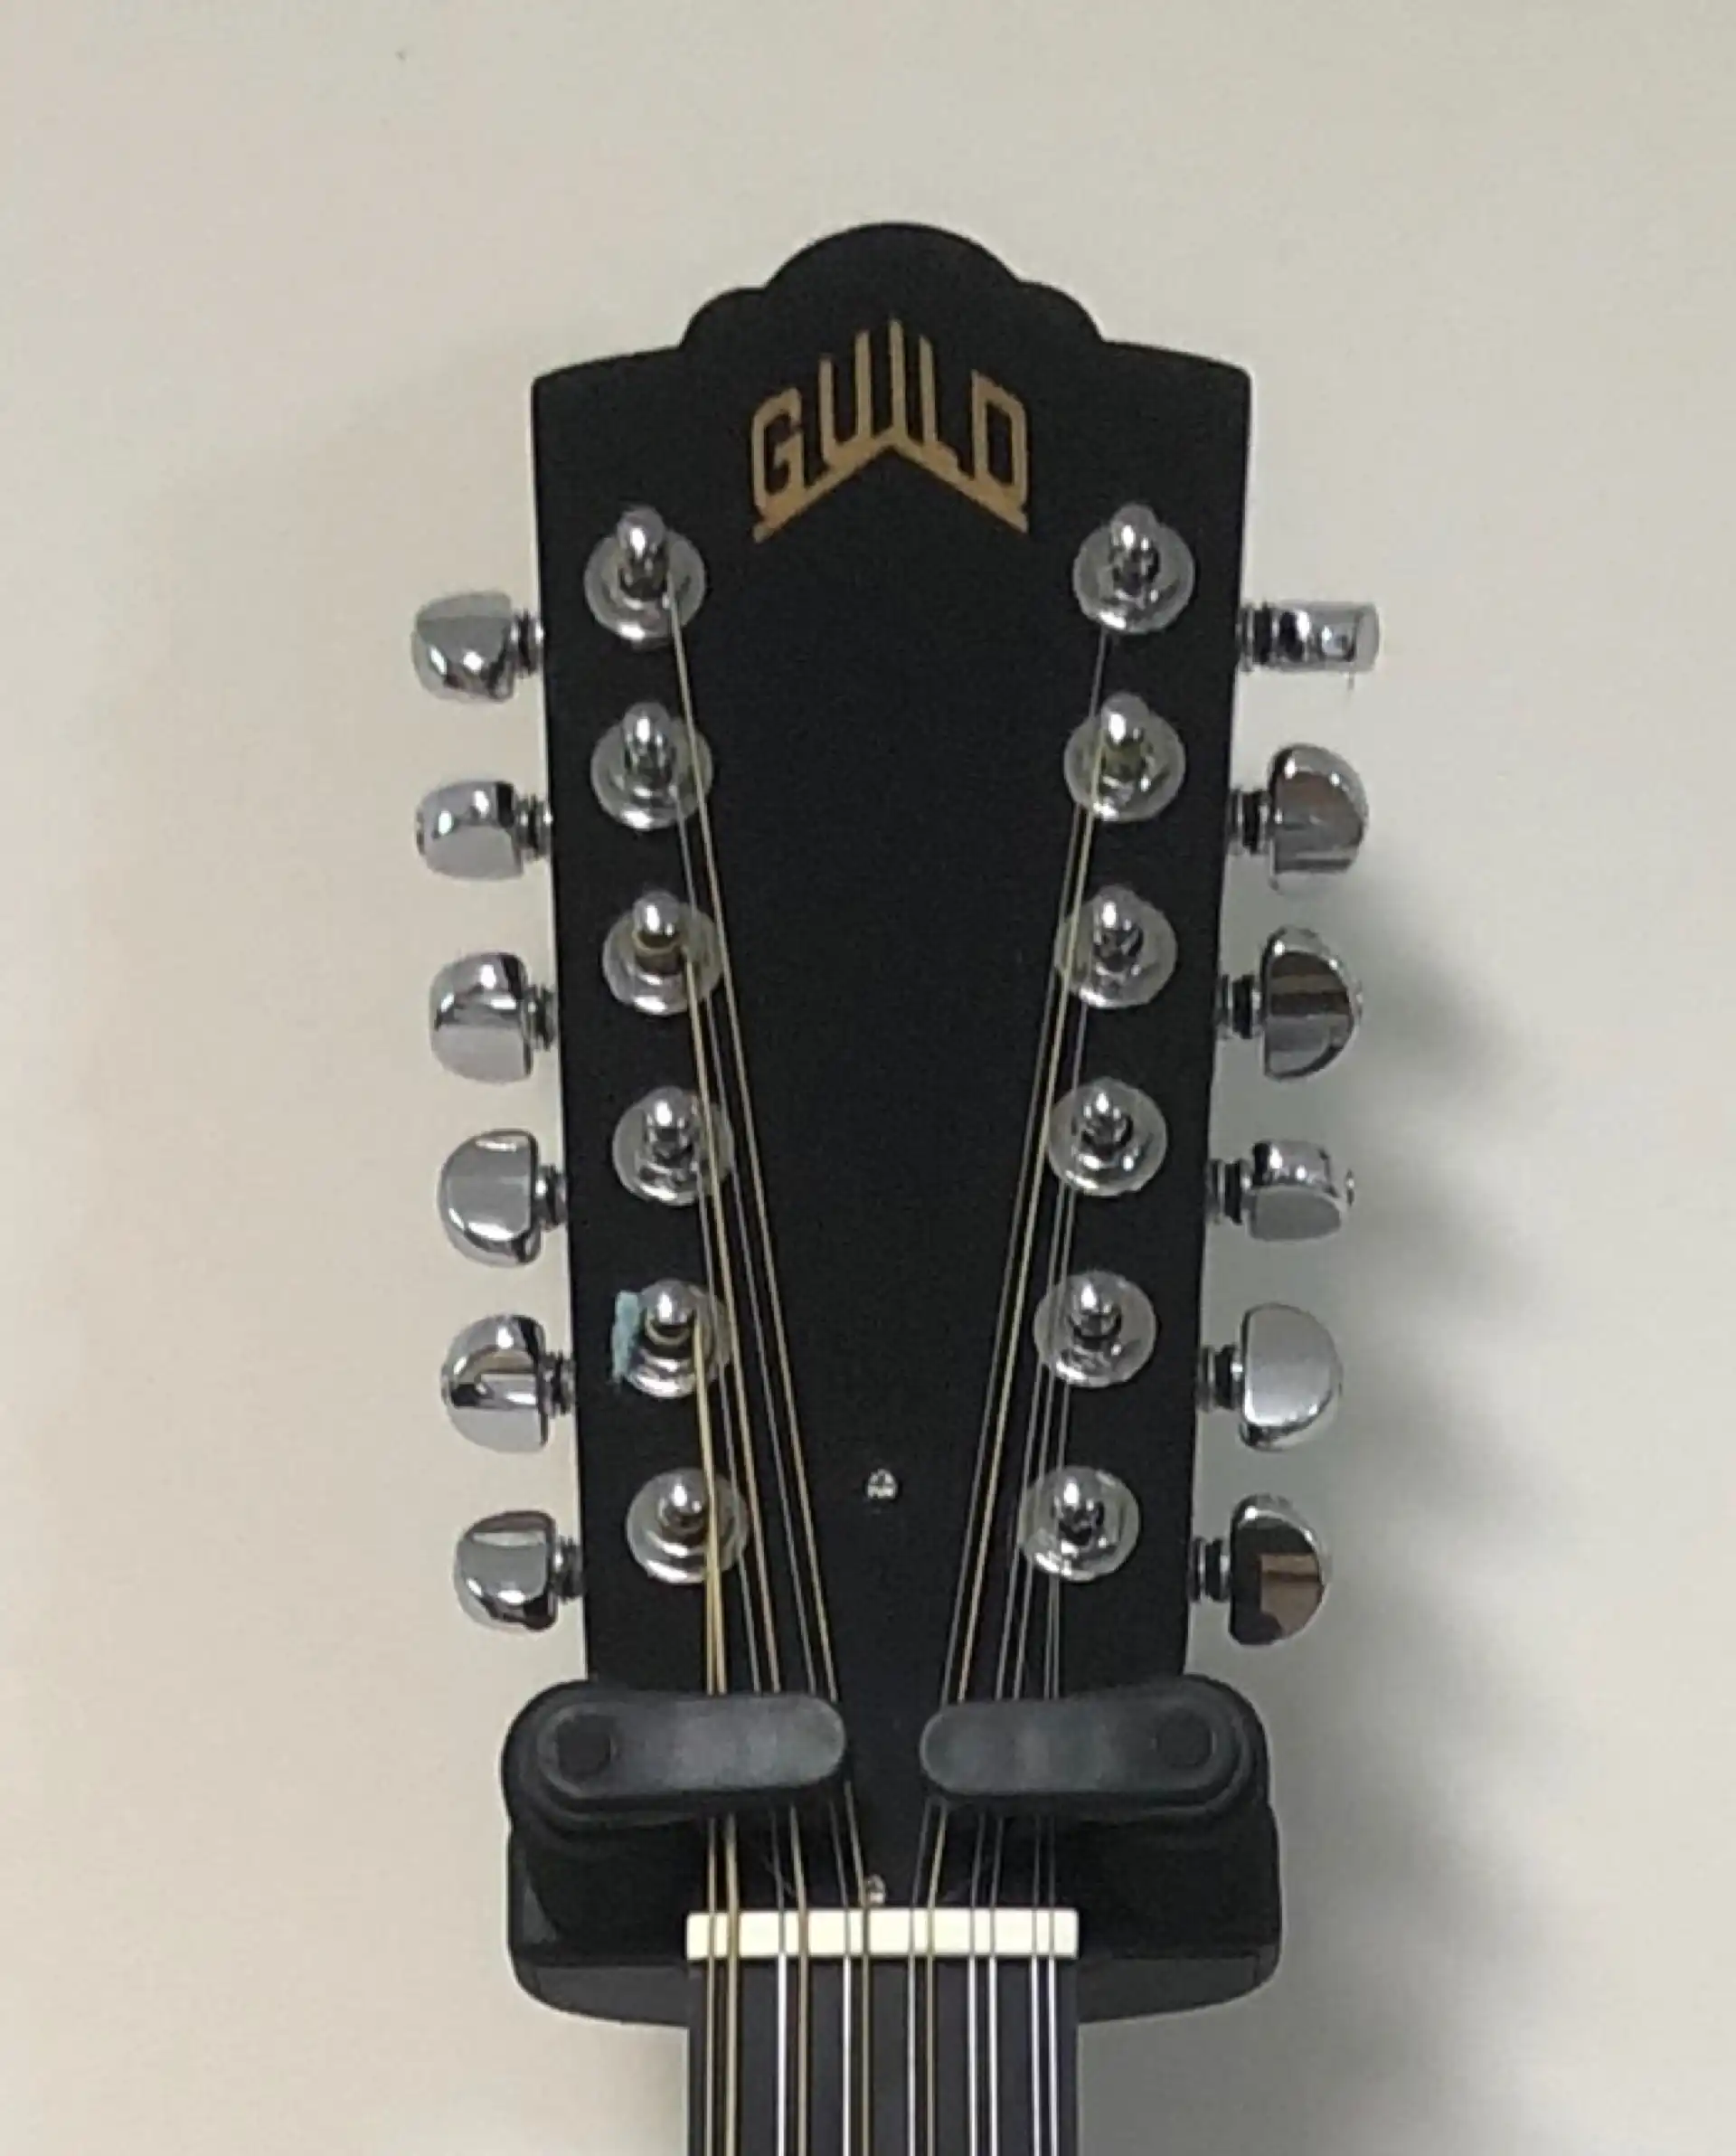
A friend’s son hand-delivered to me his dad’s Guild 12-string, a 90’s D4-12 NT, for repair. Back then, brand new out of Westerly, RI, this was an $800 guitar featuring a mahogany archback with mahogany sides, plastic fret position dots, plastic binding, minimal plastic purfling, dark-tinted (brown) back and sides, a satin finish, and a very unattractive soundboard with obvious runout (one half was visually much darker than the other).
The bridge had lifted significantly, making the guitar unplayable. I assured him this was a straighforward repair and I should be able to turn it around for him fairly quickly...once I was able to get to it. My plans were to keep the guitar in original condition. Ah, the best laid plans... often suffer from foot-in-mouth disease.
One year later - What should have been a simple repair had become a complete remake. Here is what happened:
With the strings loosened, the guitar went back into its case and took its place in line amongst the projects. Three or four months had passed before the Guild found its way again onto the shop bench, where I would begin to address the bridge lift.
Bridge lift
The most common cause of a bridge lifting off a soundboard is glue bond failure. The glue simply fails to secure the bridge to the soundboard, being overcome by a mere 250 lbs of string tension which is effectually trying to rip it off the face of the guitar. Repairing a guitar whose bridge has pulled away from the top due to glue failure under the bridge can be a very straightforward effort. Glue is squeezed into the opening between the bridge and the soundboard and the bridge is clamped down to allow the glue to dry. All done! And that is NOT what had happened to this Guild.
A less common cause of bridge lift is a cascading effect of glue bond failure, beginning with the glue holding the "X" brace to the soundboard. This type of failure permits the soundboard to really “belly” upward, away from the bracing. The bridge is inadvertently angled forward just enough to let the string tension have its way. At this point, either the glue bond holding the bridge to the soundboard fails or, worse, the wood of the soundboard shears. Either way, the bridge pivots forward (or sometimes tears off completely).
When I had first seen the guitar, when it was first brought to me, I had assumed (and hoped) the bridge lift was simply due to bridge glue failure. When inspecting a bridge lift it is customary to check for bracing glue failure, which I did. That is when my suspicion was aroused, suspicion that the bridge lift was due to wood shear, not bridge glue failure, alone. I was able to slide a palette knife between a significant section of the "X" brace and the soundboard. A common repair shop solution at this stage is to force glue between the brace and soundboard, clamp it closed, and glue the bridge back down.
I don't do common very well. So I set out to verify my suspicion by removing the bridge.
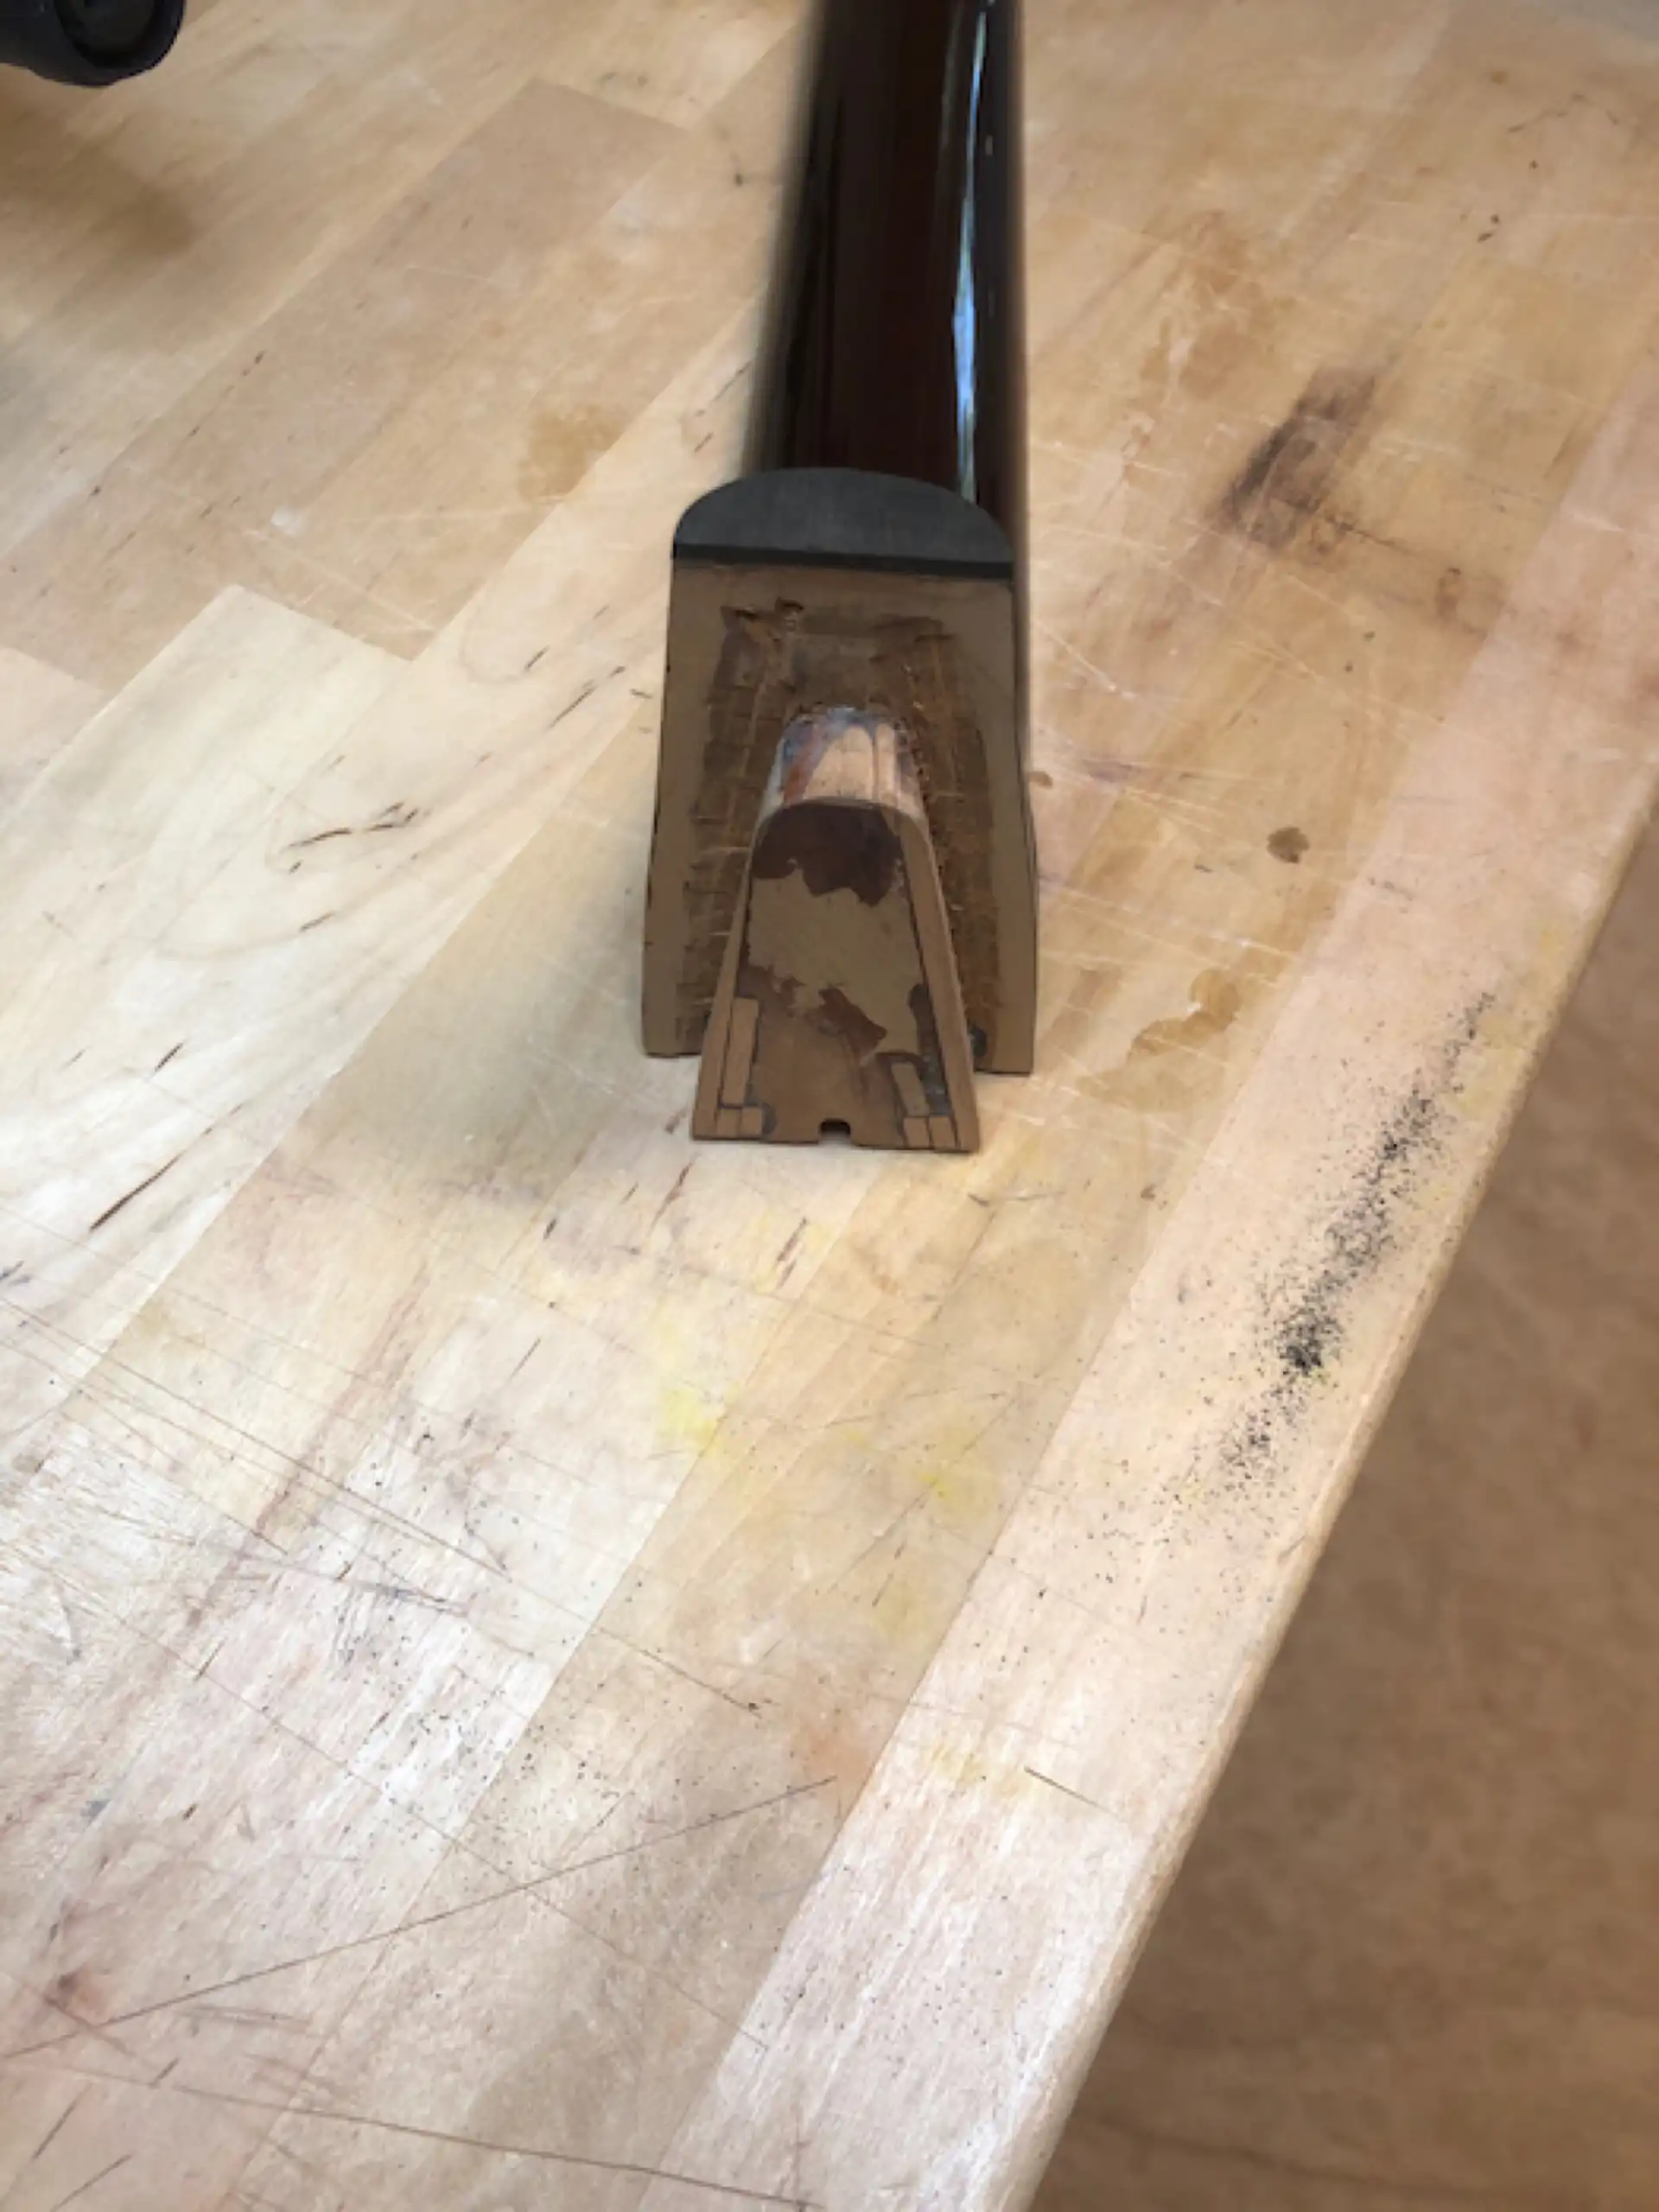
Bridge removal
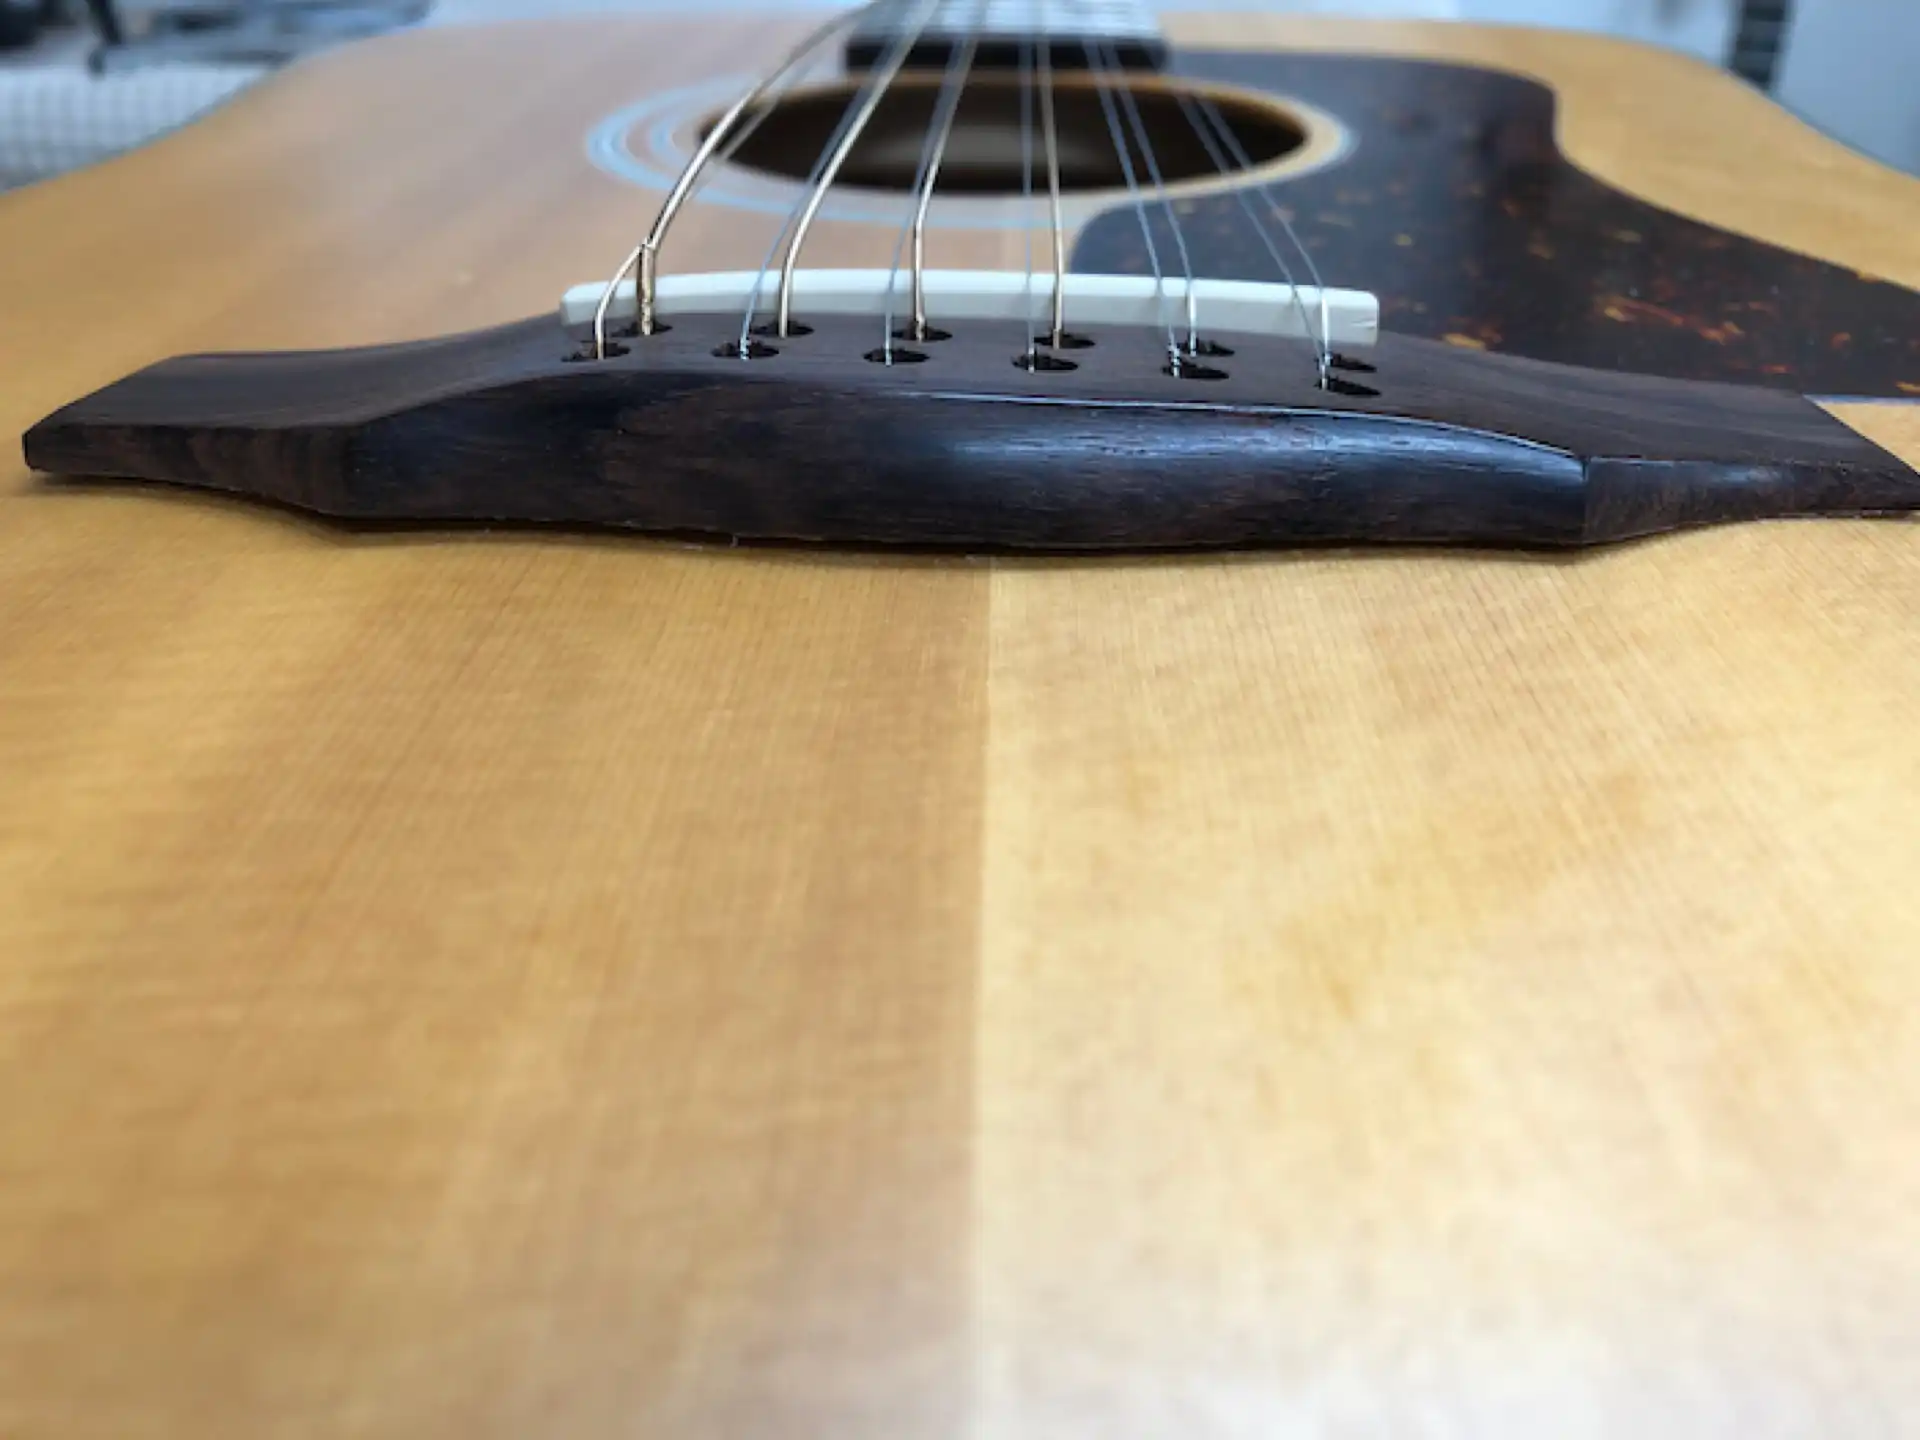
Beneath the bridge, the runout was so severe on the soundboard that when it sheared away from beneath the bridge it tore the wood out completely above the bridgeplate (the bridgeplate hides the view of the shearing condition from inside the guitar making it impossible to determine the extent of the damage without bridge removal). The wood of the soundboard was splintered about 1/2″ in front of the bridge, as well.
I glued the splintered wood down, then routed out the outline of the bridge down to the bridgeplate. I added new wood into the routed cavity and planed it smooth. I added glue between the brace and soundboard in the section where I had been able to slide the palette knife and left everything to dry. I then prepared the guitar for refinishing.
Ready to finish
I did a complete fret job on the guitar, as the frets were original from 1994. I fashioned a bone nut and saddle and strung the guitar, eager to hear the results. The sound did not disappoint, as it was quintessential Guild. I recall walking the instrument out to my wife so she could hear it, and got the nod of approval.
I left the instrument overnight as I planned to buff it out the next day. I almost contacted the owner's sons with the good news, but got busy with something and never called.
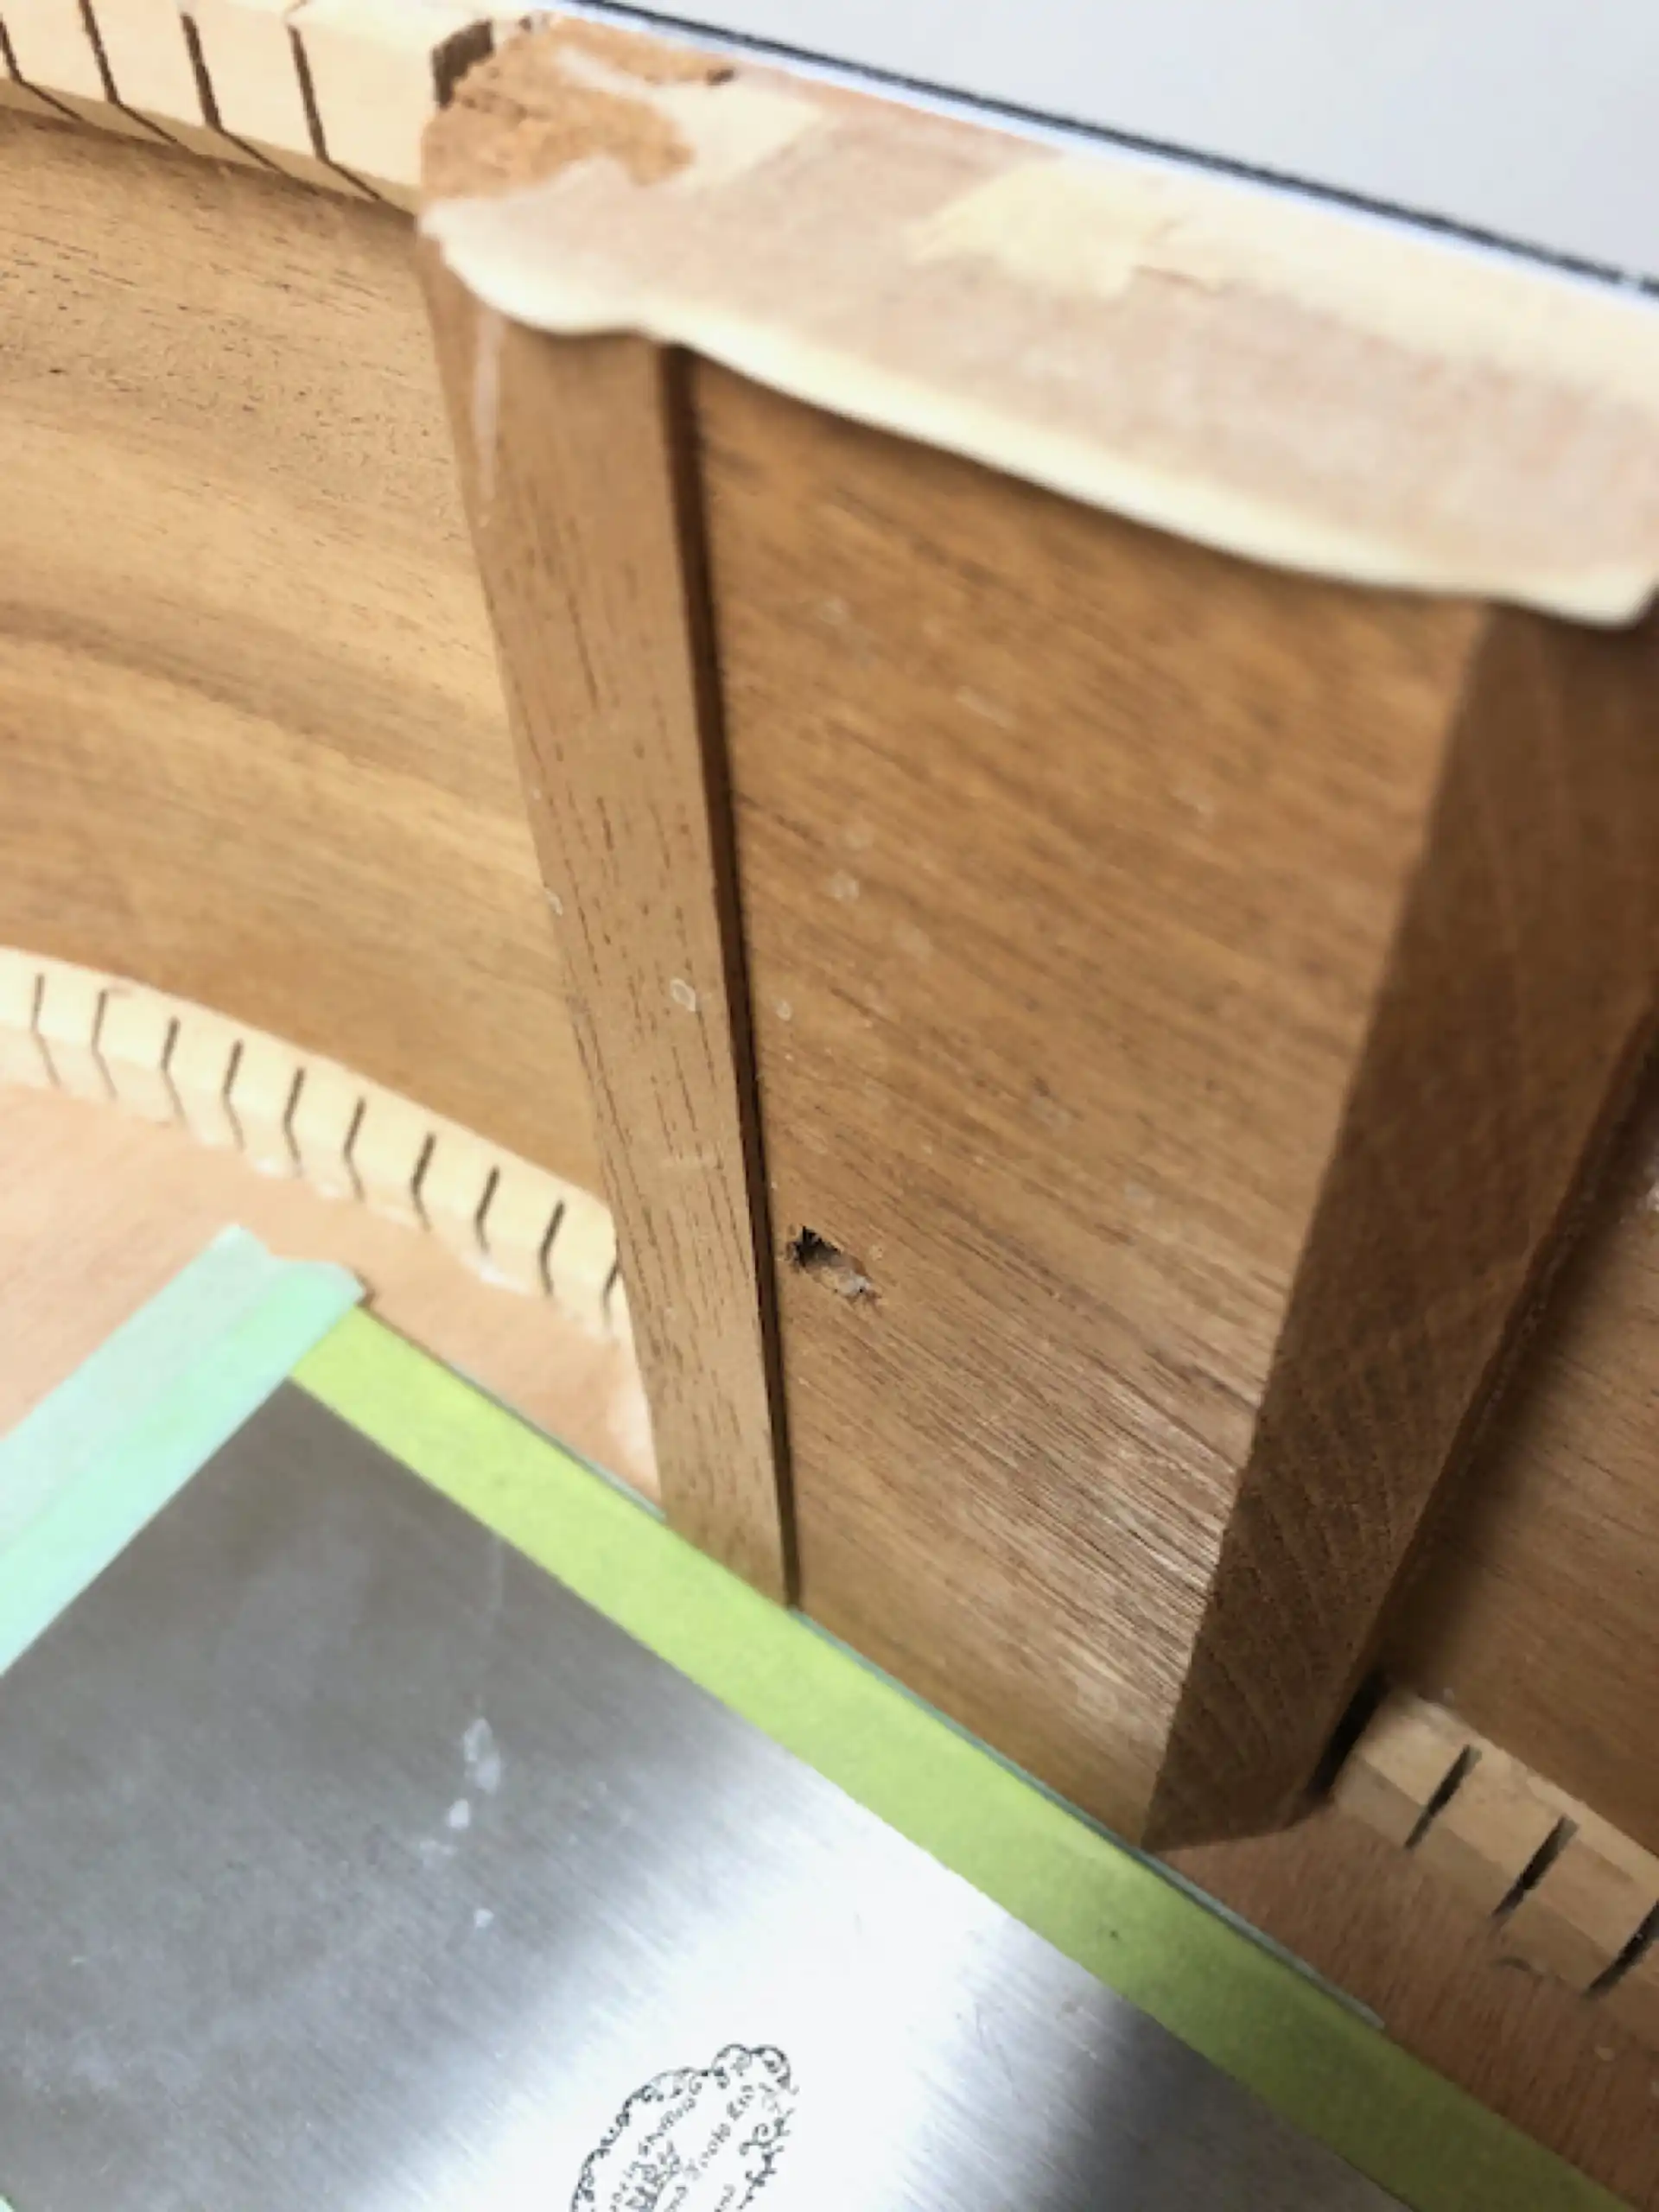
That next day I went to retrieve the guitar for buffing and nearly wept when I saw the condition of the soundboard... the bridge was intact, as was the section of the soundboard I had re-glued to the bracing. The problem was that the rest of the soundboard was no longer intact. It had it had nearly completely torn loose from the guitar just behind the bridge! The wood of the soundboard actually sheared off of itself! It was horrifying to behold! At this point the top was obviously ruined.
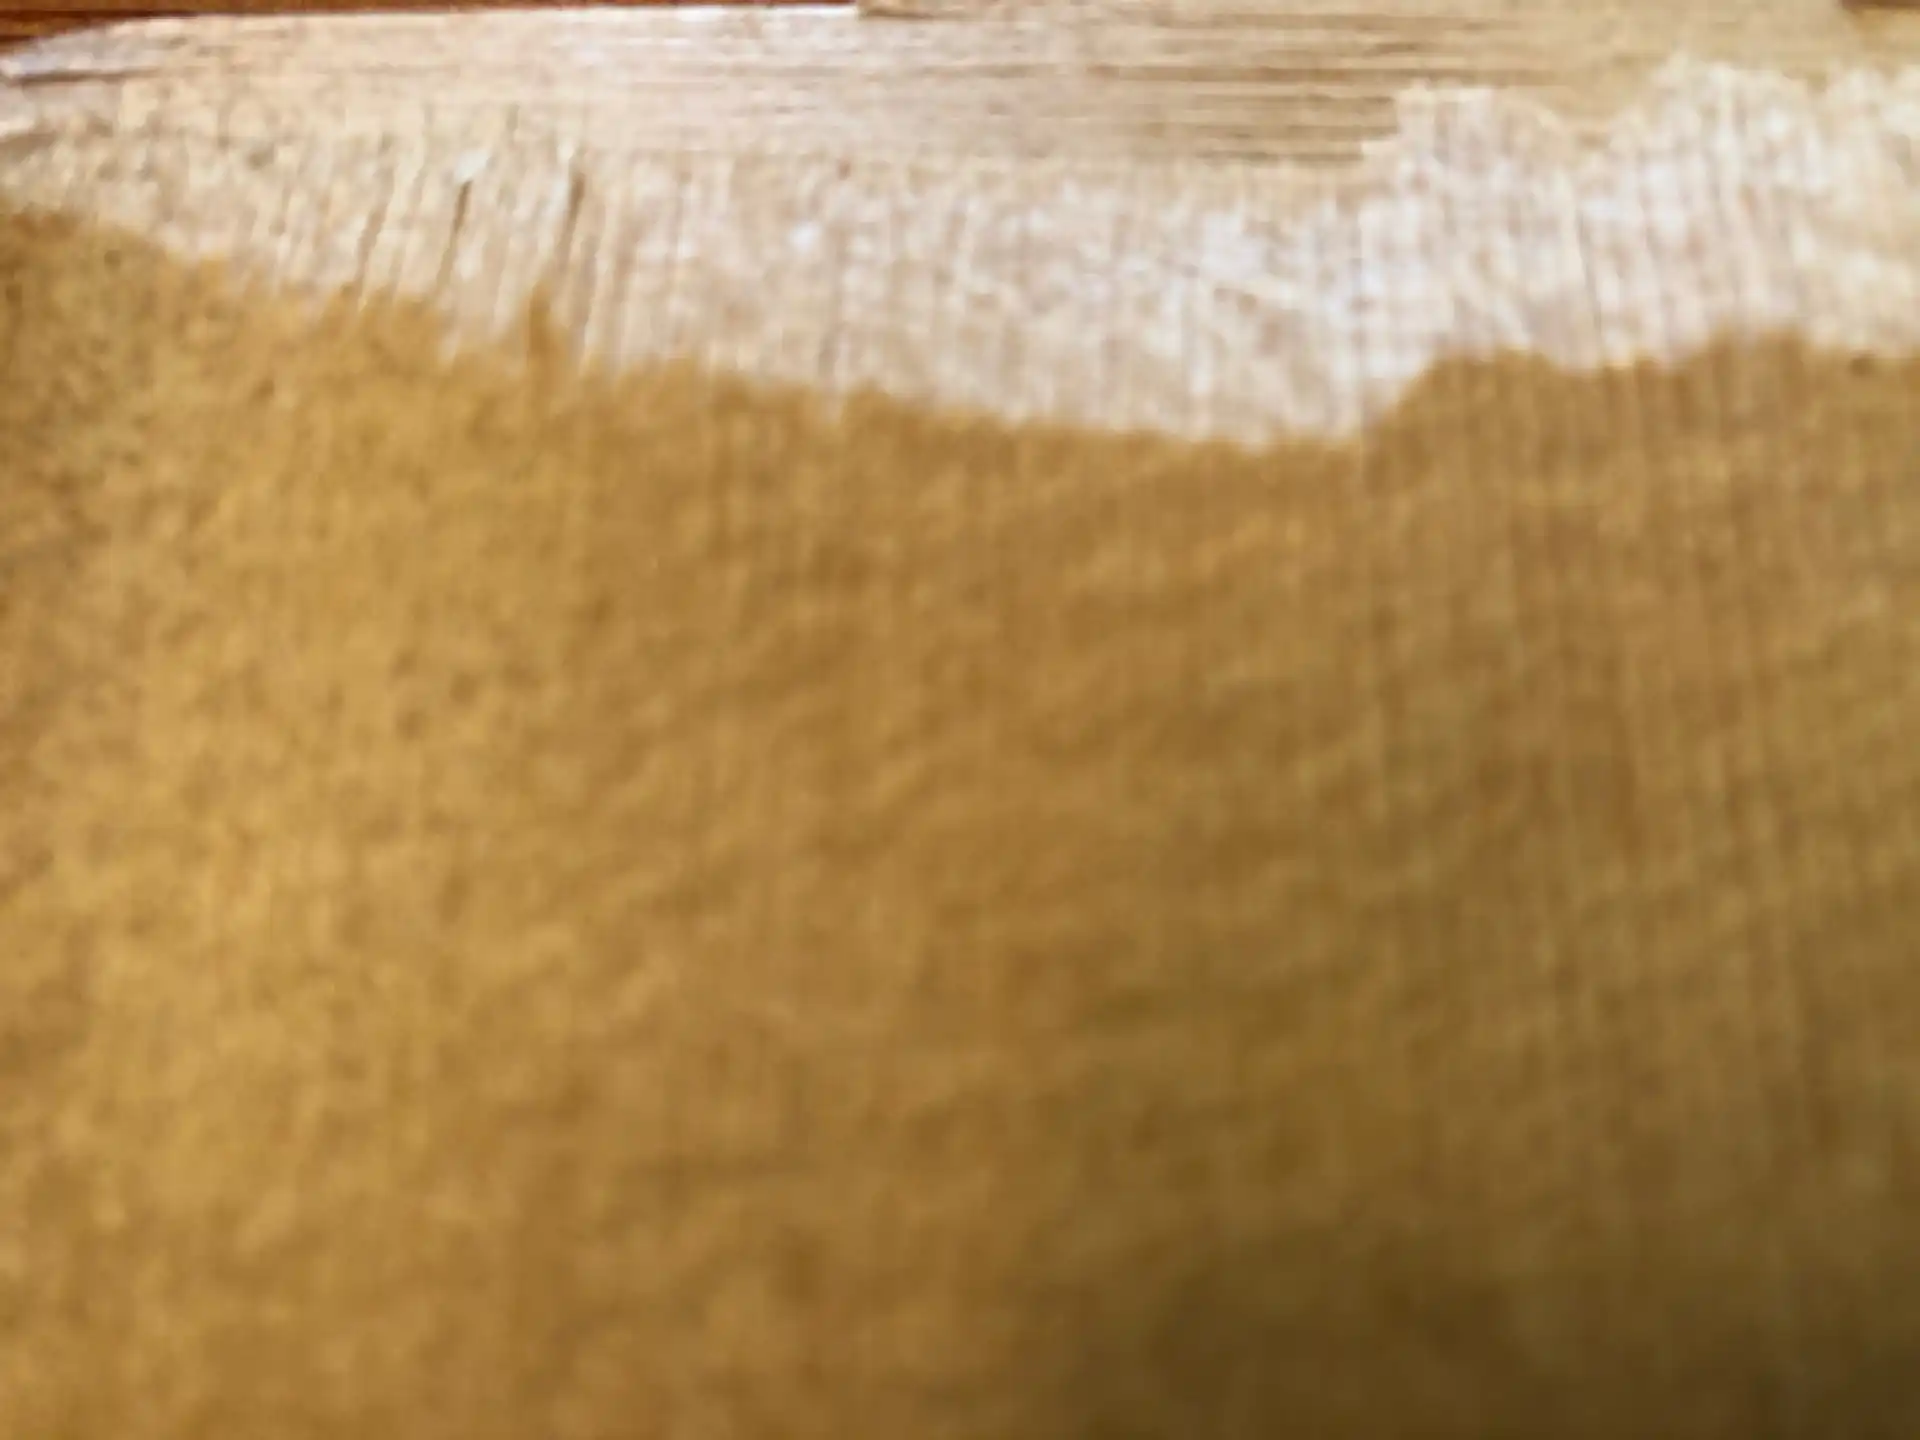
Runout
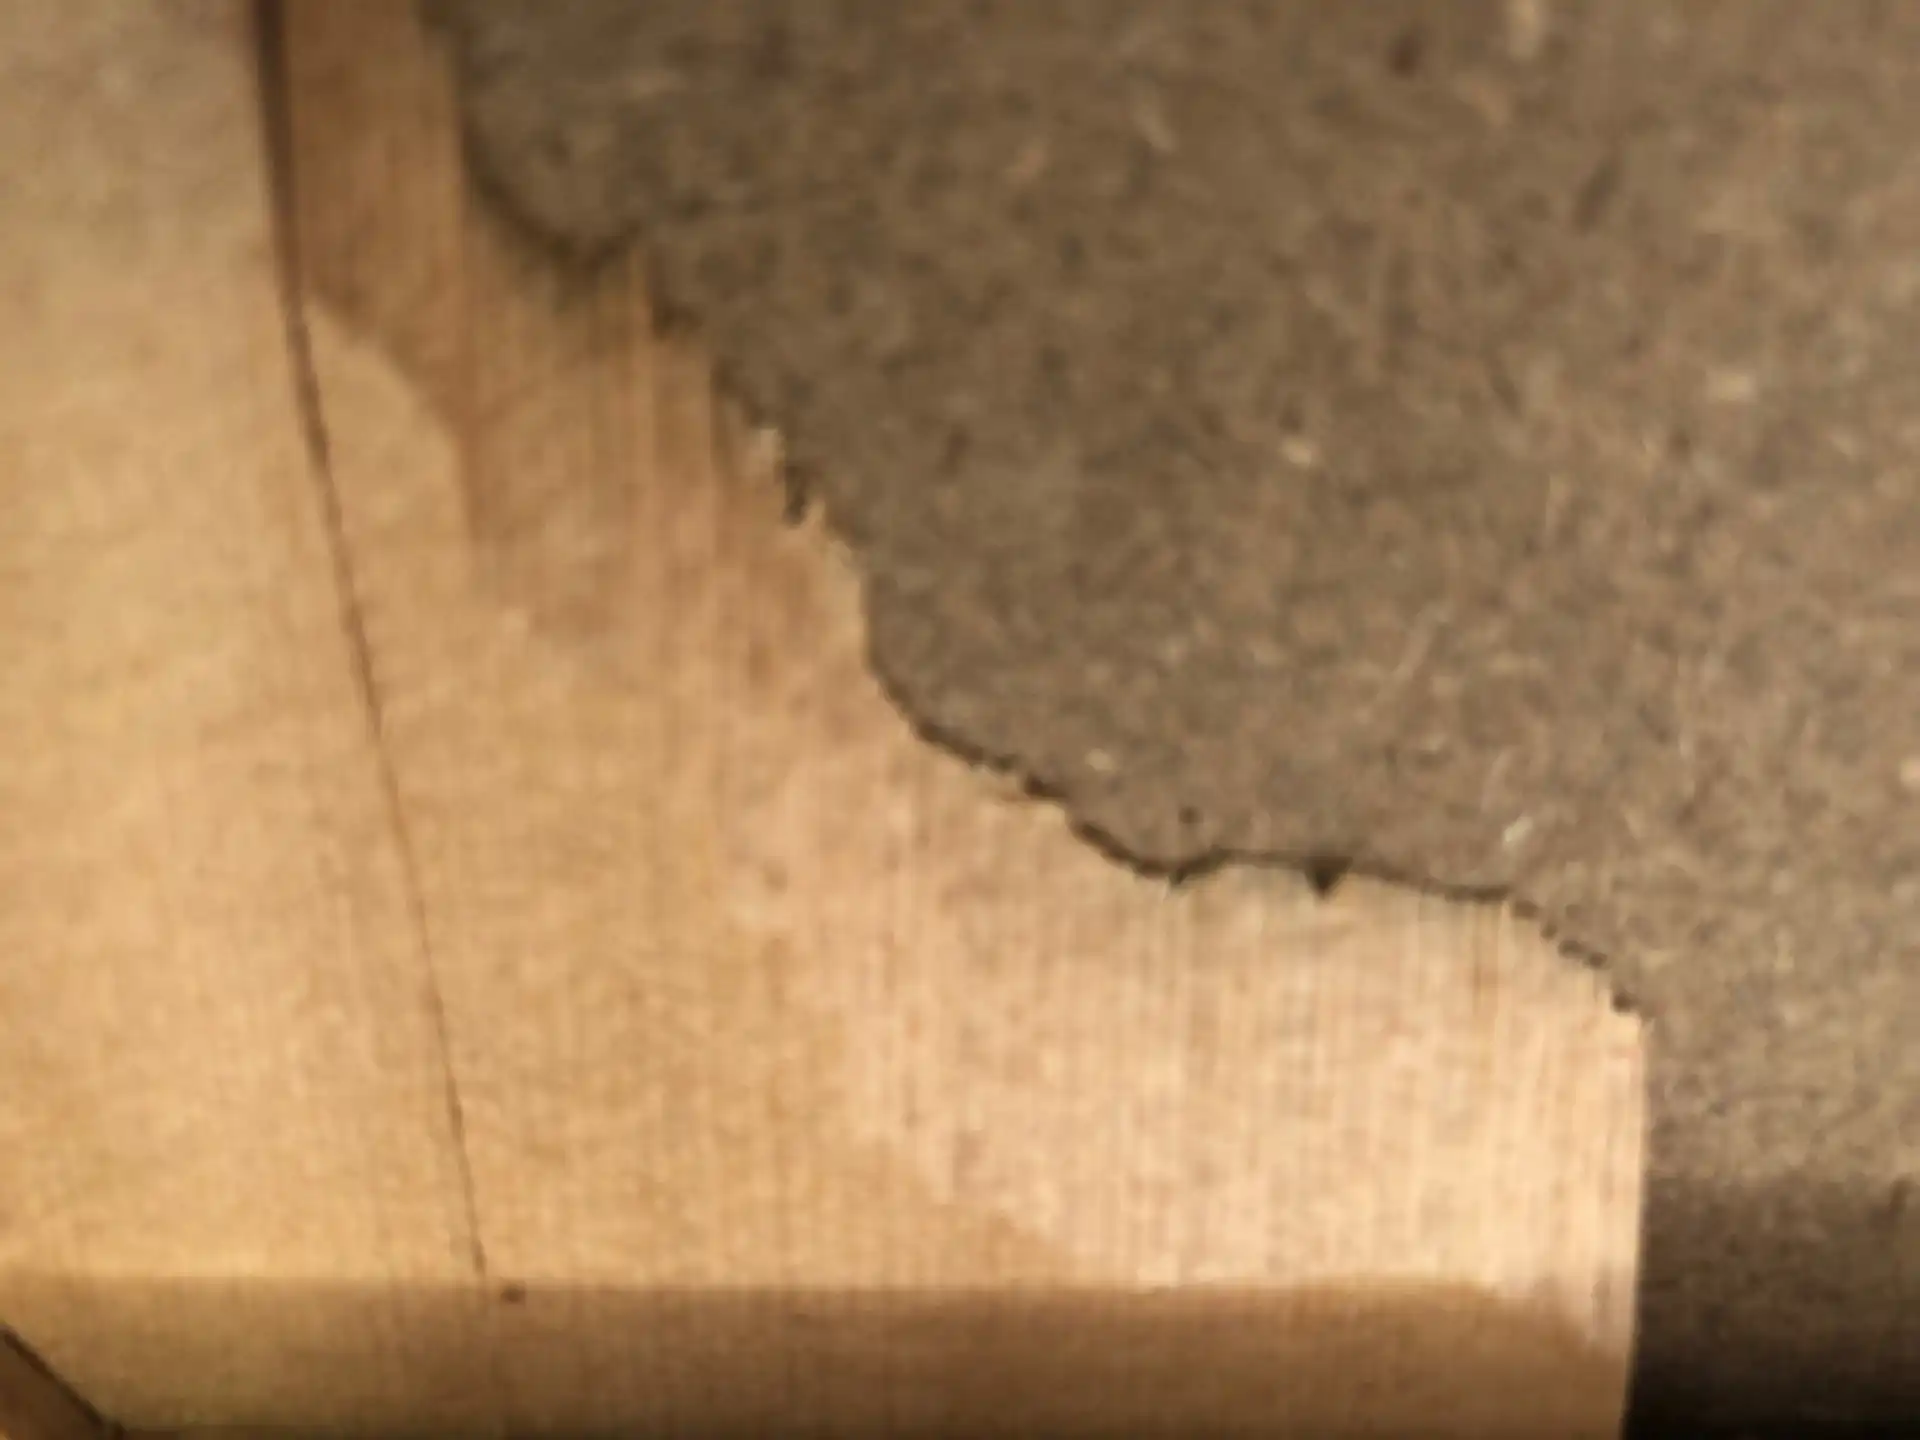
More Runout
There was only one thing to do: this guitar was getting a Cozad overhaul! That meant first removing the neck. In the event I am going to put things back together and retain the original finish, I like to carefully scribe the lacquer where the neck joins the body, as it makes for a cleaner removal...
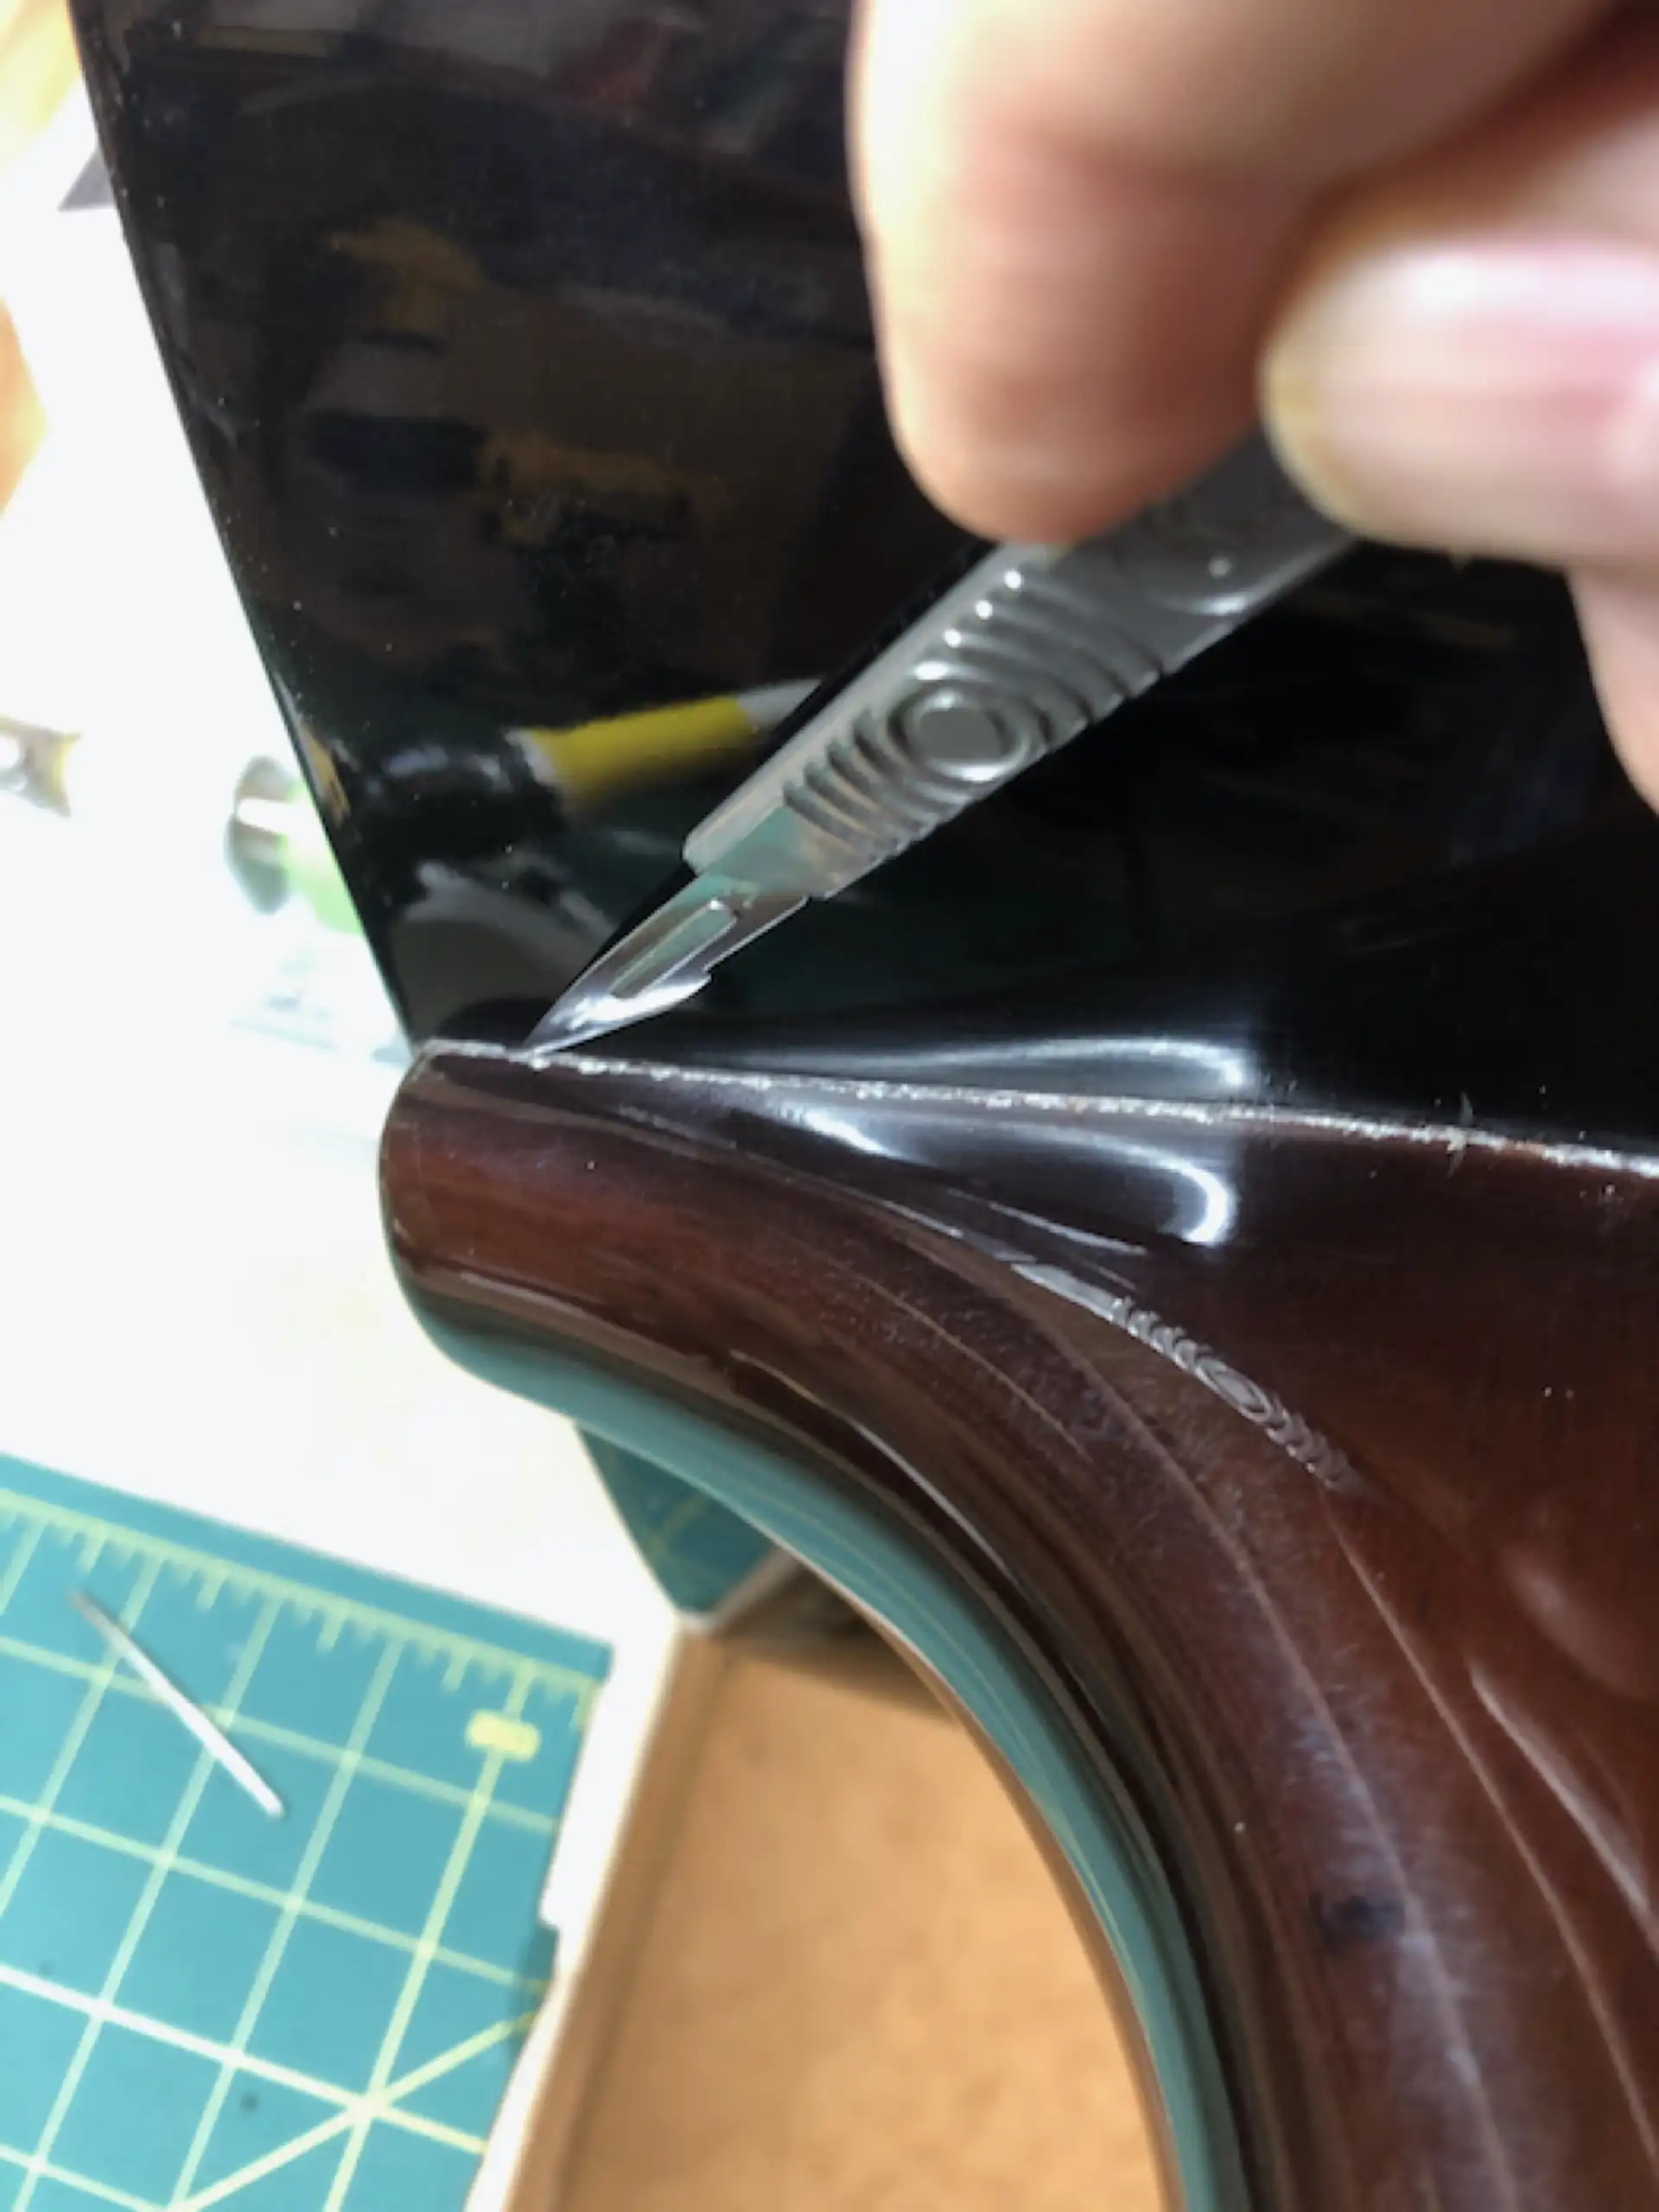
Preparing to Remove the Neck
Having removed the fretwire directly above the neck-to-body joint (my brand new fret job!), I drilled two holes through the fret slot and down into the dovetail joint. A little heat using my favorite no-water-necessary neck removal tool (simply an accessory tip for my digital soldering station) and the neck came off nicely.
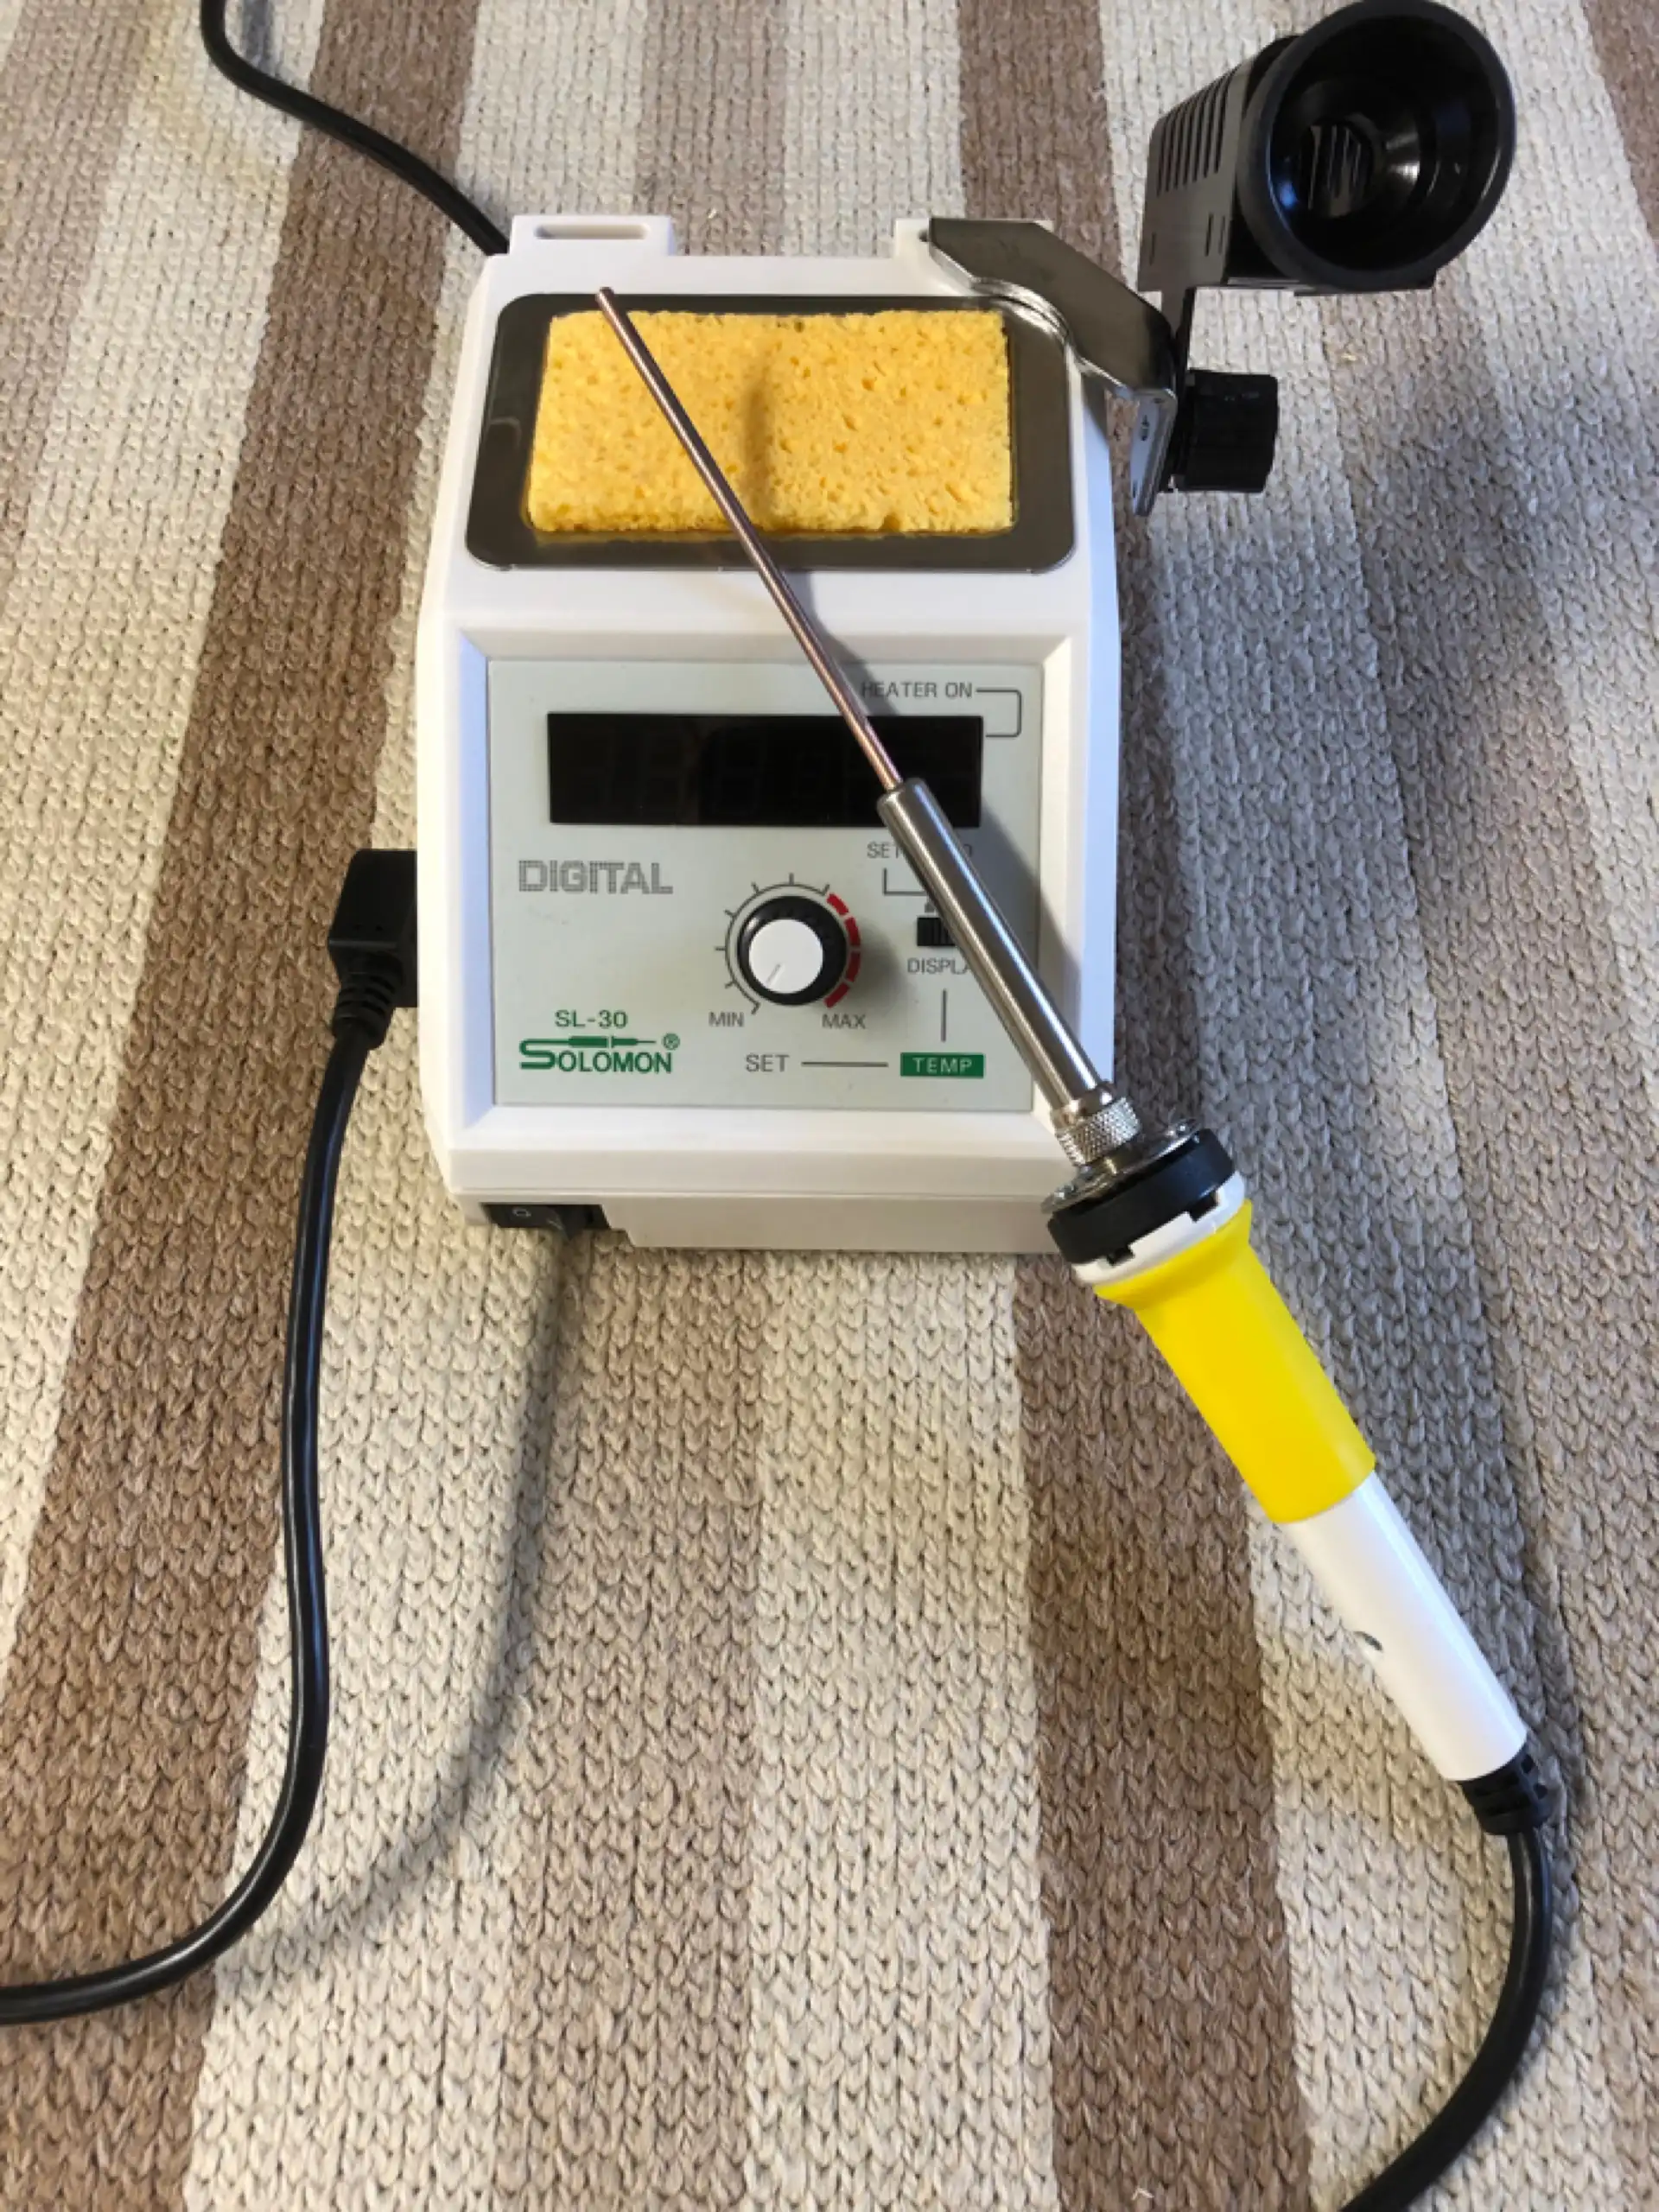
Neck Heatstick
The dovetail tenon was one of the most chewed up and sloppiest cut tenons I have ever encountered, quite a surprise for a Guild guitar. I can only guess at what decisions were made back when this guitar was assembled. I rebuilt the tenon with Mahogany and epoxy.
Dovetail Neck Tenon
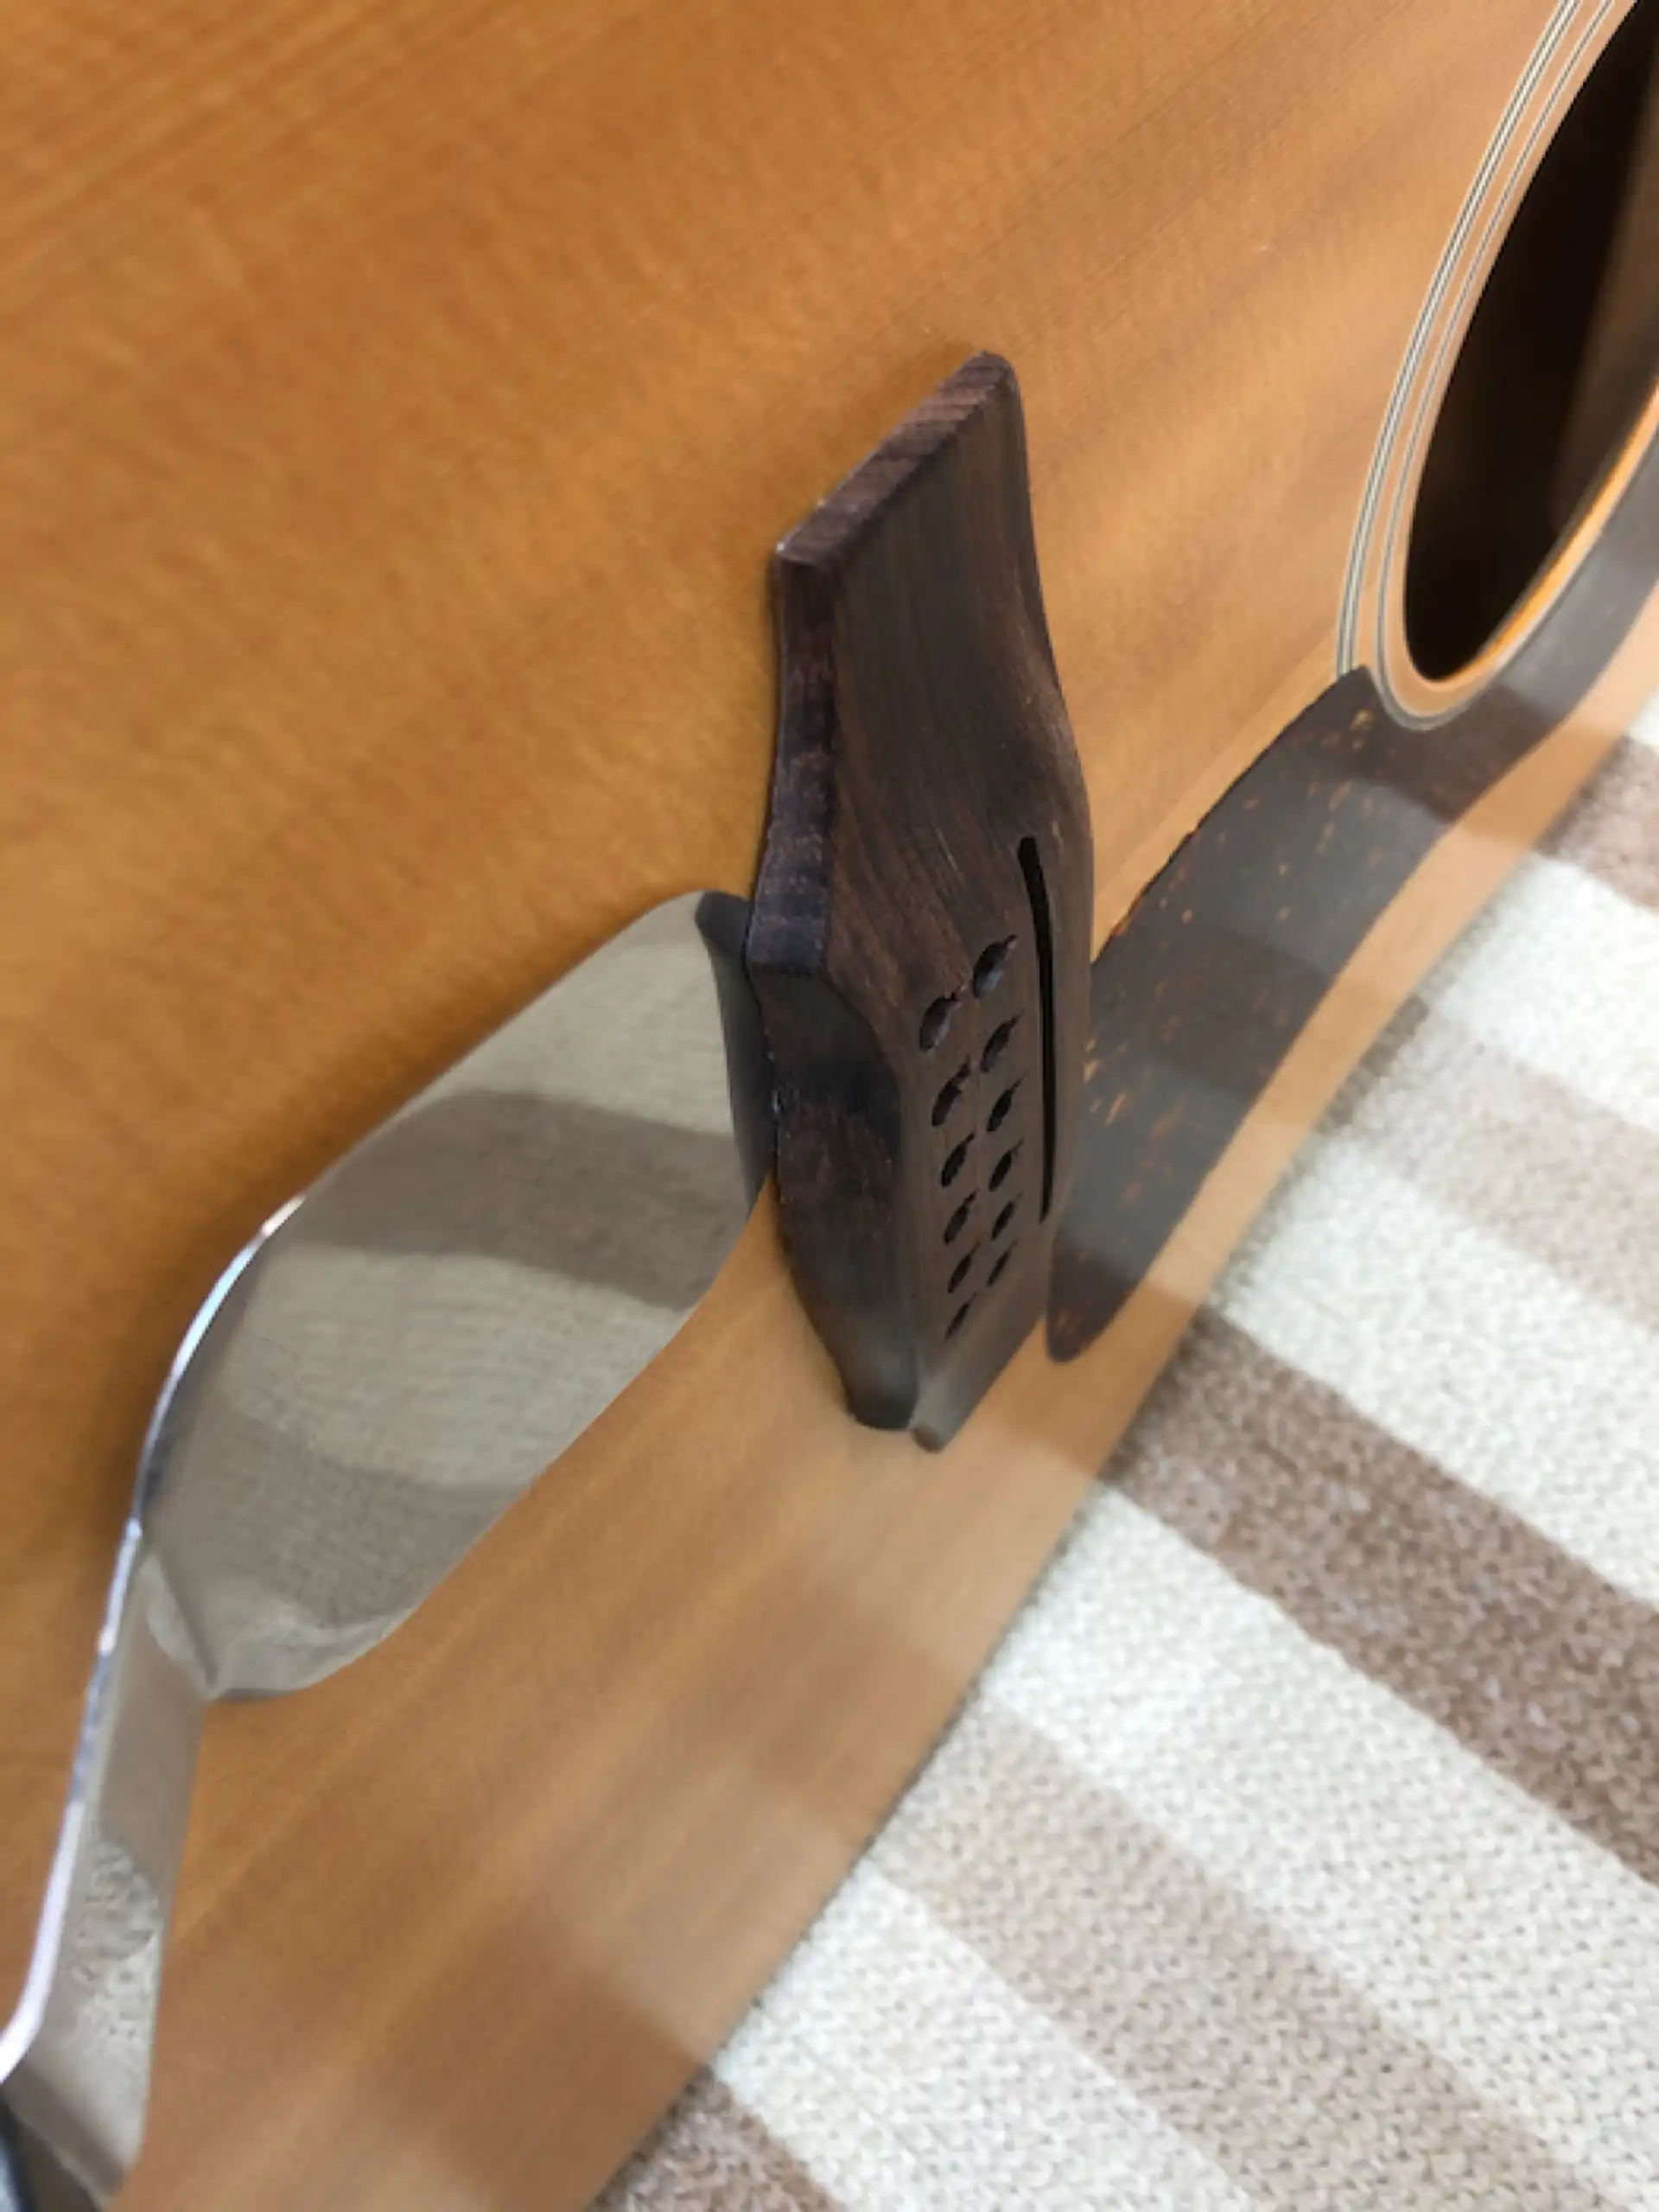
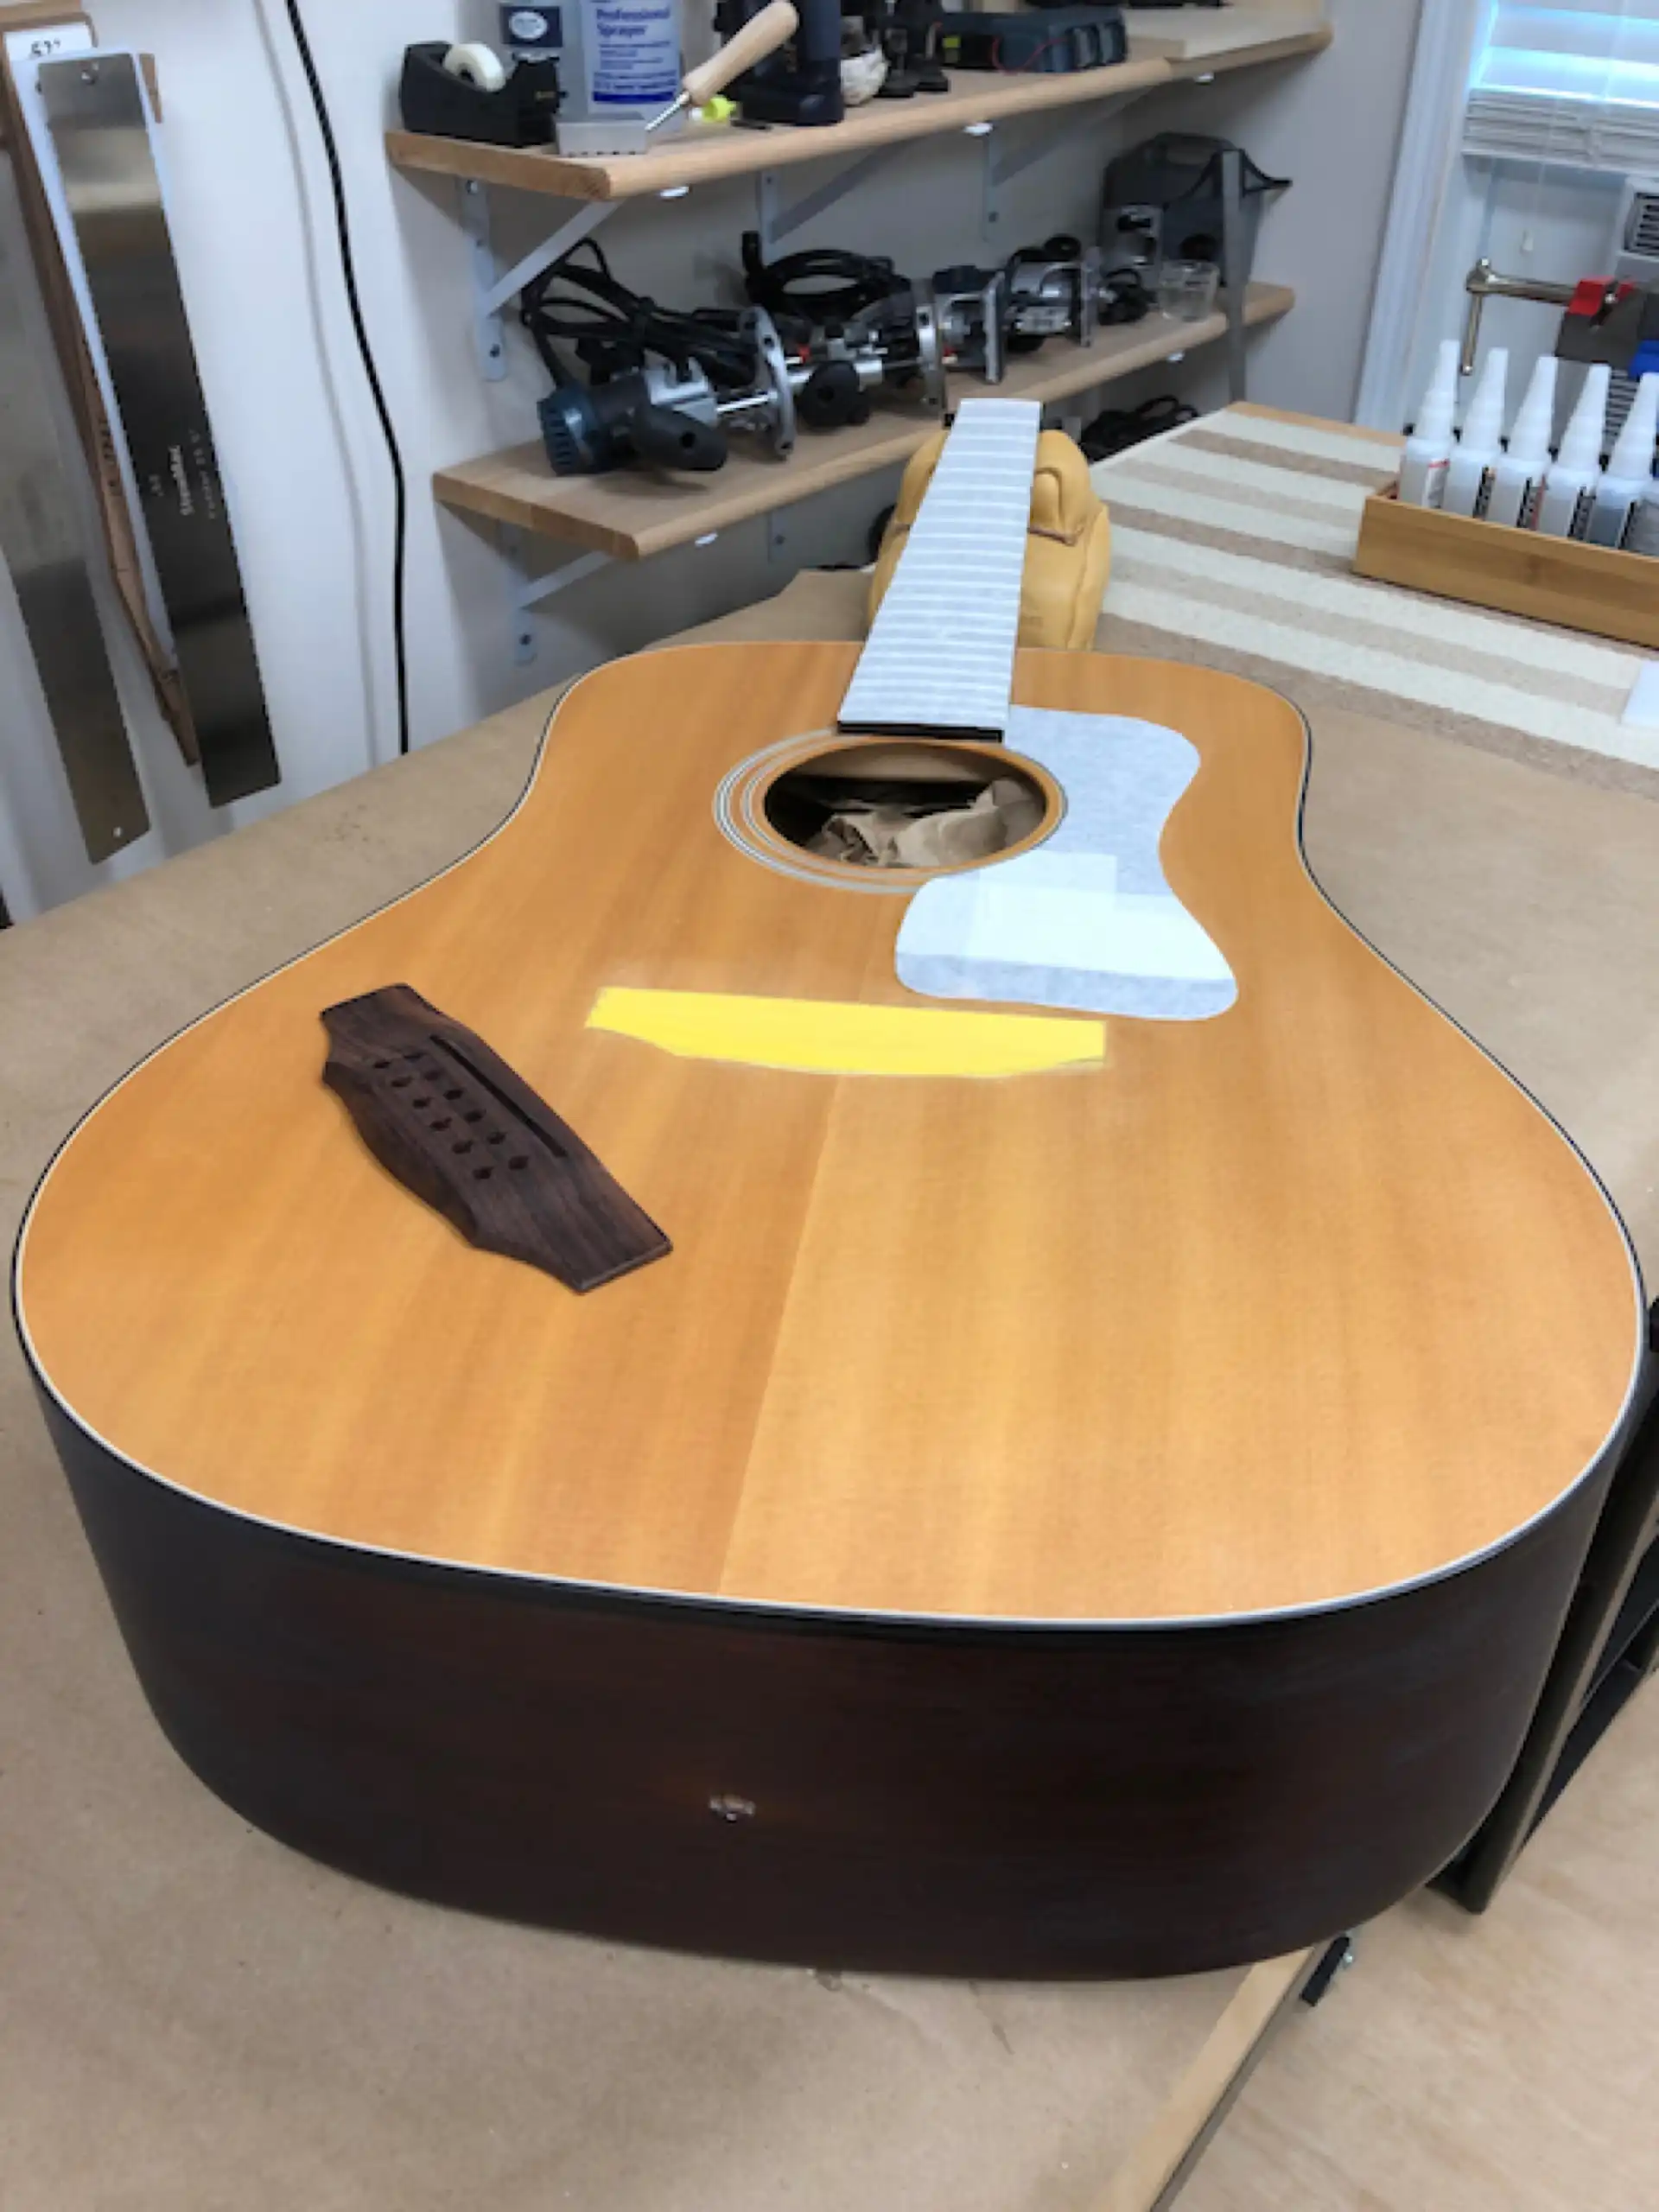
Next up - remove the top. There are two ways to accomplish this task, and both are pretty straightforward. One involves simply cutting through the binding from the side of the guitar. The other involves routing through the top, removing it from the kerfing. I used the first option and had a look insde the box. What caught my eye was the curious addition of a stick lightly glued onto the tailblock. I assume it was used to counterbalance the weight, as the tailblock had been glued on off-center.
Tailblock
I didn't like the stick, so I took it off. I also braced the sides and cleaned up all the slopped and glopped on glue that had never been removed.
Side bracing
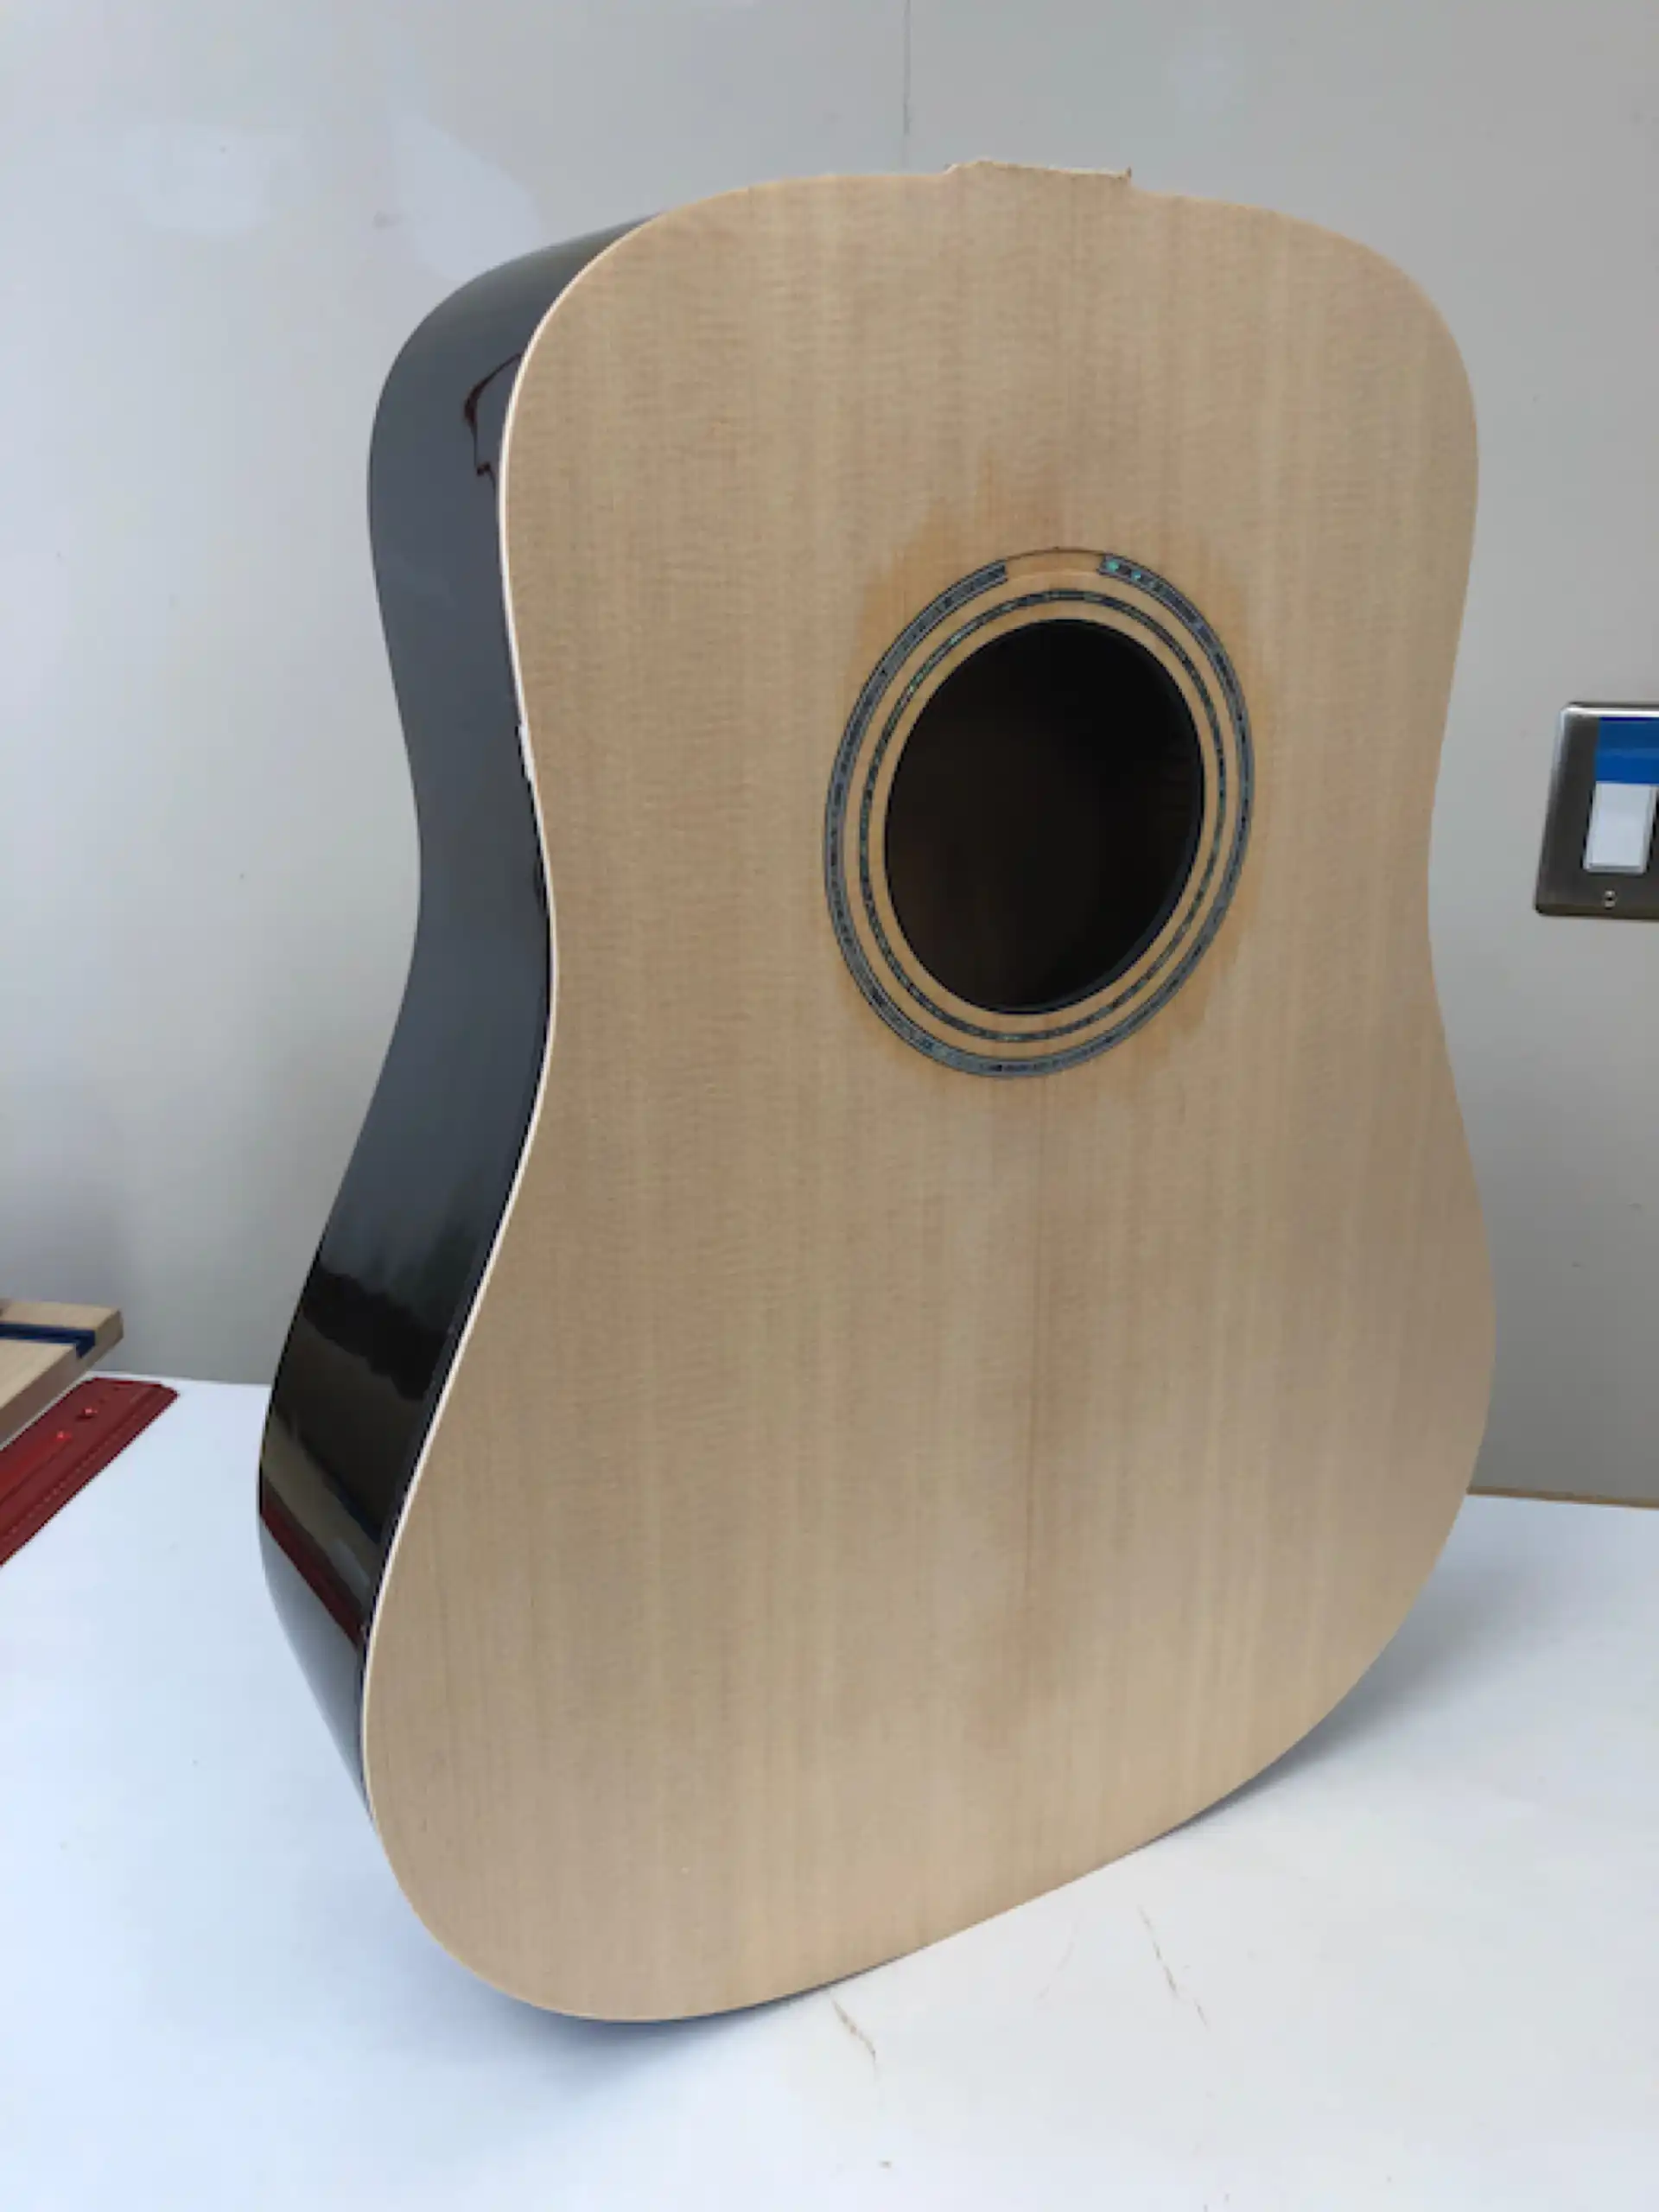
Now I turned my attention to the focal point of the acoustic guitar - the soundboard. I went to my stash of AAA Sitka tops that I had acquired from a former Westerly employee and selected just the right one for my friends guitar. None of that dreaded runout would be allowed back on this instrument, no sir! I started with some Paua inlay around the soundhole.
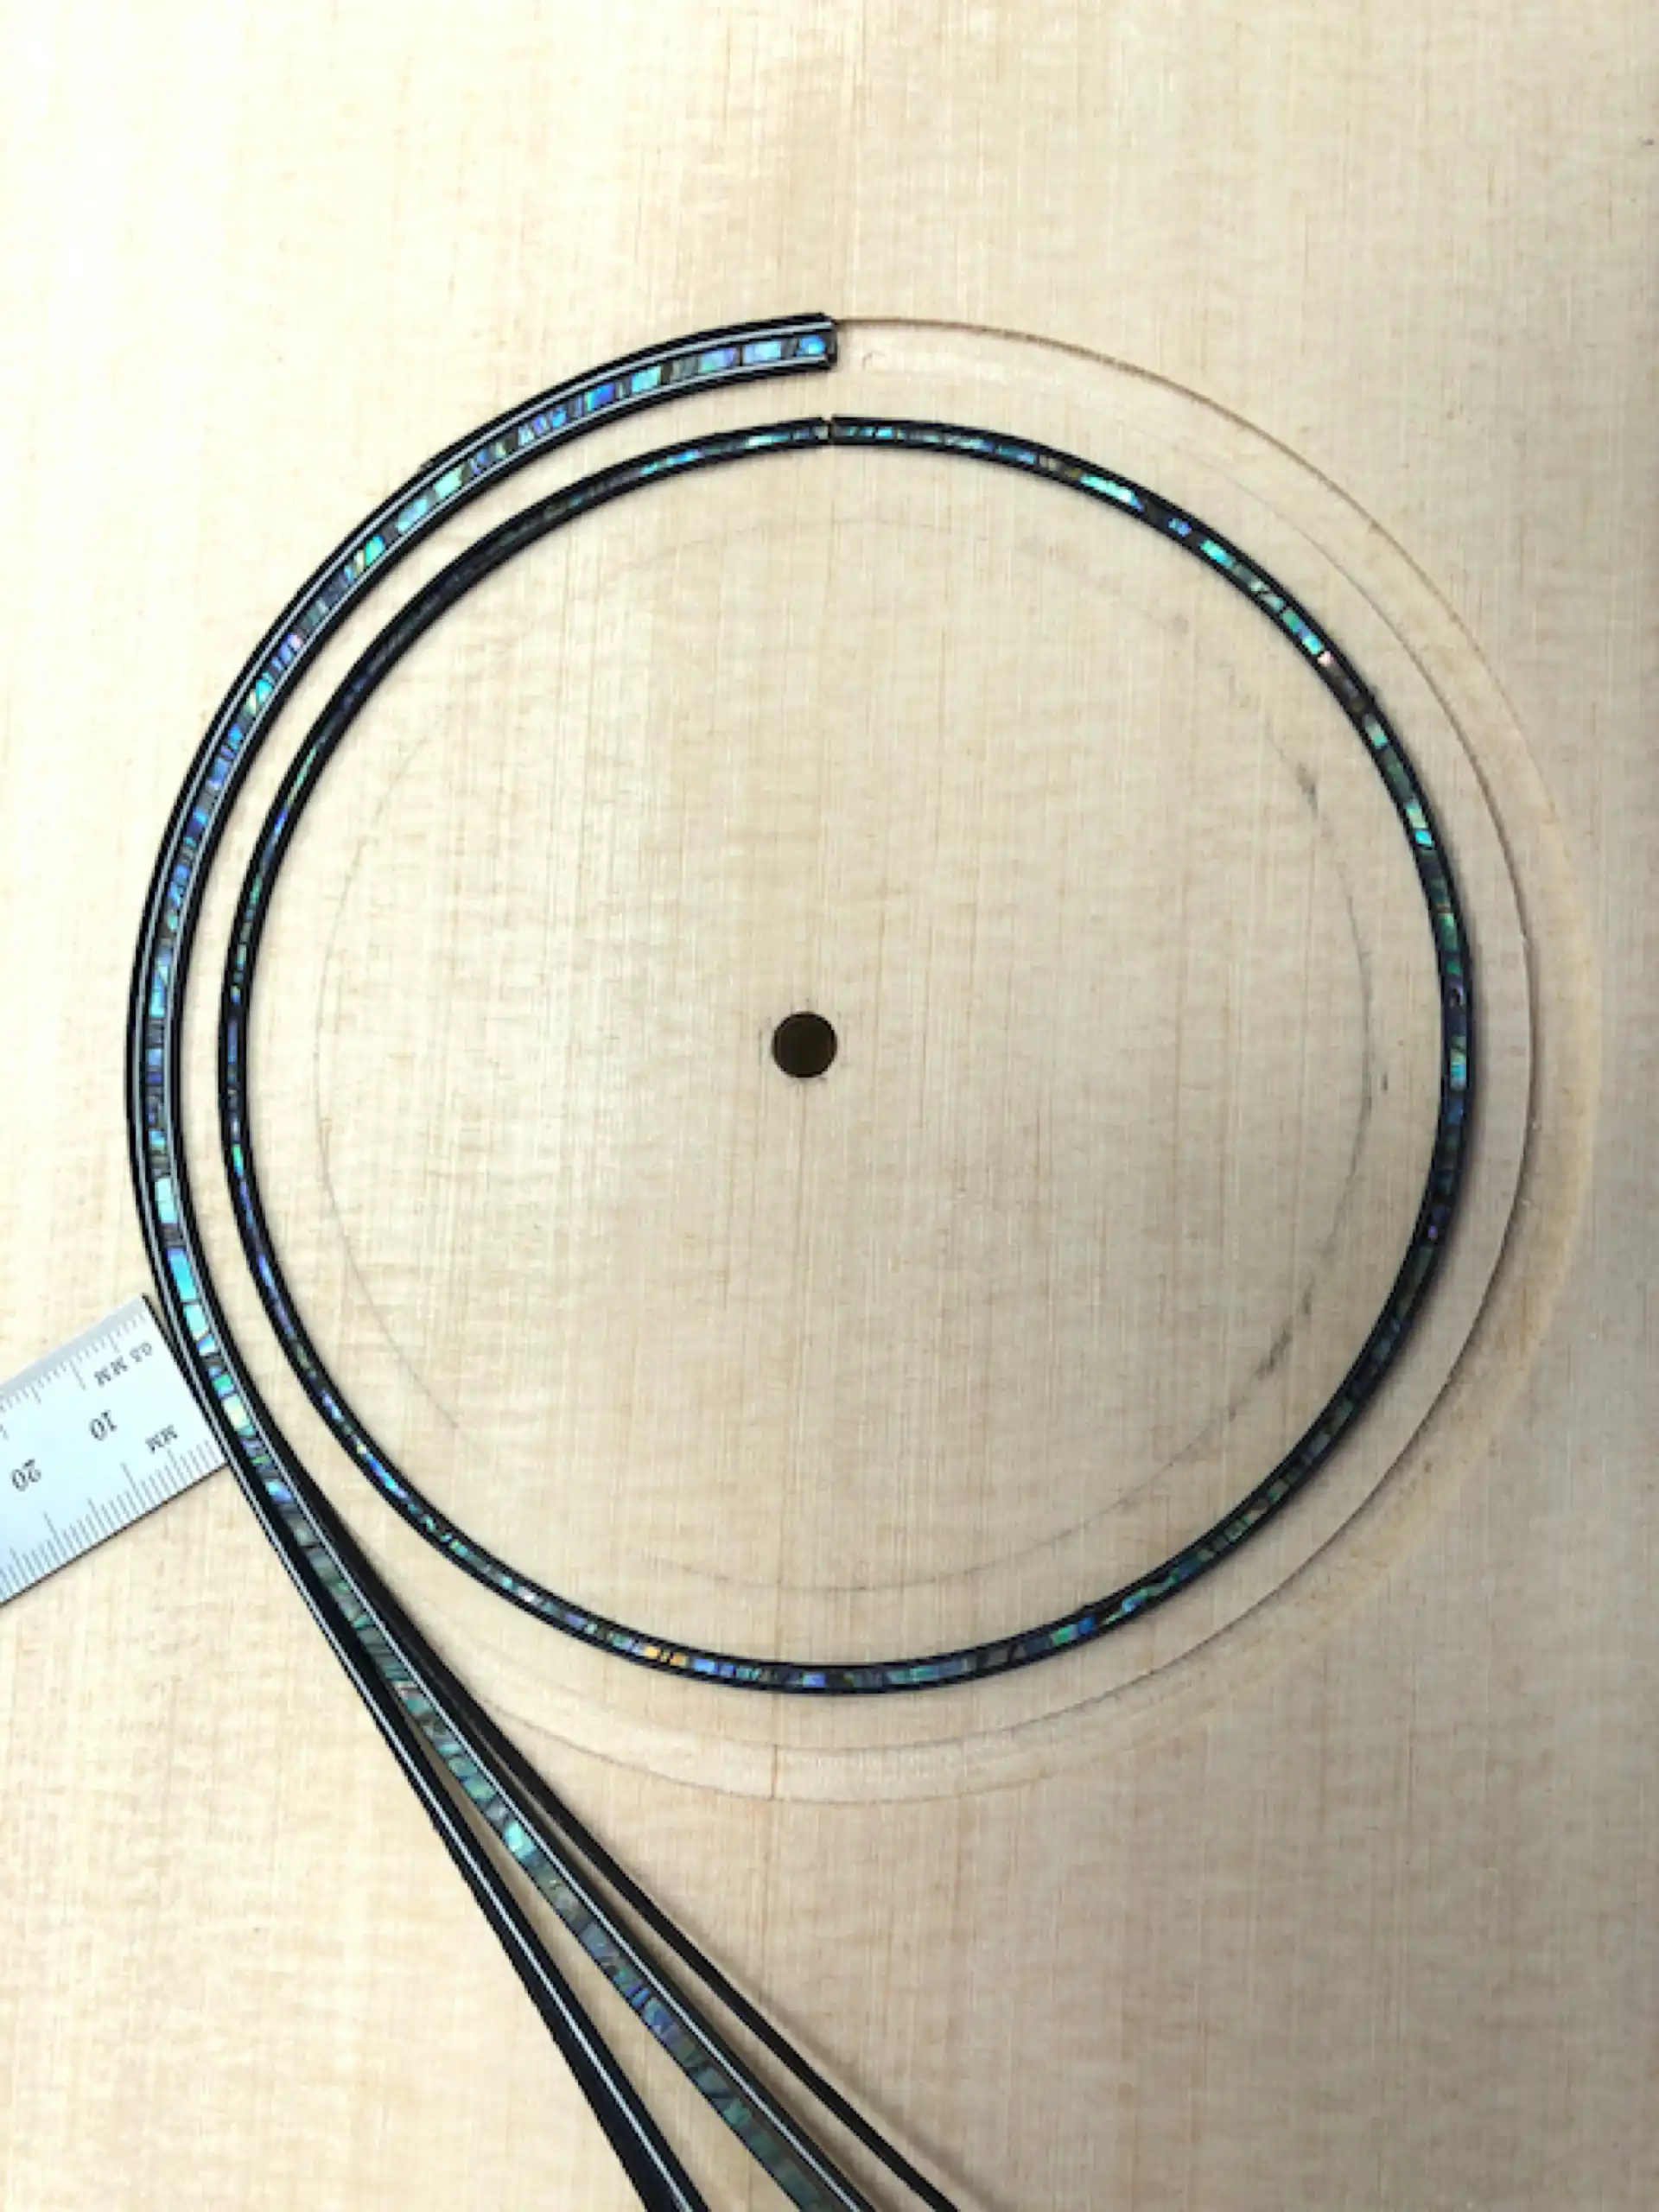
Soundhole Inlay
I custom cut my braces from a large stash of Adirondack (Red) Spruce. I radiused the braces to fit the slight contour of the inside of the top (I have been using a 50 foot radius for nearly all my soundboards, as was used during the era of the so-called “flatop” guitars).
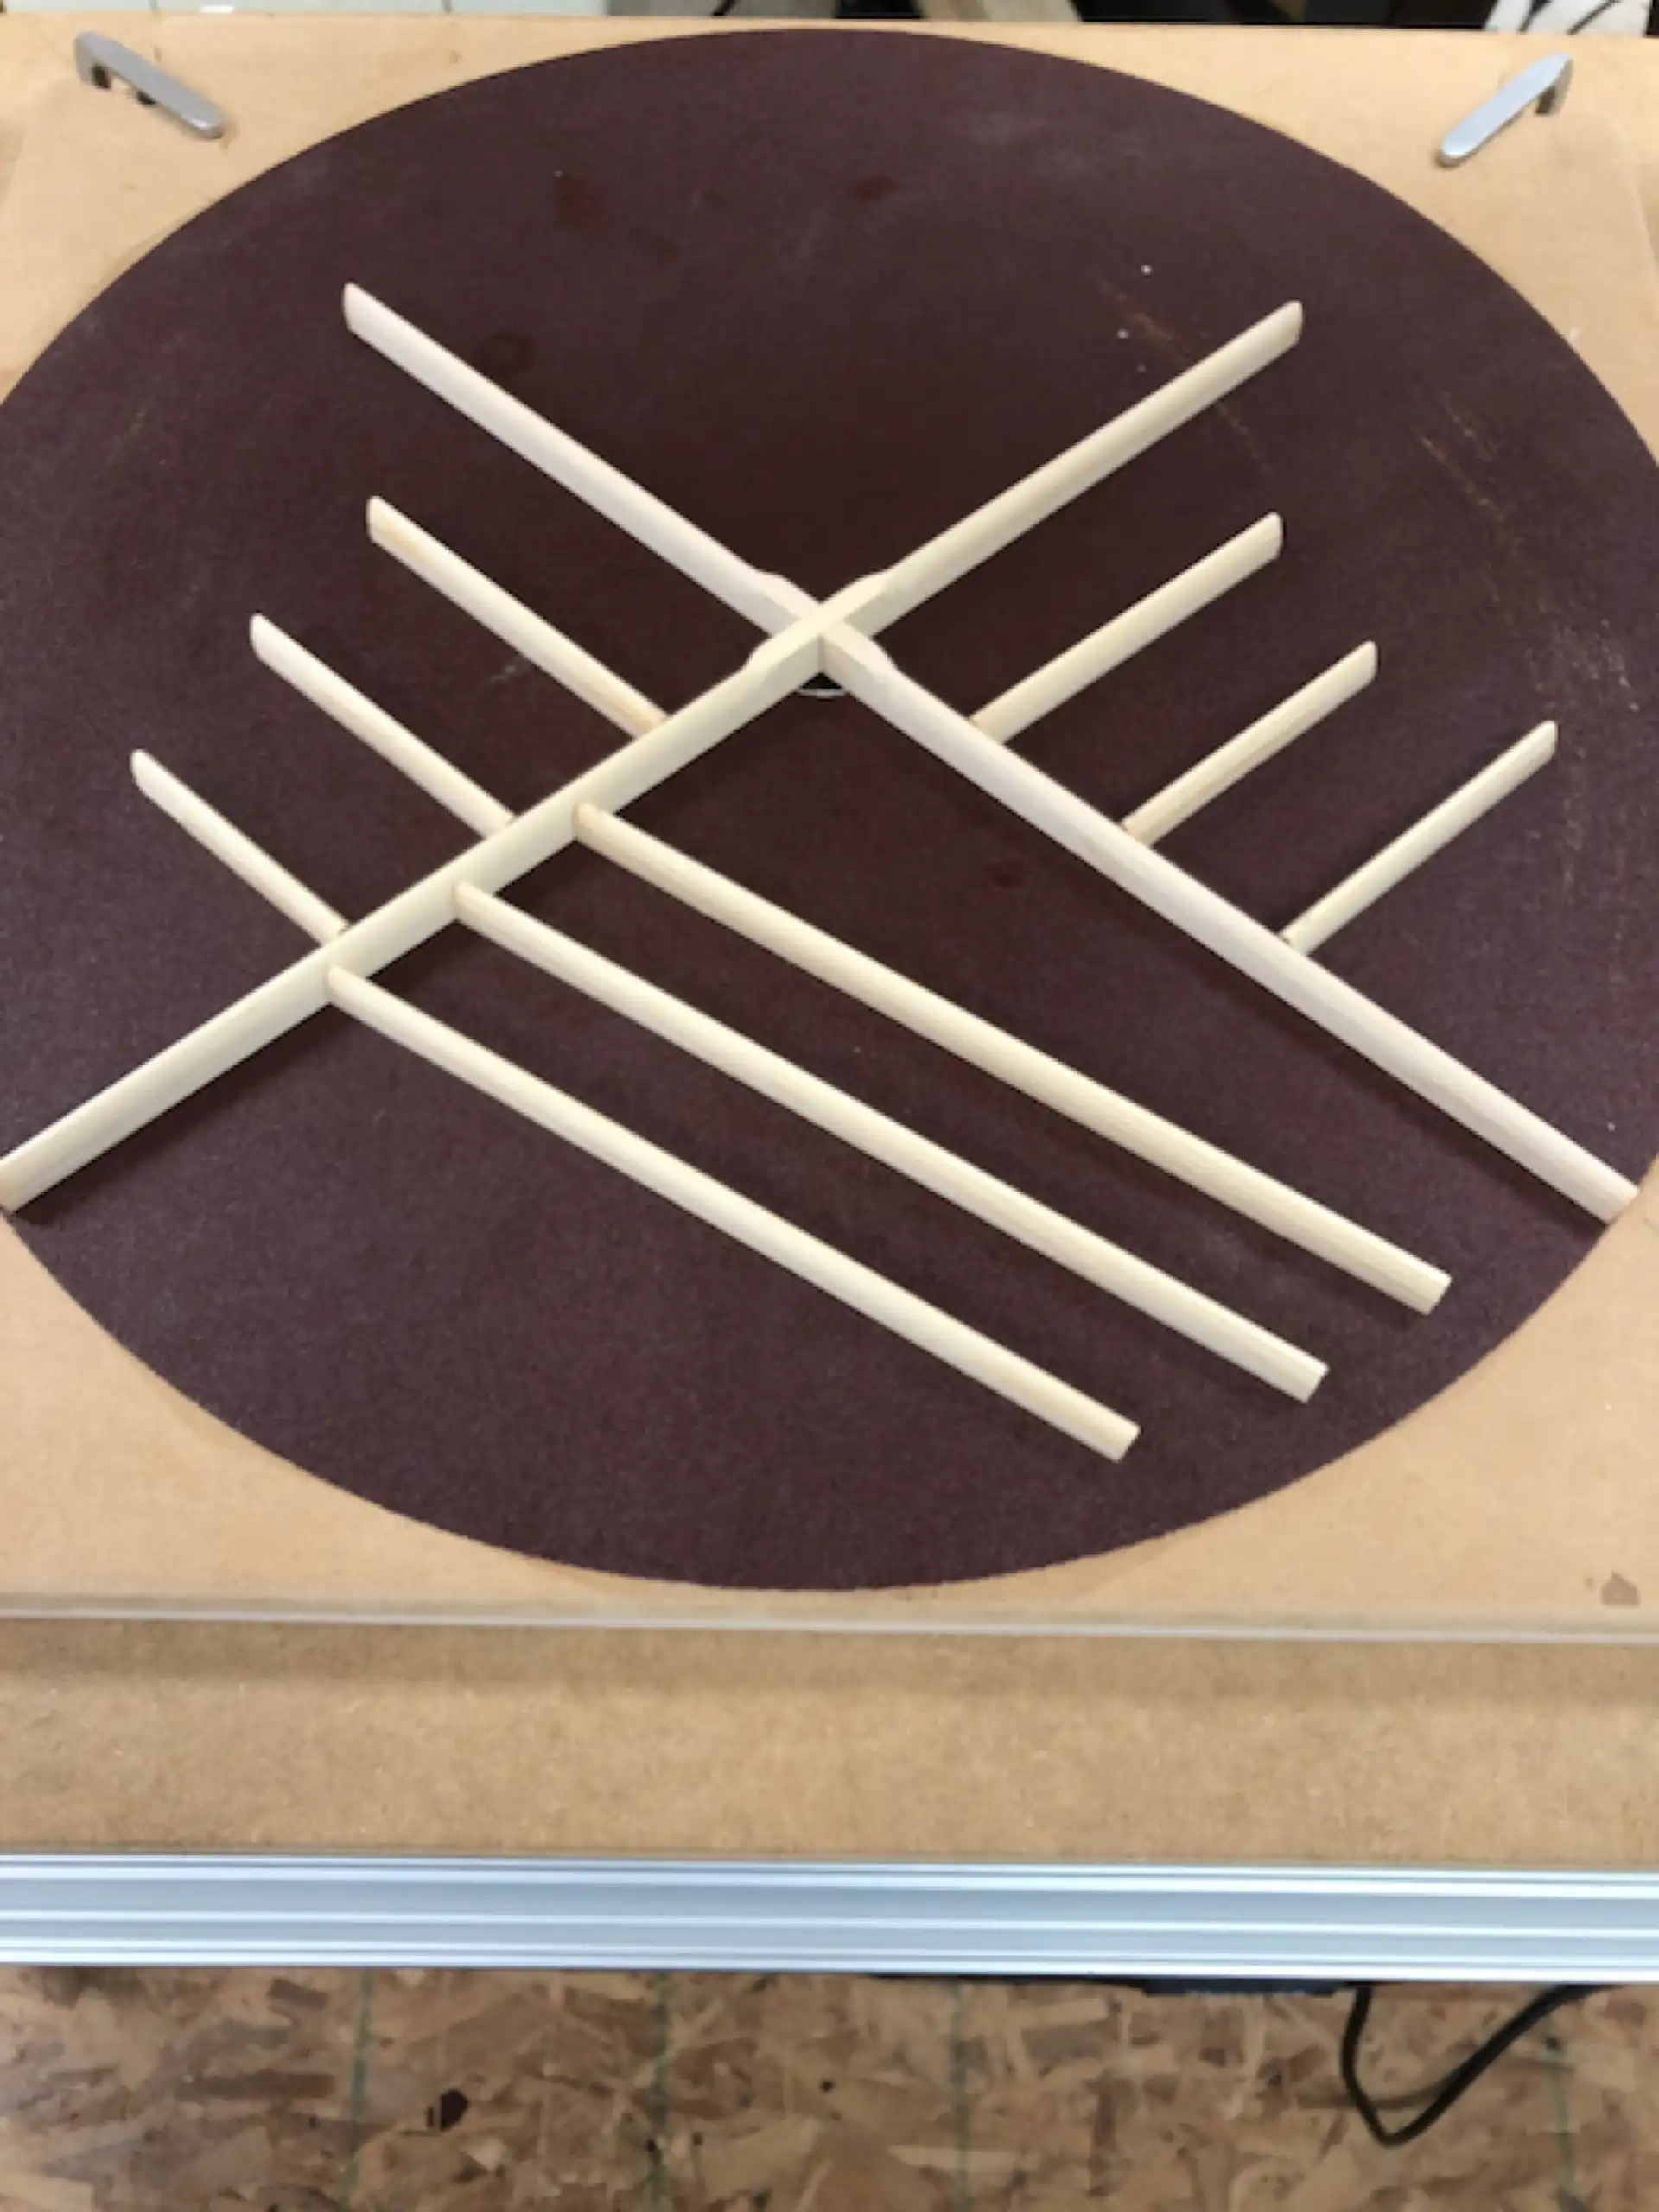
Radiusing the braces
I wanted to effect increased bass response over what I had heard from the D4-12 (prior to its demise). This guitar is a dreadnought body style, but I chose to widen the "X" brace after the spec's of Guild's jumbo body styles.
Bracing Layout
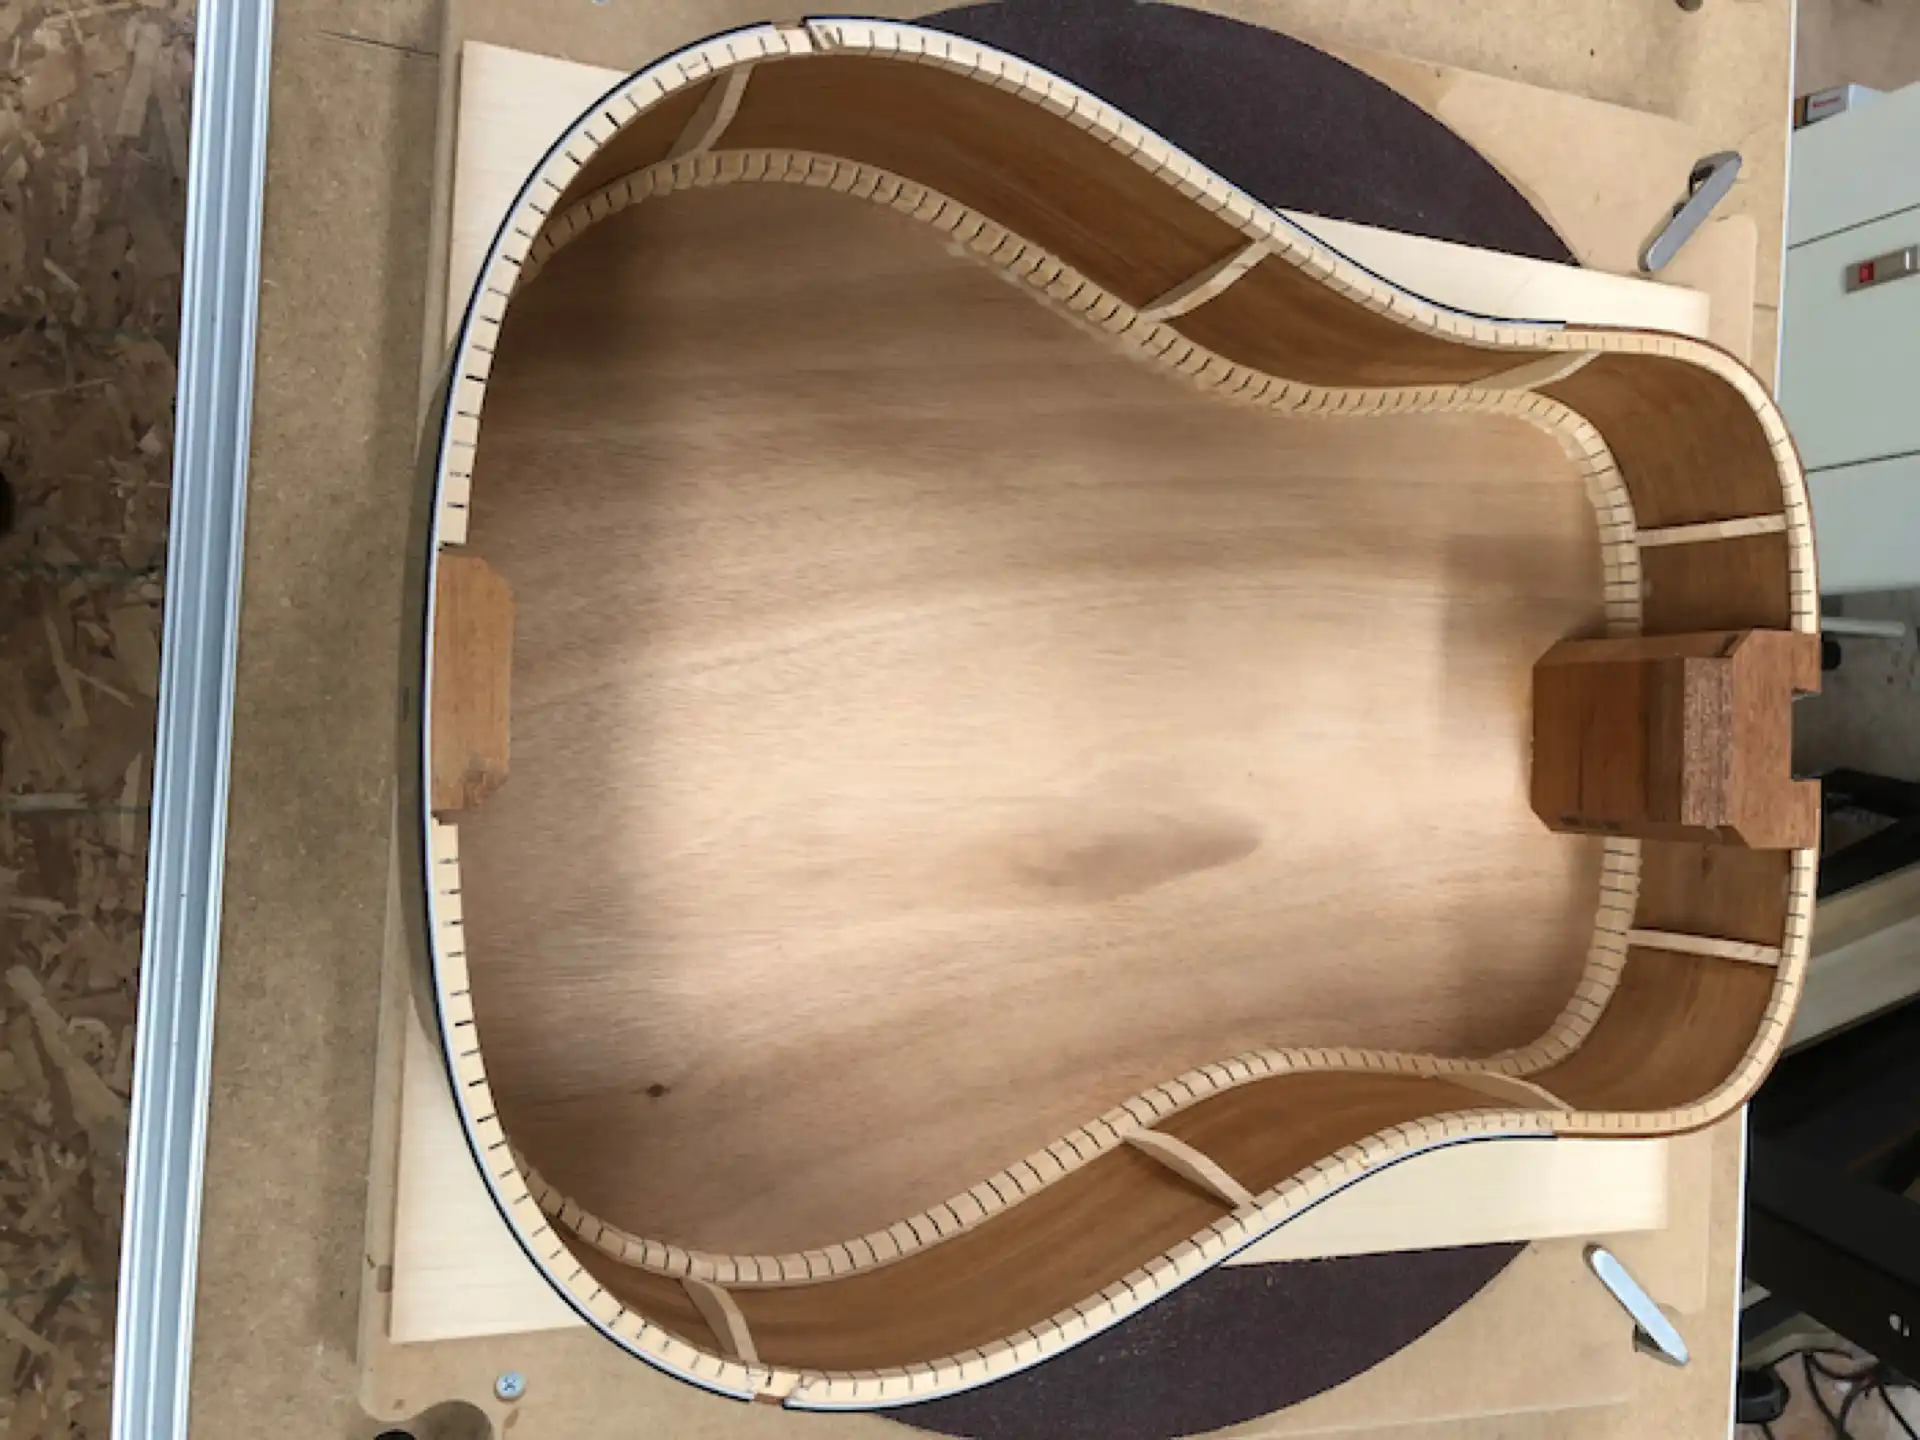
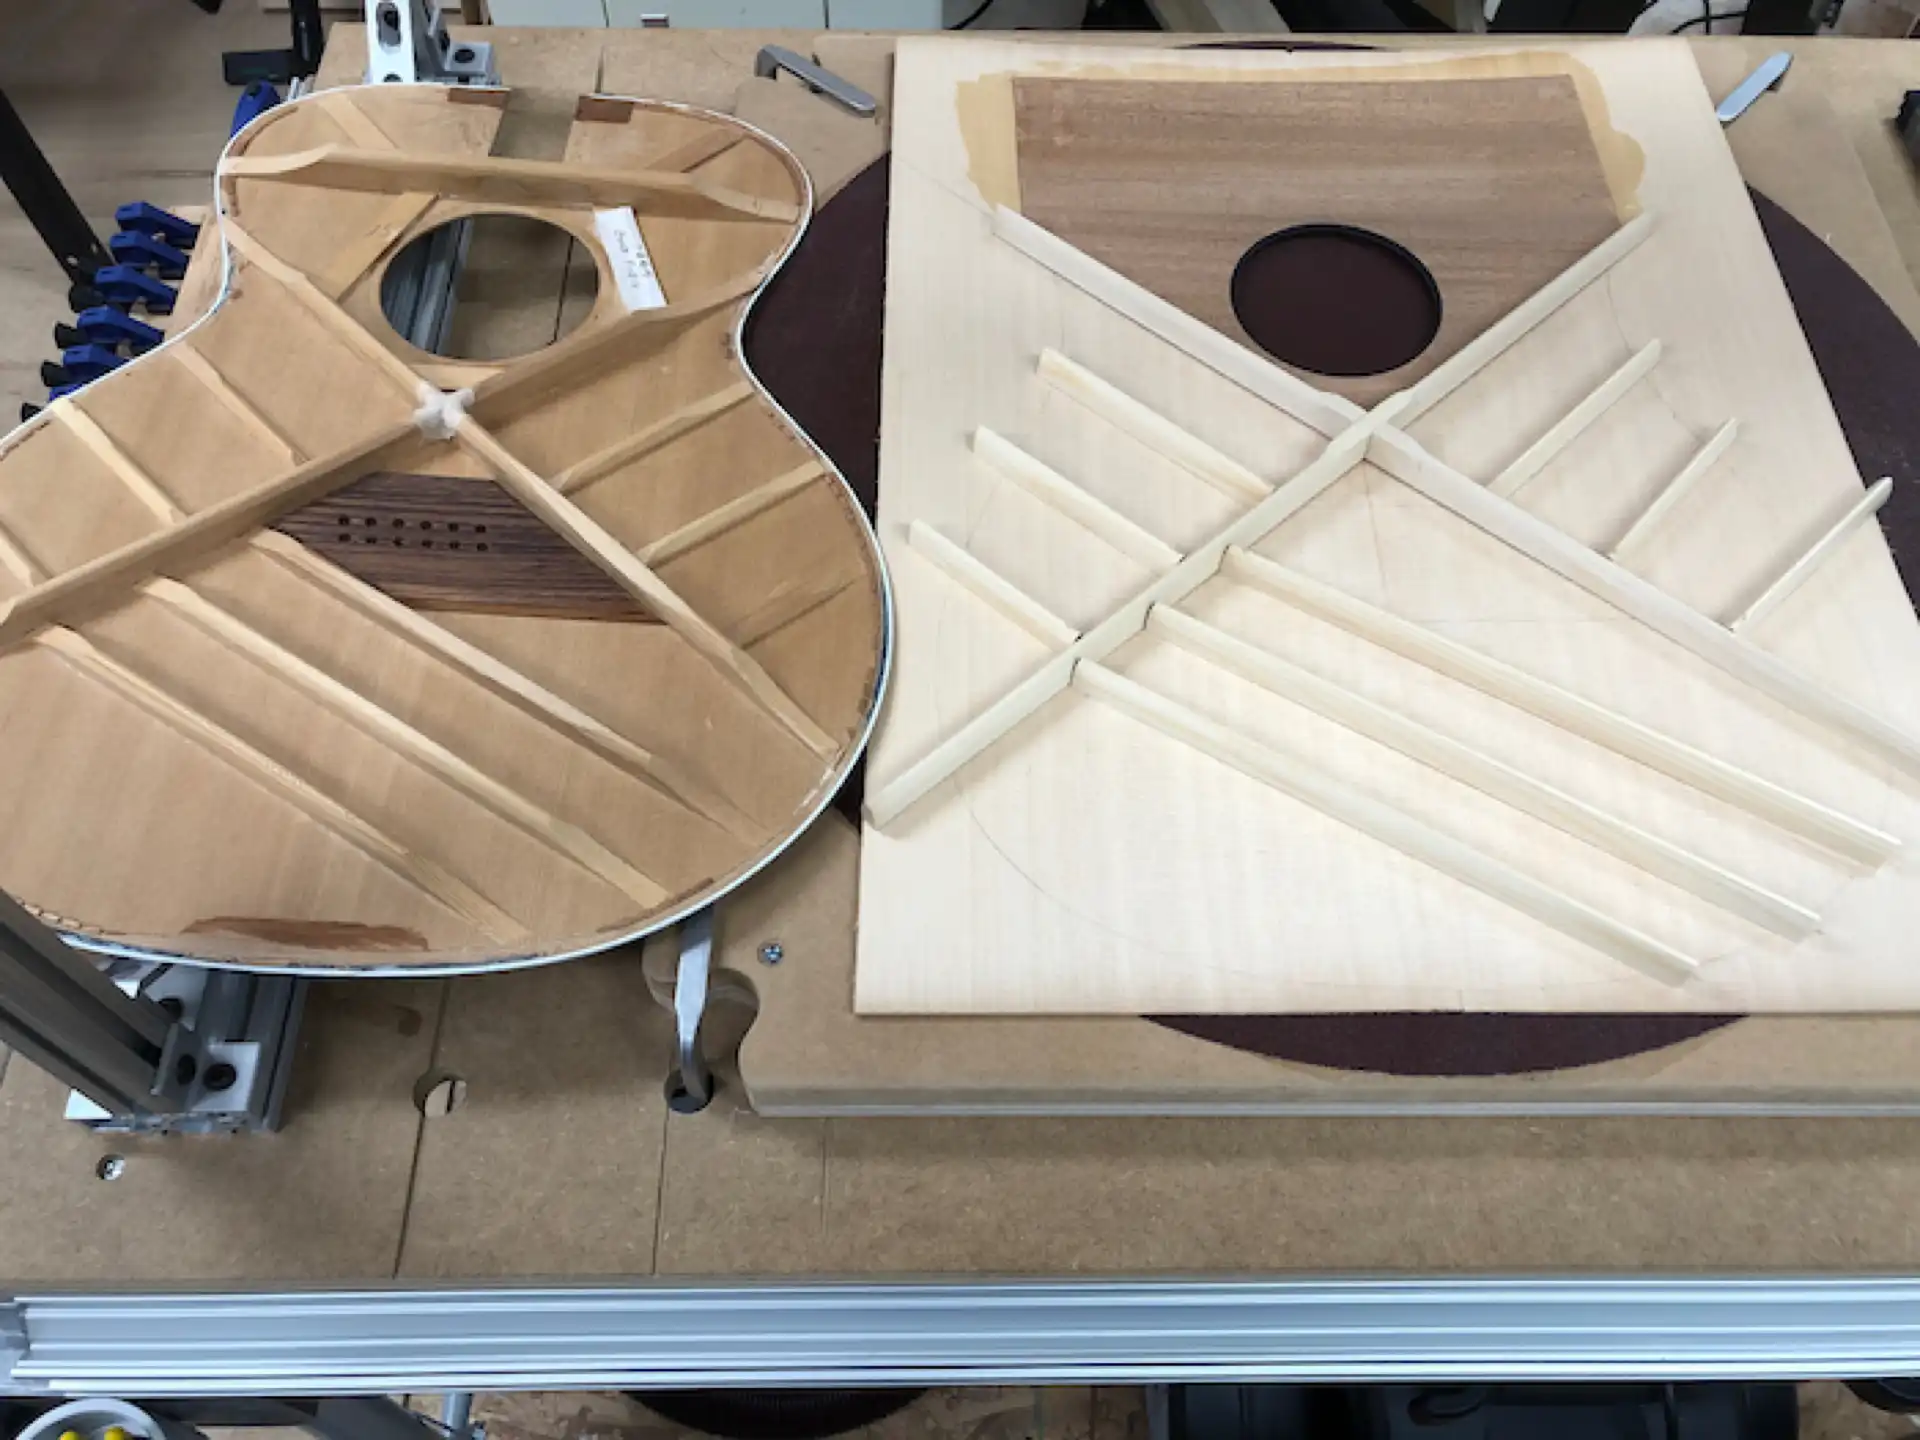
I had determined to stay true to the Guild 12 string bracing pattern, using 3 tone bars. As is my custom for my own instruments, I reinforced the inside of the upper bout with 2 additional layers of Mahogany and added a solid wood soundhole binding. This design negates the need for both a transverse brace and a fingerboard patch. The sides of the body are notched to receive the thicker upper bout, and the now unified neck block/soundboard system isn't going anywhere. Neck resets become a thing of the past.
Guild 3 tonebars
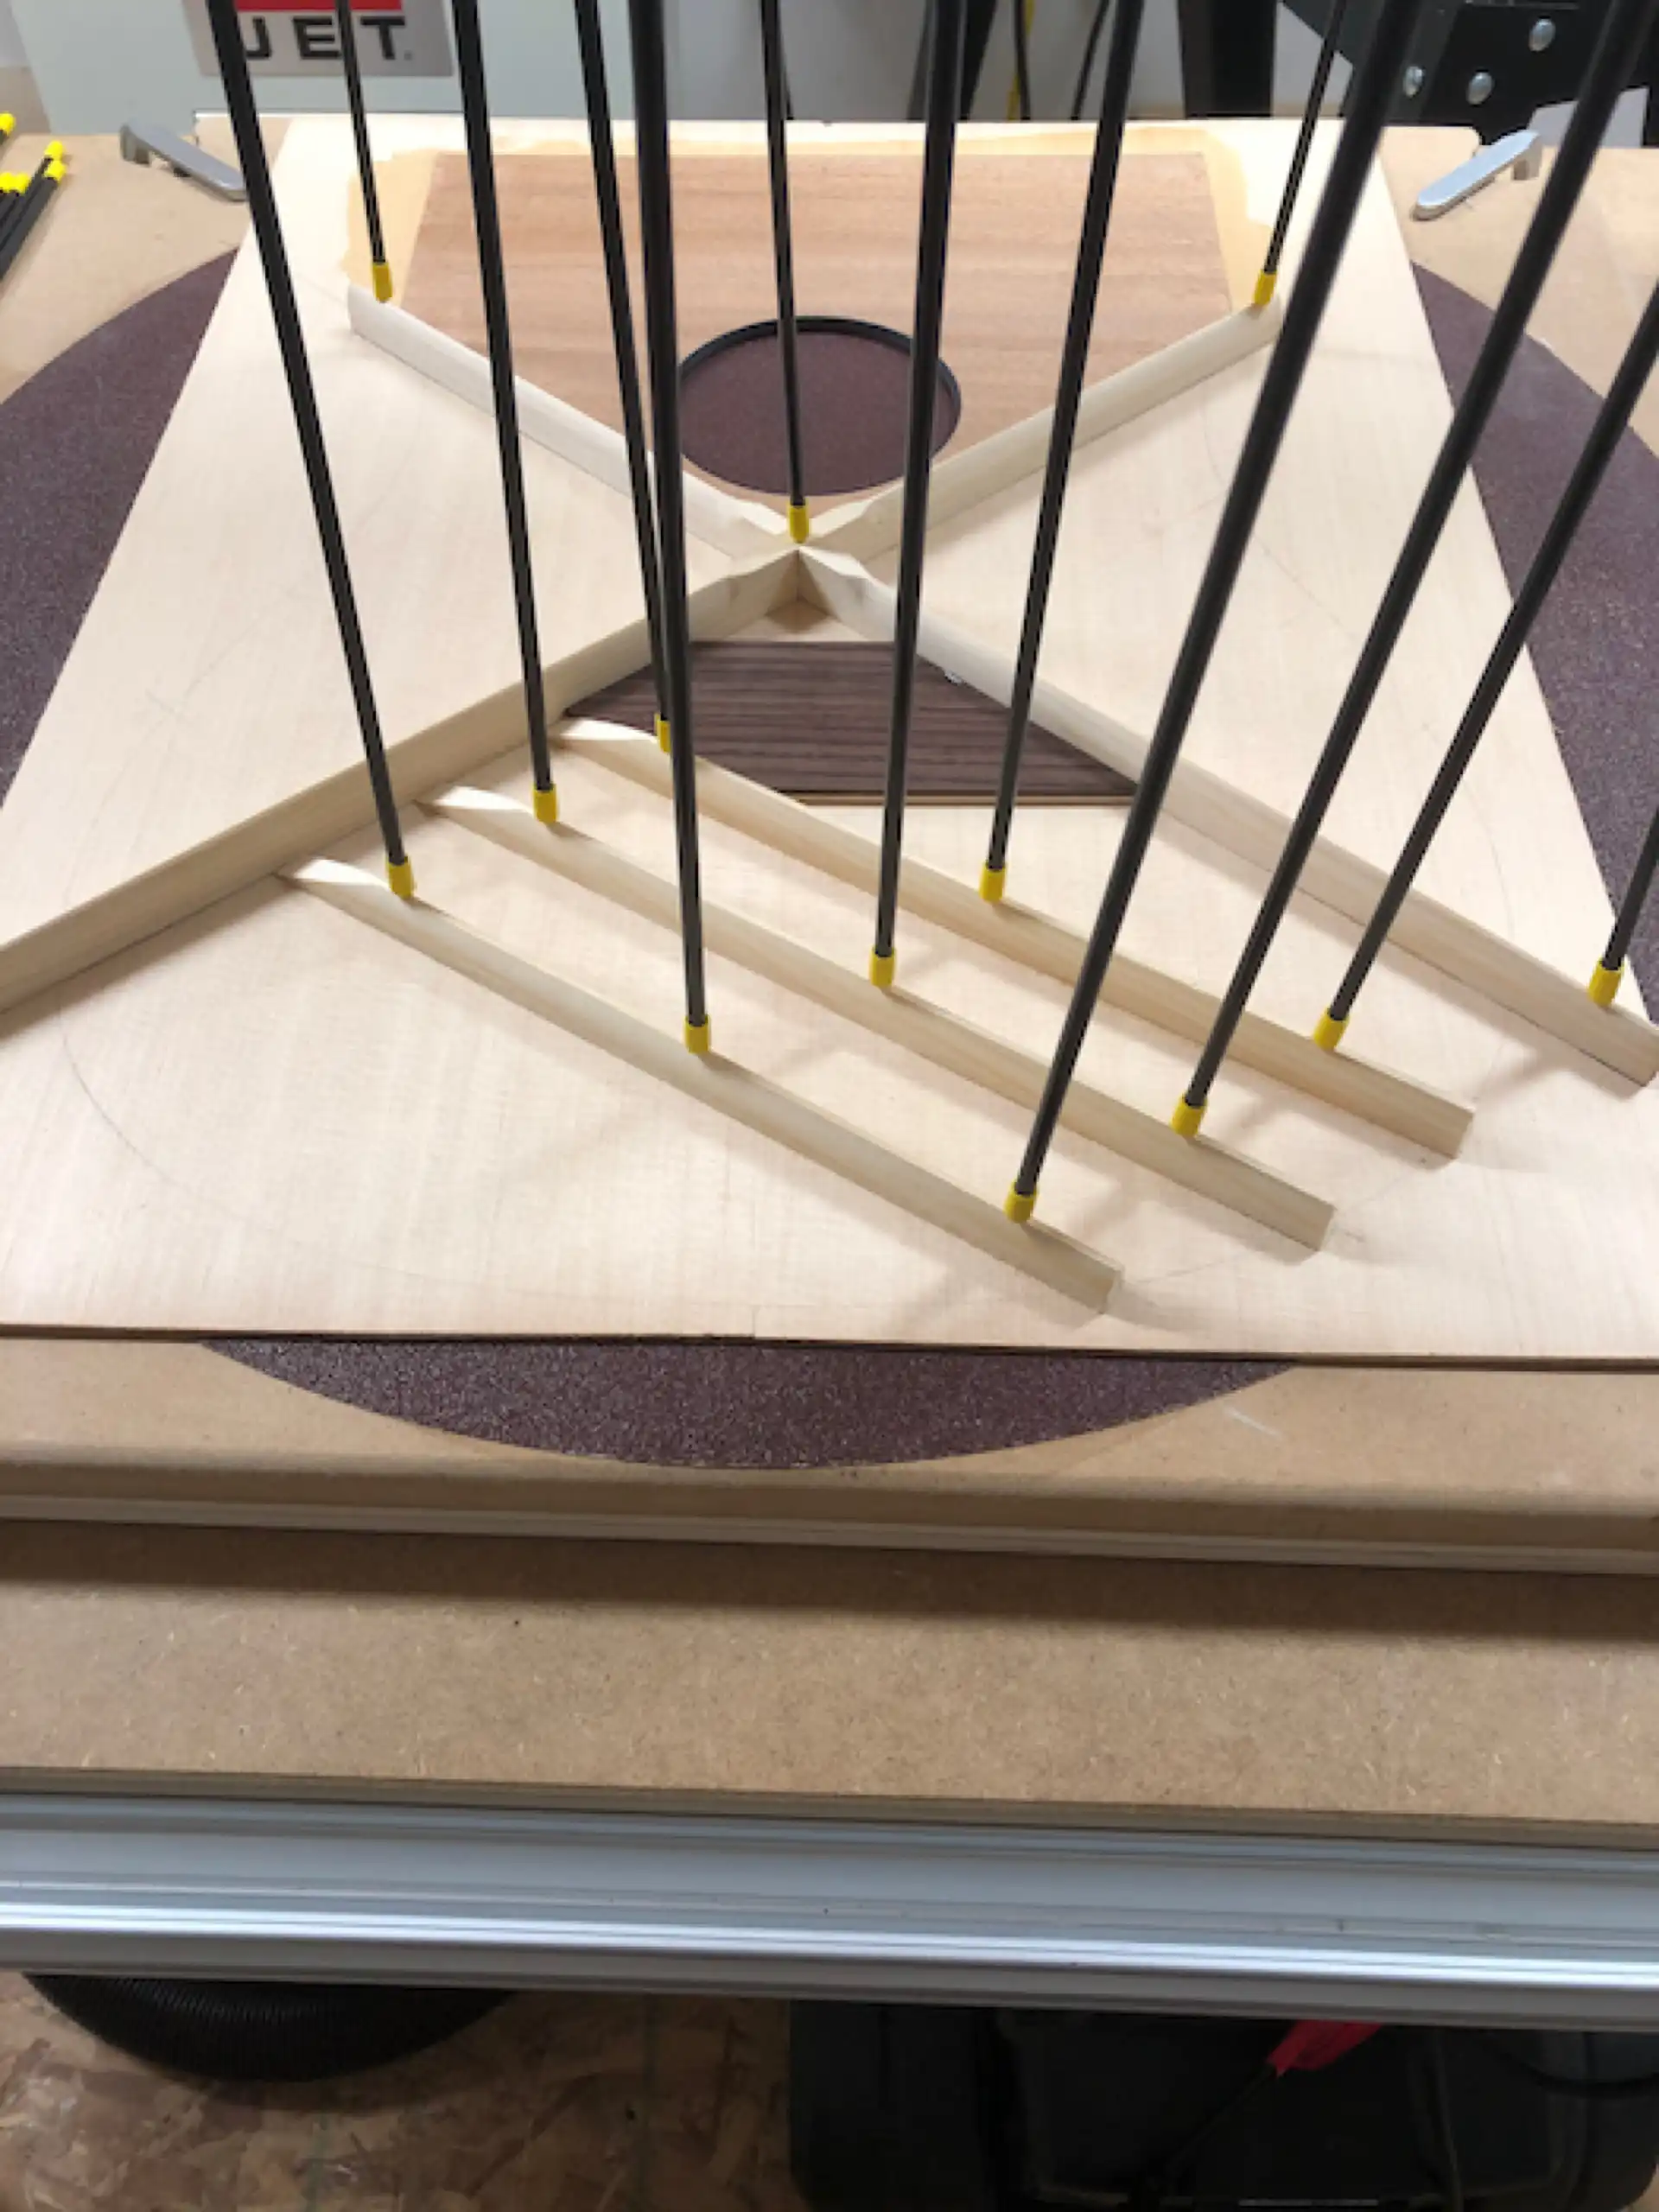
I laminated a Rosewood and Maple bridgeplate and glued it in place. The top was “voiced” using two methods. In method one, referred to as “tap tuning”, the soundboard is suspended in the air and tapped lightly to measure the frequency response The braces are shaved, and the process is repeated until a particular response is achieved. In method two I suspend the braced soundboard along its edges and set a weight atop the area where the bridge will eventually be glued. I measure the deflection, and shave the braces until I hit my target number. Combining these two methods yields the most responsive soundboards I have ever constructed, and provides me with consistent repeatability.
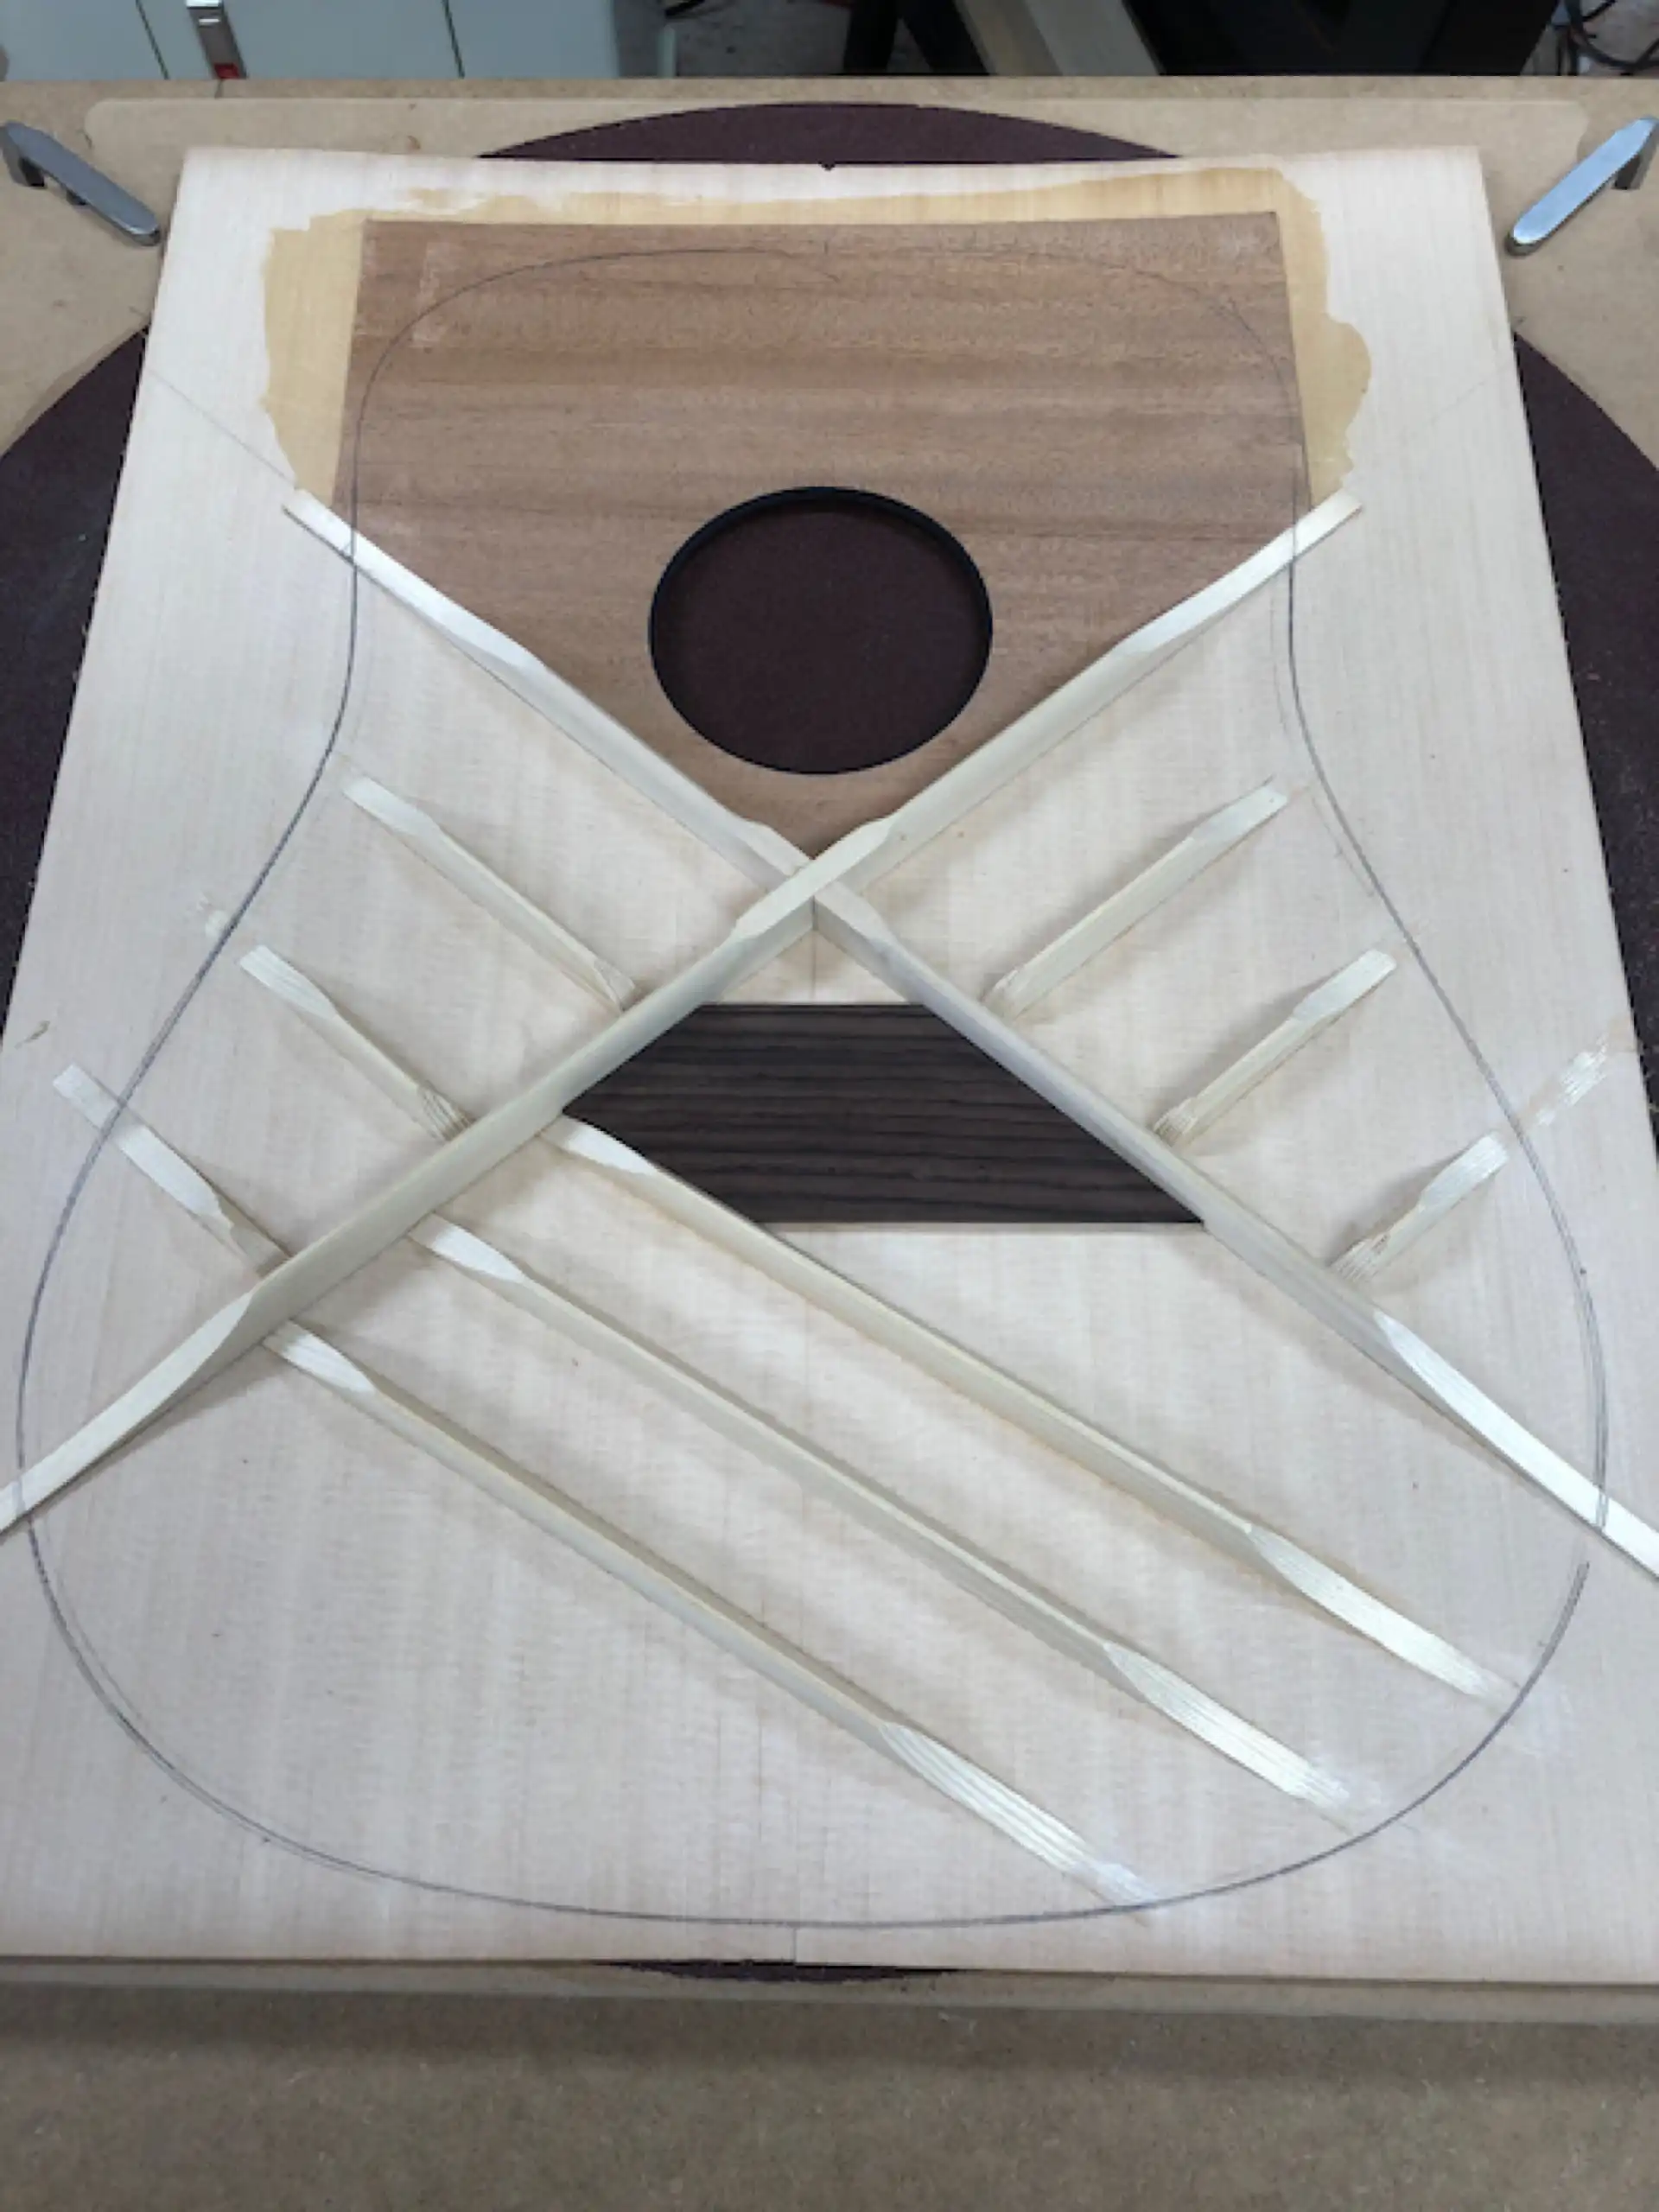
Soundboard is complete
The next step was to attach the soundboard to the body. This is a custom, iterative process, ensuring all parts mate perfectly before adding any glue. In place of the plastic that shipped with the original guitar, I added wood binding and wood purfling around the perimeter of the body.
Body is complete - almost
The final step needed to complete the body is to cut the dovetail joint that will mate with the tenon of the neck. I then fit the neck.
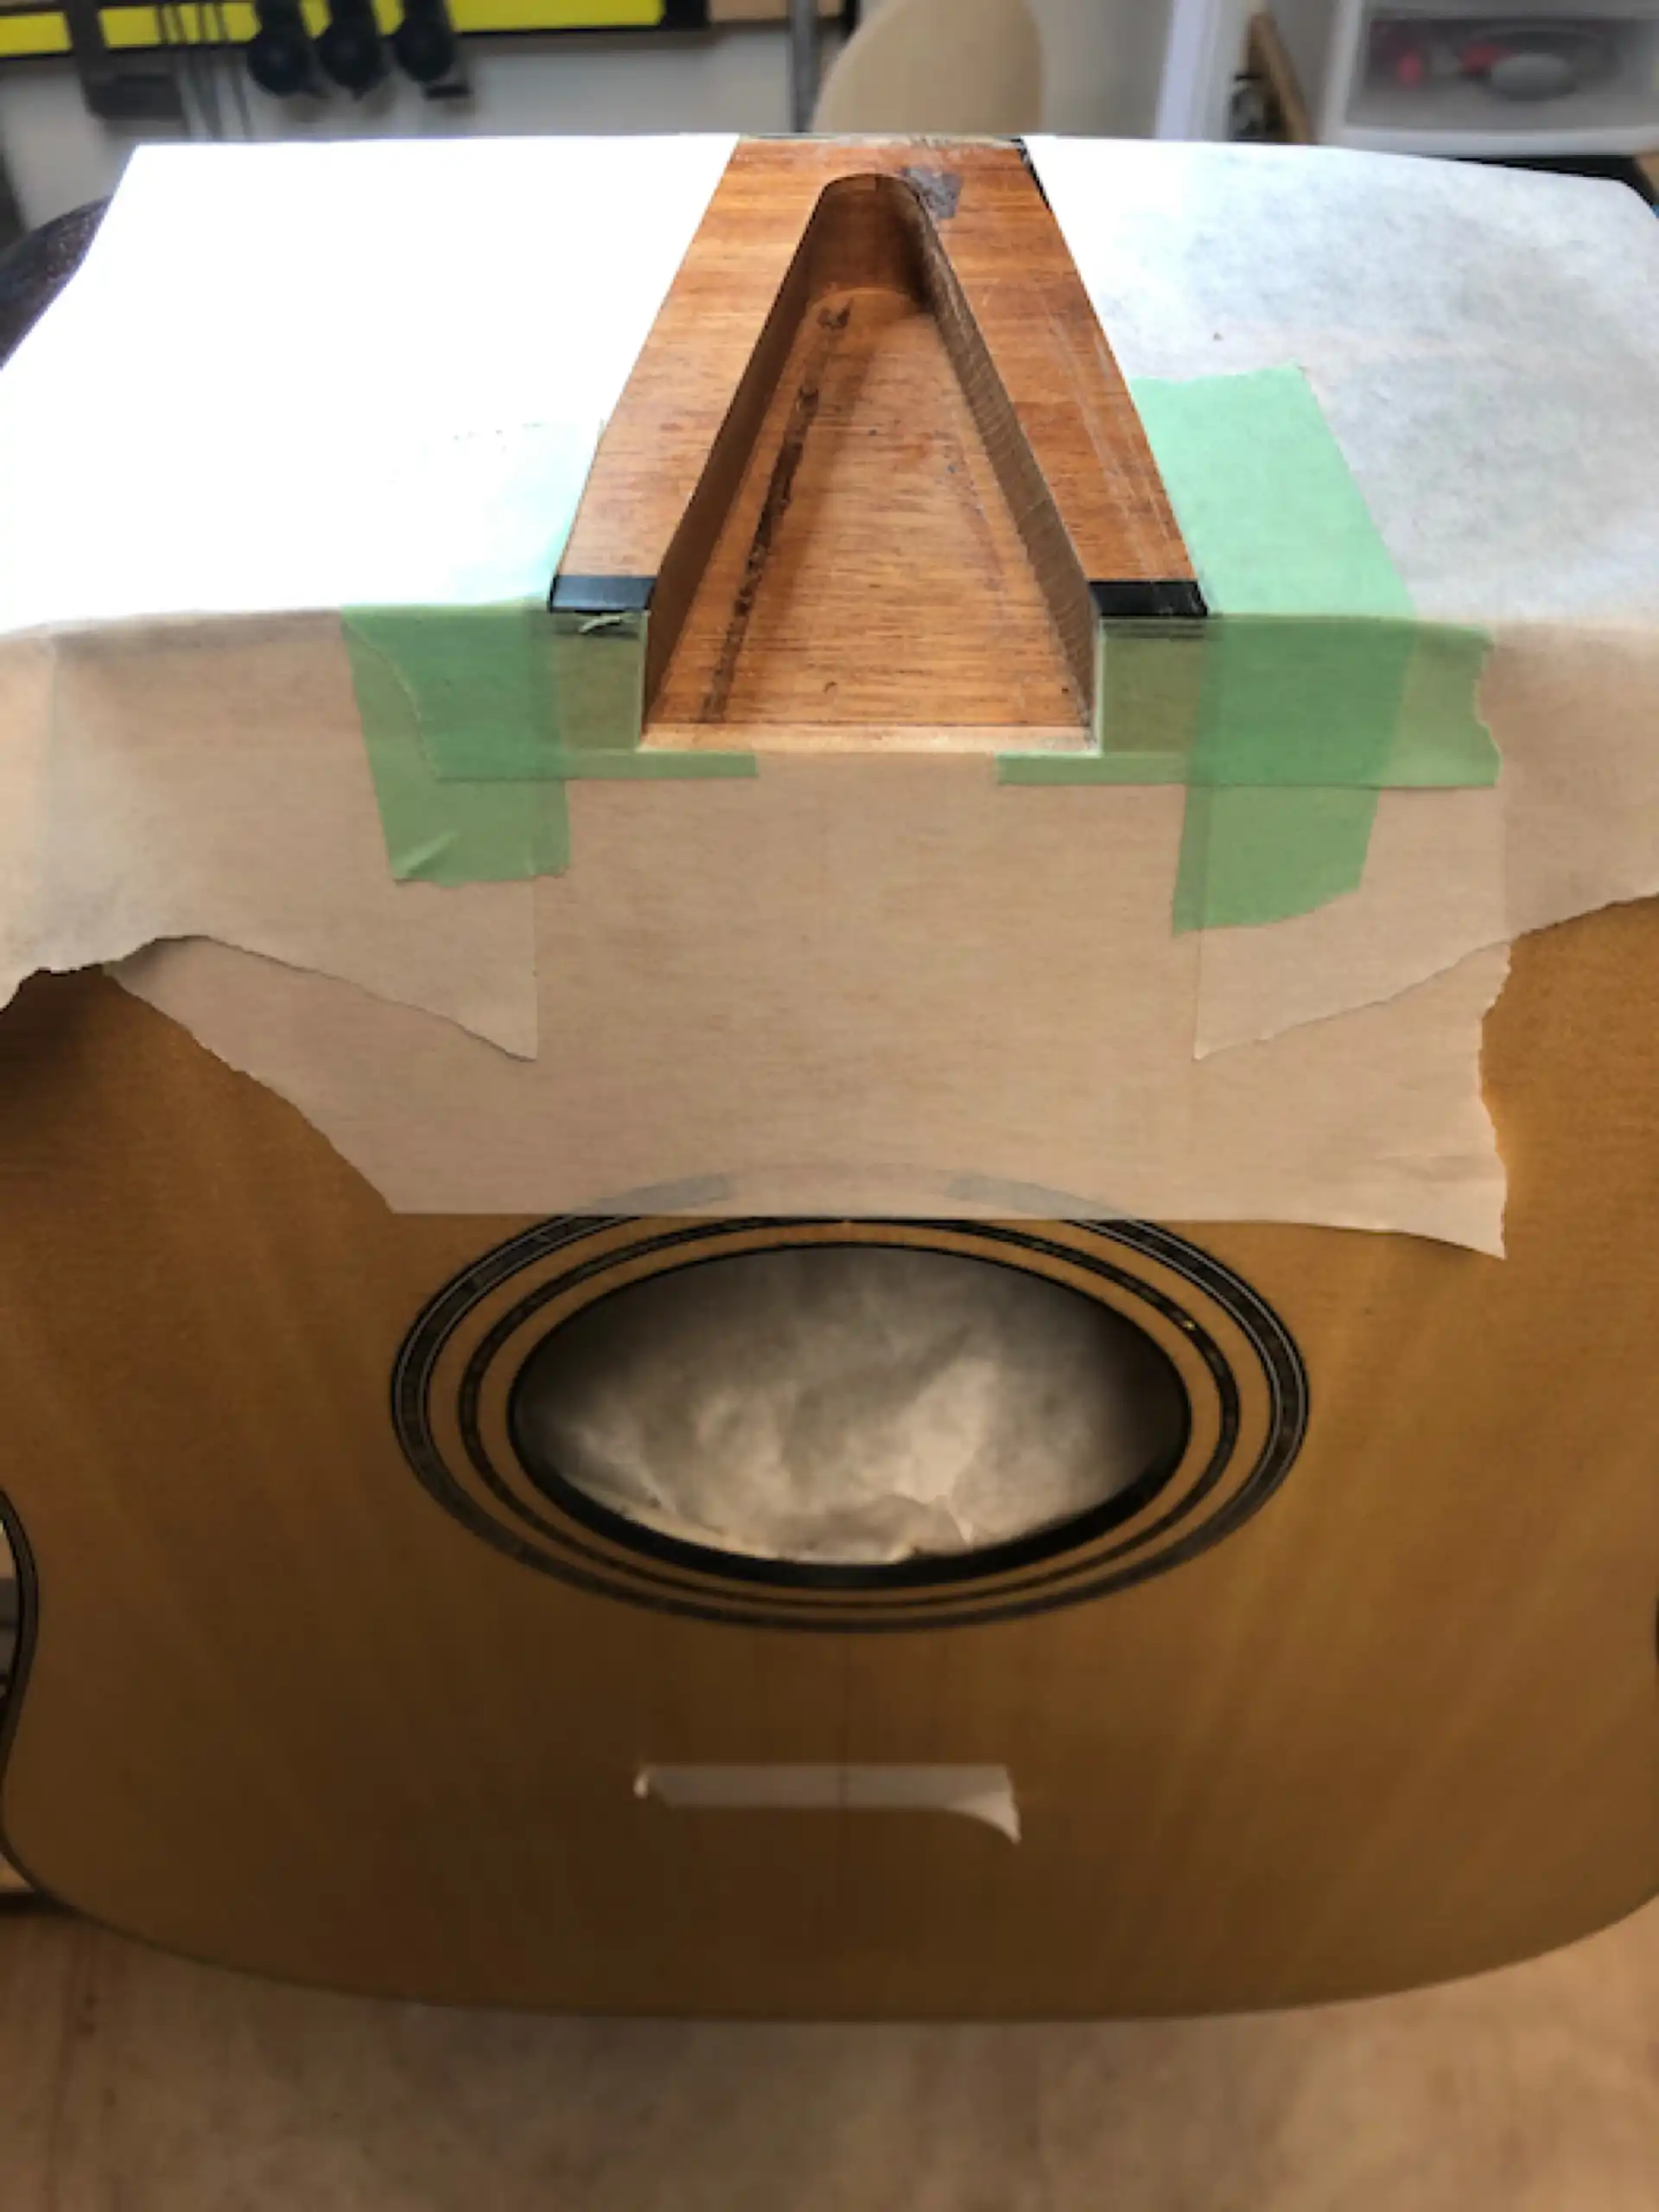
Dovetail Mortise - Ready for Neck
I decided to go all the way and fashion a new fingerboard and matching bridge, so I routed off the old fingerboard to ensure I did not alter any neck dimensions (as I had already cut the dovetail joint and fitted the neck).
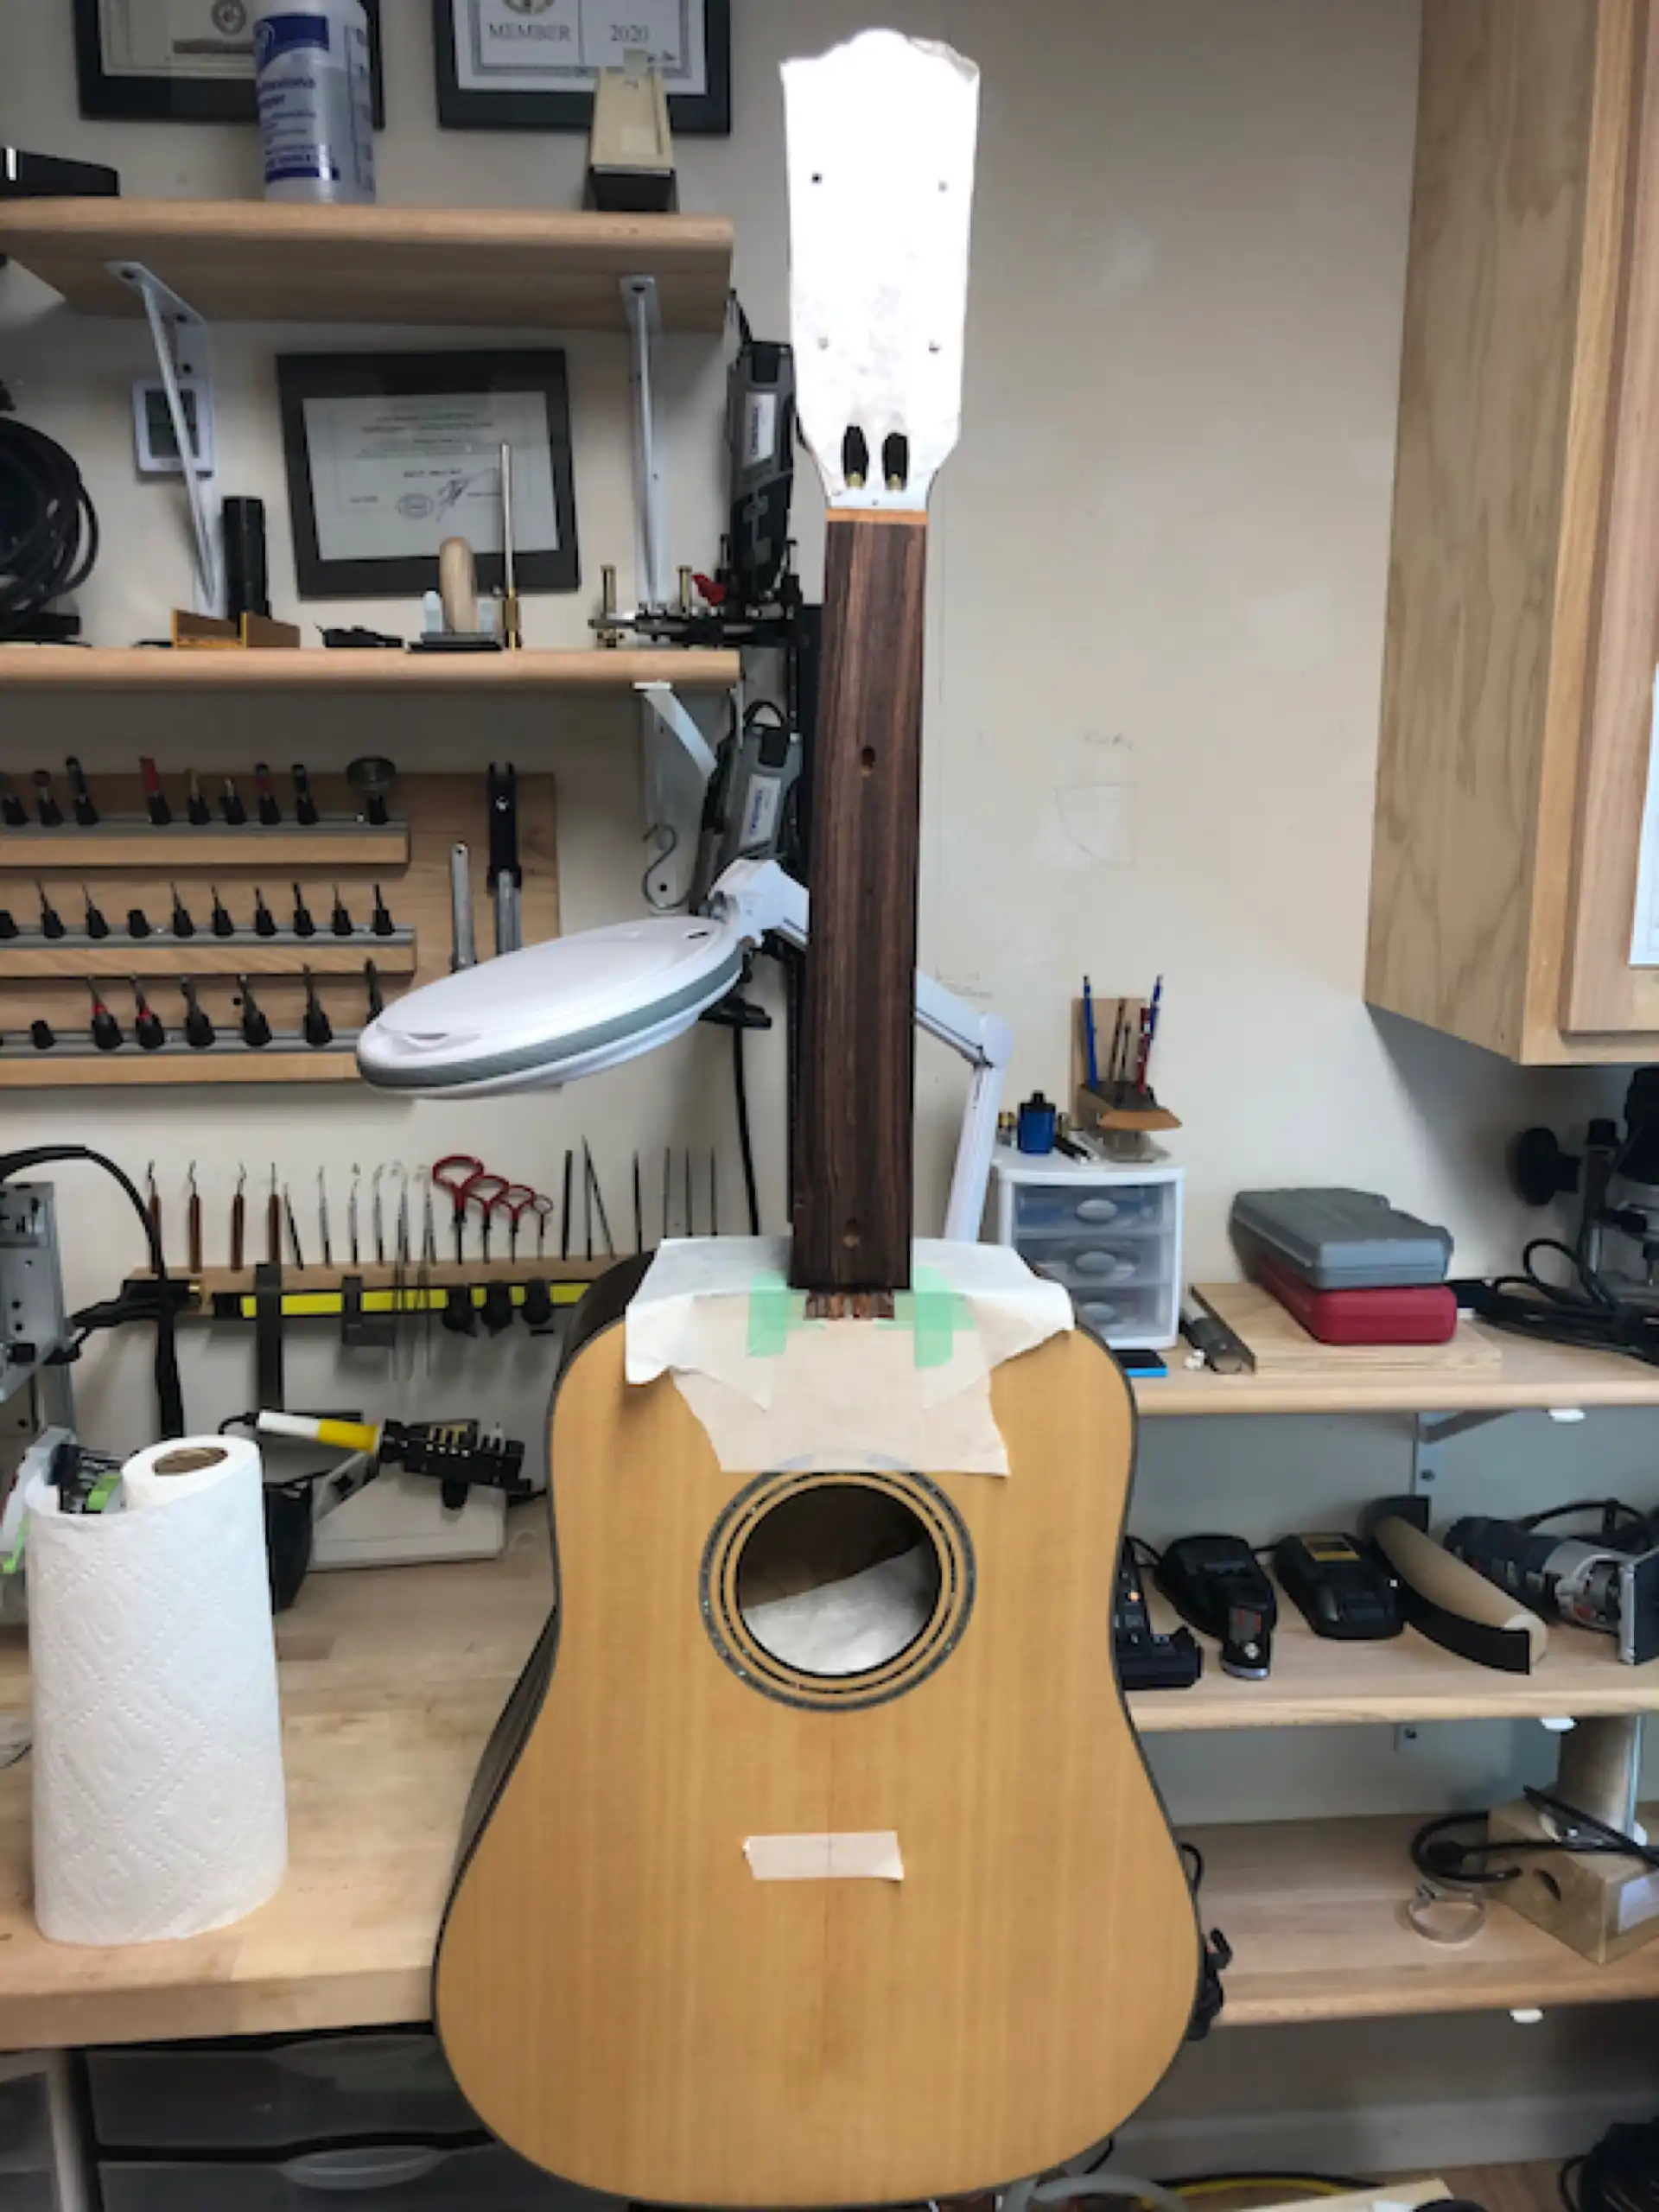
Attaching the Neck
I added Paua fret position markers along with smaller Paua side dots to the new fretboard and glued it on. The bridge would be added after the finish is applied.
I was inspired to improve the look of this guitar, so I sprayed a deep tobacco 'burst onto the arched back and finished the top with a vintage tinted clear lacquer. It turned out very pretty. This guitar was now ready to be set aside to allow the lacquer to fully cure.
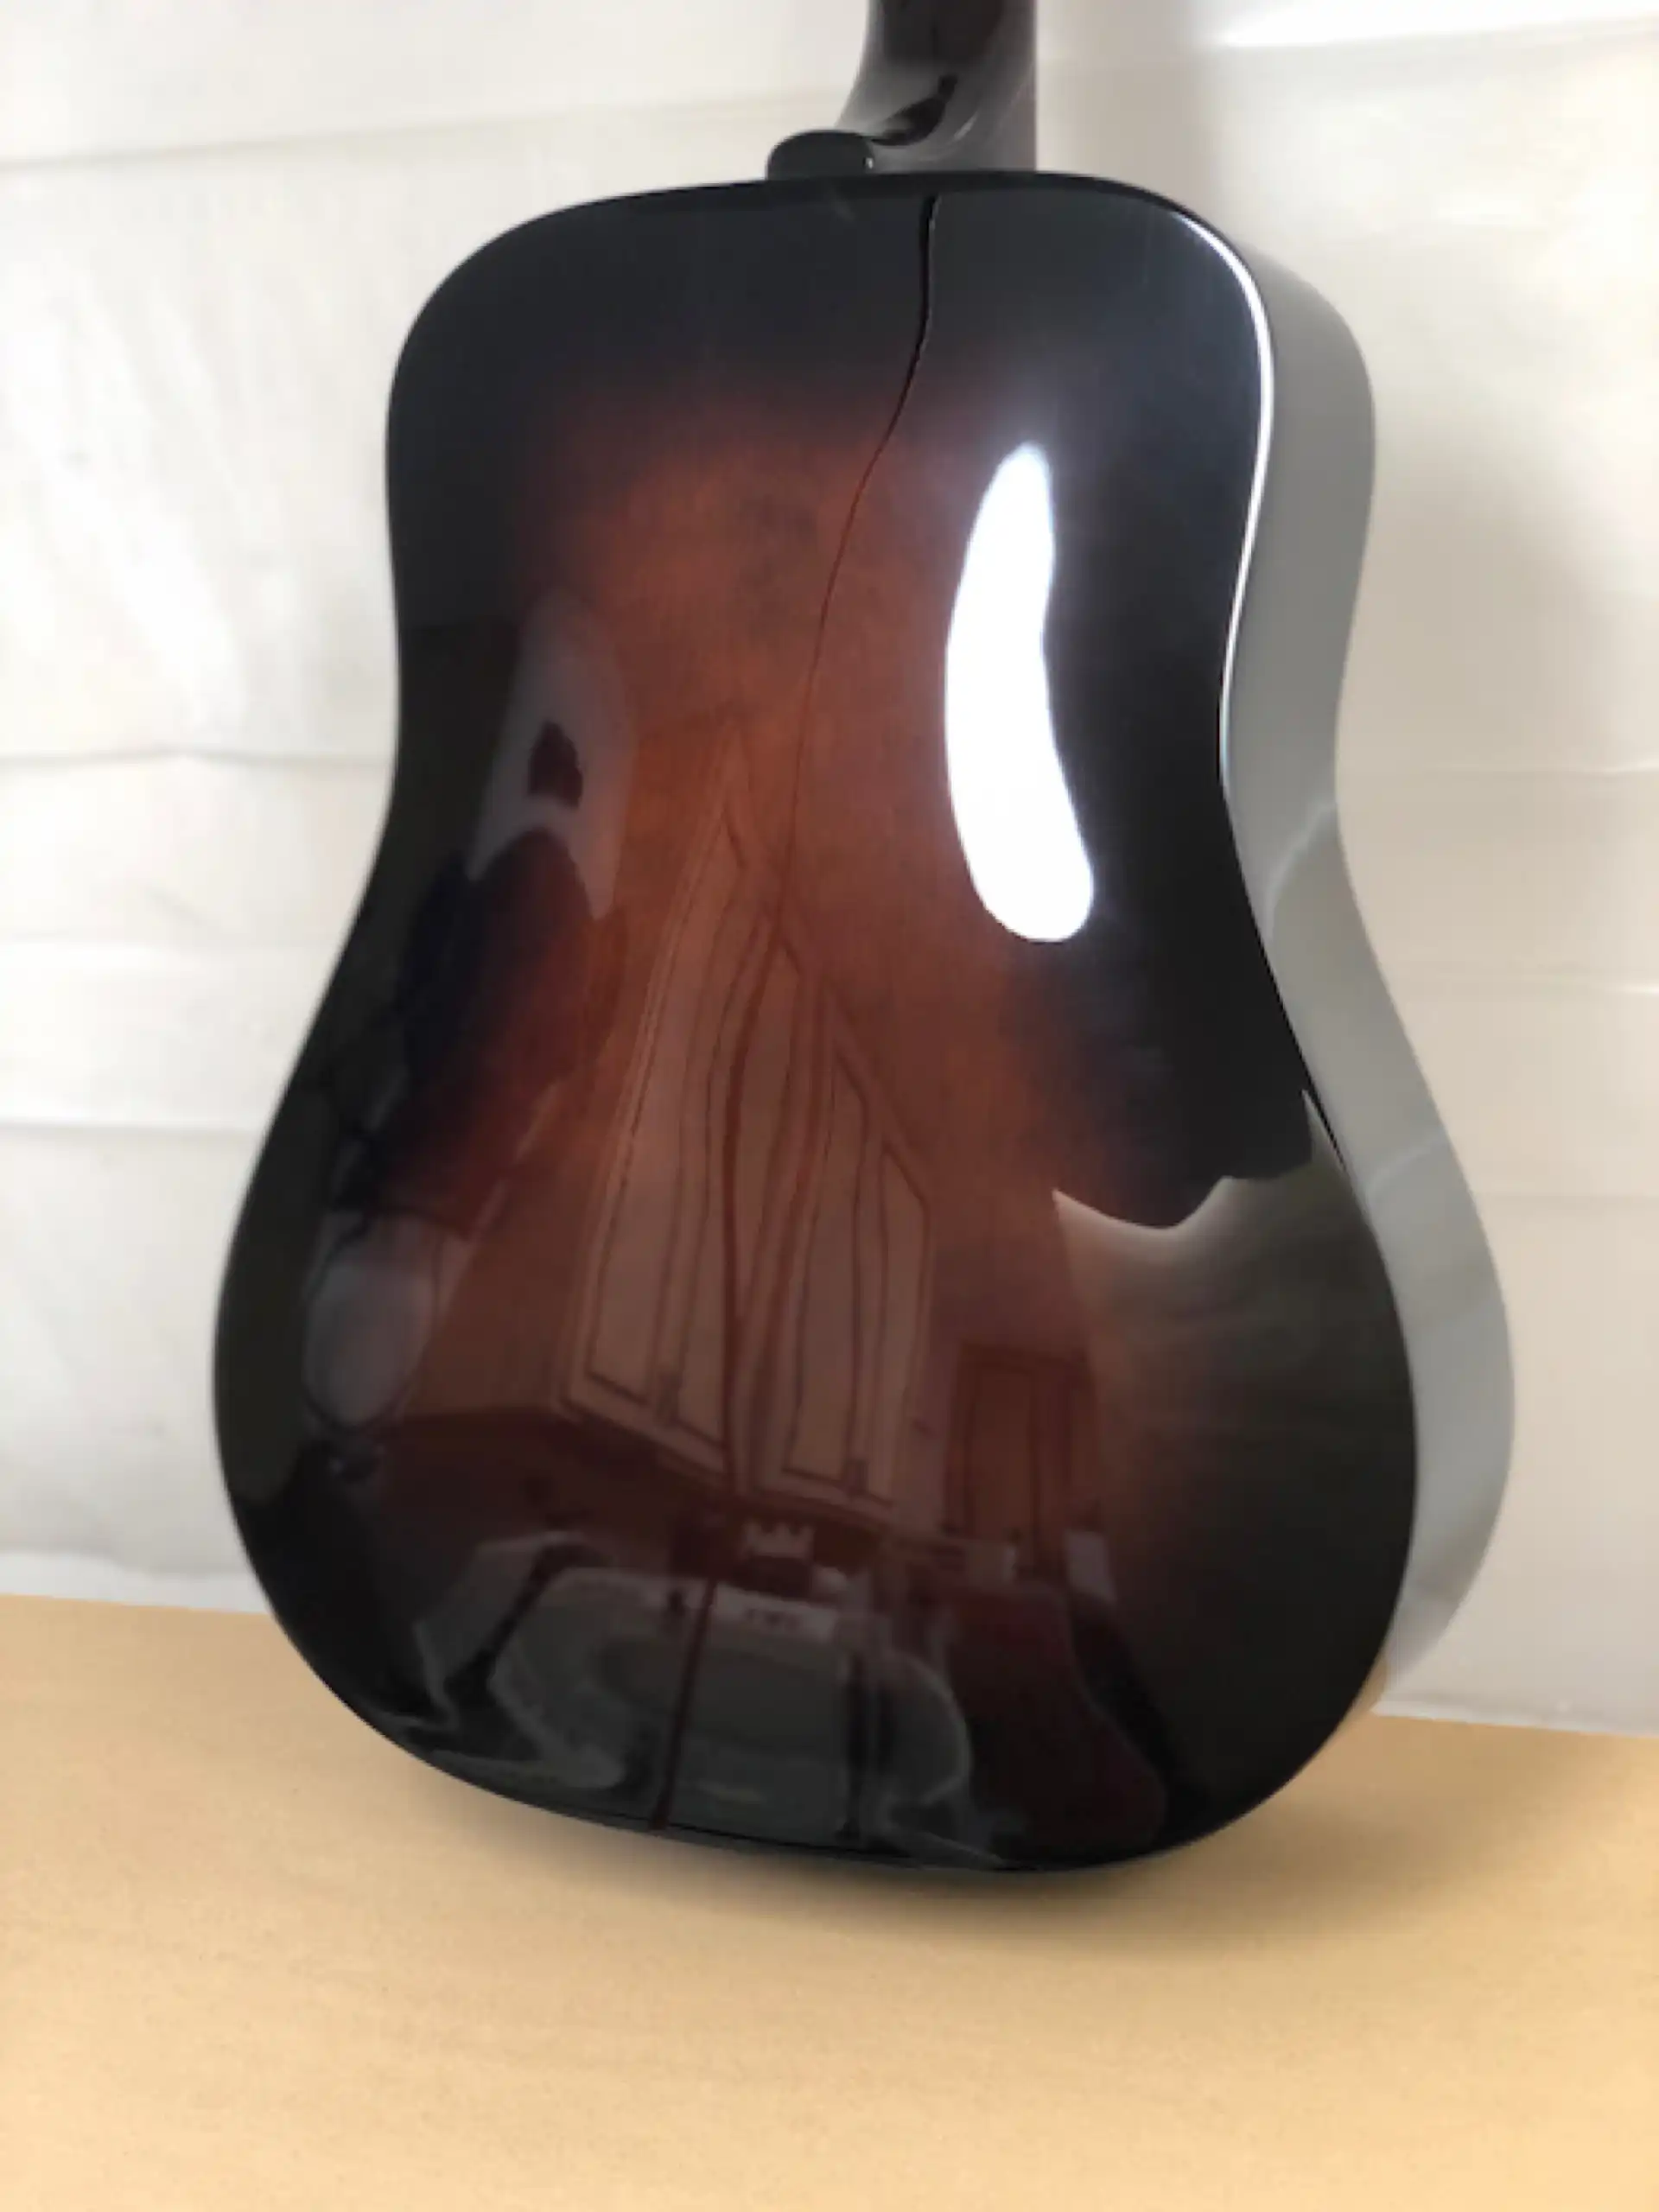
Tobacco Sunburst
I glued the bridge on (if anyone remembers: this is where I originally started!) and I fashioned a custom pickguard. I fretted the new board with Nickel frets, and fashioned a new bone nut and bone saddle. I strung it up and...
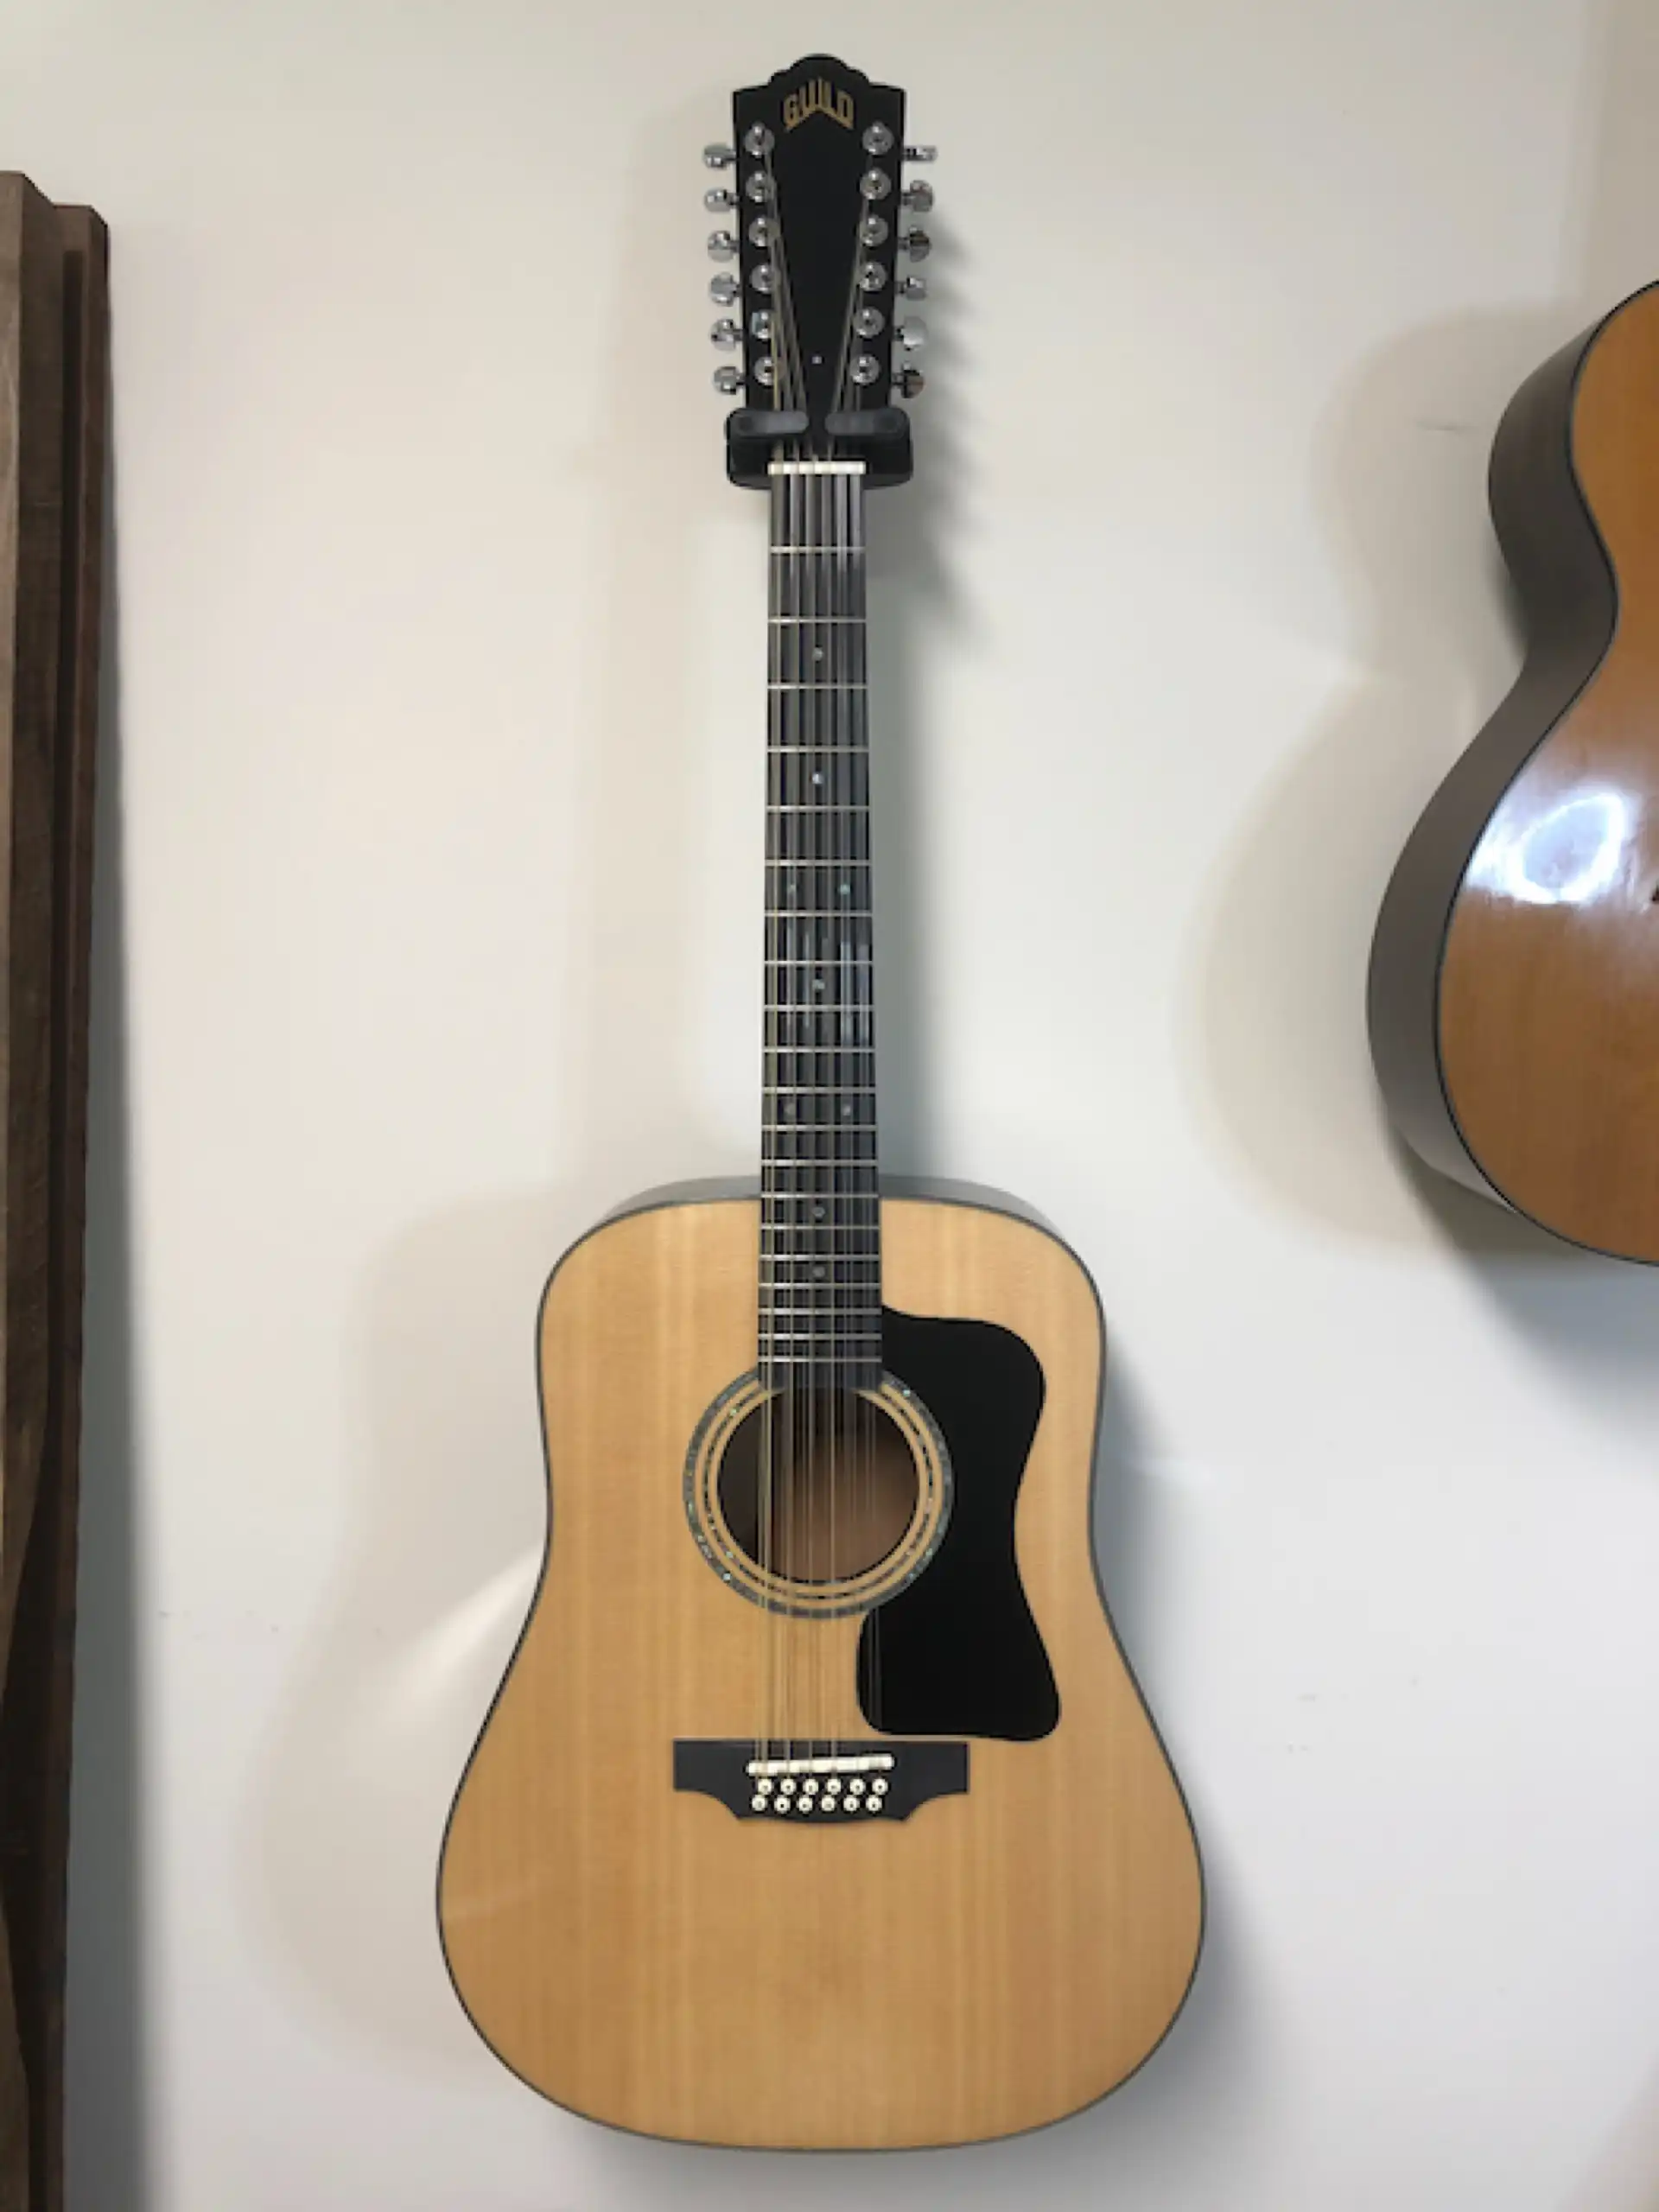
Complete
Wowsers! It sounded gorgeous! Lush and deep and rich... Everything you could want from a Guild 12 string.
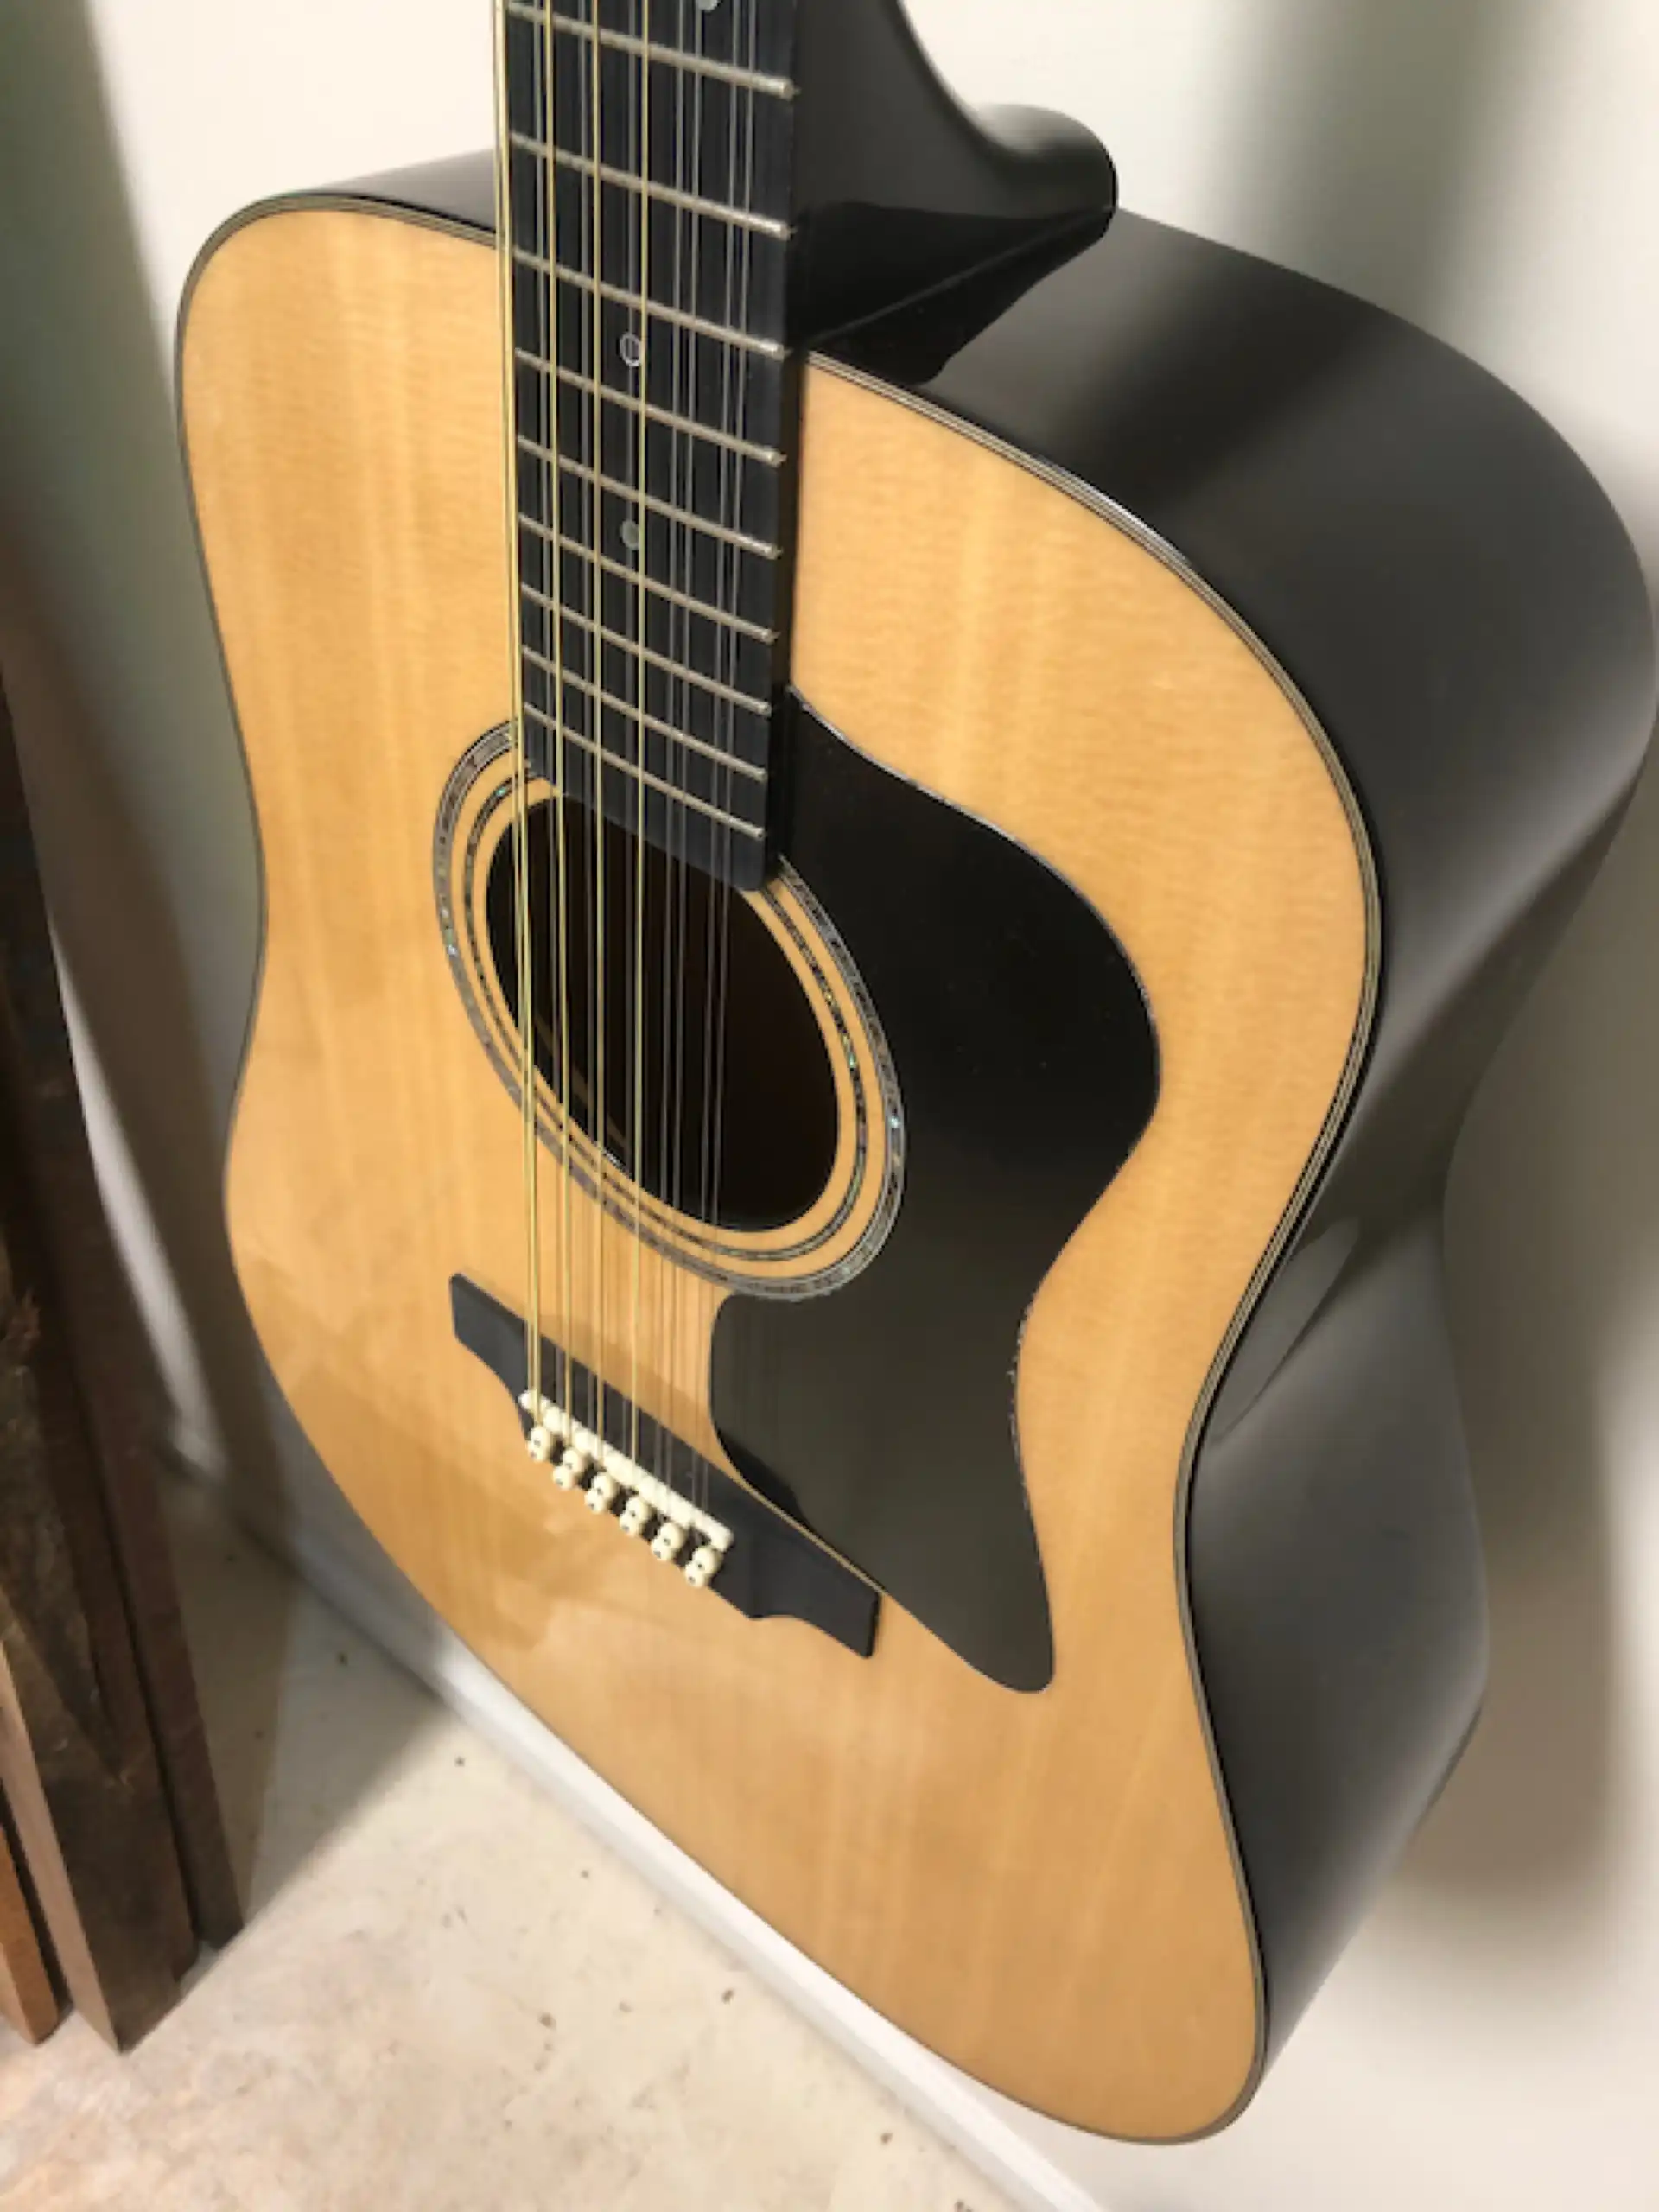
Body Closeup
I contacted the sons of the owner and asked if they remembered me {smile}. They returned the guitar to their dad, one surprised and happy Guild owner.
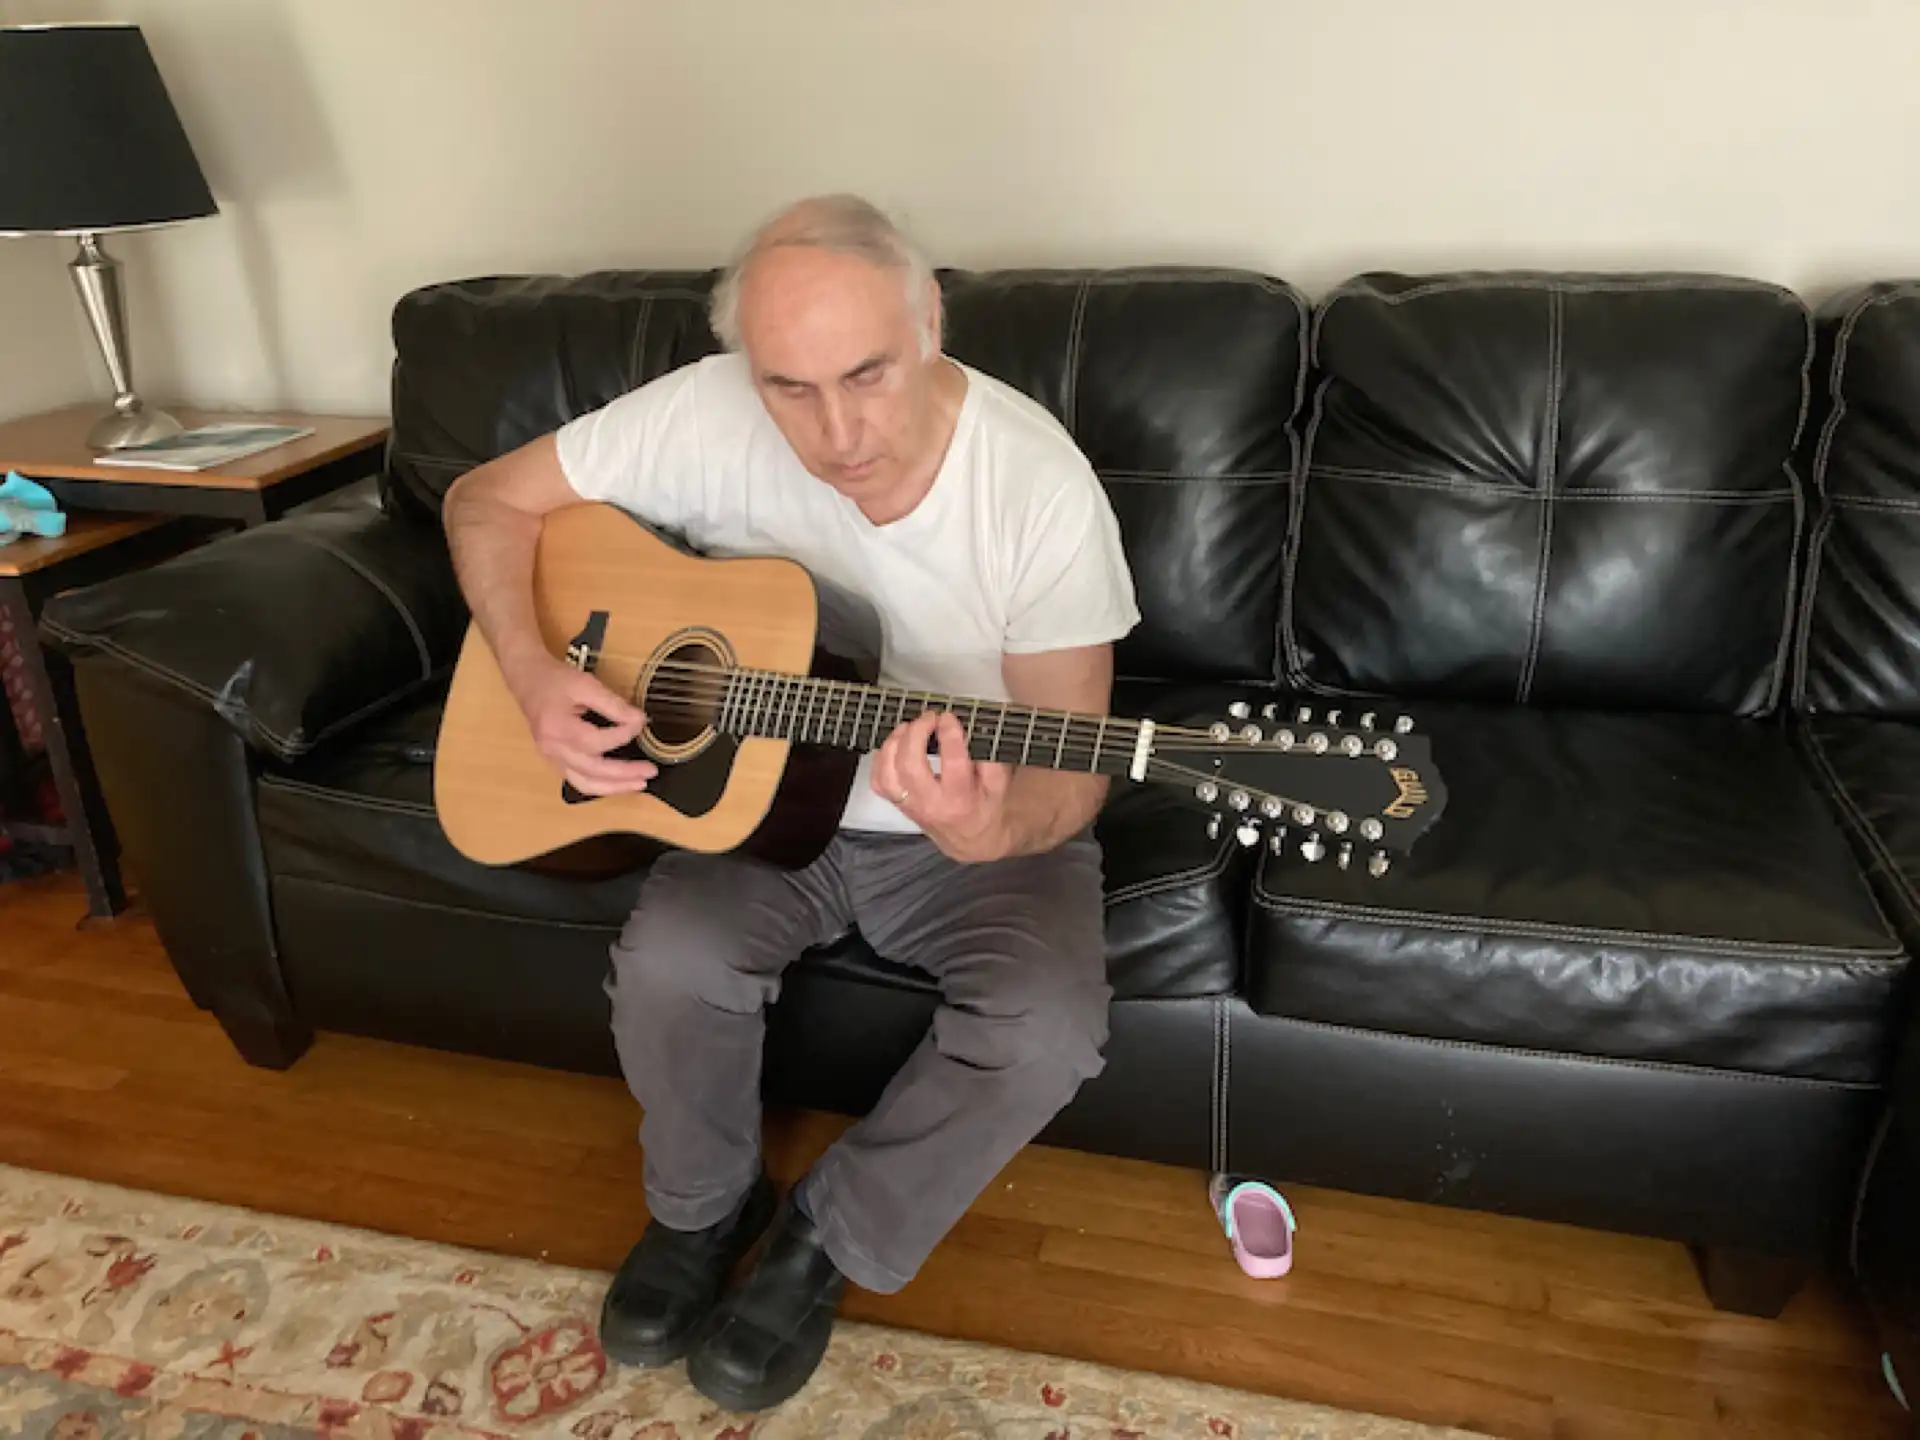
Owner and his Guild